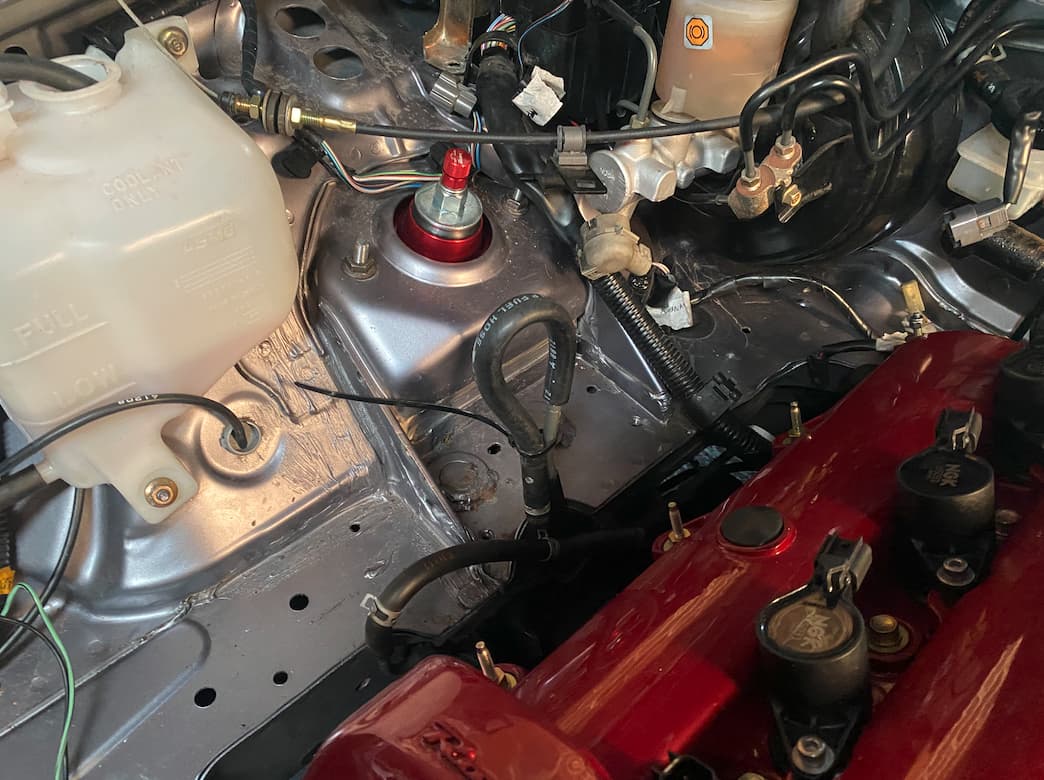
Tightened up the water hoses today after a bit more fettling & trimming to get things to line up, Then took the decision to go with the NBFL in-tank fuel regulator, it seems to run at sufficient pressure for Rocketeer’s own demo cars so it should be good enough for now. This means getting rid of the old fuel damper system on the o/s chassis rail which frees up more welcome space
And started the engine wiring, removing the glovebox & heater pipe gives you good access to a big a/c pipes hole & grommet for the wiring to go through from the cabin.
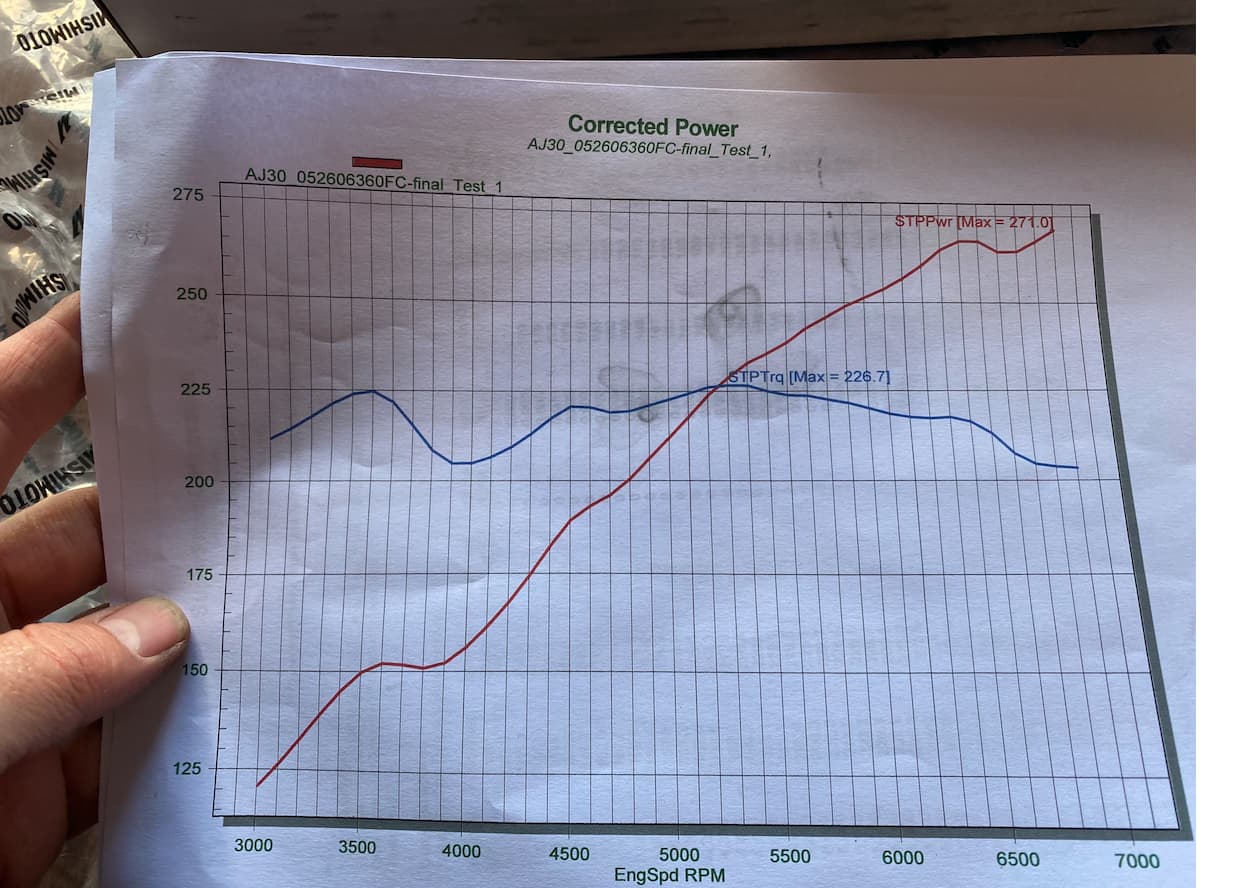
Just found the paperwork for the bench test and Dyno run for the engine when it was tested by Basset Down. 271bhp & 226 torque. Quite a comparison from the 108bhp engine we took out
The starter motor on the MX5 is up the top of the engine, the Jag starter is on the same side but on the bottom so the wiring needs extending. This involves unbinding the Mazda loom to give enough room to run the starter cable to an extension block mounted on the chassis leg.
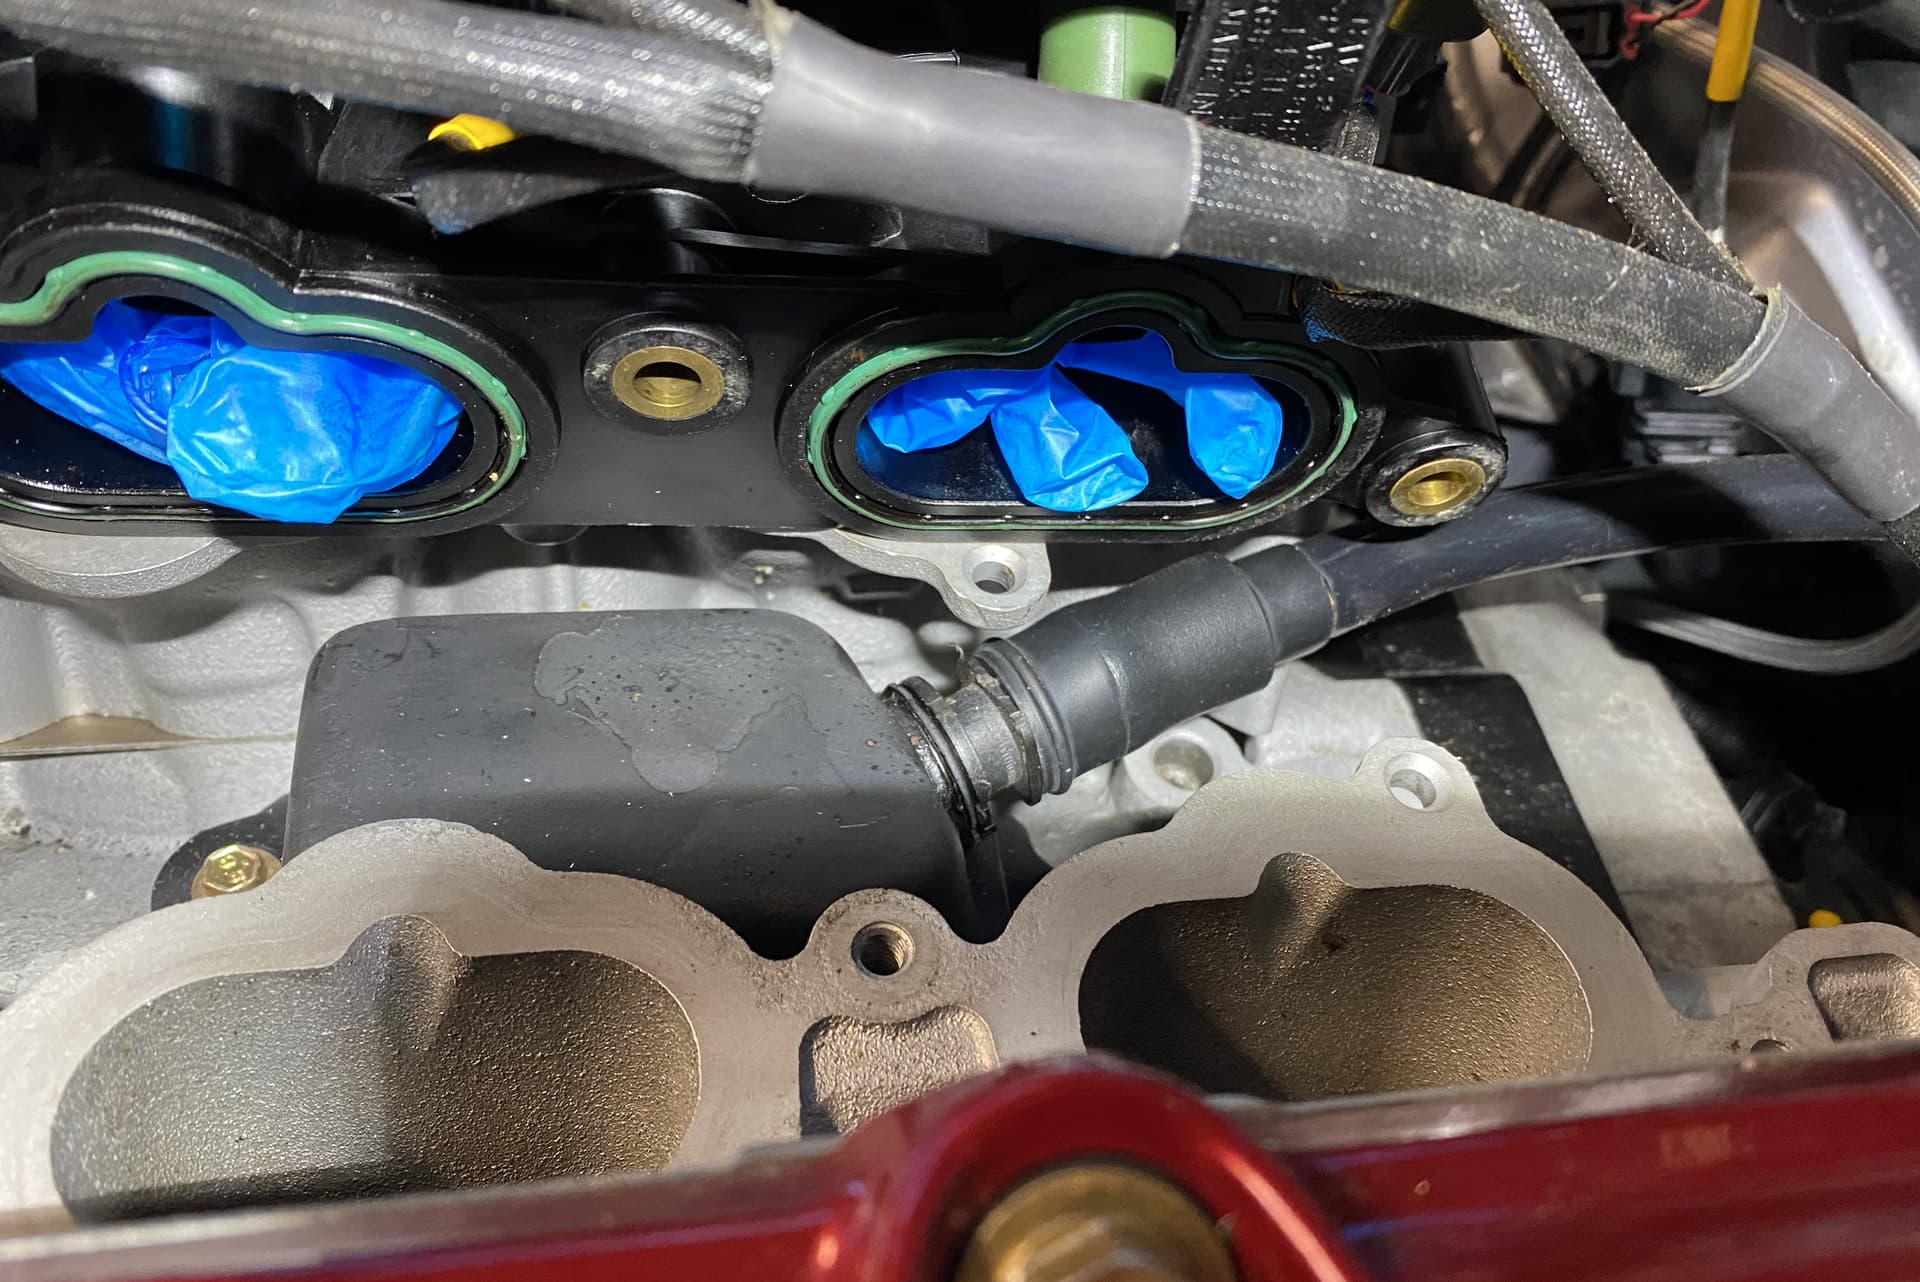
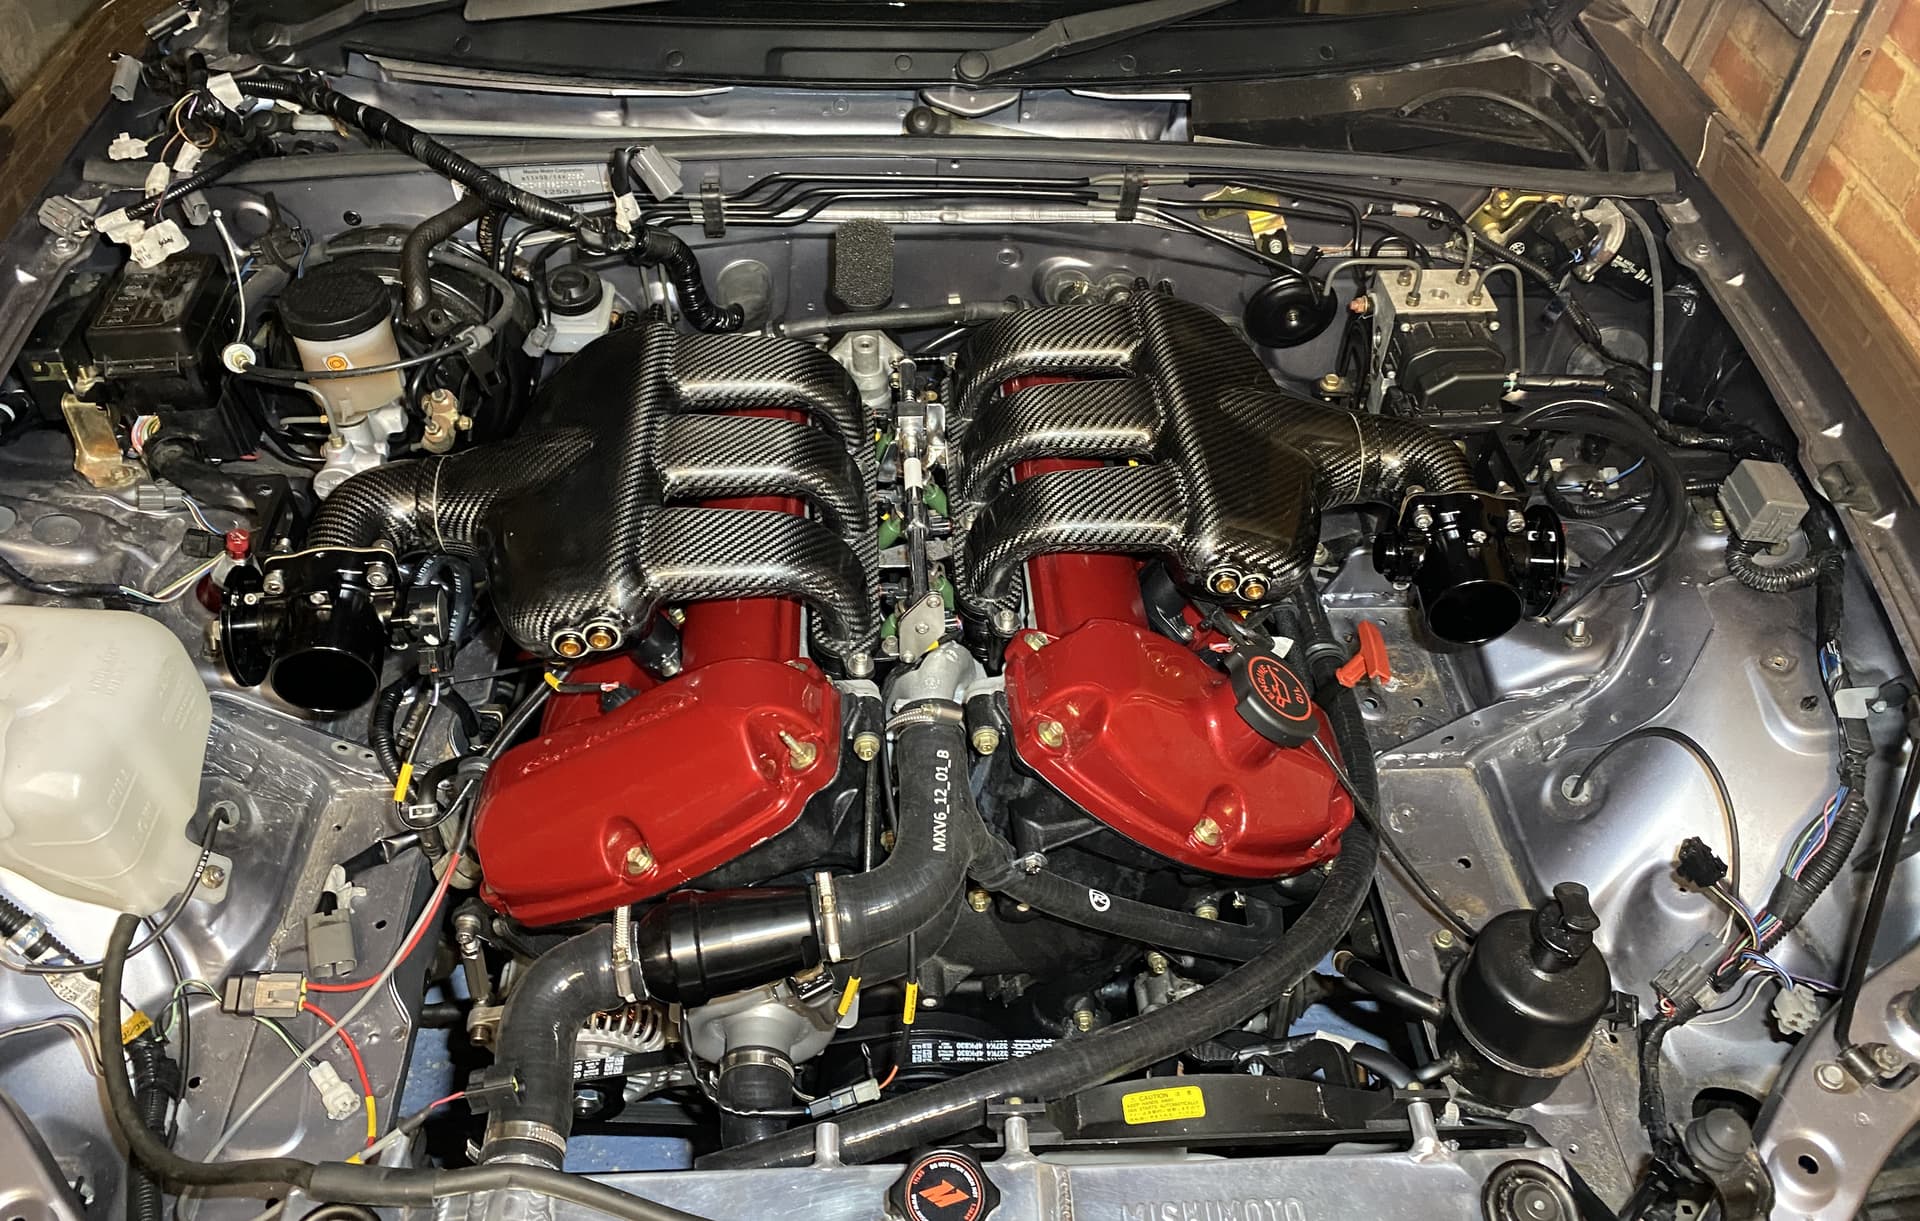
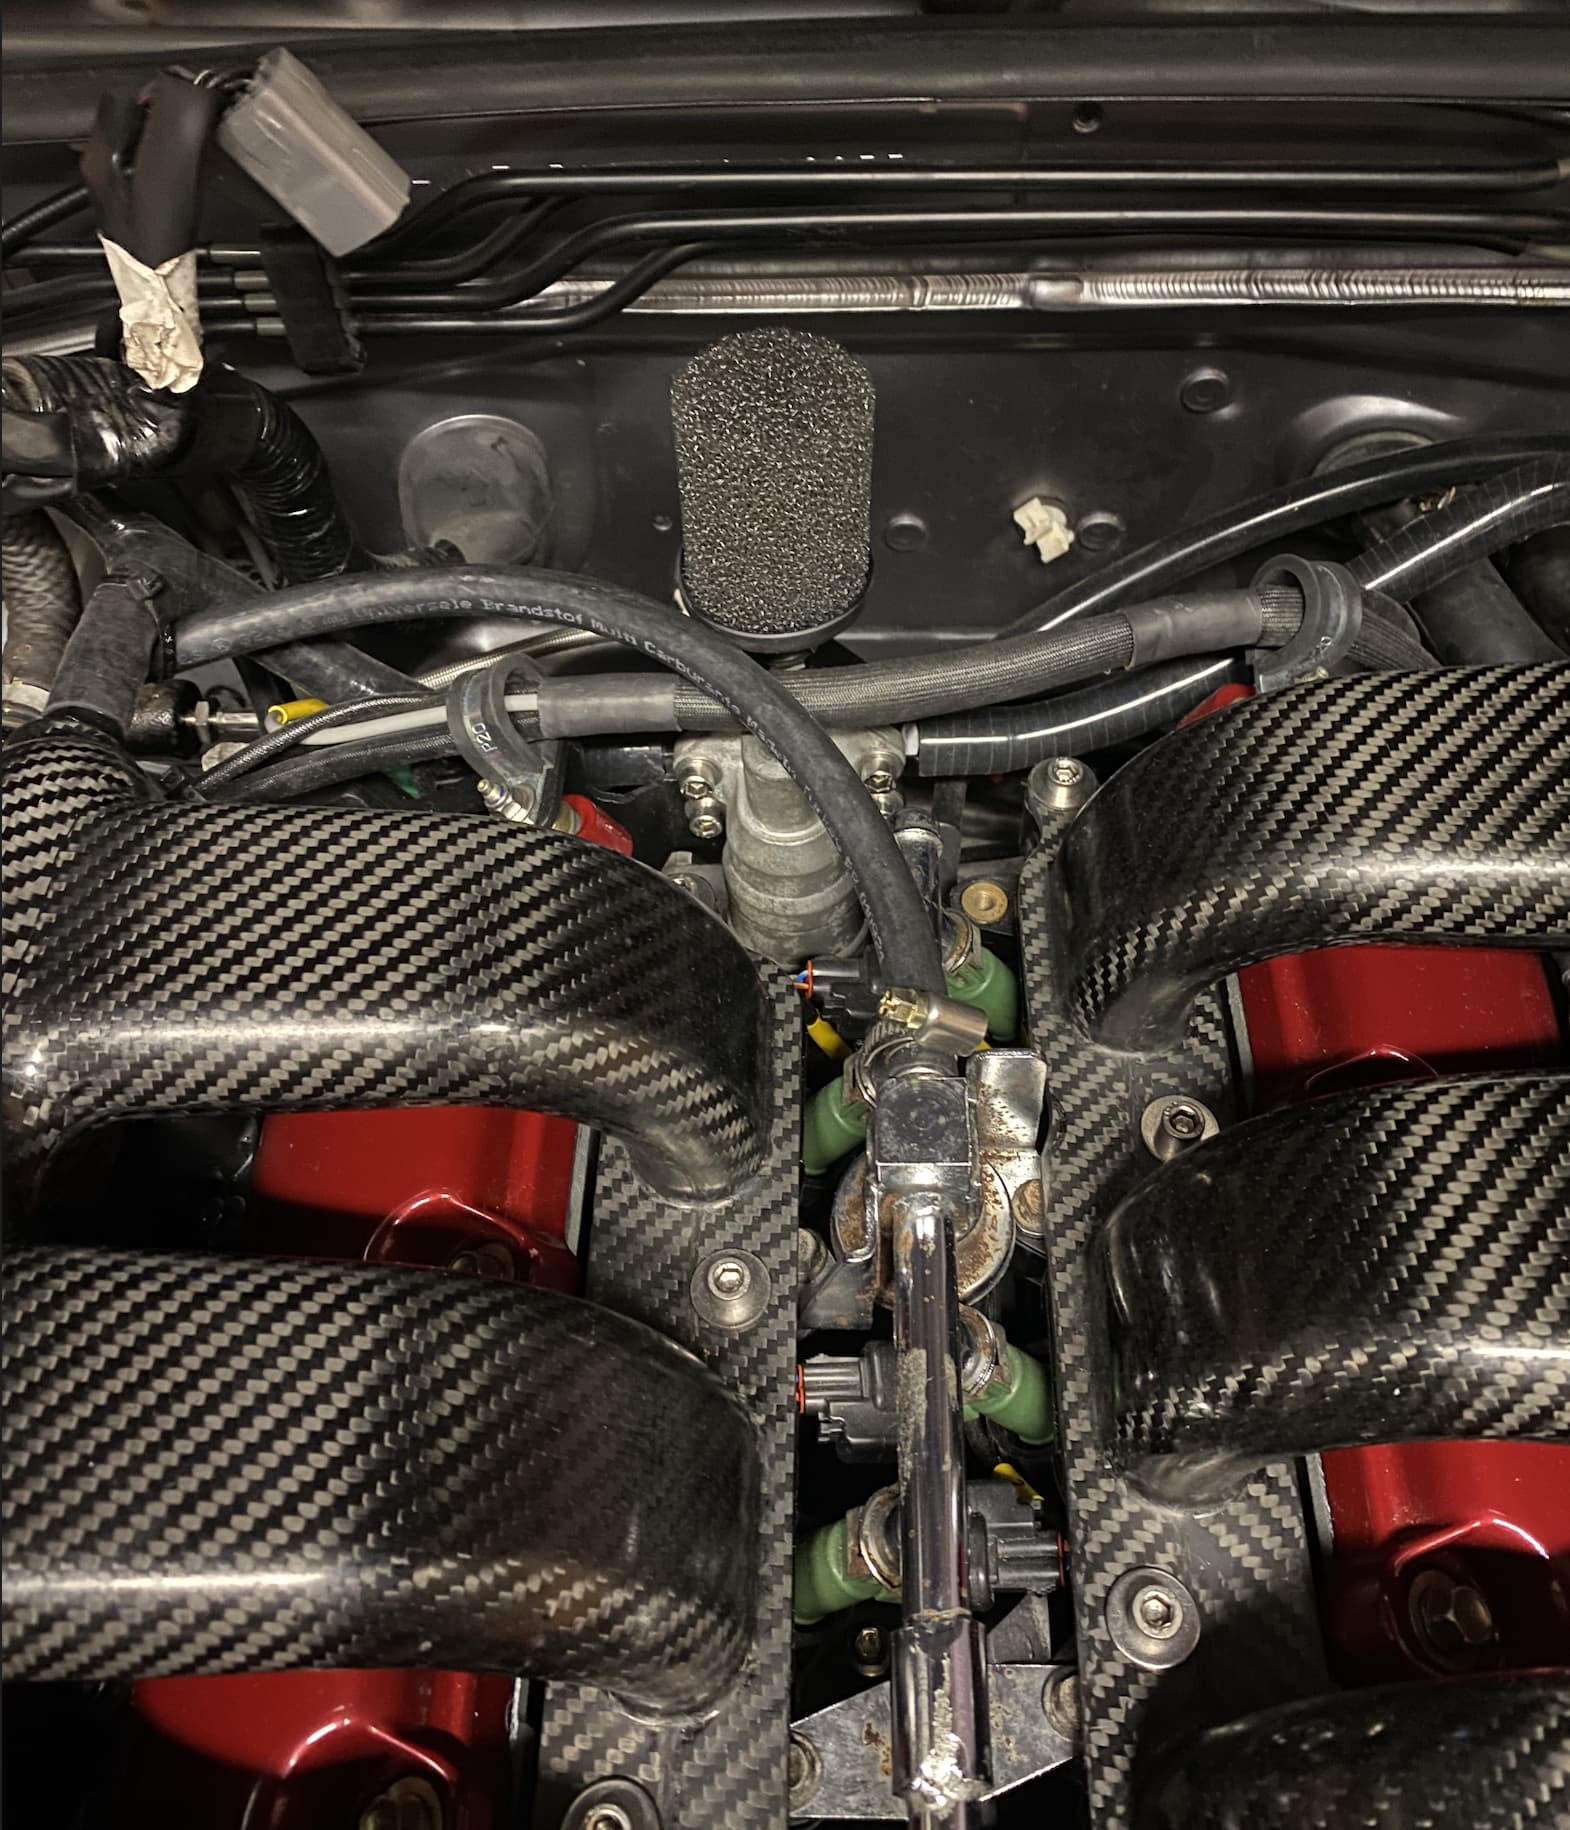
Figured out that the TB wheel can be unbolted and moved round a few degrees (see multiple holes in picture above!) then moved the other TB wheel round the same on the other bank of cylinders.
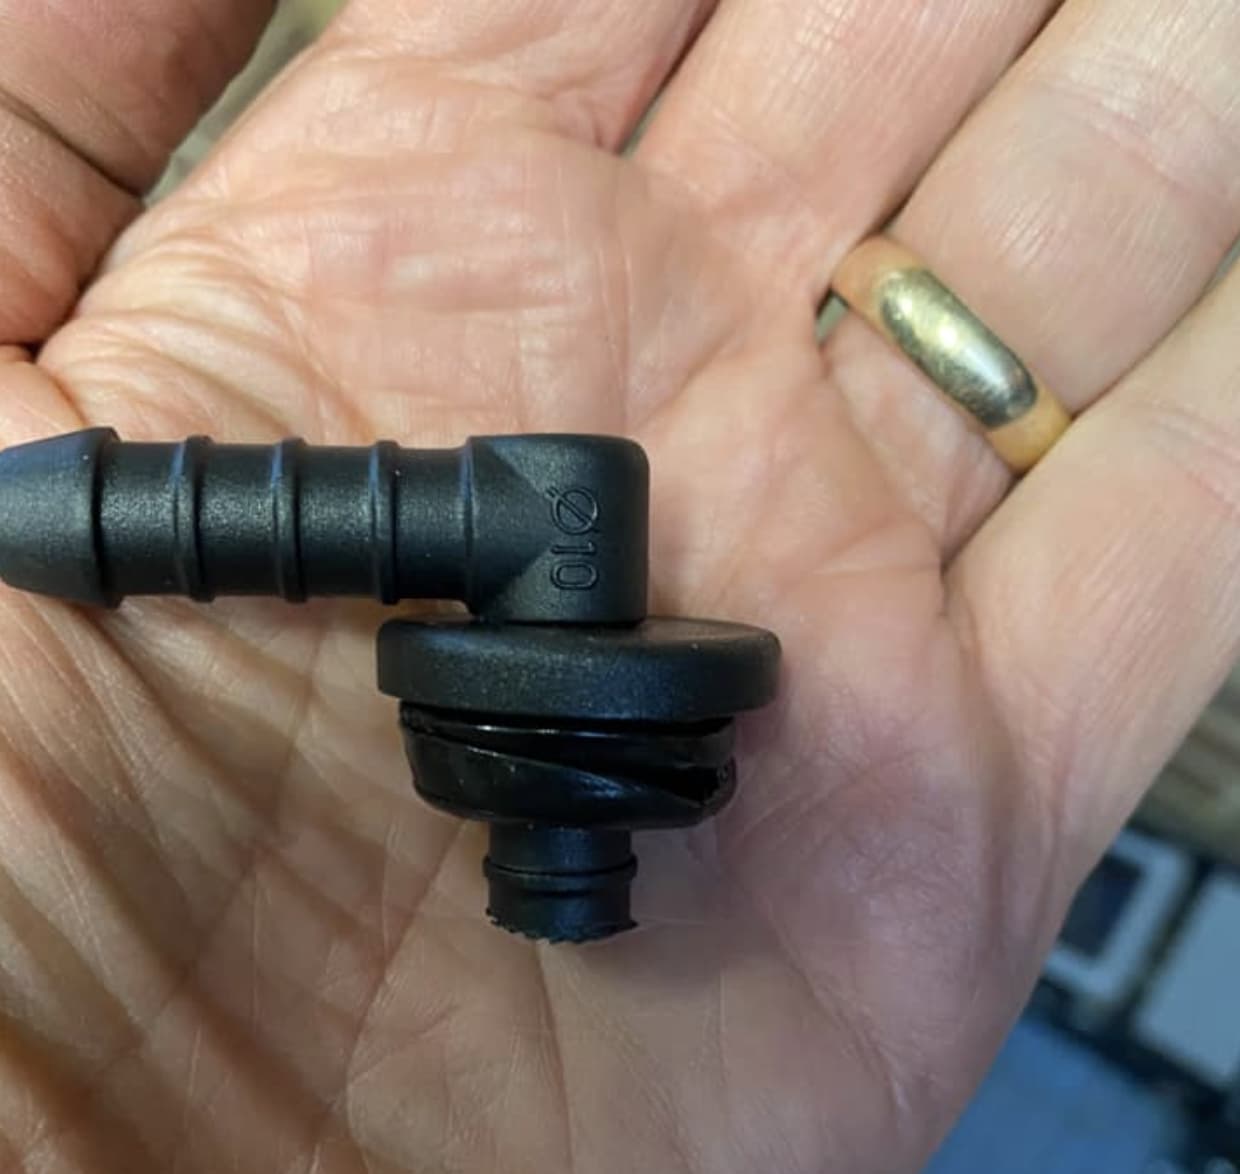
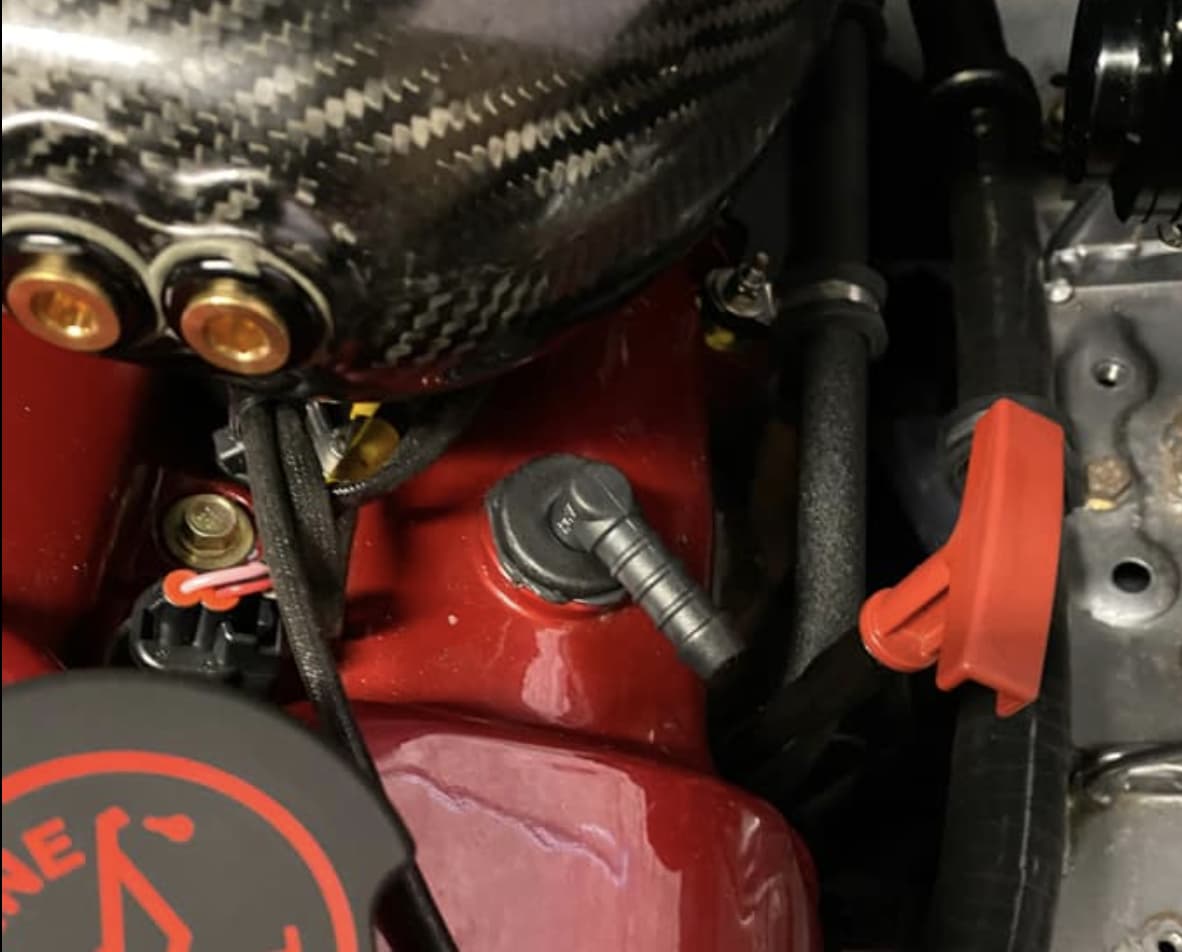
Jaguar wanted £124 +vat for this breather as you can only buy it with a load of other pipes! so £4 in parts from eBay later we have a right angled pipe connector plus one of those plastic plugs that cap off the end of chair legs. Drill a hole, trim the plug and connector to fit then run a bead of silicone around the edge to seal
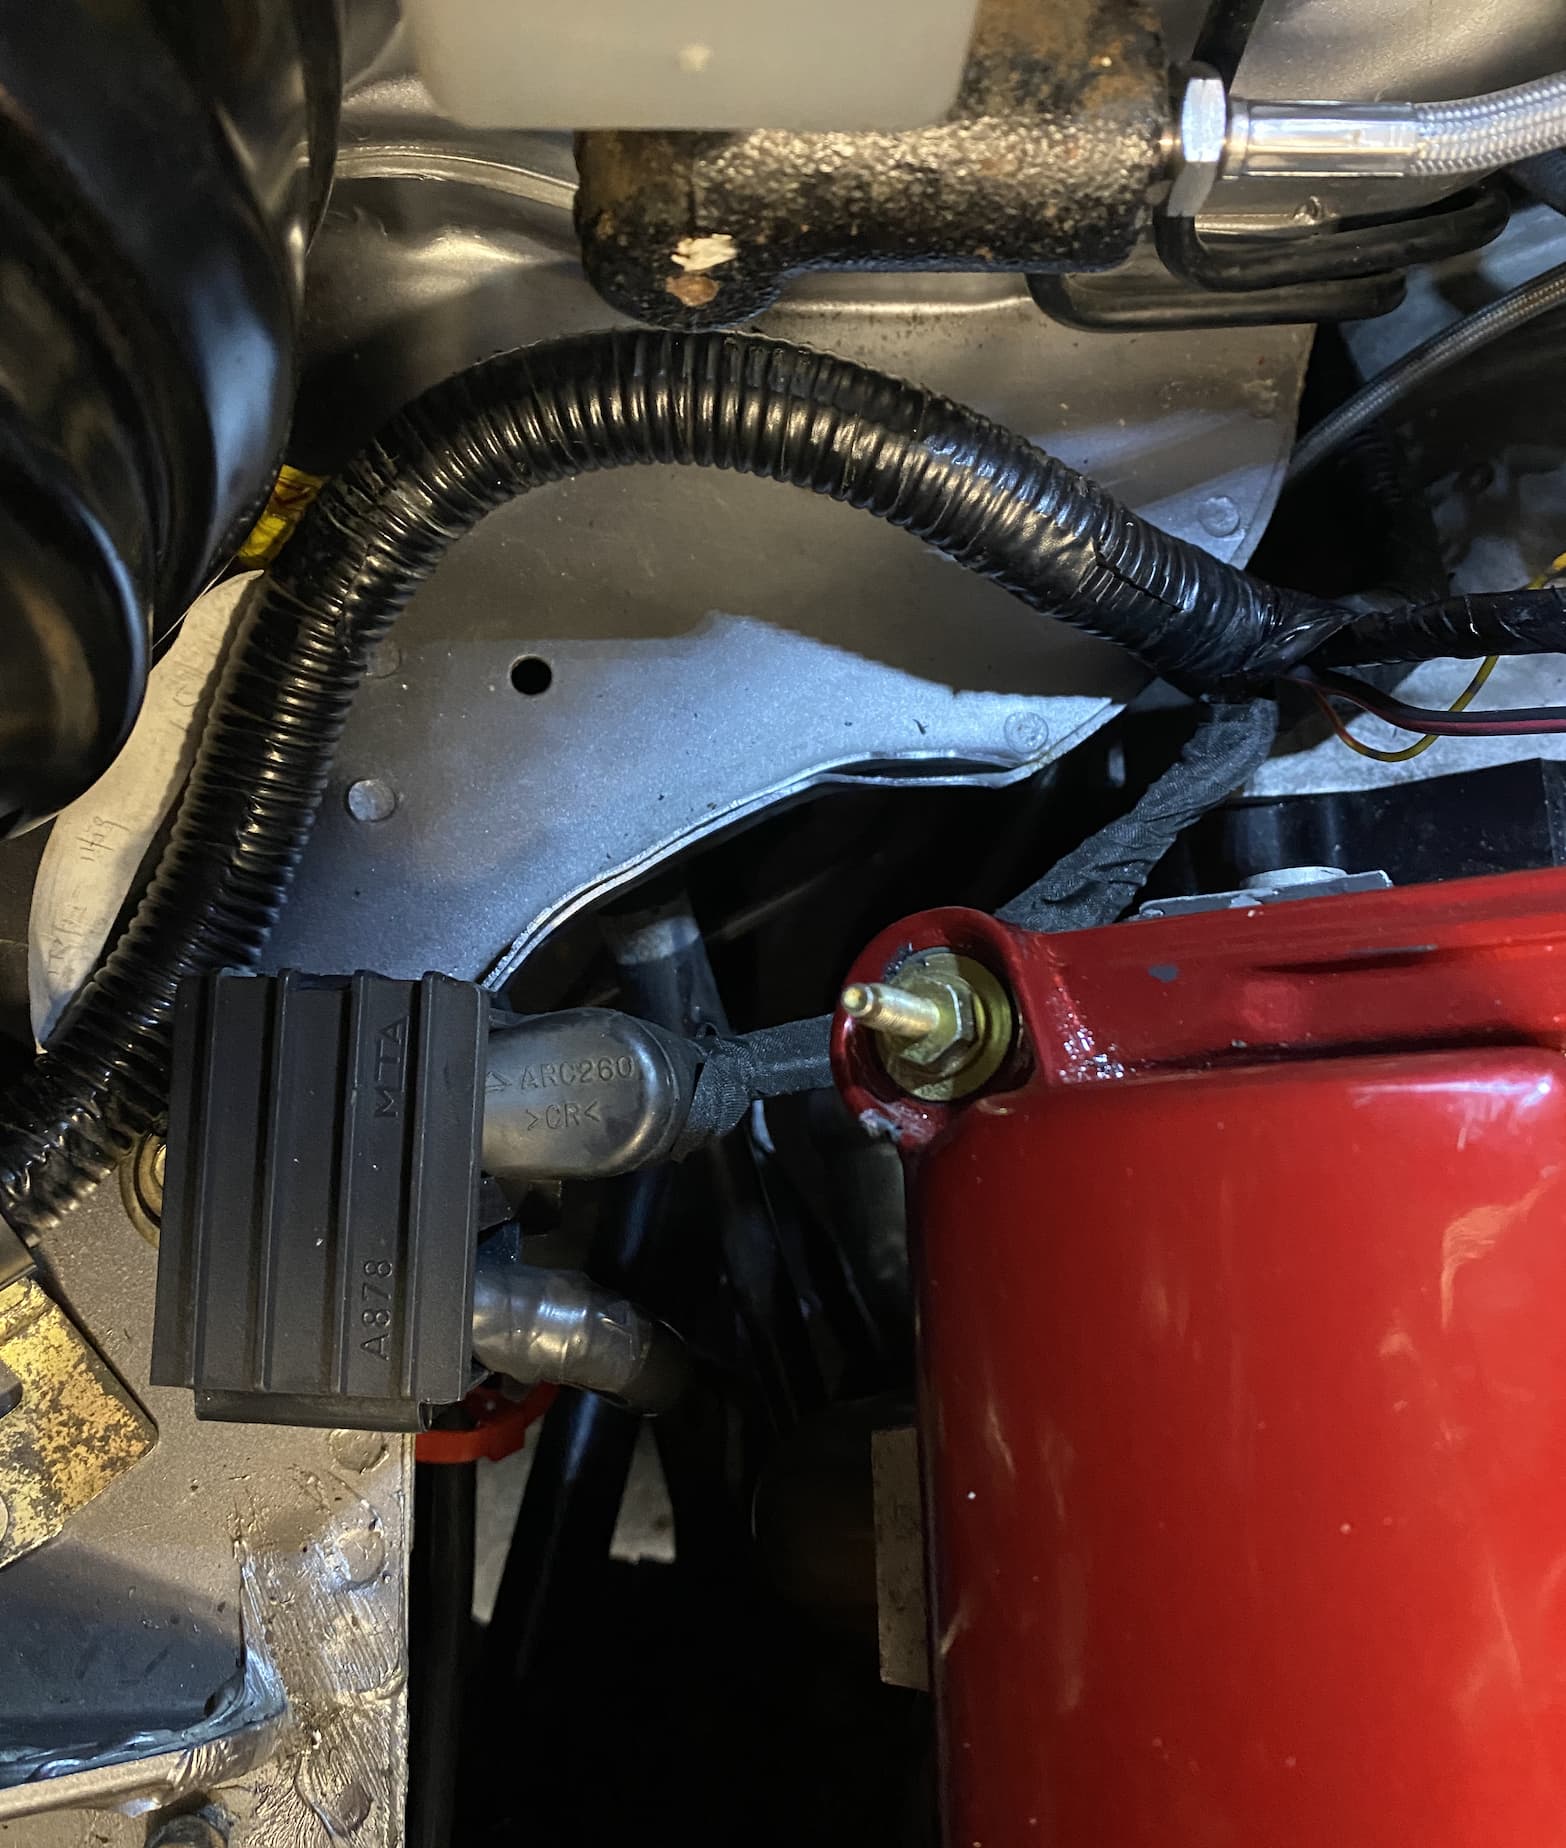
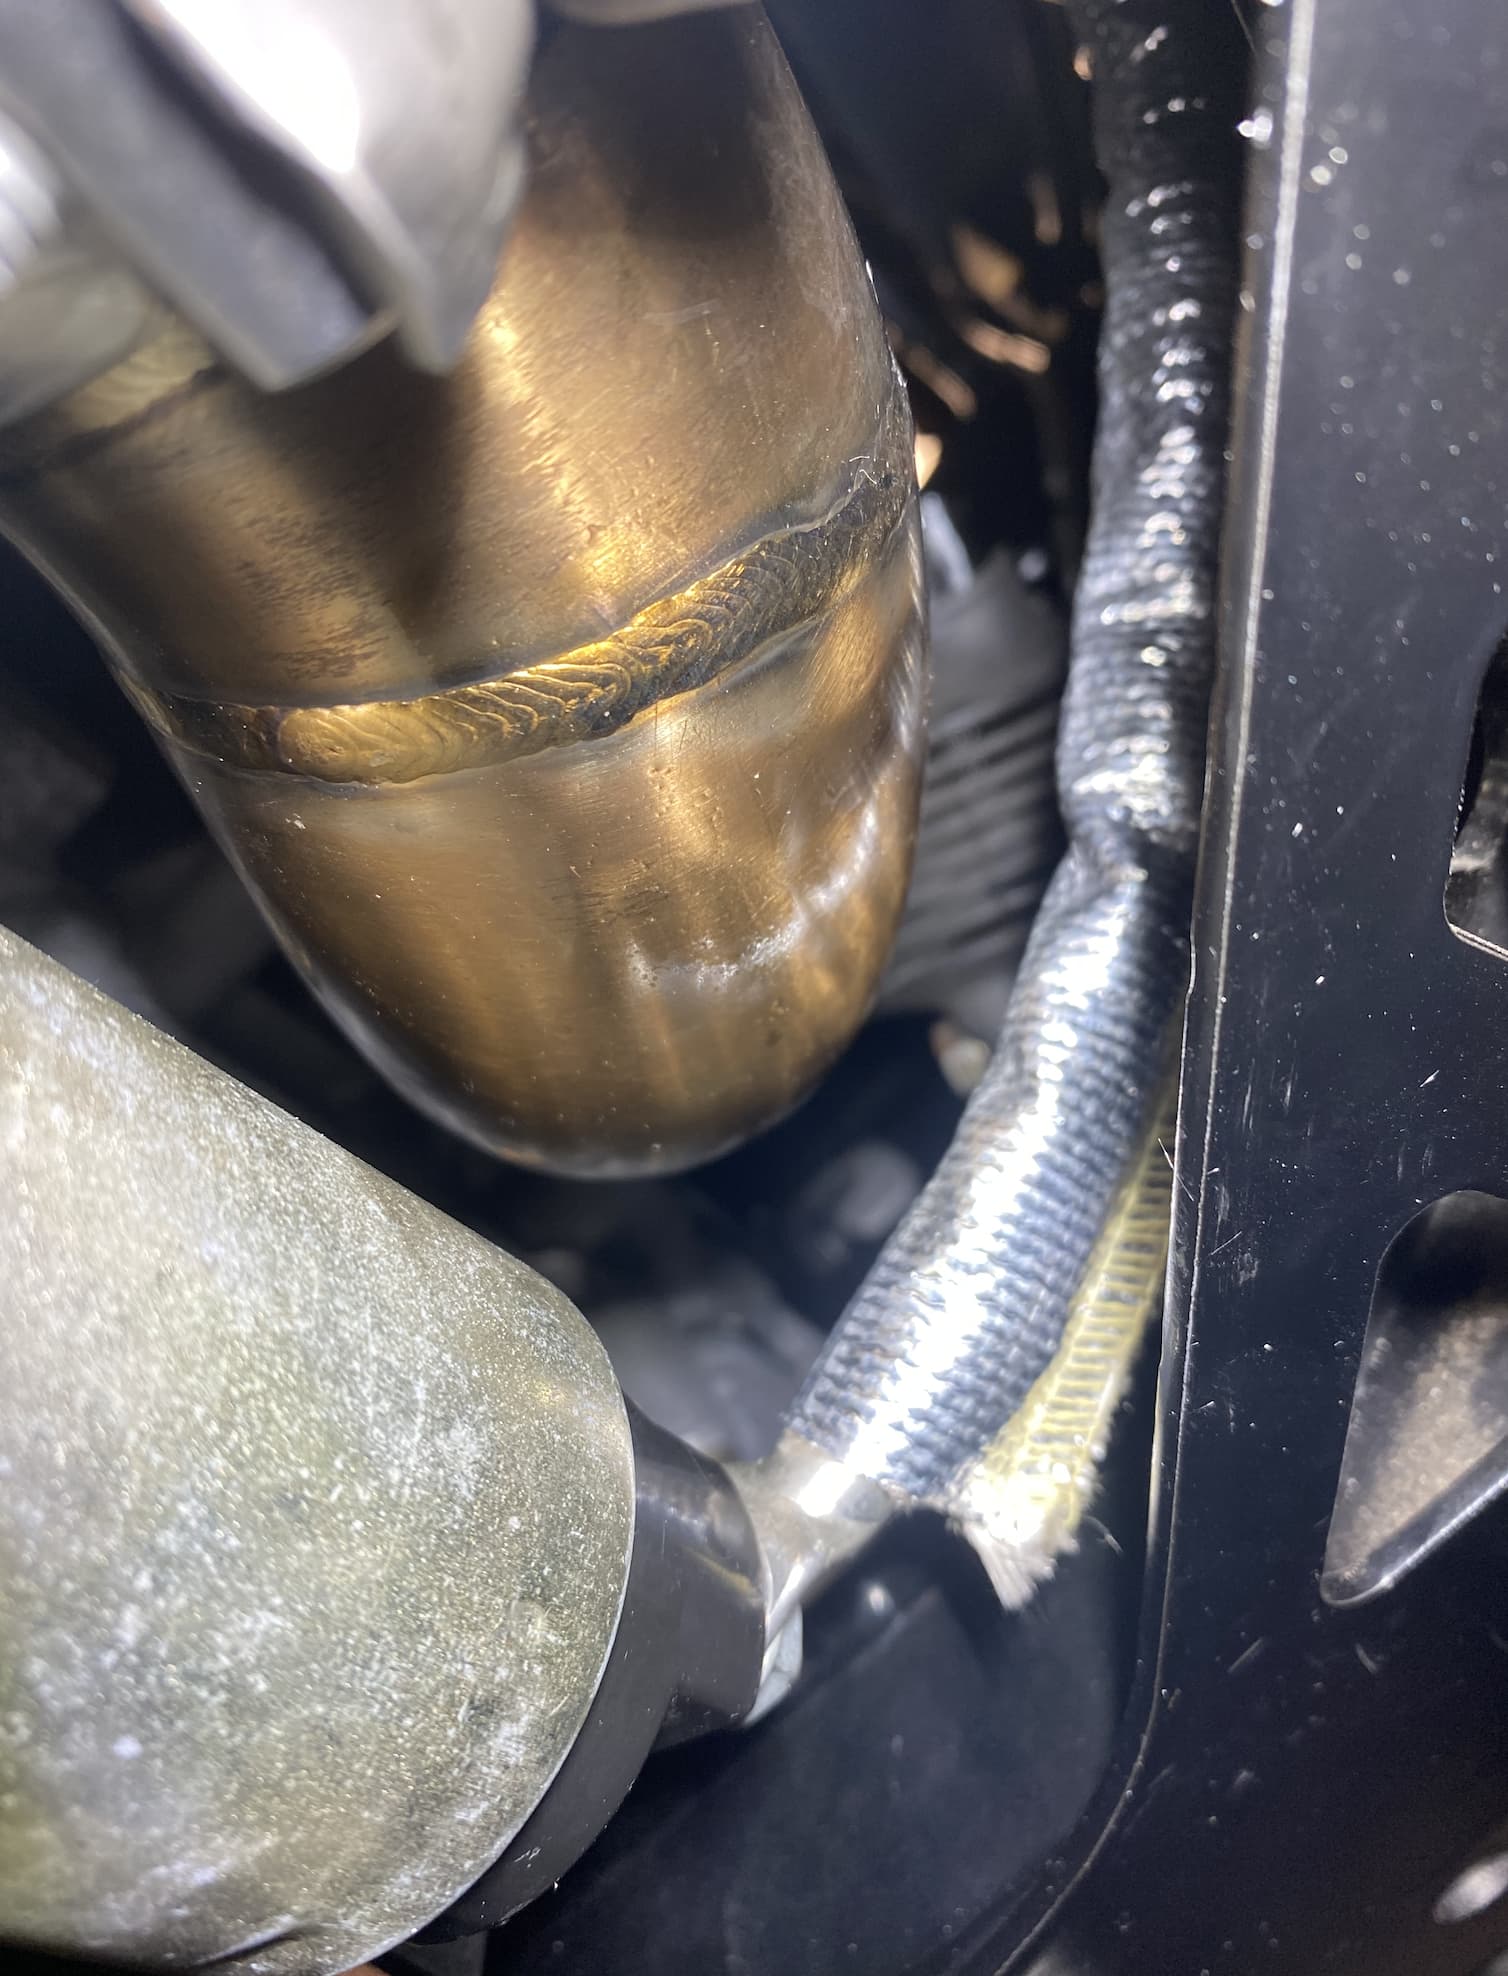
It sounds obvious when you fit a 3.0 V6 into the space designed for a 1.6 4-pot, but there’s lots of components competing for the same space so lots of time spent adjusting so they don’t touch along with some heat protection. This is the downpipe, starter solenoid, and starter cable for example.
Fuel tank breather vent pipe re-routed away from hot exhaust towards front of chassis leg, alternator now wired up with heat protective coating (you can just see it along the chassis leg)
Power steering low pressure pipe extended for new pump location with hydraulic hose. The pipe to the cooler needed shortening by a similar amount. Once this was done, everything fitted nicely into the same space without interference.
A few more bits of the electric system to sort out in the engine bay (earths, oil sensors, starter trigger wire) then it’s onto splicing into the MX5 loom which I’m not looking forward to
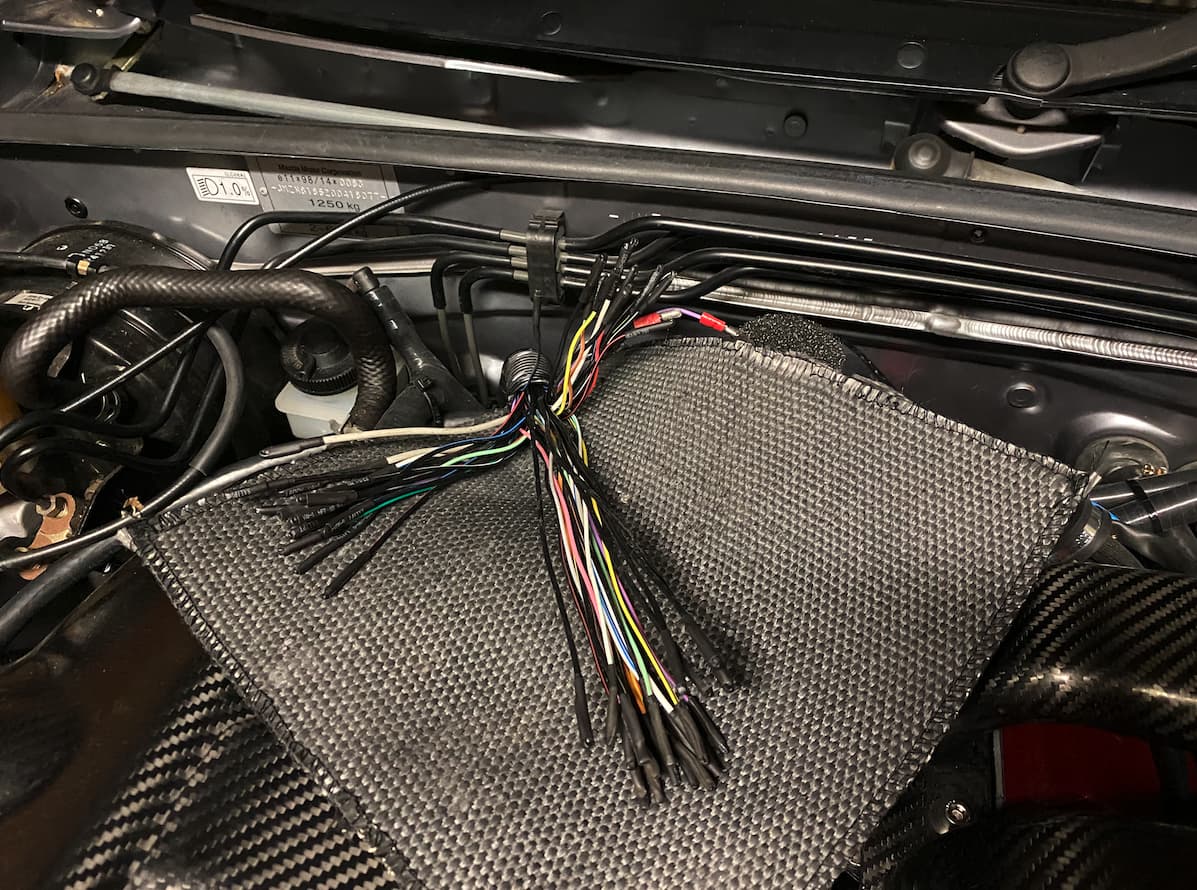
The seemingly never ending wiring job is almost done, Rocketeer don’t use the MX5 engine bay loom but you still need to unpick a few sensor wires like Power steering, engine temp gauge, Oil pressure gauge etc. from the main loom. Then you have the choice of a) removing the rest of the loom entirely (need dash out for proper job) b) taping the loom & all it’s connectors somewhere out of harms way (too messy for me) or shortening the loom & terminating it (which I did)
ECU wired in now, harder than I thought to find an exact match with the pin locations & the wire colours but I think we got there in the end with a multimeter.
This from mx5nutz.com for an MS3 conversion was the closest
Somewhere in deepest Berkshire the beast woke up from it’s slumber… Lot’s of head scratching with no power to the starter solenoid kept us guessing for a couple of days but thanks to another Rocketeer owner with knowledge of the NBFL immobiliser and the starter sprang into life. This video was genuinely the first attempt at starting.
Took the car for it’s first drive today, quite an experience the 4.1 diff is probably a bit too short but then I knew that, and the sport brakes are noticeably better than the standard ones. A few items for the snagging list including what looks like a duff alternator or charging wiring somewhere (which left me broken down a mile from home ) plus need to sort out exhaust tip clearance & fit a new washer bottle & probably 100’s of other little things. Project cars never seem to be finished
The new number plate gives a clue to what lies beneath the bonnet
Alternator problem sorted out, NB’s use externally regulated alternators and the Rocketeer uses a mk1 1.8 internal regulated one, so even though wiring on the alternator is the same it doesn’t get a signal from the ECU to start charging. A relatively simple bit of re-wiring got the battery charge indicator working on the dash and a charge signal to the alternator.
Power steering & Alternator belts needed tightening, re-checked all the hoses, tweeked & tightened where necessary. re-checked the throttle body balance but the IACV valve is still noisier than I’d like. Also stripped & repainted some Sport underbody braces to stiffen up the back a bit, the plan longer term is to fit frame rail stiffeners and a roll bar to re-enforce the chassis to take the new torque.
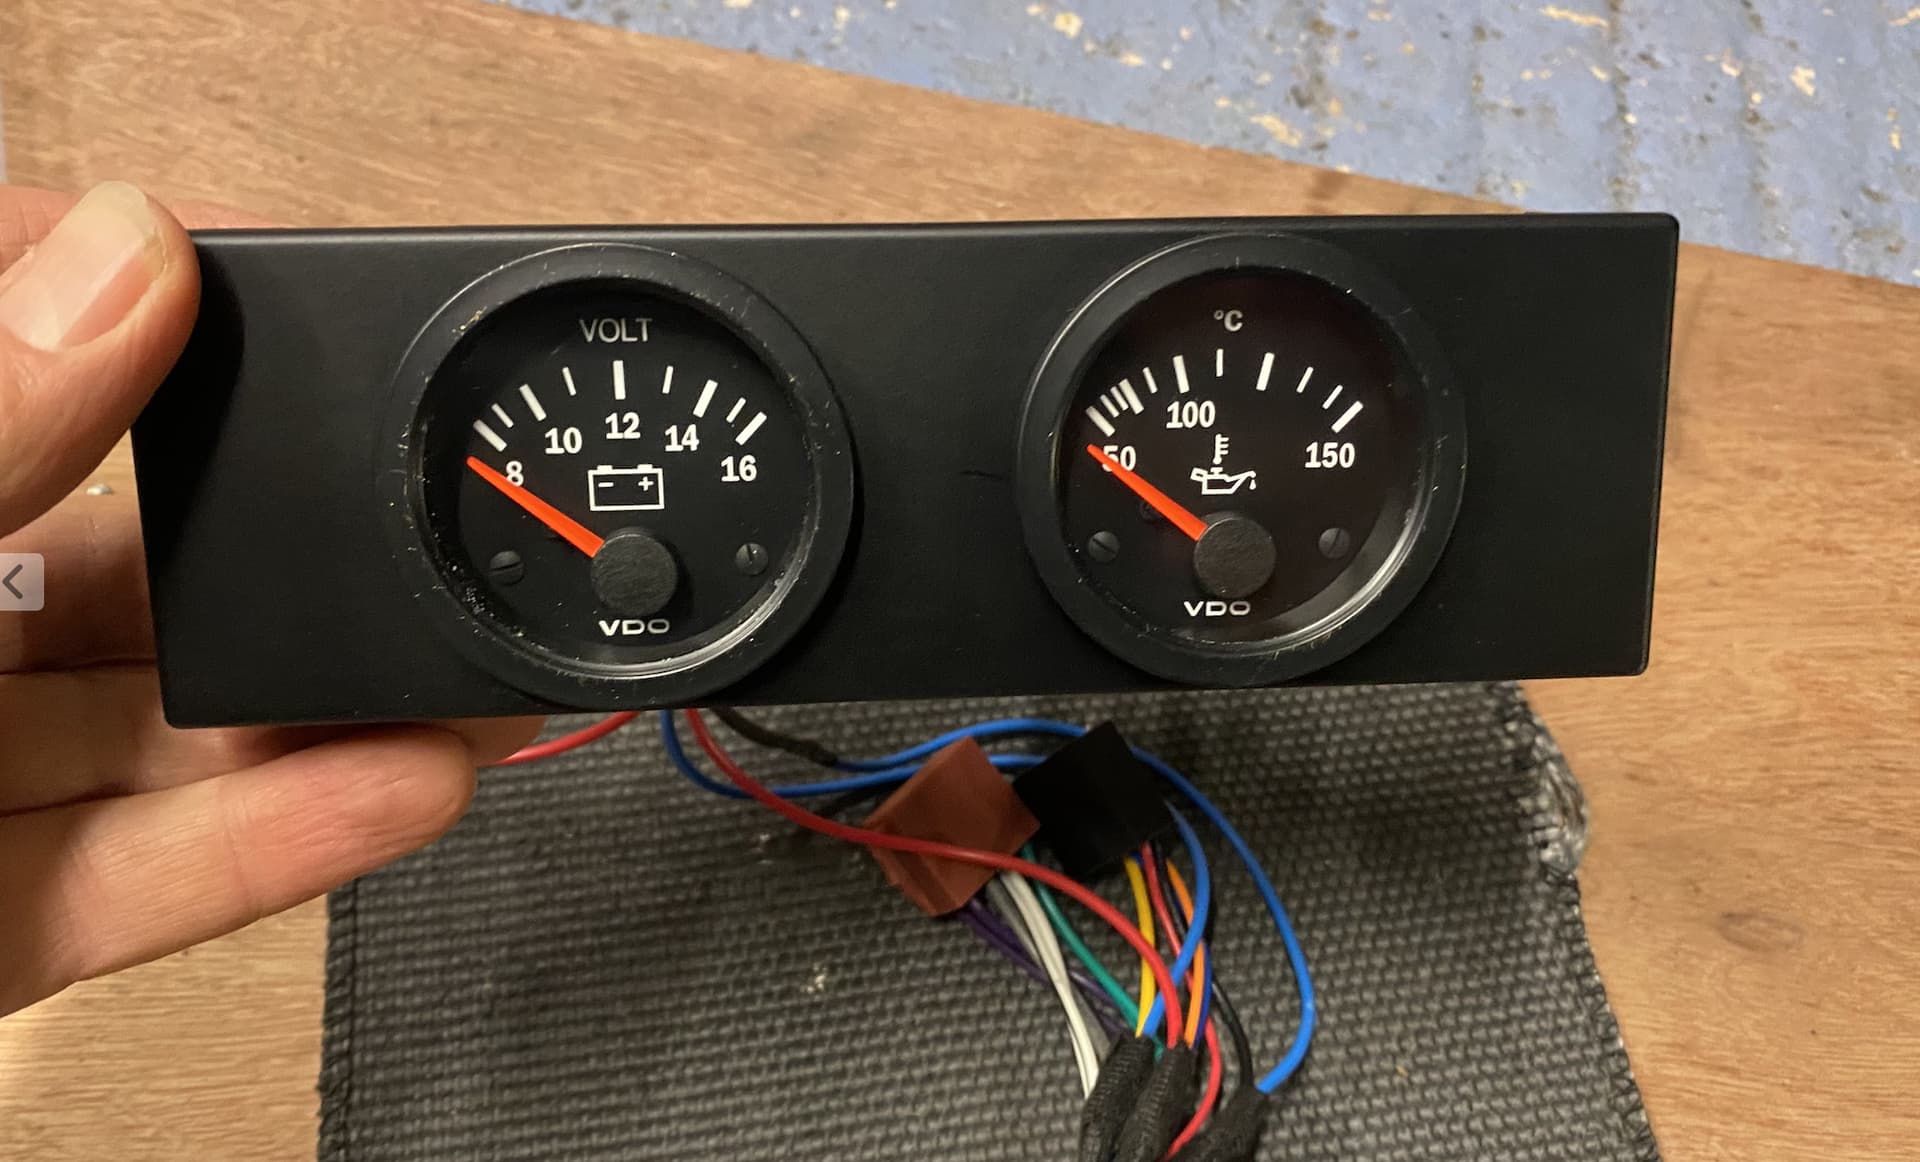
I’m also adding a couple more dials for oil temp and voltage to the dash so after a bit of investigation I realised that 3/4 of the wiring I needed was available from the aftermarket stereo loom adaptor. The dash lighting stumped me for a while until I found out that an NB dims the lighting not by restricting the +ve, but by regulating the earth! So you must take both in & out to the bulbs from your existing loom.
The V6 is now where the old washer bottle used to sit, so a Davefab bottle fitting in the scuttle has to be fitted along with some Ford Maverik nozzles to give a better spray patttern.
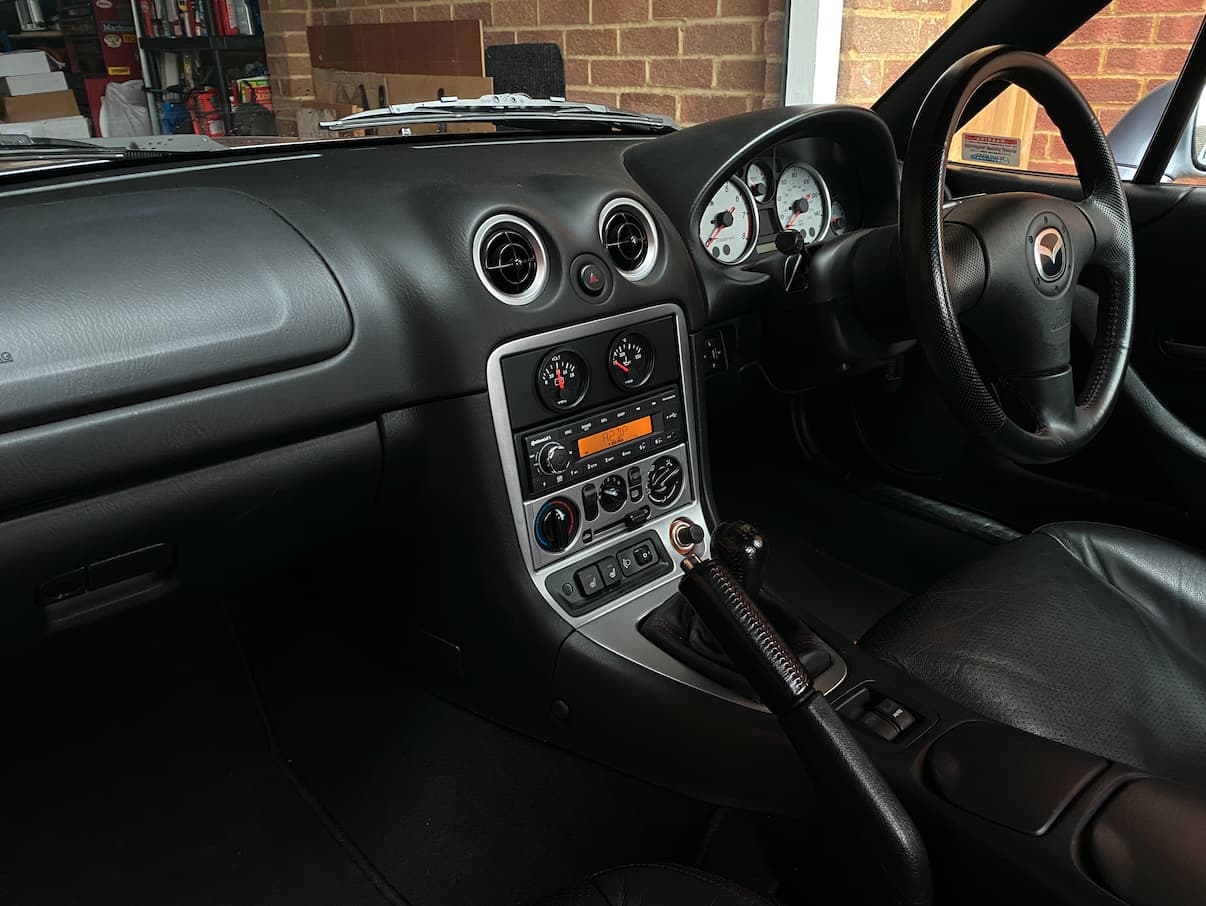
Quite pleased with how the VDO gauges have turned out, I used a surround from MX5parts to fit them, plus a small (but expensive for what it is!) metal bar from the pre-facelift NB that separates the radio & gauge backing plate and gives them both something to secure to. I wasn’t keen on loosing the centre vents that provide a nice warm blast of air on a cold winter’s drive with the roof down
Also changed the radio from the Blaupunkt that I bought in August that developed a background interference that wouldn’t go away so that was returned. Replaced it a TR7412UB-OR Continental radio, the same type that’s used by a lot of late 90’s / early 2000’s Porsche owners to update their cars to bluetooth streaming & calls.
Chasing down battery drain issues this week, I went to start the car and the battery was as dead as a Dodo at 5.9v and falling! Managed to stop it falling by turning off boot lights and recharged the battery. Trouble is that it was fine three days ago when I fitted the new car radio & gauges. I took the battery to my local garage who did a drop test on the battery and it came up fine (new in April)
So believing in cause & effect I unplugged the radio and gauges and did a parasitic drain test on the battery by connecting earth terminal and jumping across the live wire and live terminal with an ammeter. This showed 0.077 amps (77 milliamps) which is a normal amount to be expected from a car with an immobiliser or alarm in resting state. Then connected the radio & gauges and got the same 77 milliamp.
Hmm, took it for a good 30 minute drive to top up the battery with the alternator which was reading 14.4v when car was running. The resting state is about 12.8v with ignition off and I will check resting voltage again tonight and in the morning to see if it goes down below the 12.5v that I’d expect.
The thing I’m worried about is a battery that’s reached as low as 5.9v have I damaged it irrecoverably?
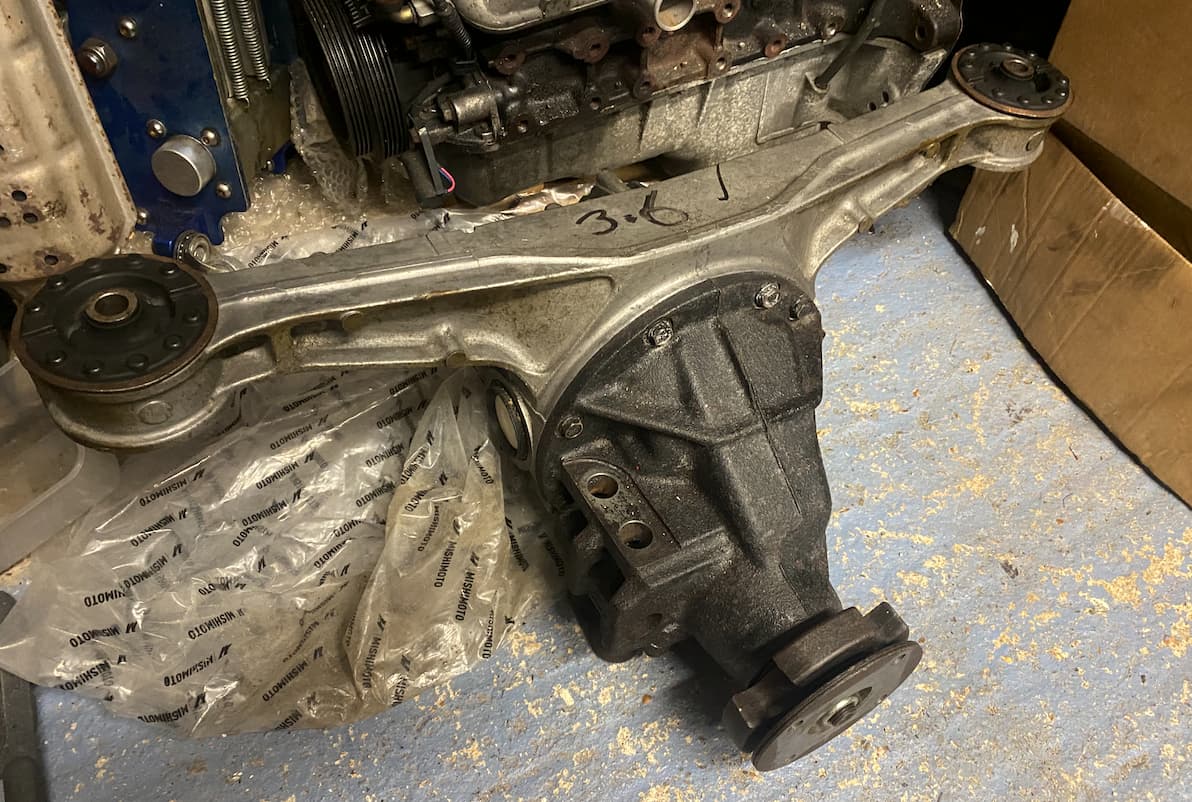
Thanks, it’s a very different beast than a SC or turbo. The car doesn’t really care what gear it’s in hence me changing the diff soon for a 3.6 as the lowest gears are pretty useless! The sound also rumbles through you rather than just in your ears which reminds me of the big engined cars of old…
Been battling electrical gremlins with the alternator & ECU having a parasitic drain that leaves the battery flat after a couple of days. (between 200 - 490 Milliamps) details in another thread here: How low can a battery go...? - #11 by carl_s
But in other news I collected a rather nice 3.6 Torsen diff from another club member
Continued working my way through the snagging list, fitted a CTEK charge socket to the car which I will keep on a conditioner until i can figure out where the last 200mA drain is coming from. Tracked down a couple of front suspension rattles and re-adjusted/tightened which got rid of them (very satisfying) Main job this weekend was to get adjust the suspension height on all four wheels in preparation for an alignment trip to WIM this week. I settled on the what the US guys recommend on Miata .net (which I’ve had success with before) of 12.5" front & 13" rear. I’ve left the car for a few weeks to settle on the new subframe, suspension & brake upgrade components, So first thing this morning I measure the front… it was spot on 12.5" then moved to the back… exactly 13" !
When we did the Rocketeer conversion I made sure the shocks on each axle were set to equal height but it was only by eye! so how lucky was that!
Also took the car out to bed in the rebuilt brakes, very impressed! with the full Sport package & braided lines. The car stops in about half the distance my old 1.6 used to from 60mph! and with very little fuss.
One water hose still keeps on weeping coolant even though the Jubilee is very tight so if anyone has any ideas on maybe a Mikalor clamp or similar then I’m all ears.


 ) plus need to sort out exhaust tip clearance & fit a new washer bottle & probably 100’s of other little things. Project cars never seem to be finished
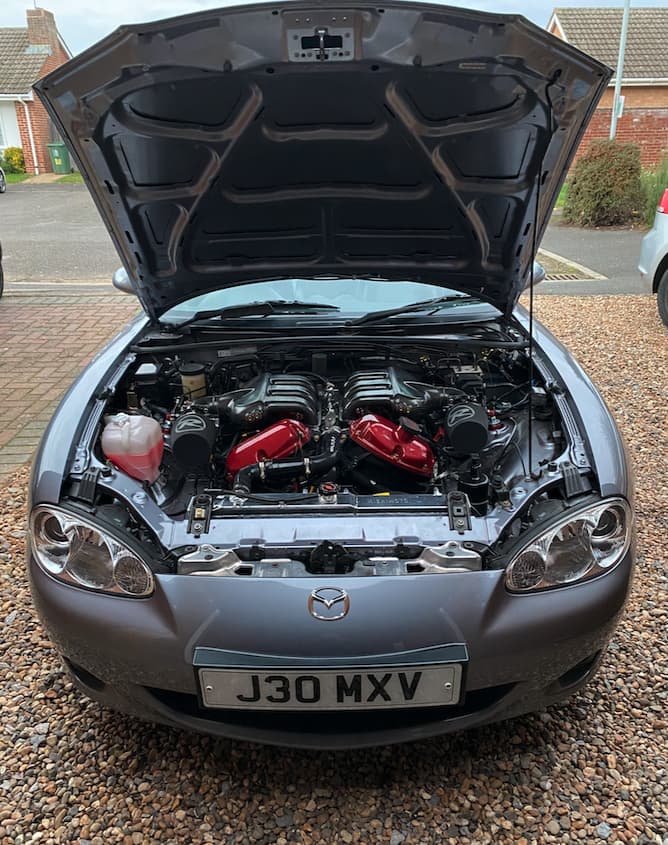


 at 5.9v and falling! Managed to stop it falling by turning off boot lights and recharged the battery. Trouble is that it was fine three days ago when I fitted the new car radio & gauges. I took the battery to my local garage who did a drop test on the battery and it came up fine (new in April)