I’ve read your entire thread on PH, immense bit of kit.
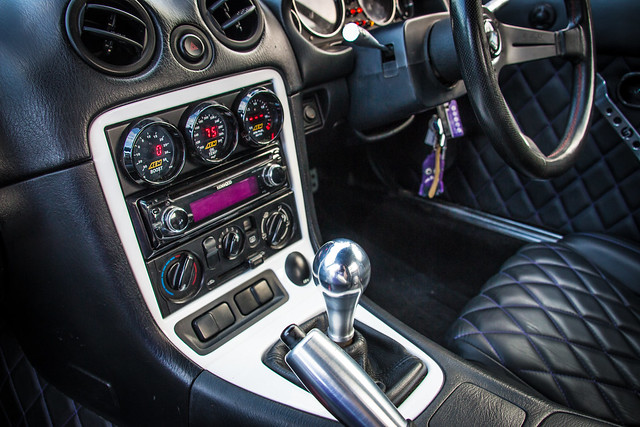
For awhile I’ve been thinking about some more gauges,but the issue was on where to put them. The current AFR gauge was in a pod on top of the steering column cowl. I did start making a gauge pod in the air bag awhile ago,but they point towards the roof (not ideal). I couldn’t find a RHD A-Pillar pod either,i could get one made but it would work out a lot of money.
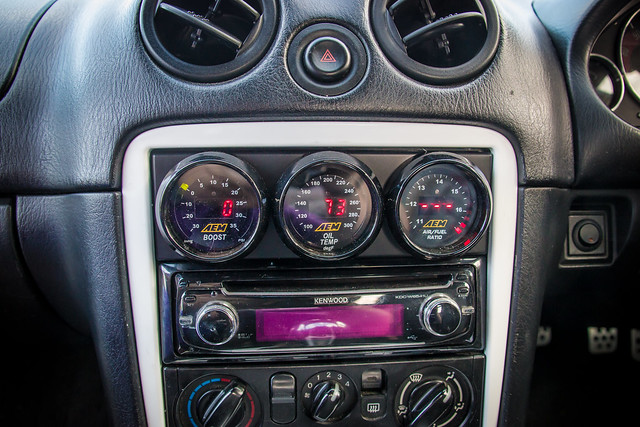
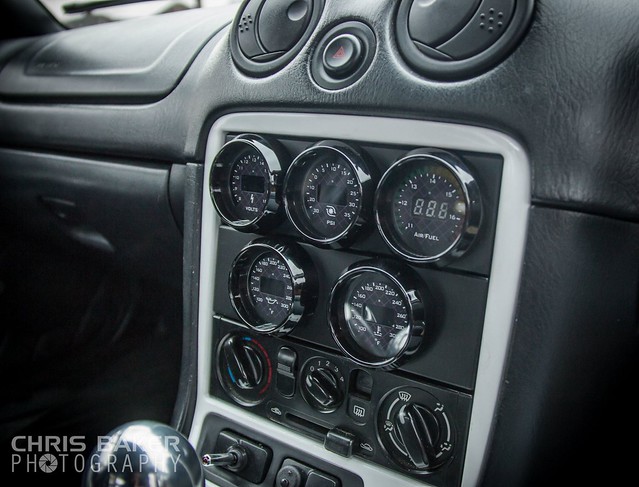
So I ended up swapping out the double din JVC to a single din and putting the gauge panel above the radio.
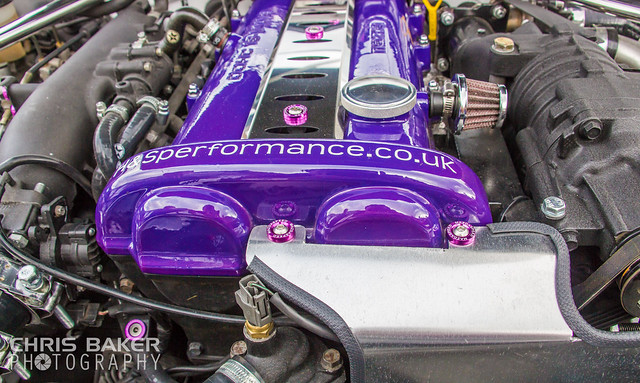
I also painted the radio and gear surrounds Gloss White to tie in the roll cage,wheels and engine bay.
I just need to fit the oil sandwich plate to get the Oil Temp gauge working
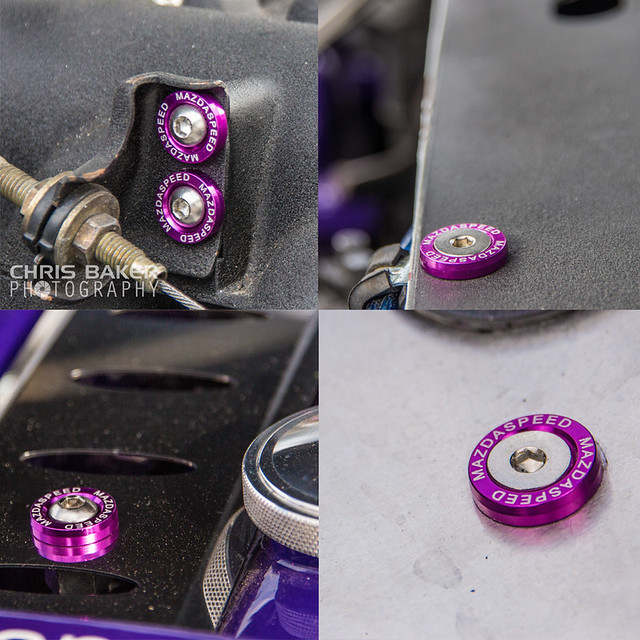
Also added these,i know its not to everyone’s tastes,but then again,neither is the whole car to some lol
Recently I was tagged in a Facebook page that sells those dress up kits. But his counter sunk washers have names engraved. So I bought a couple of packs to test and try out
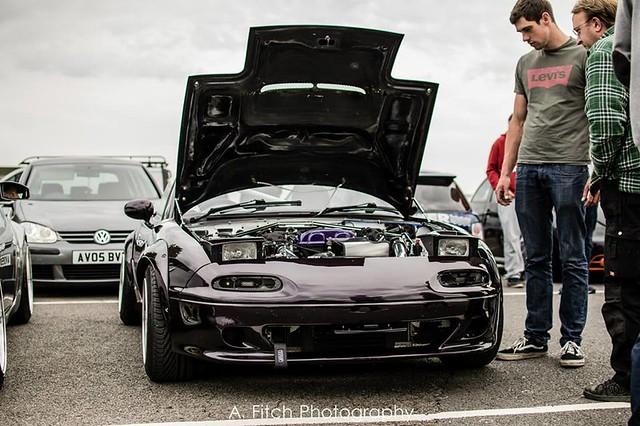
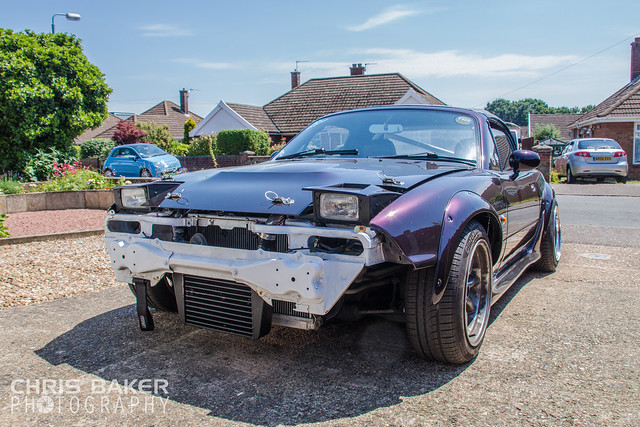
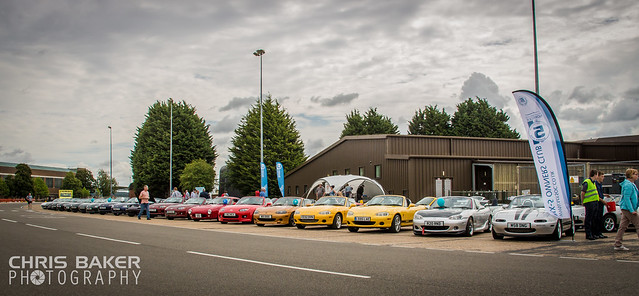
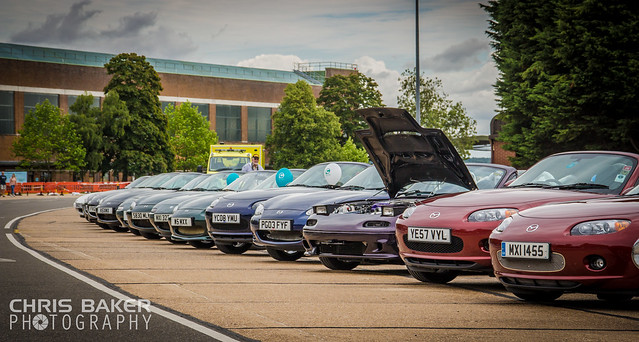
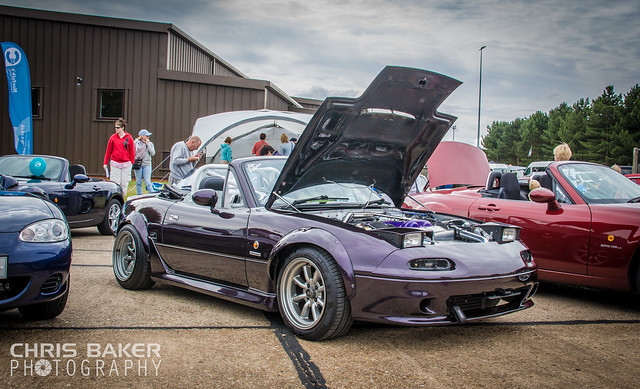
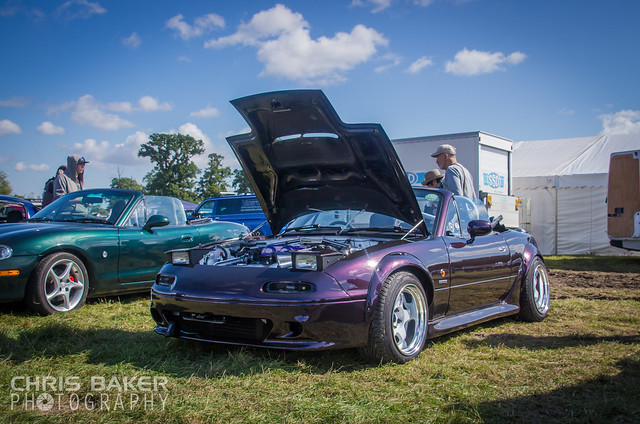
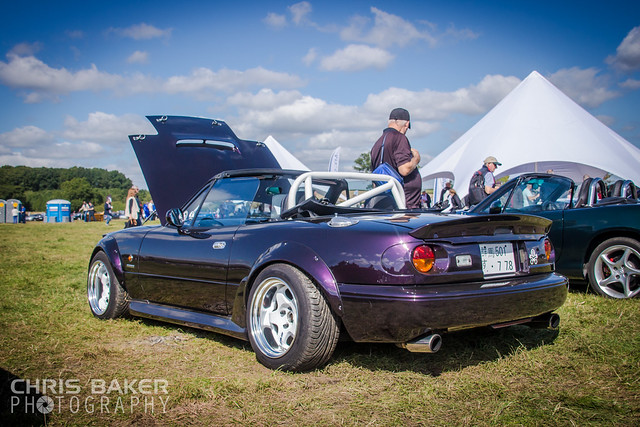
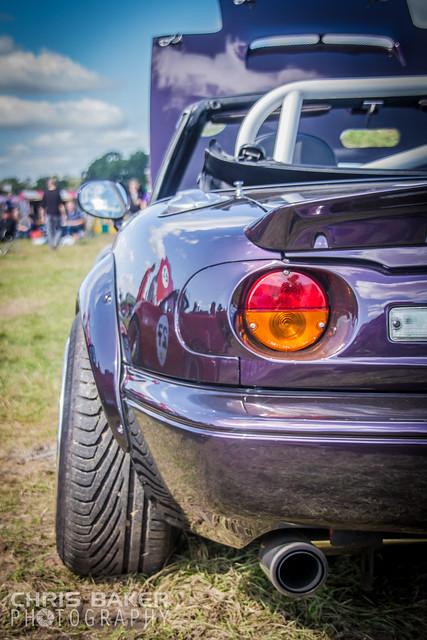
And some photos from a couple of local meets/shows

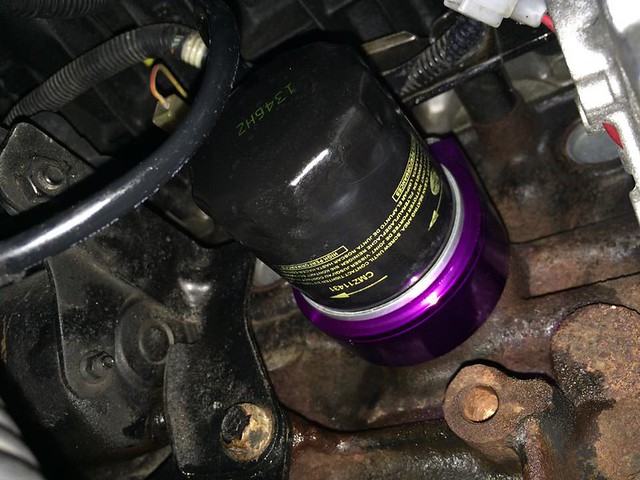
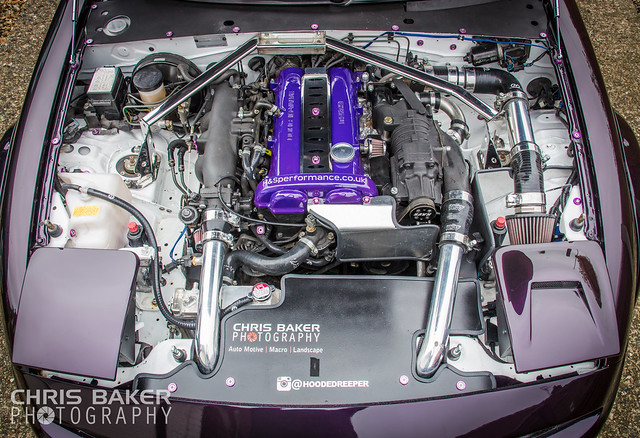
Pulled the Monster apart again,this time ready to fit the Oil Sandwich Plate and do an oil change
Got the Oil Temp sensor plumbed and working fine  Its gonna take awhile to get use to reading it in Fahrenheit rather than Celsius.
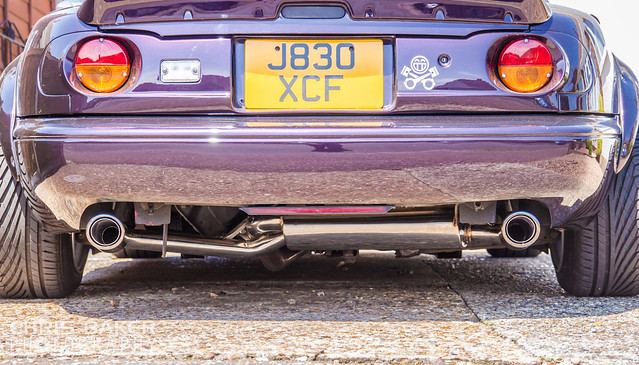
The backbox had been rattling for a number of months so finally got round to ordering a new one from I.L Motorsport. Abit disappointed the silence box has started to tarnish from the heat,i guess theres nothing that can prevent that 
Received an order from Jass Performance too
Needle Caps
Oil dipstick handle
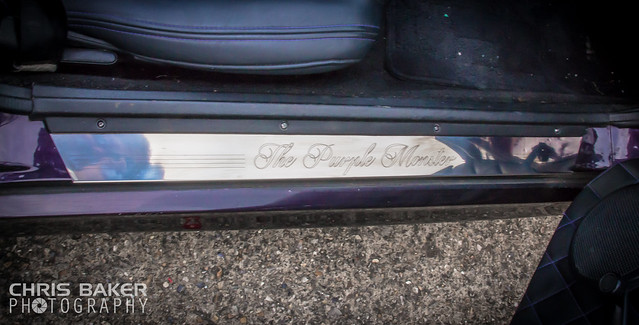
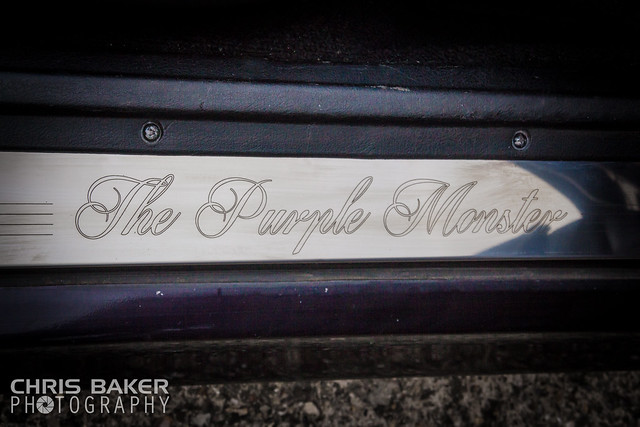
Last but not least,my custom engraved Sill Covers. The photos don’t do these justice,these are incredible!
The other half and her sister have just bought a car together,i had zero influence on the decision…honestly!

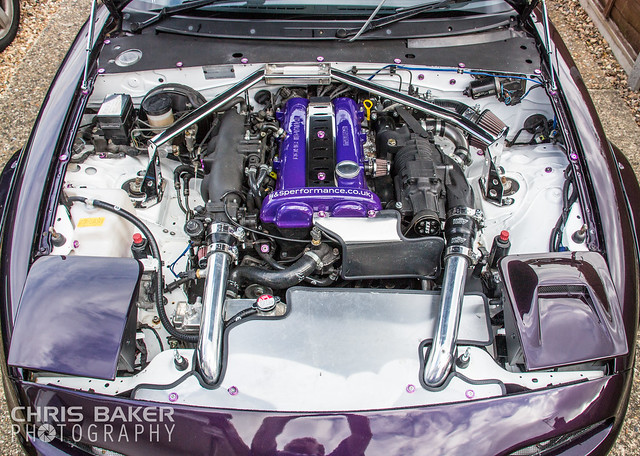
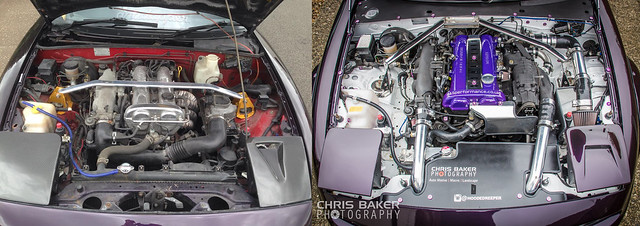
I noticed an oil leak since the supercharger had its oil change. The drain/fill plug was dry and tight,but it was coming from the side. Took the Outlet off and this was the gasket
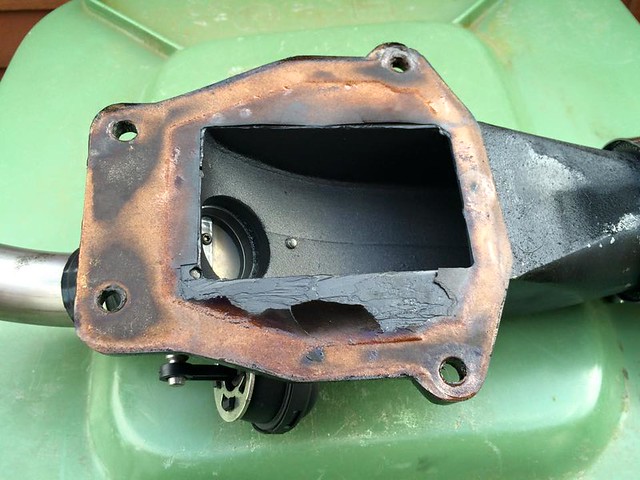
At the time of fitting the Charger I only had really thin gasket paper (that’s all we sold at work at the time). Remade them with the new thicker paper and so far its cured the leak.
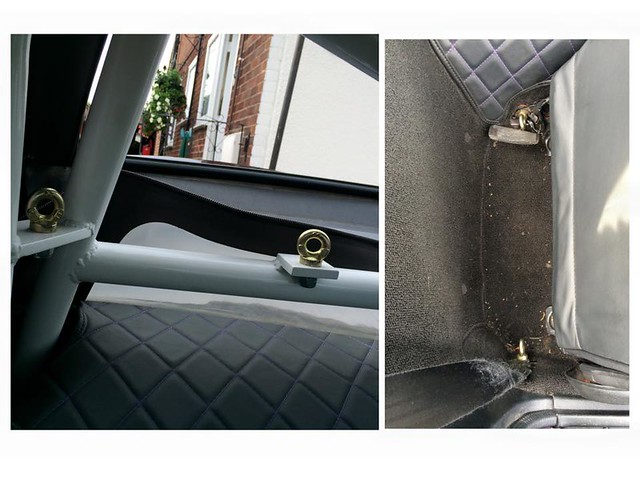
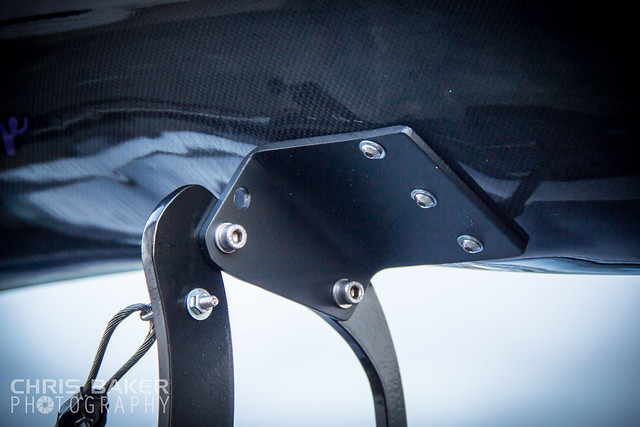
Next on my to-do list was to fit the Harness Eyelets I’ve had kicking about for awhile. In prep for the next track day (when ever that will be)
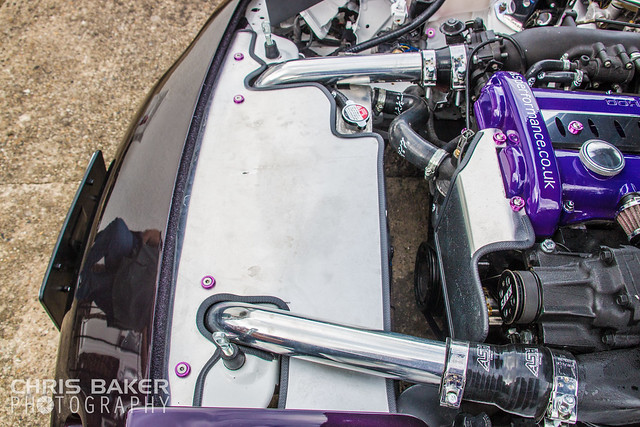
I’ve re-made the radiator slam panel in a thicker Aluminum and painted it with Black Stone Chip and lacquered.
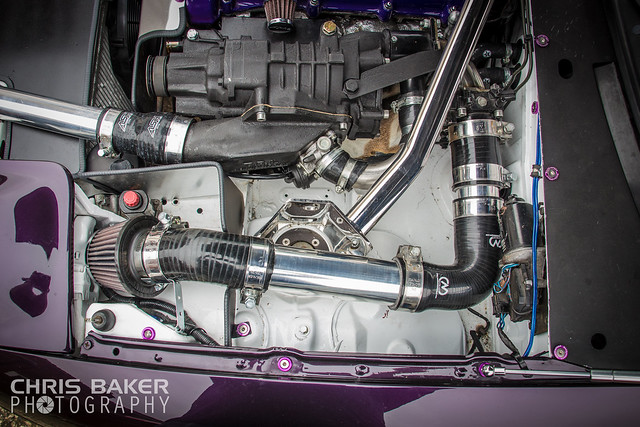
I haven’t been happy with the current location for the Air Filter. Being next to the Manifold and Charger wasn’t any help,so I relocated it.
On my last 5 I did a very similar thing with the Turbo except the filter came from the side.

And a couple of photos from a recent Classics Meet
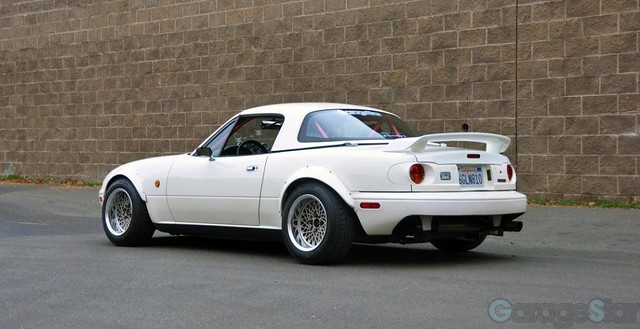
At the beginning of the year I was offered a boot spoiler which I was indecisive about getting,as I wasn’t sure it would suit my car. Then I found this photo which sold it for me
I searched high and low for a Mazdaspeed A-Spec Type 1 boot spoiler and couldn’t find one (checked all UK and US forums and even Yahoo Auctions). Until I got a message from Derrick @ Cork Sport saying he’s got one,and to make him an offer. He accepted and a couple of weeks later it was with me
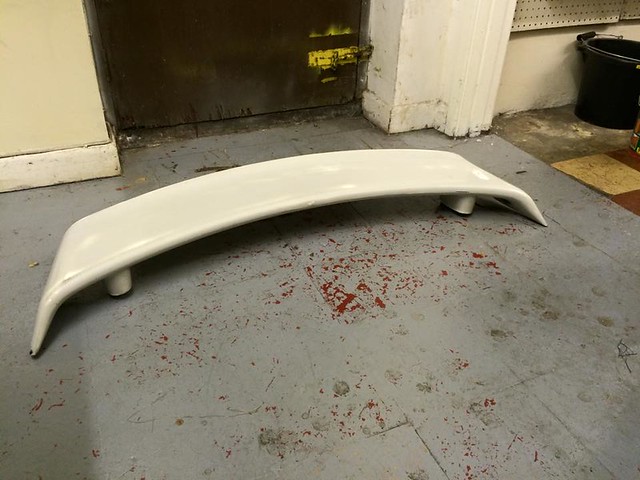
I’ve only got 2 more shows this year,so i’ll wait till Winter to get it painted and fitted
The local MX5OC area were invited to a Family and Friends day at RAF Marham (Full album can be seen here https://www.facebook.com/media/set/?set=a.881104988648685.1073741932.106487689443756&type=3)
You could say mine stuck out a little
Next show was Silverstone Classic,a very very wet day at Silverstone with the MX5OC but still a very good day (Full album can be seen here https://www.facebook.com/media/set/?set=a.882893035136547.1073741933.106487689443756&type=3)


In the photos above you’ll see I’ve also had my new Black Vinyl Robbins hood fitted that I got from MOSS awhile ago. Much much better and the glass screen has made a massive difference!
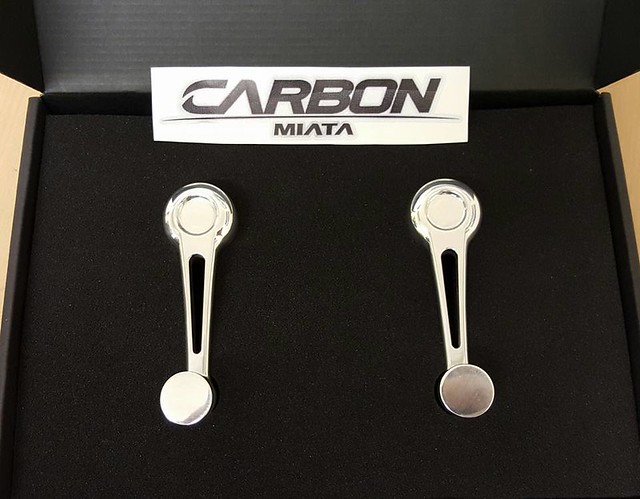
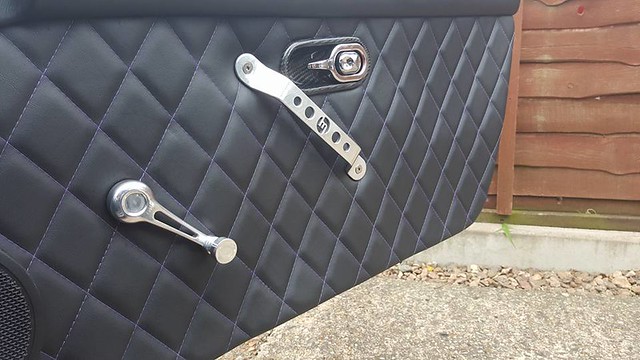
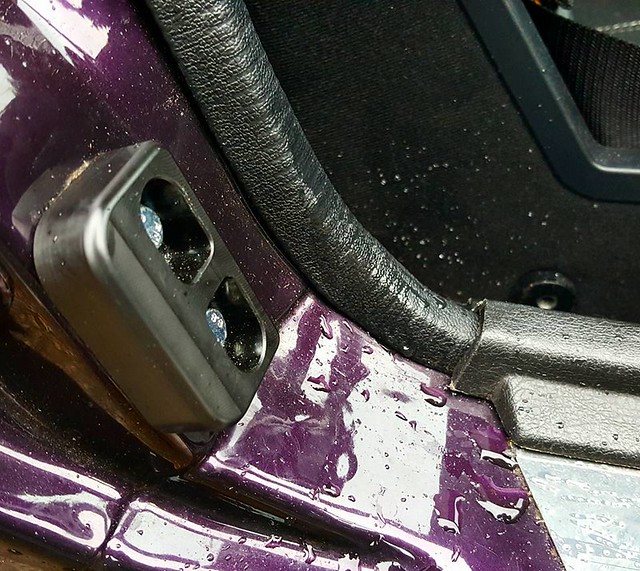
Today (Tues 4th Aug) I received my Aluminium Window Handles from Carbon Miata. These have finished the doorcards off perfectly and match Carbon Miata’s Door Pulls and KG Works Door Handles a treat!

I’ve also had an OEM undertray fitted to help reduce the water from splashing onto the Supercharger Tensioners,sadly no photos
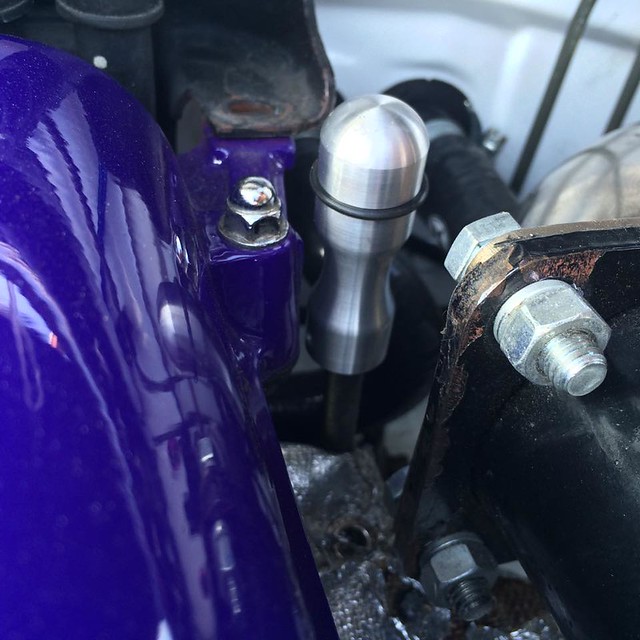
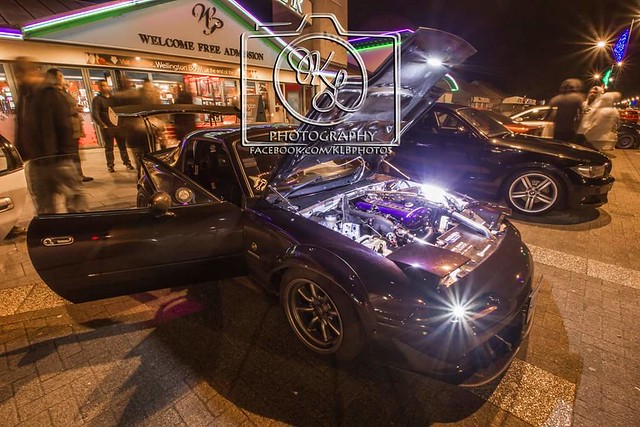
Another little addition I’ve been working on are some LED under bonnet lights.
I originally fitted 2x 17cm White COB strips under the wings,which provided a lot of light to the sides but I needed something from above. Not wanting to cut too much into Garage Vary bonnet,i placed one below the catch. Feeding the wires through the two skins and out above the hinge. I then tucked the wires as best as I could behind the hinge,through underneath the scuttle panel and through the bulk head.
Here’s a little video (taken on my phone) Remember to watch in HD
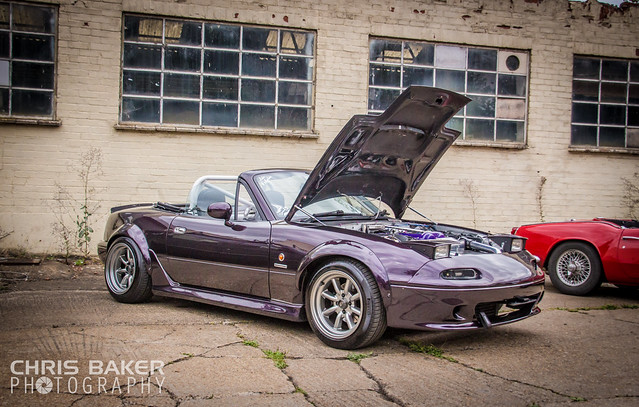
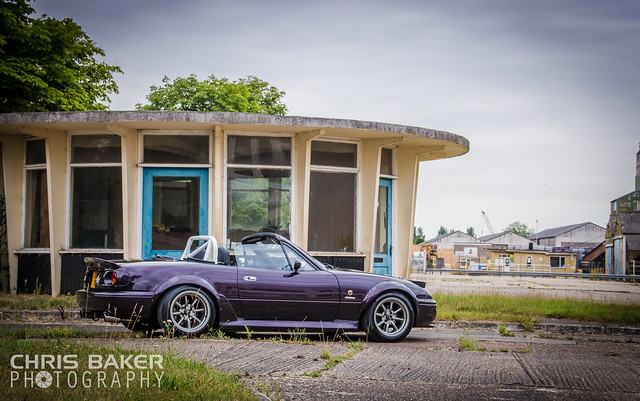
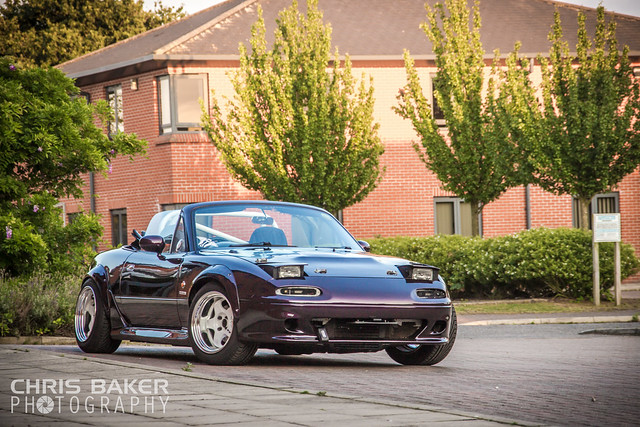
Gave the car a clean and went to a previous spot for some photos,here’s my fav photo
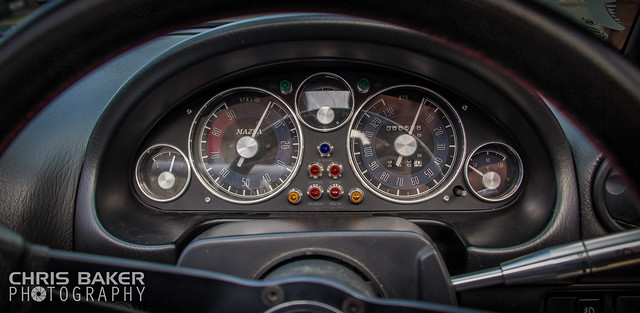
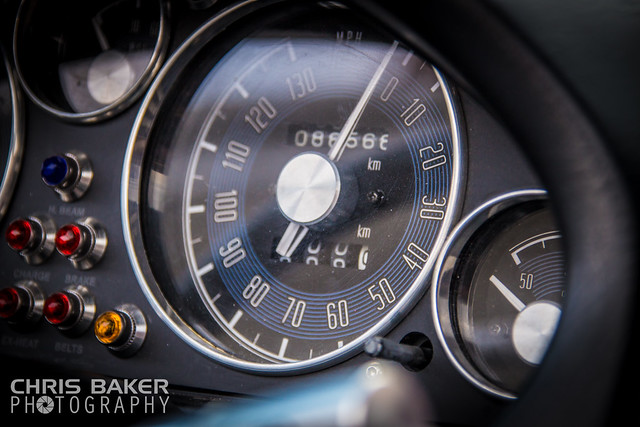
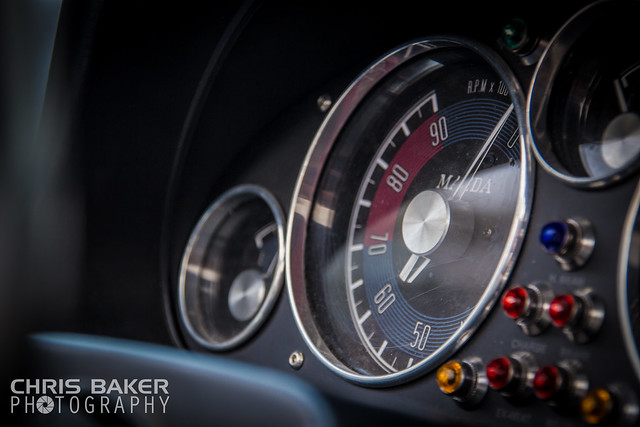
Back in November i sent Adam @ RevLimiter a message about some custom dials. I knew what i wanted but it was difficult to transmit that pen and paper. Do i go something Grim Reaper related (to go with the username) or do i go with a Purple Monster theme? I couldnt find any images that helped or inspired,so one night i drew a design up in Photoshop. Not having done this before,it didnt turn out too bad,especially the colouring!
So i sent the logo over to Adam and he loved it! A few ideas were thrown back and forth and we finally settled for this design.
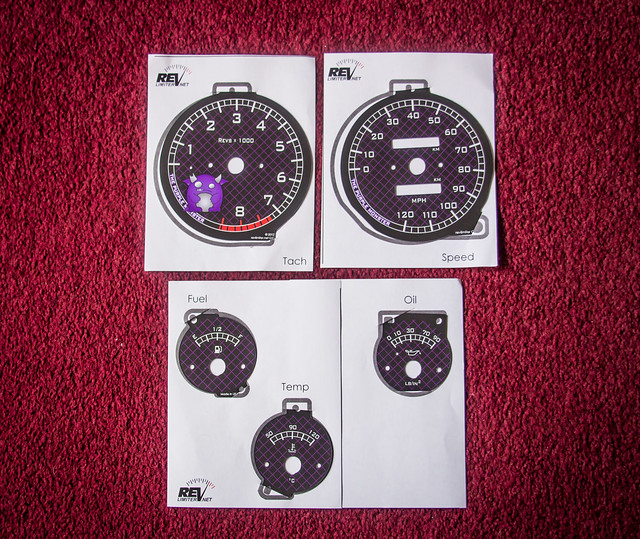
Here are some photos that Adam took,he seems to take them alot better lol
Adam has done an amazing job bringing out the detail in the logo
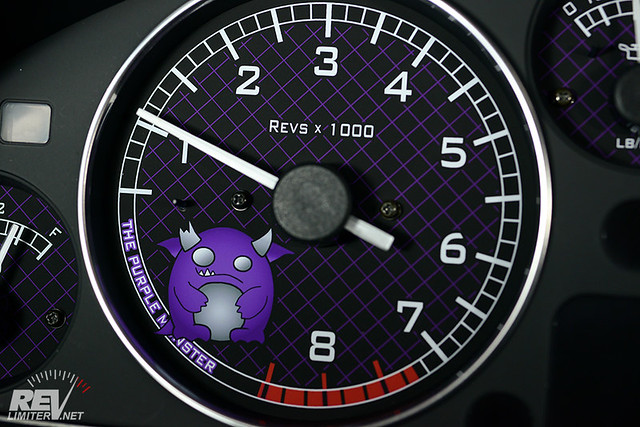
The purple diamonds is a nice reference to the Leather Retrim on the interior
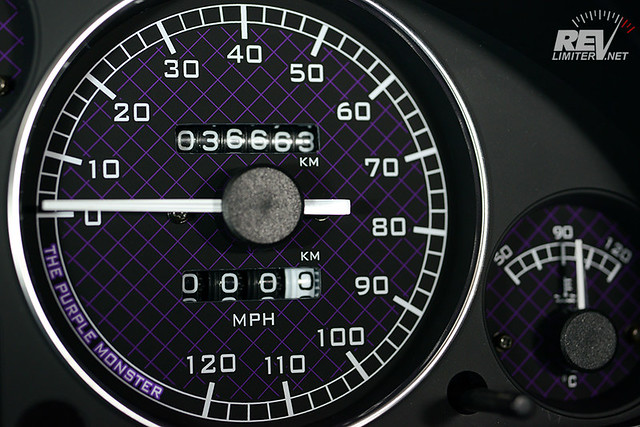
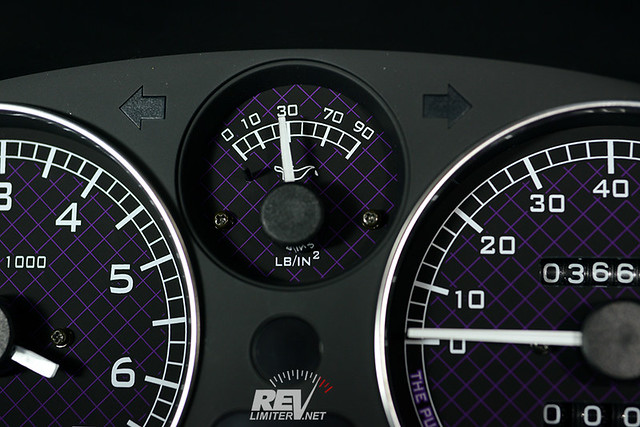
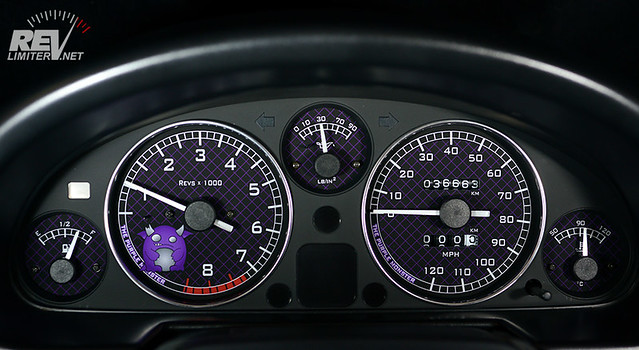
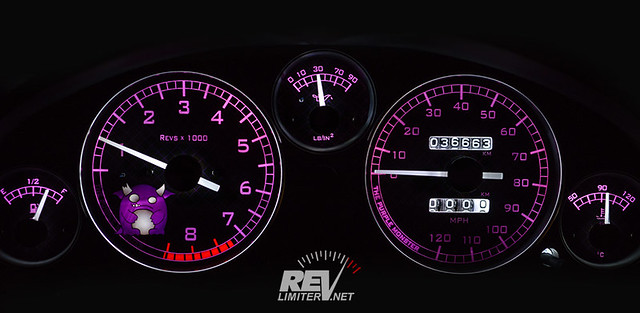
Illumination was also a key factor. The purple numbers and white needles is a great combo IMO,i think being all purple would have been too much.
I wanted the logo to just illuminate on the Rev Gauge,and the text on the other. Again,Adam has done an amazing job!
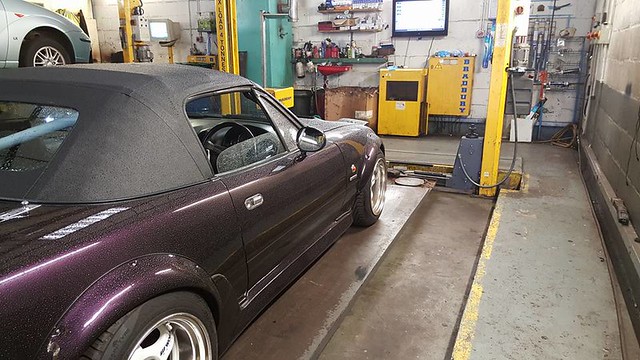
The Monster had its yearly inspection this week and passed with flying colours! They were amazed and how much it had changed in the last year,and they especially loved the charger
I’ve been having this on-going issue with the door speaker cutting out. I replaced all the Phono leads,power cable and fuse box,swapped CD players and amplifer and still nothing. Tried an old set of Phono leads and it worked,so while it was all apart i re-located the CD Player (now a Mechless unit) to the Glove Box. Its freed up alot of space behind the dash,it still needs another tidy up but i’ll be re-wiring the AEM gauges soon so that’ll wait till then.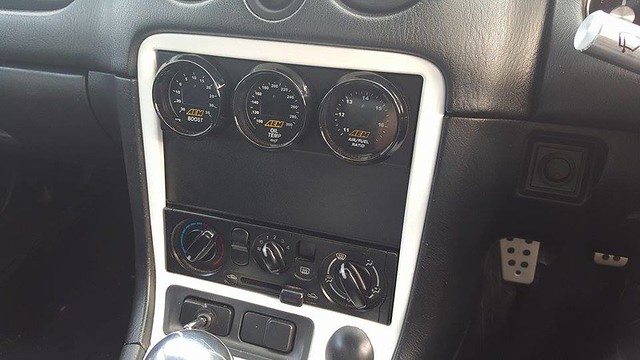
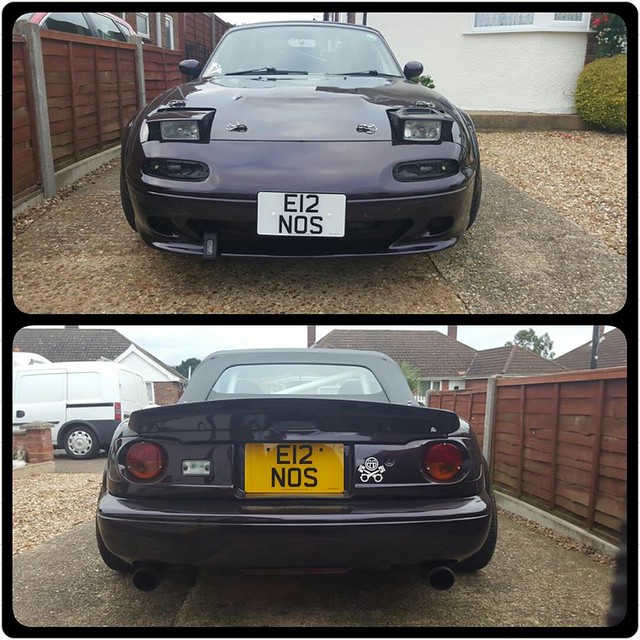
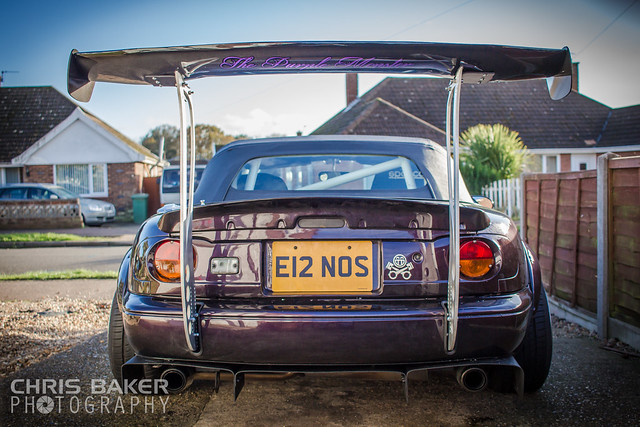
Last but not least,it was my Birthday last weekend so thought i’d treat the 'ol gal to a personalised number plate,EUNOS
?Just waiting for the transfer to be complete and i can get them fitted!
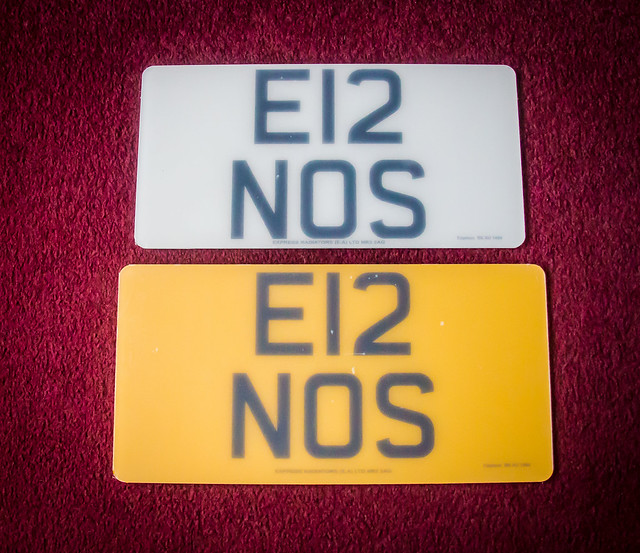
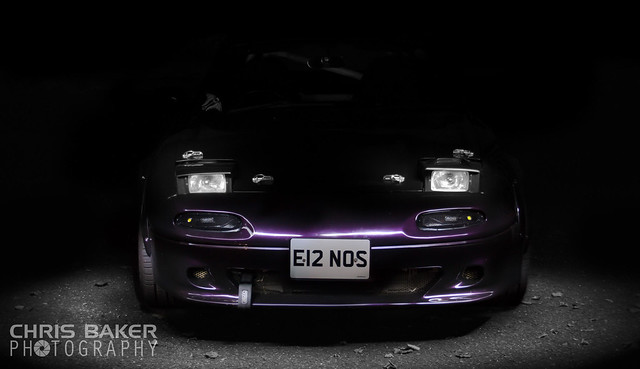
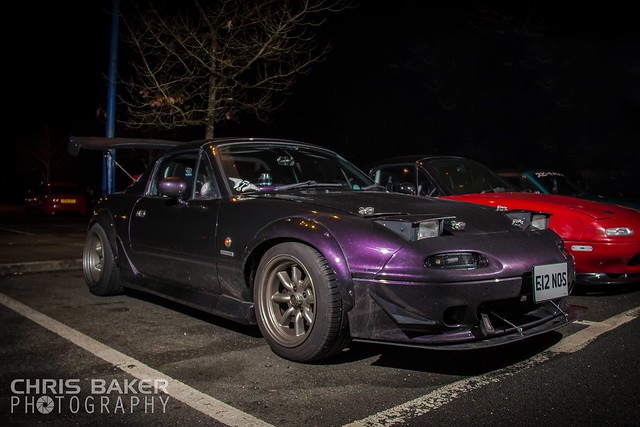
I was saying at a meet earlier this summer how surprised I was that E12 NOS was still available!
Great Thread which I’ve followed for the last 12 months or so. really like some of the ‘personal touches’ you’ve sourced for the car - gauges are a really good finish. Keep up the thread.
Andy.
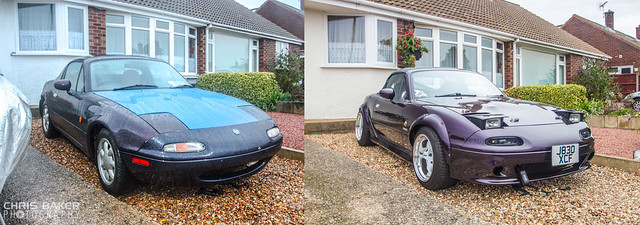
Today is 2 years since i took ownership of the car,what a crazy 2 years thats been! 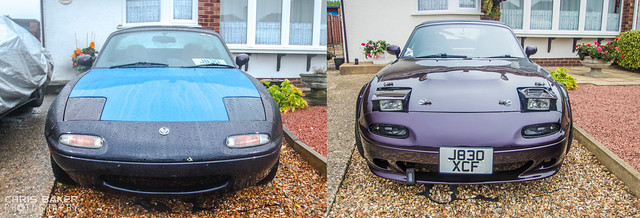

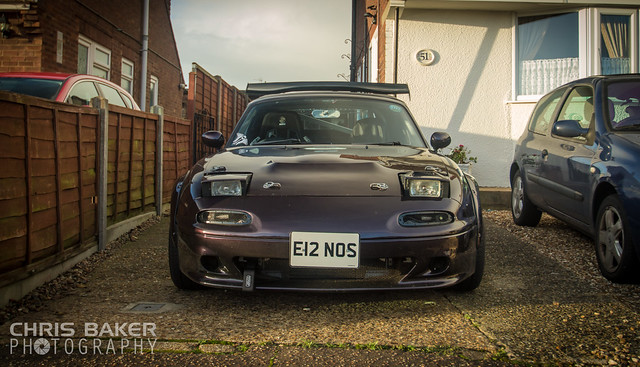
Finally got my personal number plate transfered onto the car (i know the front plate is wonky,i need to adjust the bracket)
Last Sunday i attended the MX5 National Rally
I’ve followed your threads since the last car before it caught fire, all good reading, one hell of a car.
Updates seem to be few and far between at the moment. Last month i celebrated 5yrs with Ms. Reeper (not married,yet…) took her to a surprise few days away to London which soaked up alot of money. (If anyone is interested,my photos from the trip can be seen here https://www.facebook.com/media/set/?set=a.913605695398614.1073741941.106487689443756&type=3)
I’ve also been upgrading my photography equipment,again that hasn’t been cheap either,but i’ve still been doing bits and pieces to the Monster
Shortly after the MX5 National Rally at Kelmarsh Hall was JAE at Newark Park. JAE is regarded as a the LARGEST japanese car show in the UK,and being a 4 day show,its a cracking weekend!
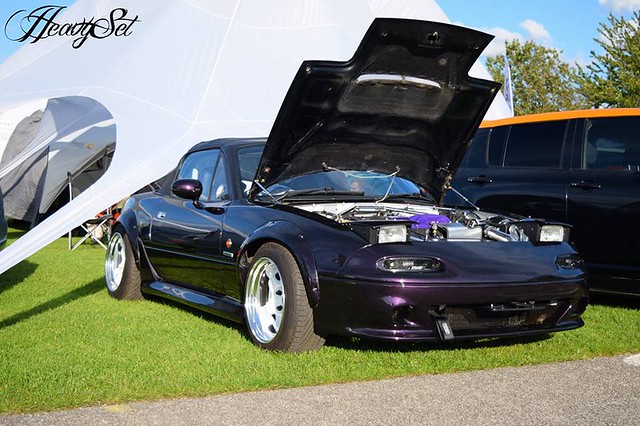
I won’t bore you with photos,here’s one from Heavy Set
Link to my photos can be seen here https://www.facebook.com/media/set/?set=a.905486649543852.1073741939.106487689443756&type=3
Got myself another set of number plates,this time single line,which is alot better!

Practiced some light painting too,although it isn’t perfect it didn’t come out too bad
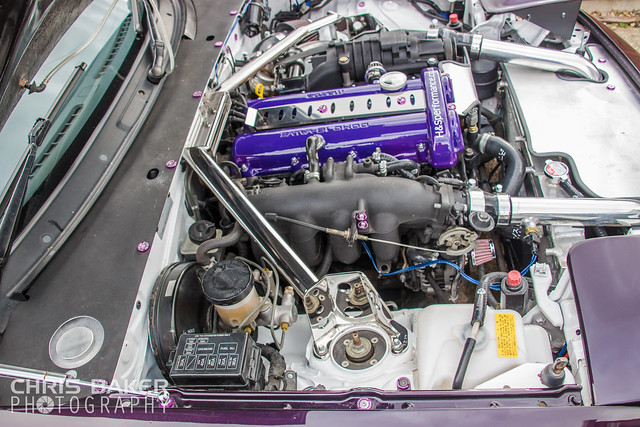
You may remember awhile back i relocated the Air Filter to behind the headlight. This gave great cold air to the filter,but the longer pipe work really made the car hesitate when pulling away and at lower revs. So i moved it back to the bulk head and quickly fabricated a heat shield that runs along side the charger

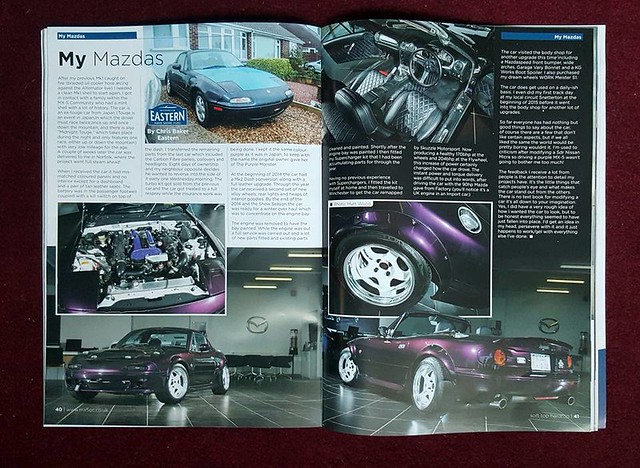
Received this month’s issue of the MX5OC Hard Top Soft Top Magazine to find the Monster got a cheeky little write up
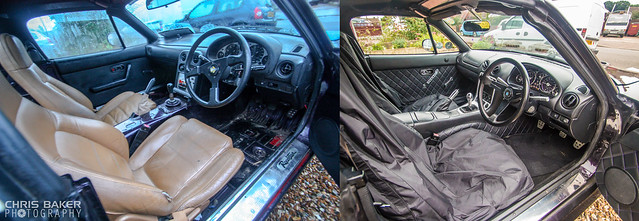
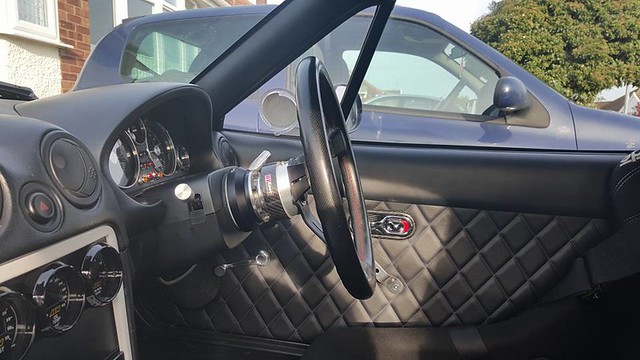
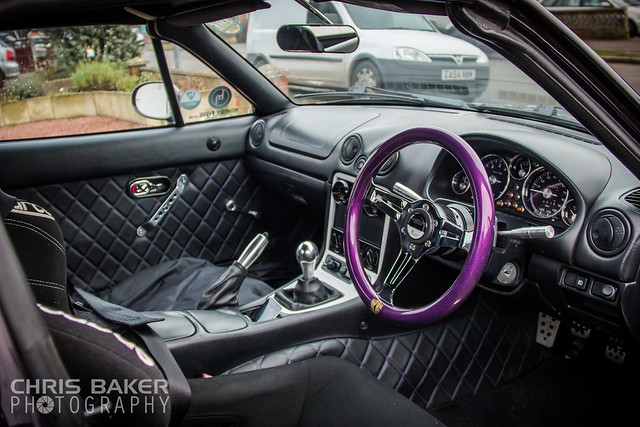
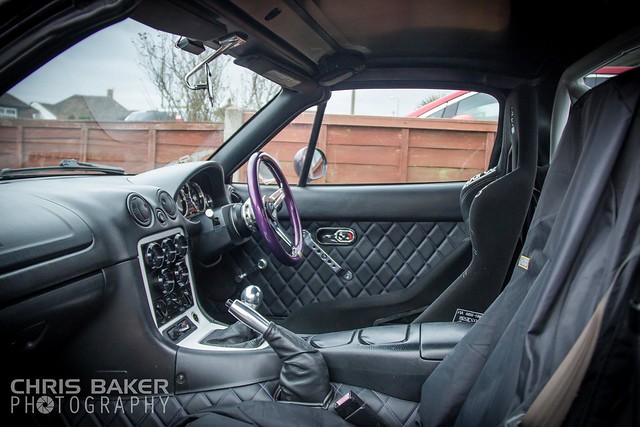
Ever since my track day back in March i’ve had the Sparco Sprint V bucket seat and OMP 4pt 3" webbing harness kicking about,so i slung it in the car for now along with my D1 snap off boss. Its weird how much a bucket seat and harness can drastically change the feel of the car,but now the wheel was faaar too close. Infact the bottom of the wheel was just brushing the tops of my legs.
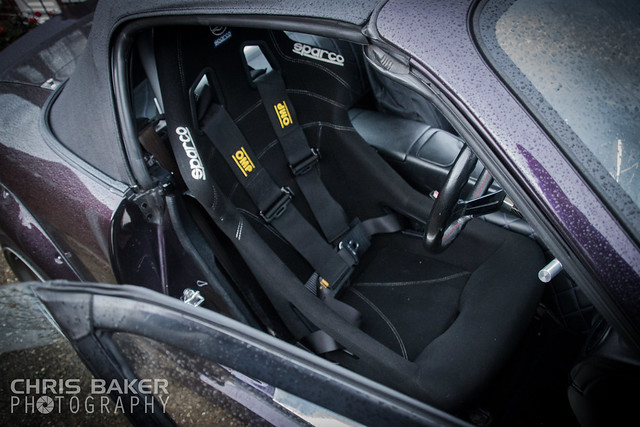

So i ordered a NRG Slim Hub and promptly got it fitted
Jass Performance has just launched a new Upper Shift Boot,would be rude not to order one

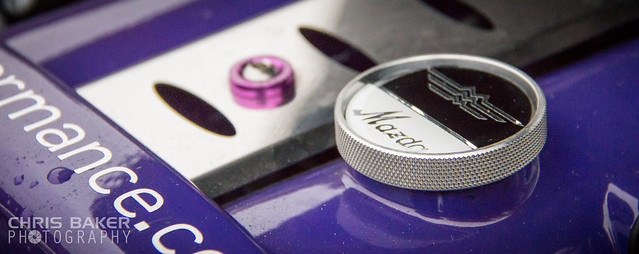
Received another order from RevLimiter,this time retro inspired Horn Button and Oil Cap
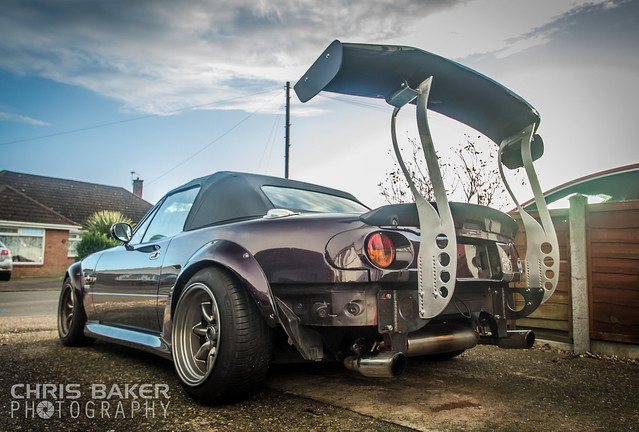
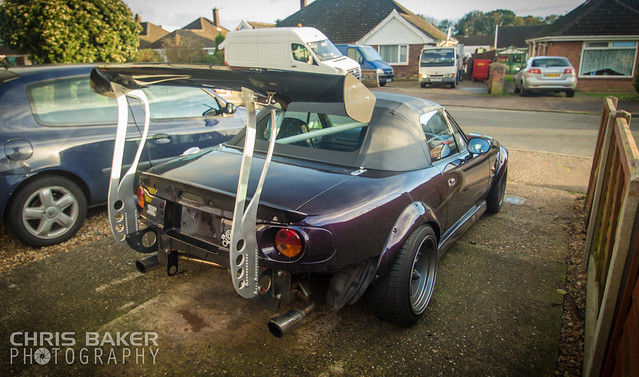
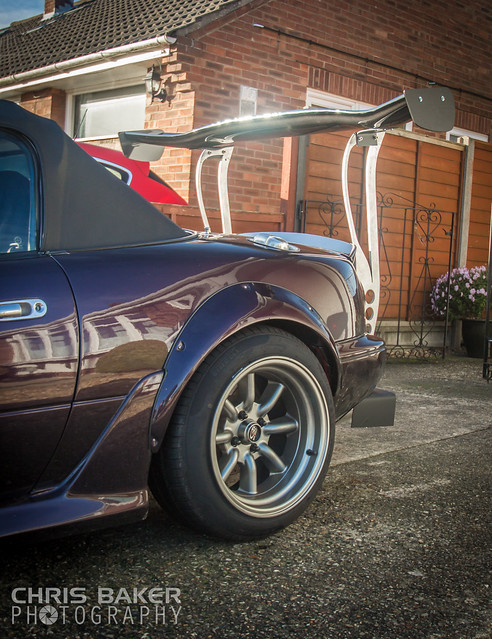
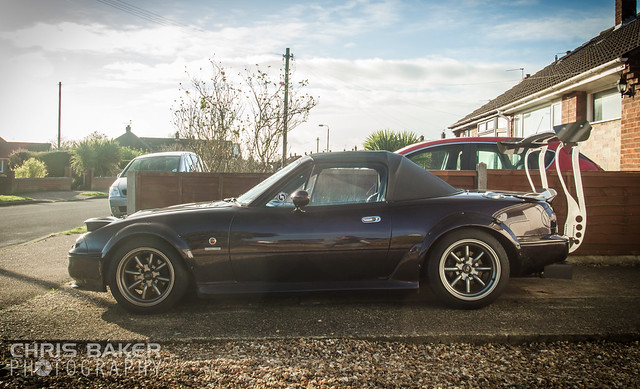
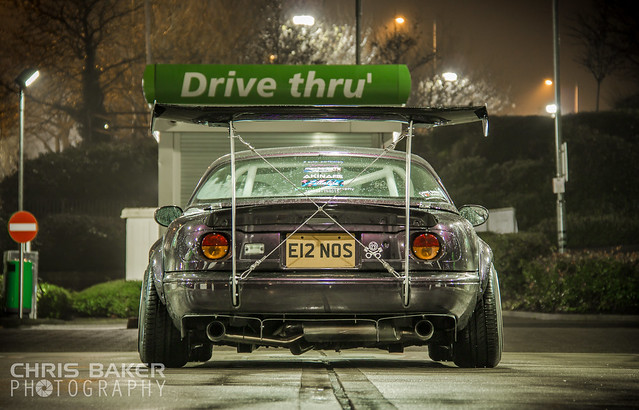
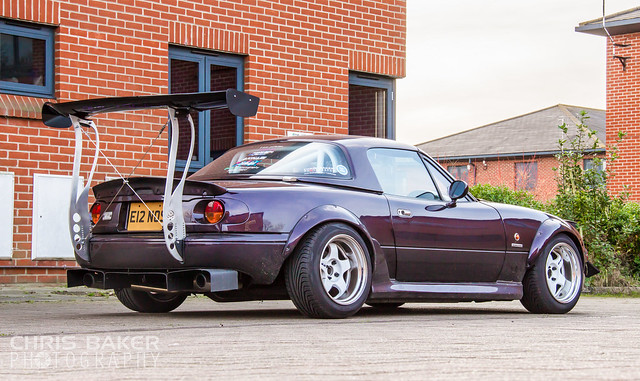
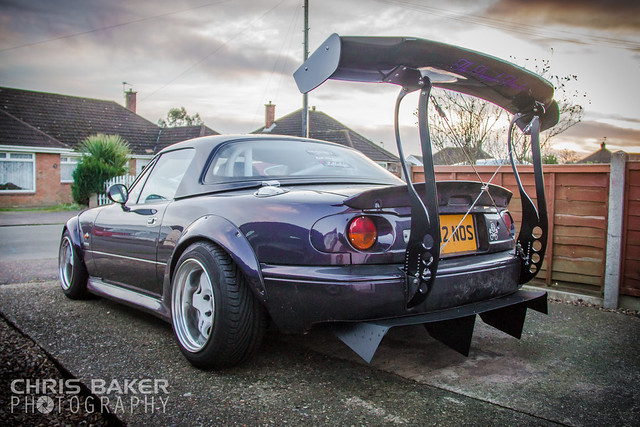
The next installment is what i’ve been waiting to order for a long time,and i know it’s going to have alot of mixed opinions
Garage Star Wing Stands with a Megan Racing Wing 
The spoiler is just mocked up at the moment,need brackets making as the Wing is wider than the stands. Its on its highest mount point,i’ll be bringing it down a little bit to make it more in line with the roof. I’ll be making a diffuser while the bumper is off,makes sense as i’ve got the access at the moment.
I’ve also got a spare bumper to trial cut before i cut mine

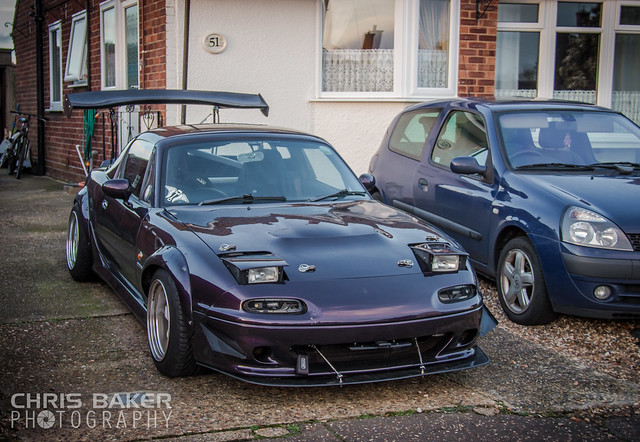
Once the back is finished,i’ll then start on the front
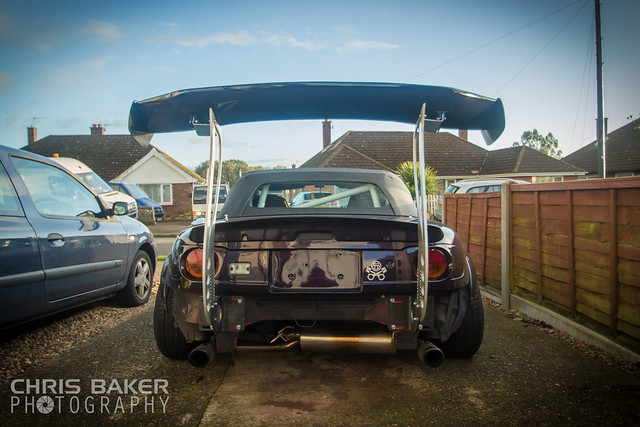
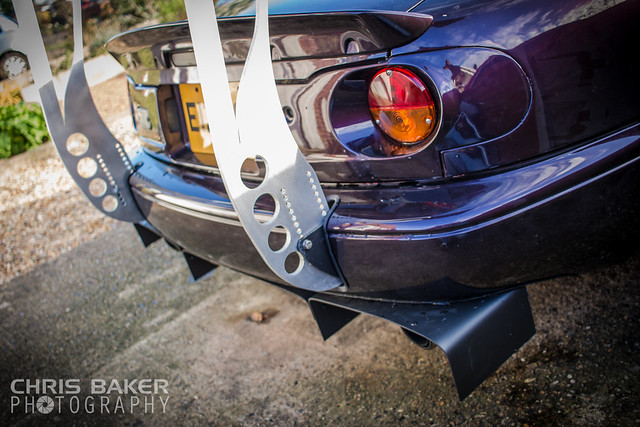
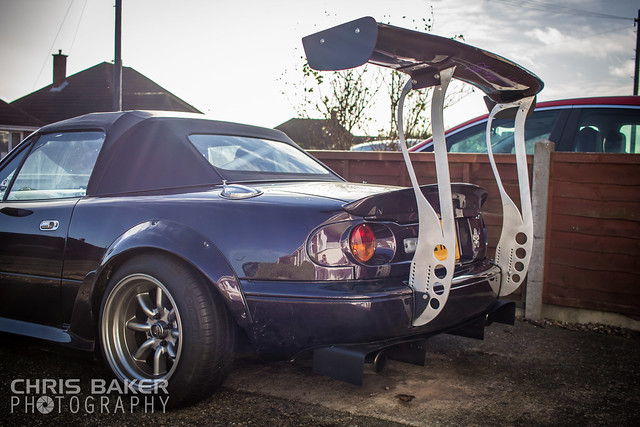
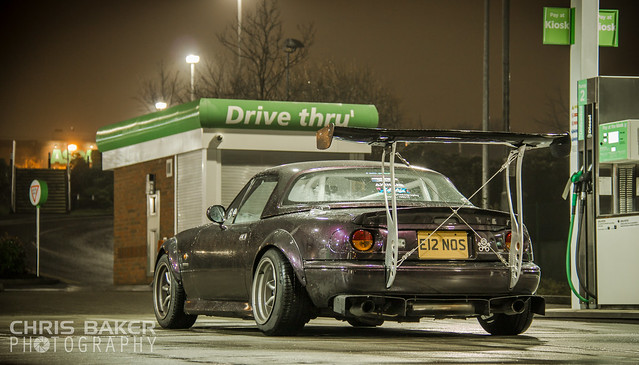
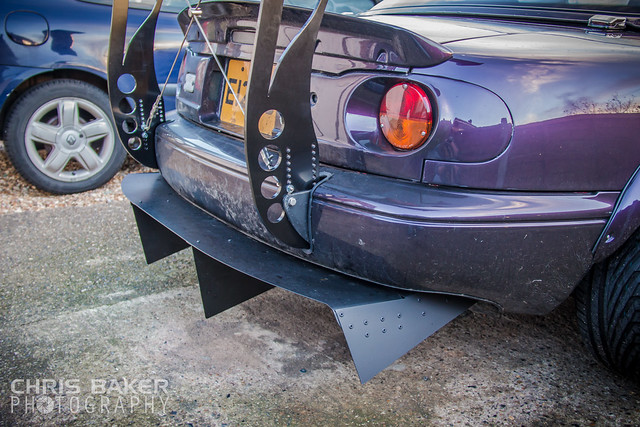
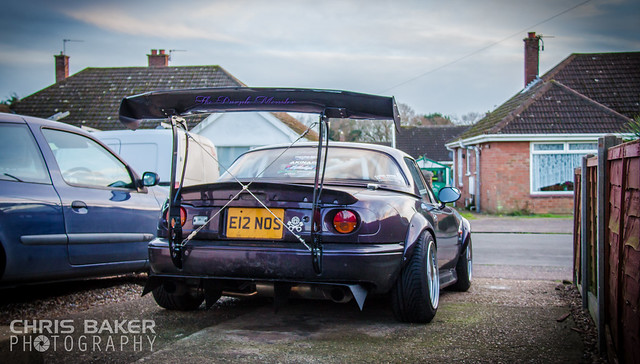
The back end is finally finished after dodging the poor weather for what seems like weeks on end.
It seemed this was going to certainly test my patience,and it did. What ever i done,another problem would arise,but i got there in the end.
By no means is it perfect and/or functional,but i like it The wing stands could have done with being lower,but that would have meant cutting the bumper for about the 5th time,and it would have gone all the way to the bottom. I wasn’t keen on the idea of the centre part only being held together with a small area of plastic at the very top.
But i guess beggers can’t be choosers…onto the photos!
Just waiting for a couple of parts and i can get the cables fitted inbetween the wing stands. Then its time to remove the front bumper ready to make the DIY splitter and canards
Received the second package from Garage Star,this time a pair of door bushings and a Thermostat sandwich plate.
Got the door bushings fitted. The doors definately have that nicer shut noise,but on the odd occasion they need a firmer push to shut them. I guess in time they’ll wear abit and it wont happen so much.
Over the past week or so i’ve been busy making more DIY parts for the car. I first started with another sheet of Dibond and made the front splitter,followed by some front Canards out of some thin aluminium (it may be too thin,but will see how i get on)

I decided to curve the splitter into the corners of the bumper rather than having it the same width all the way around. Made some brackets from some 25x2mm steel plate and mounted to where the OEM undertray bolts to (i used the front stud).
I originally left the centre of the splitter and used the two threaded parts on the bottom of the intercooler to mount it,but this pulled the splitter down leaving a gap underneath the bumper. So i cut the a section out of the middle so the intercooler fit snug-ish and made some brackets (will need to re-do them at some point as they’re not the prettiest). Lastly i used a couple of adjustable turnbuckle rods for the centre.
I have noticed the splitter has pulled over to the passenger side since re-fitting the bumper. I’ll get it up on a ramp and see if i can pull it across. It was a very very snug fit fitting the bumper back on,hopefully theres enough give in the brackets (once slackened off) to move it back across.
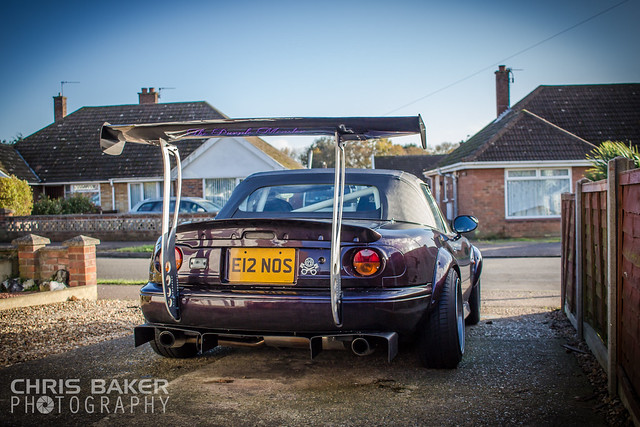
Next was fitting some tension cables to the wing stands. I used some 4mm wire cable with some 6mm clamps and eyelet bolts. Its definitely made a difference,its not swaying from side to side as i’m driving now
I haven’t had the chance to drive it ‘properly’ yet due to all the rain we’ve had recently. From what i have driven it,it does feel more stable and the front hasnt gotten much lift (from what i can tell)
After taking the above photos,i notice how badly i need to adjust the suspension,another thing on my to-do list :)
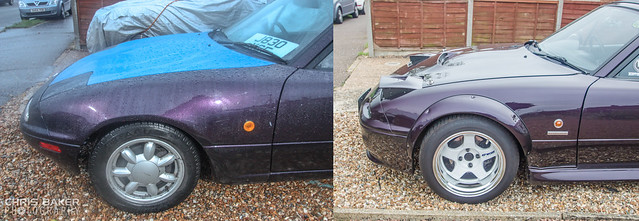
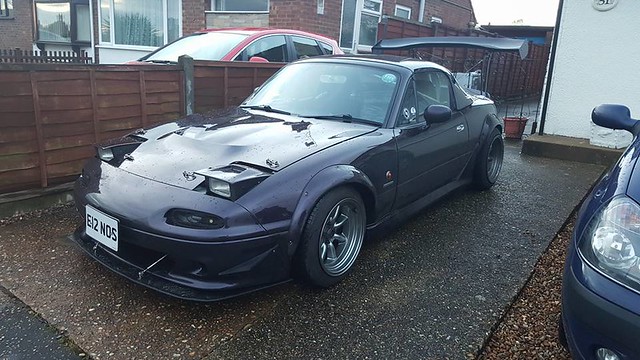
Finally got round to adjusting the coilovers (lowered the front 10mm and raised the rear 5mm). The Works were catching on the rear arches,rather than fitting new tyres (going from a 205/50 to a 195/50) it was easier to raise it.
So the Works went back on the car to test for clearance and so far no issues
** I am aware the tyres are fitted incorrectly,the wheels will be coming off again soon for a good clean and a coat of wax **
The rear diffuser will be removed shortly,i’ve got another one coming 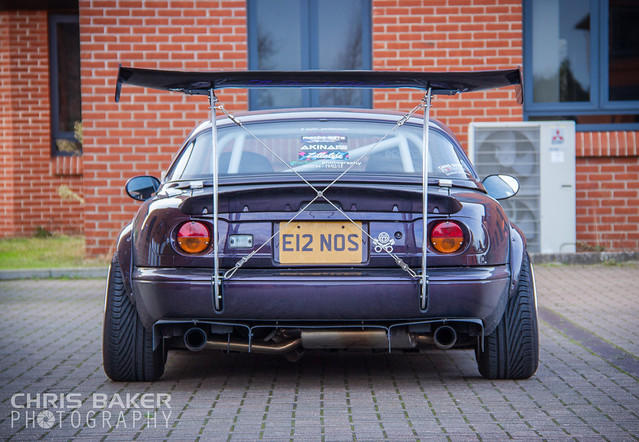
After taking the photos,i noticed i need to adjust the turnbuckle rods on the front splitter,as its pulling up on one side

I really need to clean the car lol
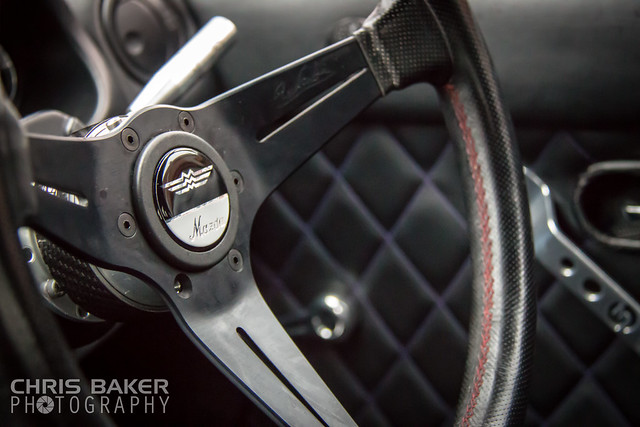
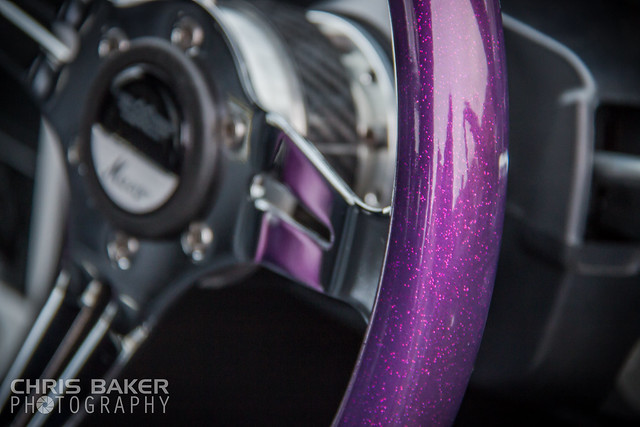
My other half bought me a new steering wheel for Christmas,was a good excuse to order some new bolts too
Just before Christmas i headed over to a local company that sells spares and performance parts for Lotus. I guess a perk of where i live is the Lotus factory isn’t too far either. I asked to look at their available diffusers as i wasn’t 100% happy with the DIY one i had made. So i drove away with their GT3 diffuser,just so happens to be the largest diffuser they do.
Before i get told a million times about the placement/angle of the diffuser,i know it needs to be angled up more to be effective. The people of Facebook have already kindly shouted this at me many times already
As i’ve said in the previous posts,i hold my hands up to the Aero not being functional,and that it is mainly for aesthetics
I’ve also rounded the corners off the Garage Star Wing Stands and had them powder coated Gloss Black
I’ve also re-made the Wing>Wing Stand brackets to tilt it abit more (for those extra scene points yO)
Two track days booked,one at the Lotus Test Track in February and then my local Track Snetterton in April
I look forward to hearing your comments on the effect of the wing after the track days.
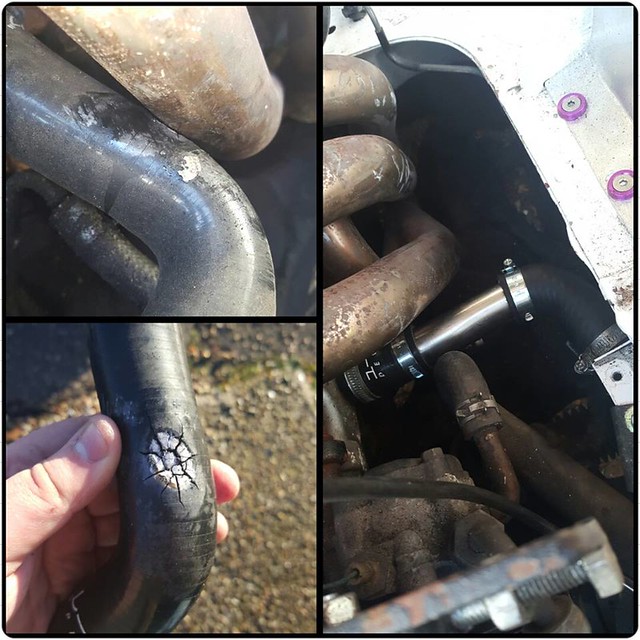
While out driving i noticed some steam coming from the front of the car,originally thinking it was the car in front being abit smokey. After some inspection it was the hose coming off the Water Pump,i knew it was close to the manifold,but didnt realise it was touching. I’ve been lucky as its been like this for quite awhile and never had any issues.
Ordered a new hose and found out that the metal tubing from a vacuum cleaner is the exact same size! Sorted
You may remember Adam at RevLimiter making me some bespoke gauges with a Purple Monster logo and purple diamond stitch in the backgorund. I asked him if he could make me some for my AEM gauges. I sent over some templates and he’s done an incredible job as always!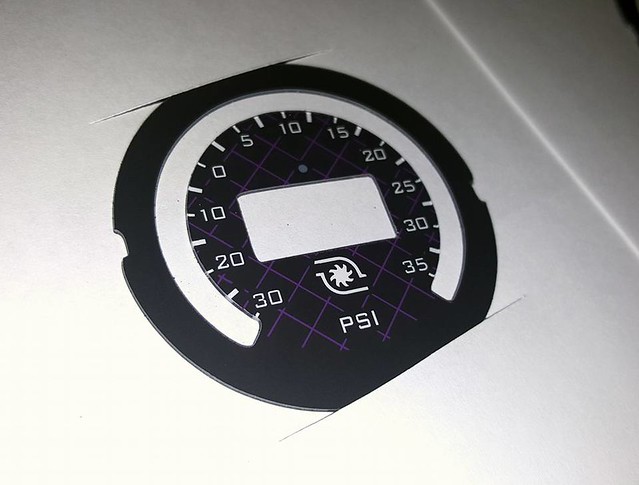
A week or so ago i met up with a few MX5 owners for our monthly midnight meet. Took the camera with me,would have been rude not to take some photos of the 'ol gal

I do my best to keep on top of things,but sadly one thing that has always been neglected and thats the Coilovers. I’ve never cleaned them,never greased them or serviced them. When i adjusted them a month or so ago,i think i’ve buggered up the pre-load and it knocks on the passenger side. Good excuse to buy some news one 'ey?
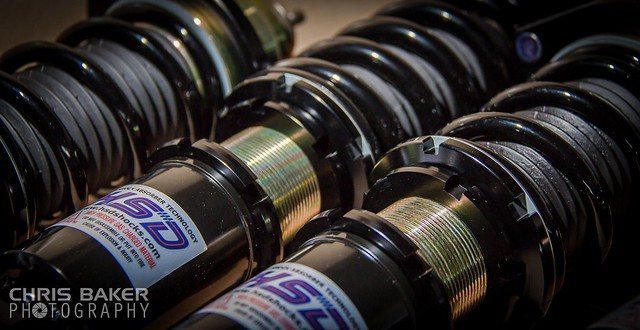
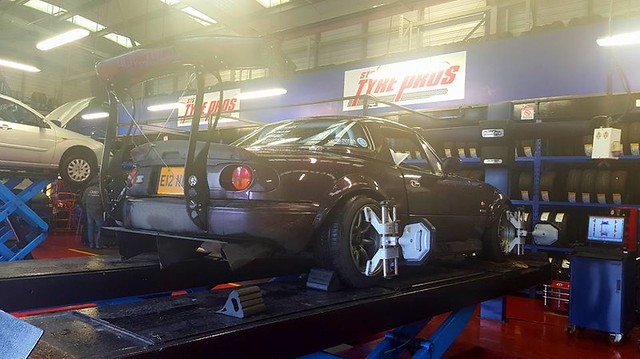
These will be fitted this week (weather depending). Will bed them in and get it laser aligned along with some new alignment bolts
Small update
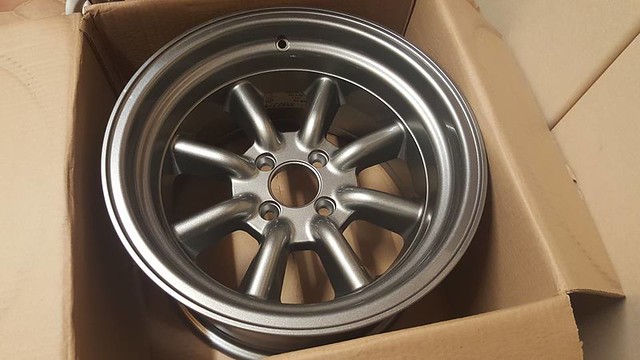
I finally got round to replacing the front Rota RKR 8js for some 9js
The HSDs got bedded in,new RKRs fitted and then a full geometry done
I’ve got the car booked in next week for a new exhaust back box to be made along with some other bits and pieces i’ve done,but i’ll save those for the next update