NC Blower MOSFET replacement

  1. My model of MX-5 is: NC
  2. I’m based near: Daventry, Northants
  3. I’m looking for technical help or recommendations on: Replacing the blower “resistor” MOSFET

Has anyone replaced the blower MOSFET (which Mazda call a “resistor”) in a RHD NC without dismantling the dash and removing heater etc? I’ve seen a couple of references to doing this on a LHD car, which indicate that it is possible but extremely awkward. There’s a back story here, but currently I have a working blower with the MOSFET hanging on its cable in the passenger footwell (where it gets HOT!!). I want to refit it into the heater airbox but local garage says it will involve removing the dash (and opening the A/C system) and several hours of labour…

From experience I can tell you the unit cannot be removed from the heater box without moving the ‘whole’ dashboard forward 4” (or 150 mm) and still you need very small hands and a good ‘feel’ to remove the unit. This means draining the coolant and flattening the A/C as you suggested. The screws are mercifully short when you do get there.

Removing the socket from the controller(MosFET) in situ is extremely difficult, Mazda have helpfully provided safety bars to prevent accidental disconnection of the connectors on the car and in this confined space, finding the release catch behind the safety bar with one hand is almost impossible, you need to almost be looking at the connection to get it to release.

Like you I have a large heat sink in the passenger foot well and its likely to stay there and get hot.

I have removed the dashboard a couple of times before the A/C and coolant were installed and the act of the dashboard removal is relatively easy, I did document it with pictures at the time if your really interested but its a full days job and costly if your paying someone else to do it not to mention refilling the A/C.

Thanks. The position I am currently in is that the MOSFET has already been removed (local garage did it for me). They also taped over the resulting hole in the back of the airbox. I have no idea whether this tape was applied externally or internally. The Haynes manual says it can be done - but somewhat unhelpfully offers no advice as to how, simply saying to disconnect the plug, undo the screws then “manouevre it from the housing”. Even less helpfully, it says in traditional Haynes fashion “Refitting is the reverse of removal”.

I have even seen it stated that the best way to do it is to cut a hole in the bulkhead…

I can’t offer you any advice but i would appreciate any out come and advice you can offer.
My second MX5 which i bought a couple of months ago has a nonworking blower.
I have had the blower motor out which was full of water now stripped, cleaned and lubricated the bearings, i then made a jump lead and connected it back into the loom and had it running correctly at all the speeds it should do but when i refitted the blower it would not run and all the lights in the dials would not light up.
I have disconnected all the multiplugs and checked all fuses in the foot well to no avail.
What symptoms did you have, was the blower stuck at one speed or not working at all.
Did you loose the dial lights.
Did you loose the radio functions.
Pictures attached of blower removed and stripped also a damp patch at the side of the car which was the water from inside the blower assembly.


The car is in bits at the moment with all the back end stripped off, work on it will resume after Christmas and a little warmer weather comes.
Like yourself i’ve done some research into the MOSFET and been told it’s a £900 job.

Here are some diagrams from the workshop manual if they help…

image

Hi…if it gets hot then surely its a resistor and not a MOSFET as these are just an electronic switch.
The resistor pack purpose is to give you the different speeds?

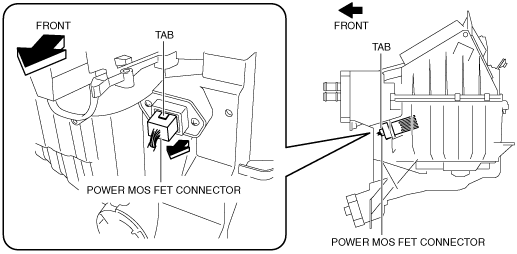
So we are in no doubt lets review what needs to be done to remove the MOSFet ‘resistor’ block.

Fitted in position the space between the bulkhead and the plug-in connector of the loom is approx. 2 inches, just enough to get extended fingers up to feel, if you have small hands. You cannot manipulate the plug and you cannot get a stubby screwdriver up and onto the two screws holding the MOSFet block in place. Been there tried that!

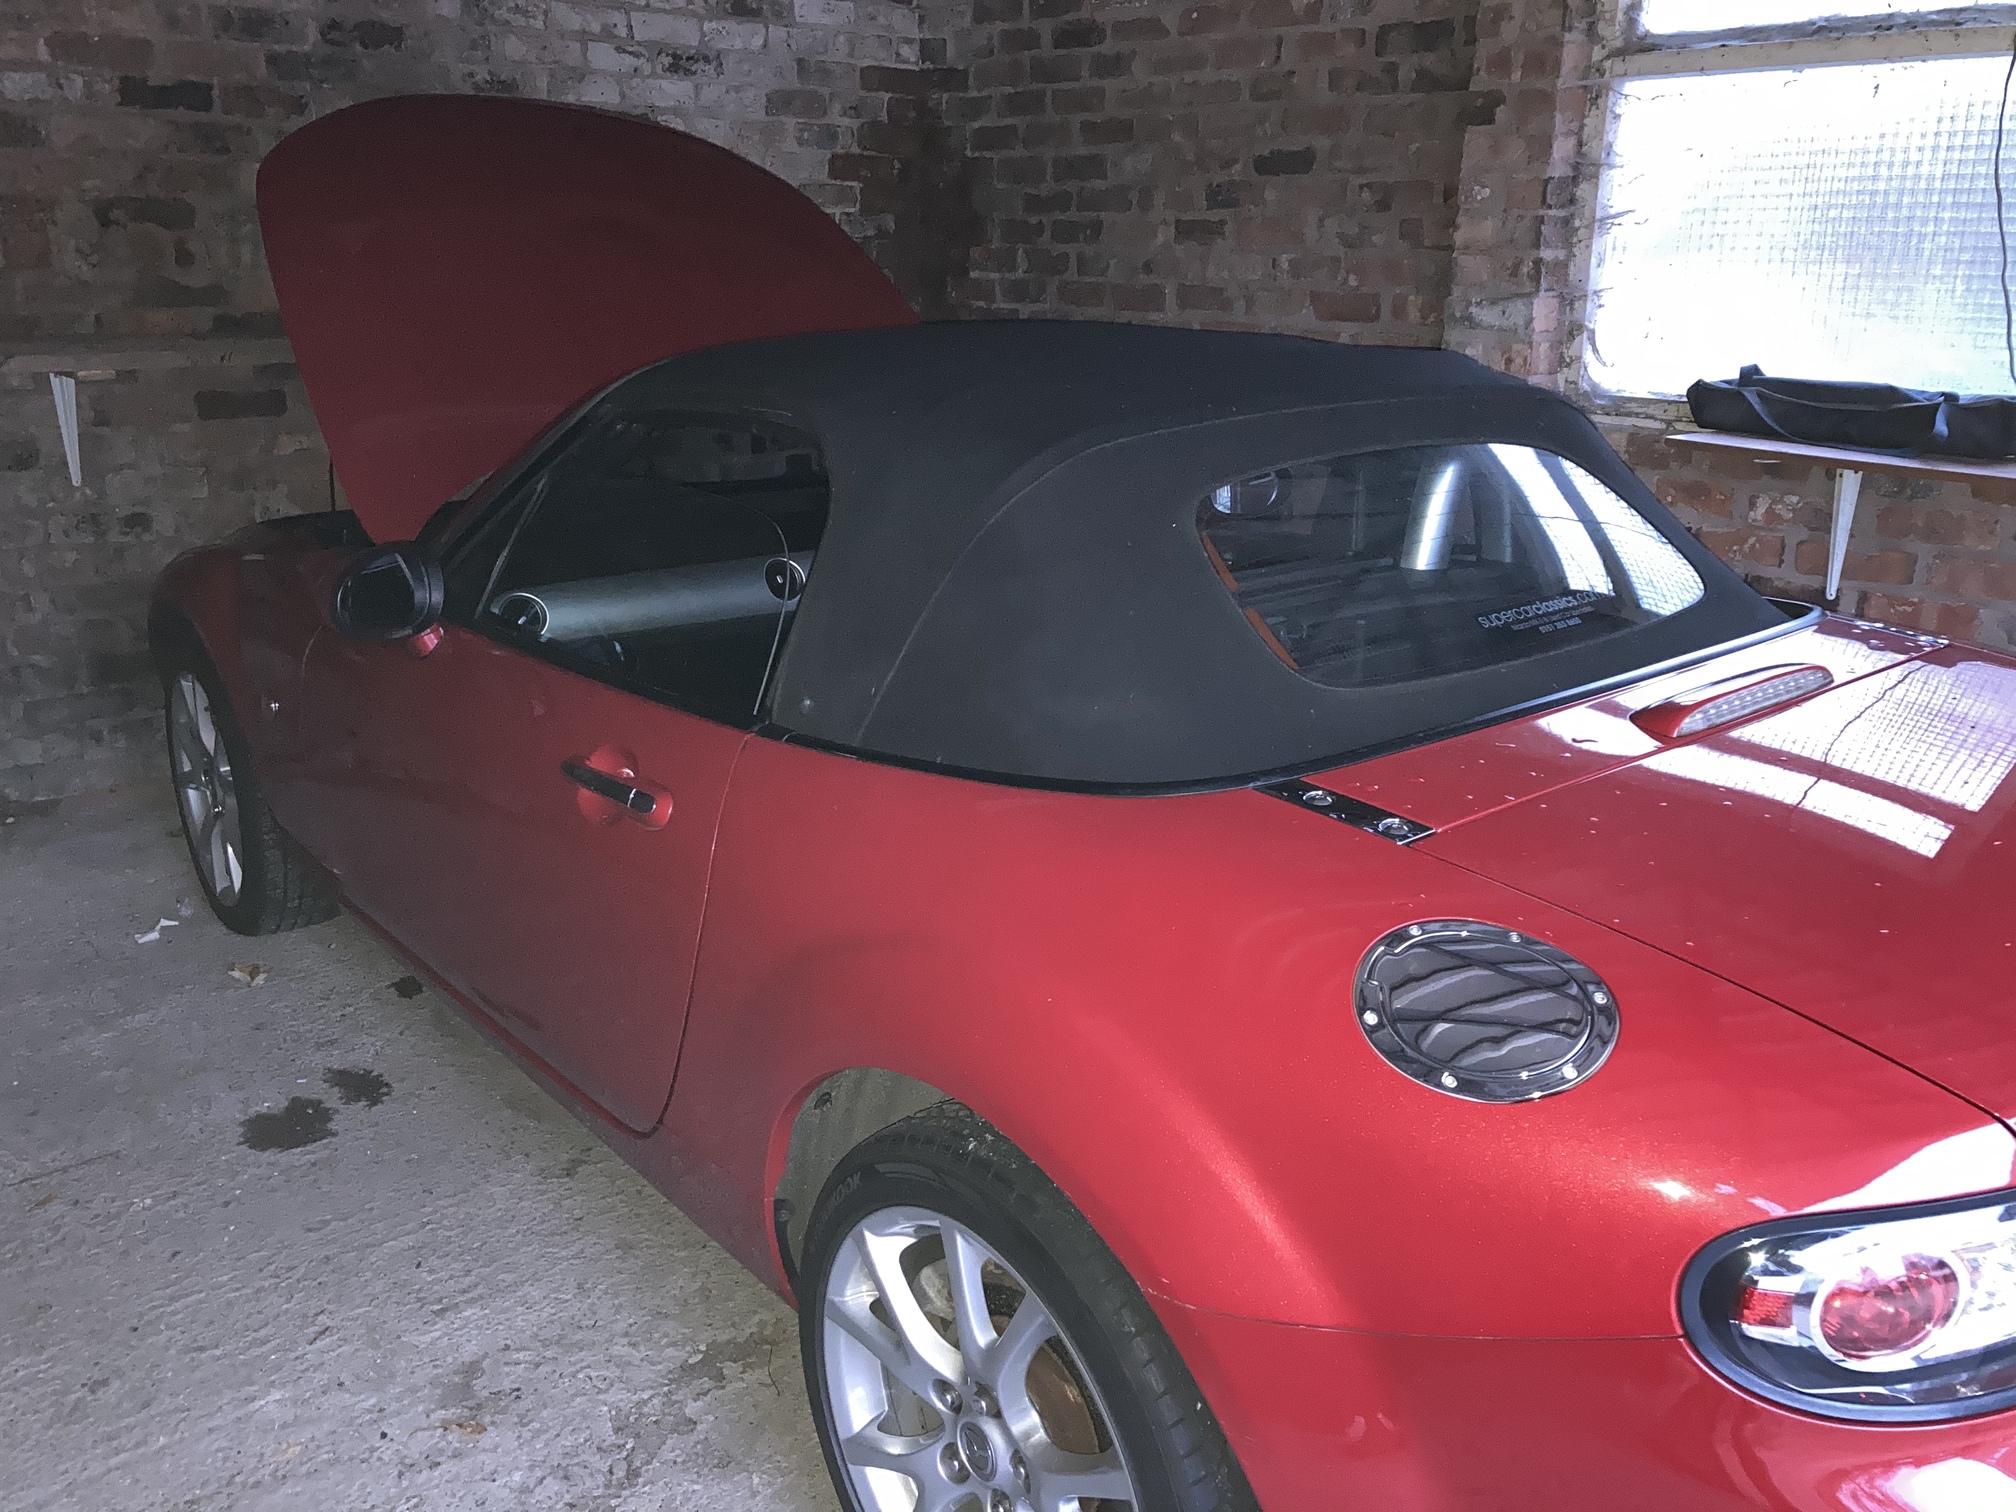
Workspace to do this job required each door to be fully opened or openable ‘fully’ at some stage of the process. If that means moving the car out the garage to do it, be prepared.

Removal of dash.
Under the bonnet disconnect A/C and coolant pipes going through bulkhead in front of passenger.
Strip out the hood guides and the head lining plastic trim enough to allow the A pillar trim to be removed.

Passenger side
Strip out seats(Its just a lot easier if you do), door opening plastic including the rubber seal and trim from ‘A’ pillar.
Strip out glove box, peel back passenger carpet as far as you can, remove passenger foot rest.
Remove heated seat panel and console side trims.

To lighten the dash assembly you can remove audio, speedo and trim but its not essential.

Drivers side
Remove all, under steering wheel trim including the steering column plastic.
Detach the bonnet release mech from lower dash.

Remove all loom connectors including the big white connector behind the speedo area but accessed from the drivers foot well.
There is a yellow air bag connector there too that needs disconnecting.
Disconnect all the loom connections to the steering column switches.
There is an aerial connector rising from the drivers footwell up the ‘A’ pillar and across into the dash.

Lower steering wheel and column to the floor.

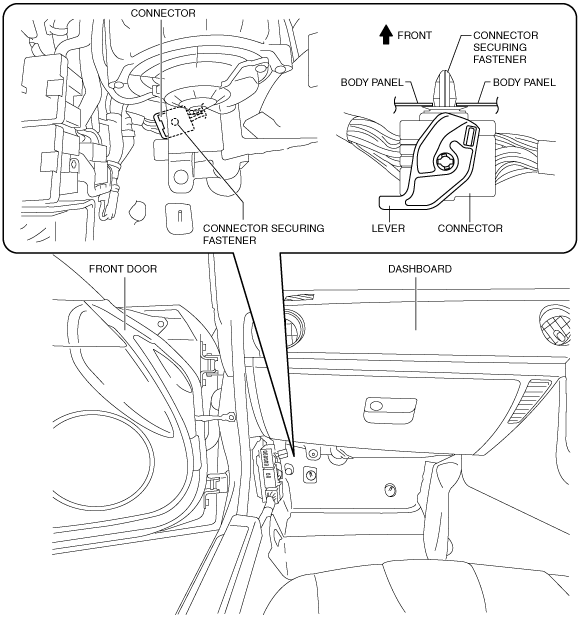
There is a big blue connector in the passenger side foot well behind the heater support stalk and you need to move the dashboard out by inches before you can disconnect it so prep the apprentice.

There are 14 bolts holding the dashboard in place, open both door fully, in the upper rear of the wing remove the rubber domes and remove the bolt it covers (its a long bolt) below that one there is a second shorter bolt, both sides. Passenger foot well heater support stalk one bolt. On either side on ctr console two bolts on each side. Steering column support there is a final bolt in the middle of the column retainer, high up under the speedo area…

Four bolts to go.

On each side on the ‘A’ pillar there are 2 bolts that face towards you at the lip of the door to dash

Fit 4" bolts to the middle hole of the mounting bracket that is fixed to the chassis. When the dash is moved forwards it can rest on these bolts and not fall into the car.

Ease the dash forwards and check you got all the loom connectors, there is always one more!

Column down and dash 4" forward resting on bolt shown more closely on second picture…

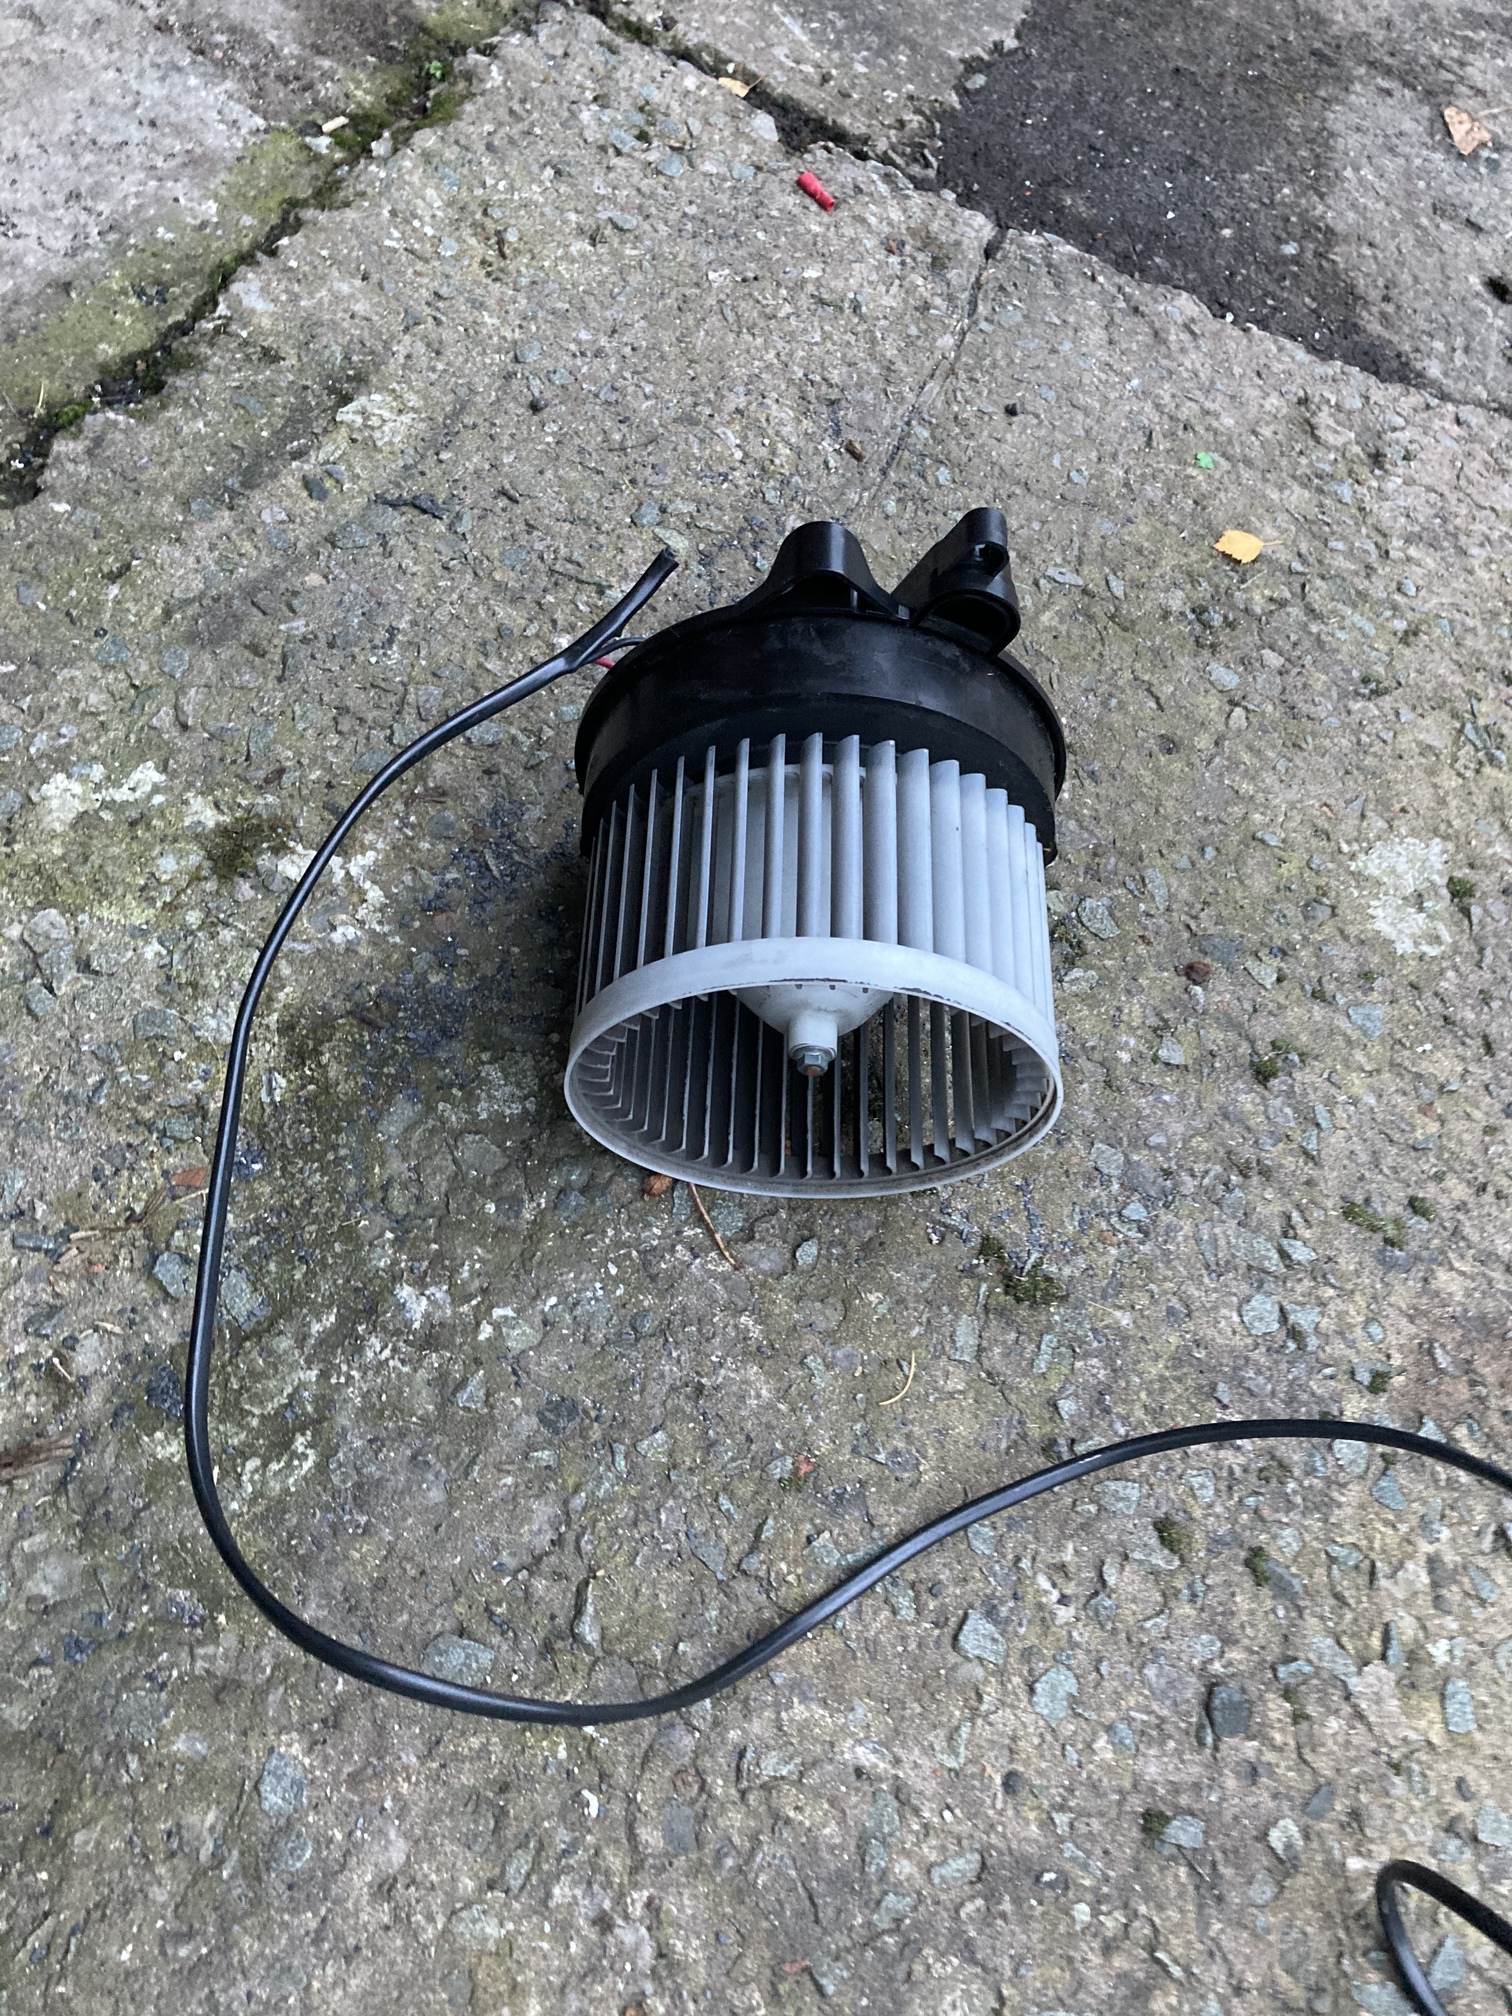
OK now you have access to the ‘behind heater area’ you can remove the MOSFet controller.

If you disconnect the passenger side footwell blue connector… you can lift the dashboard right out the car and work on the floor.

This is the abridged version of a 6 page multi picture account of this job. (too big for a post)

If you asked me to do it on your car I would ask £900 also.

With a nod to Haynes ‘Replacement is the reverse of the removal procedure’.

My original objective was to remove the MOSFet heatsink and replace the MOSFet chip and refit which I did, the MOSFet chip cost £3 for 2off.
The replacement of the chip took about 10 minutes.

Regrettably the heater blower is an essential part of the capability to de-mist the screen so it has to be done.

I hope you enjoyed reading this journey, it was fun once completed.

On a side note electronic ‘resistors’ get hot also not just resistive load controllers. The MOSFet can control 15amps and dissipates a large amount of heat in the process hence the extended heatsink into the blower air flow. Order of magnitude that’s 150watts of power, try holding a 100 watt incandescent bulb for more than a second, or a headlight bulb.

2 Likes

All credit to you for doing this job and documenting with the pictures.
Do you suspect the failure of the original was due to scuttle grommet leaks or is there a drain in the blower housing which had plugged?

My goodness looking at the amount of complex work involved there I think I would gladly pay you £900 to do the job.:flushed:

Thanks for the extremely useful replies, gents. Those diagrams from the workshop manual will be particularly useful.

I really don’t fancy removing the dash myself, so if I can’t manage it by groping behind the heater I fear I’ll be biting the bullet and paying someone to do it for me.

no no no! that is not how it is done. If you search the forums in the USA you can follow their procedure. I have removed and replaced the MOSFET resistor myself, ok, you do need to get into an upside down position under the passenger dash. Basicly all you need to do is release the bolts holding the lower part of the passenger dash to the bulkhead enough so that a wedge can be placed between the car body and the lower passenger dash. That will enable enough room to get you hand up behing the heater housing to gain access to the MOSFET bolts. A good trick is to get the socket, I think is 10mm but not sure now, stuck onto the bolts with some mastic or sticky tape and then insert the wrench afterwards. There is definately no need to take hole dash apart or AC , !!!

All I can say Sparks is good luck with that one, no matter what I read I would doubt its easy.

In many cases its easier to bite the bullet and just do it properly.

To remove half the bolts holding the dash and wedge it open as far as you can, I understand may work if you have small hands. There is a scaffold pole(as near as dam it) running from the door bolt in the left to the door bolt in the right, ever tried influencing a scaffolding pole over a 5 foot length?

I disconnected the dash, moved it 4 inches forward and still struggled to release the MOSFet unit, in the end just lifted the dash out and did the exchange job is seconds. I wonder if the LHD model method made 4" to allow you to play.

It’s more complicated that that, actually physically looking at the socket plugged into the unit mounted in the heater its a pain to release it from the unit with only one hand, no room for a second!
Releasing two self tapping screws with Posi-drive or 8mm socket works if you can see but you can’t!

Add to that getting the two screws back in to secure it in place when you have finished.

…and you still need to flatten the coolant and the A/C if you have it.

I think my motor has a shorted coil in the armature so it blew a second MOSFet, the motor runs fine on a battery but it may be destroying a IC chip before it can rotate away from the short circuit.
Like the OP I am operating on a floor well unit and it has blown that, so it must be the motor.

£30 for a second-hand motor and 2 days work to reinstate the controller unit
£45 re gas A/C…

tough choice…

If we have another lock down and 6 weeks of endless sun I could be persuaded to make it alright again.

No wet in my foot wells.

1 Like

Took mine to S.P.A servicing and repairs in Ilkeston, Nottingham.
Was quoted £900 last November but left it as i didn’t have £900 to spare at the time, ended up taking it back last month as I couldn’t be doing with the issue of not being able to demist the car, it ended up paying about £450,

I believe that @Smiffy was attempting this job based on the Mazda diagrams. Did you manage it Smiffy? Last I heard you were buying a very stubby screwdriver…

My car is a uk mk3 launch edition, yes it was practicaly 4 inches manuverability once the underside is freed however the bolts are not as far up as one would emagine. So as long as the socket is fixed to the bolt it is an easy job with the end of the wrench hanging down in full view in the foot well. I paid £90 for the mosfet and bought some glue to secure the socket overnight and then I was able to remove and install the new mosfet in 20 minutes.

If you’ve lost other systems (i.e. instrument lights etc) you’ve got more than a failed Power MOSFET on your hands - probably a blown fuse or three at a guess.

The story of my failure (and the mistakes I made) goes as follows:

For some time I’d been seeing apparently random dimming/flickering of headlights, especially when operating the indicators and/or the dipswitch. I thought the issue might be with the switch/stalk so I bought a new one, intending to fit it at some convenient point (First Schoolboy Error). But then I noticed it also happening occasionally when I used the brakes. Preliminary checks of electrical connections, battery earthing etc revealed no issues.

Then back in early December it got worse, with noticeable dimming almost any time I switched on a significant electrical load such as heated screen, indicators, main beams etc. One evening on my way home from work it even provoked the radio to momentarily switch off/restart and all the warning lights to cycle on as if the ignition had been briefly switched off/on. This happened a couple of times. Then to cap it all on a frosty Monday morning the blower simply failed to operate at all, resulting in a very dodgy drive to work. Throughout all this, the car continued to start first time every time, and run/drive perfectly.

I naturally checked blower fuses, and researched the blower issue, mentally matching the symptoms I was seeing with those described by others (Second Schoolboy Error). I took the car to a local garage and described the problems I had seen, the research I had done and the fact that I thought it might be the Power MOSFET that had failed. The garage reckoned there were two separate issues - the blower failure and the earlier electrical gremlins. He agreed with my (mis)diagnosis of a failed Power MOSFET and undertook to investigate the other issues (which he thought were likely down to a failure in the alternator and/or battery). The alternator passed all his tests, as did the battery, although he still felt that was where the problem was. A new battery was fitted and I was later happily able to confirm that the gremlins had been put to bed. He agreed to source a new MOSFET for me, and to swap out the old one which was presumed to have failed (another Schoolboy Error…). A few days later I took the car back in for the work to be done. By the close of play that day, he had removed the old MOSFET and connected up the new one - but still no blower. He reckoned it would require “dealer level diagnostics” to find out exactly what had failed. He also advised that. although they had managed to extract the old unit, refitting the new one would indeed require removal of the dash and would attract significant labour charges. In the meantime they had taped over the hole in the heater box and tucked the (new) MOSFET up behind the box as a temporary measure.

During the weekend before Christmas I had another look at the car, and perused wiring diagrams etc. I noted the “Blower” relay in the main under-bonnet fusebox, pulled it and swapped it with the “Starter” relay. The blower started working again…

I contacted a local Mazda dealer to source a replacement. They didn’t have one in stock but could get one in for Tuesday (for £18 + VAT). I got one from a local auto-electrics place for £4.70.

Hurrah! I now had a properly working charging/battery system and a working blower!

My euphoria lasted only a few days, when the blower again stopped working. I set about retrieving the MOSFET from its temporary hiding place behind the heater and swapped it back with the original one. Working blower again! Presumably the new MOSFET had failed due to overheating, due to being tucked away out of the airtsream and the original problem had been a failure of a £5 relay…

So that’s where I am now.

Can you confirm the scuttle grommets have been sealed on your car as the resulting leaks of water to the footwell fusebox seem to provoke weird electrical gremlins?

Yes, I bedded them into silicone sealer soon after I bought the car (in Summer 2017). Everything under there is dry and appears in good order.

1 Like

You have a PM.

I think the job will have to wait until the warmer (or at less drier and less cold!) weather returns as I can’t even get the car into my garage at the moment, and even if I did there’d not be enough room to open the doors fully. So I have decided to fabricate an extended heatsink using a piece of scrap aluminium extrusion (some sort of sliding door runner, I believe) which can live in the passenger footwell on a temporary basis until I get a Round Tuit.

1 Like