Adding a Garmin reversing camera to an NC1
My Garmin Nuvi sat-nav has the option to listen to a wireless reversing camera and configure the guide lines. But not just any camera, it has to be their own low-res one. However it is not much worse than some of the other cheap cameras I’ve looked at and installed in other cars, and the sat-nav is in view in a good place. It also means I don’t need to pay for a new head unit.
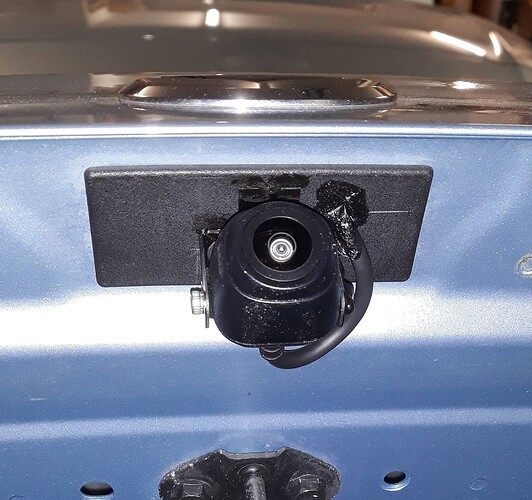
The camera is now installed on the spare plastic panel between the pair of number-plate lamps.
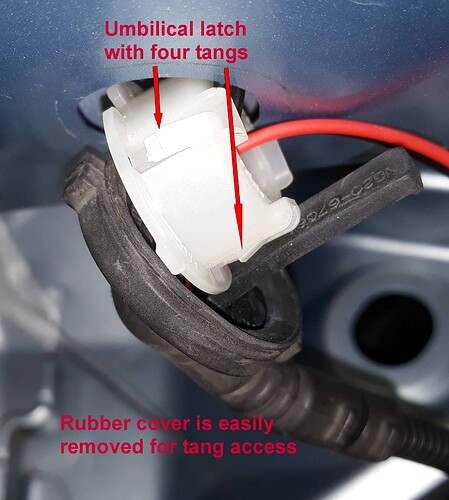
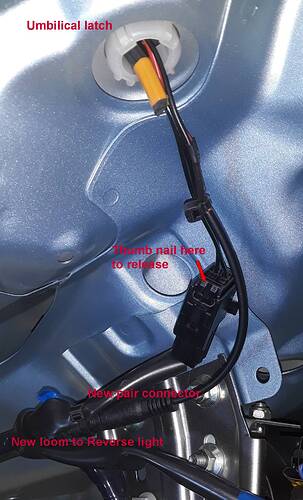
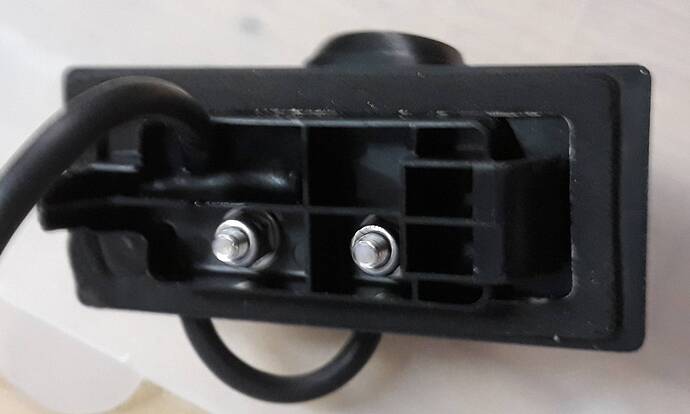
Getting power to it is the interesting part of the exercise because it involves feeding a thin pair of wires though the umbilical between boot lid and body. Removing the umbilical is a lot easier than I expected, just unclip the rubber boot from around the plastic retaining latch, ease in the four clips to release the tangs and the plastic latch lifts out.
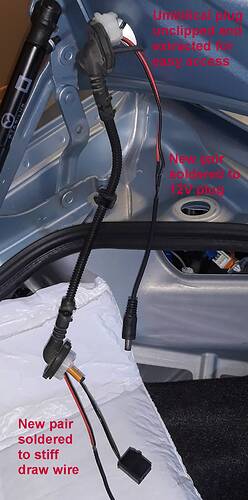
In that close up I’ve already drawn the pair though after first gently, gently feeding a stiff wire though, to then be able to draw back a partly assembled pair and a standard 5.5mm 2.1mm 12V DC barrel plug on a tail for the boot lid end.
Then add the mating 12V DC barrel socket for the body end.
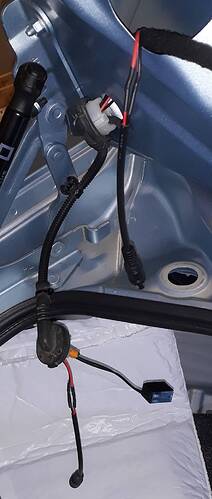
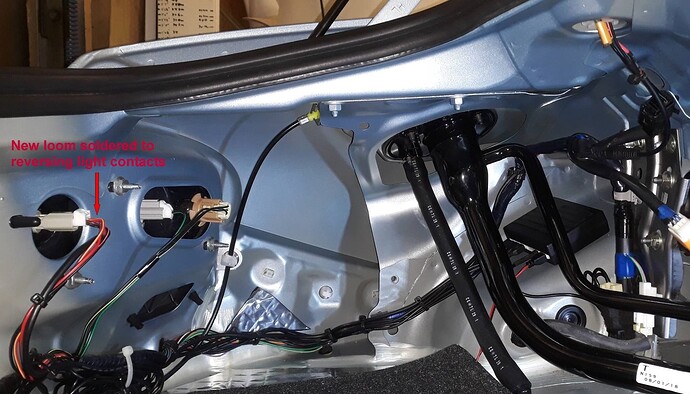
Add in an extra bit of loom from the reversing light pins to another 12V DC barrel plug, and connect this to socket on the new pair in the umbilical
and tie it all in.
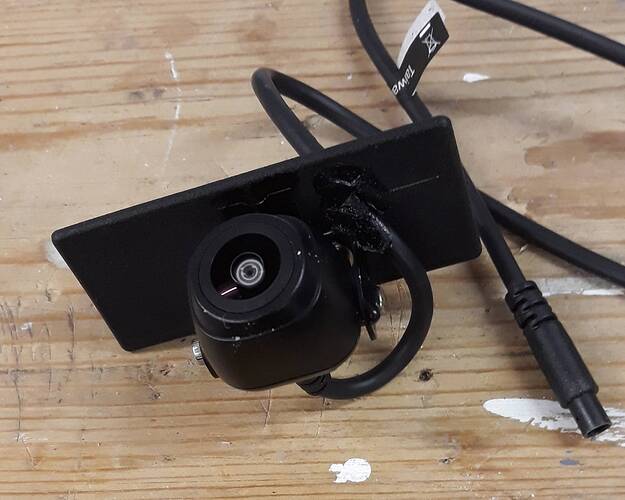
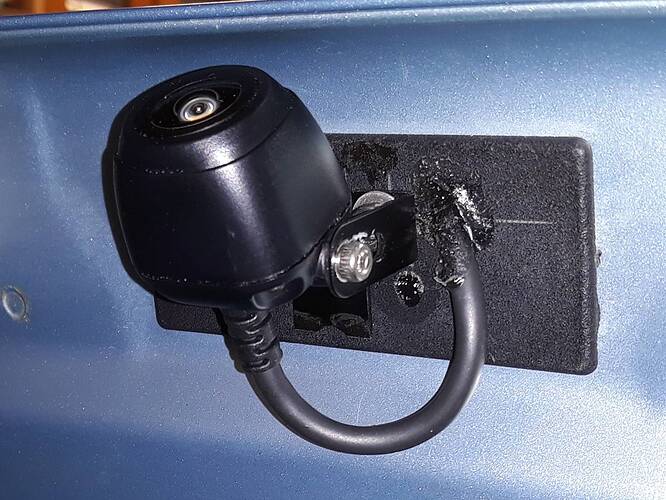
I mounted the camera on the blank panel; two M4 stainless screws, washers and nylocs to hold the chopped-down camera bracket to the blank, and some rather nice left-over thick glue to seal the hole for the cable. With hindsight I think I should have mounted the camera a bit further to the rear of the car, ie more on the edge of the blank, because there is a bit too much cut-off top (boot lid) and bottom (bumper) on the image. I can do that any time as the camera simply unplugs, I just need another little blank panel to chop up.
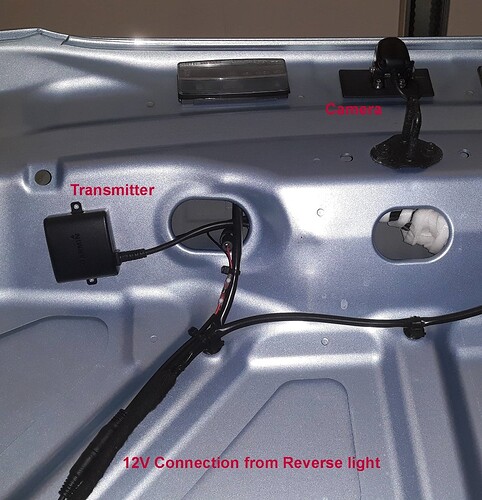
After checking the 12V was actually reaching the plug up on the boot lid I plugged in the camera and its loom (trimmed and with a suitable 12V barrel socket) and located the transmitter in a place inside the boot lid to aim forward - after first checking I had a picture from there.
Unfortunately I could not trim the camera lead to the transmitter so that is bundled up inside the boot lid with some cable ties and to stop it rattling wrap some foam tape around it, just visible through one of the holes.
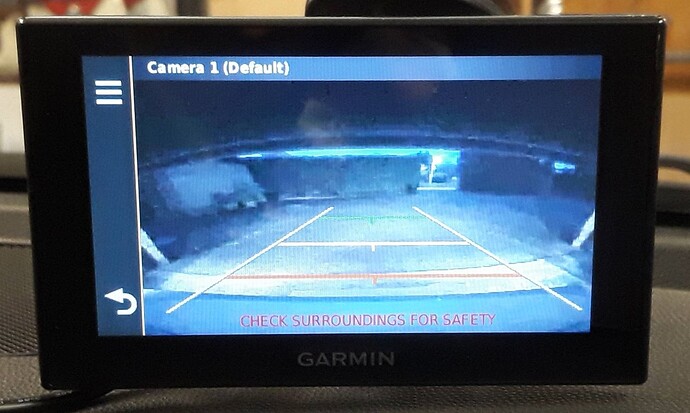
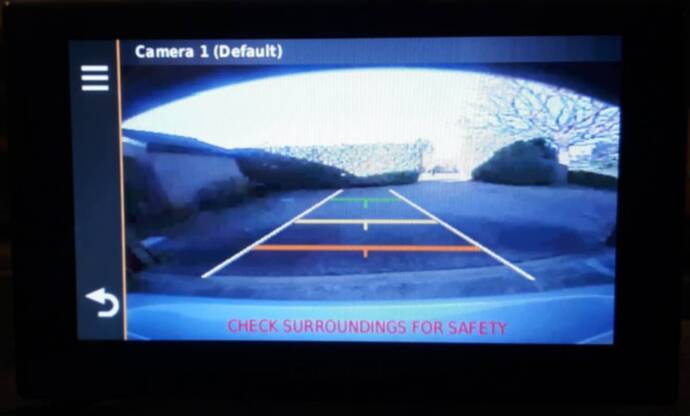
The picture I took when I had finished today is after having adjusted the guide lines to match the sides of the car, plus a 30cms each side. Unfortunately by then the daylight had gone, and the nice bright LED Katur reversing lamp failed last week, so it is back to the weedy 21W lamp. Hence a noisy picture on very low rf bandwidth for a low bitrate. I’ll replace this with a daylight picture tomorrow. I notice it is as if looking in a mirror (ie properly intuitive), and not as looking over one’s shoulder.
However with standard 12V connectors in place I can now always upgrade to a better camera and display in the future.
Update next day.
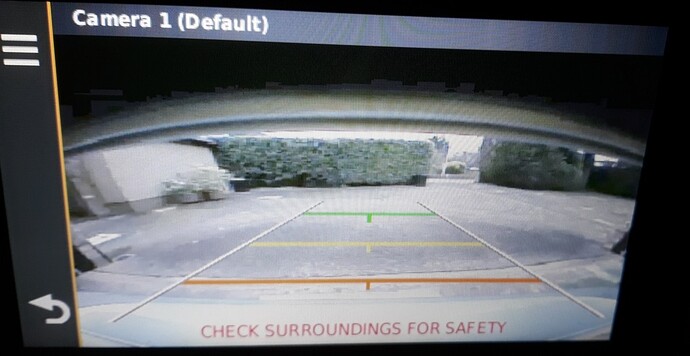
Here is a daylight picture. The orange line is the edge of the garage floor half a metre away, the bit of blue below it is the bumper
The camera lens is 16mm inward of the boot lip, hence the cut off at the top. I can drop it 3mm and angle it down some more, but the real solution is to move the bracket outward 11mm on the blanking panel. I’ll move the bolt holes to the other possible location. This pic shows the present position.
Update 27th Feb
I’ve moved the camera further to the rear on the same plate, two new holes, old ones plugged, all visible in this close-up picture.
And it shows quite a lot more of the scenery and less of the boot lid. The bright sunny day and deep shadows don’t help much though.
