I know this topic has been covered a few times, but I wanted to put my experiences down, in case I uncovered any useful info…
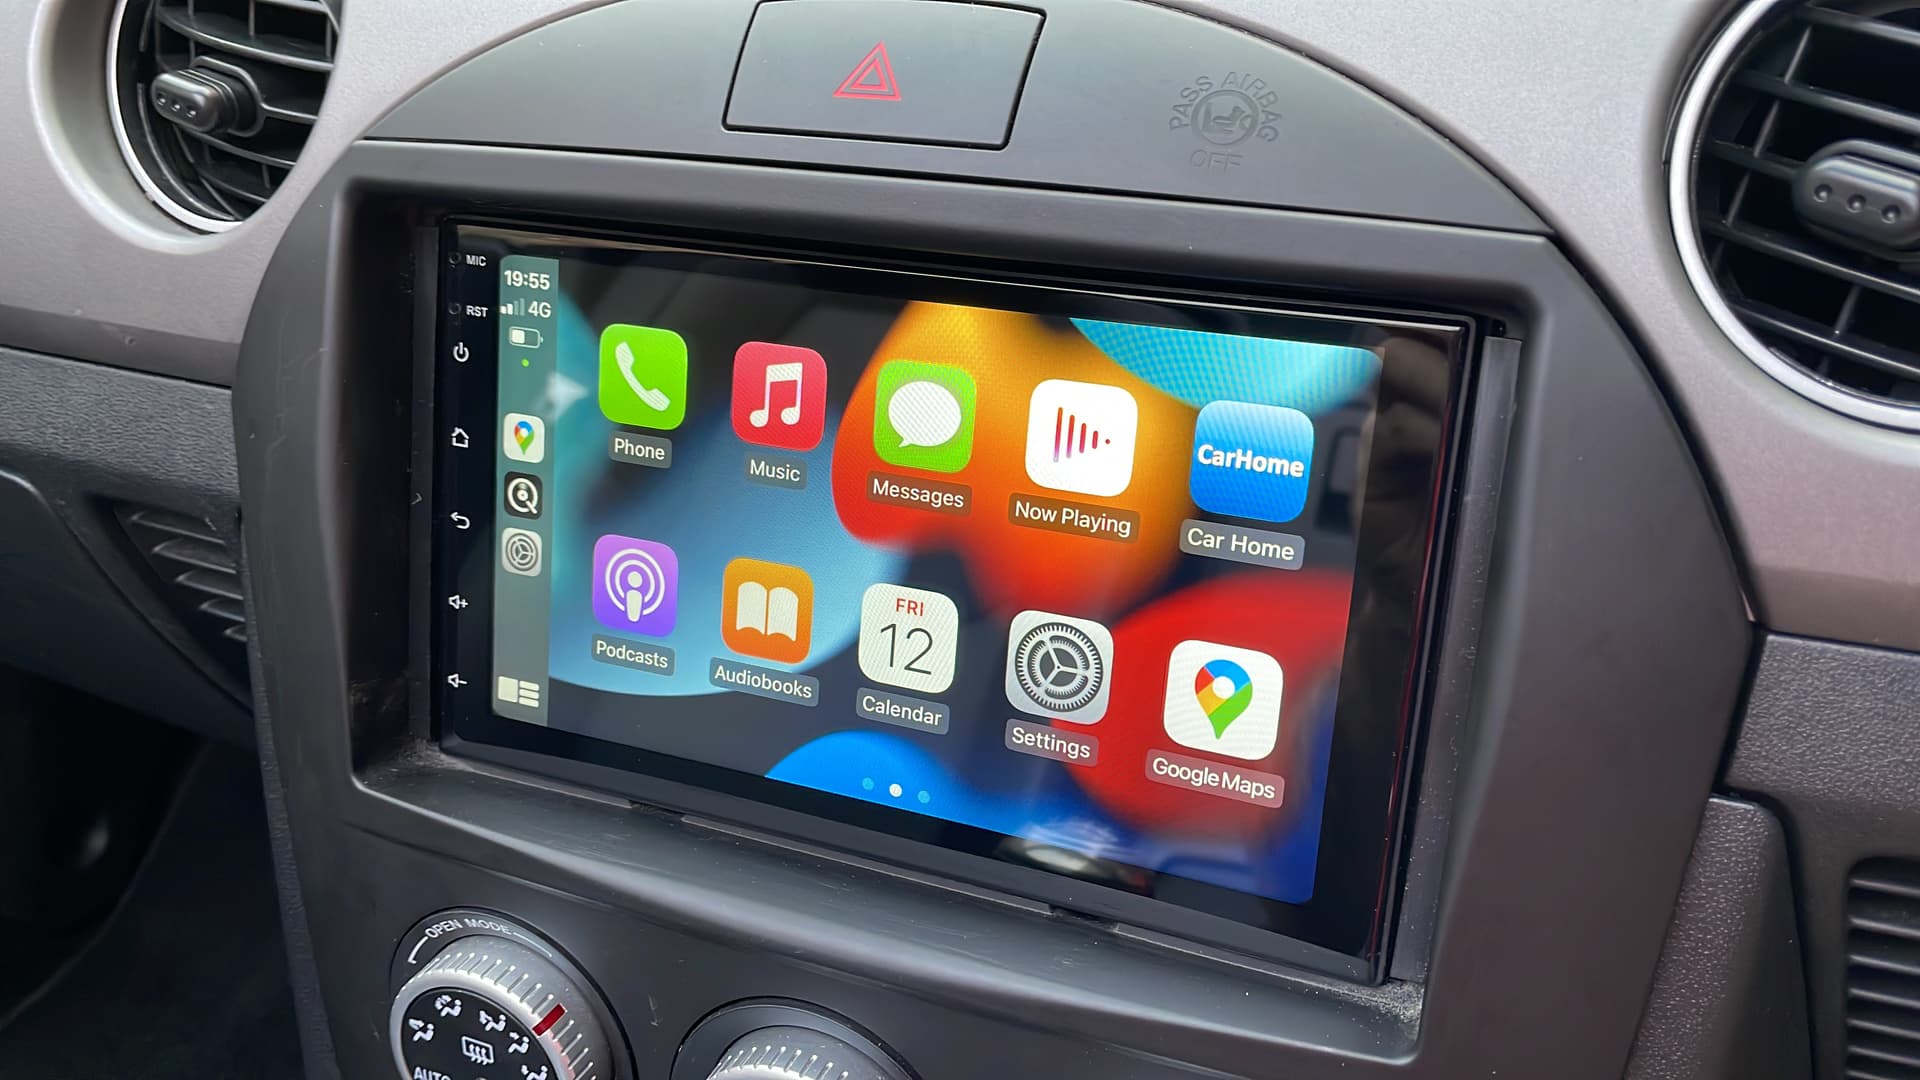
I recently replaced the CD player head unit in my 2011 Sport Tech, with a DDIN unit. This was mostly for navigation purposes, but I also wanted Bluetooth audio.
The new head unit I chose had preamp outputs, so I could properly interface with the Bose amplifier. I also wanted to make sure that nothing I did required reverse-engineering later, if I pop the original head unit back in. So, no modifications to the original Mazda wiring.
Parts used:
- Head unit https://www.sony.co.uk/electronics/in-car-receivers-players/xav-ax3005db
- Double-DIN Fascia https://www.mx5parts.co.uk/radio-face-plate-aftermarket-mk35-p-4014.html
- Mazda ISO adapter: https://connects2.com/Product/ProductItem/CT20MZ02
- Sony ISO adapter: https://connects2.com/Product/ProductItem/CT21SO02
- Phono cables.
- Terminal block (screw terminals): https://uk.rs-online.com/web/p/non-fused-terminal-blocks/8133120/
- 3.5mm audio jack cable.
- 2x 'breadboard jumper leads' https://uk.rs-online.com/web/p/products/7916463/
Step 1: remove existing radio.
For this, I followed all the standard guidance. For the 3.5/mk3/NC model, to remove the radio and corresponding fascia there are four important steps:
i. Remove the centre console (by which I mean the trim which runs between the seats, housing the cup holder/storage tray, window switches, etc): 1 screw in central cup holder and 2 under the pop-off panel at the rear of the console.
ii. Remove the footwell side panels (by which I mean the trim which extends from the centre console into the footwells on both sides: 1 screw each, revealed when centre is console removed.
iii. Remove the trim under the steering column (pops off).
iv. Remove the radio fascia (includes the radio and A/C controls): 2 screws, plus hidden security bolt which can only be accessed from in the drivers-side footwell, aside the steering column.
- Note: the cables behind the radio had very little slack in them.
At this point, you will observe that the stock head unit has one large multi-way connector, plus the aerial. Remove these and also the connector for the A/C controls.
Step 2: Prepare wiring for new head unit:
I had to do some research and take some continuity measurements to fully understand how the power amp is wired. It’s pretty straightforward actually: 4 pairs of wires go from the head unit to the power amp, plus one extra wire sends a signal to turn the power amp on when the head unit is powered (amp control). Any other connections to the power amp are not related to the head unit. My finished connection diagram is like this (note, this is a modification of an Audi Bose wiring diagram which I found online):

i. Firstly, I prepped the basic power wiring. The Mazda ISO adaptor separates the power and audio connections from the big multi-way connector. The smaller black connector is power, while the dark red/brown connector is audio:

The black connector connects to the matching black connector on the Sony ISO adaptor:

ii. At this point, I checked the Head unit powered up correctly (you need to connect the Sony adaptor to the head unit).
iii. Audio wiring:
- As previously mentioned, I decided to use the preamp outputs on the new head unit and wire them into the power amp. Some other guides to this have made use of a little adaptor which allows you to use the speaker outputs of the head unit, but I don't personally like that idea extra electronics is normally a bad idea with audio. YMMV, naturally.
- I took some standard Phono audio cables and chopped a short section off them. Then I stripped the wire ends and terminated them into a screw-terminal 'choc' block. Then, I chopped the red connector off the Mazda ISO adaptor and connected the wires to the terminal block, ensuring the channels were wired correctly (Right Rear, Left Rear, Right Front, Left Front).
- The nice thing here is that the ISO adaptor uses standard wire colours, which makes this job much easier than understanding Mazda's wiring loom (colours required: Purple, Purple/Blk, Green, Green/Blk, Grey, Grey/Blk, White, White/Blk):
-

- At this point, I noticed that the Mazda ISO adaptor didn't have a connection for the amp control ("remote turn on"), only the antenna power. Antenna power is for a motorised extending antenna, which my car doesn't have. So, I swapped the pin over in the connector, from loaction 1H to 1J:
-
- At this point, I powered the unit on again to check it was all working. Seems ok.
- I found that the pins on these patch leads: https://uk.rs-online.com/web/p/products/7916463/ are exactly the correct size for the Mazda ISO adaptor. I just needed to remove the black plastic shrouds and locate them in the adaptor (pin locations 1N and 1P).
- I terminated those into the terminal block.
- Then, I took a standard 3.5mm stereo lead, chopped one end off and terminated the bare ends into the terminal block, connecting to the patch leads (only requires TIP and SCREEN connected).
- Again, I powered the unit back on again and 'taught' it the steering controls, via the settings menu.
Step 3: fit the fascia:
Following the instructions that came with the fascia. The only challenging part was that the ‘wings’ for mounting the radio were far too thick to accommodate the short screws that came with the radio. I went to a hardware store and bought some longer screws, but I had to cut them down to prevent them penetrating too far into the head unit and affecting the electronics.
You have to swap the A/C controls over to the new fascia, too. 4 screws.
Note: I wouldn’t actually recommend this fascia, as the plastic is fairly poor quality and doesn’t quite match the rest of the dash. I’m not sure if there are better ones out there.
Step 4: reassemble the trim and centre console:
Nothing tricky here, but do make sure that the window controls are connected and working before you screw the console down (they have a small connector which seems to come out very easily).
Step 5: relax and enjoy the new head unit.
Although, I should note that now it’s proven to work, I will probably now replace the terminal block with some proper connectors (crimp, or other).
I hope this is useful to someone!