I dont mean to be nasty but I think there is too much work/time and expense.I know its low mileage etc but rust tends to creep back afetr 2/3 years as it did from previous repairs. It looks quite bad in my humble opinion, and I have to say I have scrapped ones with less rust , and more miles obviously and standard or RS/10Ae etc.
Thanks again for the comments guys - and to address Robert’s point, I think that this is one of those that isn’t an economic decision whichever way I went with it, but with the work done so far, it hasn’t cost me loads so far (I’m about £200 in on parts - all of which I would have needed whichever way I had build the car) - and my time is free - I’d certainly rather be tinkering on this in the garage in an evening rather than sitting festering in front of the telly!
So - where are we up to today? First of all, I got a large box of goodies from Autolink (very quick turnaround, and a bit of savings with the OC member’s discount):

Next, I got the paint on the offside - which has tidied things up nicely:

Then got the spring compressors out and swapped the broken spring:

and started stripping the nearside (and am still pleased that despite the rusted fixings, I have managed to be patient and clean up the threads, use lots of penetrating oil and have managed to remove everything cleanly without rounding fasteners or snapping anything!):

which was followed by a good clean up with the wire-brush and a coat of rust converter:

which made a bit more mess!

so I ignored that and went to build up the driver’s side - which is looking much improved over where I started:

So now I need to get some more bits done - I need to clean and paint the caliper carriers both sides, the wishbones etc on the n/s and also the calipers. Before I paint the calipers though, I want to give them a good going over to make sure that they are free and not going to end up sticking - if so, I will look to put on replacements as needed.
I am hoping that I can get it back on its wheels this week, as I have more business travel coming up - then when I return I am going to get started at trying to address the rust…
Time for another update, as I have been making more progress since I got back from Asia!
The first job was to unpack another parcel which contained a pair of front calipers and a rear offside flexible brake hose from brakeparts.co.uk (very reasonable for new calipers and no exchange surcharges), So first to finish the front end by fitting the new calipers:


Then I moved to the back as there was a significant fluid leak from the brake pipes around the 3-way connector on the o/s flexi-hose, so I ripped out the old hard line linking the two sides and replaced it, and also fitted a new hose - which looked better:

Next I had to swiftly bleed the system through, so that I could move the green car off the ramp - as my mk 3 brakes had started grumbling… I knew i needed new pads, and to ensure that I could use if for work on Monday, I threw in a set of road pads that I had in the garage… it’s fair to say that I got value for money from the pads!

Then yesterday I got an added distraction, as my new daily turned up, so I went to collect it…
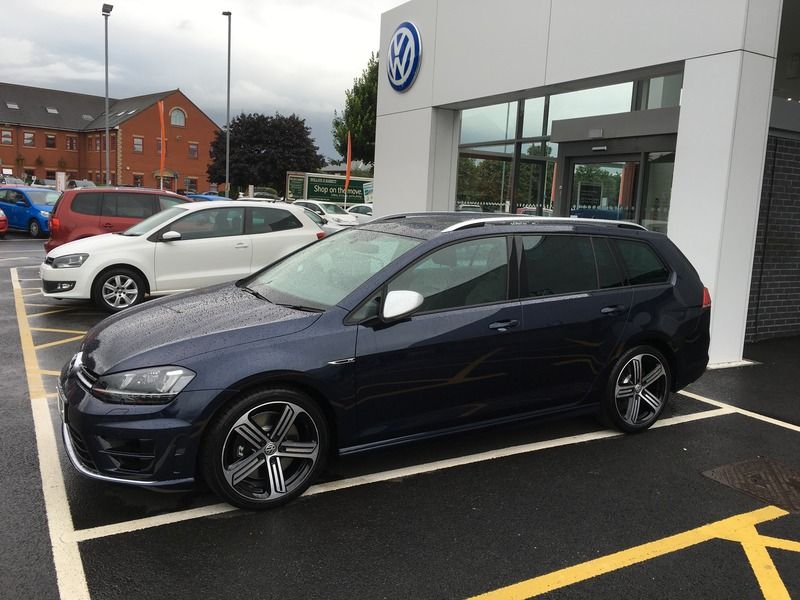

This is very different to drive to either mazda (and also compared to my old Vectra VXR) - but is very nice, and the dsg box is very impressive. It isn’t quite the involving driving experience of the MX5, but is much more lively than the vectra, and really can move pretty well - I think that it will make a great family bus for the next 2 years!
Back to the Berkeley, I am getting to the stage now where I need to start chopping out the rot, and then get hold of the welder to begin stitching it back together!
I love what you’ve done to this '5, it’s splendid. The Golf looks OK too.
Thanks Tomoose, I am enjoying getting on with it and seeing the improvement!
Unfortunately no more progress on the green car over the last couple of weeks due to other things going on, but I have made a couple of additions having been over to visit the previous owner last night (a former colleague’s mum, who had owned the car from new and was very attached to it - now driving a mk3).
As seen in some of the pictures when it was having previous work done, the car was originally supplied with a matching sparkle green hardtop, which I have now bought to keep it with the car - and I was also given the mazda wall hanging brackets too for storage, which should be useful.

but the hardtop wasn’t the only goody that they had left over - they also had the original (and unused) tonneau cover:

and finally (and of more immediate use!) they had also bought a rear quarter, which hadn’t been fitted when it was repaired 3 years ago - but needs fitting now as the n/s arch is starting to go, and also a copy of Rod’s manual - which is always a useful thing to have handy.

Hopefully will be starting to get sorted and progress with this shortly - assuming that the mk3 passes its MOT next week! Almost time to fire up the welder at last!
Well, progress has slowed somewhat here due to holidays and more jobs to be done on the house over the summer, and as a result there isn’t as much to report as I would like - but I have at least managed to get into the garage and fire up the grinder briefly to see what is facing me inside the passenger rear quarter panel - where the area around the arch lip was beginning to bubble and had gone through in one area.

so with a bit of chopping out, we can see what is going on inside (and also find that the lower lip of the inner arch came away with the outer skin, so that will need replacing)…

and we can also see the repairs that were conducted to the inner sill area 3 or so years ago - but that there is some corrosion further up on the inside that needs cleaning pack and treating.

I also needed to do some a service on my wife’s clio 182, so the green one saw the outside world for a couple of hours alongside my mk3…


Next, I chopped a little lower on the bottom of the sill - revealing quite a bit of rust in the area that has been previously repaired… due to the corrosion on the inner edge too, the lower lip also fell away with the outer skin.


A bit of an attack with the flap wheel does make it look much better - with much of the issue here looking like surface rust.

So I put a coat of rust converter on to try and improve things, but looking from below, we can really see the problem. There is still some more work to do to remove the rust and see what is needed to start repairing the damage - I think and inner sill repair, fabricate the inner/underside panel that forms the bottom edge, and look at how much of the sill closure panel needs chopping away to see whether that can be patched or if I need a replacement panel.

So I don’t think I will be driving it to the national rally on Sunday (I may be in the mk3), but I am at least slowly moving forwards. Having had another busy few weeks at work, I am hoping that things are starting to quieten down a little so that I can make a bit more progress soon!
A bit more chopping done tonight to get rid of some more of the rot - but opening up some substantial holes!
Firstly under the o/s inner sill, which as had a 1/4 panel and looks ok beyond this patch (obviously, I need to do a bit more chopping and continue cleaning back to protect everything once it is welded up).

And similar area on the n/s which is rather more in need!


And clearing the holes out of the sill closing panel/inner wheelarch area
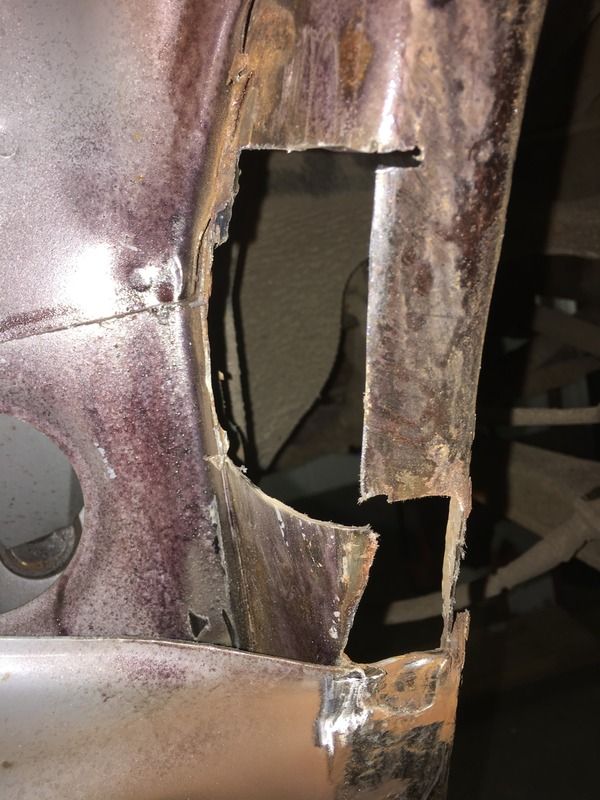
The same are from inside the wheelarch

Then finally the area on the n/s front lower wing mounting, which needs a small patch.

Then finally a slightly superfluous job, given the state of the rest of the car - I removed the front plate and plinth…

I have ordered the inner will panel to replace the n/s and give me a lower lip to work with - and should allow me to fabricate the panel for the underside of the inner. So it is looking pretty serious, but at least I am starting to be able to see what needs to be done…
Time for another update on a bit more progress…
Some more chopping and cleaning up the inner wheelarch.

And some more chopping away the lower inner sill for the repair panel.


Back panel removed (and also the bumper, but haven’t taken a pic of that)

So, having raided the scrap bin at work for some sheet offcuts to try welding, I got impatient and began making a start at fabricating the patches starting with the little ones - front of the sill first.

Then the holes in the wheelarch:


So we are heading a small step in the right direction - and I hope to be able to begin reconstruction shortly (well, maybe just a bit more chopping!)
Splendid work
Cheers Don, it is progressing slowly, but heading the right way - I am conscious that I am probably making a proper meal of something that would likely take a pro a day or two, but I hope my amateur ramblings are at least of interest!
Today was having a go at a bit more metal bashing - with the lower sections of the inner sill to do - which were a little trickier! So first job was to raid the recycling bin for some cereal boxes to make templates!

And then after a fair bit of trial and error (and some duct tape in place of weld for now…) we have some more patches (all patches have been made from sheet that is a bit chunkier than the original steel to try and both give some meat to weld to but also maximise strength of the repairs).

Which still need a little tweaking but should eventually marry up to the lower sill repair I bought to sort that area out…

So we are beginning on the road back to repair - just a few more bits to make and then the small matter of getting it all stuck together left to go!
Time for an update - So having got to his stage, I have taken stock of what needs doing, and with large holes in the rear inner sills, one quarter panel and holes to the from of one inner sill and one frame rail to sort I have come to the conclusion that while it might be possible to fix all of that, I am still going to be left with a relatively average car - without throwing loads of cash at it to do a complete rebuild and respray - and I think that treatment might be best reserved for early and/or very special cars at the moment.
As a result of this, I think it is time to stop being sentimental and get back to plan A - turn it into something unusual and fun! My thoughts are still going with an exocet to provide something that isn’t yet another seven-type car (not saying there is anything wrong with them, but I think with a seven I would want a caterham, even though the roadrunner does look like a very good kit) and is more unusual - along with it keeping much more of the Mazda parts and nature, and potentially being an easier build for my first kit car.
I haven’t done anything really to the mazda over christmas, other than switch the cars round in the garage so I have better access to my mini and can get it on the lift. My plan right now is to put the Mazda on hold for a little while until I can get my mini (a 23-year project that needs finishing!) all sorted and MOTd and then rip into taking the mazda to bits.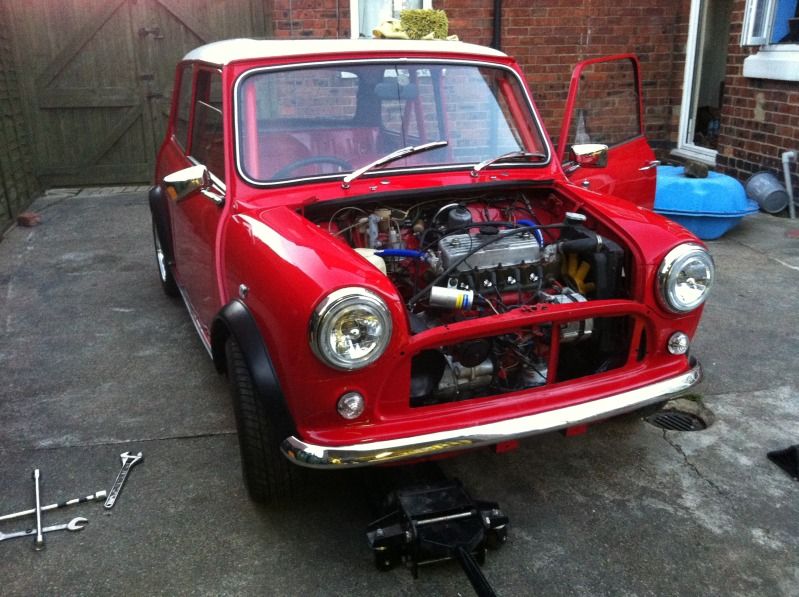
I have though robbed the mazda of its front indicator bulb holders - I had a short on the indicators on the mini from within the front indicator units (dodgy fittings in there, allowing the connectors to short), so I looked up and saw the fittings on the mazda would fit, and so a quick wire cut and splice later, then it made its first parts donation! I am now waiting on new indicator and hazard relays to arrive, as the short appears to have fried them, then it is on with more of the list of jobs pre-MOT. I don’t think there is a lot to do really - it starts and stops ok (but does need setting up properly), I need to refit the grille and bonnet properly and make the interior look presentable, and then I think it will be time to get it in and see what it needs for its first MOT since August 1993!
As I said above the plan is to get the mini MOT’d before really ripping into the mazda - but I am planning on getting started photographing and listing some bits for sale soon to get bits out of the way, and to go towards the cost of the kit! If anyone needs anything body/interior wise, then let me know - I know there are a few Berkeley owners on here, and I would be quite pleased if I can help to preserve some of the other Berkeleys with parts from this one!
-
From your earlier post. Yes, you’re right, a professional would deal with the metal work in fairly short order.
-
It’s your car, but TBH, I believe this car deserves far better than to be broken up for a kit car, or parted out.
What a shame,
I can see an argument for going either way (and believe me, I have been thinking hard about this plan!) but I think my issue is that I could probably repair the immediate holes already uncovered and have something that would pass an MOT and be ok for a couple of years (in fact, repeating but increasing the scope of the work that was done well to it only 3 years ago), but then it would still remain far from perfect, and would likely be in the same boat in a couple more years as there is certainly plenty more corrosion within the sills that is visible, but not yet perforated, and the o/s quarter that was replaced needs some attention, or a repaint at the very least. I guess on at least £1000 to get the visible rust sorted and painted professionally without going any deeper.
If however, I did want it to be perfect then I would be in for a full bare shell build with complete new sills both sides, both quarters, front wings and then a full repaint - and then I will be in for significantly more than the car will be worth, but would have a nice end result - but something that could be “too good to use”. Instead I am planning on reusing what I can to build a car that I am likely to use and improve over a long time, and hopefully make use of the unneeded parts to extend the life of cars that are less rusty, or whose owners want something different from their cars and are happy to do the work.
Overall, I figure I will be in for a reasonable cost for the initial build, but will end up with something that I have built myself to do exactly what I want (which is likely to be fairly focussed, since I already have my NC too), but that I can also develop further with time and experience in the car. I know I can do much of that with the Berkeley, but I already have something pretty capable with the NC as it stands, so would be retreading that route. I could also spend £6k on getting the NC supercharged, which would add performance, but might not add anything else to the experience (and I have plenty of straight line performance from my Golf R)…
I guess the good news is that these aren’t (yet!) rare or valuable cars, and there are plenty more being killed that are in better condition than this one - and I do intend to at least do it properly! I know this won’t be everyone’s cup of tea, but I hope that it is at least a better use of the car than simply breaking it, as sadly these cars remain worth more in bits than as complete cars, and allowing at least part of it to live again.
So it has been a while but it is time to resurrect this thread from its slumber…
I have managed to get my mini sorted and ready for MOT (it failed, but is being sorted!), so I am now back on sorting this one…
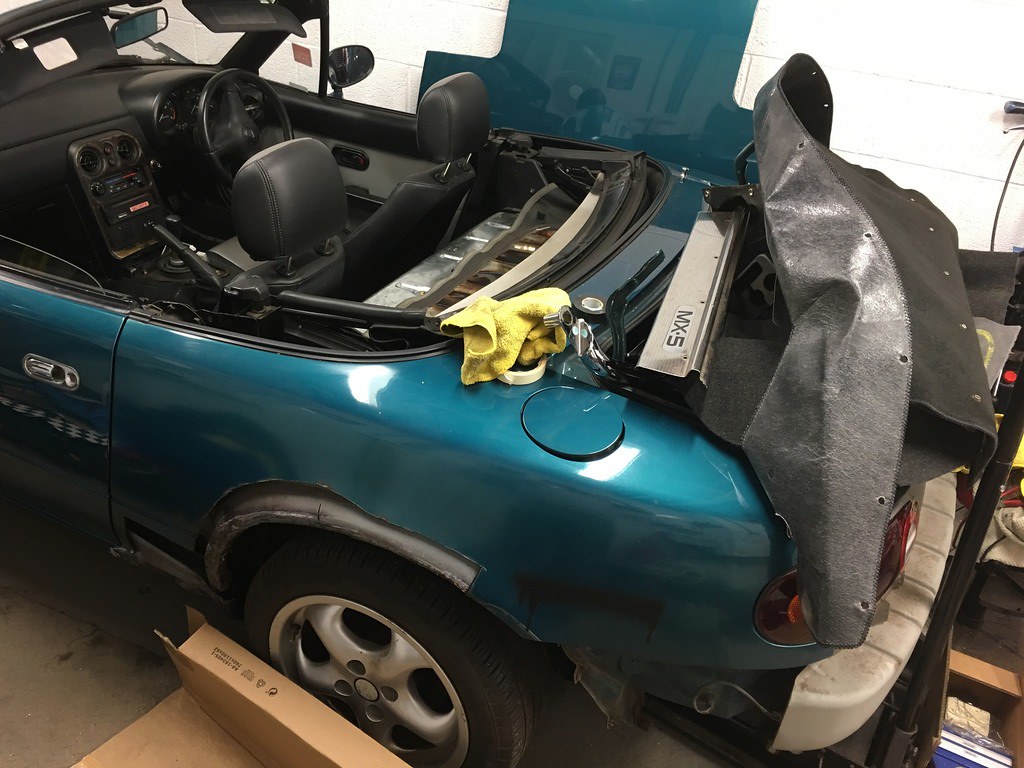
Firstly I have started stripping and selling off some parts, so far getting rid of the hardtop, boot lid, bumpers, mirrors, brace bar and tonneau, which is a good start on my aim to recover the cost of the donor in parts sales.
With those bits off and a few more starting to be stripped, the car is looking a bit more bare:
 09B32713-4560-47BC-9C14-D69BF15BC266_zps50cxfeux on Flickr
and the boot is filling up with trim that is coming off…
 09FF857E-3700-4C3E-9342-E21FCA052DFD_zpsf58qg8za on Flickr
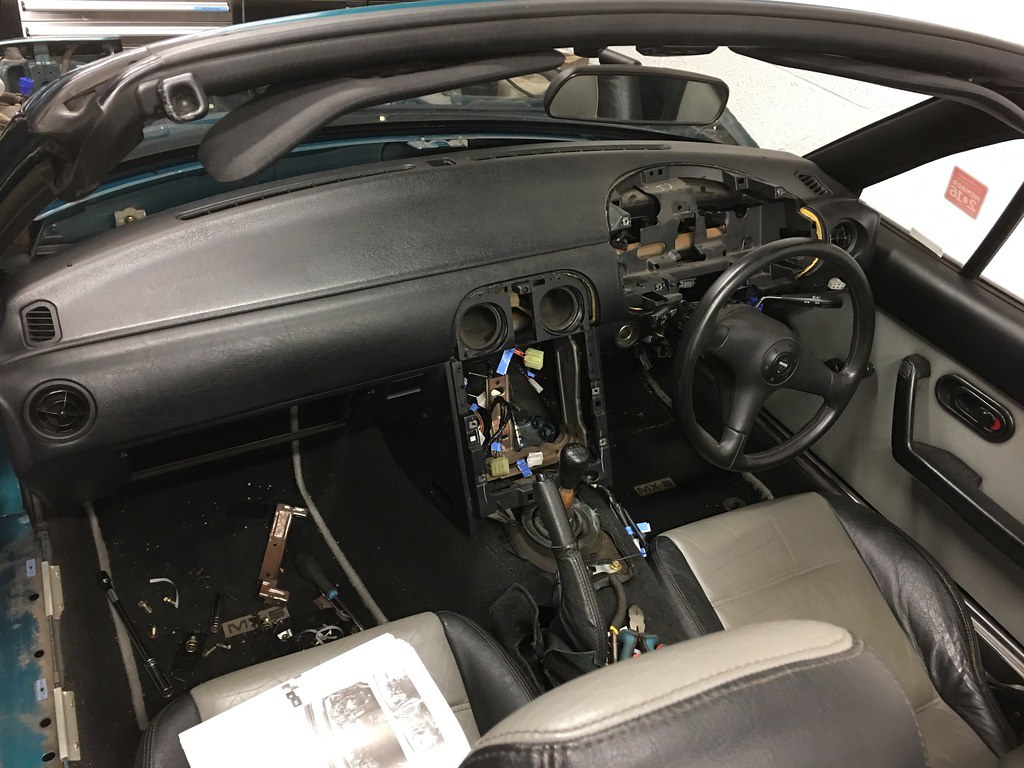
and tonight I have begun removing the dash - making sure to label all wiring! The dash is now free but needs the column lowering a little to make sure it will come out…
 ABE8D134-AA02-4CC4-85EE-050630587836_zpsfxx8xdf7 on Flickr
So just a bit of progress, but it is good to see it start to come apart - although I need to keep the momentum at selling parts as I fear the car will take up rather more space in bits (if anyone needs. anything, let me know, or see my parts sale thread)! My overall plan from here is to get the car stripped and get rid of everything I don’t need then start to work on cleaning and refurbing the mechanical bits before ordering the kit - I will then have the duration of the order lead time to get everything cleaned sorted and rebuilt before the kit arrives for building.
So, a little more progress tonight on the stripdown - after a lot of fiddly fixings I have managed to get both doors off and also (after the fiddly job of extracting the dash loom) removed the dash - while making sure that all connectors are labelled and that I remembered to remove the immobiliser module from below the dash.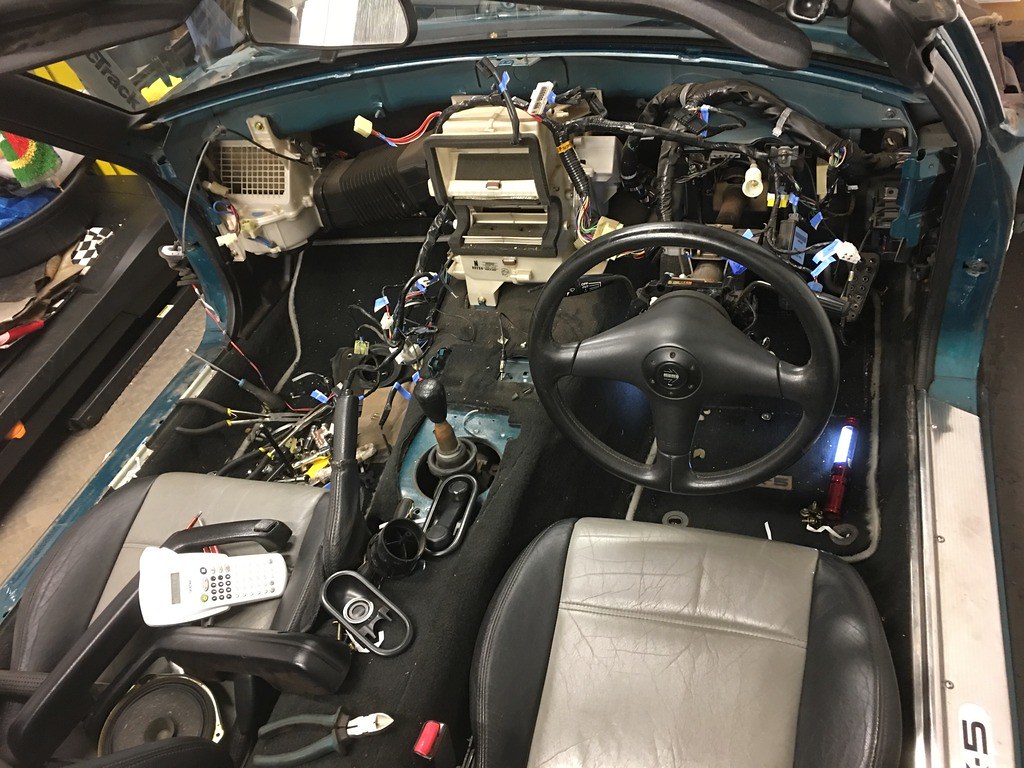 119194B9-53FF-423E-AB60-86EB2A30A139_zpsef5qlm0m on Flickr
 86DD22A8-043E-41F7-9549-0393C2916164_zpsxckjx8jt on Flickr
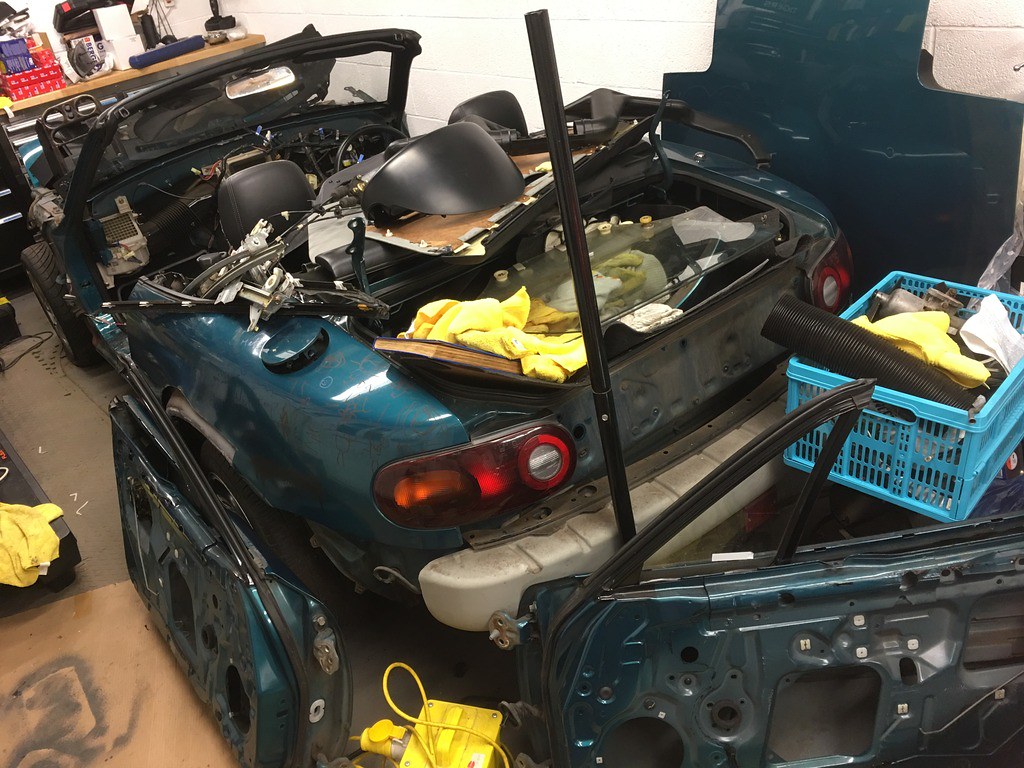
which means that the back of the car is getting increasingly covered in parts to sell off
 49FB8872-AA84-49F6-BEF3-1383A0AA95AC_zpschgbr6er on Flickr
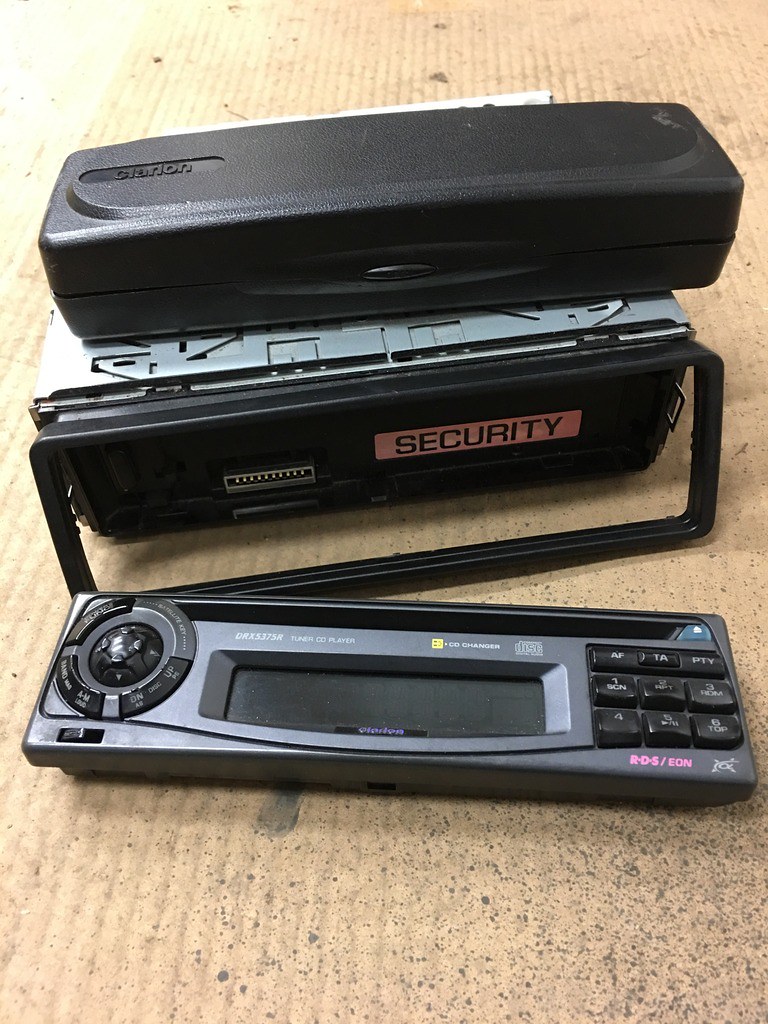
Although progress on that front is continuing - so while I am taking this car to bits, it is at least helping others to live on - including parts like the original stereo that was one of the limited edition features that is being passed on restore originality to another Berkeley…
Hello, have you managed to get the window scuttle off yet, I can pick up this weekend if you have.
I haven’t managed to get it off yet - have been trying very delicately to get the caps off with no success as yet (as I don’t want to butcher either the caps or the panel!) - If you are around over the weekend and wanted to come and have a go at getting it off, drop me another PM and we could sort something - I think that it might be one of those jobs that needs a second pair of eyes and a sanity check to get it sorted neatly!
So, time for another update on what is happening with this - I have slowed progress on this somewhat as I have been busy on my other project - which is a 1985 mini that I bought back in 1993 to tidy up as my first car… and which I have finally got MOTd on Saturday after a full rebuild (and 23 1/2 years!).
I have got some more done to the deconstruction of the green one though, and am going to visit MEV on Friday to check that the Exocet is the right kit for me (I am still pondering the seven-type kits as a backup, but given the cost to build one of them I may as well go out and buy a decent ready to run westfield…).
So after the last update, the next job was to whip out the seats and carpets, which (with some help from my 7-yr old son!) was easily achieved.
 CD040E71-76C1-4EA6-AEE9-B51553CDAB91_zps6thoeh31 on Flickr
which left me with a car piled with bits
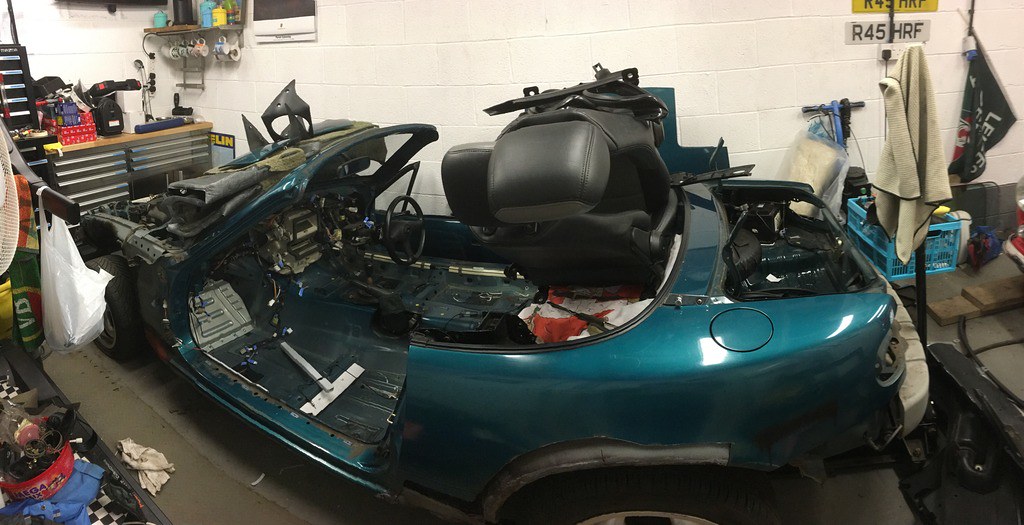 70CDA995-CC22-47CA-90E4-2388196EB4DA_zpsdddexteo on Flickr
Then I removed the headlights and started clearing under bonnet wiring - with the n/s being relatively easy to access and sort, before pushing it all through the bulkhead, while making a good start at labelling the o/s. One note here is that I have been using a label printer that I picked up from costco ages ago (the machine is only about £7-8, tapes aren’t cheap, but not horrid at about £20 for 6 from Amazon) which has made ensuring that I have labels that will stick to the wires and remain legible very simple - and hopefulyl durable too.
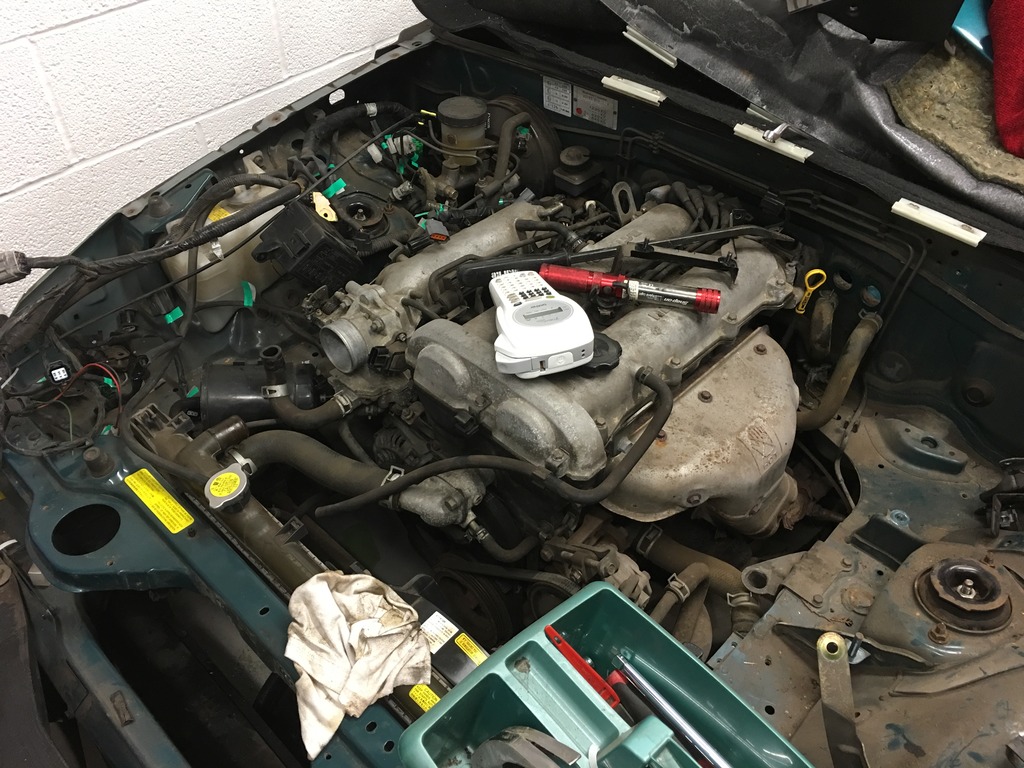 91BED762-E5F5-417D-B5F0-3EB02F0A9406_zps2ui08yj5 on Flickr
which left the cabin filled with more wiring
 34D8B972-6077-415D-BE7B-E5CD3E26CC48_zpst3xqztbm on Flickr
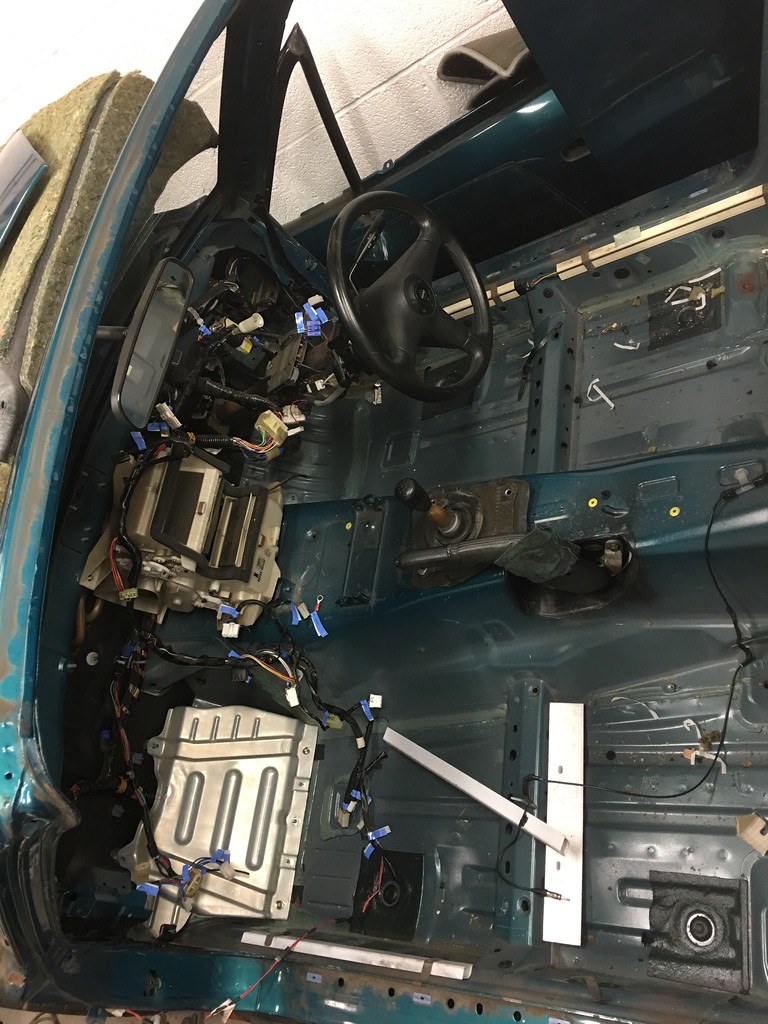
Since that I have drained the coolant so that I could remove the heater matrix and free the harness behind it, and label and free all the wiring on the o/s - apart from one section that runs under the brake servo and doesn’t want to come out - so tonights job is to remove the servo and master cylinder to allow me to remove the last of the wiring completely. For now, the interior is looking rather more bare than it was!
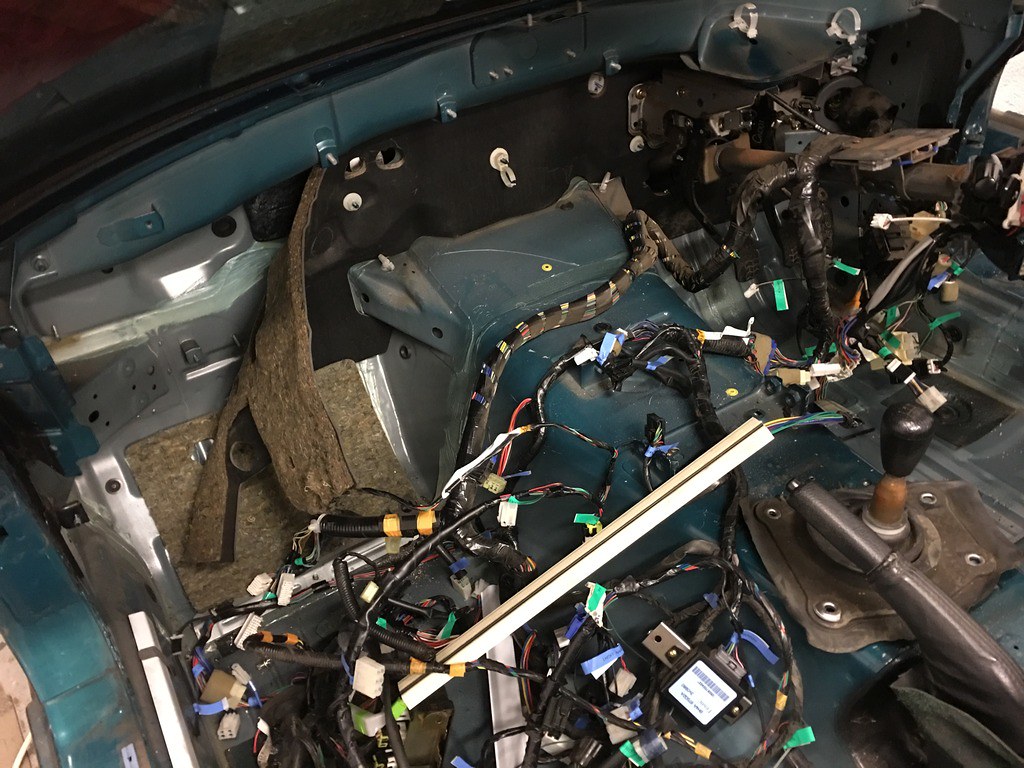 8E68F7E7-292E-4685-AEA6-C8A3DD591EEA_zpslv53cmxk on Flickr
I have to say that as I go through this, and compare to the mini that it is interesting to see the differences in design and build methods - the mini had clearly evolved by trial and error, whereas the mazda is very much designed, and everything planned and executed for reliability, but also for ease of manufacture (and service to a degree).
A mini-update for today, but with a couple of important steps achieved (but a failure to take any new pictures!)!
Firstly, to get ready for the next steps I had a ride over to MEV in Mansfield to meet Julie and Stuart to have a good look over an exocet in the metal (I had had a look at Stoneleigh last year, but at that point was erring towards a restoration!), and more importantly think about options and colours that might work. It was great to spend some time looking over the cars and chassis and get Julie and Stuart’s experiences of many different builds.
I had thought of a colour scheme (that I hadn’t seen done before), but then having played with photoshop was not convinced by it. I have then been playing around a little more and have a final plan (again a combination that haven’t seen) - and after a bit of confirmation with Stuart that it will work, my order is now in - pending confirmation of any very final changes once I have seen the new demo car at Stoneleigh… This should then give me plenty of time to get the body off and everything tidied up before collection day! My plan at this stage being that I want the build to be quicker than the mini… quite a lot quicker in fact, and would like to be on the road by next spring - let’s wait and see!
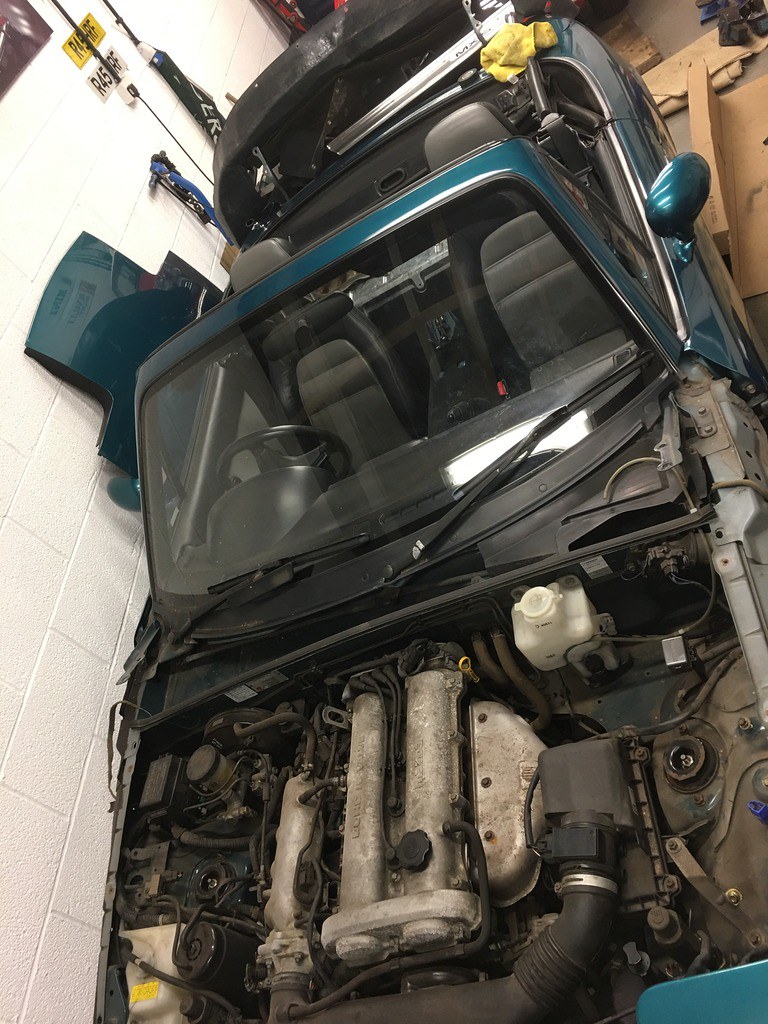
As a result of that, I have been getting the last bits stripped from the donor,so since the last update, I have removed the loom, steering column, handbrake cable, brake lines and fuel pipes and am almost ready to lift the body. One good piece of news is that I stuck it on my lift and removed a few of the subframe bolts and they all look to be ok to remove with my impact gun - so that’s another worry off my mind. Following that, I put in my wooden props in each corner and started removing more bolts - it is currently sat with all but 2 subframe bolts out ready for the body to come off later this week.
I have also now provisionally the interior from the donor, so that’s a little more into the pot for shiny bits!
Finally, (and slightly prematurely!) I a reasonably priced set of new pro-race 1.2 wheels on ebay, so I snapped them up - 15x7 et25 in matt black - which will suit my colour scheme perfectly. I am a fan of the pro race wheels, having had a set of anthracite 18’s on my old Vectra VXR, and I think the style and light weight of them will suit the Exocet well…