Berkeley 058 - restoration to Exocet project

Well - here goes with a new project, that I wasn’t really planning on, especially since I ordered myself a new golf R estate a fortnight ago - so I really need to focus on getting my Vectra VXR advertised soon to make space for that!

Today though I have made a new addition to the fleet - a 1998 mk1 Berkeley edition no. 58/400. I have bought this from a colleague whose mum has owned and cherished it from new.

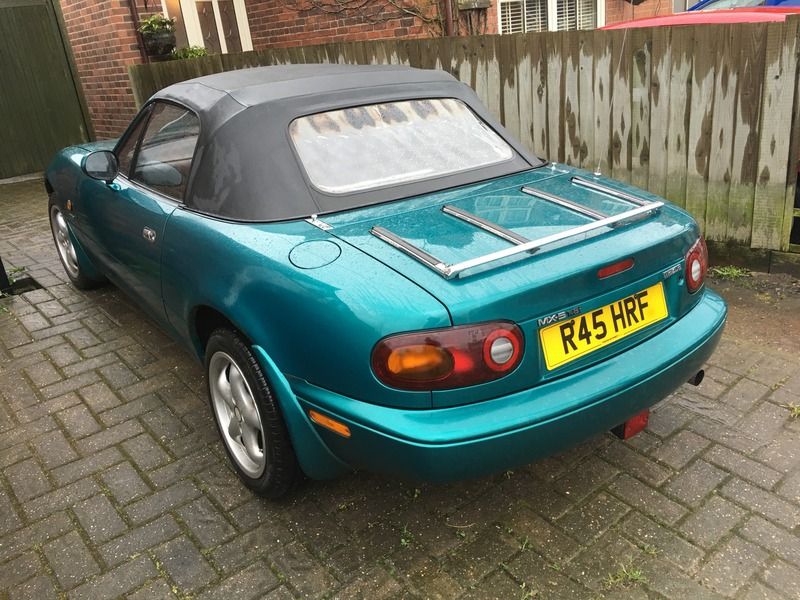
Looks like a decent start point - but what to do? Well, I have bought the car as an MOT failure, which needs a brake pipe, and rust to the inner area of the rear sills and also one area to the front. So my first thought was that this would be a perfect basis to use to throw away the bodyshell to build either an Exocet or roadrunner sr2 as a bit of a project.

However… That was before I had seen the overall condition of the car, and driven it around (on trade plates to stay legal) I am wondering if it might be too good to suffer that fate! I think the key will be to get it in the air and see how bad it looks (and how taken I am with the kits when I go to the kit car show at Stoneleigh on Monday!).

Having had an initial feel around underneath there are holes on both sides below the lip on the bottom of each rear sill - I had my outer sills done on my old mk1 but am not sure how bad this is likely to be below the surface.

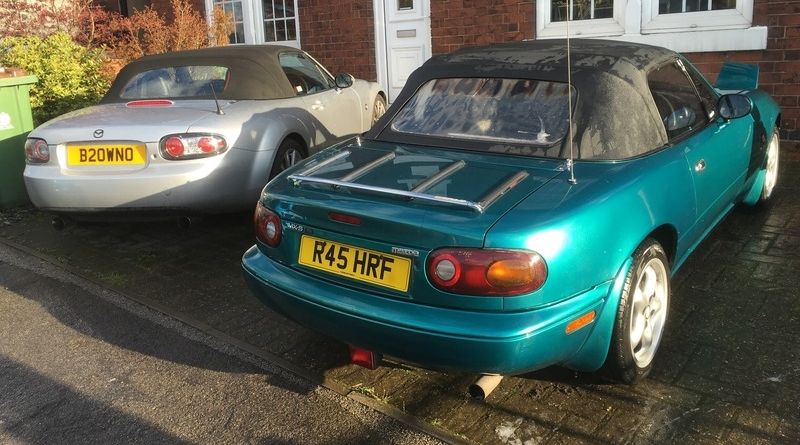
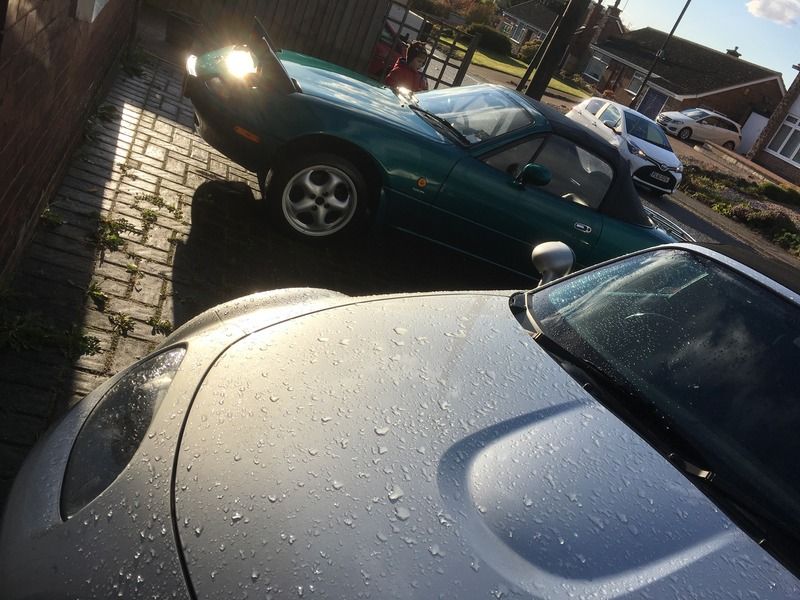
First job was to give it a quick wash with some help from no.2 son, the drive having a bit of a Mazda theme with my mk3 alongside…

Then I pulled it into the garage for a good nose underneath…

Drivers side sill

And passenger side

Passenger arch looking a little crusty

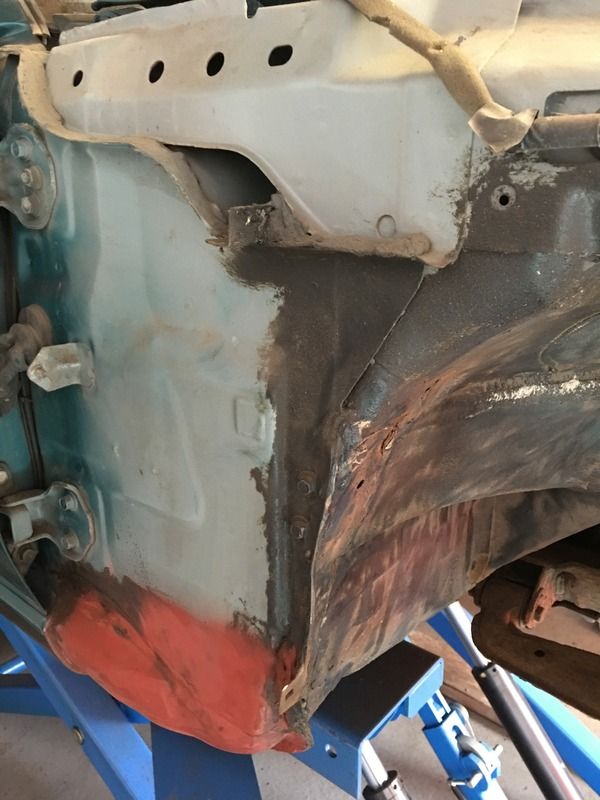
And both front wing bottoms are a bit thin

Oh, and a small hole spotted here too (front rail, by the testers chalk line)

But other than that little lot, it seems otherwise solid… So what’s the verdict? possibly a saver? if it is, I think I need to get cracking and learn to weld - I think I would like to try and do it myself (or at least under the guidance of someone who knows what they are doing!)

Still planning on heading to Stoneleigh on Monday for a nose round, but feeling less inclined to strip this at the minute!

Oh, and the green is growing on me!

Far, far too good to be broken.


A project me thinks, too good to not try and save it.

The last special edition MK1…too good to break

Keep it if you can.  It’s much better looking than a bunch of horizontal scaffolding poles!  The cost of those would probably pay for most, if not all of the restoration expenses!

It has got to be kept.   

Restore it


And I would add, if you didn’t want to save it, I would try

But you know you want to

I have an SR2, it is brilliant. And I having driven both many times, I therefore would say it is far more brilliant than an Exocet.

However, is it more brilliant than an MX-5? The SR-2 is certainly raw and that gives a different sort of excitement. It over takes, stops and goes round corners in a way that an MX-5 with another 700Kg of weight just can’t do, just like a motorbike would do. However, the opportunities to enjoy that are vastly dictated to by the weather. I would have driven mine on the road less than 10 times last year, although I have driven it long distances. It is not a jump in car, you have to plan and that will always dilute that high from the visceral experience of driving it to the chore of having to prepare to drive it. It is dedicated. 

Even if you can’t do that car yourself, taking it to a good body shop and paying £2,500 to have an amazing professional repair to the body done will be cheap over the cost of the kit cars and you will ultimately get far more use and pleasure out of the car. Even if you don’t drive it, repair it and put it away for 5 years. You will get back more than you paid. 

However if you want raw, get the SR-2. 

Thank all for your comments - it seems that everyone I have asked is going for a restore option - and I think I am beginning to agree. I think that Nick’s comments in particular resonate, having had experience of all options. While I think an Exocet or SR2 would be awesome fun, I have my mk3 Mazda for the track (with Meister suspension, sticky tyres etc), and that is plenty for my amateurish driving abilities, but still retains the ability to take the kids to school.
With all that in mind, I am coming around to the idea of turning this into a very tidy and pampered car to go out for a nice drive on a sunny day or head to a show in… Given that the basis looks good, I think that this is where I will head, assuming I don’t discover anything catastrophic in the process!

I have been cracking on with delving a bit deeper tonight, and thought I would start with the front wings (as they are nice and easy to whip off!

First of all was to get the mudflaps off - which I think might have been a contributor to the problem, giving all the crud a nice place to hide behind…

Then out with the arch liner to reveal lots of crud lying in the convenient trap at the bottom of the wing

And off with the wing - can you tell where the rubbish has been sitting?

But thankfully everything appears pretty solid underneath - which is a relief!

And with a repeat on the other side, I have a car looking like this…

Looking at it, I think the wings could be saveable with a bit of TLC along the bottoms - although if the sills at the back end will need paint, I wonder if it would be best to do it properly and stick a pair of new ones on… A decision that can wait until I have opened up the rear end and seen how much work is needed there!

So, assuming I don’t have a change of plan after a day of looking at kit cars tomorrow, then the restoration starts here…


No nasty bodged repairs on it. Looks to have survived better than average. One owner, low mileage, the only thing that’s not how it left the factory is a bit of rust. Plenty of nice running tatty rotten standard cars out there if you really want an Exocet as project number two. Saving this tidy looking Berkeley as project one is the way to go.

Looks like a previous owner has already had the underseal out to it at some point.

So, I had a day out at the kit car show on a slightly grey and wet bank holiday which has made me realise how much compromise there is with a more extreme car with no weather gear to speak of - whereas I would not think twice about putting the roof of my Mazda up and leaving it in the rain, there were a lot of tarpaulins and improvised covers in action when the rain came! There were lots of lovely machines there (and some good bits and pieces on the trade stalls!) but it did reinforce how much I take for granted the everyday useability of the Mazda.

So, back in the garage for a little while tonight to have a quick look at what lies beneath with the aid of the flap wheel.

So, on the offside front sill, all looks good and we have clean, shiny, solid metal which is good - so this can all be cleaned back, re-protected and then given a good coat of dinitrol.

The rear has had a patch put on, so I will chop this out to get back into the inside, as there are holes on the inner edge, so I assume the inner panel will need some work.

So this all looks like it will be as expected, so onto the other side, where things look a bit different!

At the front, we didn’t have as much of a solid feel to the metal, and sure enough we have a hole when trying to clean back the surface. Thankfully, the metal around looks ok, so hopefully this can be cut cleanly and a patch welded in.

Then to the back, (which has rust starting to appear around the wheelarch) where we also have a patch - and a covering of filler - which I think will take some more investigation, and chopping back!

So, nothing that is too surprising so far (I was aware that the sills had been patched - my colleague, who is a picky engineer, had put some patches on, but I didn’t know quite how much had been done.

I think the plan of action from here is to have a good think about what to do next - I am torn between buying a welder and trying to learn to sort it, or saving that cost (I figure with a reasonable MIG, gas bottle and extras that I will be in the £3-500 range (but will have gained a skill), but that would go a long way to getting a pro to sort out welding it up - which will undoubtedly be a much better finish than I would achieve as a first-timer.

Any thoughts or guidance from folks on here that have had a go at similar repairs or learning to weld would be very much appreciated! I’ll keep the updates flowing as a continue to dig a bit deeper!

Where in the world are you Browno?  Only asking because I can thoroughly recommend the services of a brilliant, MX-5-specialised welder, who does a PROPER job, is very reasonably priced - and is a lovely guy.  10 miles from Southampton, Hants.

Do you know anyone who has a mig welder you can have a practice with to help decide?

Nearly twenty years ago I bought an old car (an A reg Talbot Horizon, cost £60!!) and hired a welder to patch the sills and rear suspension turrets. Pigeon poo doesn’t even begin to describe the result, so I let someone else do the sills when mine needed doing last year.

You may find you have the knack and can weld. If you do I’d get a gas mig welder, the ‘gasless’ ones tend to be a bit harder to use as well as producing ‘splatter’ over the weld surface. A co2/argon mix gas gives a better weld than just co2.

Good luck, looks like you’ll have a cracking car when you’ve done.

Thanks for the advice on welding guys - unfortunately I am in Derby, so a bit of a trek! I am still pondering what to do, and have been on business in the USA for the past week, so haven’t made much progress apart from trading a few emails with the guy I bought it from, who emigrated to Oz last week.

He has kindly provided me with some more pictures and comments on what he has already done and what he discovered below the surface. He apparently also still has a rear wing panel and tonneau for the car that I can have, which is a bonus!

So when it was repaired 3 years ago, this is what it looked like, and what was done. First the nearside - which looked like the below when the sill was opened up.

And was repaired and coated like this before having the outer welded up (this is the side on which the arch is now going - so will need chopping open again.

On the offside, the inner sill was like so:

And the arch was also chopped out leaving it like this:

Leaving the inner arch to be re-formed and everything coated with an epoxy paint

Before the wing was then fitted

Having seen these I am confident that it has been well- done underneath. So now that I have taken stock of what it now looks like, I think that the offside just needs the inner section underneath repairing, while the nearside will need the wing fitting to sort the arch rust, and also the underside inner sorting - then finally it will need a small patch on the front inner and the offside chassis rail. With all that done and a leaking brake pipe replaced it will be good to go!

I have been busy all day cleaning my Vectra VXR ready for sale - but hopefully I will get some more time to play during the evenings this week…

So a mini-update for today as I haven’t achieved much progress as I have been busy travelling with work, doing jobs around the house and also selling my vectra which have all taken time away from the Berkeley. I have made a small step forwards though, so here goes:

Started to try and get at least the o/s front inner wing all sorted and protected, as this is in good condition, and so can be sorted.

First off, after removing the wheel, here’s something that the MOT didn’t spot… New front springs needed - so will sort that later (as well as new discs and pads all round).


First job then was to attack the whole area with the cup-brush on the drill to clean back the dirt and grime and any loose paint:


Notice here the top edge of the brake backing plate crumbled when I hit it with the wire brush - I guess this will either need replacing, or at least tidying up too!


You will notice that I haven’t touched the wishbones or any suspension - I will sort these when I take the strut out to sort the springs.
Next I treated any areas that had gone back to metal or showed signs of surface rust with Dinitrol rust converter, and then masked and painted liberally with Dinitrol underbody wax:


This has left a good finish and should protect well, so that’s a good start. I have also been looking at a plan for the repair work, and am going to borrow my mate’s big MIG from his garage - I think I might try and get going on that at some point soon - at least get the patch on the n/s front sill sorted so that I can protect the inner and get a pair of wings sorted.

I have been wondering what to do for the front wings - both originals are crusty at the bottom edges, so I think it will be best to replace. Do I go with a pair of steel ones, or a pair of fibreglass ones instead? Has anyone done the same and what would you go with - I guess that all new wings now are pattern, and will likely take some work to fit perfectly, so would the carbon miata ones perhaps be a better starting point (and mean no future issues with rot)?

I have been continuing with stripping and sorting - firstly I have spent some time drilling out the sheared lower mounting bolts and retapping the threads, which is all sorted and ready. Then I worked on getting out the front strut to replace the broken spring - which was made somewhat challenging by the fact that most of the bolts look like they have spent a year at the bottom of the sea… 


A combination of patience, persistance, penetrating fluid and a lot of wire brushing say things being removed gently without anything getting rounded or sheared - which is a first for me!


I had at this stage thought about stripping out the wishbones and everything to put them in an electrolysis bath and really get them cleaned up - but have held off for now, as I have decided that it is really beyond the scope of what I am doing for now - although if I decide to keep the car long-term, I may go back and re-do this. For now, I have attached everything with the cup-brush on the drill and a flap wheel on the grinder to clean up the surface, and have begun with a coating of dinitrol rust convertor, which has got things looking better already…


So tonight I will add some primer and a coat of paint and that should leave it looking rather more presentable - and the bolts and threads all cleaned up in a rather better state than they started!


I have also put in my first autolink order - front springs, discs and pads all round and service bits (for this and the mk 3) - so I expect a nice big parcel arriving soon, so that I can get this corner reassembled!


Progress is steady, but at least going forwards! I figure that if I get this corner sorted, then it is all done - the other 3 all need welding, so I will then start to tackle them one at a time too!

The amount of work that you’re doing means you should finish up with a very nice car so don’t ruin it with fibreglass wings. You could probably get a really good second hand pair from someone like Autolink. Keep this one for a few years and it will be an investment.