Hi
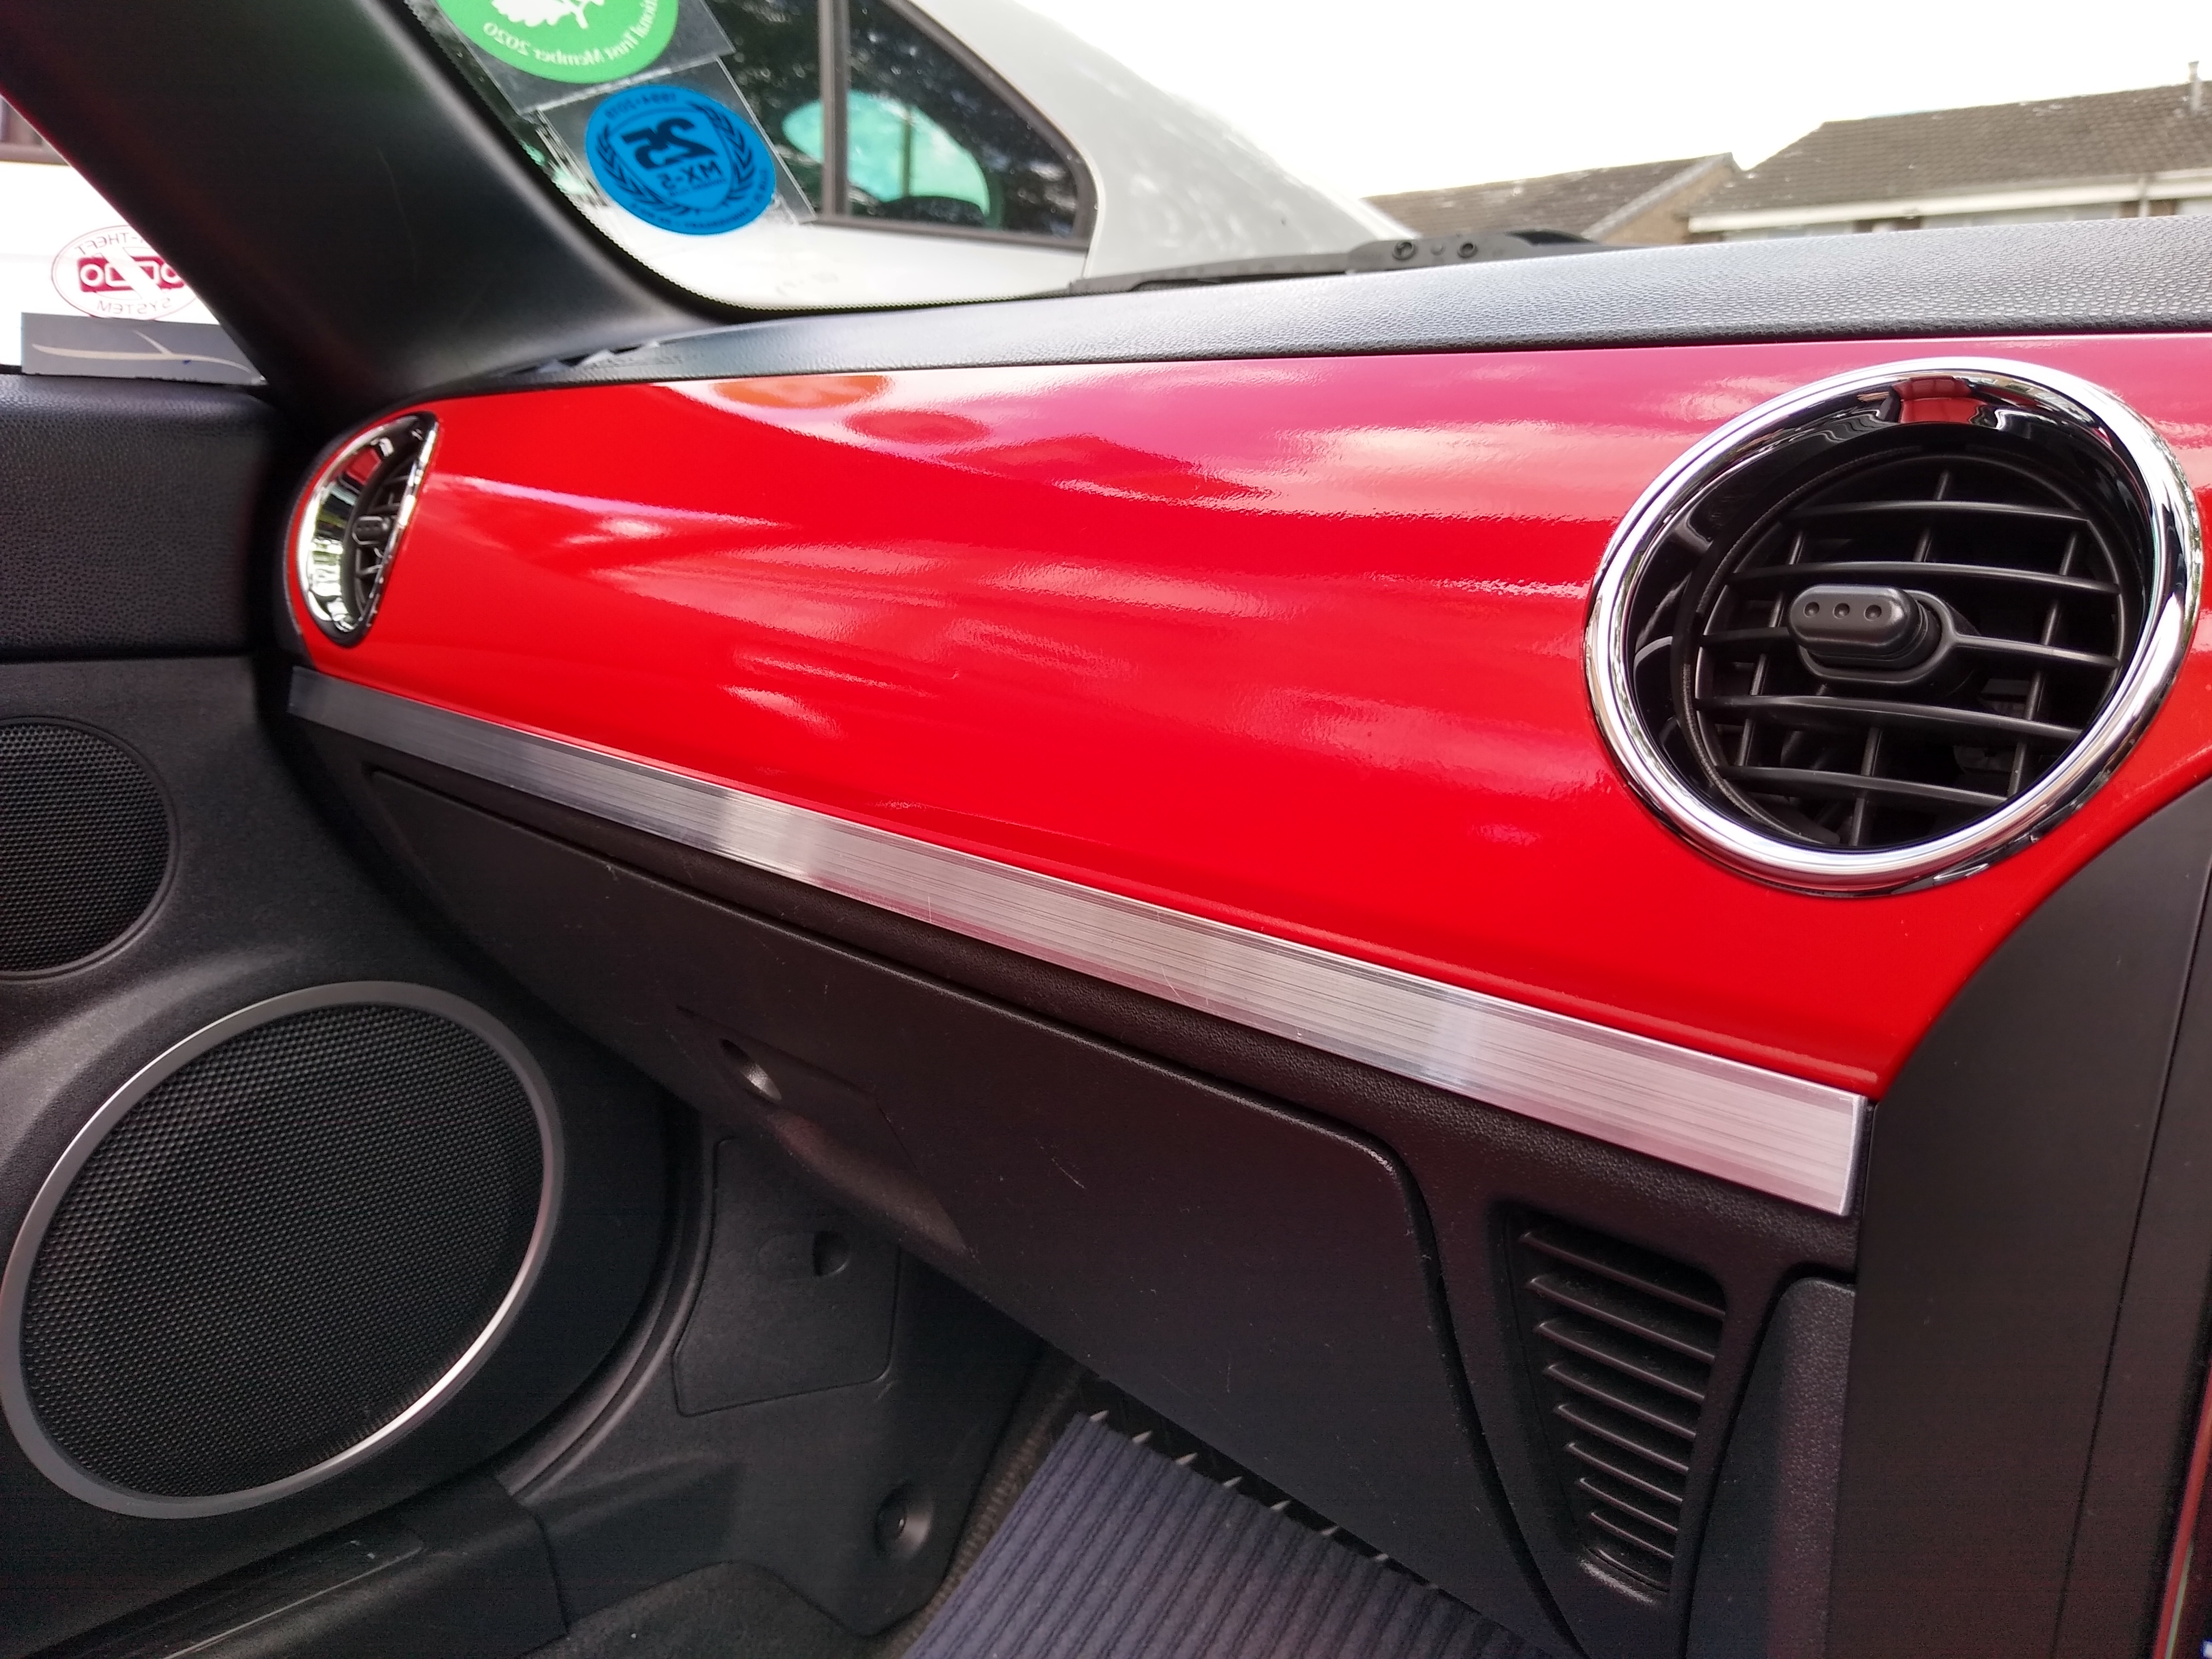
I have a MK3 ( 2006 ) and the gloss black dashboard sections that have the vents fitted into them ( the long section and a small section to the right of the steering wheel ) are looking a bit sorry for themselves thanks to the former keeper, I was toying with the idea of removing these and re spraying them either gloss black or Sunlight Silver, either way are they easy to remove ? or will I have a struggle on my hands, break one and regret even thinking about it.
Any advice about removing these would be helpful.
Cheers
First off you need to remove the head unit, not all the way just enough to get at the two screws behind the upper part that hold the long section in. After that there’s a small screw behind the part above the glovebox, you can feel for it and get a short screwdriver on it, glovebox out of course.
Once those fixings have been removed the trim panel can be ease out, a trim removal tool or a thin blade. Take care not to mark the dash surrounding material. The small dash insert right side is just pushed in, no fixings to remove, just ease it out.
The vents are removed from the rear, held in with screws straight forward really.
Go for it. It’s a pain, particularly the 10mm bolt that locks the head unit, but you can get a superb finish with usual rubbing down painting and polishing. Maybe some chrome to finish off?
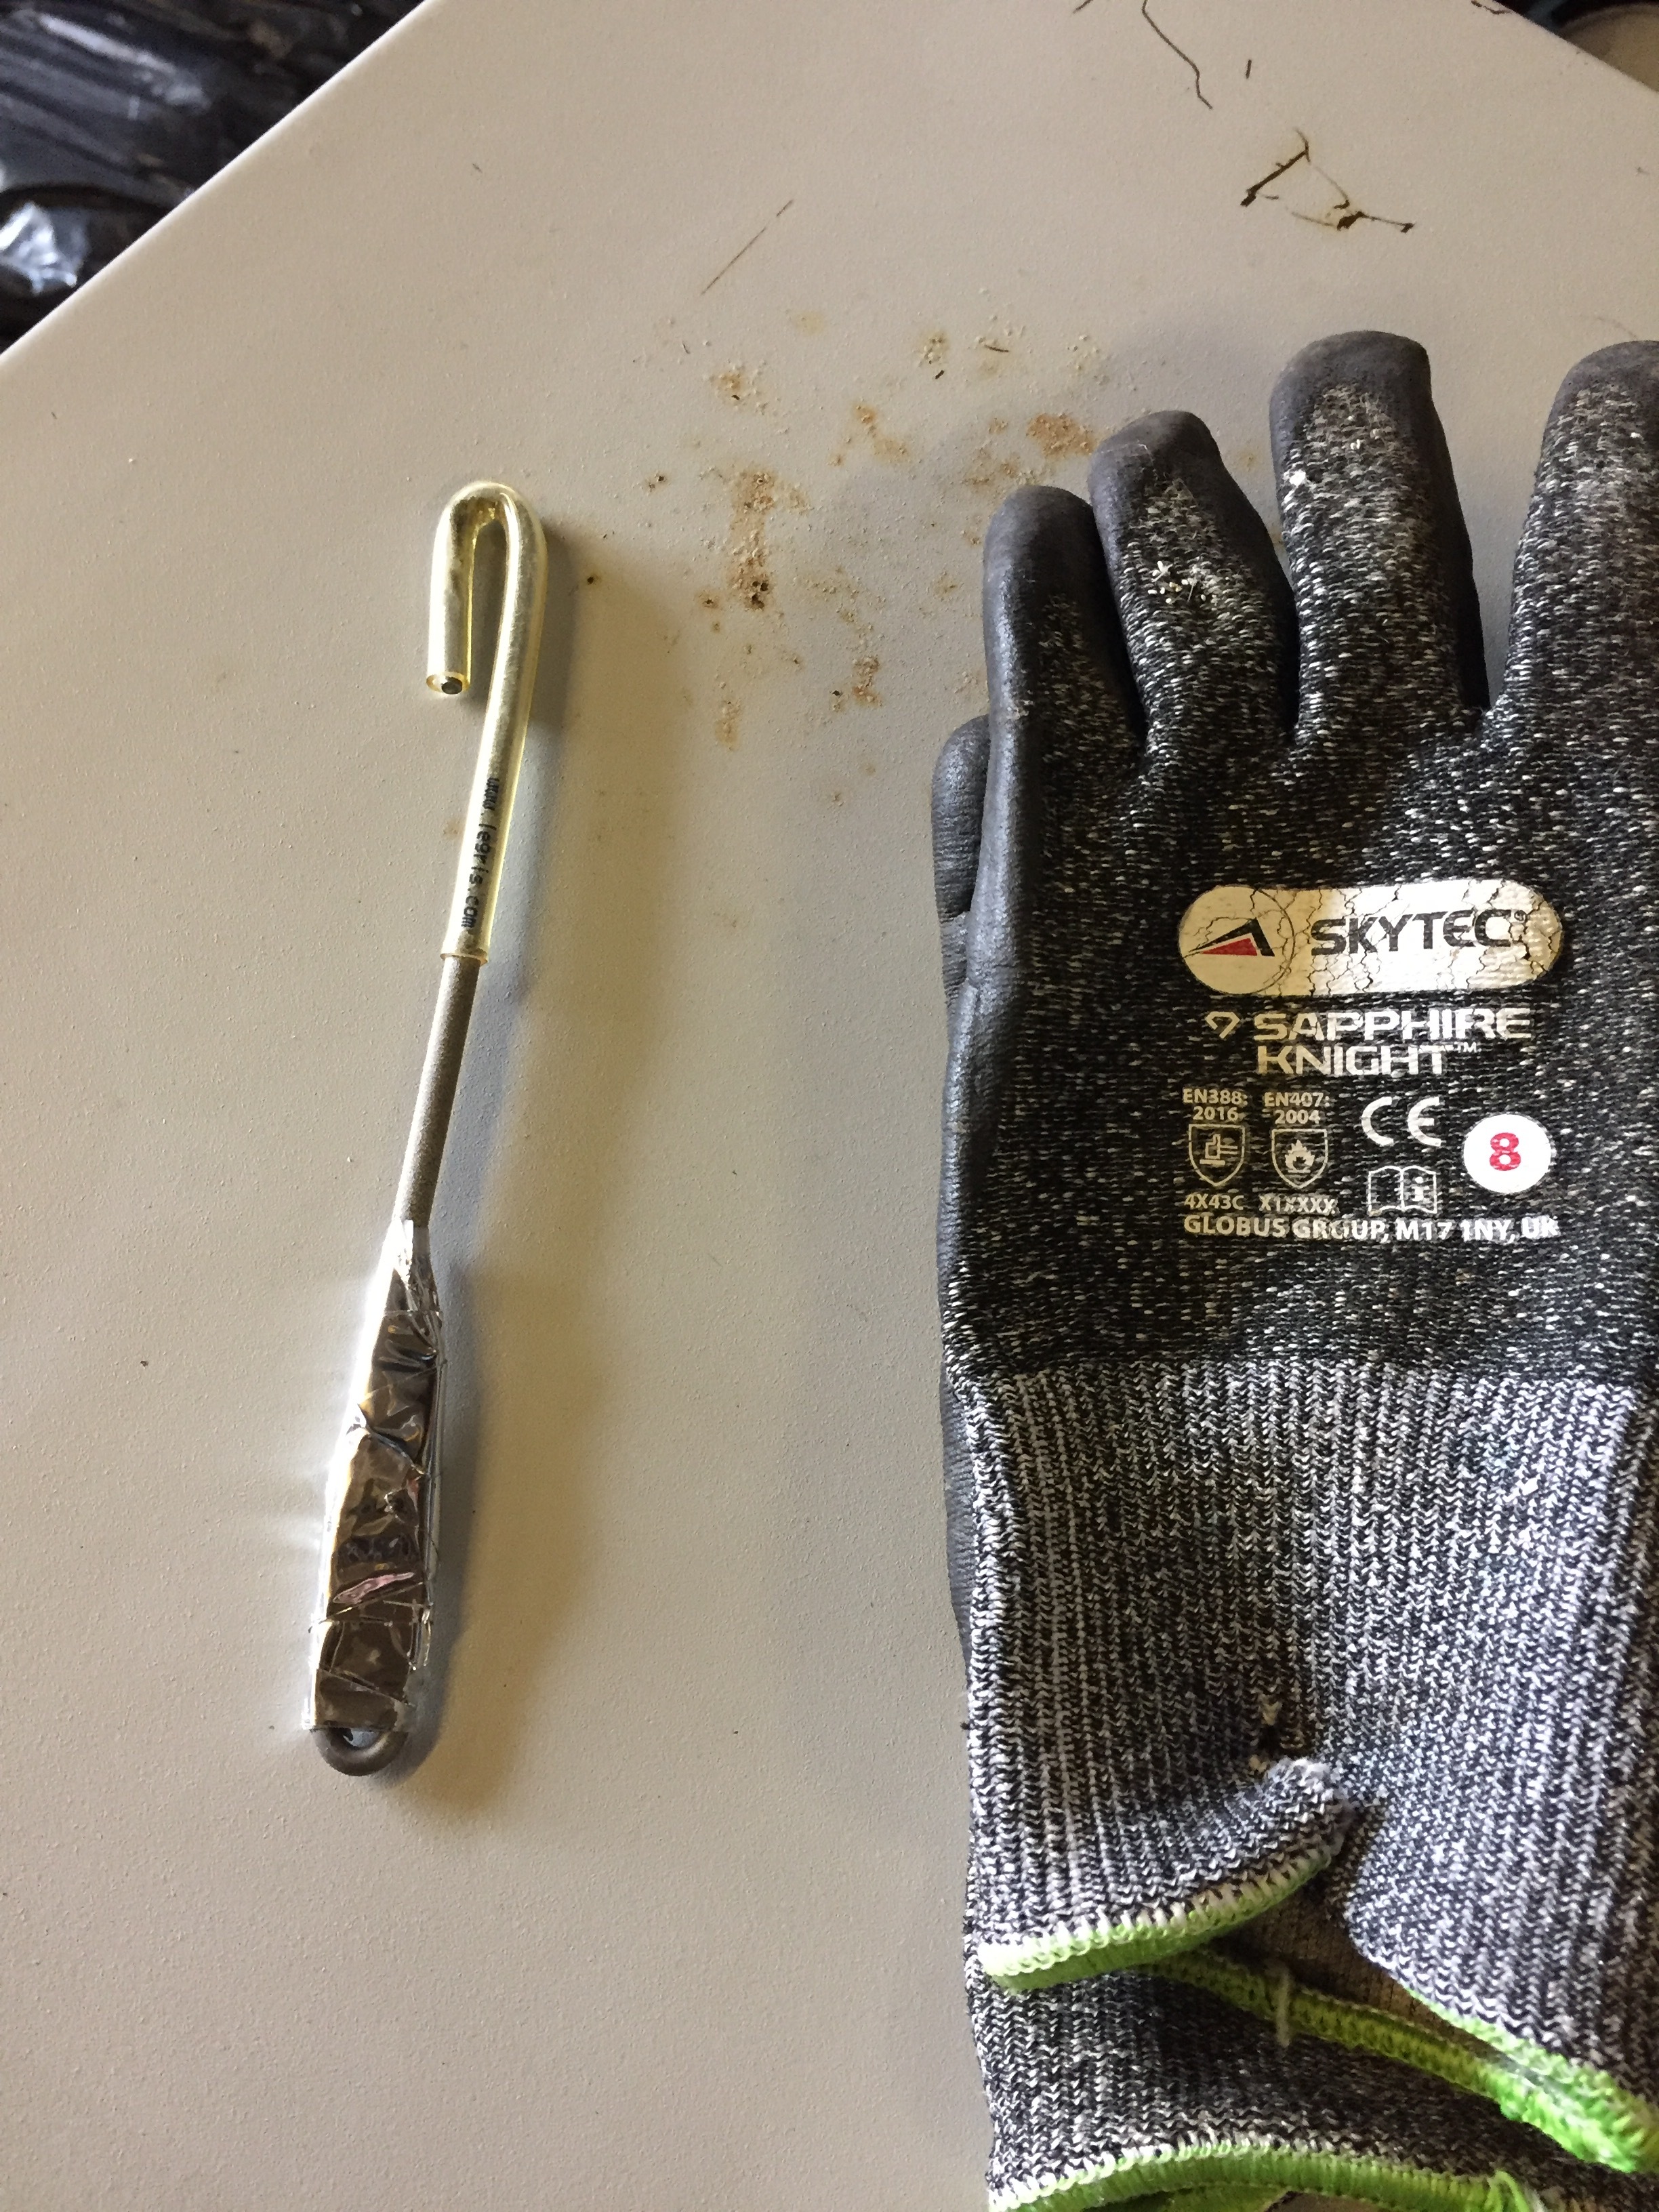
instead of levering the parts out and risk damaging them , the easiest thing is to use a hook ( welding rod works well ??? )
slip it into the vent and get a good purchase , then just tug
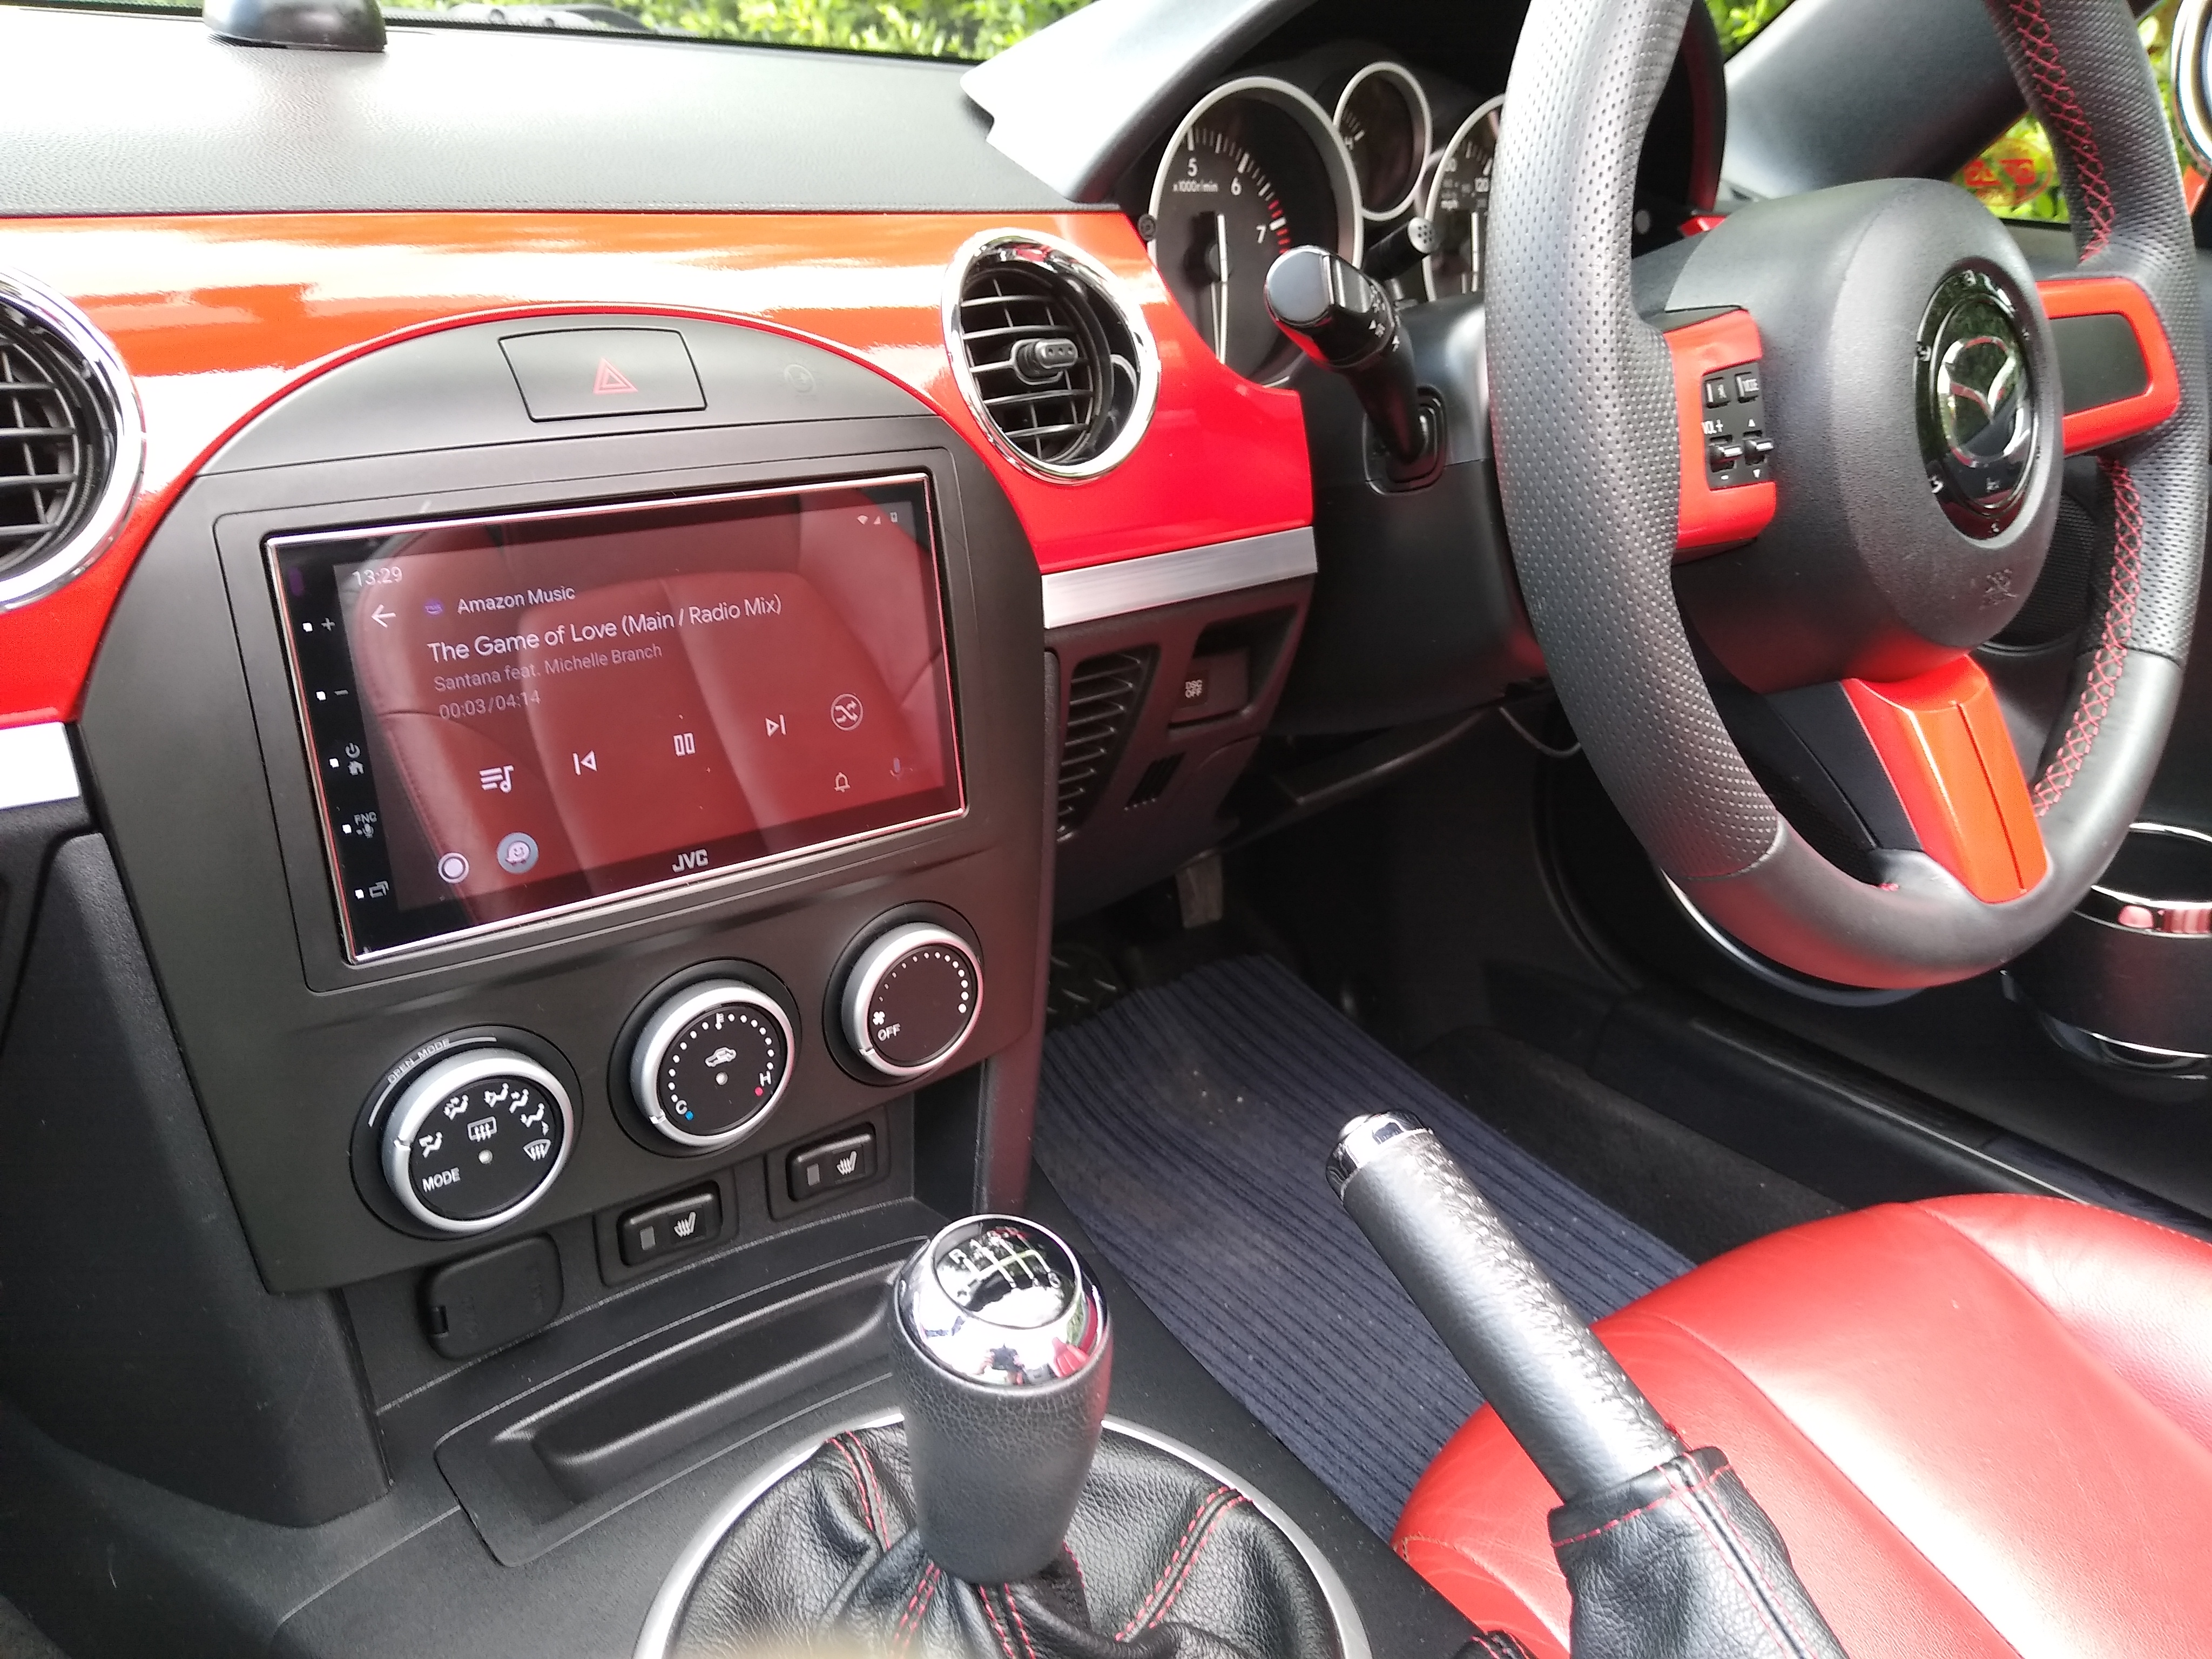
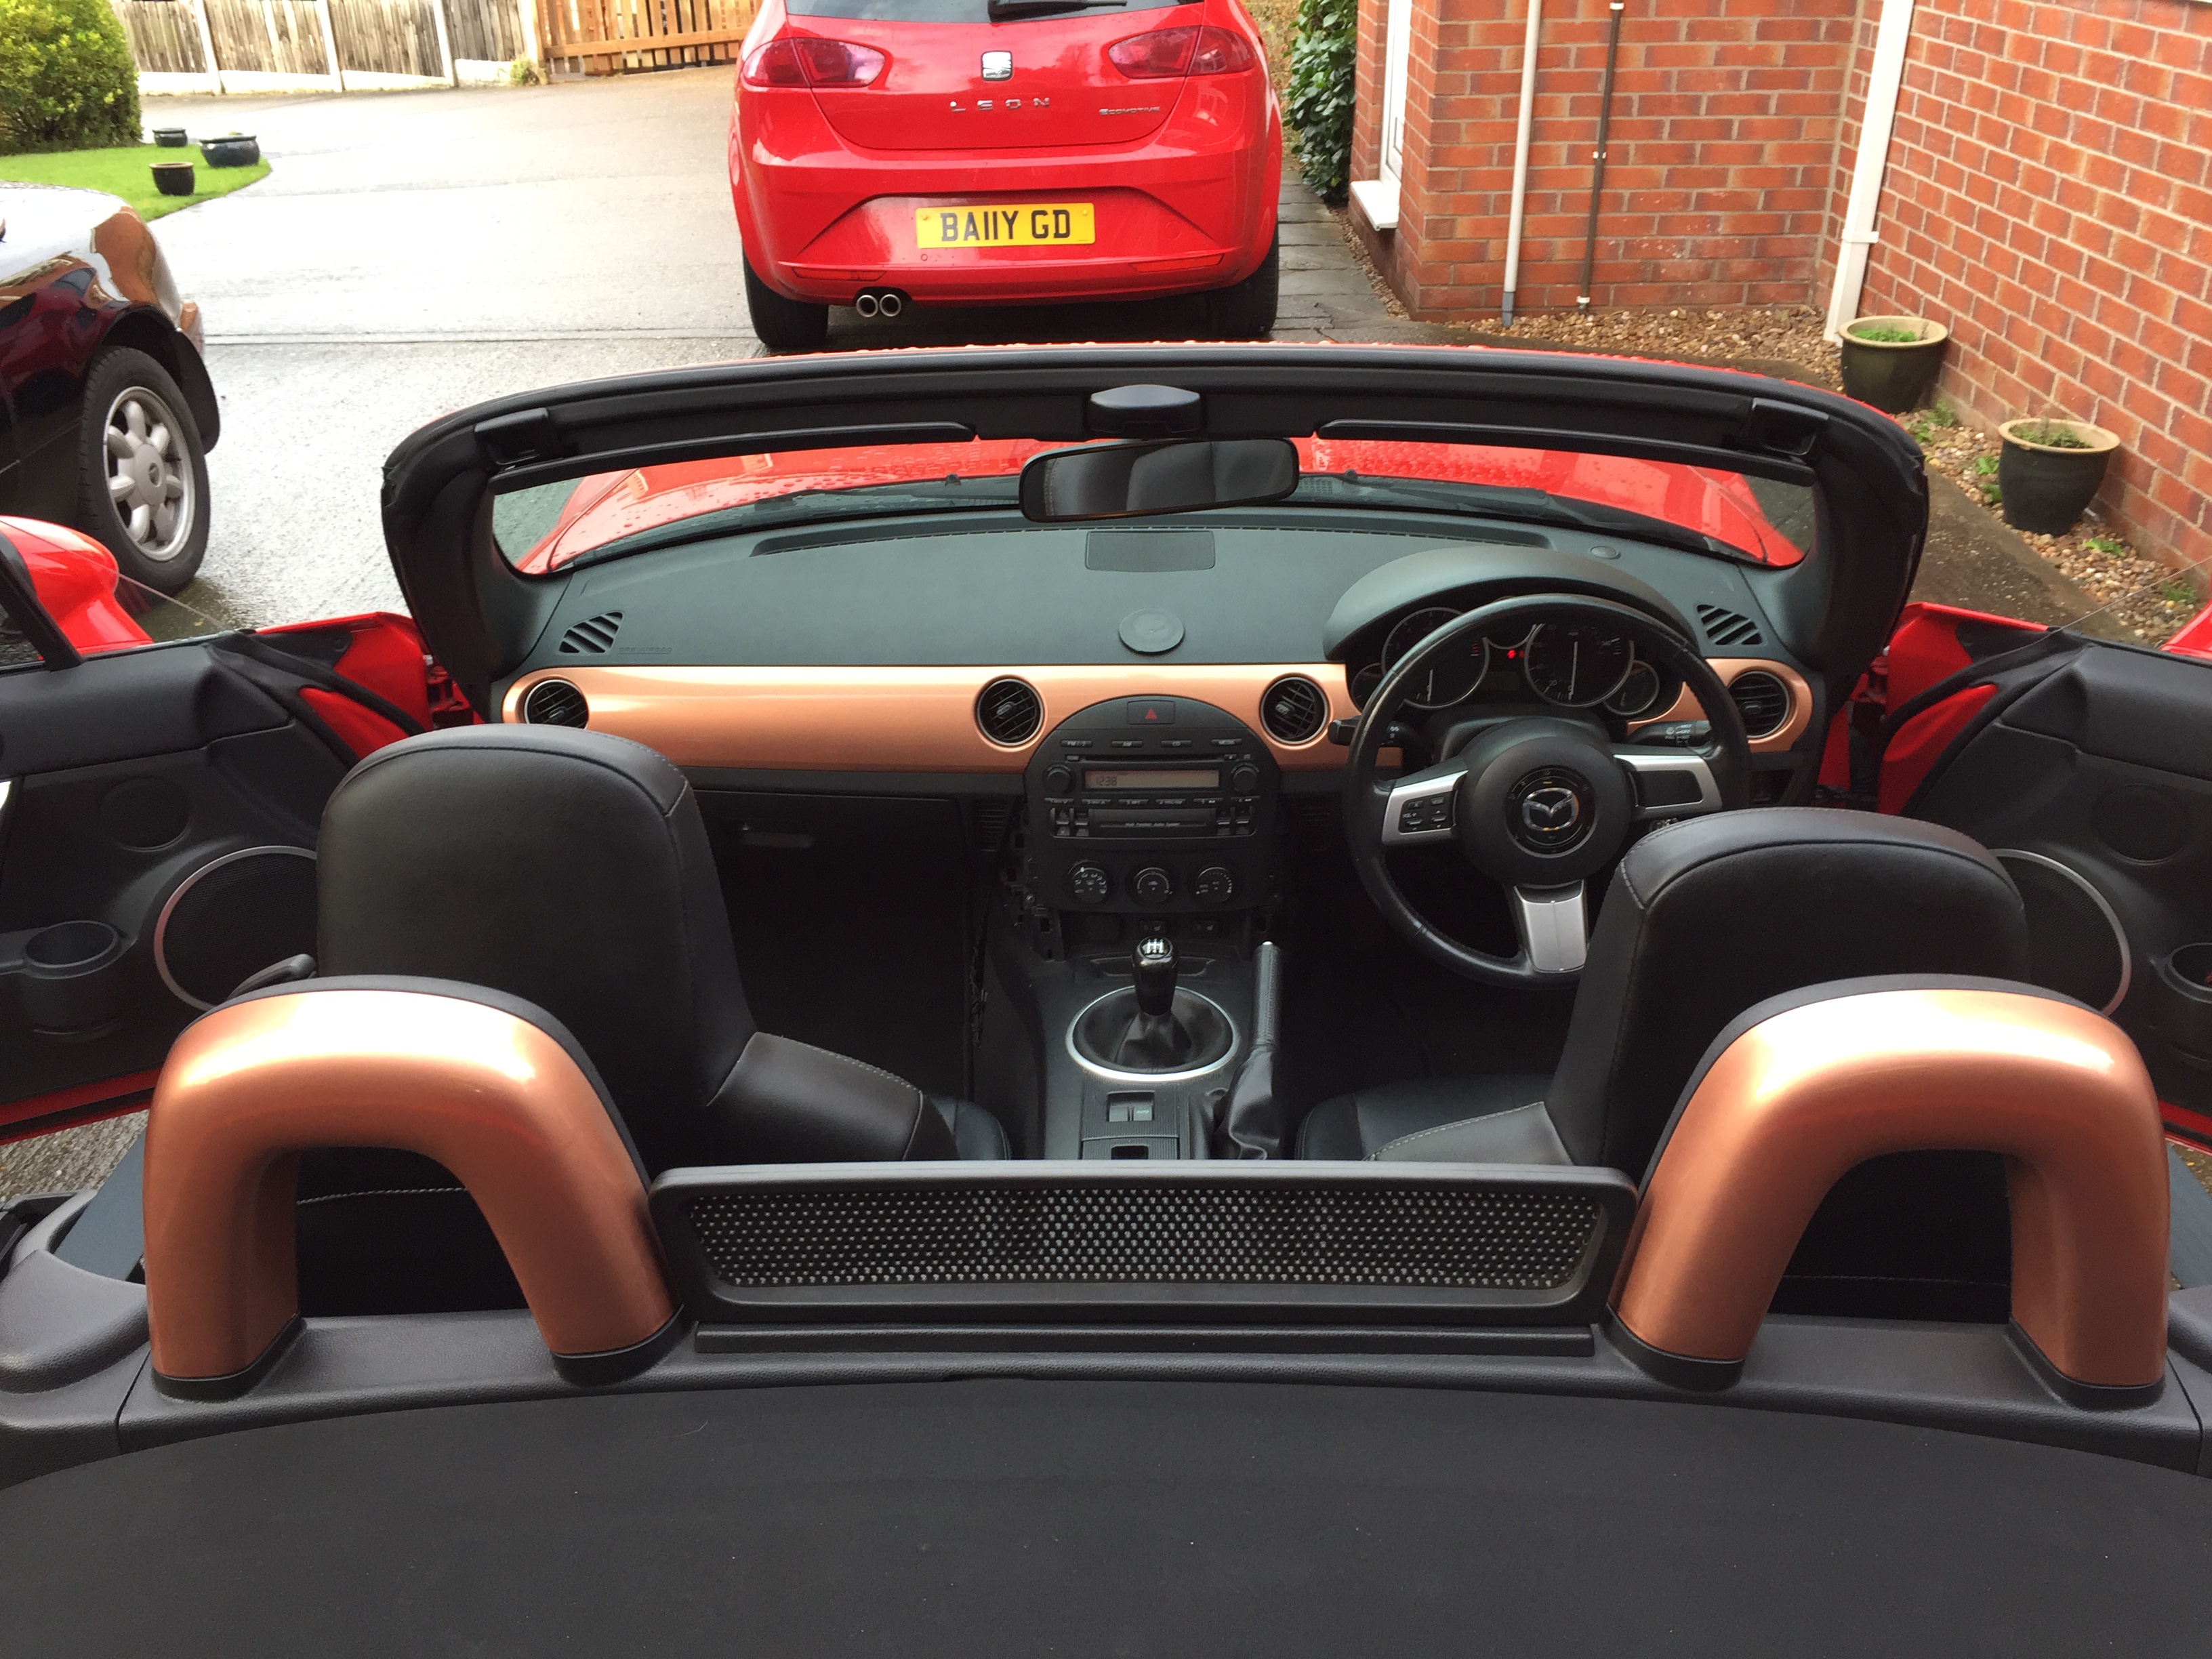
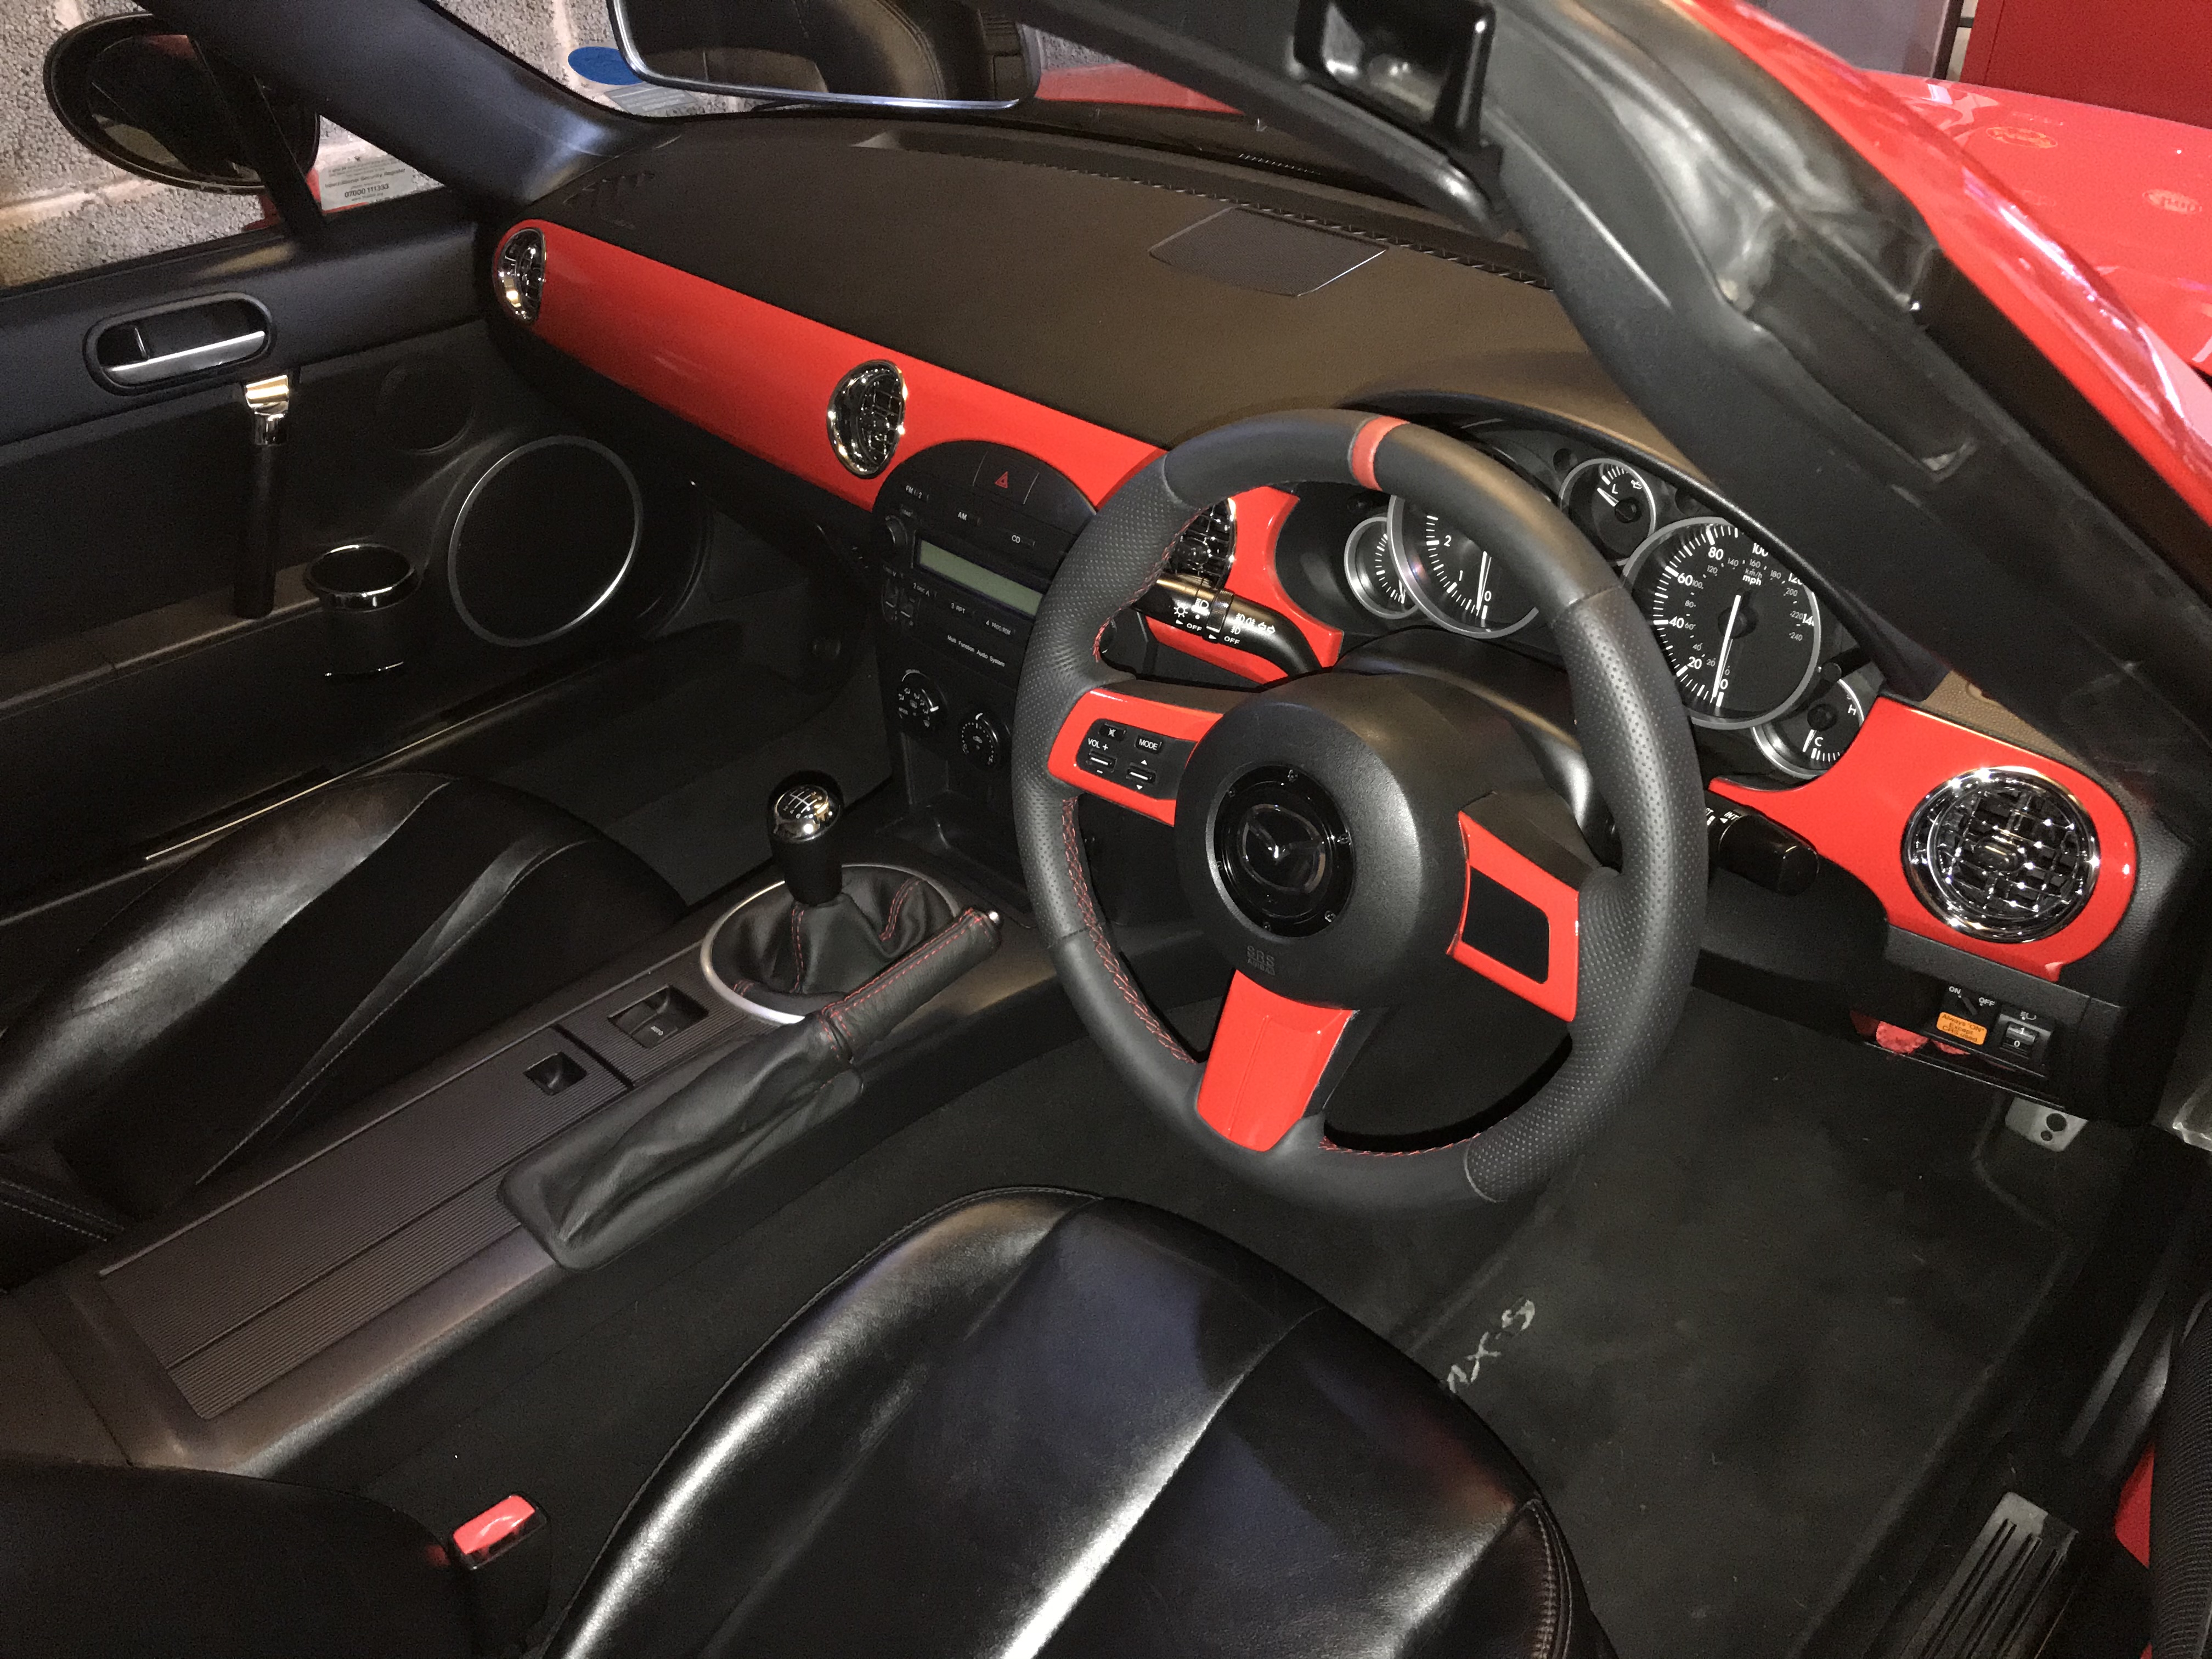
The colour matched interior looks really nice without being over the top, but I don’t think my patience would stretch to the engine bay, not yet anyway, doing the dash will stretch my skills and patience as it is
I have to say that I find the shiny (original) finish can cause considerable glare on a sunny day with the top down. I have been considering a vinyl wrap?
Now there’s a thought , I suppose once you’ve removed the panels you can experiment with paint/ wraps until you get it how you want it, although I’m not looking forward to removing them, as my fat gnarly old fingers are not what they used to be