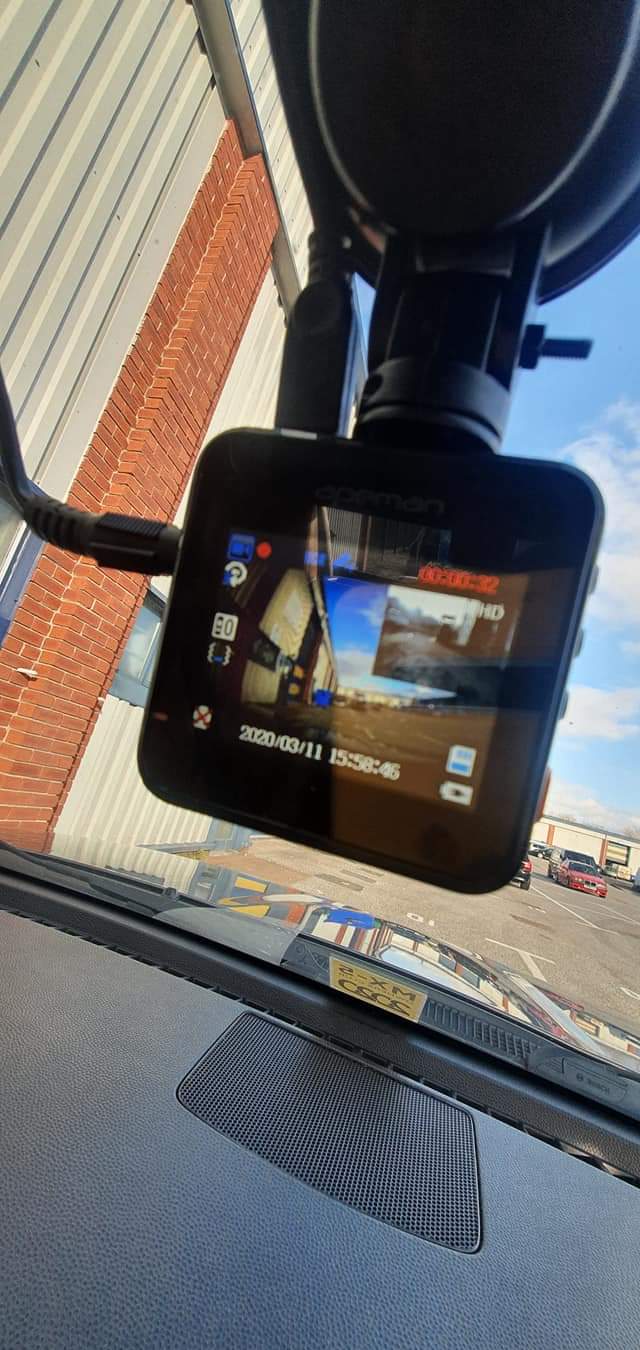
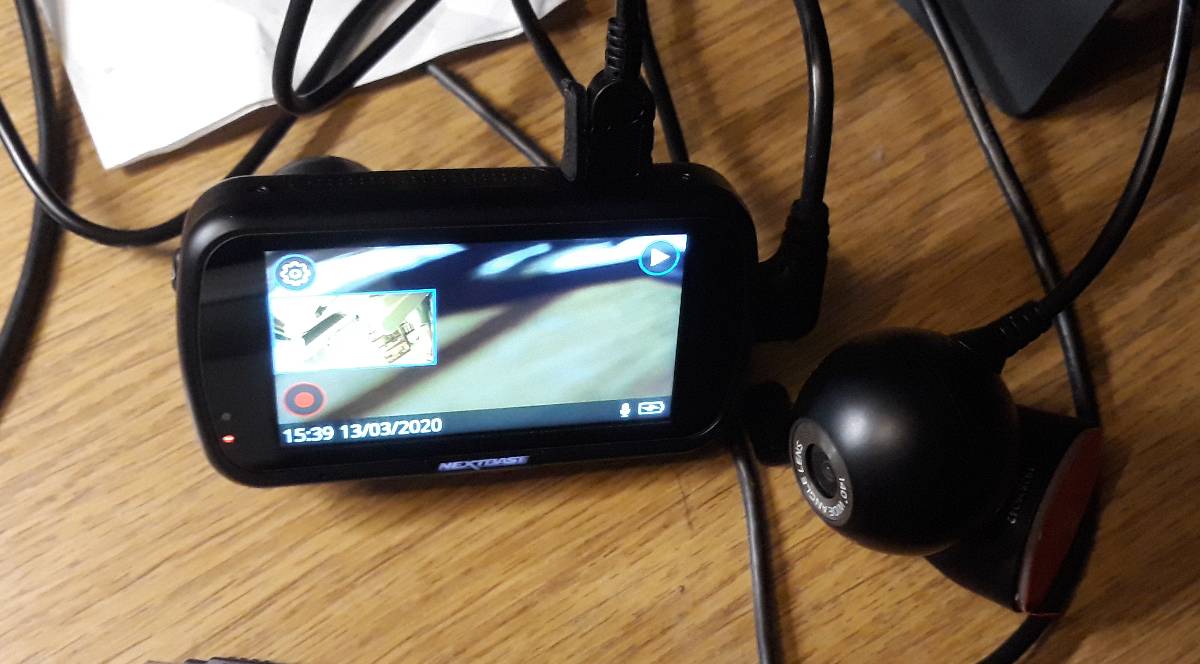
DIY BUDGET DASH CAM FRONT (1080p) AND REAR (720p) INSTALL - TOTAL COST £50.
Took around 2 hours, hardwired into the interior fuse box, freeing up the cigarette lighter.
Dash cam link here:
https://smile.amazon.co.uk/dp/B07RL1DTLH/ref=cm_sw_r_fm_apa_i_jeQyEbQ0D190X
Hardwire kit link here:
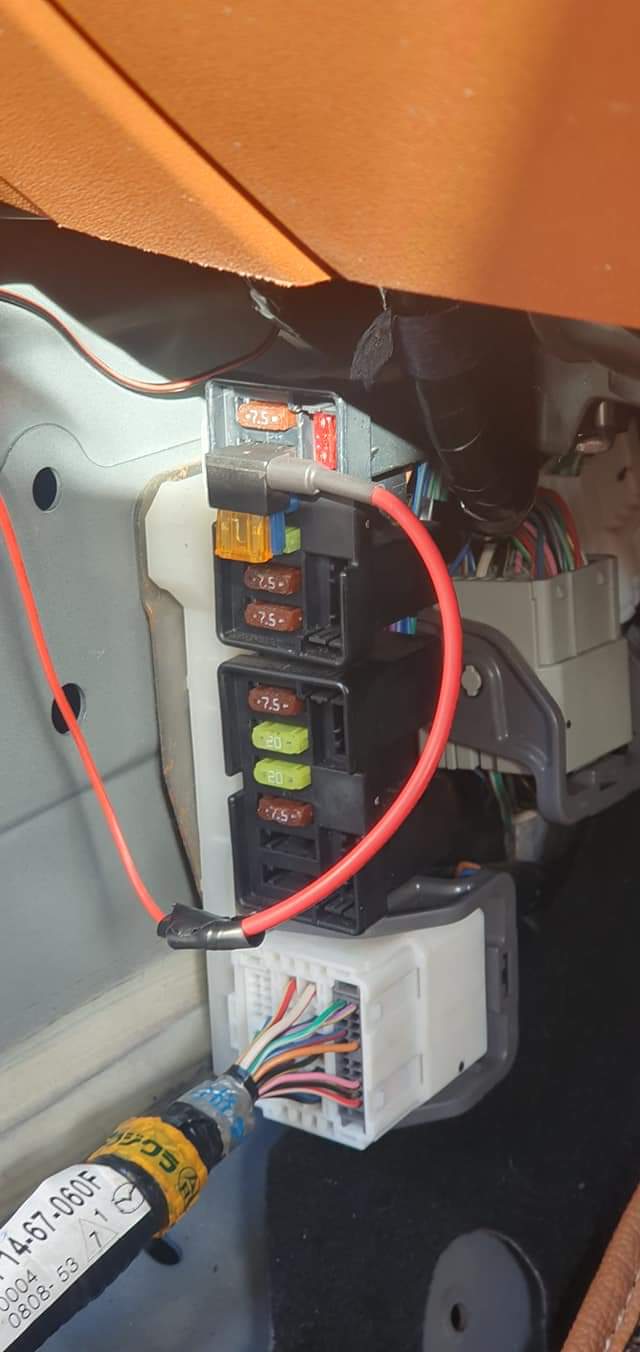
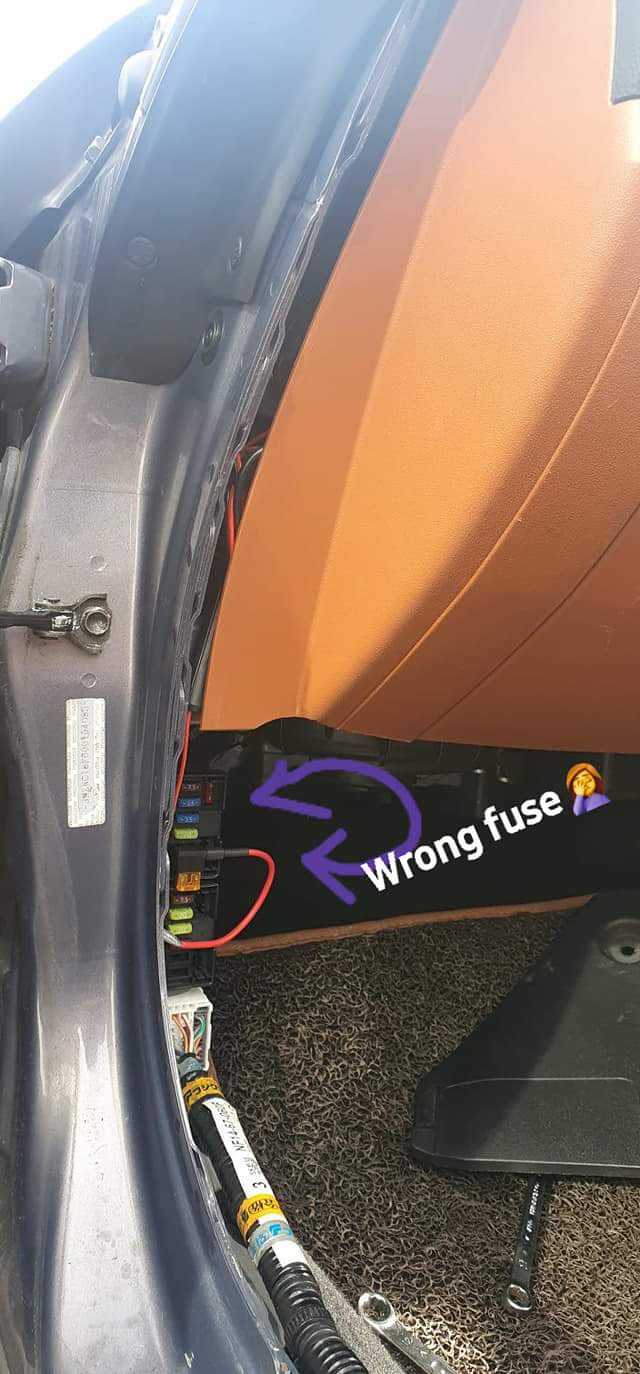
The wiring kit provides a type of piggyback fuse, inserted to the 15A AUX POWER slot. There arent many places to earth from; the 10mm just behind the fuse box was used.
The power lead then runs from the interior box, tucking away nicely behind the plastic trim, up the side of the passenger A-pillar, running along the windshield - totally unseen.
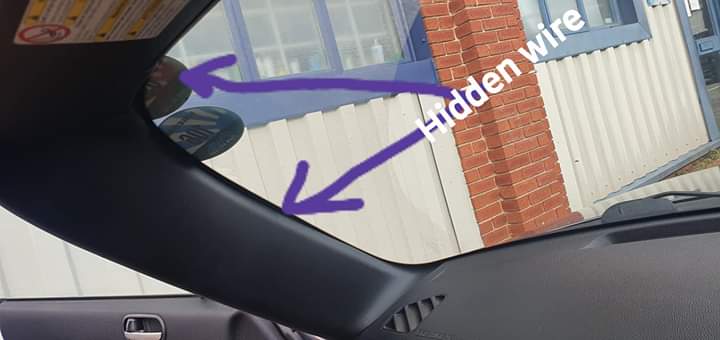
Removing the windscreen plastics was not required - there is a small enough gap to hide the cable behind the plastic trim using a trim tool, credit card or similar. (Kickplate, rubber seal and lower plastic around the fuse box were removed).
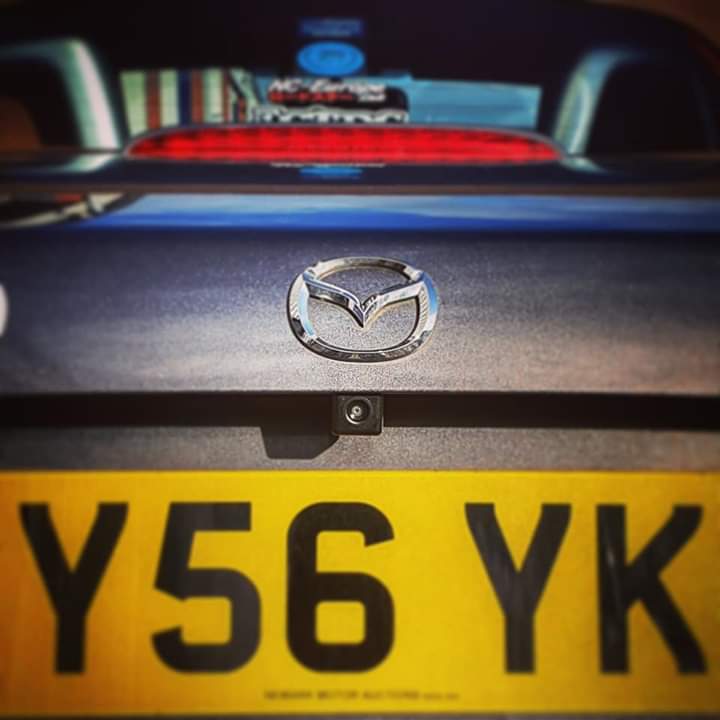
The interesting part was the rear camera.
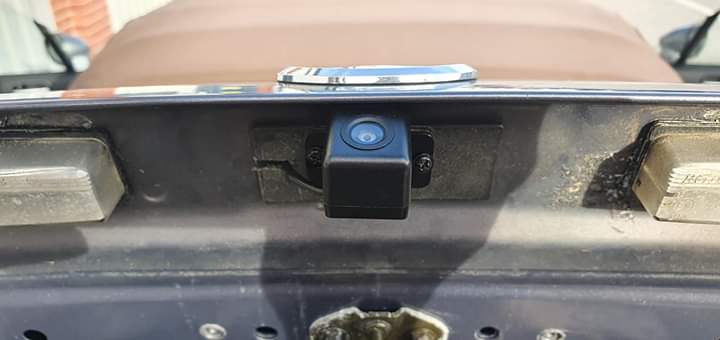
There is a small plastic blanking plate between the rear number plate lights that pops out, providing the ideal mounting place.
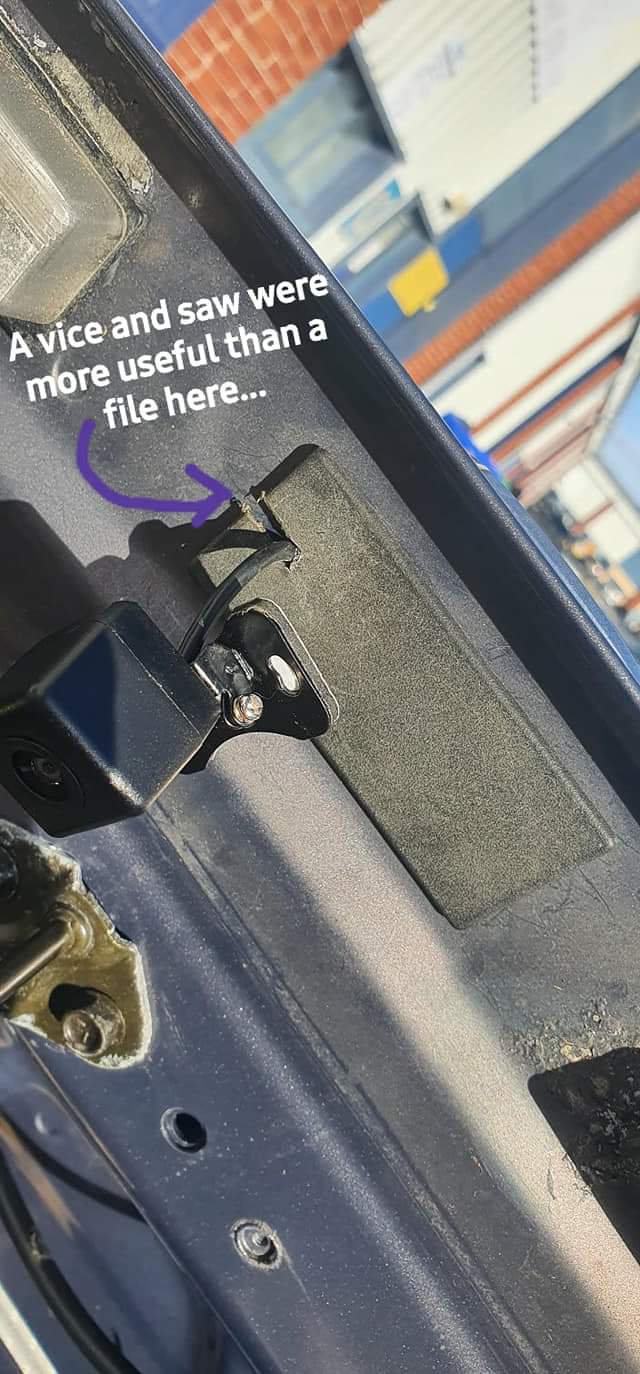
Behind this plastic blank plate, there is a hole. The cable was routed down this hole, inside the boot lid, following the existing wiring and cable tying together where necessary.
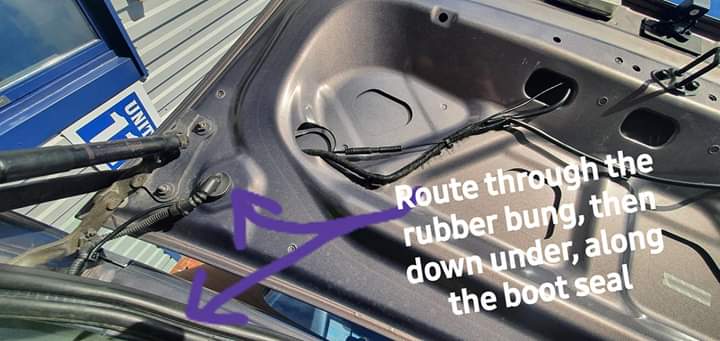
The cable is tucked under the rubber boot seal, running along to the DRIVERS SIDE of the boot - this is reportedly the ONLY access area into the cabin (rag top NC1).
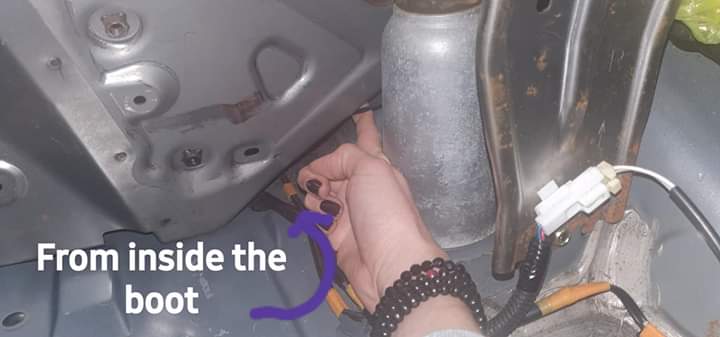
A small gap, low down towards the back of the boot floor where the existing cables go, is the hole you’re looking for. My boot interior is already stripped of carpet and plastics (I carry alot of random ■■■■)…
Difficult to photograph, a flexible drainhole tool was used to pull the cable through the hole. For the cabin, the plastic side panel, seat belt cover, rubber seal and kickplate were removed to access.

The cable was routed under the carpet, back up the drivers side A-pillar (in the same way as the power cable on the passenger side) and into the camera.
2 hours later with coffee breaks and I have a stealth install and real piece of mind, plus something to use for fun! No screen upgrade planned, but could also be used as a reversing camera with something to view through.
Though I appreciate this isn’t super detailed, I do hope it to be useful as a rough guide for some people. During my own research, I found a few handy pictures through facebook group searches, but not many start to finish explanations. It is a relatively straight forward job, with the “boot routing” posing the most difficulty in my experience.
I’d be happy to answer any questions, and will report back on the performance. Also happy to receive any feedback - have you done something differently?
- Clare


 Thank you, glad it has been of some use/ interest to you!


