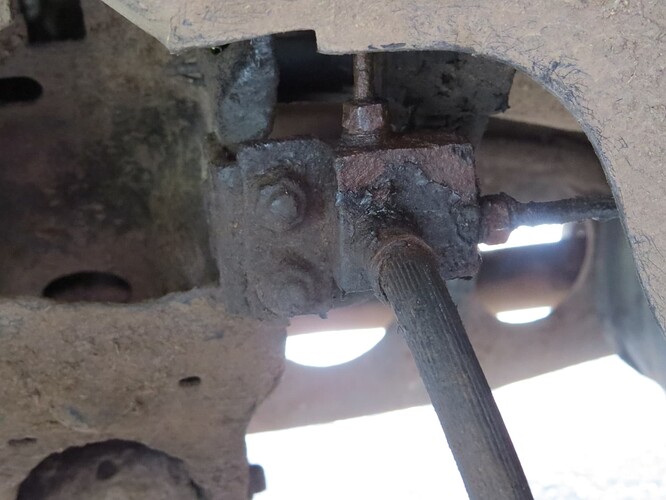
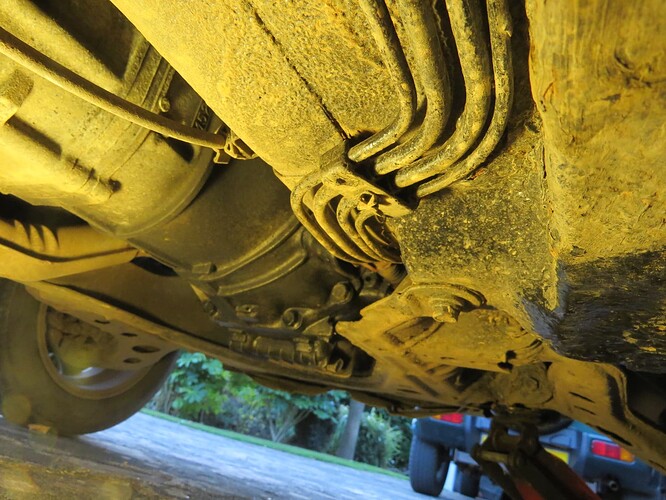
We had a nightmare when my Eunos went for its MOT. At the start of the procedure, doing the brake test, the pedal went to the floor as a pinhole leak developed in the rear metal pipe. It is where it leaves the metal block on the offside to go to the nearside rear caliper.
I will attach a picture later but the fixing on the metal block looks to have lost shape. I’ve wire brushed it up and soaked in plusgas but just know that the 3/8 brake spanner that should work on this will round off what is left of the shape. Don’t actually have one to try at the moment but the 10mm open ender that fits ok to the other fixing is very loose and I can get a 9mm on two of the three options.
Have ordered copper pipe and fixings to make up a new pipe and will order a 3/8 brake spanner later.
Any advice on this job particularly the undoing of the nut on top of the block gratefully received. Perhaps I should undo the feed nut on the side of the block and seal the flared end with something first?
I was also considering replacing that other pipe that goes to the front but look OK and mainly plastic coated.
I did the brakes on my 1993 Eunos last year. I couldn’t under a hose connection on the nearside at the rear. I cut through the copper pipe that runs across the rear, and got a new one from Mazda. It was not expensive and came shaped to fit. I replaced all hoses with HEL stainless ones, and they came with a new distribution block (as in your picture). I also bought a brake nipple spanner from Halfords which is quite deep and I think gives a better grip than the thinner cross-section ones.
Thank you for your reply.
The rusted pipe on mine is original and steel.
A good idea to buy a pipe ready made up with fixings as avoids some messing around with flaring tools, etc. I did see full sets of pipes for sale after the repair kit ordered but not the individual pipe required.
I am not worried about making up a new pipe and fitting; just the issue of removing the old fittings. I have that one you had problems with to deal with and the one on the distribution block. In my opinion, no spanner will work and we need a plan ‘b’. Anyone used mole grips to tackle one of these before?
Replace all the rubber flex pipes the block comes with the offside rear one. Brake pipes are cheap enough to replace the lot. This is quite normal to have to fit all new brake pipes to an older car.
Fair point Dickie but it’s not the time of year to be doing all that sort of work and I want it through the MOT. It does seem that the distributor block on these is an integral part of the o/s flex pipe which explains why these are not available on their own, thank you.
Managed to remove the pipe. After wire brushing, knifing the join surface, rattling fixings with an SDS drill with chisel and plusgas application, they did finally let go. Had to use mole grips on the o/s one though.
Had to use a suitable bolts wrapped in PTFE to stop fluid flow at the distribution box as the pipe near old fixings too rusty to crimp over to seal.
The next step should have been simple but I made the mistake of buying a cheap Chinese flaring tool and pipe kit with fixings. What a complete waste of money and time! There are hundreds of these sold by a number of sellers and great feedback. How can that be; total rubbish.
The supposedly copper pipe is heavily magnetic and proven rust facilitating steel with a very thin coating of copper. Nickel, often added to these is barely magnetic or non magnetic and does not rust as non ferrous. The flaring tool takes that thin copper coating off when used, so even a successfully fitted piece of this pipe has a very limited life span. the tool is rubbish with loose bolts that make alignment difficult. The first bubble type part of the process works OK but compressing to make the double flare is a disaster. The tool simply cannot cope with steel producing a clumsy off-centre single flare as it pushes the steel out rather than in and down. Useless brake pipe and a worse than useless flaring tool - please be warned!!
Luckily an octogenarian retired garage proprietor friend let me use his Sykes Pickavant 270 flaring machine and solid copper brake pipe - definitely the way to go. Looking at the ebay listings for copper brake pipe, I would only trust solid copper and that looks very hard to find and relatively expensive. The stuff I used was BS2871 but is dated 2005. This is BS2871 as well and annealed, so easy to bend and flare.
Looking at those unions and pipes ,they need replacing, they have had their life on her, the junction block will be fine as will the hoses, but if you are going to replace the hoses, then get yourself a good set of braided ones .
As for a flaring tool , the hand held one is highly recommend for the tight spots these roadsters can give .as you will not need to replace the whole line to the front …
flaring tool kit…
M-m
Thank you, that looks like a good flaring tool and there is no way the one I have would do tight spots.
I was going to do the long pipe as well; tried to re-book MOT and they are so busy that 24th October was earliest. the pipe is long but no issue except possibly at the last couple of inches, up to the distribution block. MOT man did mention he thought it would be a good idea to do that one too. The rest of that pipe is either coated or free of corrosion in the engine bay. where would you suggest a join?
cut and join in underneath her at the back end, and personally i would replace the whole pipe that runs from the junction box to the passanger side along the sub frame, looking at the picture, the junction block is still ok to use, but invest also in a brake union C spanner to crack the old unions,do not use a open end spanner ,you will round them off, remove the filler bottle lid before you start work and use a thick plastic bag on the filler bottle then screw the lid down tight , it should act as a vacuum while you work on her, because if it is a abs system ,the last thing you want is air in the pump.
Once finished blob some grease on the unions and join for protection.
As for the old male unions , don’t throw them away, they can become a very useful tool for the box… Brake line/hoses plugs..... - Mazda-Menders
M-m
I have always used Kunifer 10 when replacing brake pipes since 1976 !!
I broke a Draper flare nut spanner the first time I used it !!
I have never bothered to buy another one.
I do have a set of Metric, AF, BSF/ Whitworth spanners in the play pen so have most things covered.
After succeeding with the subframe rear brake pipe, I was intending to replace the long pipe from the compensator valve at the front beside the brake master cylinder to the distribution block near the rear offside wheel. there does not seem to be a sensible place to join to this pipe to partially replace so was looking to do the whole thing.
We have use of a snapon brake spanner that has undone the nuts at either end. Cannot see a way to get the pipe clear or just free of the 5 x plastic clips along its route that hold the 3 fuel pipes as well. Anyone done this job before advise please?
From memory, some of the brake pipe clips are attached to the body with a 10mm bolt, others are just clipped to the pipes. You should be able to gently lever the pipes out of the clips using a strong plastic trim tool. Lever the pipes out of the clip rather than the clip off the pipes if that makes sense.
Last time I checked, pre-made brake pipes were still available from Mazda for not much dollar, making it a nice neat job.
Thank you for that. I have already bought copper pipe and I think I will need it. Those 2 x 10mm bolts are rusted on; one has come undone and can probably be removed, the other will probably snap off. If I can relieve the pipes from the clips as per your suggestion, I will probably thread the copper pipe through with the clips in place. Hoping to lever back into the clips.
What a Job!
There were 6 clips holding fuel pipes and the brake pipe. Four had very corroded 10mm bolts. They all had to be undone and the brackets removed to allow the old pipe to be taken out and facilitate the new one being fitted. I made up a wooden yoke to push the brake pipe out of the brackets. Brace the brackets first with a wide chisel and then tap the yoke down on the pipe with a hide hammer - worked well. It was correct to advise purchase of the complete pipe as this would have been much easier to fit. As I had copper pipe and already, made up the pipe using the old one as a template and fitting was reasonably straightforward. Reassembling to the clips was fiddly, had to tap a couple with the hide mallet where they came off the fuel pipes. Locating and refitting the four bracket mounts was also quite tricky.
I think my advice to anyone else needing to replace this pipe is to pay someone else to do it!

