I’ve just fitted some Eagle Eye LED DRL’s to my MX-5 Mark
3.5 and I’ve put together this guide, with acknowledgments to the other write
ups which gave me a head start.
Wanting to have an installation that could easily be removed
this installation does not involve any modifications to the vehicle thus if
removed it would return to the original state.
The primary challenge is finding a suitable power supply.
Most DRL control modules require an ignition positive feed and a positive feed
from the lights, together with an earth. In this situation I wanted the DRL’s
to stay on with the sidelights but go off when the headlights were on.
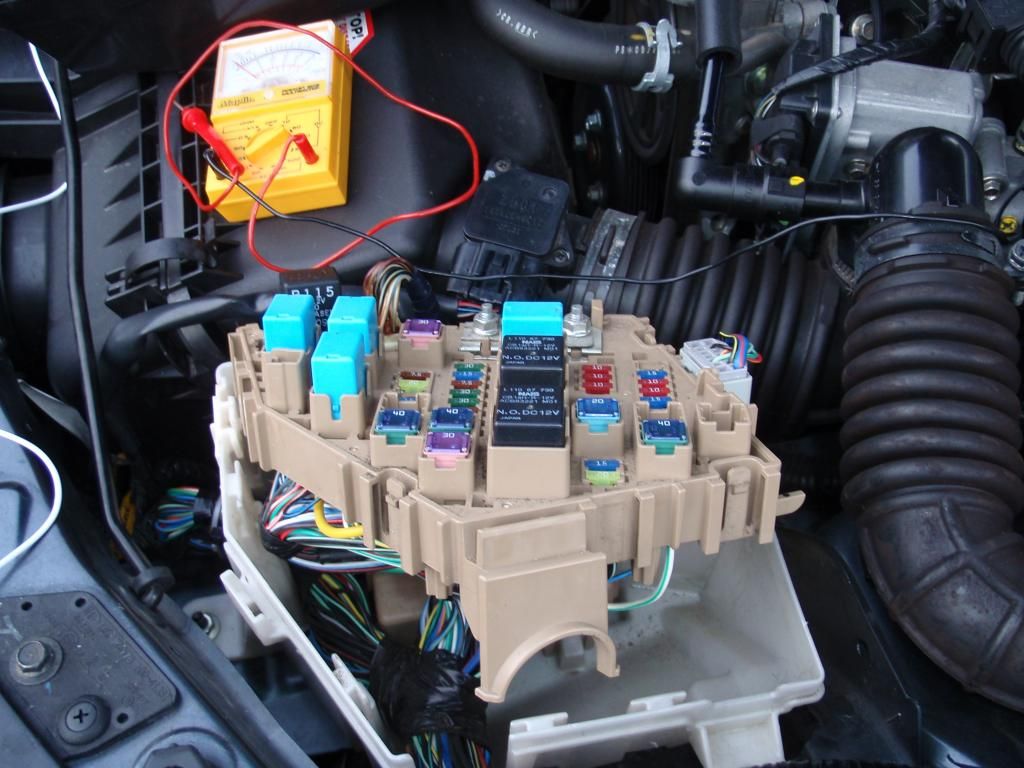
The easiest place to take the power supply from is in the
engine compartment main fuse box. Remove the black cover, and then free the top
fuse tray by undoing the latches around the periphery.
There
is no need to undo the two bolts connecting the positive supply to the top
tray. However these cables do restrict the movement of the tray so to increase
the accessibility loosen the cable retainers for these 3 cables.
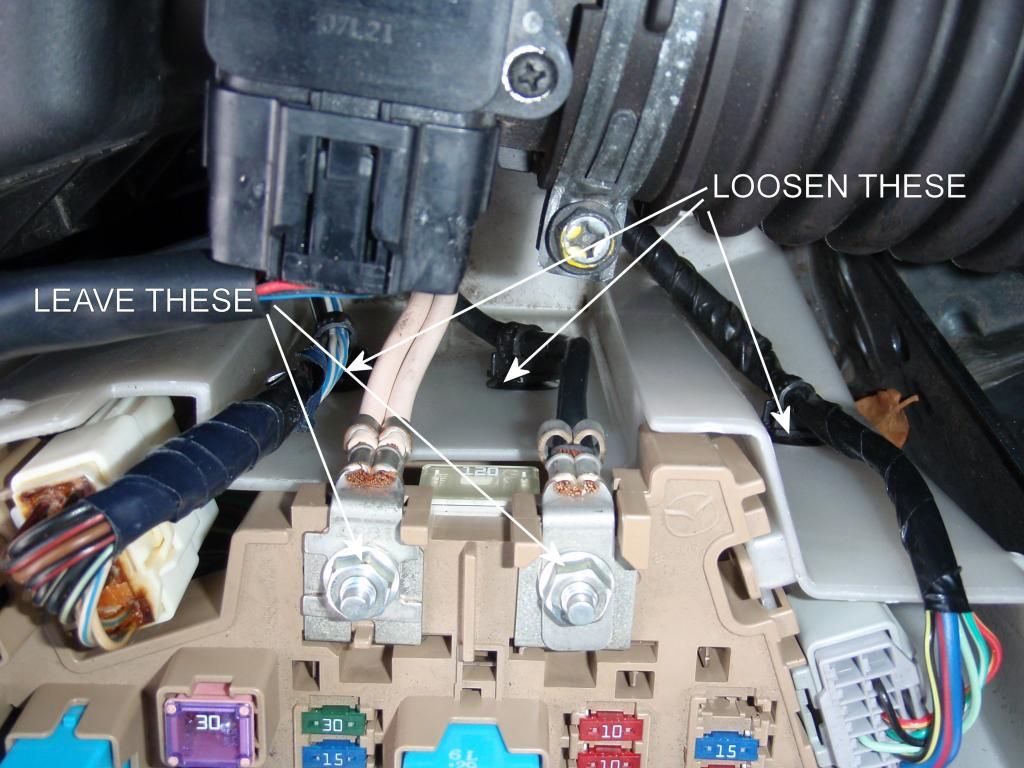
With these free the whole tray can be swung up to expose the
underside.
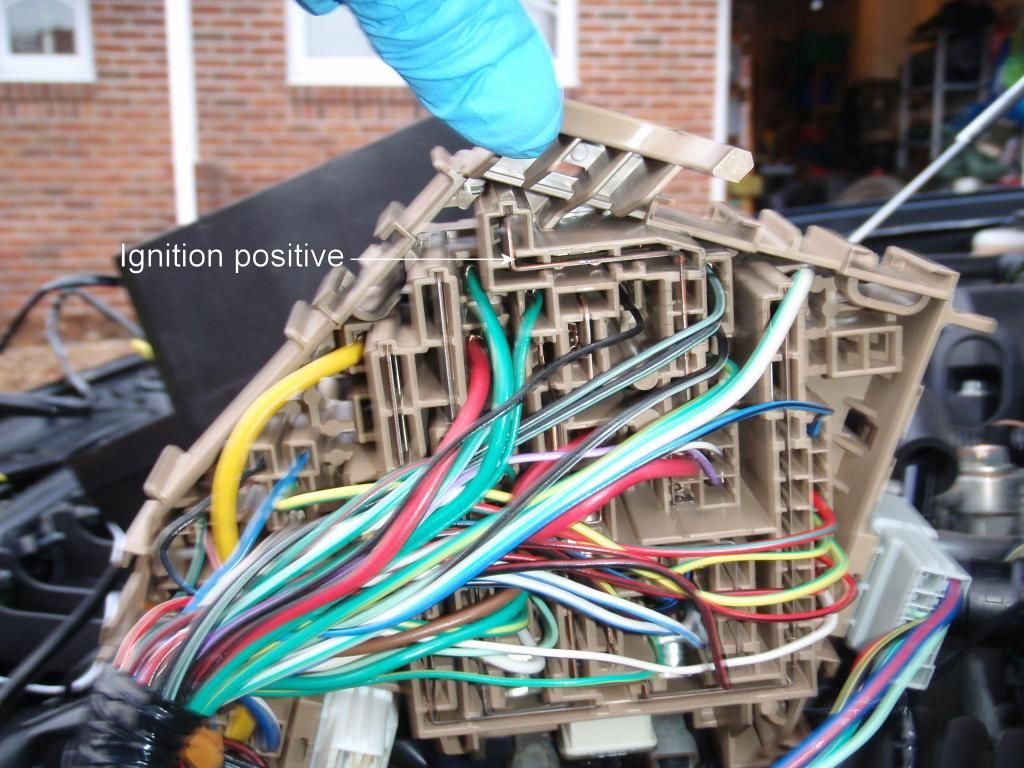
Two power supplies need to be found. The ignition positive
bus bar is highlighted below:-
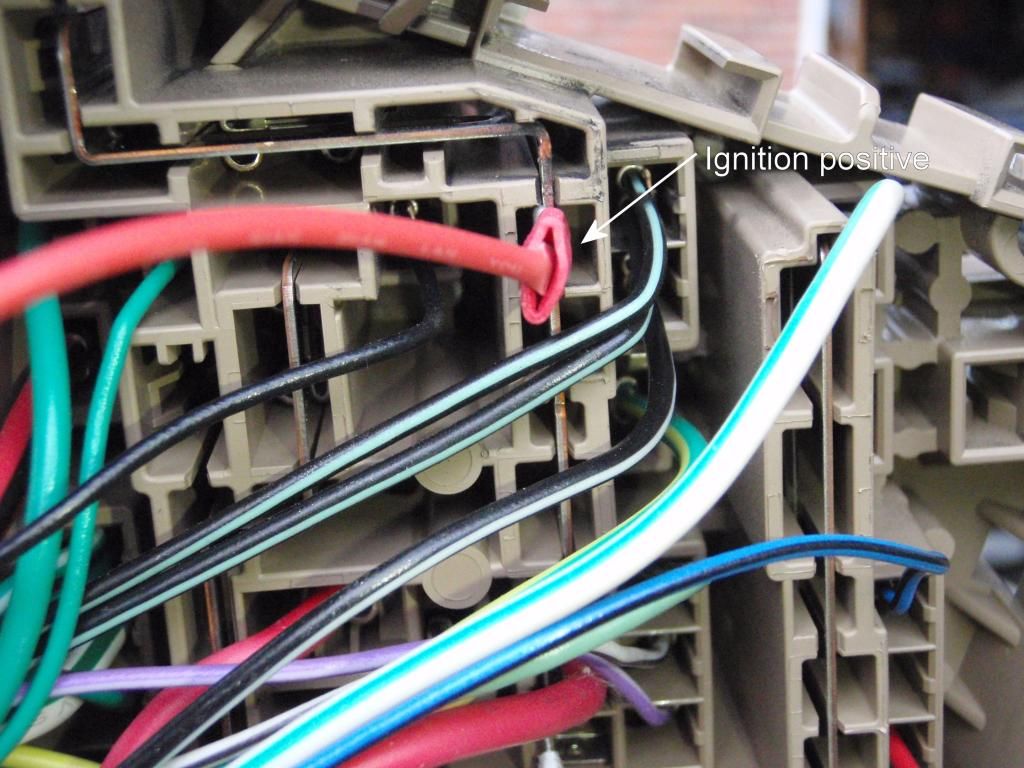
As there is no spare fuse slot connecting to this bus bar I
took the power supply from this side. A flat blade terminal connector can
slide, with some firm pressure, alongside this bus bar without damage - red cable in the image.
The next positive power supply is for the headlights. There
is a smaller bus bar supplying power to the 3 headlight fuses.
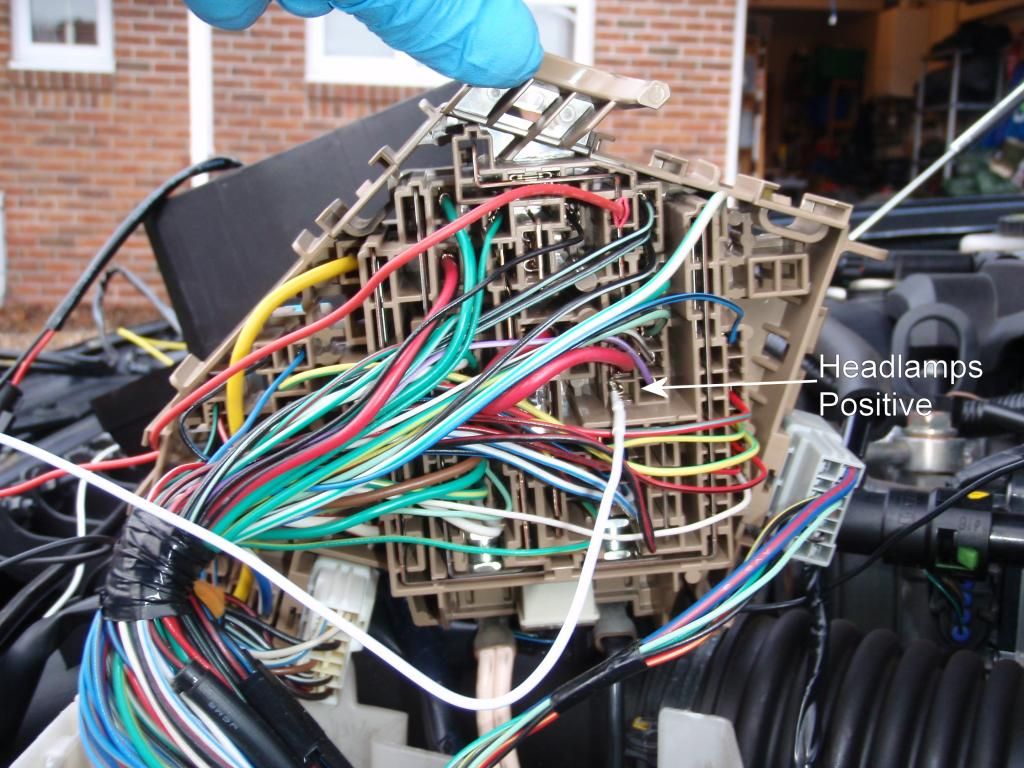
The red cable is connected to the 2 fuses either side so
that all 3 fuses are supplied with a positive feed when the headlights are on.
Again a flat blade terminal can be slide firmly alongside the bus bar - white cable in the image.
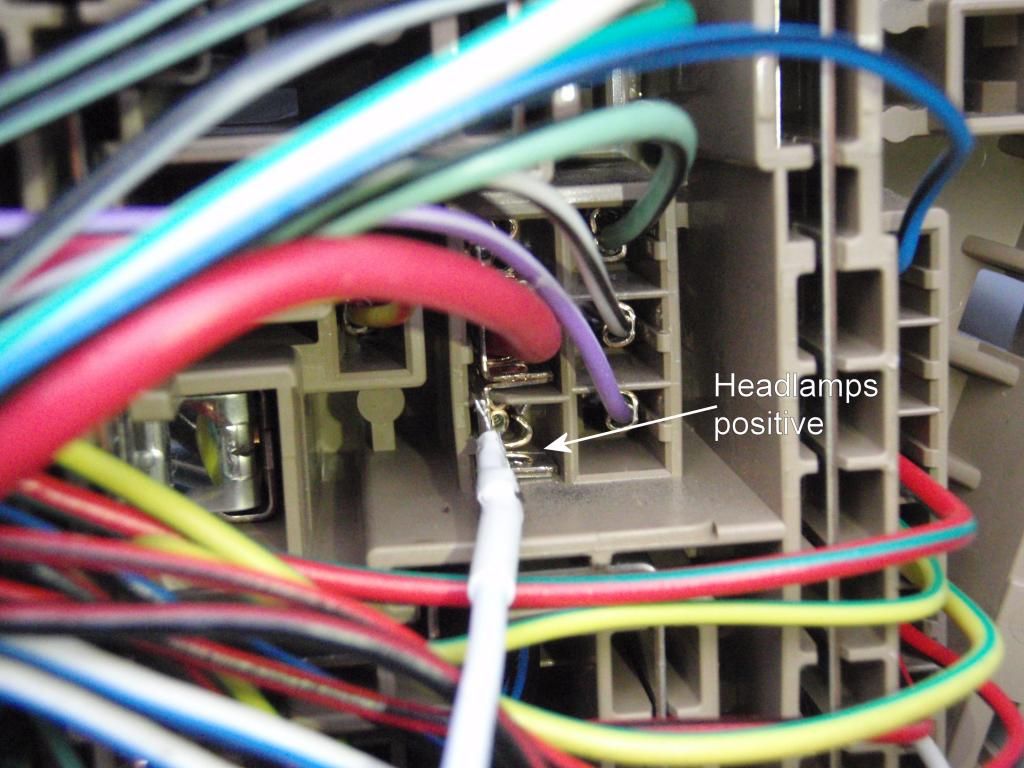
Both of these connections are firm and would take a pair of
pliers to remove.
The final connection is for the earth. The nearest earth
point was the bolt holding the fuse box compartment.
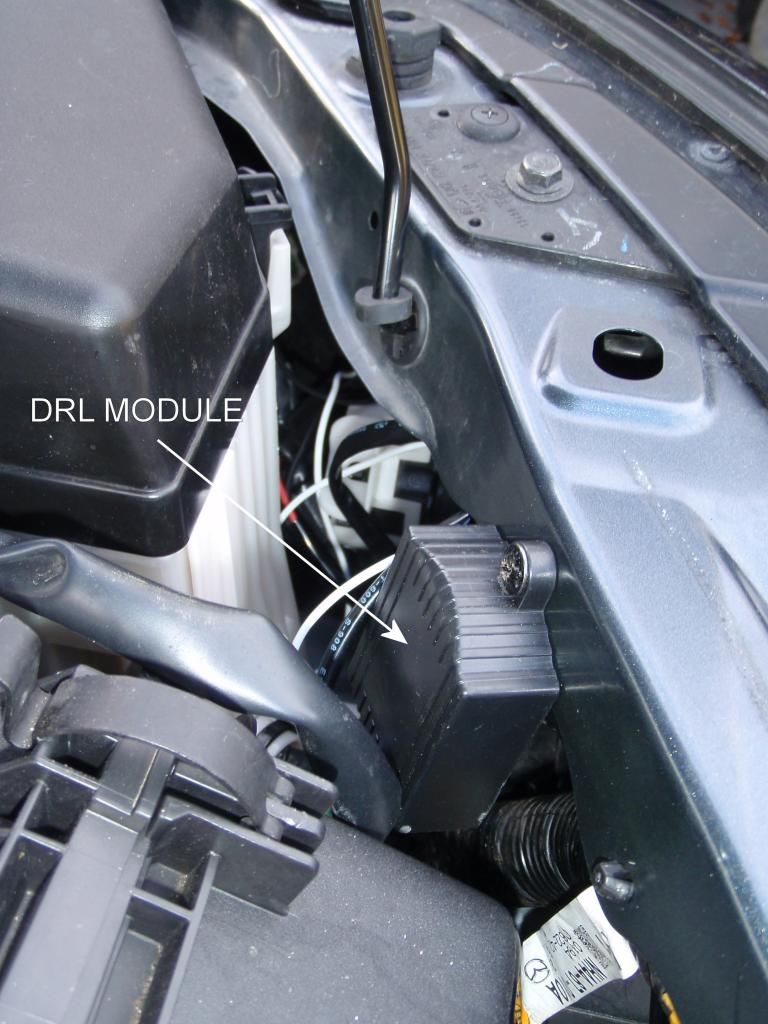
The new red, white & black cables all exit the fuse box via the same exit as the main cable bundle, with the DRL module being mounted outside of the fuse box.

The DRL module itself was fixed to a spare hole in front of
the main fuse box.
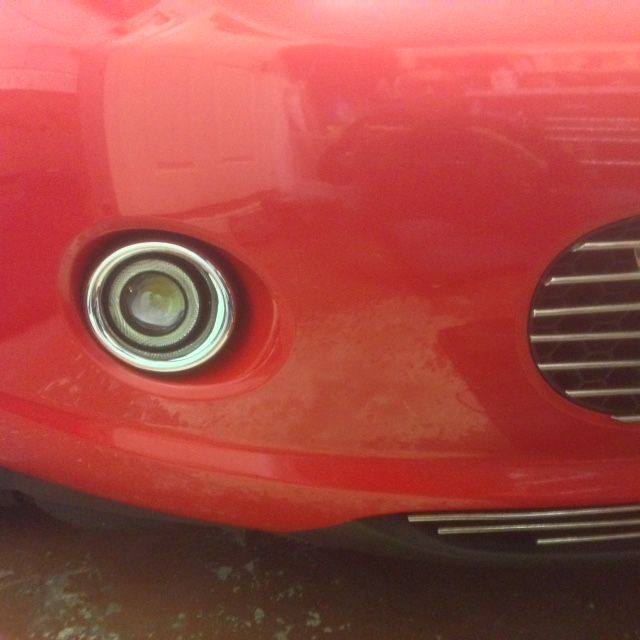
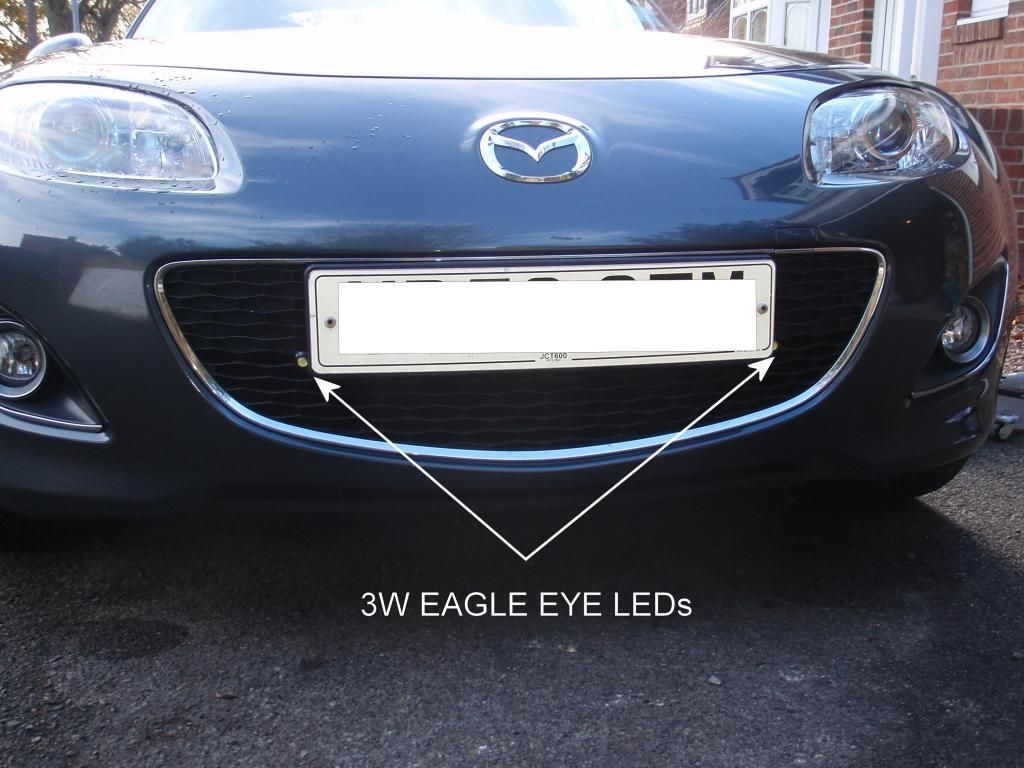
Finding DRL’s to suit the front of the Mark 3.5 and look
discrete has been a challenge. I fitted two 3W Eagle Eye LED’s either side of
the license plate holder, bolted through the grille so no drilling was
required.
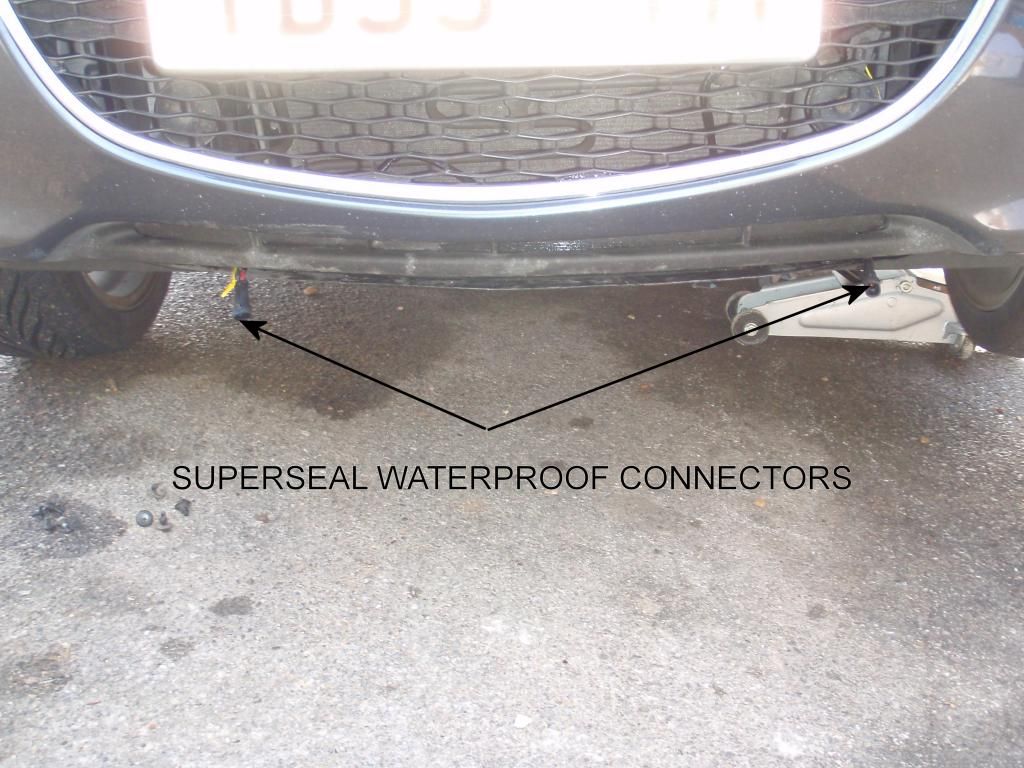
The cables to the LED’s from the DRL module drop vertically
downwards (shine a torch up from below to see the space) into the space behind
the front bumper & grille.
To access this area the plastic guard will need at least
loosening where it meets the front lower bumper.
I used AMP Superseal waterproof connecters, wiring tucked up
behind grill.
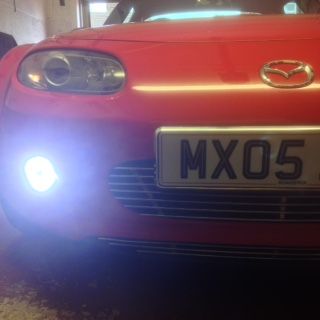
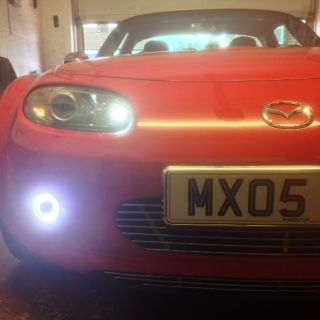
Final result:-
When lit they are much brighter than in this photo (taken
with a flash):-
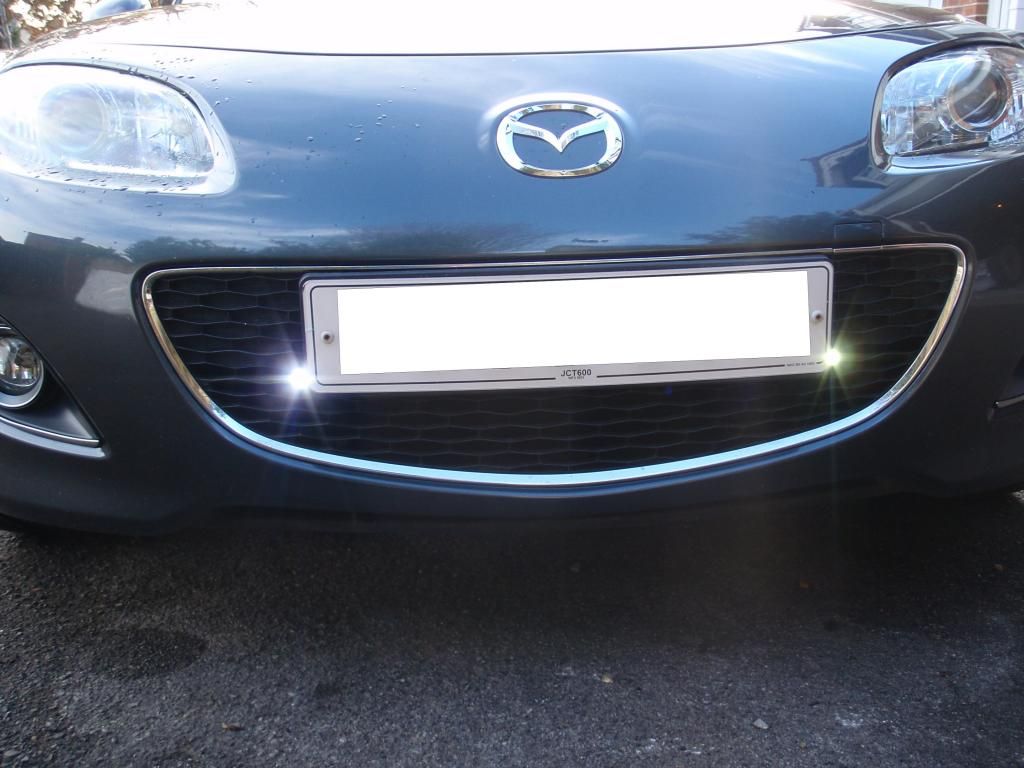
Hopefully these will increase the visibility of a small grey
car!