I’m looking for technical help or recommendations on: Wing replacement
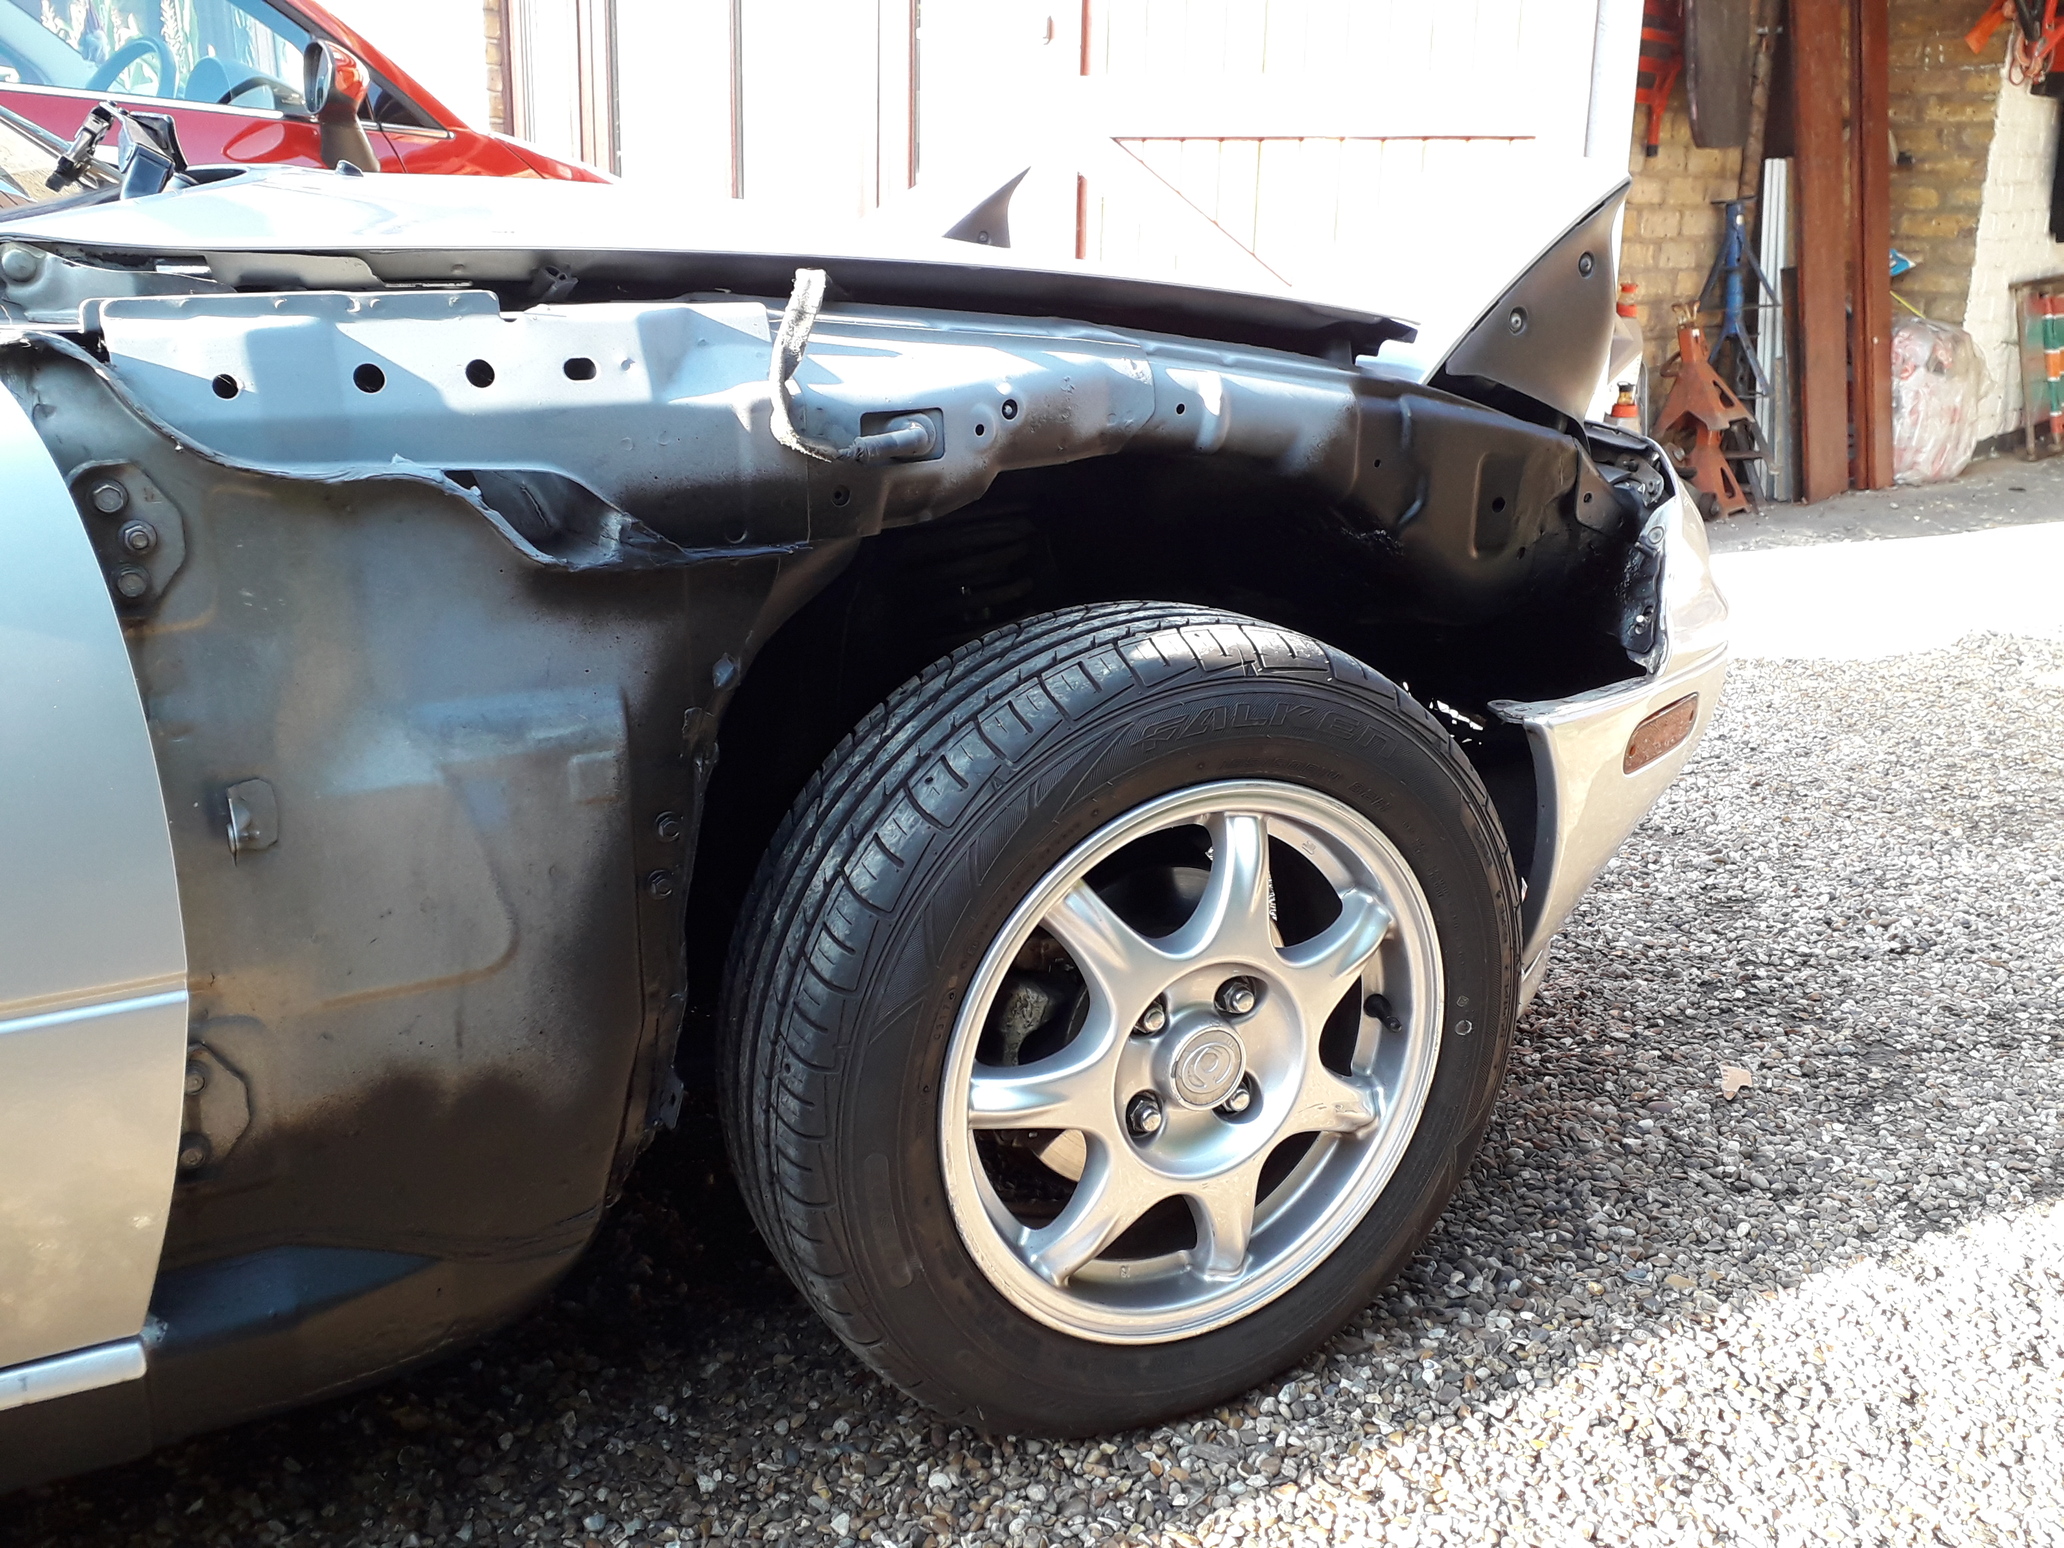
If the weather holds, I’m planning to fit a replacement passenger front wing on my NA this weekend.
The bottom of mine is rusted, and managed to pick up a good 2nd hand one. I’ve painted the bottom edge as I thought it was easier to do off the car.
I plan to spray any bolt I can see with wd40 tomorrow to hopefully let it soak a bit
I’ve watched a couple of YouTube videos which make it look far too easy
I think I’m ready, but welcome any hints and tricks from others that have done it before
Hi, recently replaced my RH front wing. I estimate that at least 50% of the bolts sheared off! Be prepared for that. Other than that, make sure that you take enough bumber bolts off to give good access to the hidden bolt at the top front of the wing. It’s an easy enough job but also be prepared for some rust behind the wing at the bottom.
Hi Matt, there are a number of 10mm bolts along the top of the wing, these come out fairly easily.
You have to remove the wing liner and there is another bolt half way down the
A-pillar which can be problematic and awkward to reach, you need long extension on your ratchet.
There are two bolts at the base of the wing on the sill and these rust into the captive nuts inside the sill. I ended up grinding mine off after they started to rotate. You then have to find a means of re bolting these holes. If you need help I can explain in detail but it required the use of a lathe in my case.
Finally there is a wing brace at the front of the wheel arch that needs unbolting and two nuts if I remember correctly that join the lower edge of the wing to the bumper.
It is a bit of a faff separating the wing from the bumper and some books recommend removing the bumper cover to make it easier.
Think that’s all although from memory the front top wing bolt is also fiddly due to restricted access.
I bought a bag of 10mm stainless bolts and nuts and replaced all the bolts etc and the two sill bolts will benefit from some washers between the wing and the sill to create a gap to allow mud and water to drain out.
Hope this helps, I have photos from mine if it helps.
Good luck
Dave
Thanks Dave - thats really helpful - not looking forward to those bottom bolts as its pretty much the lower 2 inches of the wing that has rusted away - so they aren’t going to be dry and pretty!
Had a look this morning while squirting the WD40 - effectively there is no wing metal left on the underside of the wing - just the 2 bolts left securing nothing.
The washer idea is good to avoid future build up.
The replacement wing had a little surface rust on the inside so i scrubbed that back with a wire brush and added some kurust and a coat of hammerite smooth as its not going to be seen, just to give it a little protection
Hi Matt, sorry just seen your update.
I doubt the WD or anything will loosen the bolts and brute force will probably just pull the captive nuts loose, it did with mine…lol
You could try a little heat from a gas torch if you have one or failing that grind off, drill out and re tap depending on your tool kit.
The washer idea works to a point but too many and the wing does not line up with the A pillar.
You should also find spacers under the top wing bolts to align the wing and bonnet.
As I said I would go the stainless route, these bolts are not really structural after all.
Also worth cleaning up any rust on inner wing whilst you can get at it all as I am sure you have already considered.
Keep us updated
Dave
Hi Grandad, I took mine off when I got the car 6 years ago to inspect and rustproof the inner wings, The first side took me ages working out where the bolts/nuts are and then getting some of them out. The second was much quicker, we learn by our mistakes and I had the satisfaction of knowing that all was sound under there.
The third time after a full respray and someone clipped my newly painted car. it was even quicker as I knew where the bolts were and being S/Steel and greased it was a doddle.
Dave
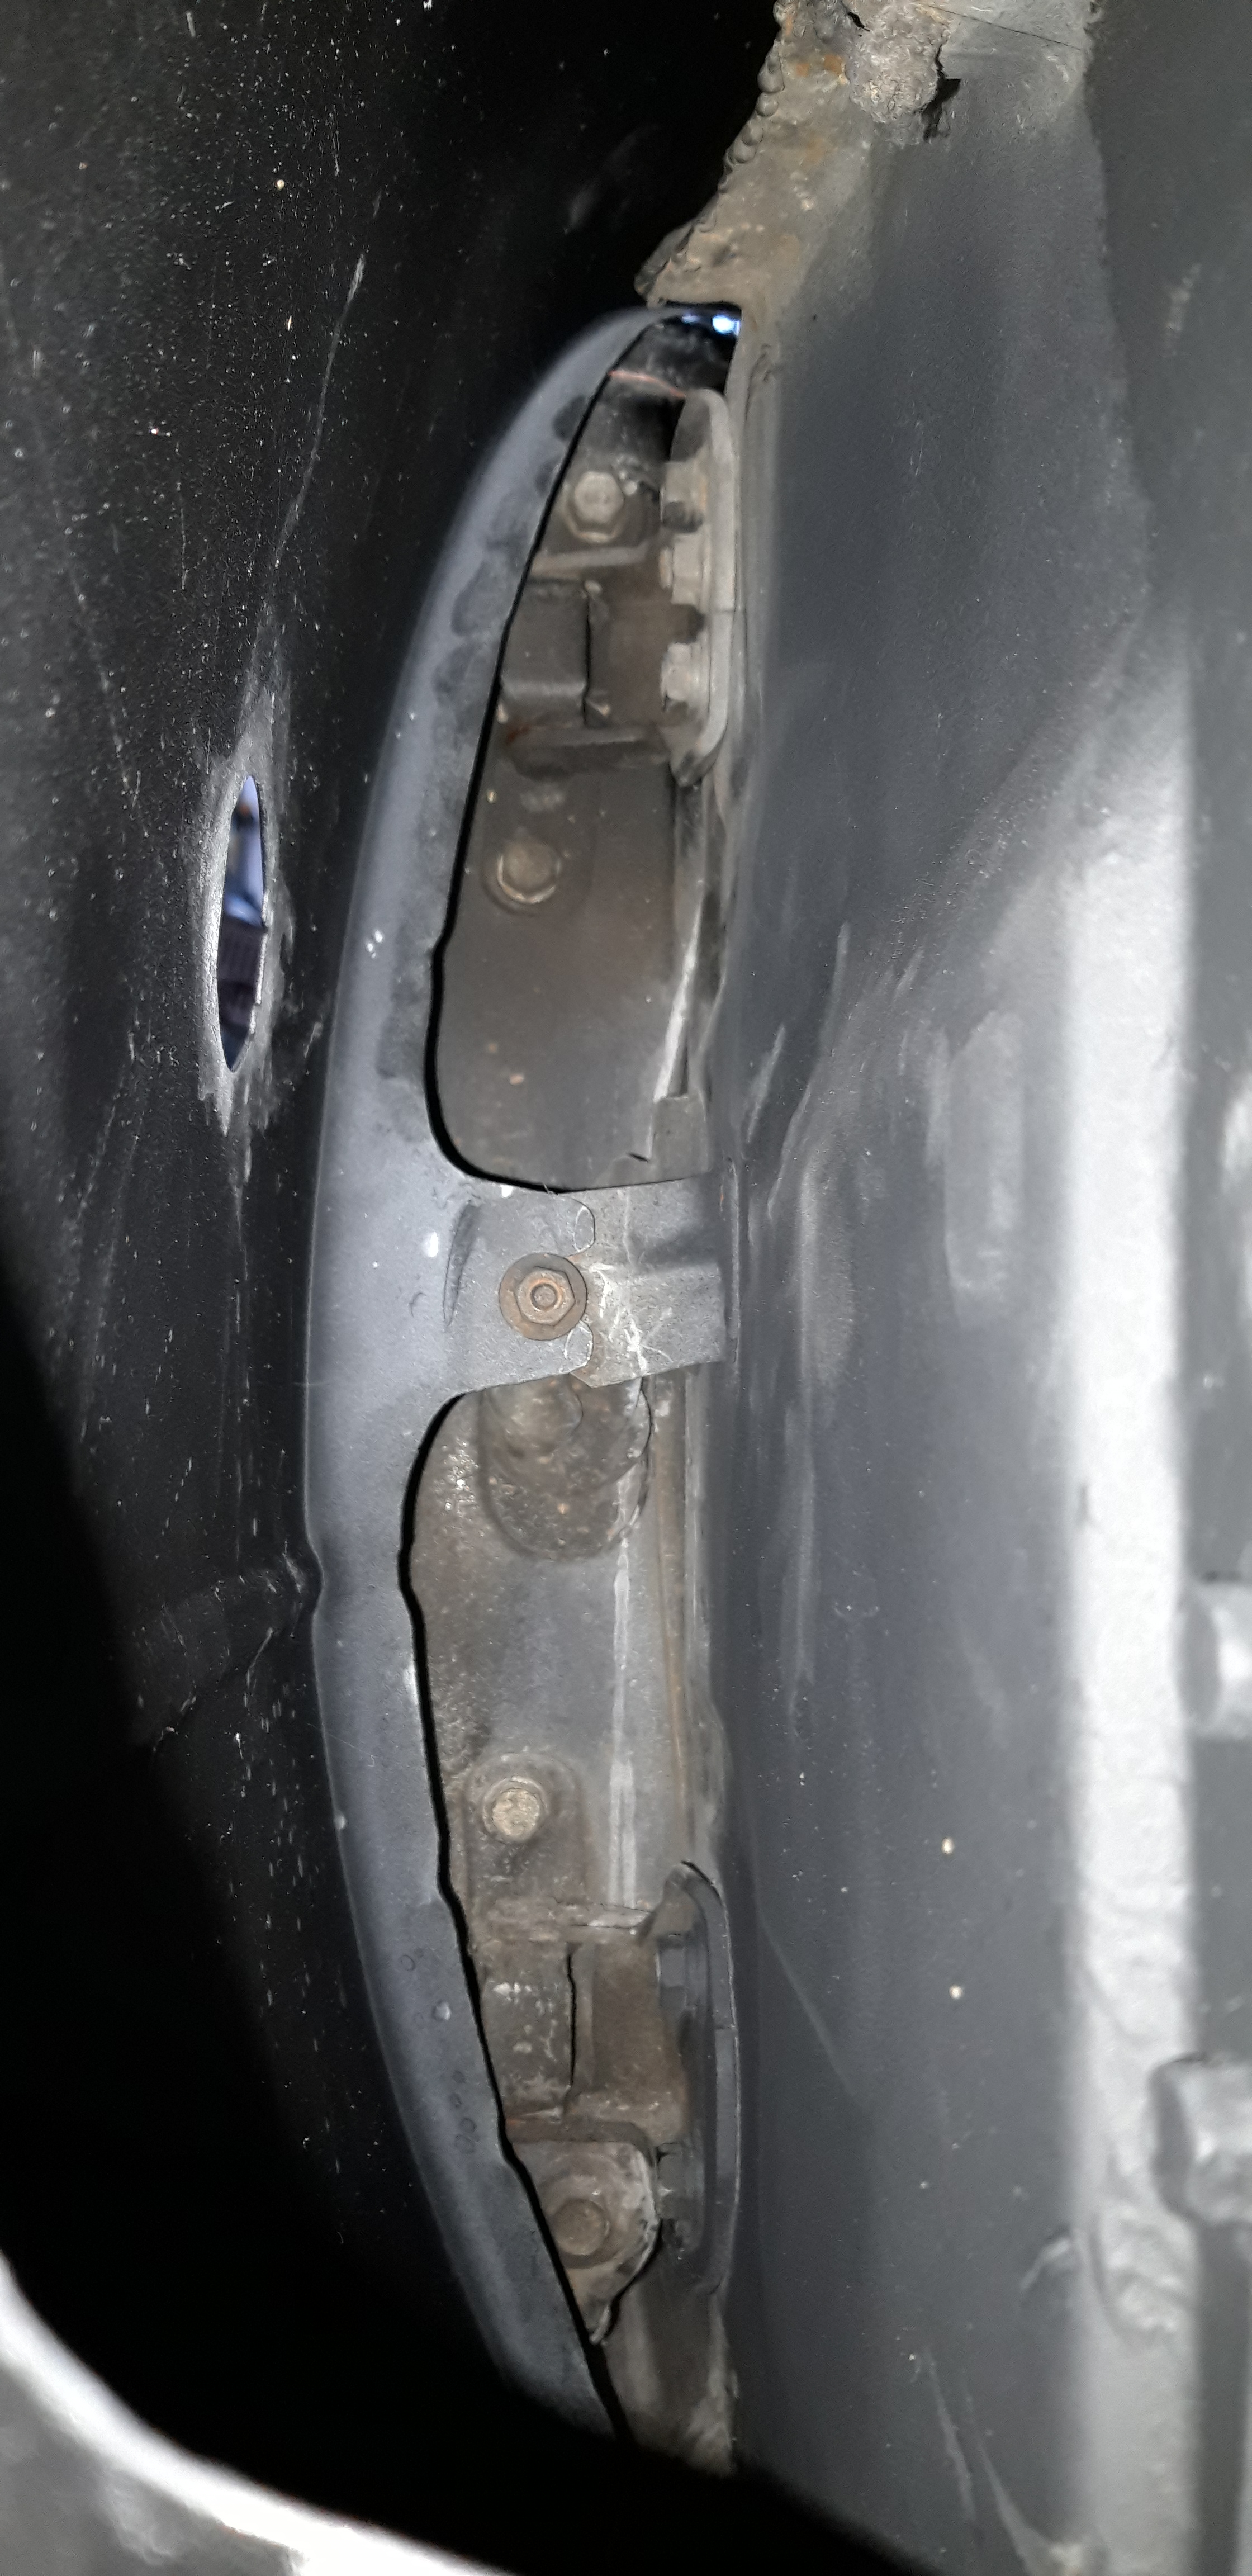
I’m currently replacing a wing on my NA after a slight altercation with a downpipe in the garage. I’m having a slight alignment problem and trim line on the wing seems to sit low with respect to the door. Looking inside the wing the mounting point behind the indicator repeater seems to be angled downwards (picture attached hopefully). Does this look correct?
Have you replaced/inserted the washers under the top of the wing bolts. These align the wing with the bonnet and the area under the windscreen corner, and in doing so lift the wing slightly. Sorry I cant align myself with the photo but if a s/hand wing has the tab been bent slightly? Just a thought.
Good Luck
Dave
Hi Mike - looks like that tab has been bent slightly as Dave suggested, mine was square to the car when i replaced it.
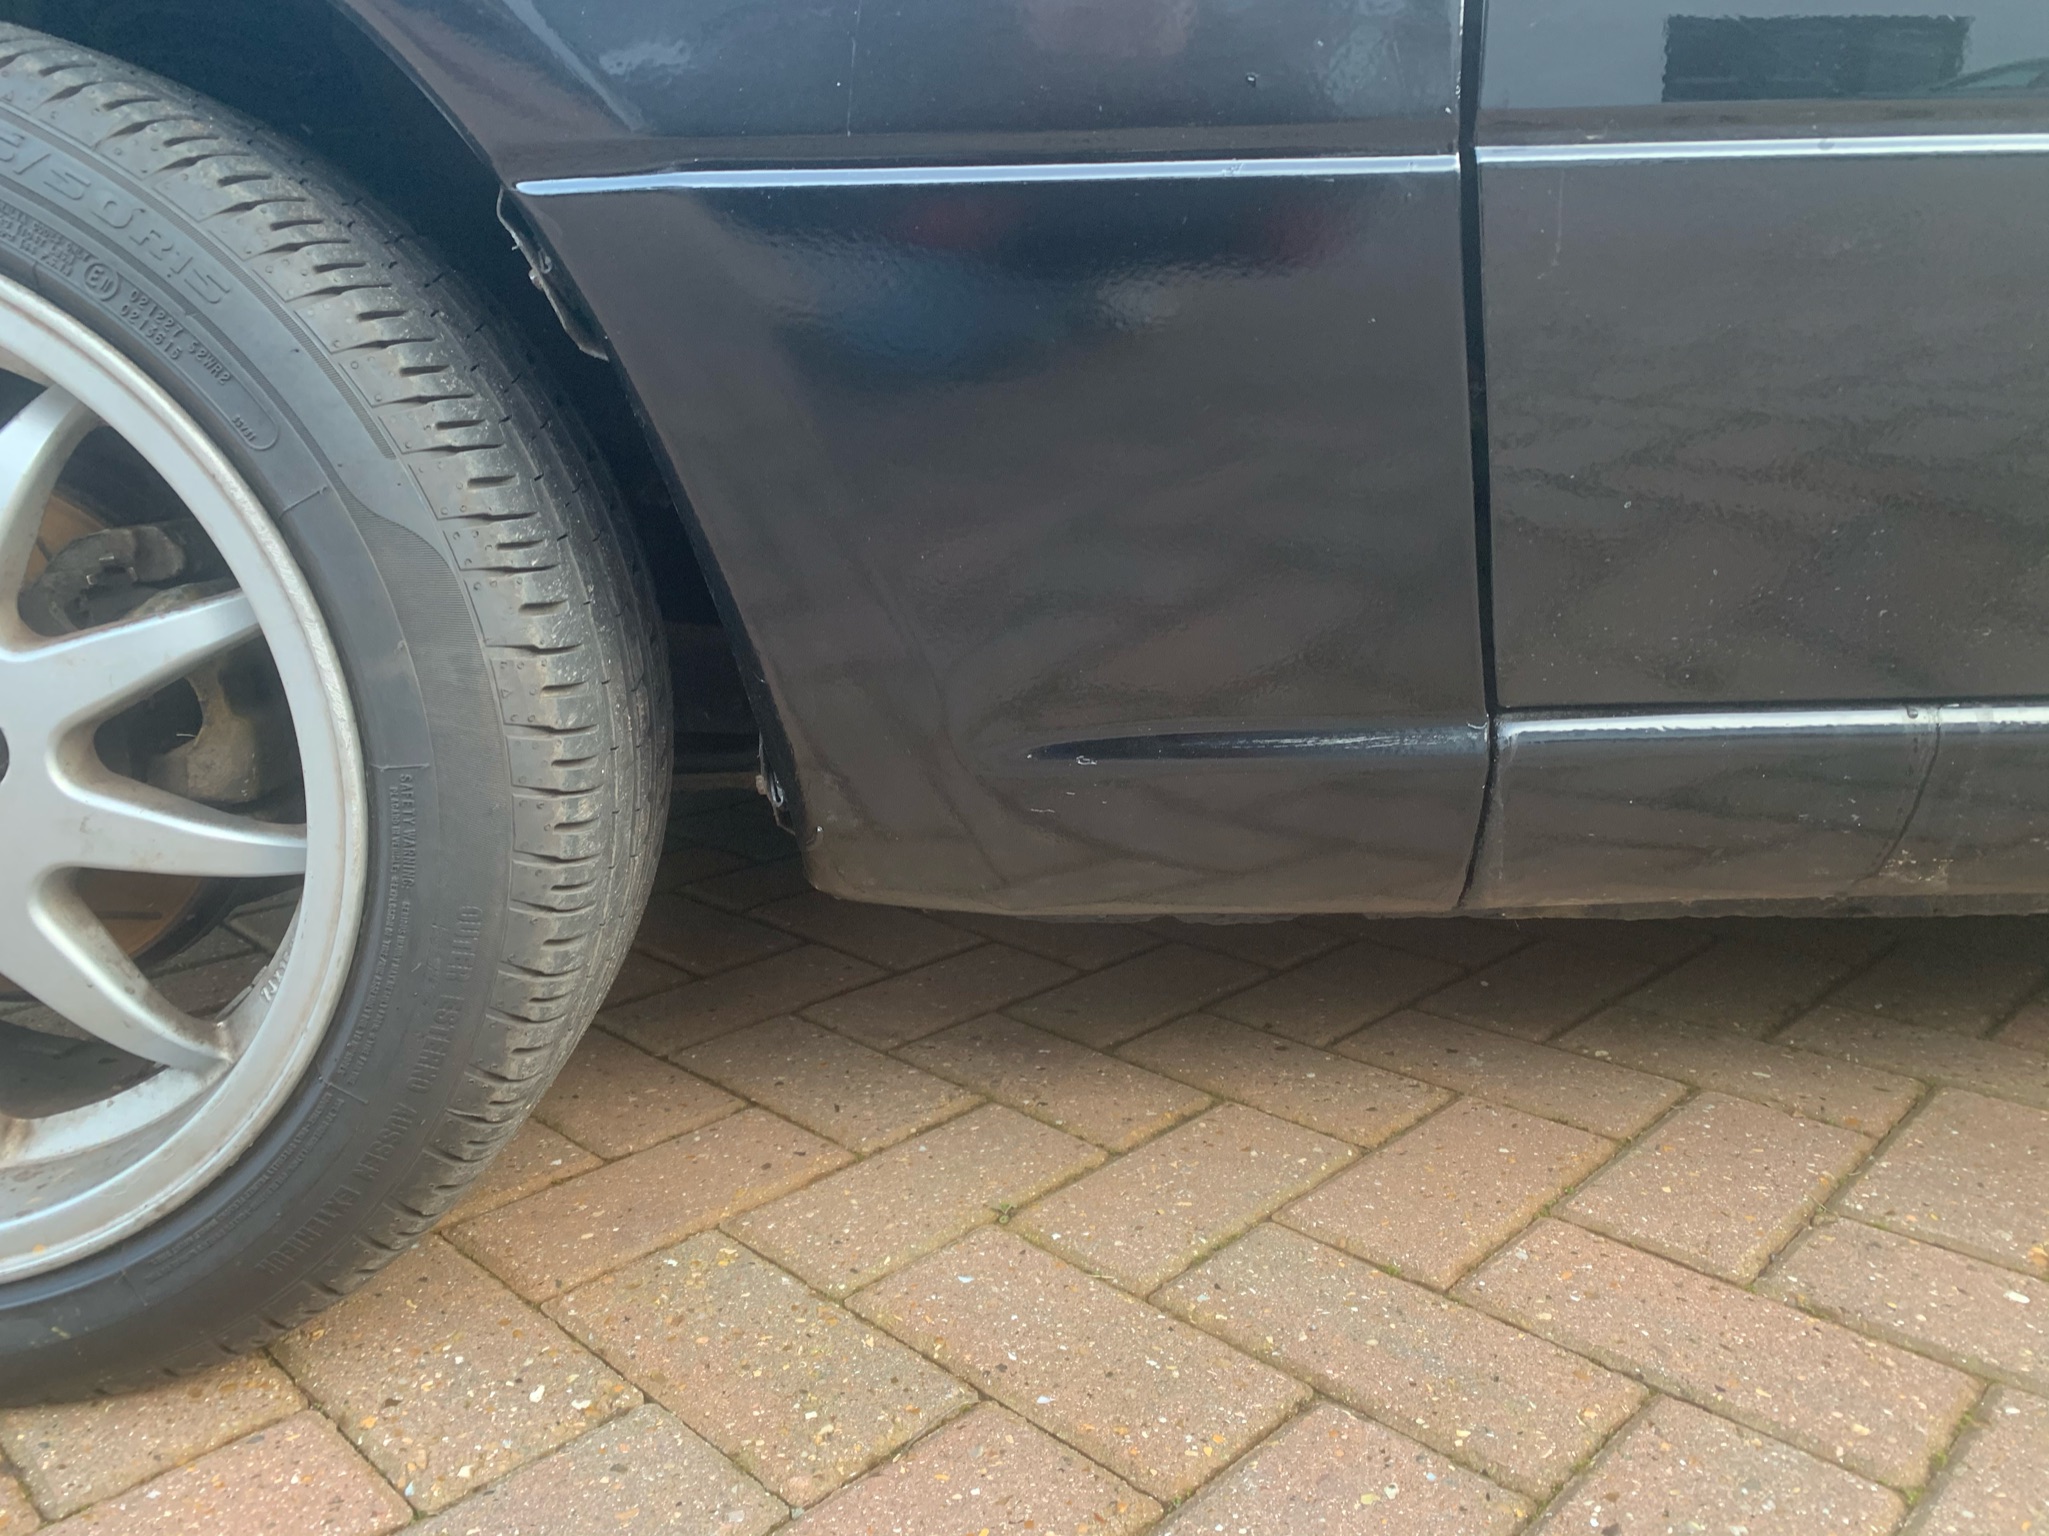
Although i still have a slight drop in the swage line between door and wing as you can see in my after photos. I’d lost my sense of humour by this point so was bolting it back as it stood - i need to add another washer on the top wing bolt as its very slightly lower than the bonnet line.
Hi Dave, interestingly my car didn’t have any washers under the old wing, which I think was the original fitted to the car, I’ll have a look and see what happens. I’m going to try and get a picture of the other side of the car.
Thanks
Mike
I know what you mean about the sense of humour taking a break, it’s driving me (and my inner attention to detail) mad. From what you’ve said it does look like my tab on the inner wing is bent as it isn’t square. I think a combination of gentle persuasion and washers is called for
Thanks
Mike
Just to close off my question - I managed to ‘gently persuade’ the tab back up to be square to the inner wing using a long bar. The wing now lines up nicely