Valve Cover Gasket Replacement
Oil in the plug holes, or leaking down the engine sides, you probably need a new cam cover gasket.
It’s worth buying a genuine Mazda part B61P – 10 – 235. Mx5 parts stock them at
http://www.mx5parts.co.uk/product_info.php/products_id/240
And Autolink do them as well
http://www.boundville.co.uk/camrocker-cover-gasket-mx-5-16-mk1-130-p.asp
In order to complete the job, you’ll also need a high-temperature silicone gasket sealant.
When everything is ready, just go through the following procedure….
1. Disconnect the negative terminal from the battery in the trunk. You’ll later be removing a series of electrical wiring as well as the PCV Valve, and it’s best to not have any “juice” in the system.
CAUTION! If the radio in your vehicle is equipped with an anti-theft system, make sure you have the proper codes to reactivate it later!
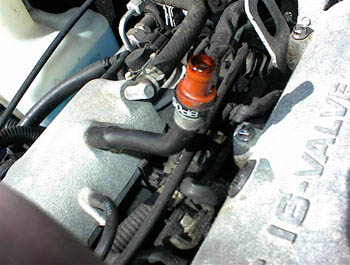
2. With a firm grip, remove the PCV Valve and the breather hoses. You may also want to disconnect any electrical connectors near the rear of the crankcase.
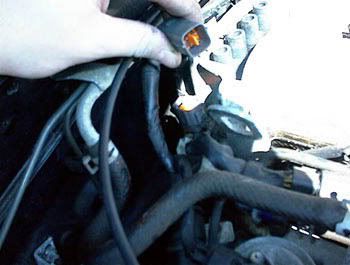
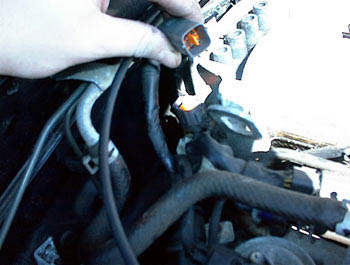
There were two I needed to remove. One on the left, one on the right; both in front of two bolts needed to free up the rear of the valve cover.
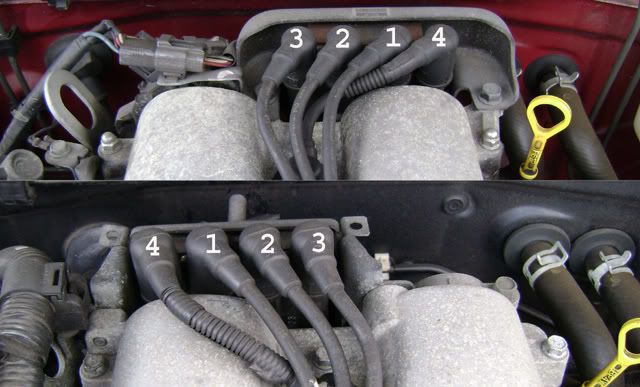
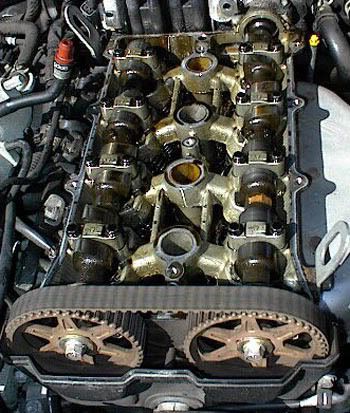
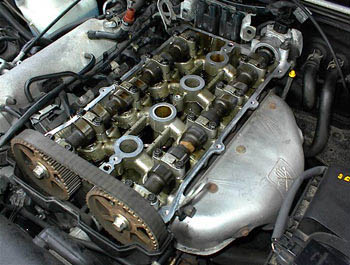
3. Remove the spark plug wires completely but make sure you label them (if not already labeled) so when you reconnect them, you will maintain the proper firing order. [Top pic 1.6, bottom 1.8]
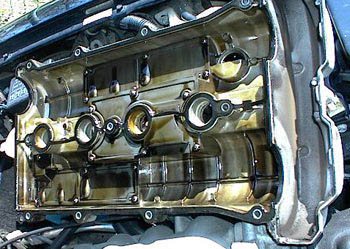
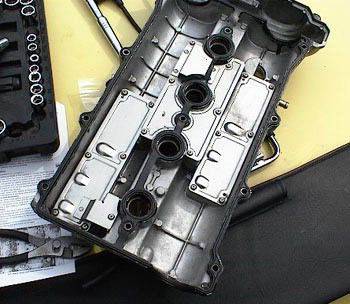
4. Remove the bolts securing the valve cover, and lift the cover from the engine.
5. Remove the existing gasket and sealants that may stick to the cover or the top of the crankcase. Use a non metalic scraper for this job, so as not to damage the joint face.
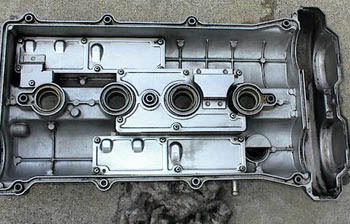
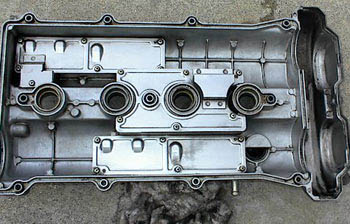
6. Depending upon the mileage of your car, the cover will most likely appear to be quite dirty. It is best to completely clean the cover with the utmost care and completeness when cleaning the groove where the gasket goes. I purchased some gasket remover, but found that brake cleaner was by far the best way to go along with a toothbrush or non-metal bristled brush. Verify that the grooves on the cover are completely free of oil, water, and other foreign material.
7. Install the gasket into the cover.
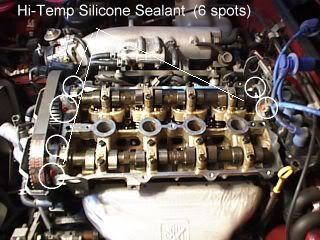
8. Apply high temperature silicone sealant to the corners where the cam bearing caps and crank angle sensor cap meet the cylinder head.
9. Put the Valve cover back onto the crankcase being careful when aligning each piece. Hand tighten the head cover bolts.
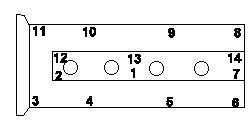
10. Using a torque wrench, tighten the bolts in the order shown.
Torque bolts to 43 - 78 inch-lbs.
11. Reconnect all electrical wiring and battery.
12. Run the engine and check for any possible leaks. Hopefully there aren’t any, and if not, you’re all set.