Reassemble your old seats (with spare zip ties), someone will have them.
Reassemble your old seats (with spare zip ties), someone will have them.
Damn, I don’t have the time to rebuild them then try and sell them Saz . Plus the metal buckets/seat base are rotten with rust to the point they’re really weak. I cut a huge squar of vinyl from the rear of them too to repair the tombstones with. Those recovered ones look sweet though! Still prefer the look of the tombstones though
That wheel!
Thanks mate! It’s a really nice bit of kit, very well made and feels nice to use. Not sure if the place has any left in 330mm but know they had 350/360mm same style. Can post the link if anyone needs it.
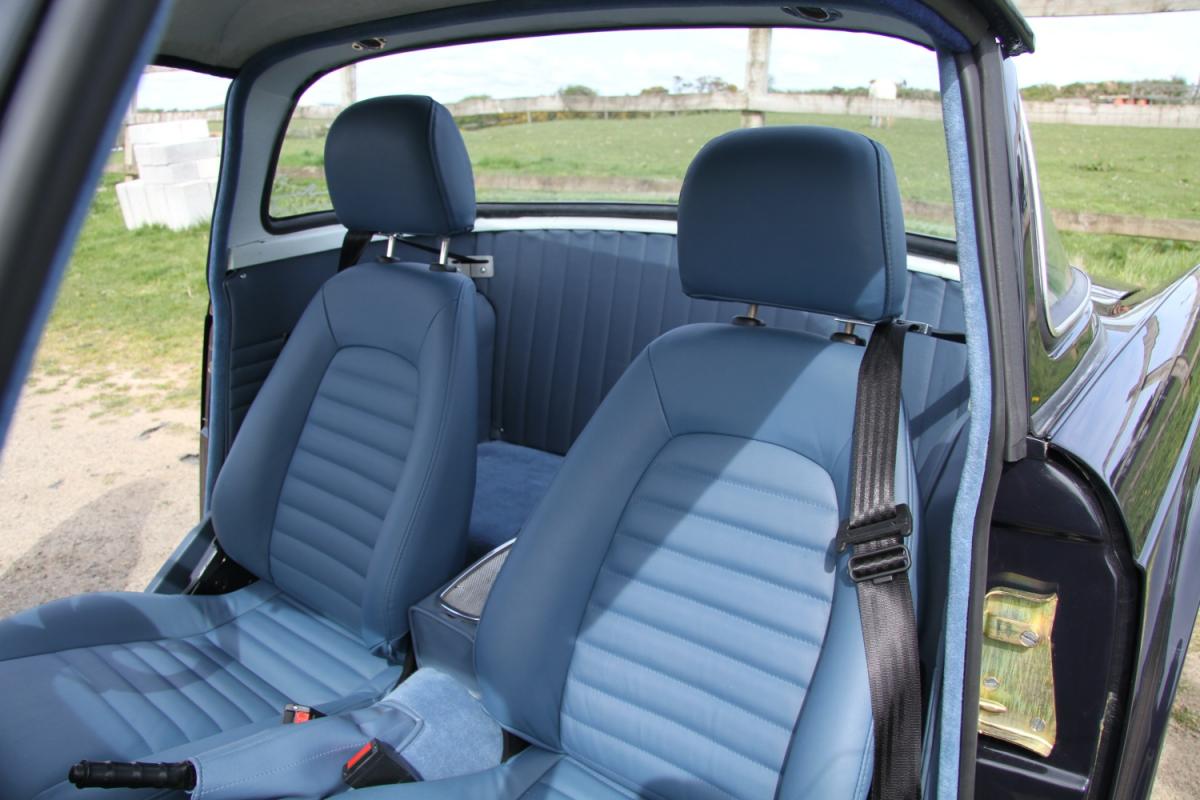
some recent photos.
Decided that it was time to source and replace the osr tail light on Mindy. It’s had a scuff mark on it since we bought her, and try as I might I couldn’t get it off. So found a replacement set of tail lights on Facebook from a Guy called Ric. Went through to pick them up and turns out he also has a red UK MK1 just like Mindy! Had to take a photo of Mindy and her new playmate!

Better pic of Rics MX5

Interior has everything I want to do to Mindy (and some of the stuff I’ve already done! Even the same stainless kick plates.!

So got the new light fitted and decided that even though I’d been told not to do too much manual work by my cardio nurse, it was time to give Mindy a proper detailing!. Washed, dried and then the following


Next, something arrived that I had ordered ages ago! Wood dash trim kit. Had issues as the first one that arrived was way to dark and would have looked wrong so that had to be sent back to supplier then had to wait on a replacement. This matched better, so got to work and got it fitted. Really happy now! Lifts the drab black interior I think and also makes the steering wheel blend in instead of sticking out like a sore thumb. Still to get the chrome surrounds for the heater vents but will add them later. Also still planning a custom radio install.


Hope you like!
Another thing that has bugged me about the mx5 is more of a technical one. The amount of times I’ve parked her somewhere and returned to find I’d left the sidelights on was getting beyond a joke! Only a matter of time before I returned to a flat battery, so decided to retro fit a lights on warning buzzer! Got a little video below of it working. The buzzer is an annoying tone, but it does it’s job as you want to turn the lights off as quickly as possible to shut it up! Works when you open the door if you’ve left the lights on.
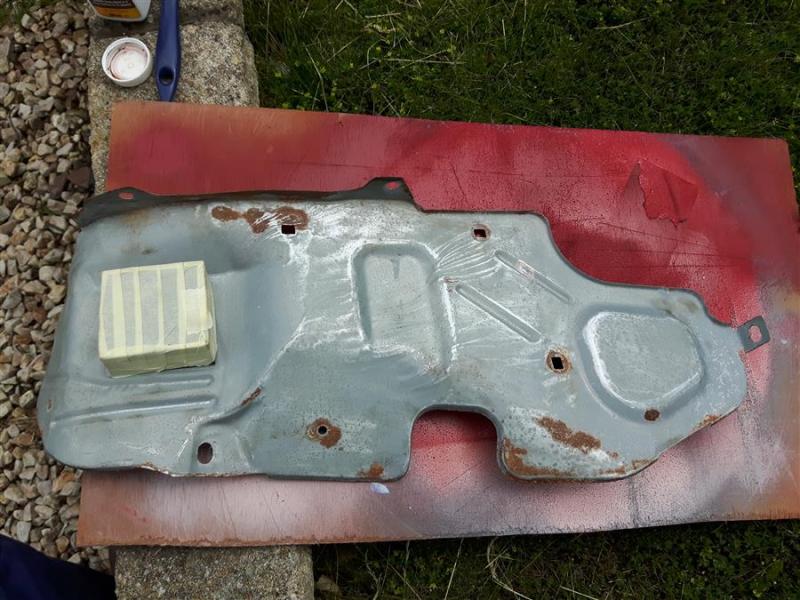
So, just a wee job done today! In the boot on the left side there is a metal panel that protects the fuel filler pipe. This is an unpainted panel, and as such has no paint to protect it so they rust. It’s covered by carpet so nobody really bothers about it but you know me, it was bugging me where you could see it through the carpet.
Off it came to get prepped. Sanded it done and treated any rusty bits.
Sanded down
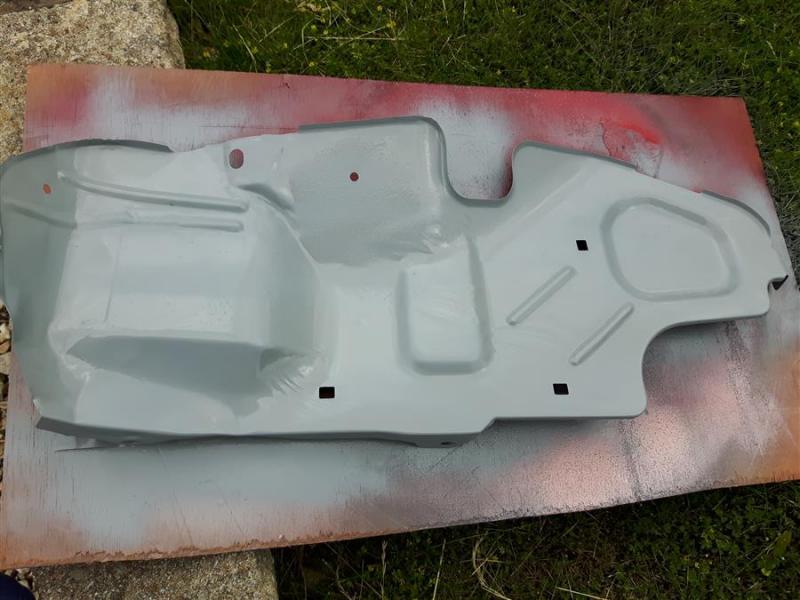
rust treated and then 3 coats of primer
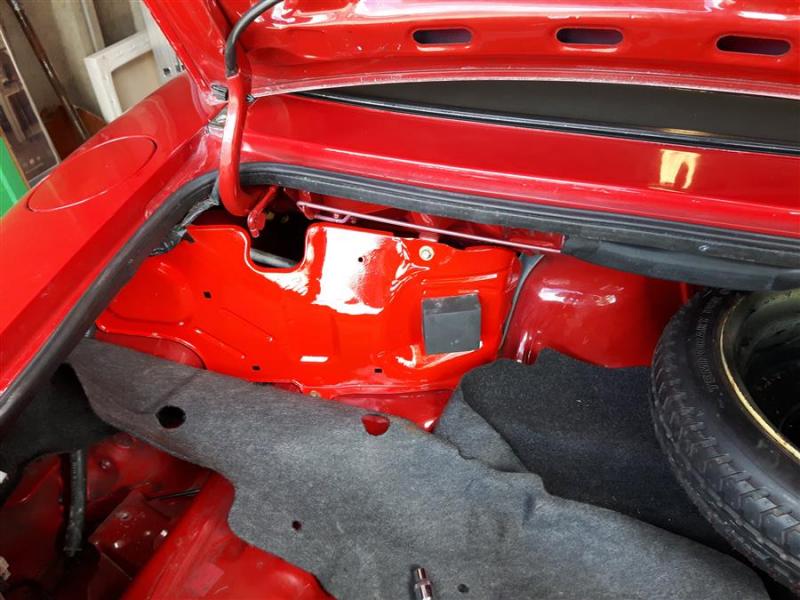
Then 3 coats of red and refitted to the car. This was before I put the carpet back in place. Just think it looks neater.
Oh, and a wee photo of Mindy and my Aerodeck (DD)

MOT is now out so she will be getting booked in for this Wednesday…fingers crossed!
MOT time today for Mindy, first one Ive put her through. Was litteraly bricking it as the 1st mot usually throws up things you cant really see/check when buying the car. Got the call from the garage…she flew through her MOT! One advisory on a very slight oil leak, but other than that mot tester said she’s in fine fettle. Relieved and pleased…all is good in Mindy’s world! Hoped to get her out for a run this weekend weather permitting, but I’m currently floored with a rotten cold.
Oh, and DD my Honda Civic Aerodeck also passed her MOT today, so she’ll be getting taxed soon and hitting the road. Very happy and both my girls have done me proud with their MOT’s
Great news on the MOT’s always a relief when they go through easily! Some effort going in too judging by your recent posts, just don’t overdo it? You, not the cars that is
Barrie
Thanks Barrie! Yeah, I’m behaving in the garage, not doing anything too strenuous but on saying that (apart from this stinker of a cold) I think I’m getting fitter than I was before the heart attack. Noticed since starting back to work I’m climbing the back stairs (my dept is on top floor so 3 floors up)every day, usually two to three times a day. I only used them occasionally before as it almost killed me every time! Now I get to the top and sometimes I don’t even feel out of breath (although not every time!) and my legs are fine so deffo seeing an improvement not only to after the attack happened but even before it. Just have to be careful I guess as overdoing it will inevitablly set me right back. Enjoying being back in the garage though mate, it’s where I belong!! And both cars have been treating me kindly recently when working on them, all bolts etc undoing easily. Got loads more work planned for both! Need to get my funds back up though!
Oh, and my wife keeps a check on me too when working in the garage to make sure I don’t overdo things. All’s good!
Hi Dave, so glad to hear all is going in the right direction Great to have a partner that cares for you too, bless her!
Barrie
Really been lucky, my first wife who passed away with cancer was a wee gem (and petrol head)and never thought I’d be happy again/have a wife who cared so much but my wife now Gayle is also a wee gem (and petrol head!! ) She’s been amazing and really does have my back always.
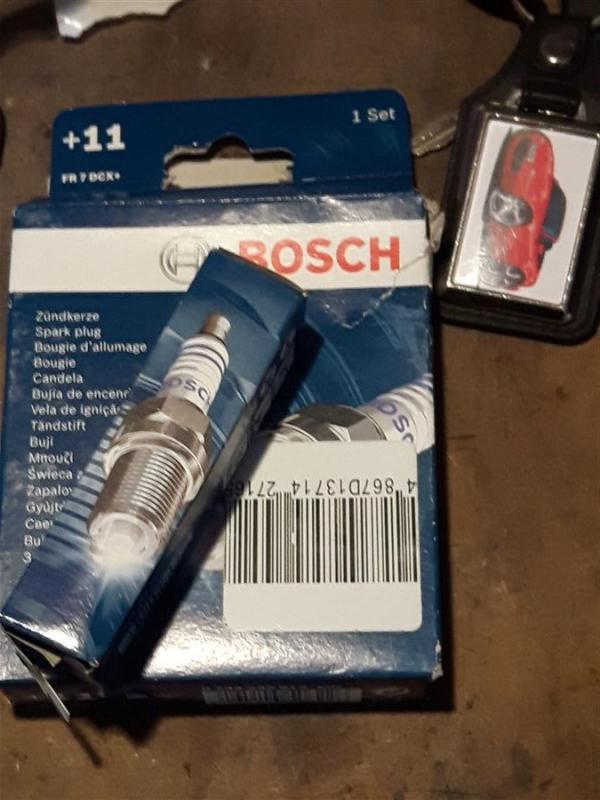
Bit of a problem developed with Mindy! Seems she has started a slight missfire under load at around 2000rpm and below. Have ordered an OBD (1) reader to see if that can trace the fault but in the meantime thought I’d check then replace her spark plugs. Got nice new ones as I couldn’t see any mention of them being changed in her history.
Got the first three fitted without any issues (old ones looked really discoloured although only one seemed to be burning wrong.) but the last one (typically the one against the bulkhead so hardest to get at) when taking the plug lead off, the rubber end came off and is stuck to the plug away down inside the hole. meaning I can’t get the socket onto the plug to get it out! Was going to be replacing the leads too, so with this one doing that seems a good idea to bin the old ones. I’ve added some photos below of the problem rubber.
How the lead should look:
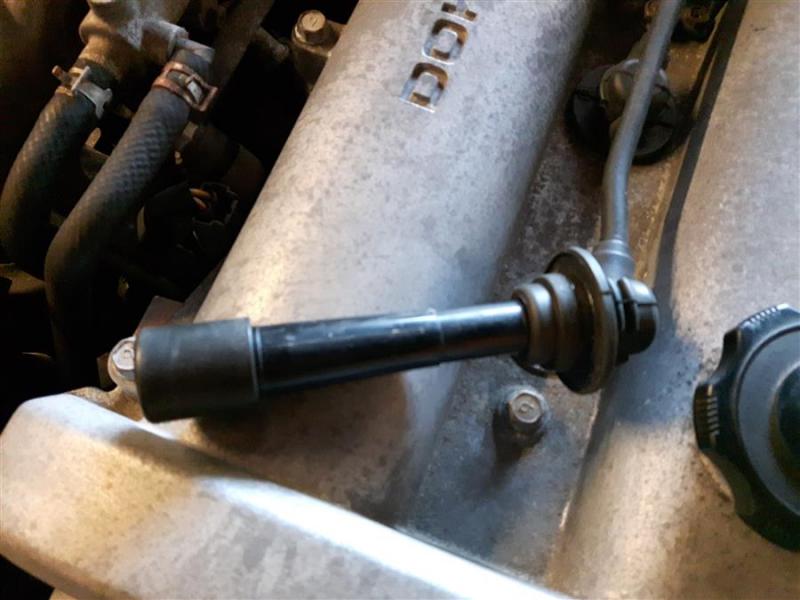
The big rubber bit on the end that seals around the plug is the bit that’s came off and is stuck onto the plug away down in the hole.
How the problem lead looks (shows rubber bit is missing)
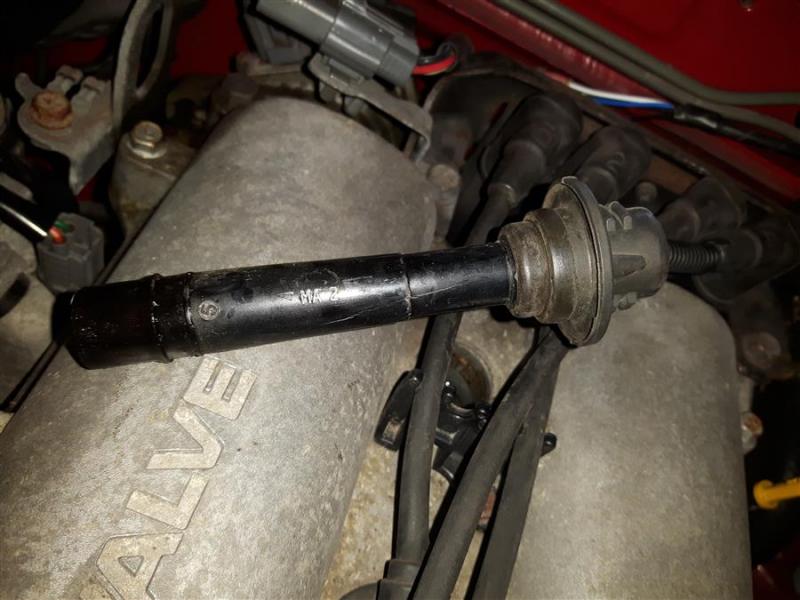
And the rubber down in the hole stuck to the plug

I need a pair of really long nosed pliers, but the kind that work in the opposite way to normal pliers (like the ones that you use to remove circlips so the ends open when you squeeze the handles) as I think that might be able to pull the rubber bit out. Anyone got any idea how to get this out?
Hi Buddy
Looks like some oil has got in there probably from the old cam cover gasket leaking and softened the rubber shroud at the end of the lead.
If you are chucking the old leads I would try cutting the rubber seal part off the top and get as much oil off the bottom as possible. You can then try to slide the plastic tube back in to the shroud, turn it a few time and then try lifting it out perhaps at a bit of an angle. It will only take a little grip to lift it away. If at first you fail, clean the oil off each time and try again.
If that fails borrow the wifes long tweezers and get a grip on the top edge - should pull out easily enough
Last suggestion is a sharp wire hook.
Hope this is an easy fix following the good advice from Rhino (as usual) and it sorts the problem.
Thanks guys! And massive thanks Rhino, used an old CB ariel whip bent into a hook, removed it first go! Rubber was all perished so I’m thinking the leads deffo need to go. Final new plug now in. Test drove…still doing it!  Going to get the new leads ordered from Autolink (was intending to change all this anyways then pop her in for an oil/filters change to keep the service book stamped) so not too bothered about the cost of changing the plugs and leads. The diagnostic thingy from here >> http://www.mx5tech.co.uk/diagnostic.aspx?fbclid=IwAR16-p8pkCFLQKlspmB7mRn_IWQBNxEH2qbKNBGepUDDfg38kxVjlZdZeFE will hopefully arrive soon so I can get to the bottom of the problem. I’m thinking coil pack/MAF sensor/or maybe o2 sensor?
She’s ok if your giving it large on the right pedal, only suffers coming out of tight twisties in low rpm and driving through towns etc. Getting nice sun here too and can’t get her out to enjoy it.
Mindy is looking very nice, and should be with all the work going into her. Great job
thanks David, shes seffo a labour of love. So, new HT leads (in red) & new coil pack ordered today from Andrew at Autolink uk. Have to say what a really helpful guy on the phone! Hoping the bits come tomorrow. He suggested getting a ratchet spanner to make getting the bottom bolt out of the coilpack a bit quicker/easier, so been to Halfords and bought a set.
Weather is utterly amazing here just now (better than where we were last week in Gran Canaria!) so want Mindy on the road asap! So with mindy out of action, only one thing for it…take my other modern classic out for the trip to halfords. DD (my Honda Civic Aerodeck) performed perfectly as always, so we went for a wee run. Forgot just how nice this car is to drive, and love the looks she gets when we’re out and about.
Oh and the reader thingy came but didnt pick up any faults although with it I was above to rule out the MAF sensor. Andrew said that it wouldnt pick up some things such as faulty coil packs
Handy wee tool though!
You need a fine ratchet spanner for that bolt. Its a bolt with a long shank. You will skin your knuckles getting it out. Useful to have a long goose neck spanner to crack the bolt, thereafter its two clicks at a time. And have some rag underneath to catch it it falls out. I modify the coil pack (there is a rubber-metal washer on it, which I cut a slot into), so I can slip the pack over the bolt, and then tighten it up, rather than trying to refit the bolt with the coil pack in place.
This is the bolt you will be undoing

So when its loose, you can get your fingers on it. Some people just leave it off, and apply thread lock to the top bolts. Probably not a great idea, as the threads on the camcover might wear.
There’s lots the so-called diagnostics can’t do. I’m told it only picks up voltage drops. I’d almost regard it as a confirmatory tool, not a diagnostic tool; absence of a code doesn’t mean that component is working.
When checking the coil pack, did you check the terminals. Some plug leads can arc, to such as extent the insulation can burn. Sometimes one terminal can look corroded, and a quick whizz with emery paper wrapped around a pencil fixes it. Racing Beat leads were quite disposed to doing this.
MK1 1.6 coilpack from my experience is the most reliable of the cradled coils 1989 - 2005.
Don’t mean it ain’t goosed though but as mentioned above remove the HT leads and check the ports for burning and water ingress, These will still run fine when looking dreadful but always a good idea to keep those ports clean and the lead ends corrosion free.
Easiest way to test the coilpack is by substitution. Ideally you would have a spare, already tested on the car but failing that just plug the HT leads and LT leads in to a nice clean used pack and lay it on a piece of padding on top of the cam cover to test basic funtionality.
The third lower bolt is a pain but undoing the top bolts and tilting the pack makes it easier to get at. Once loose a ratchet ring spanner with a floppy head works well to minimise effort and scraped knuckles.
I have an ugly old but guaranteed pack here you can have for £20 + post. Will test it on my MK1 1.6 before sending out.