The Car is Now 5.5 years old & is a project to help get me through being bored from Many Eye surgeries over the last 4 years… Most of the mods I have made…I am Going to use this page to post and store thread builds of what I have been doing as I am getting to the end of the project…
I seen a lot of Aero products on the market but being such a scrooge I like to make my own these mods are mostly cosmetic but some are bought then fitted by me I am a little old school being Ex Armed forces you tend to be skill enabled but a master of none
So the thread will be picture Heavy I started with kit I have bought Wheels to be the last part of Under the wheel arch which will be bought soon for the 2026 season …
1/ UNDER THE ARCH…UP grades .
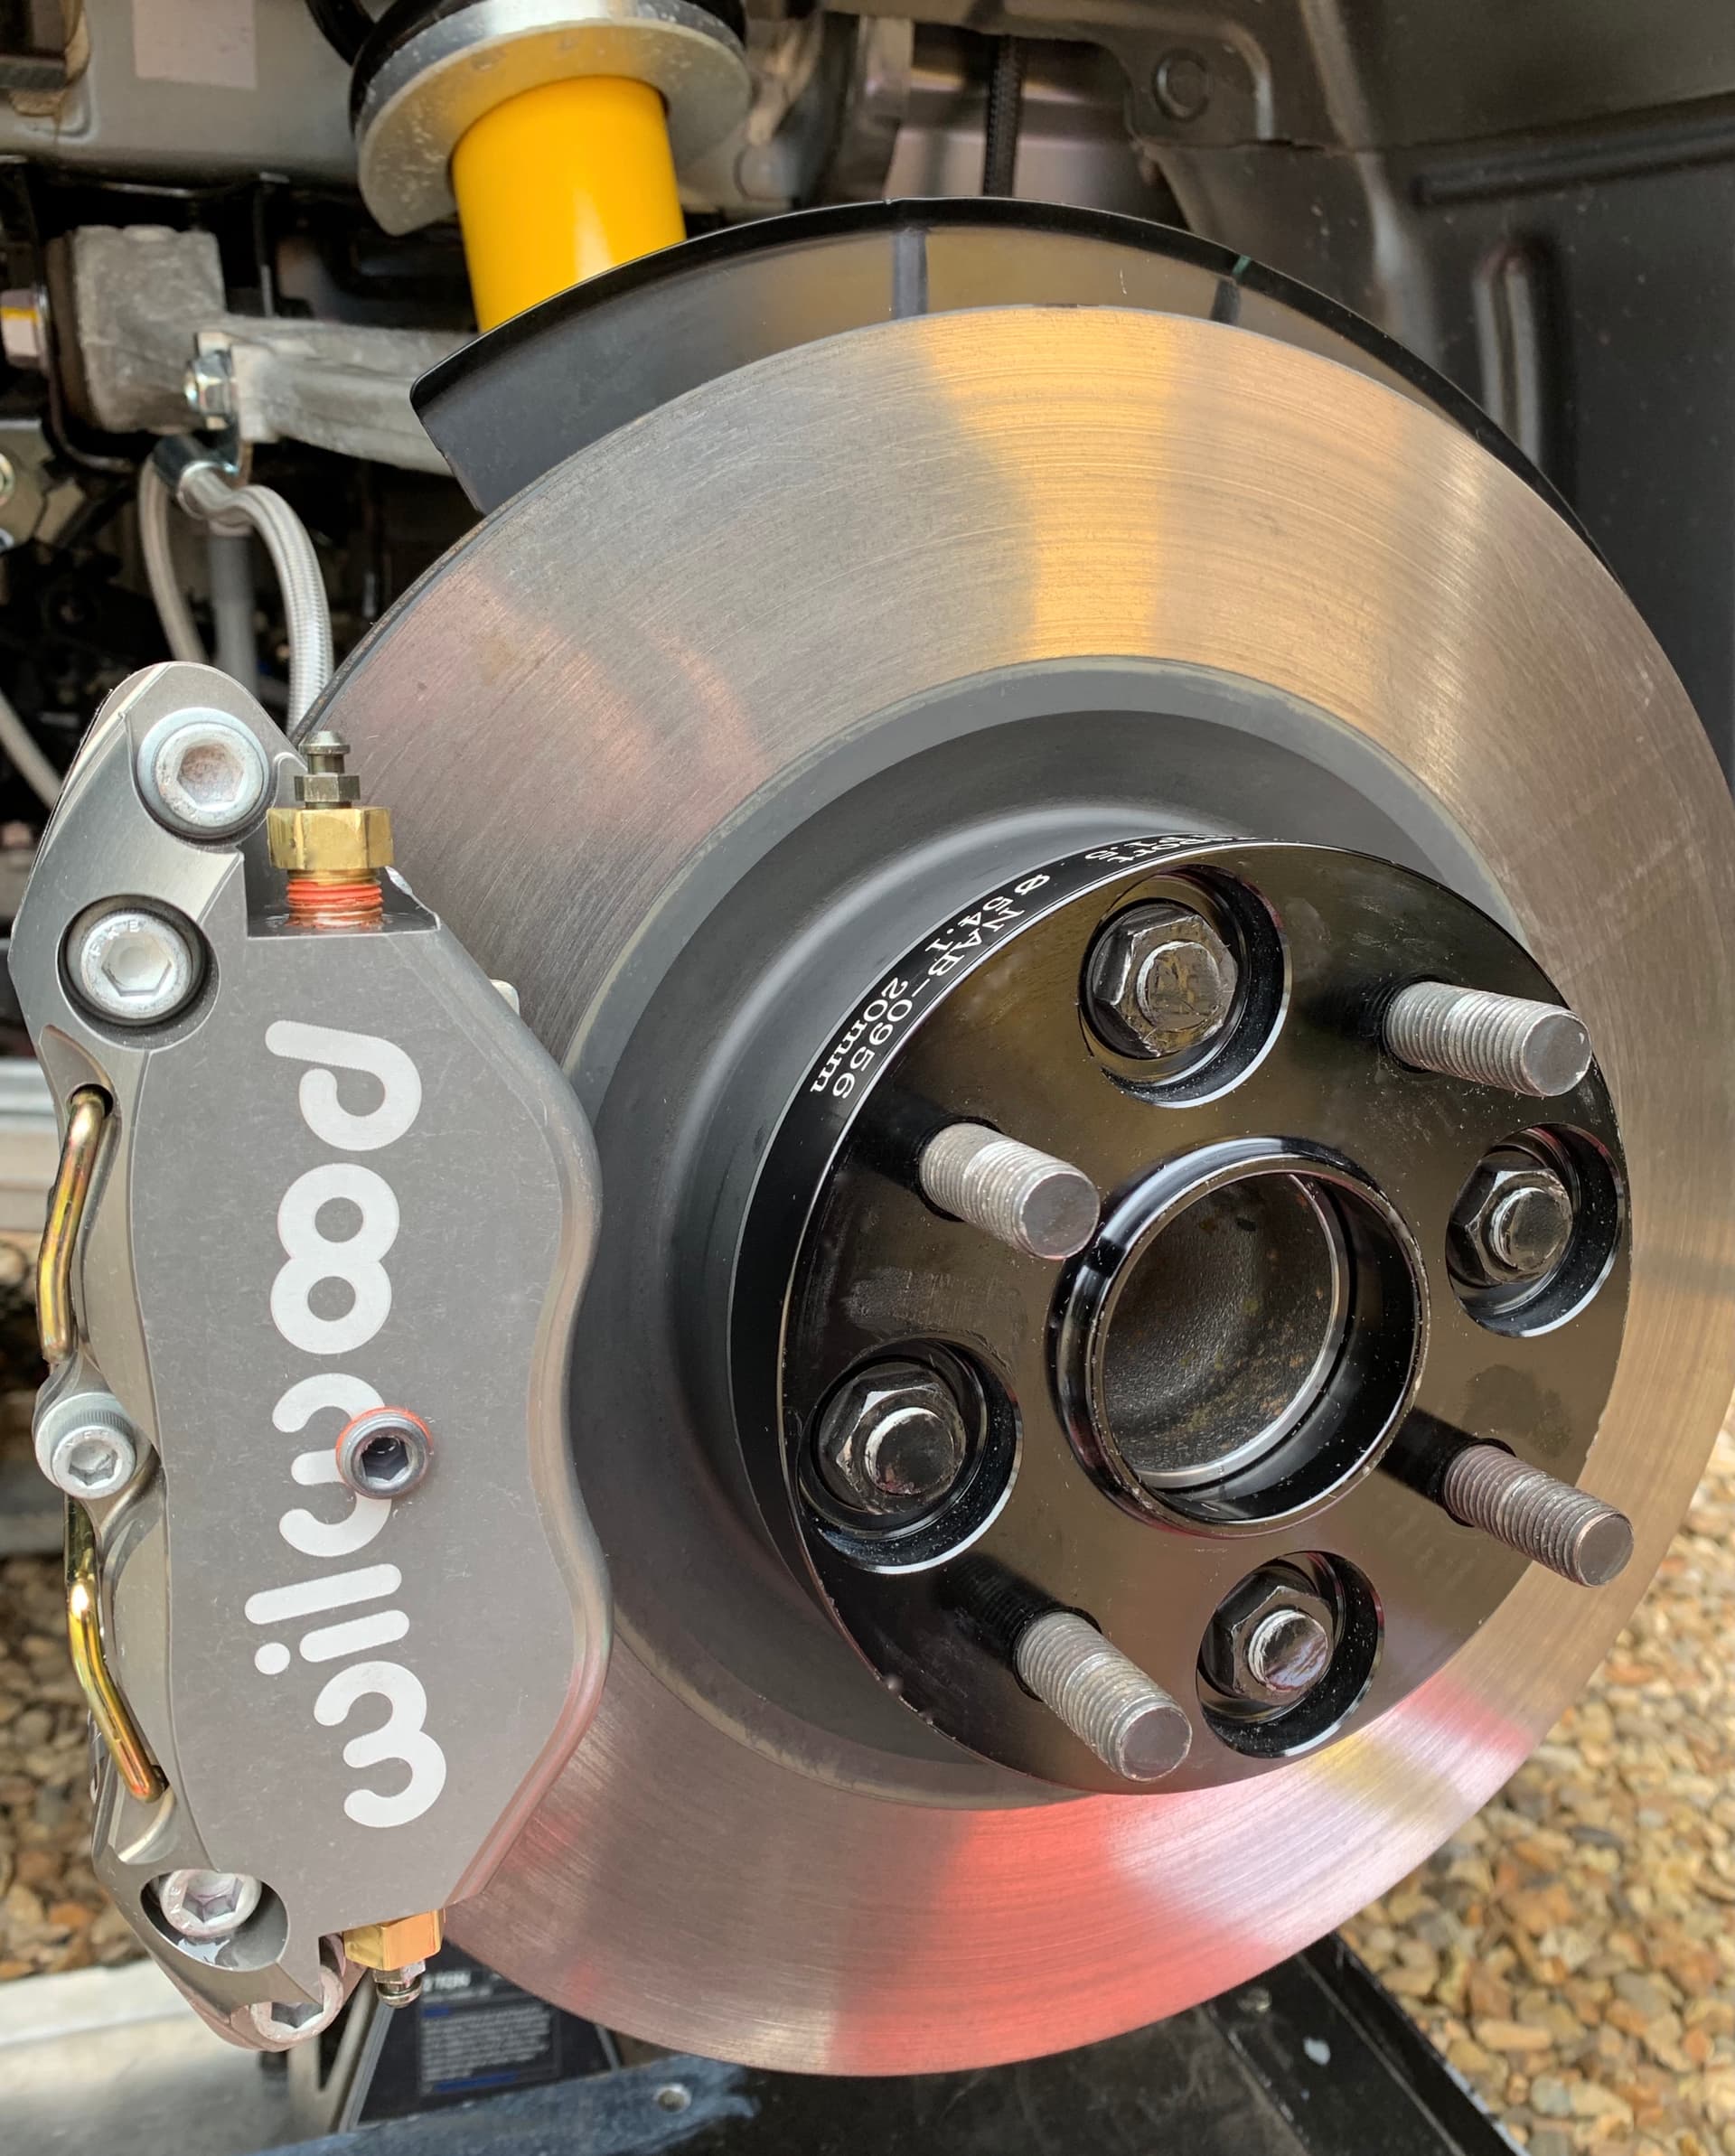
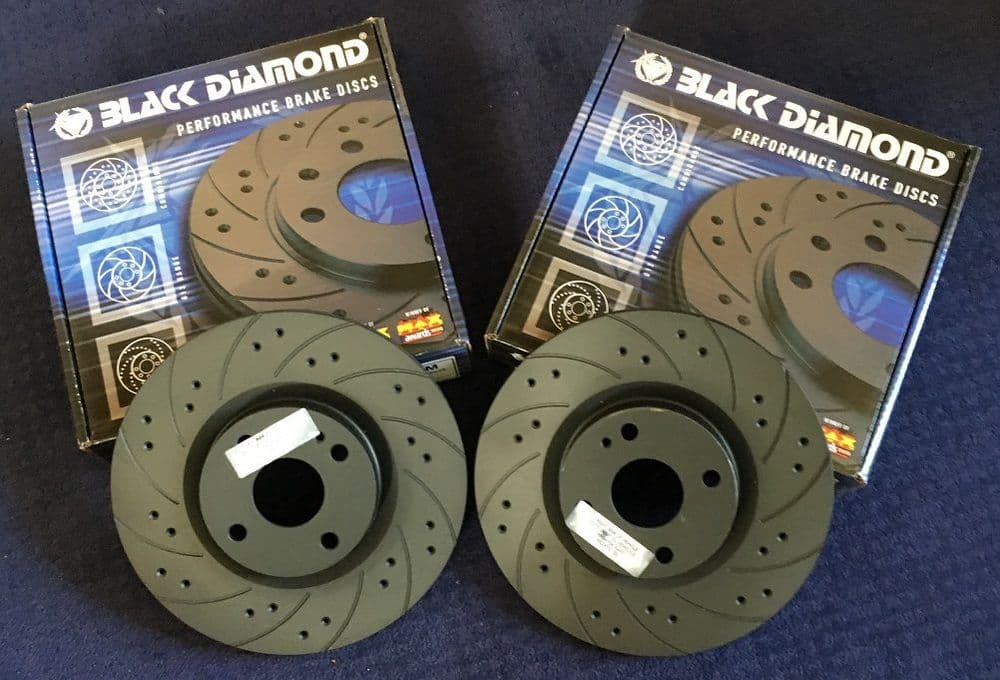
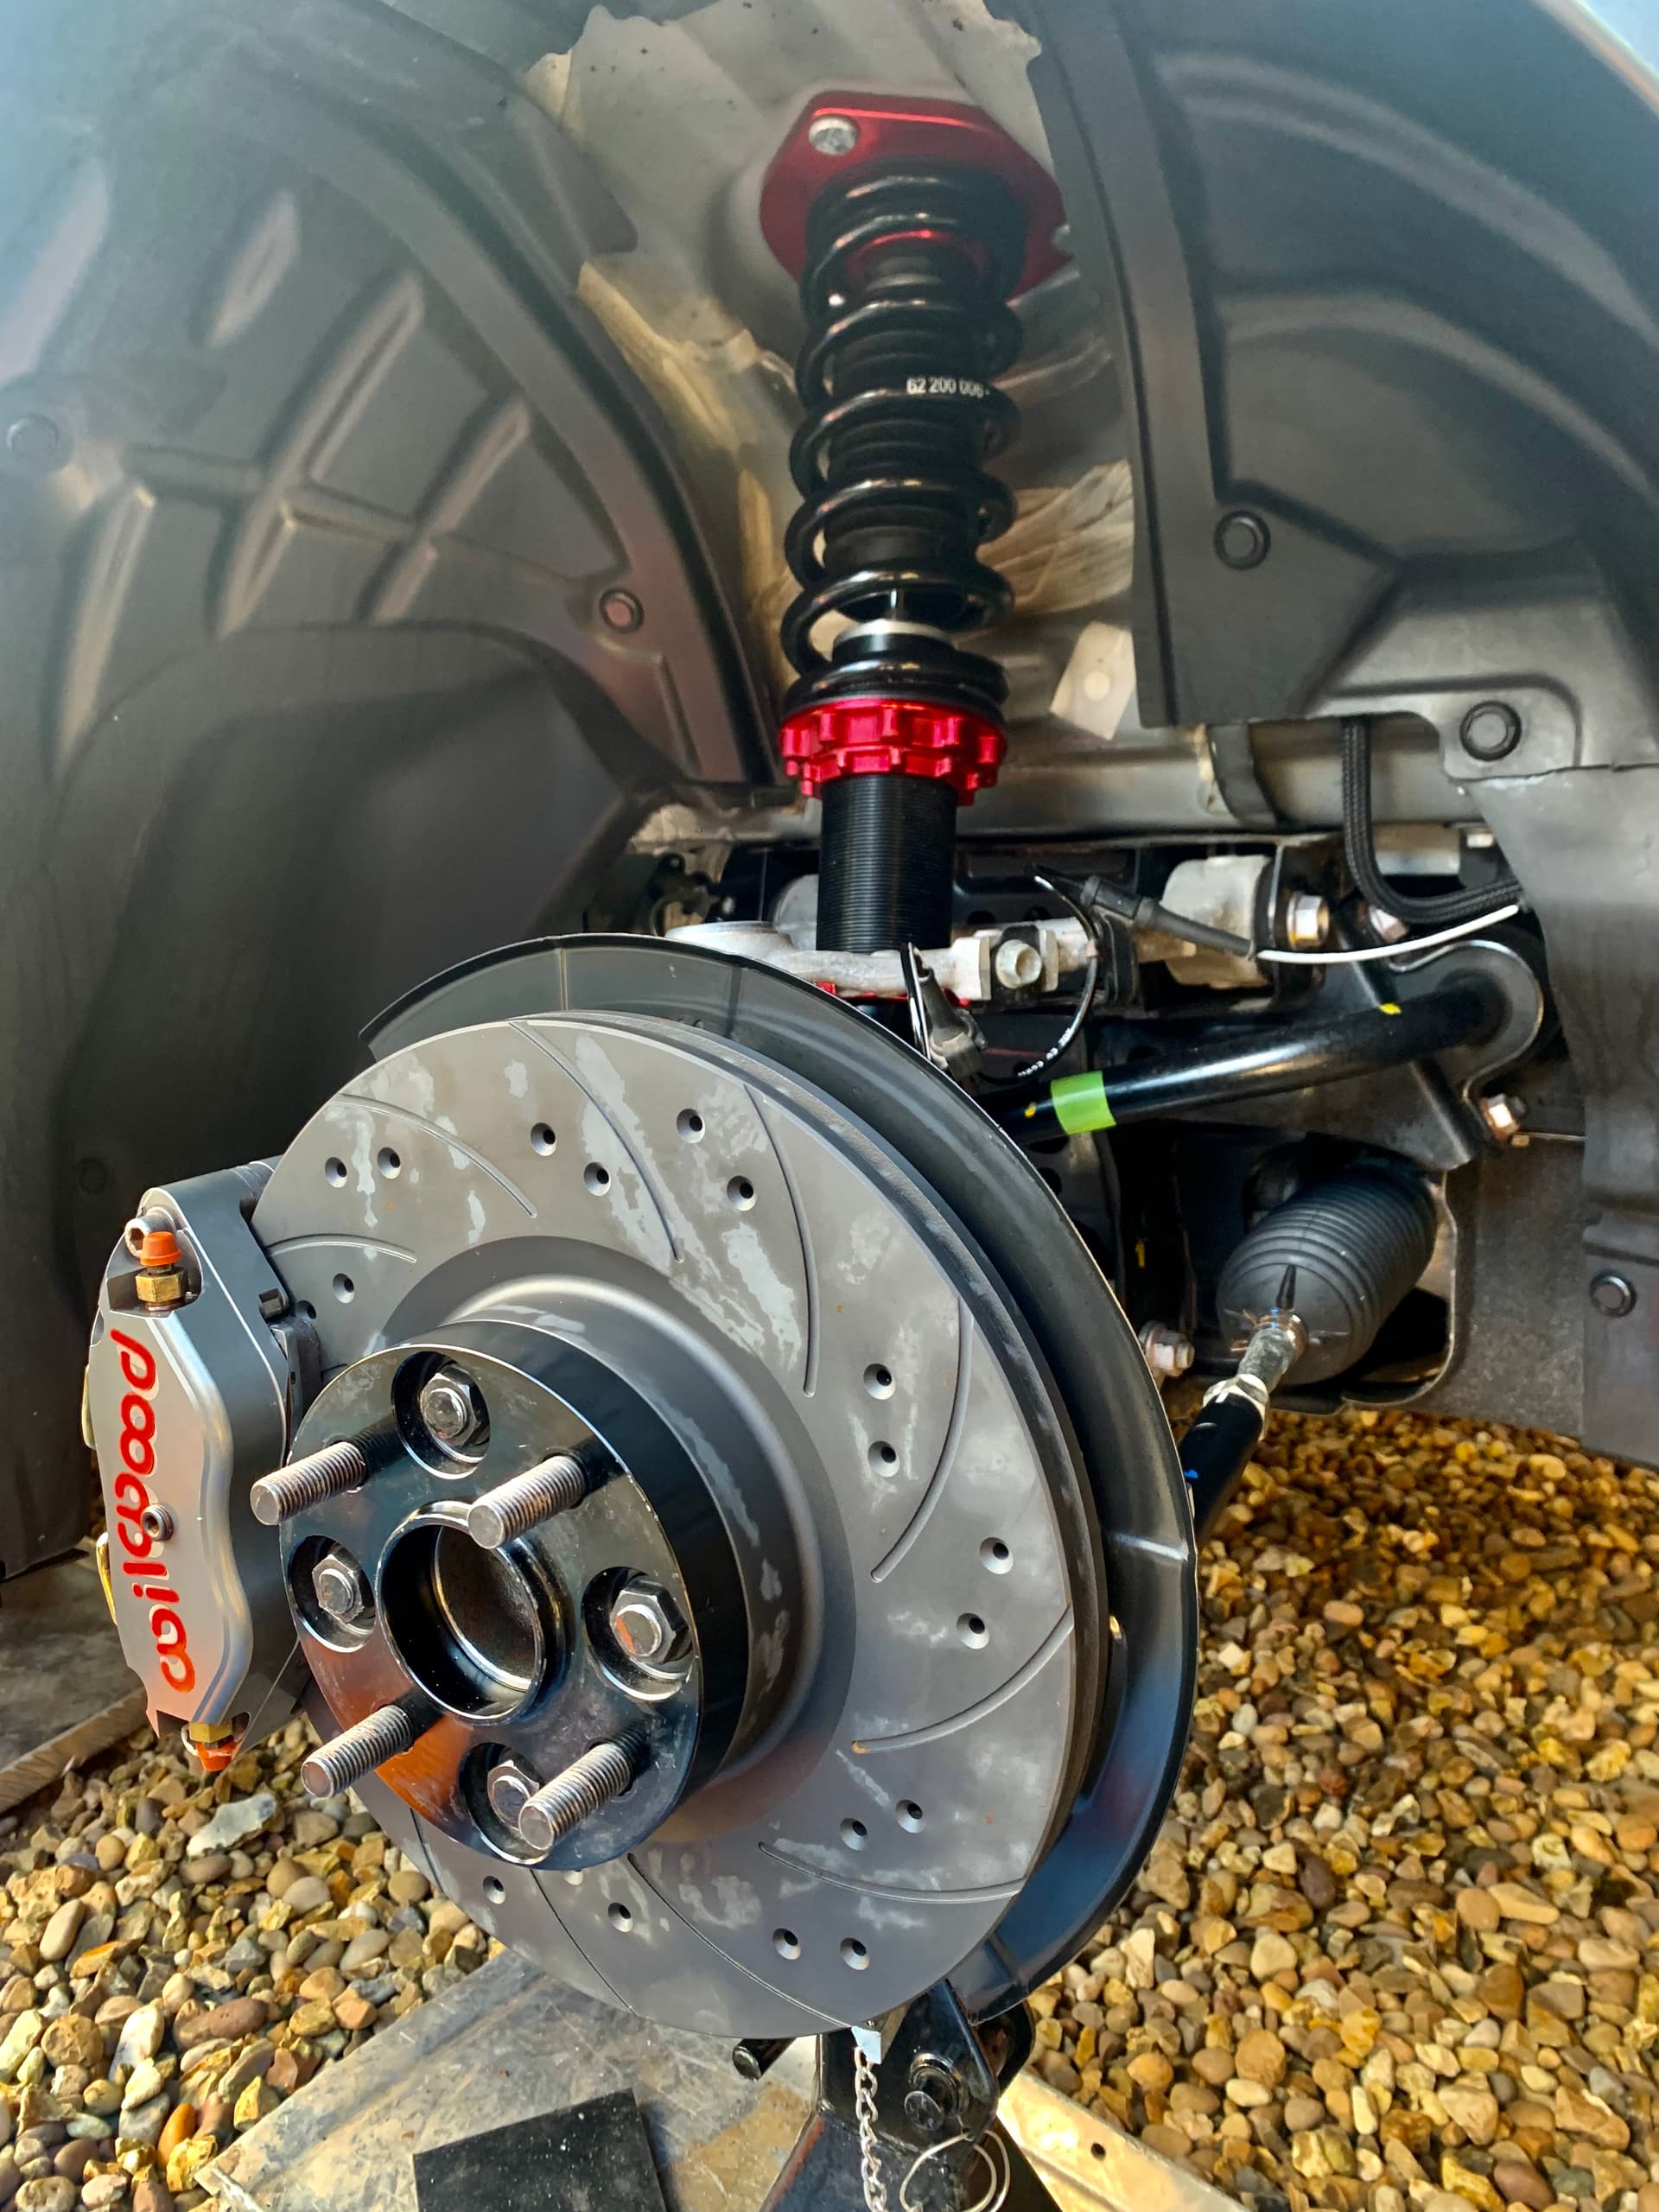
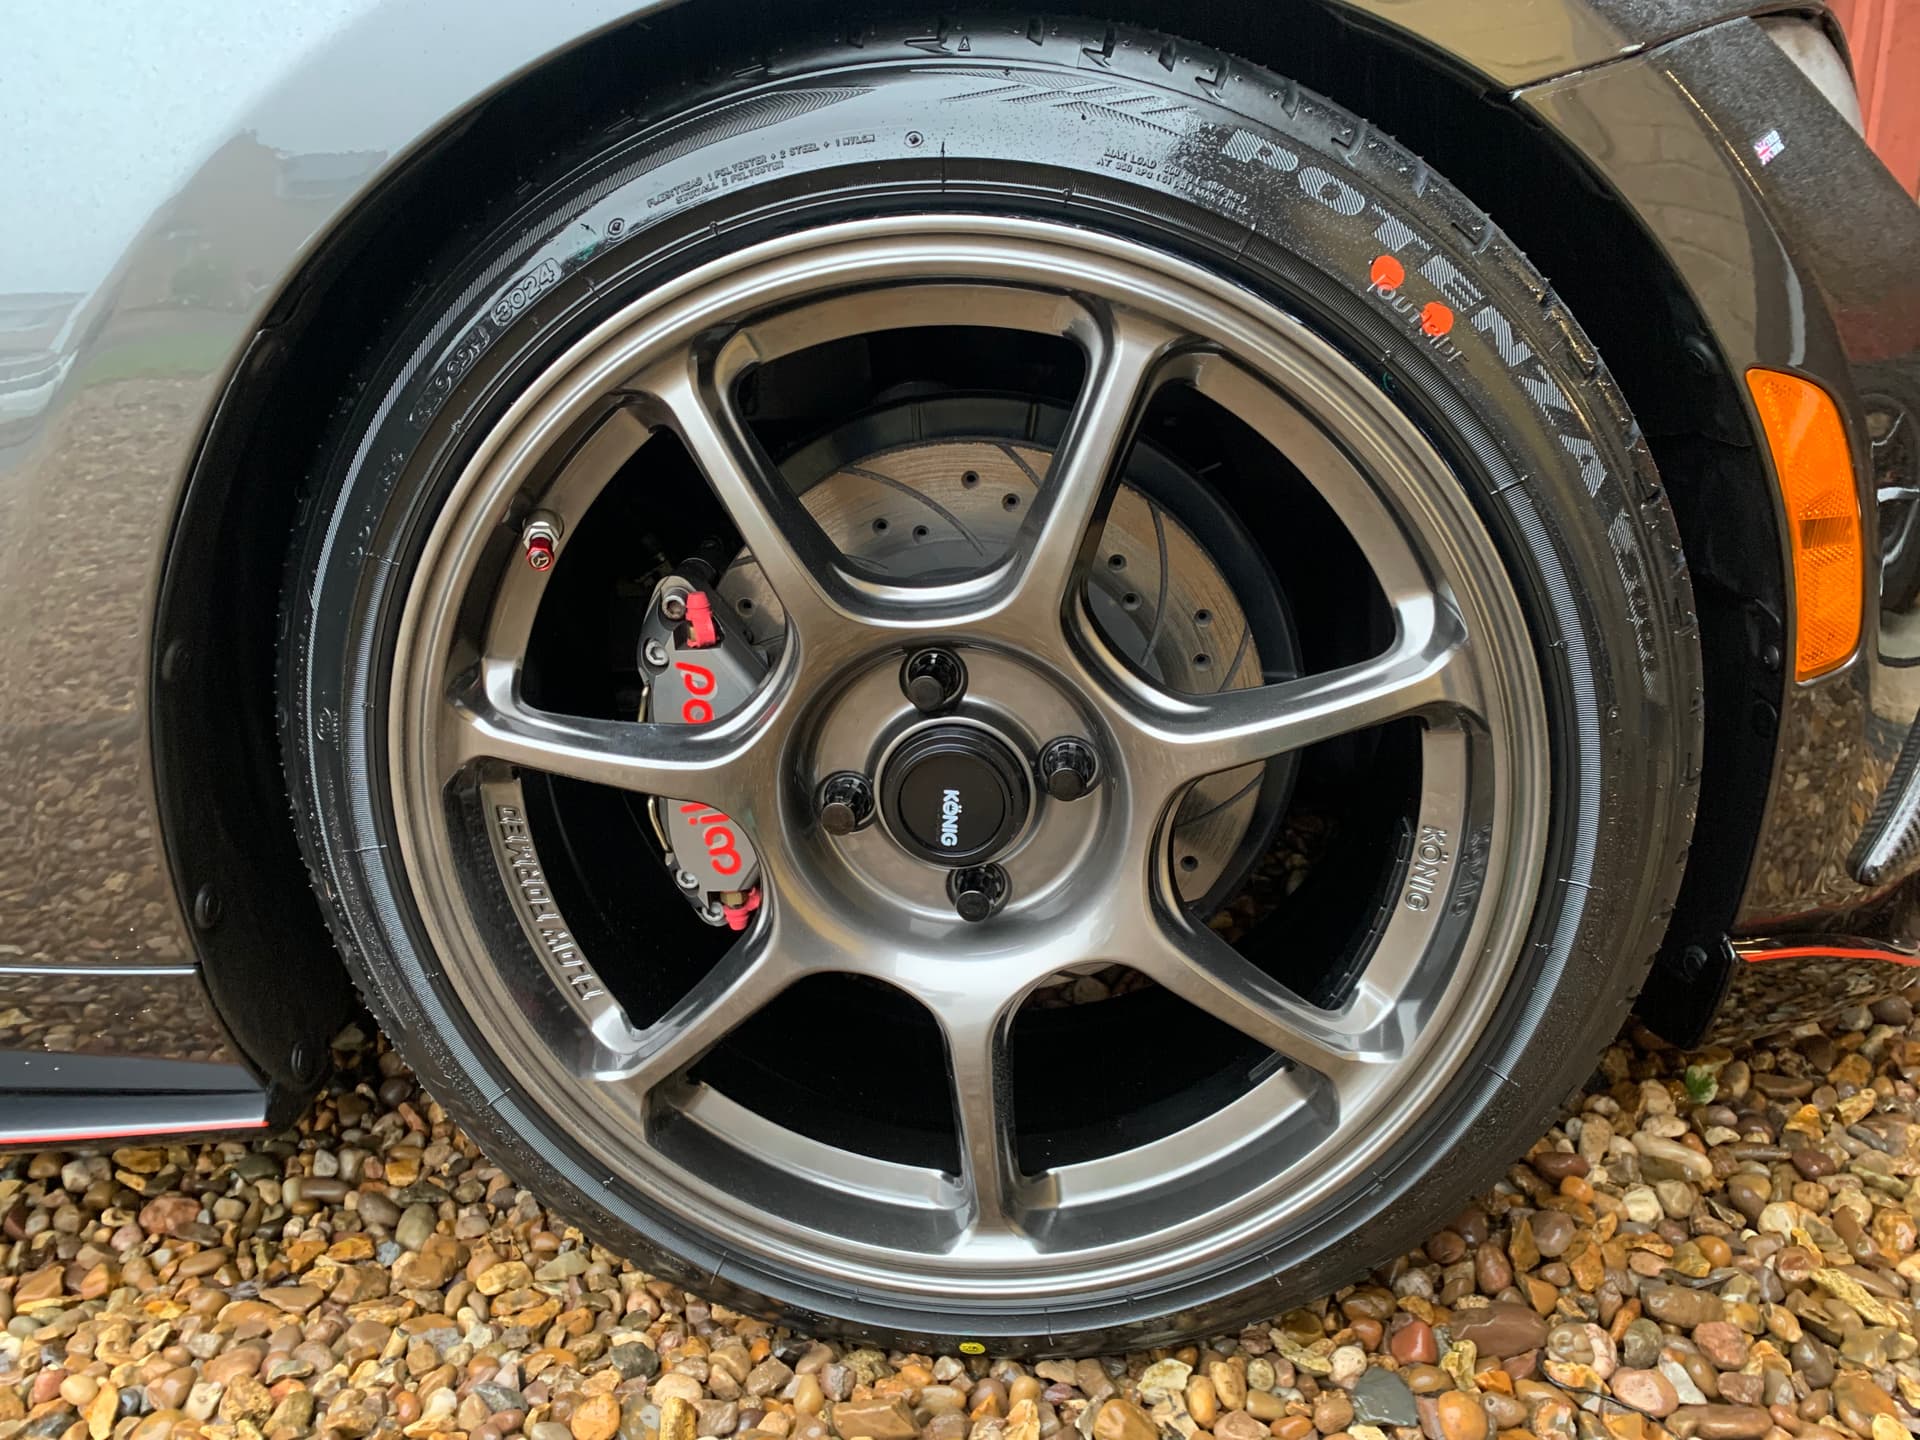
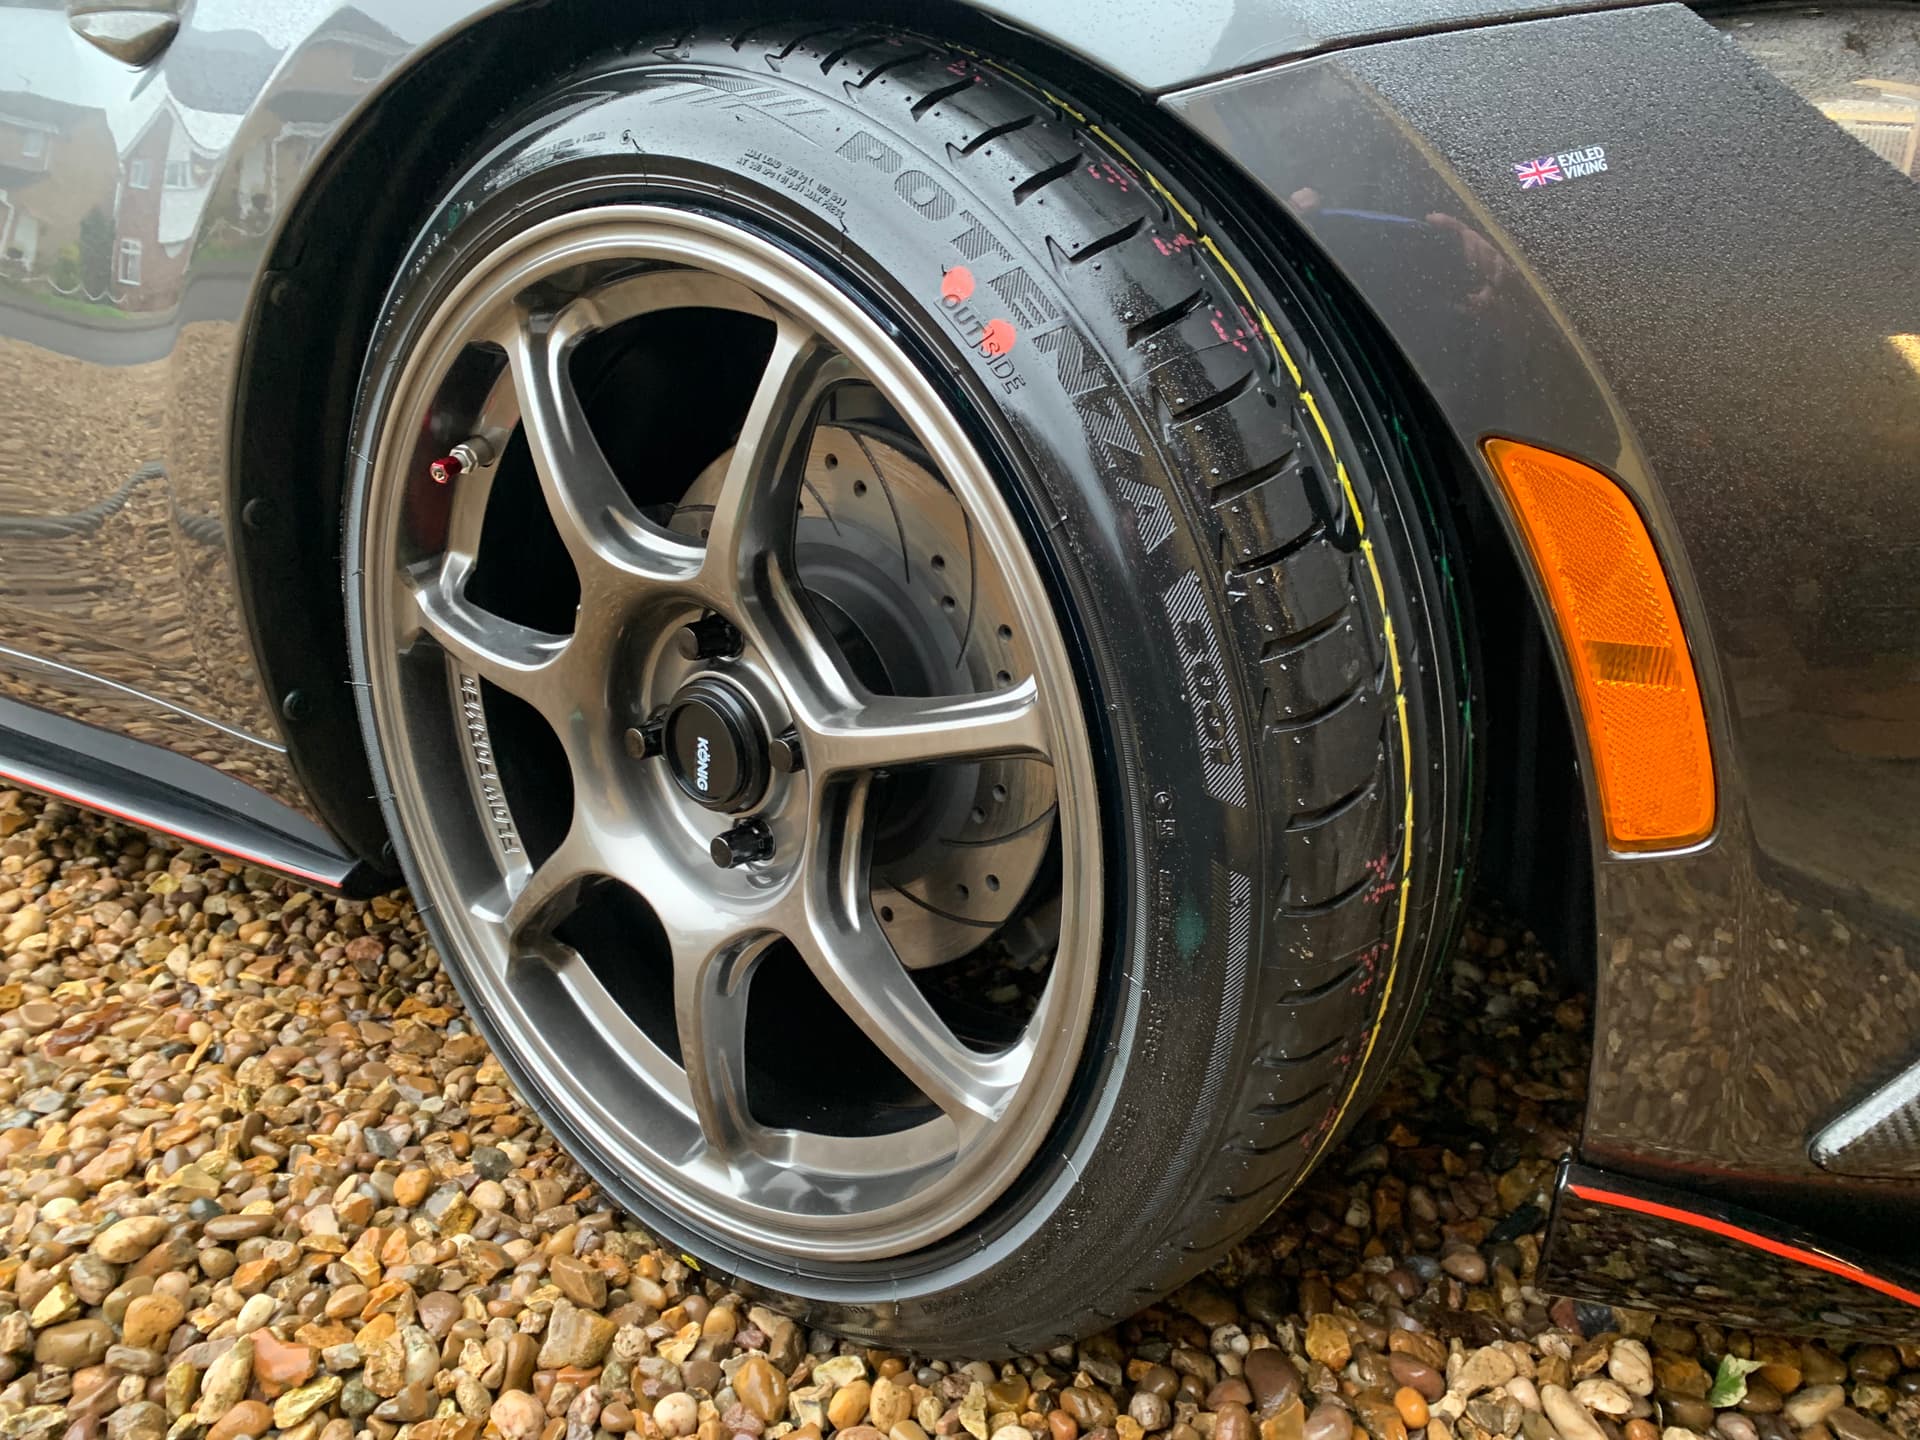
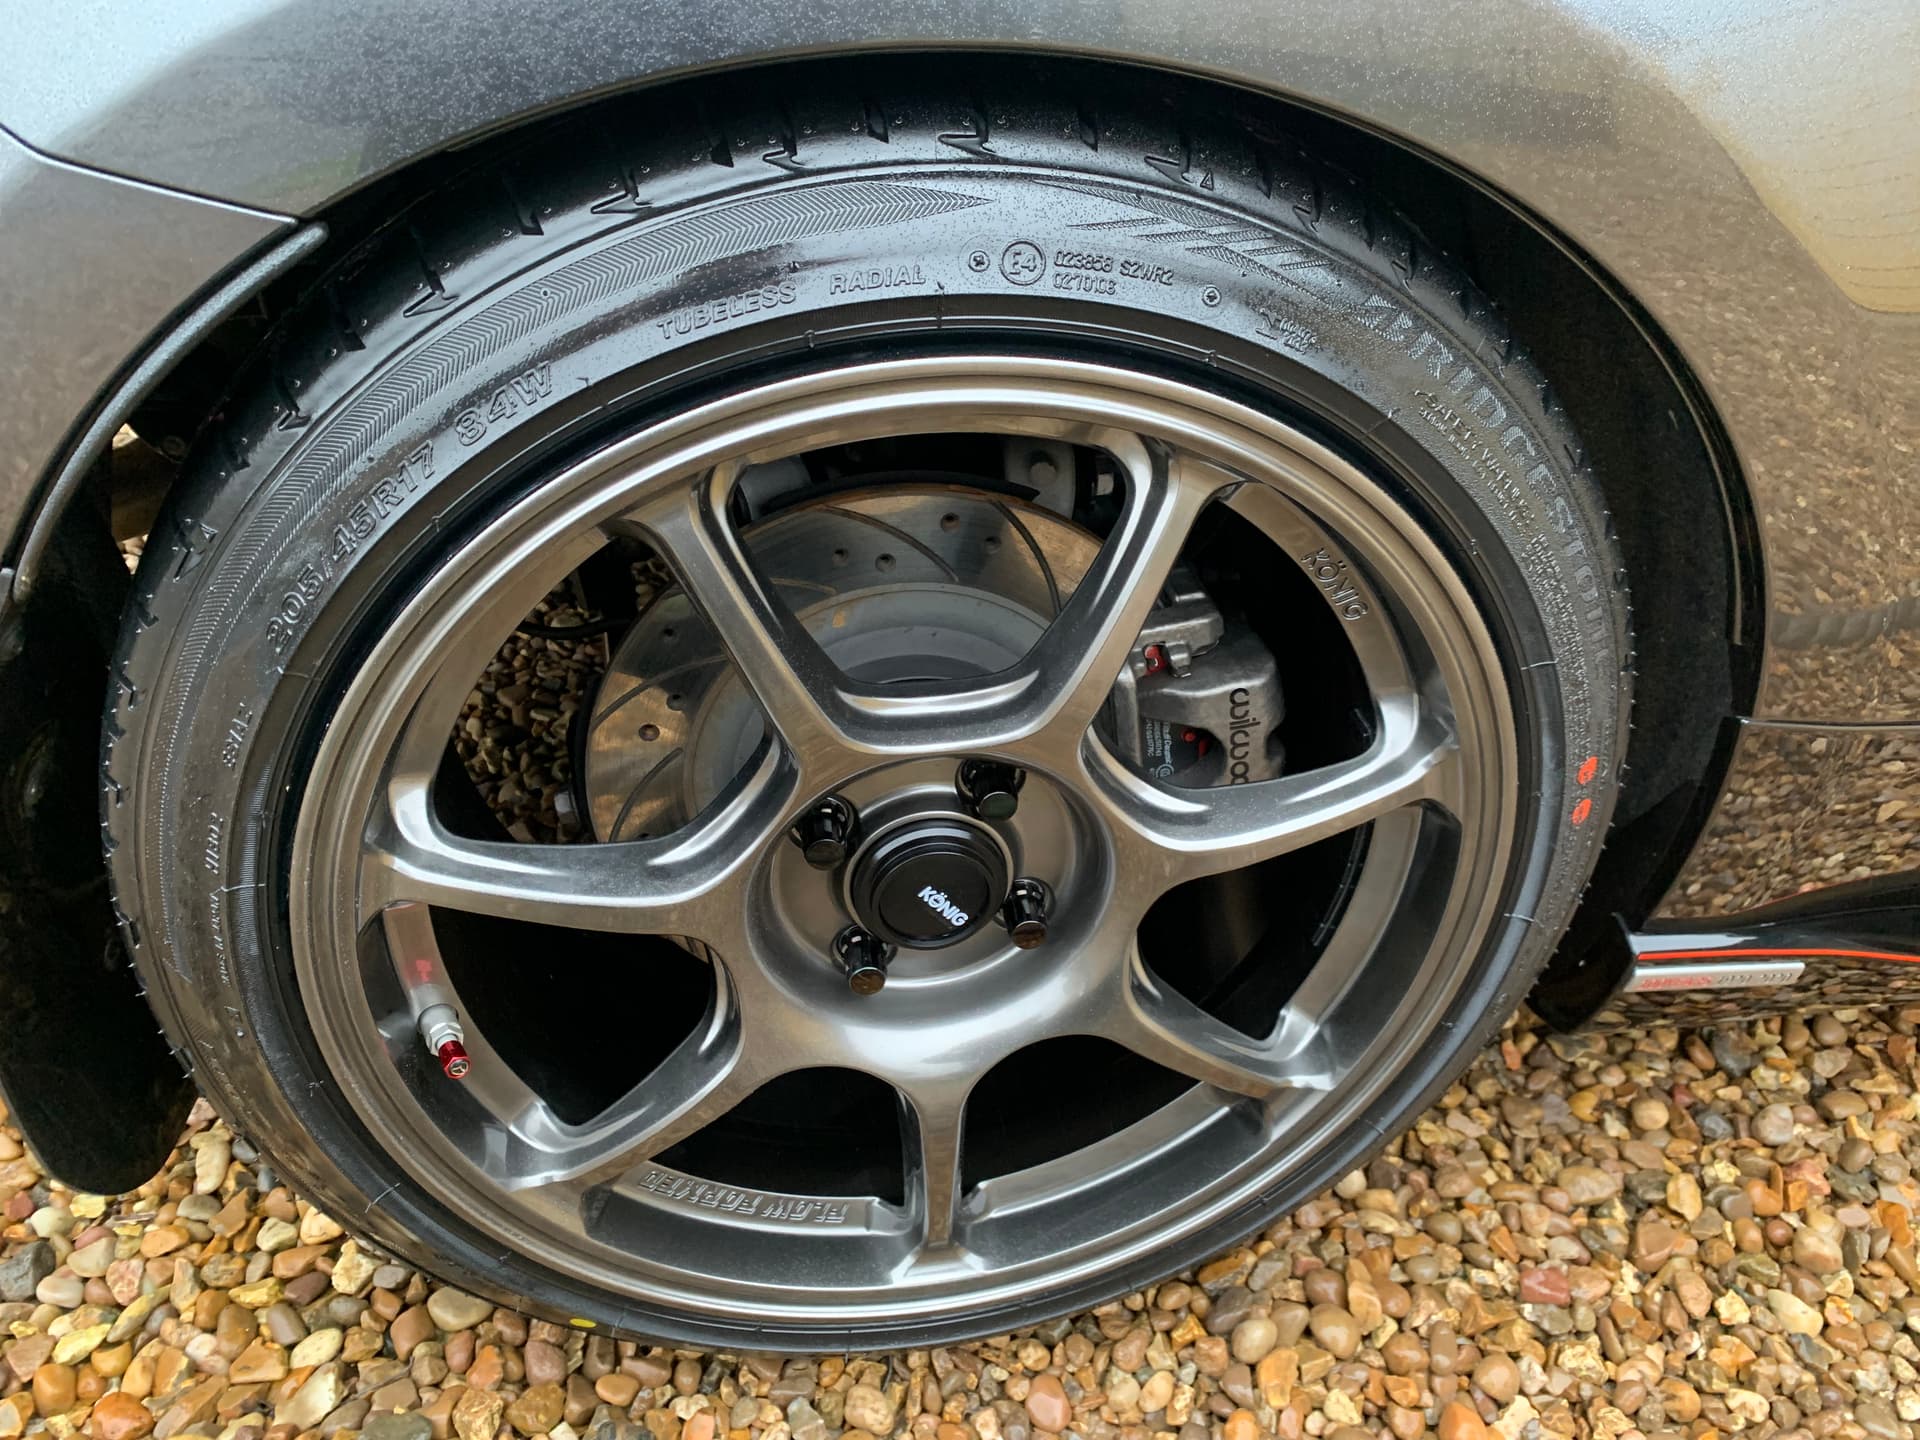
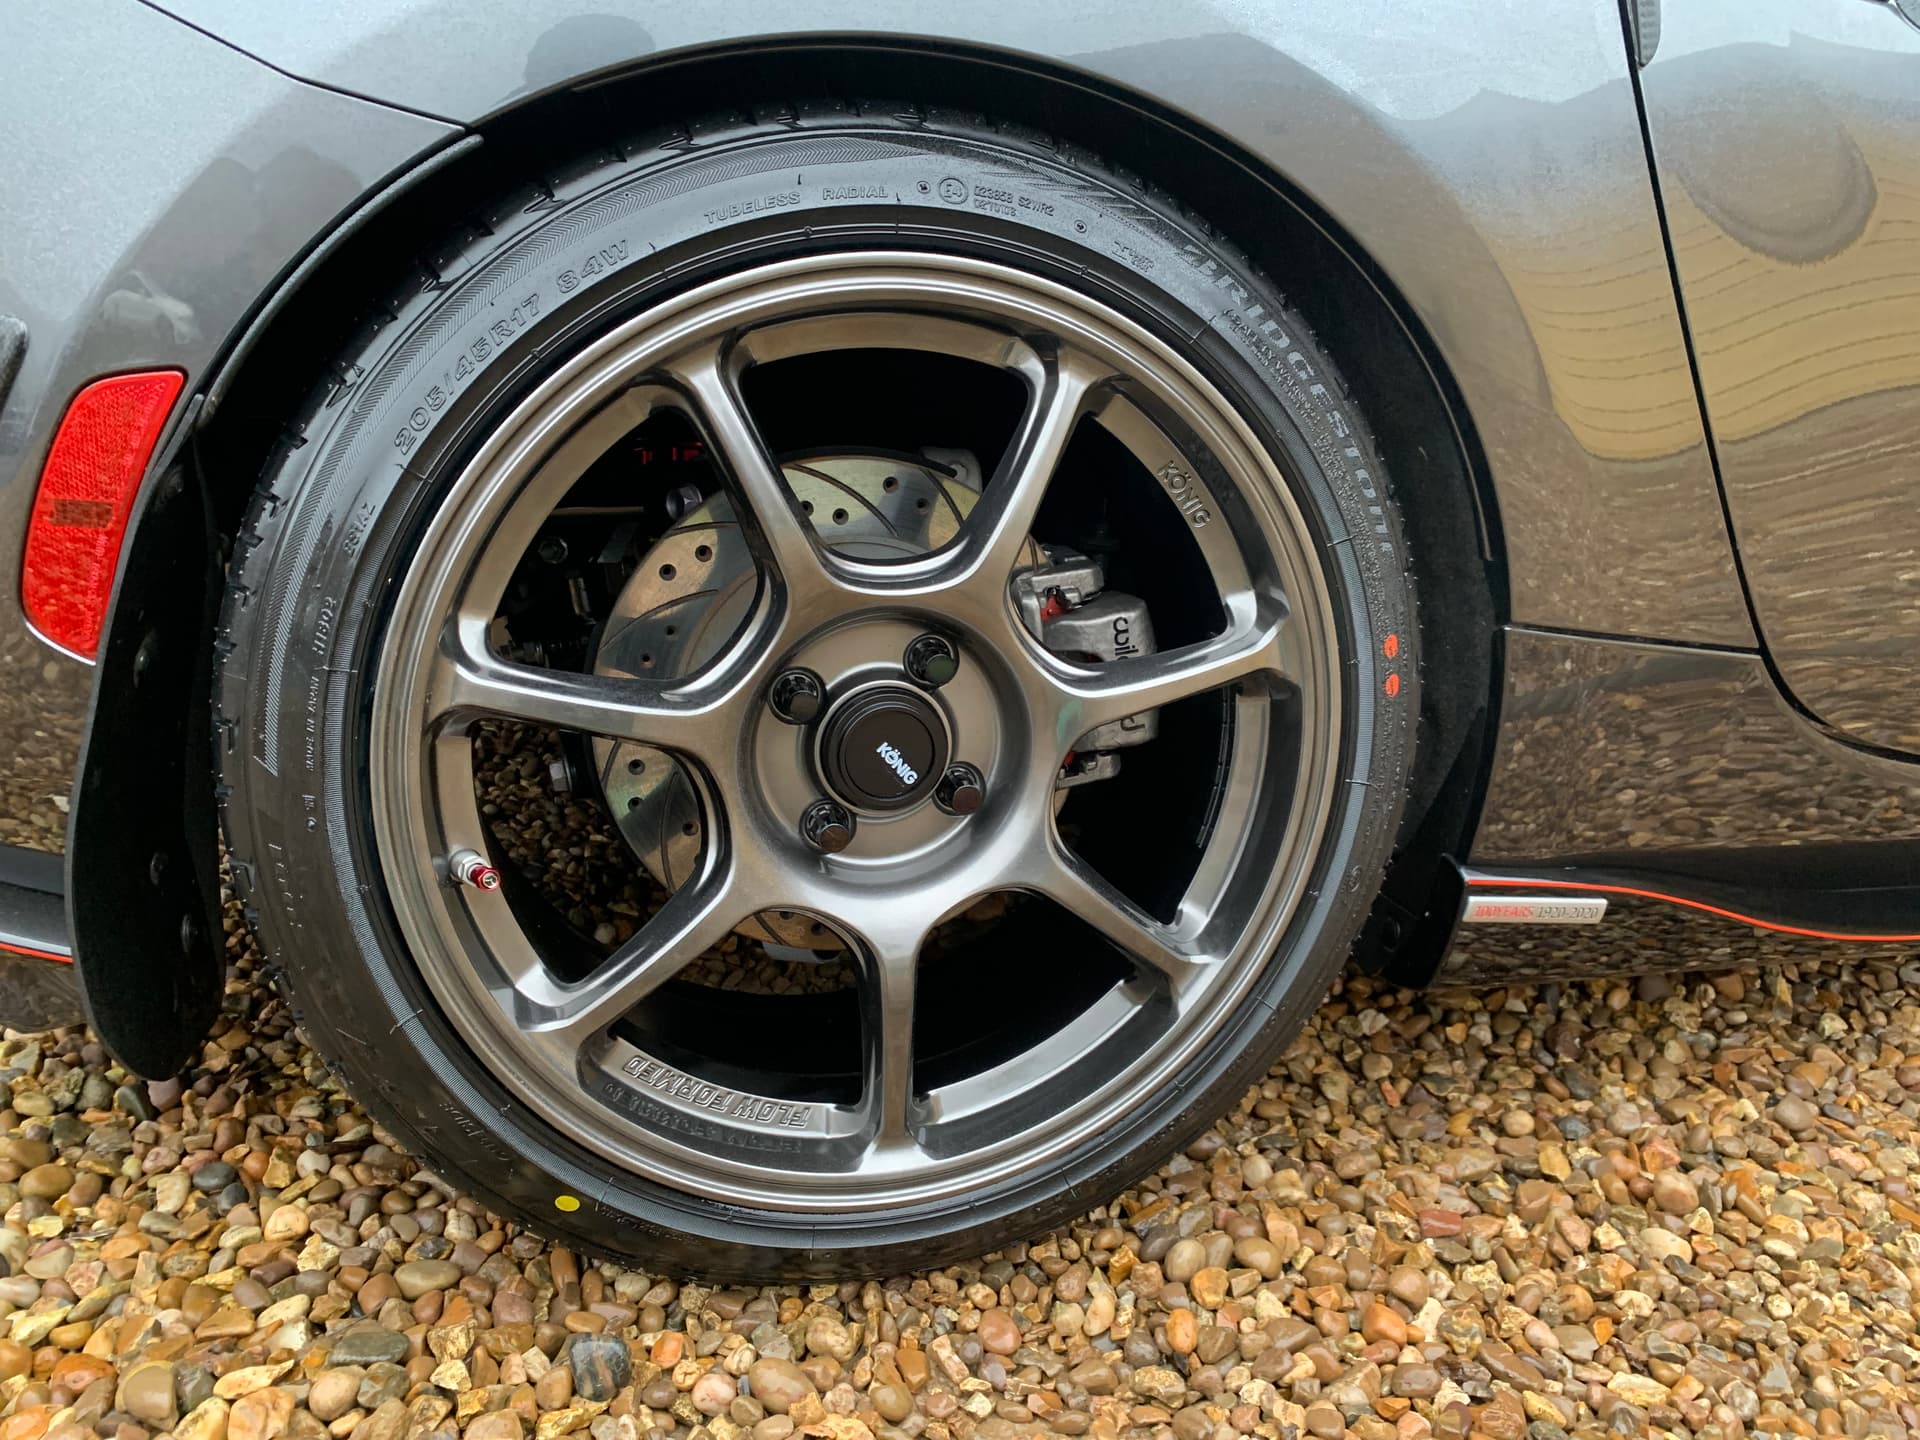
Black Dimond Brake Disc’s
Auto exe Drop links
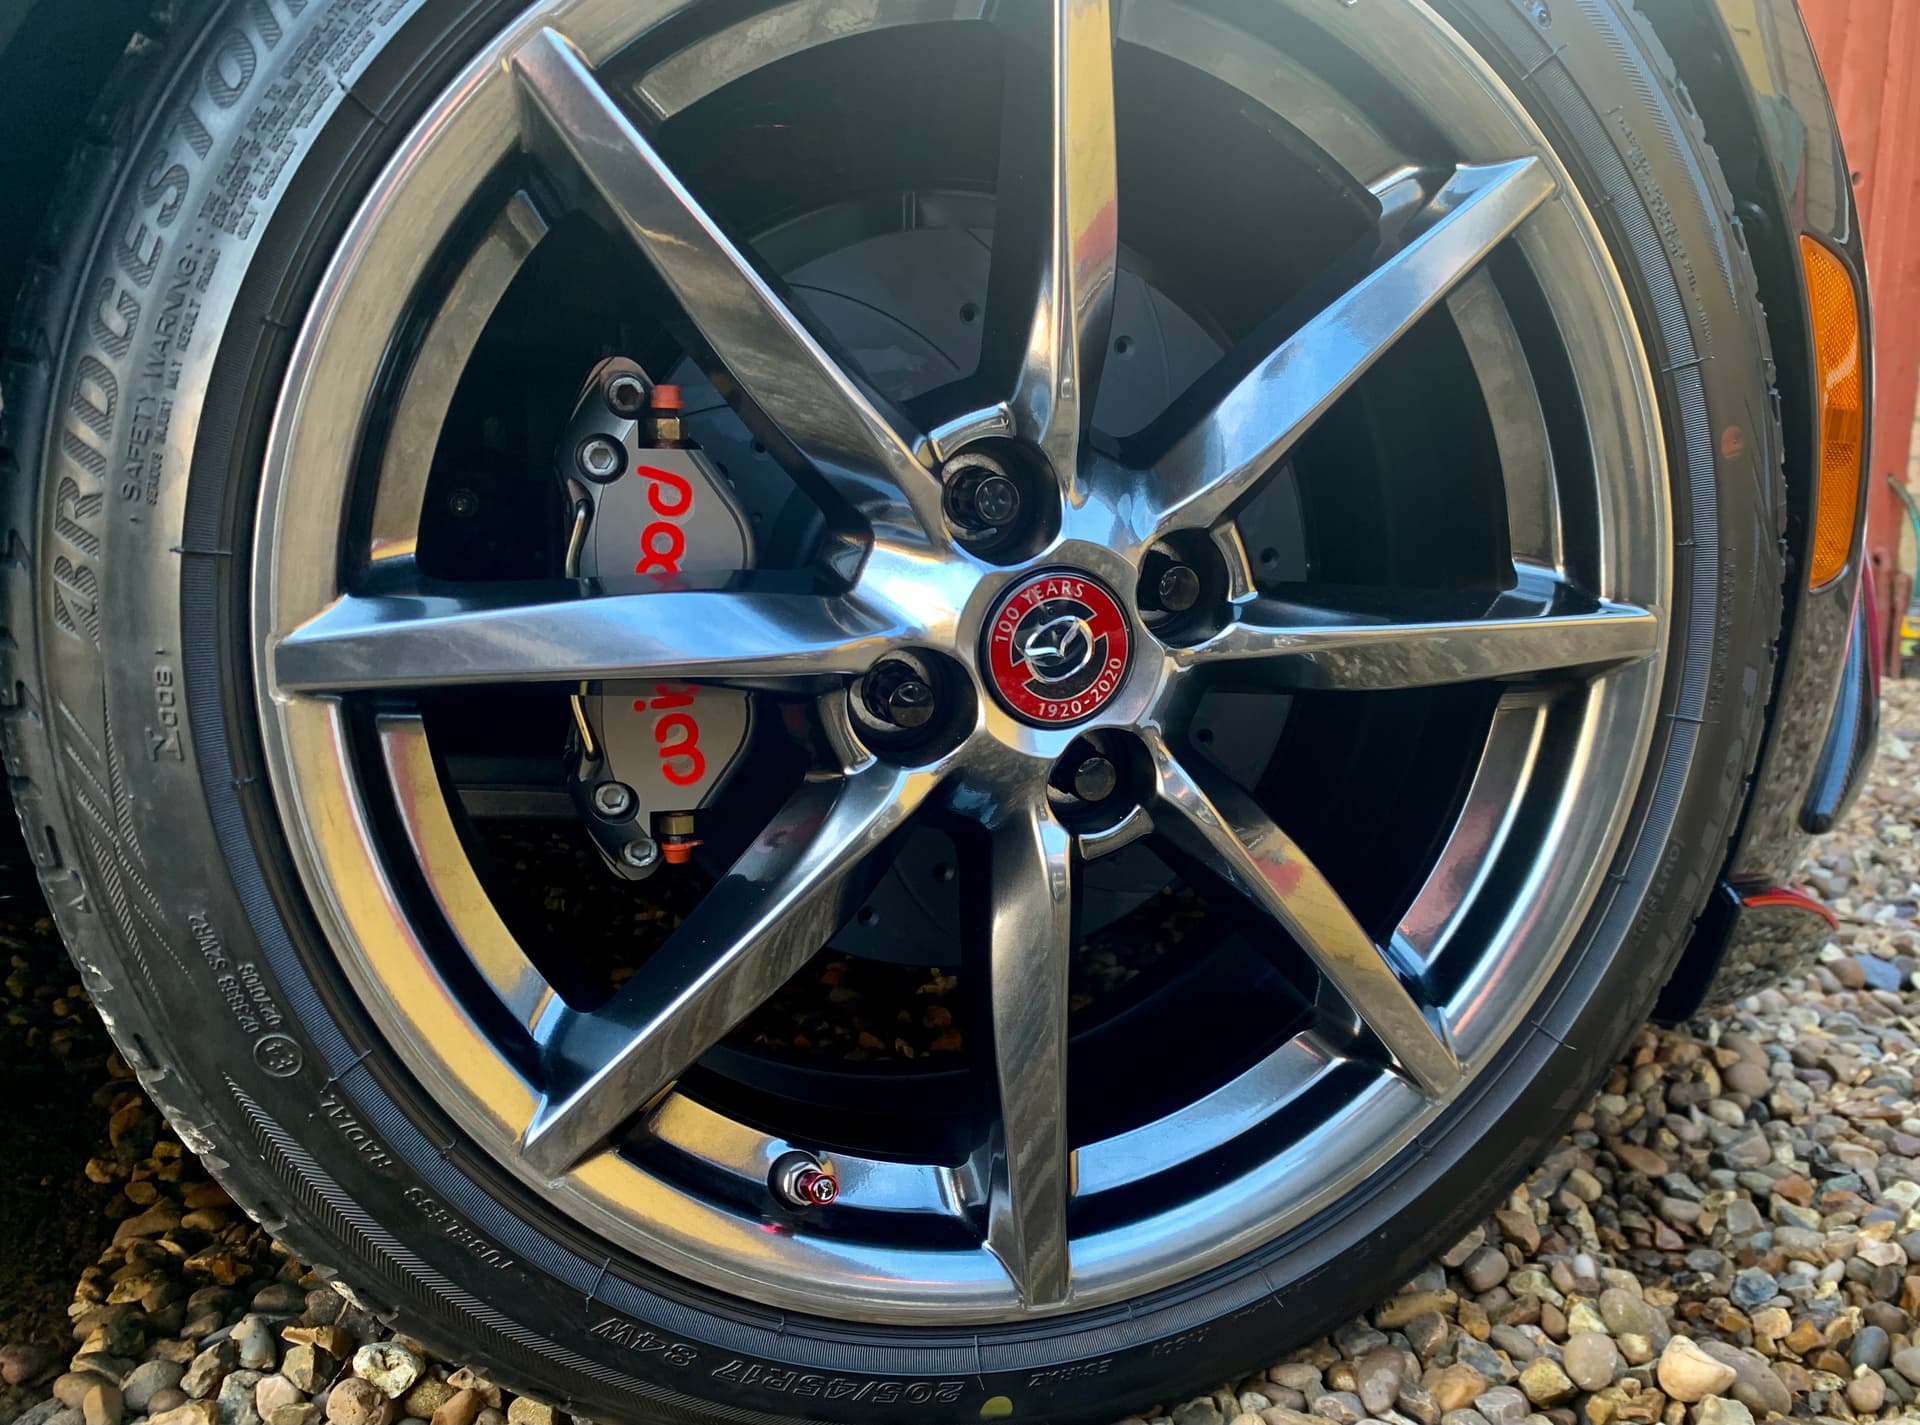
Wilwood 4 Pot Brakes green stuff pads,braded brake lines…
20mm LL/sport spacers all round
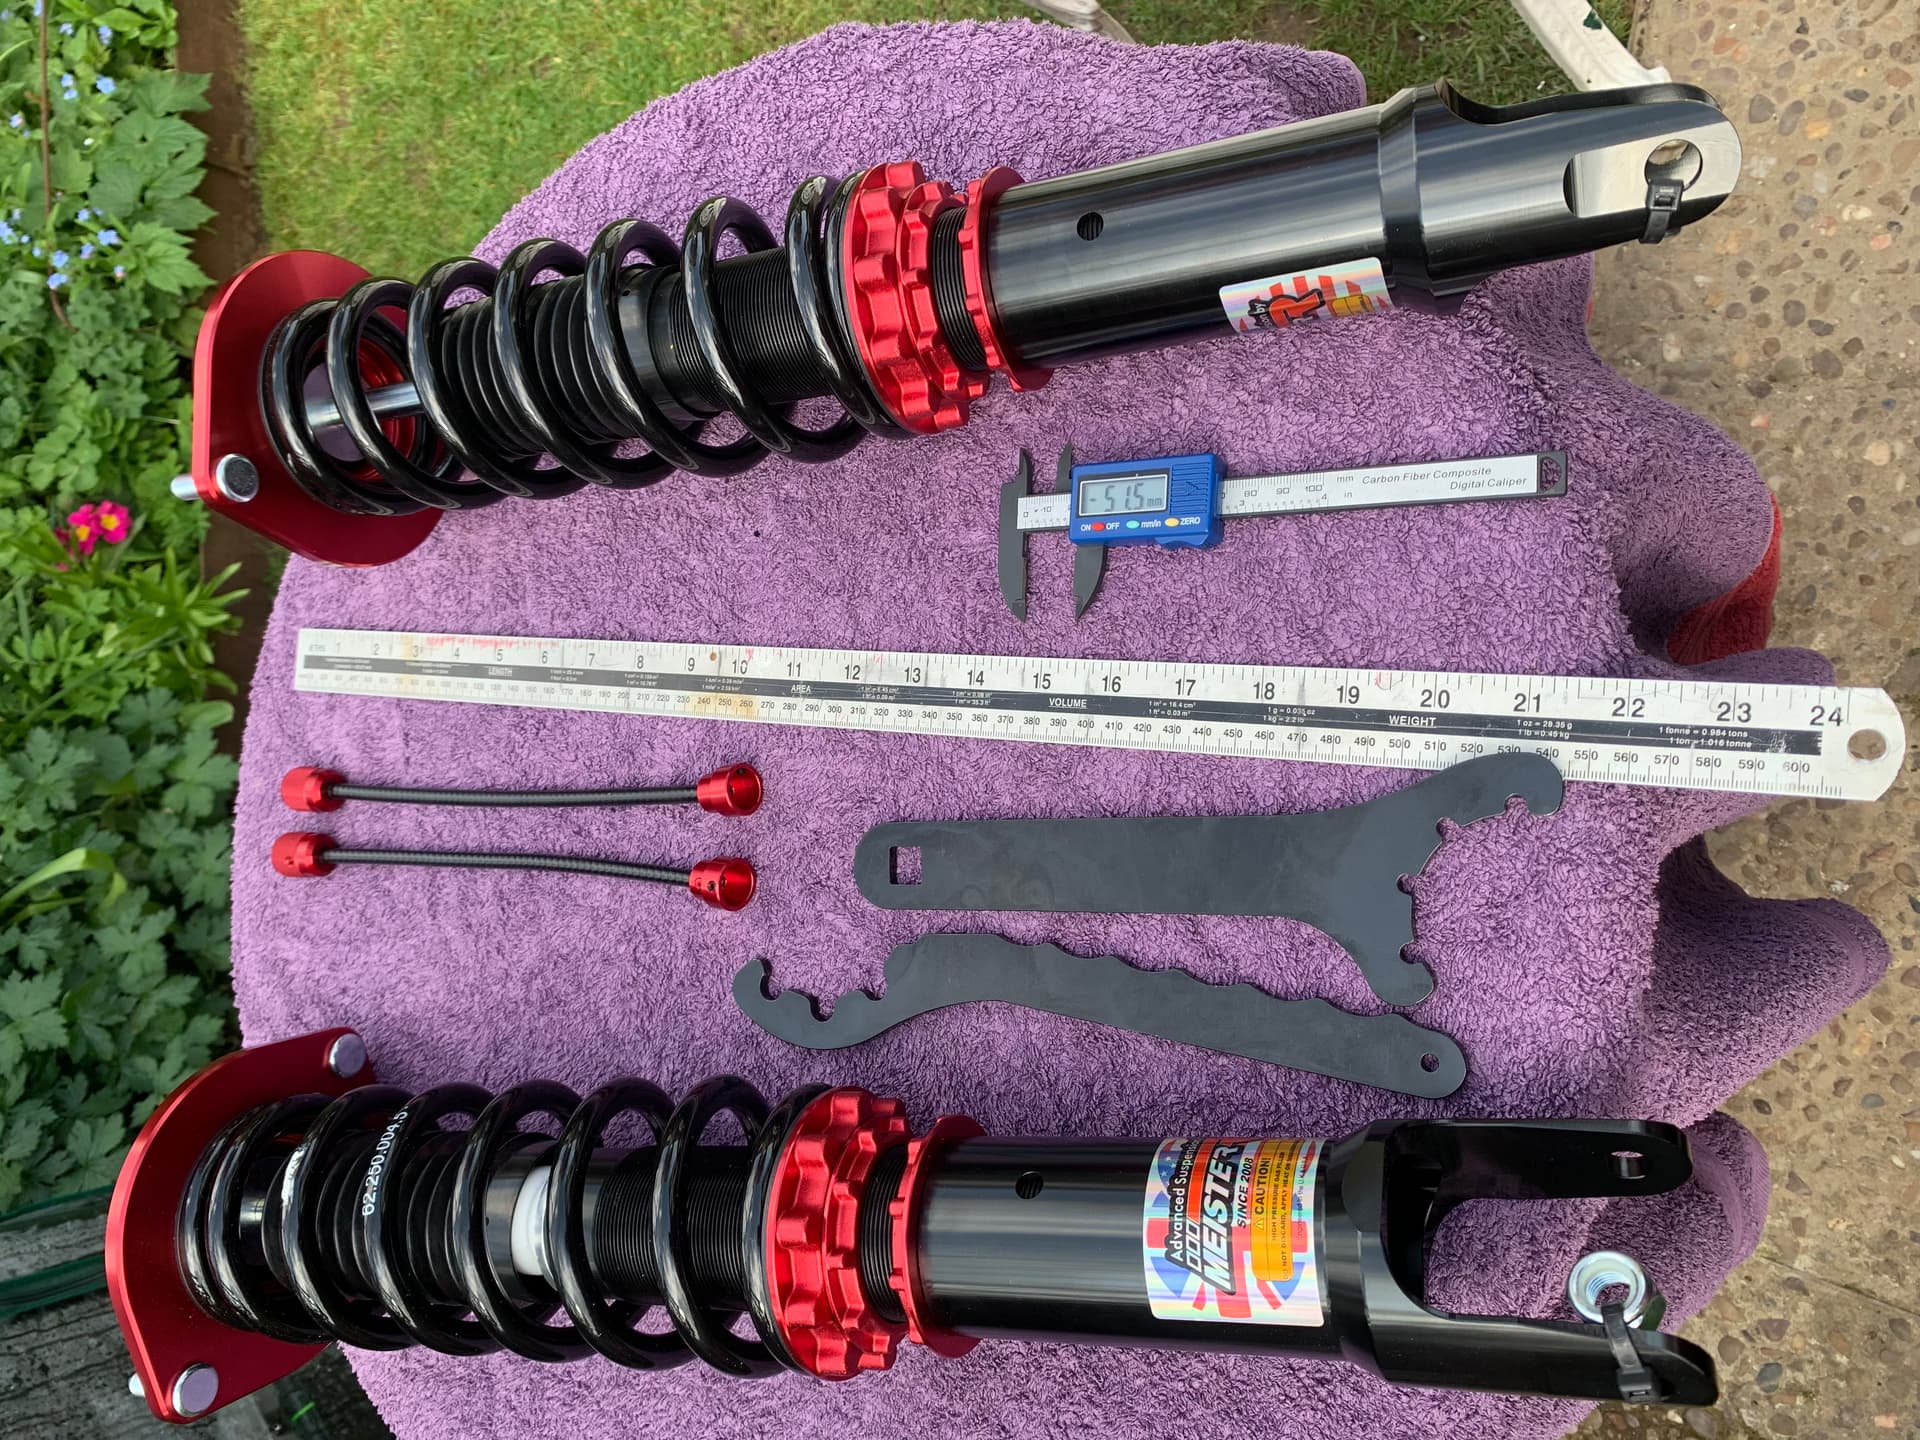
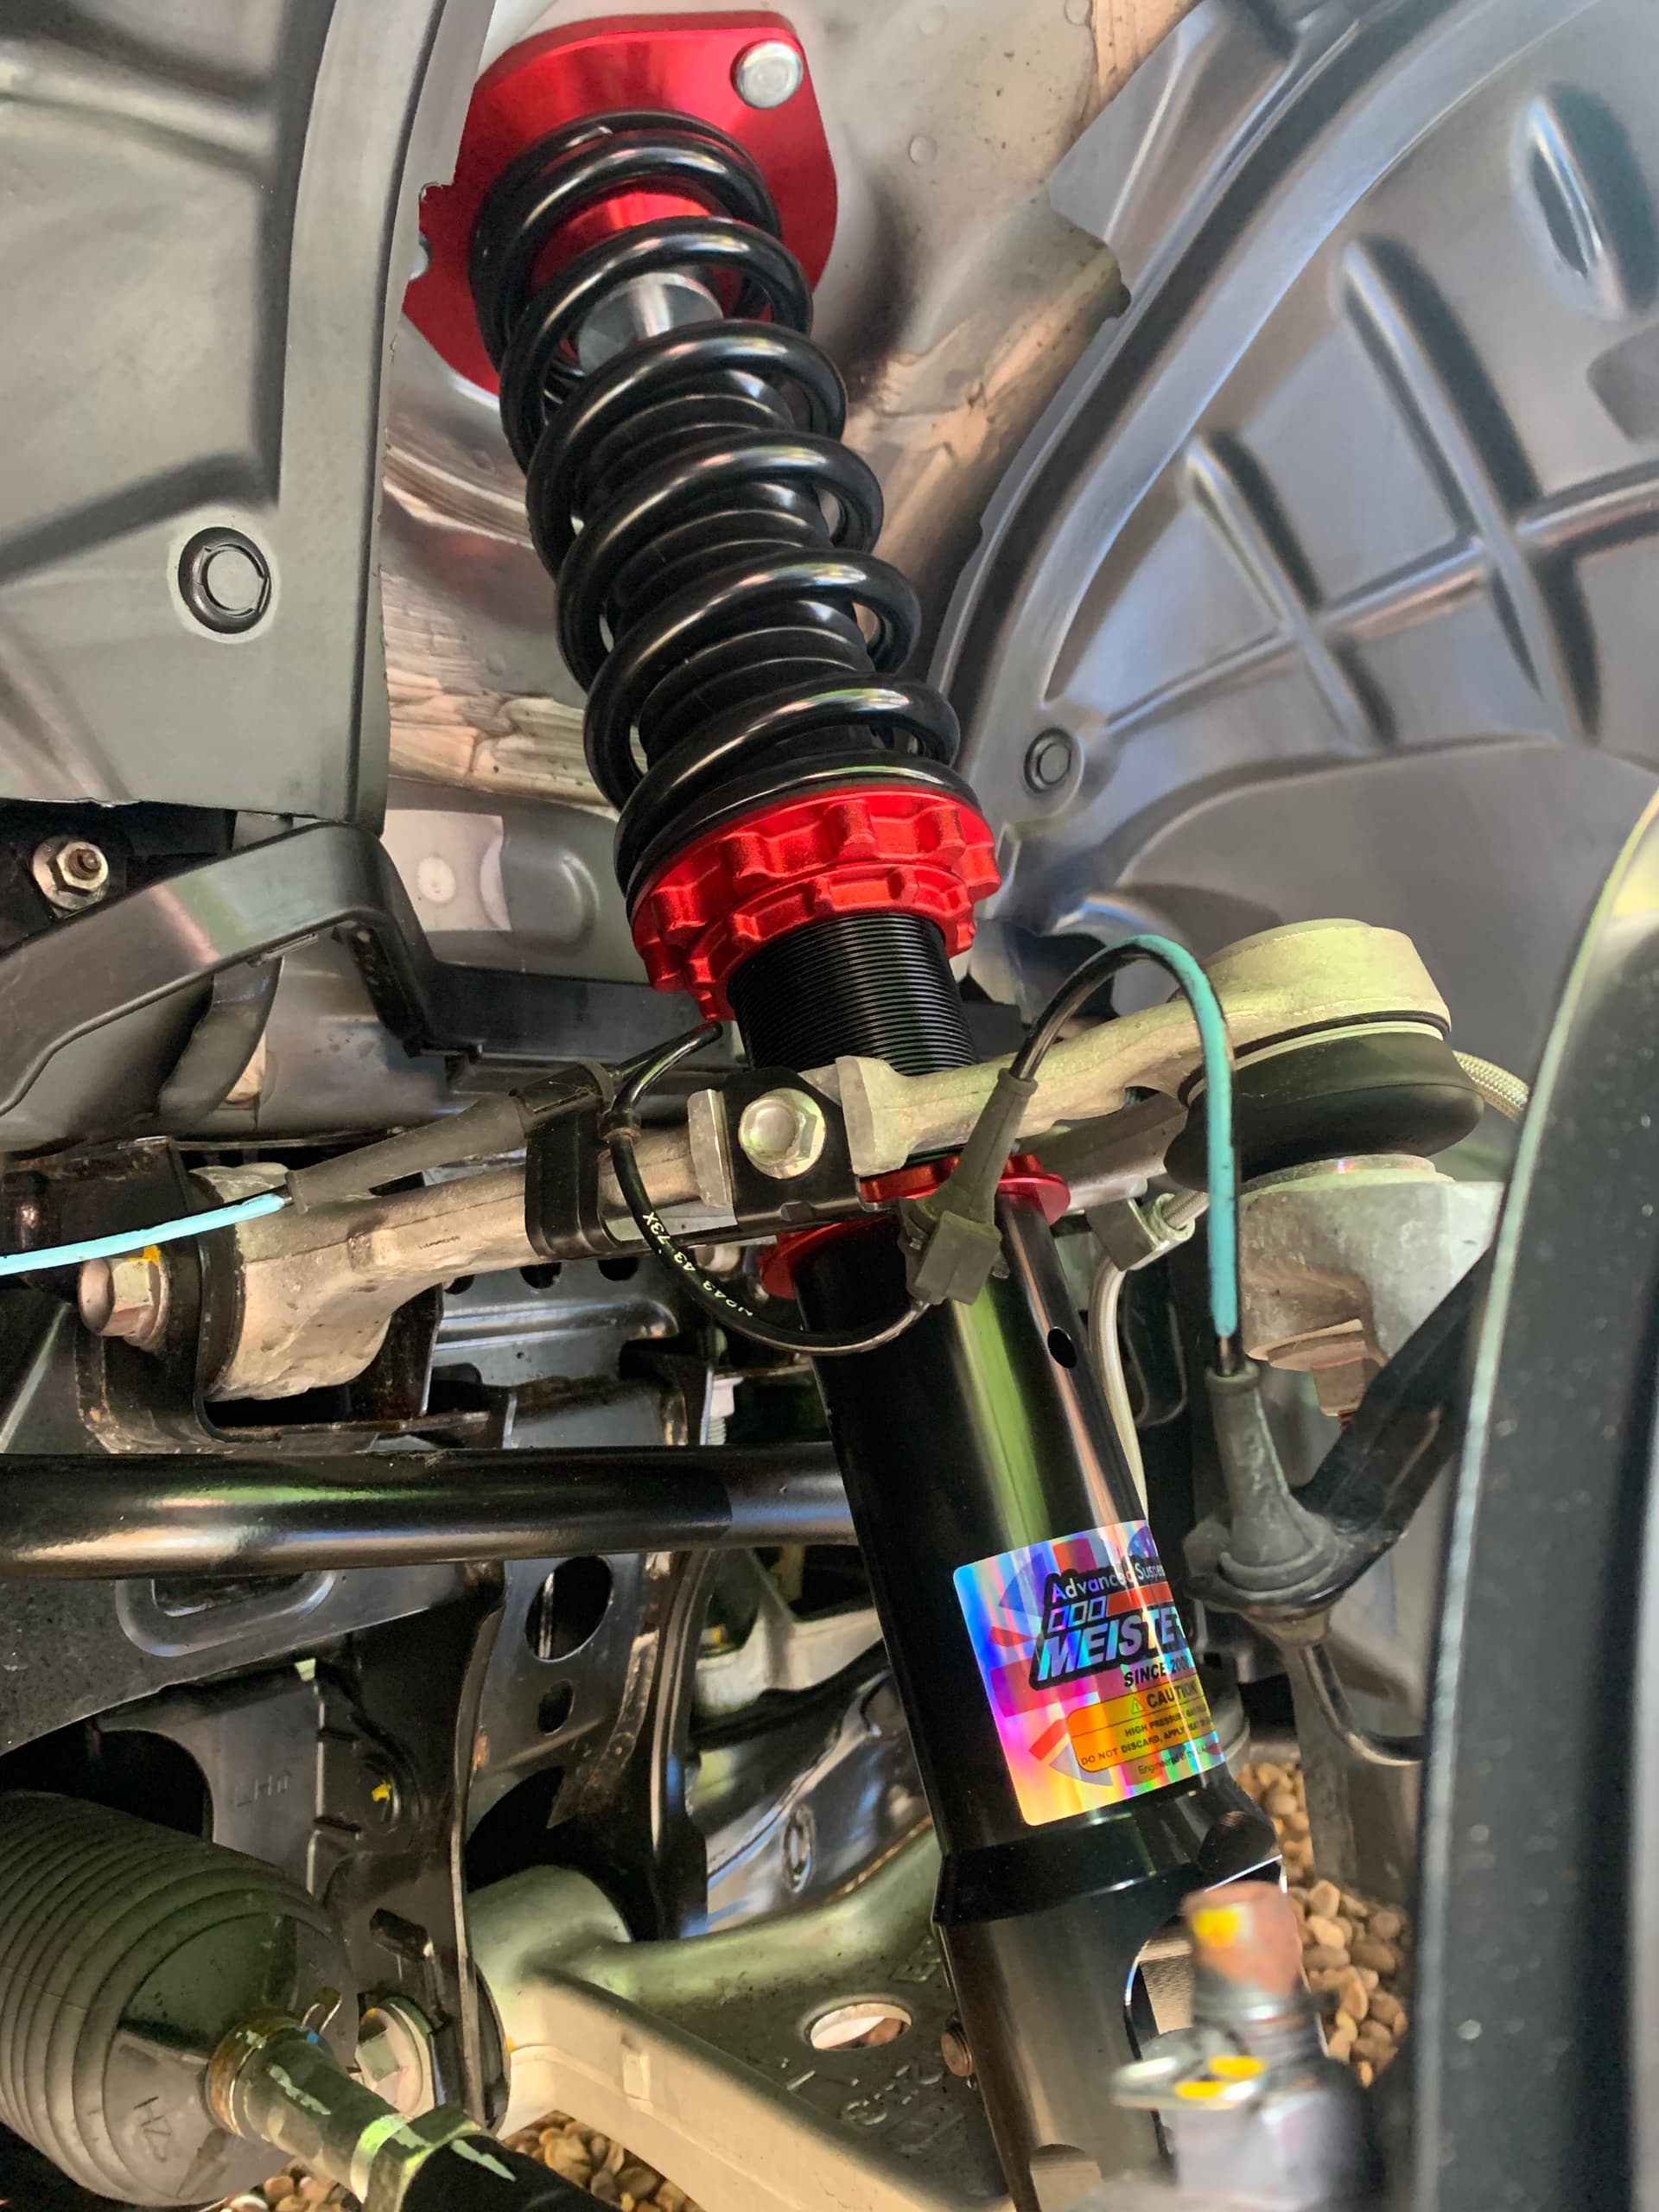
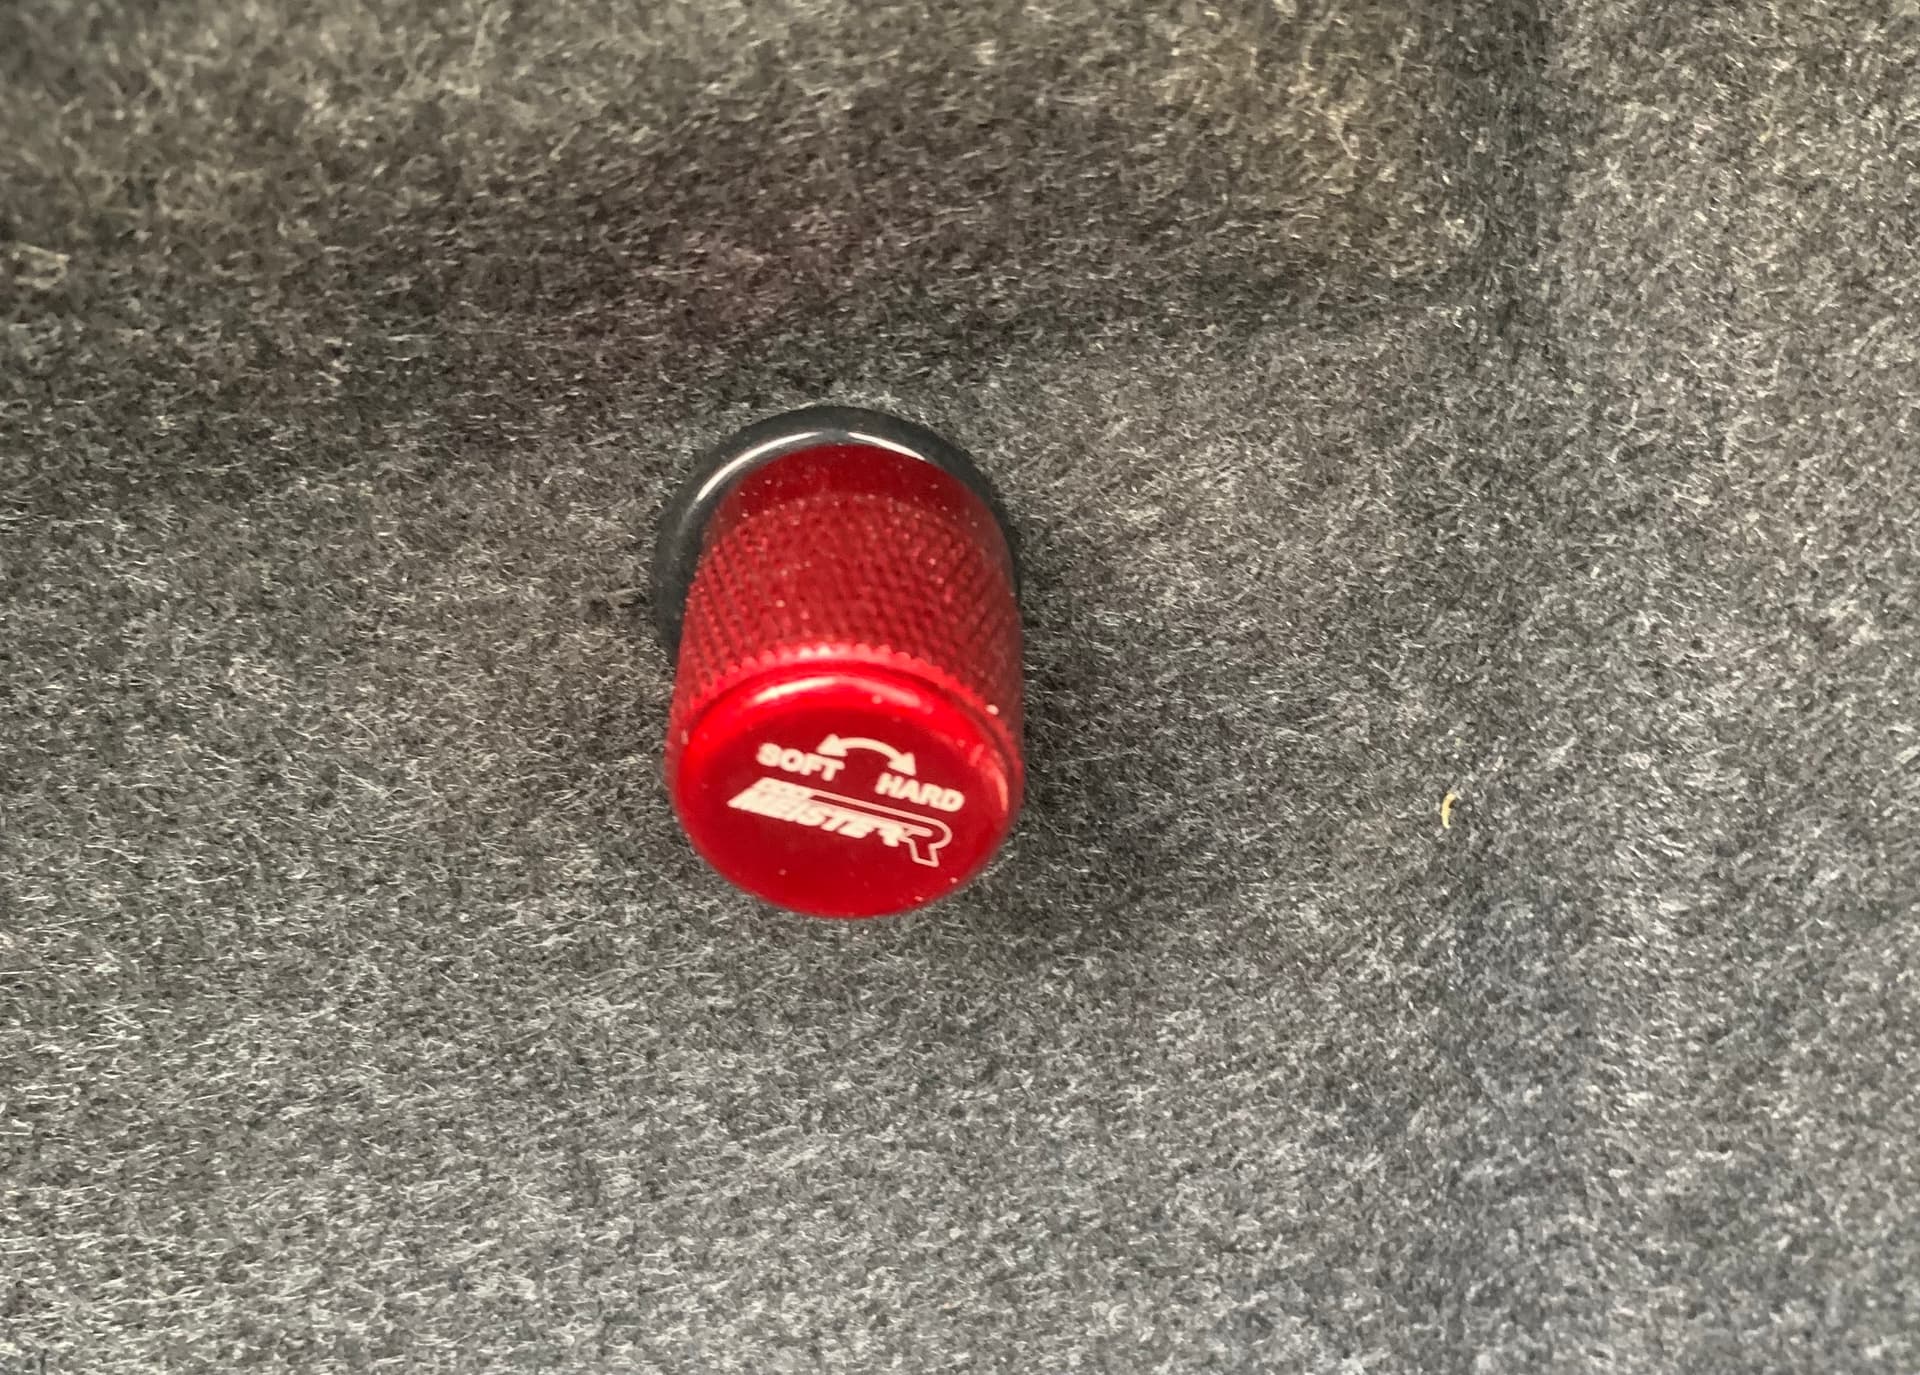
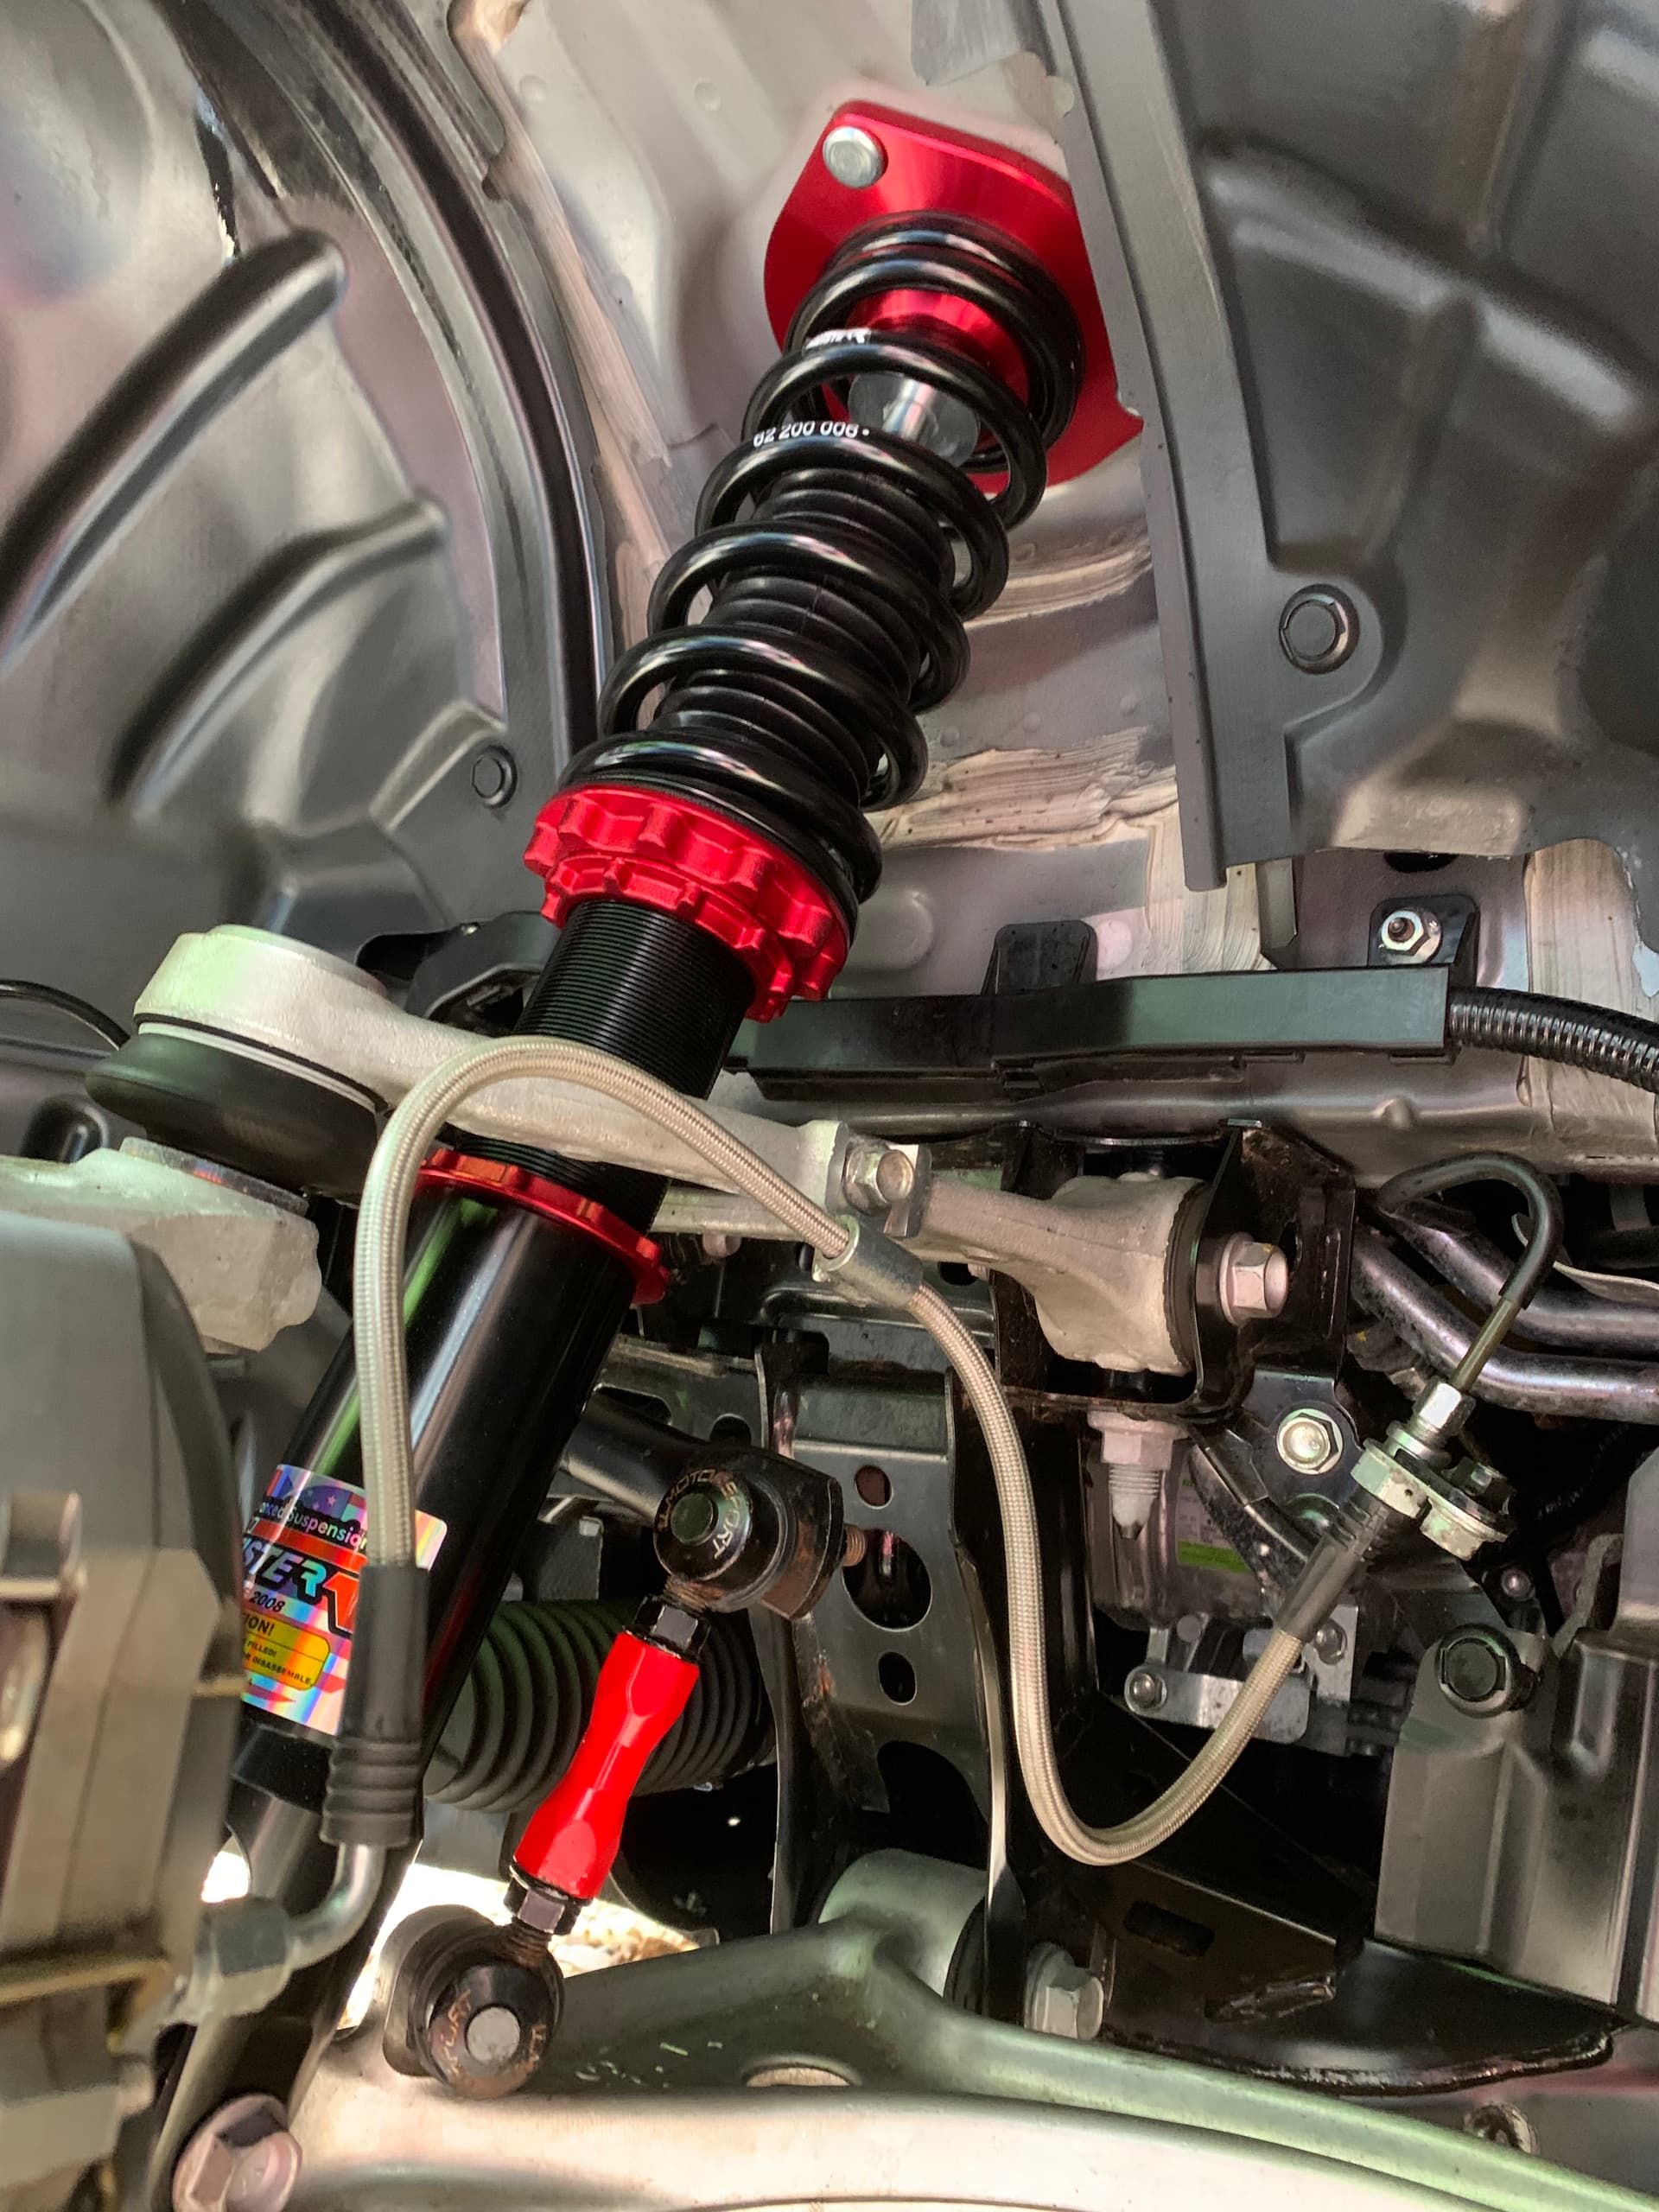
MeisterR suspension
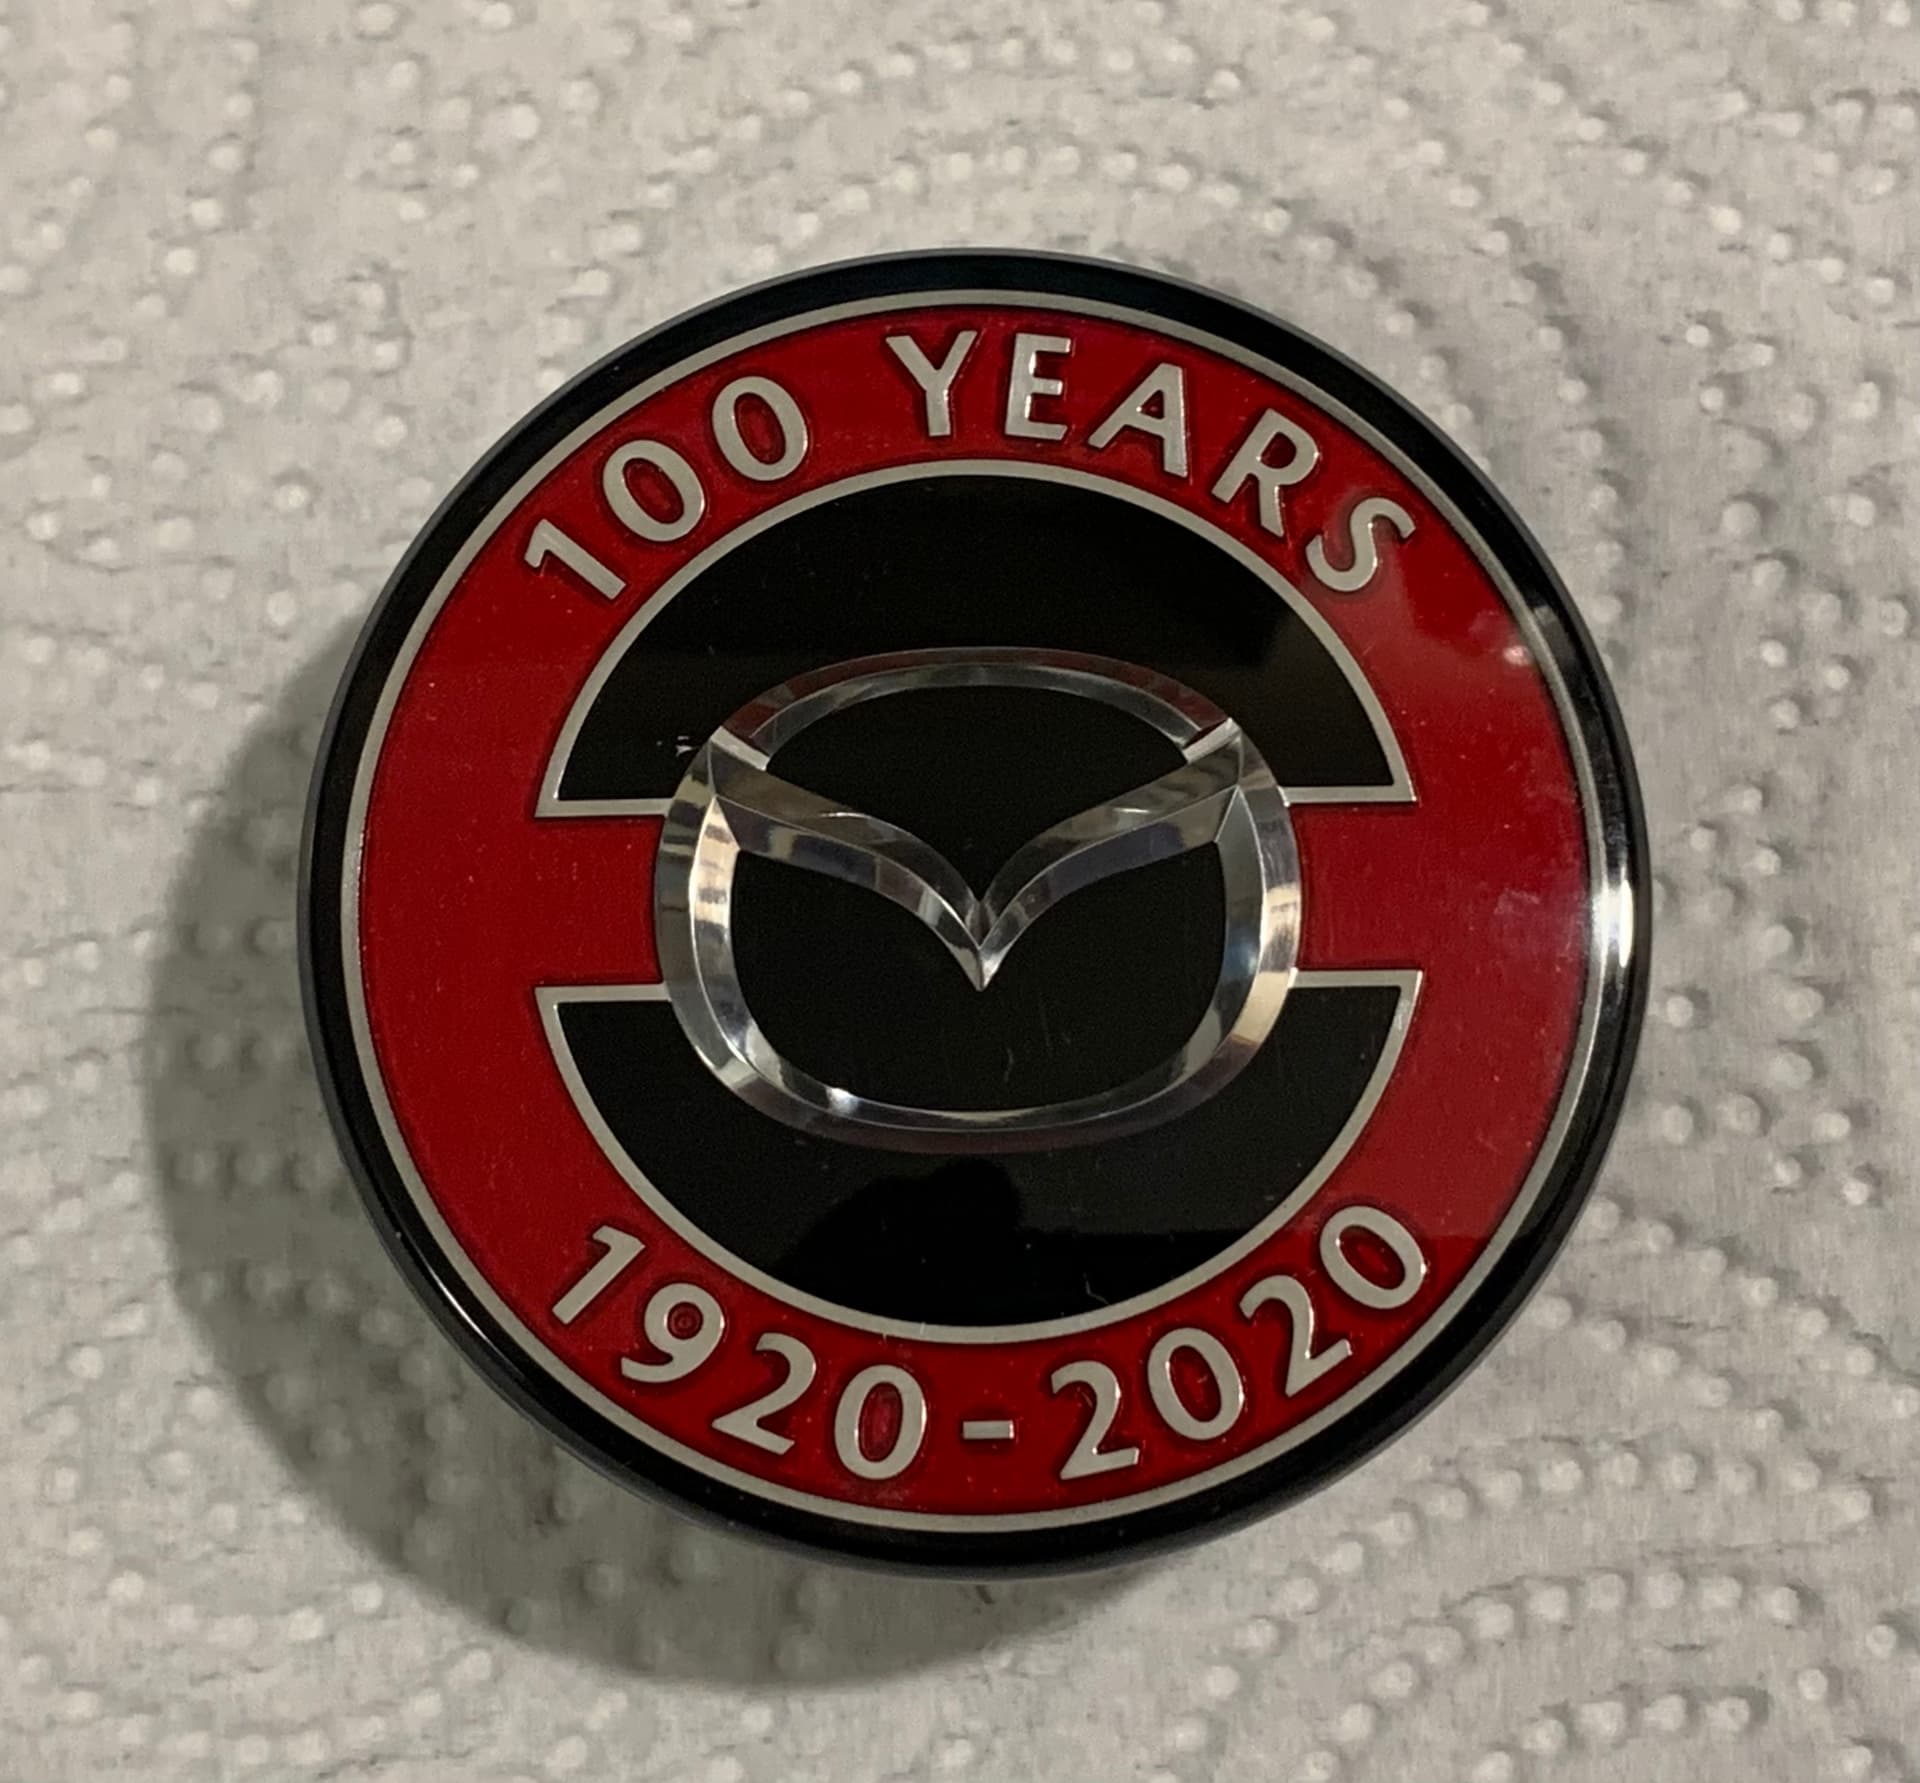
Mazda centre cap Anniversary edition …
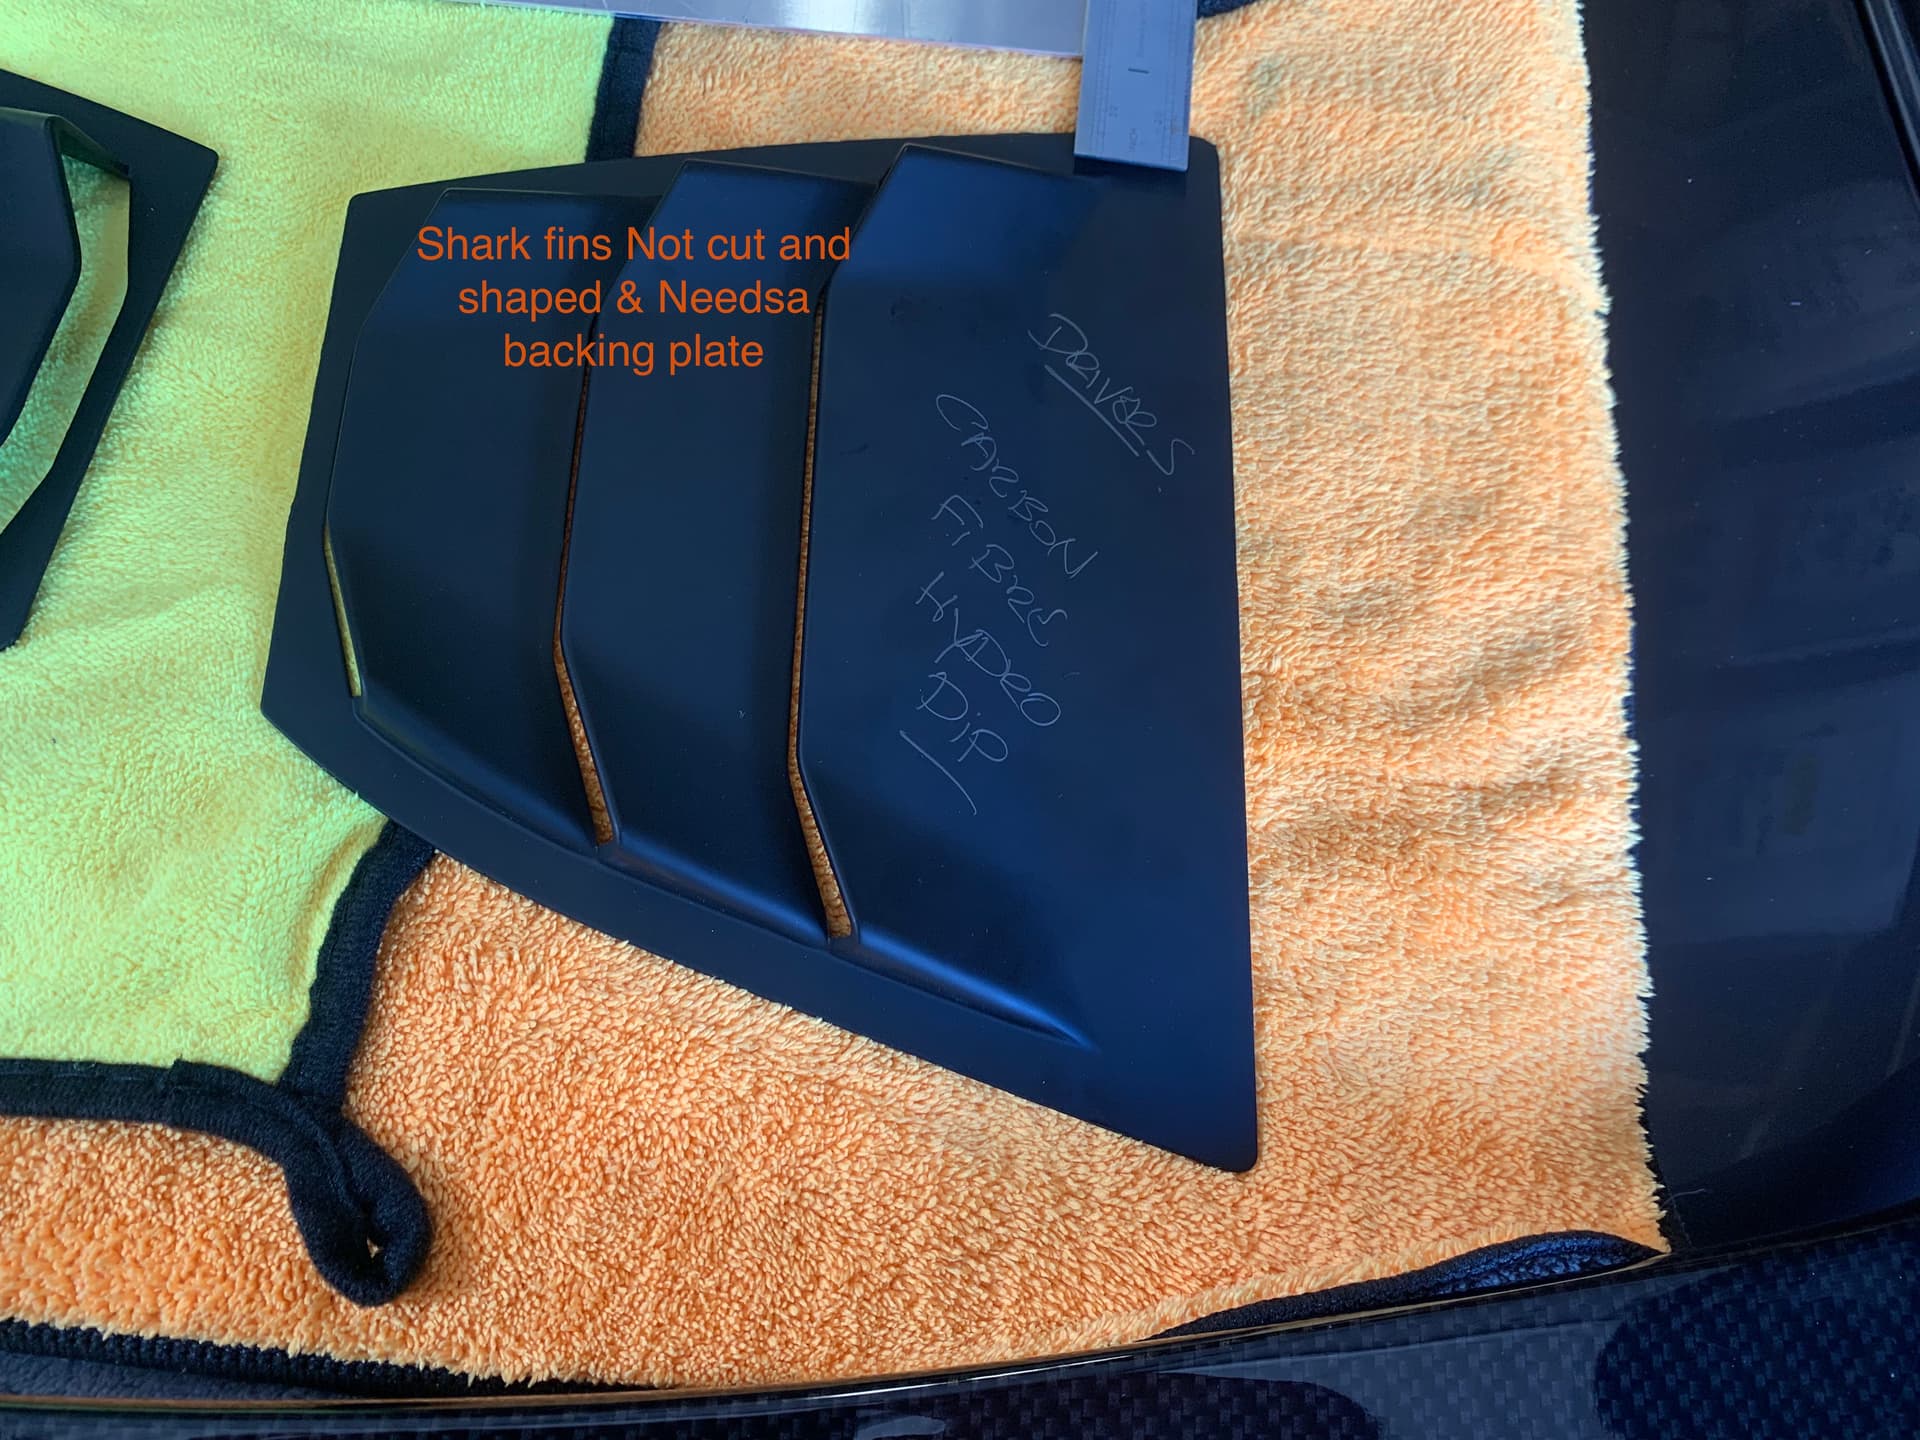
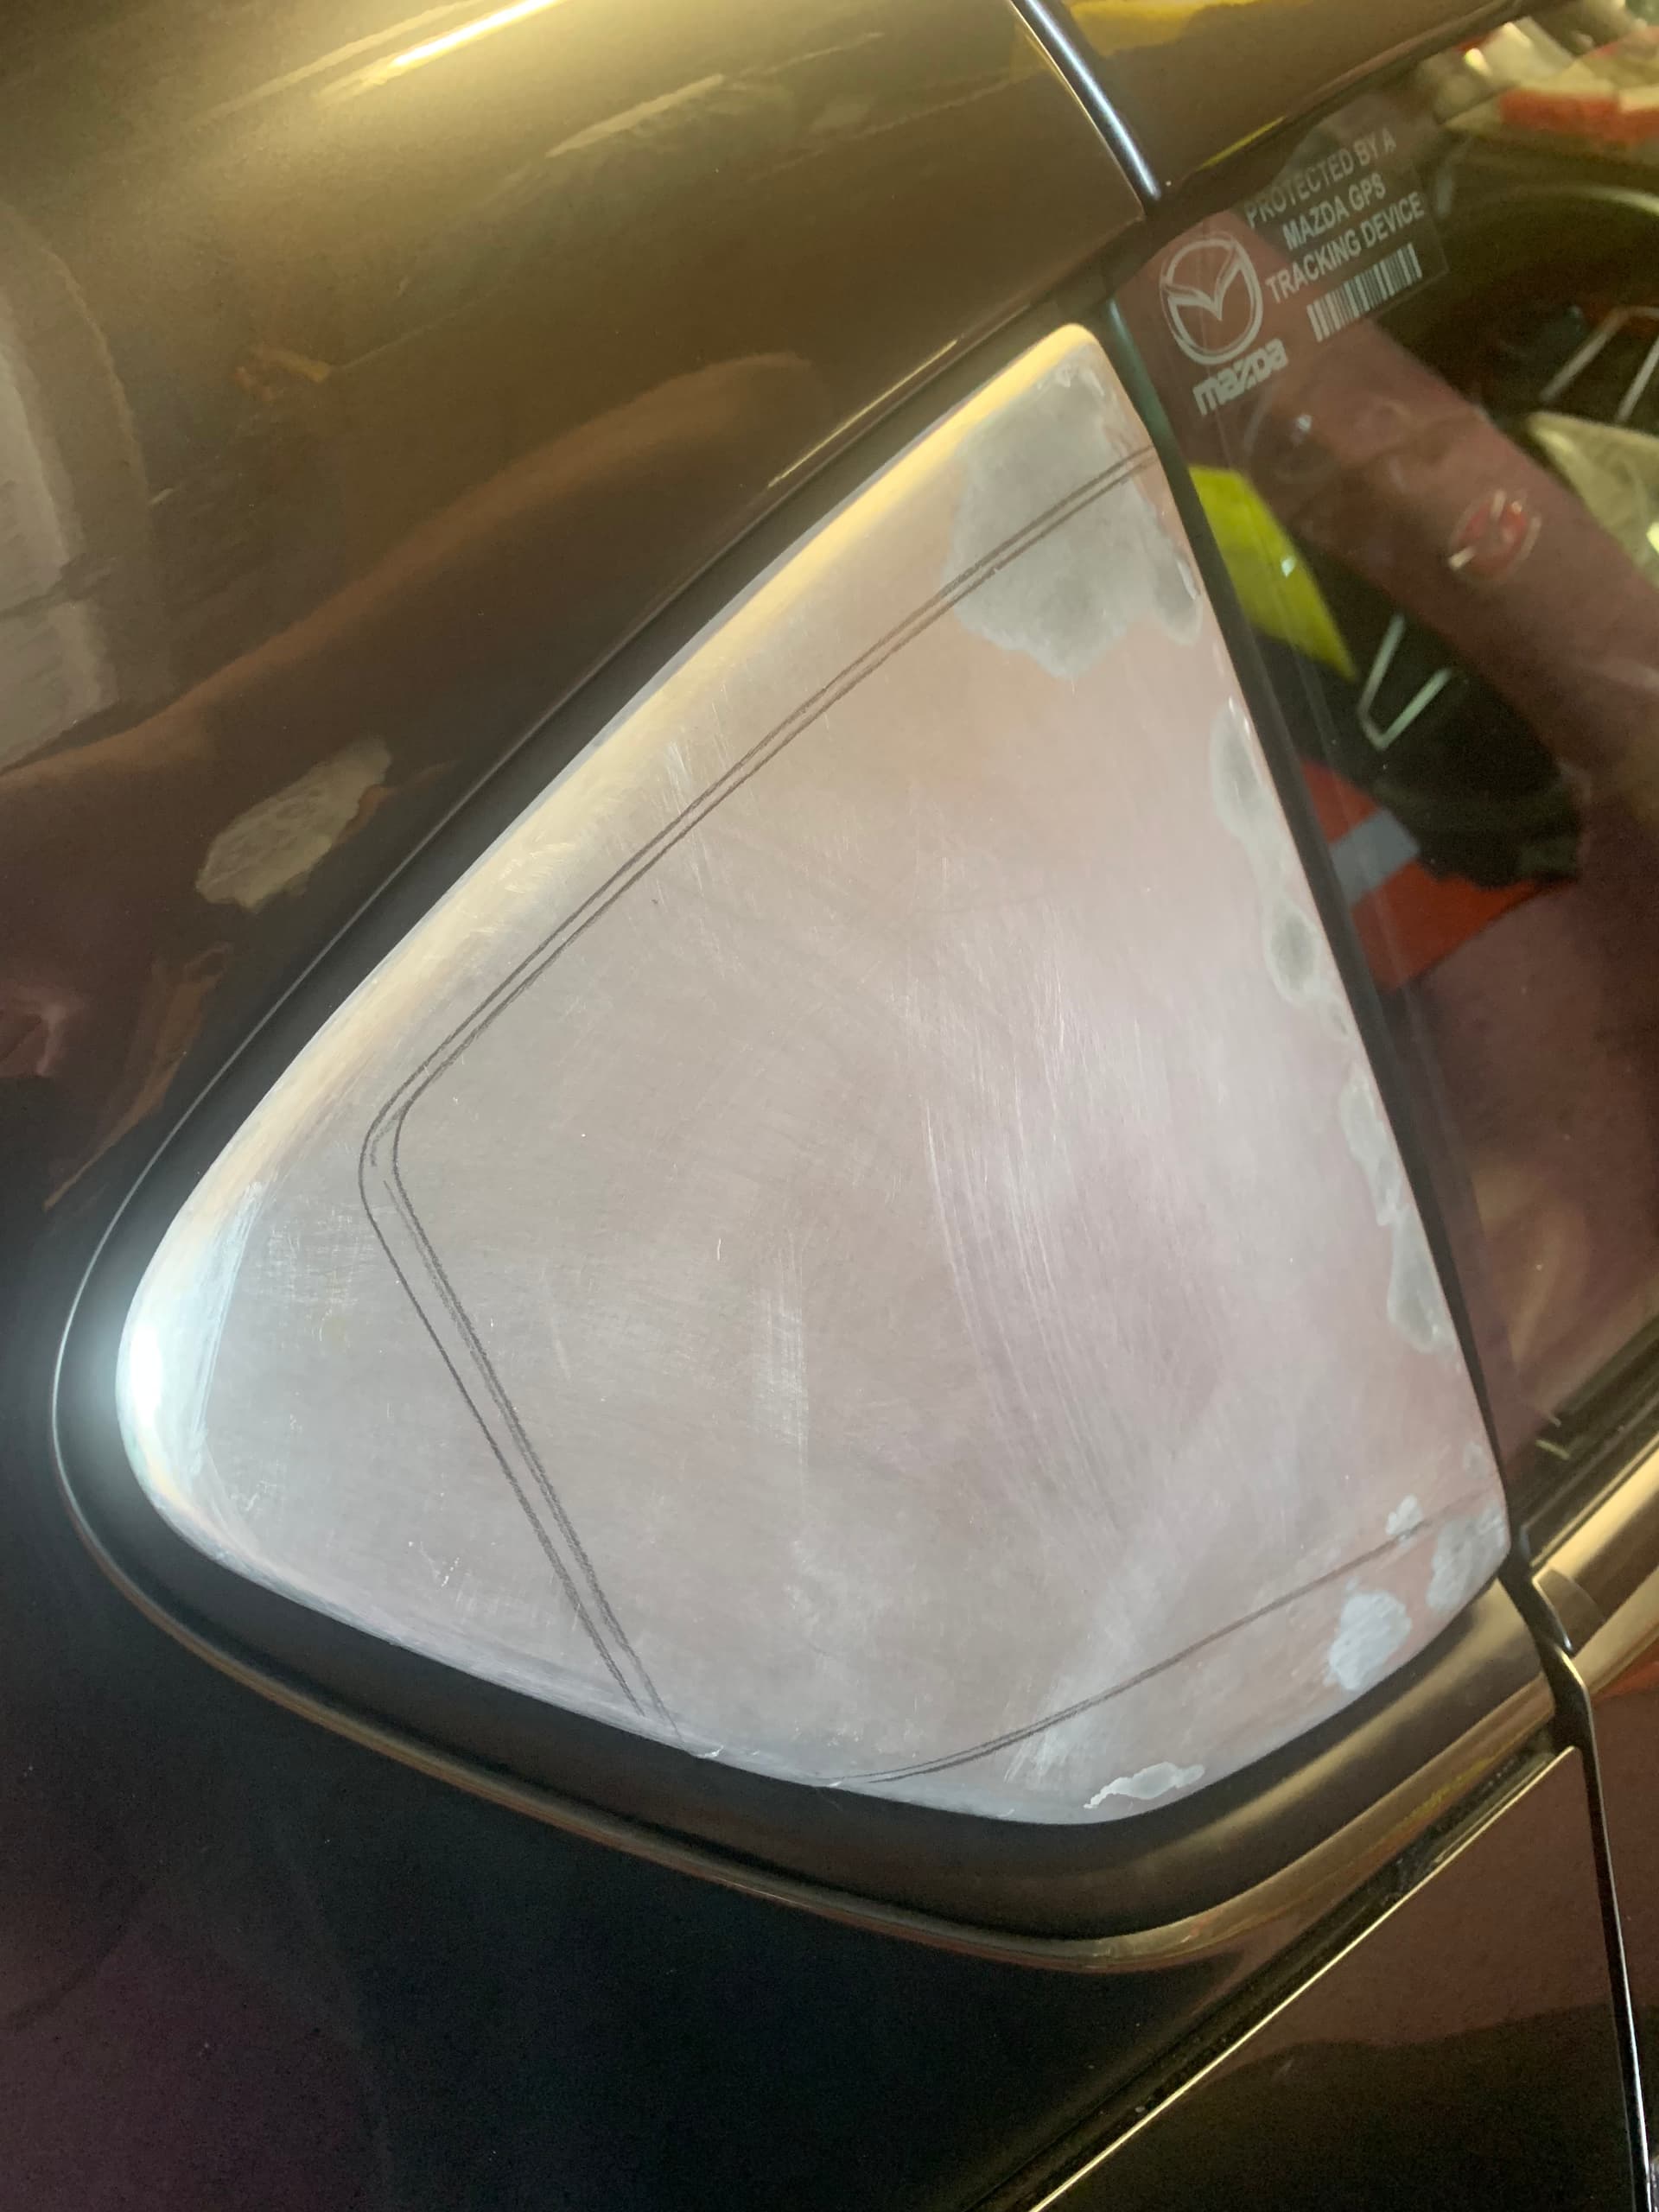
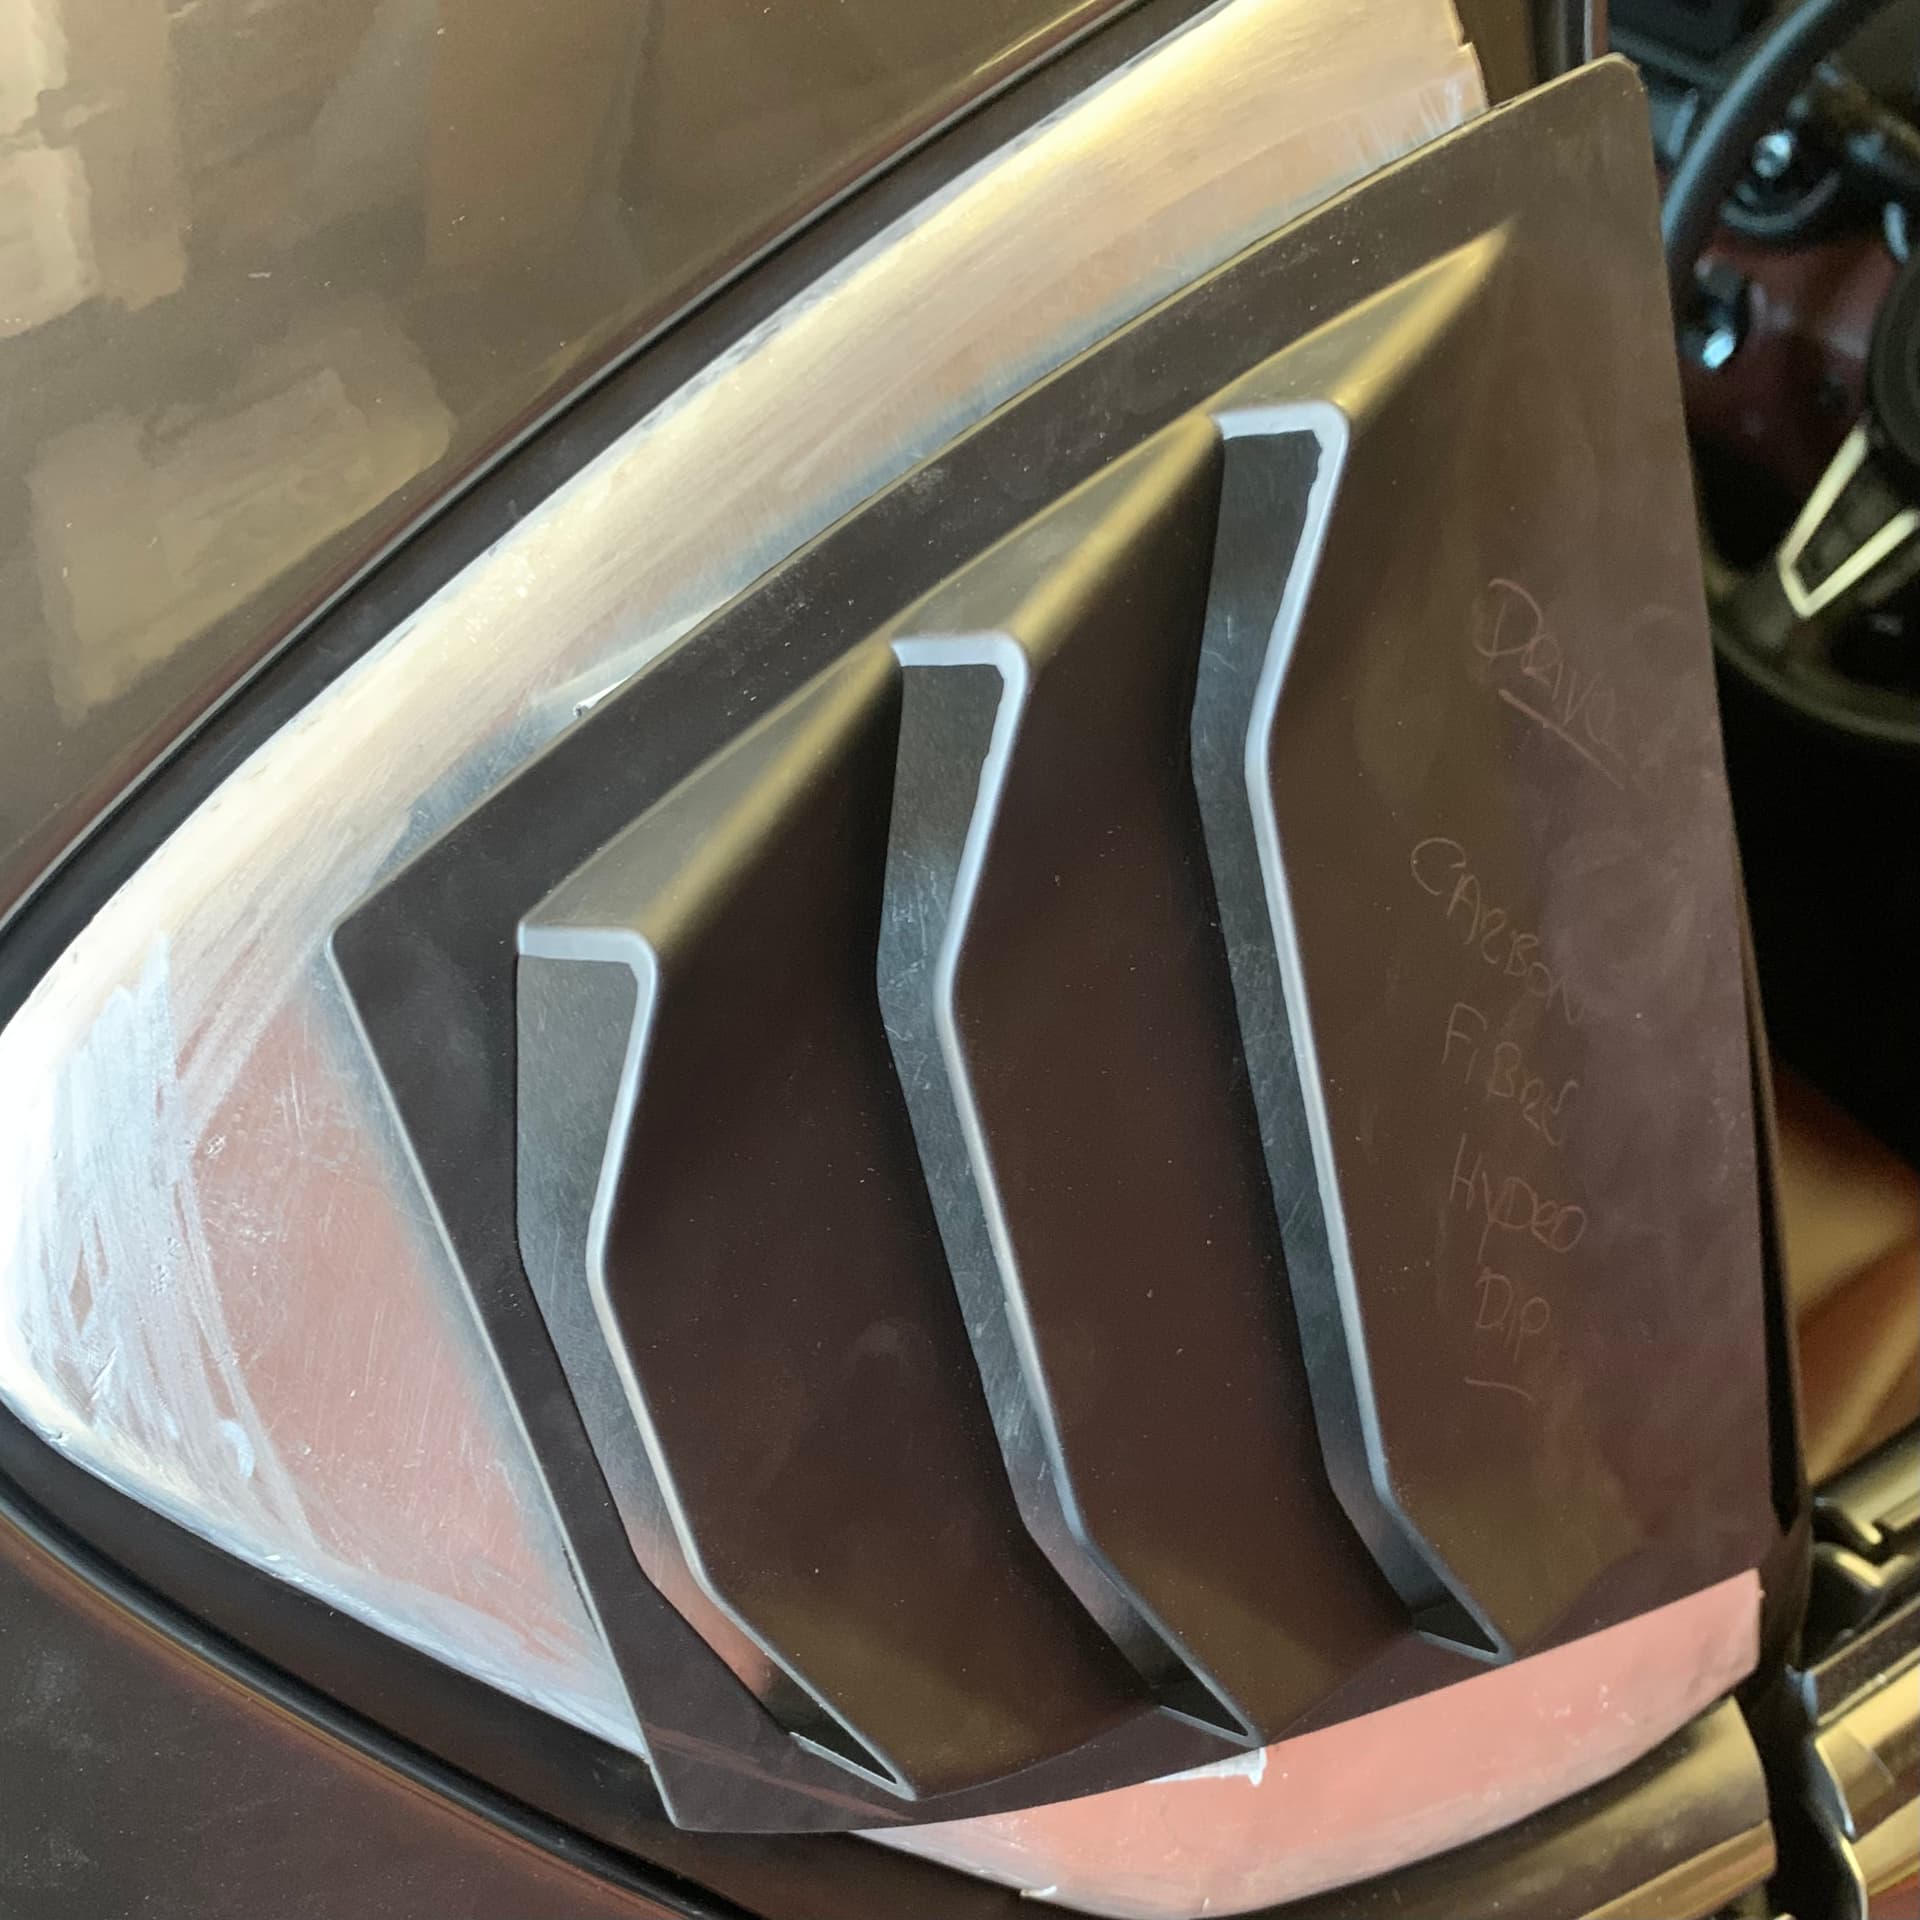
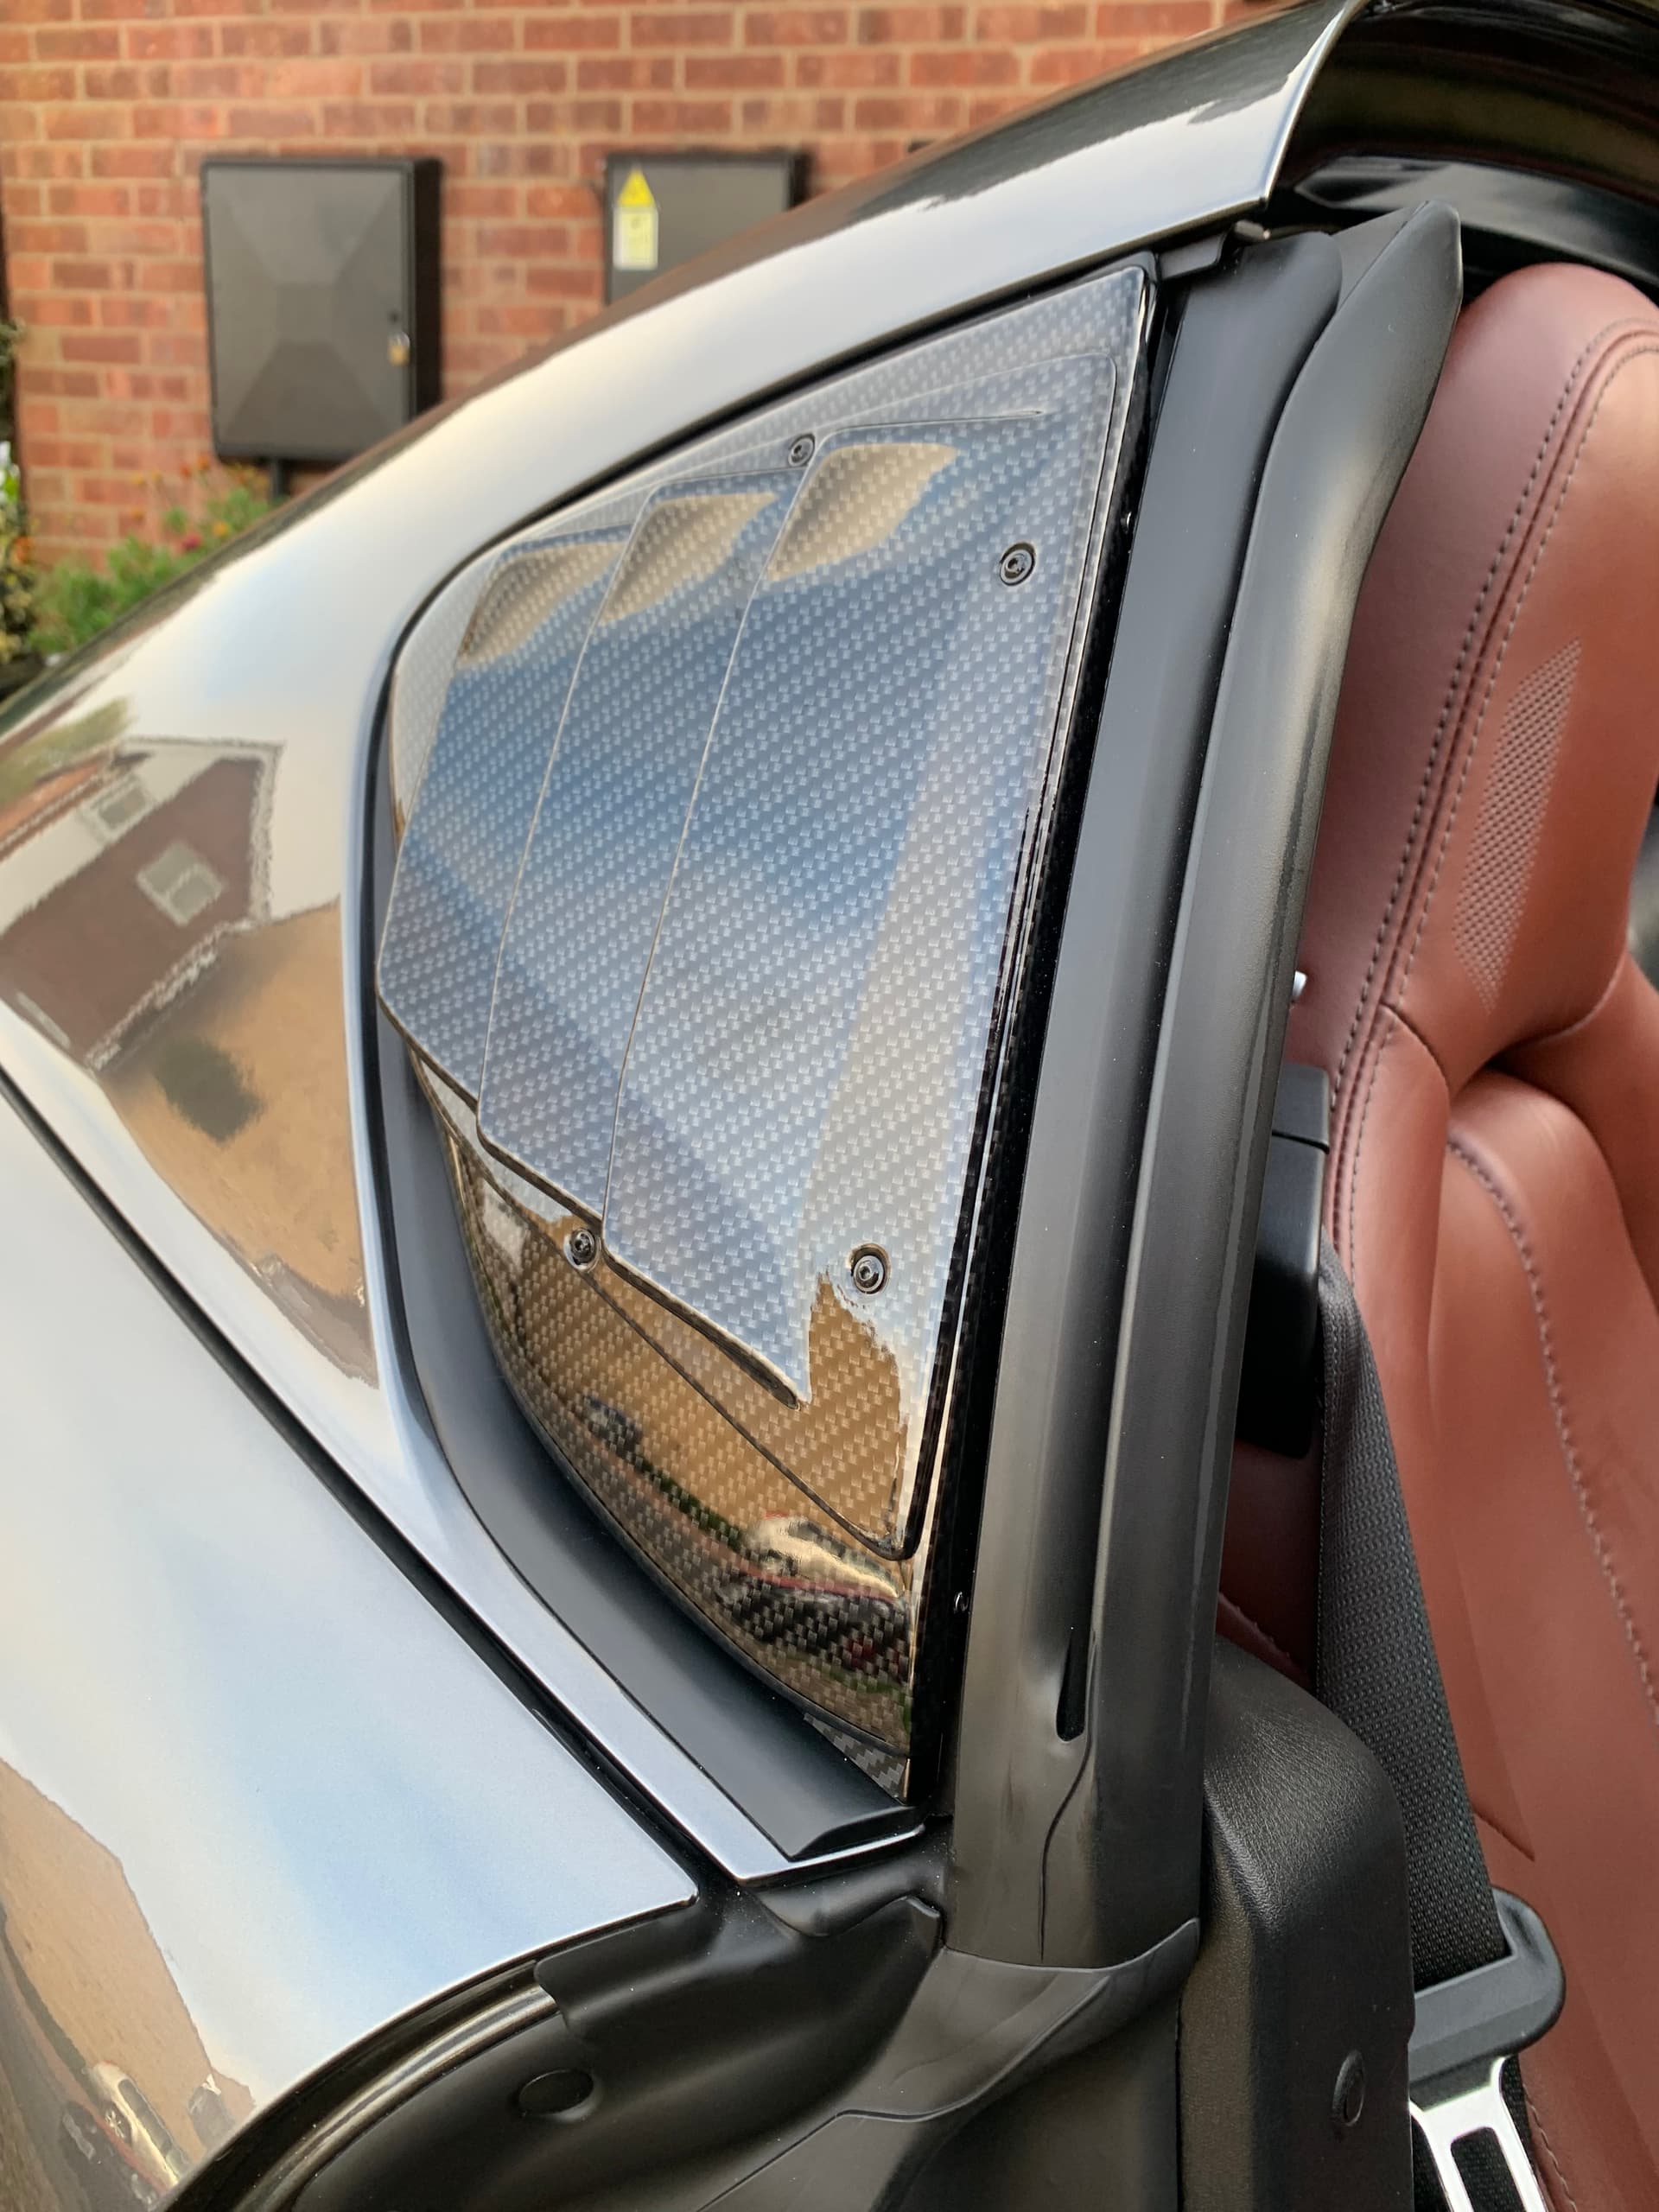
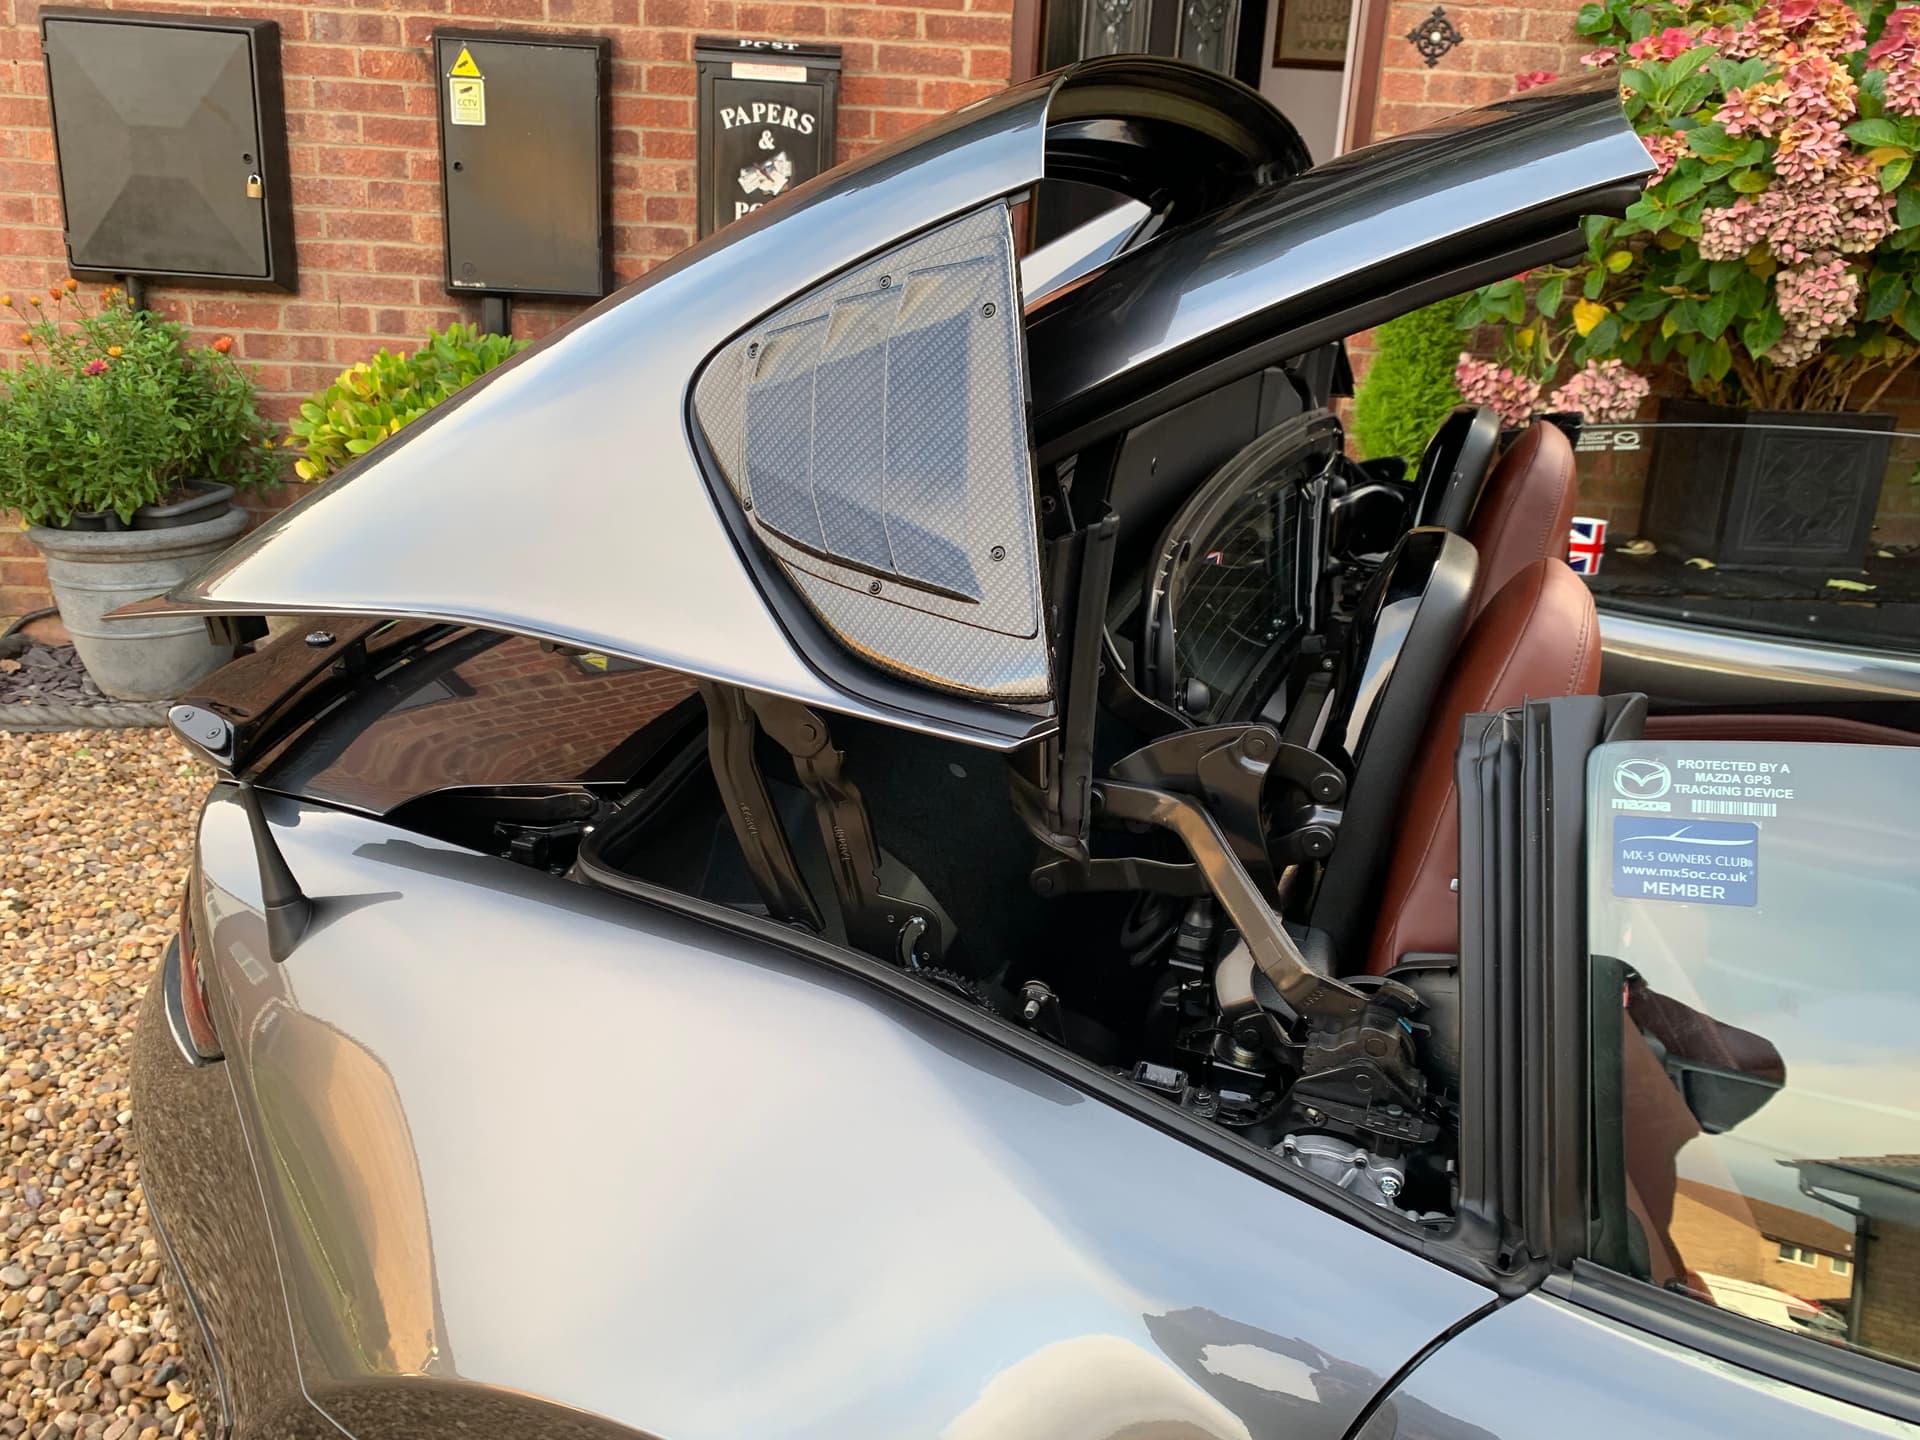
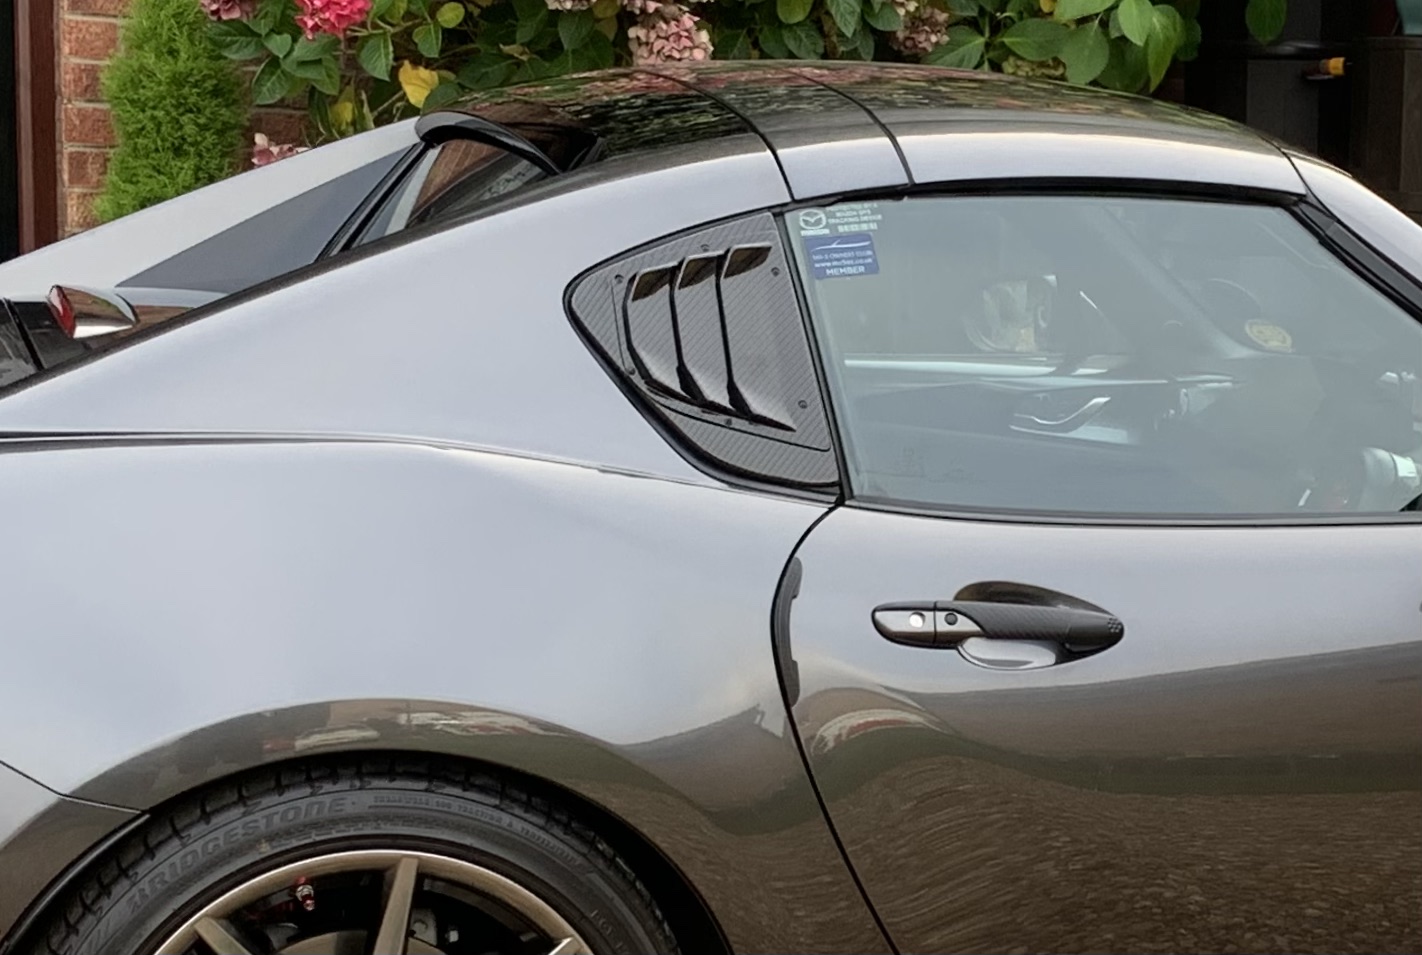
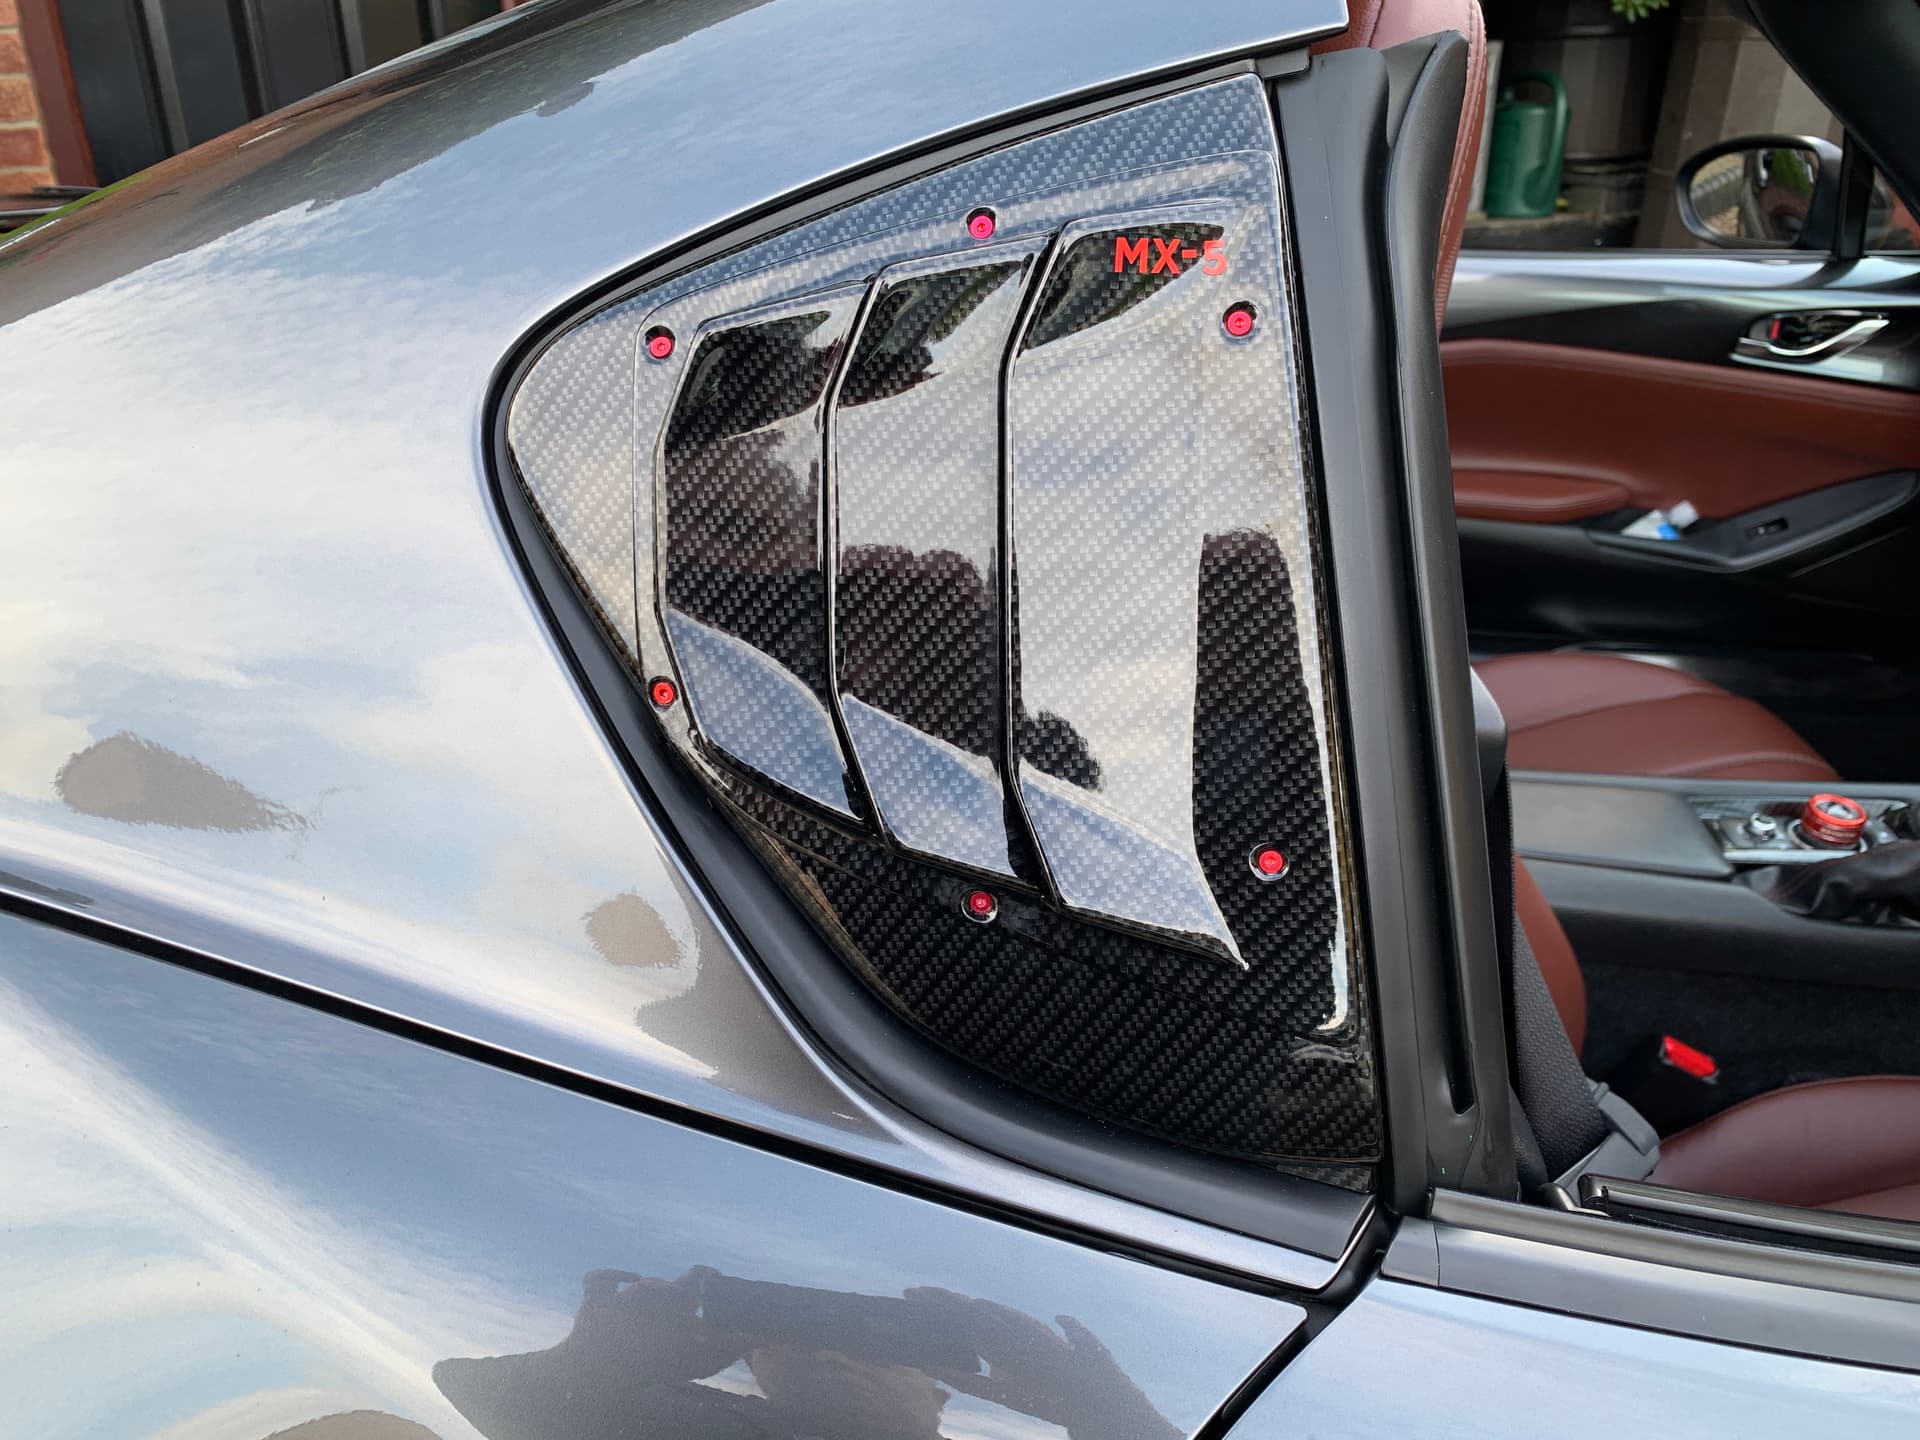
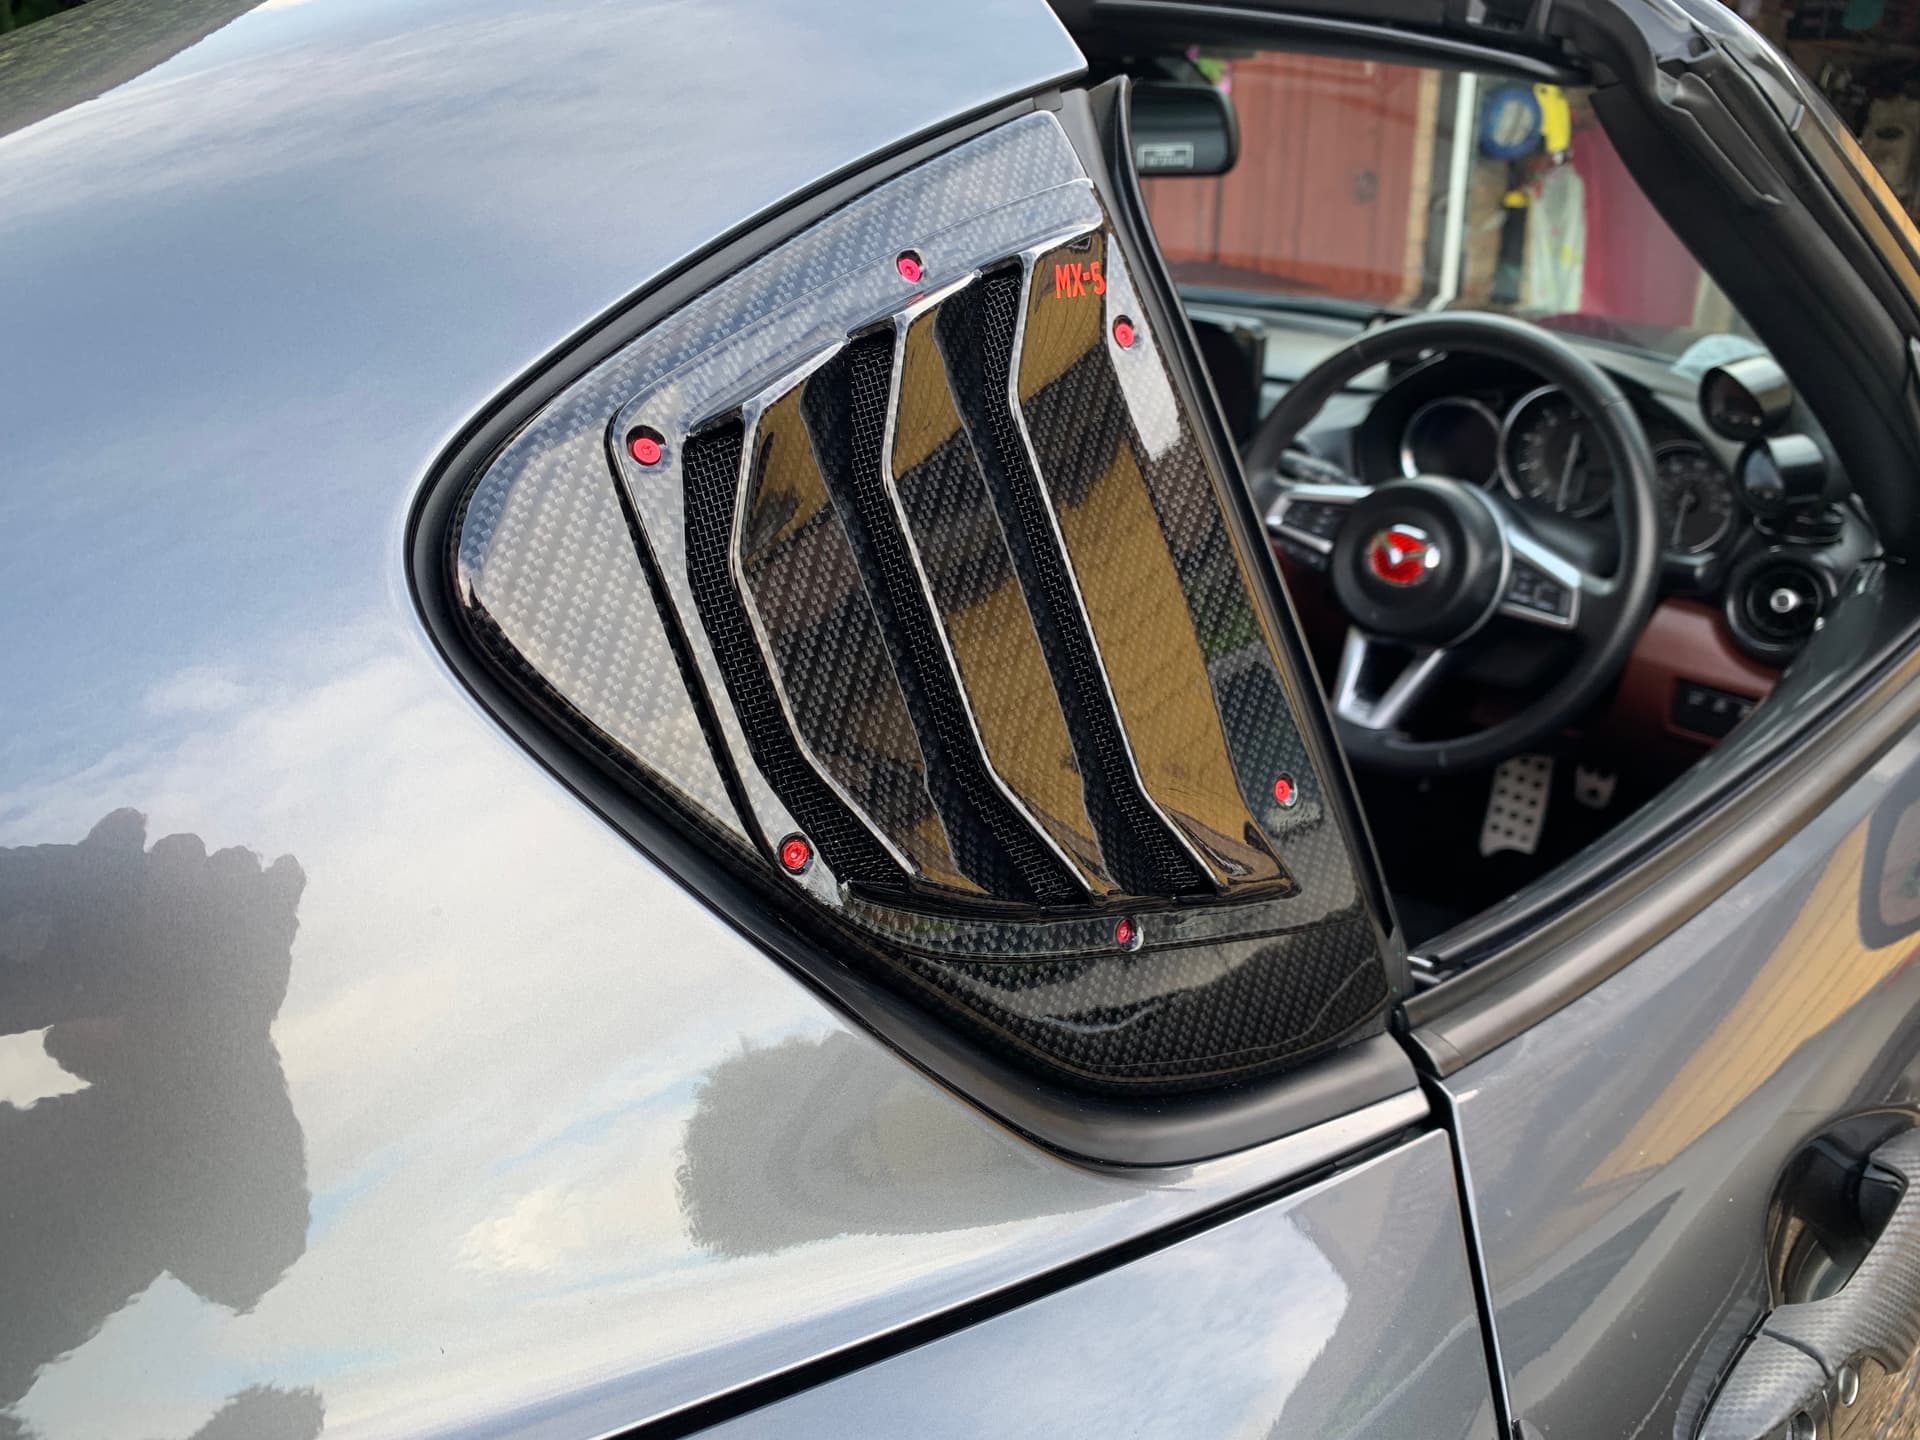
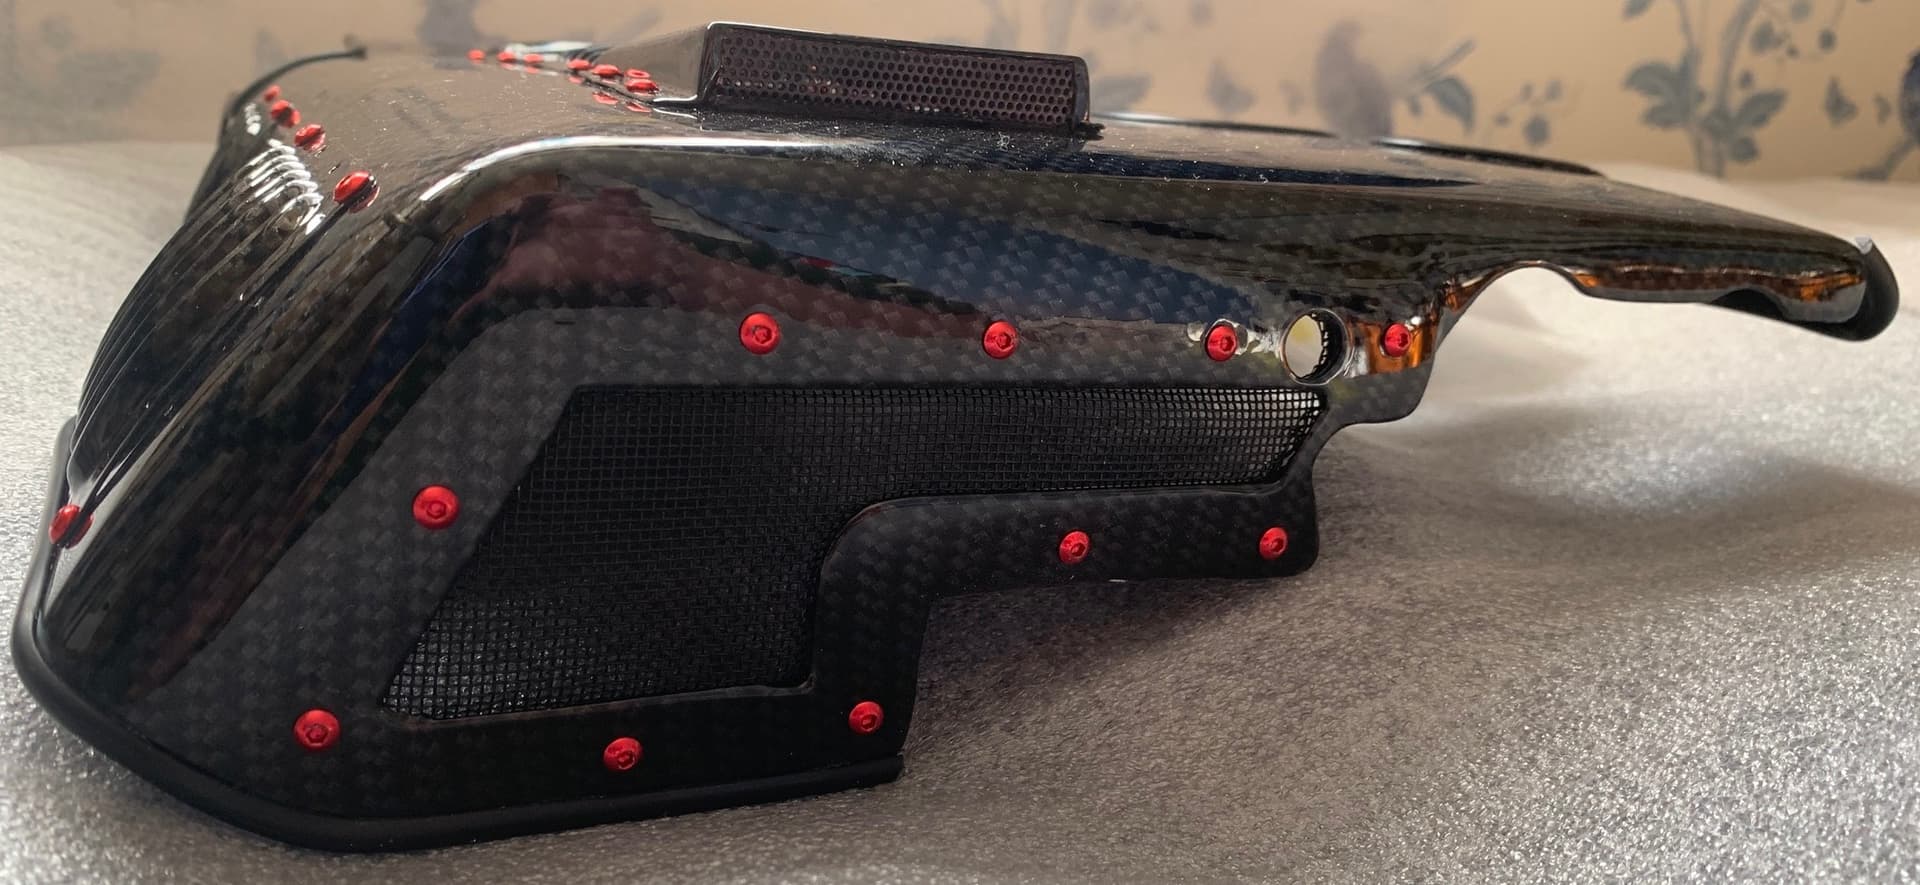
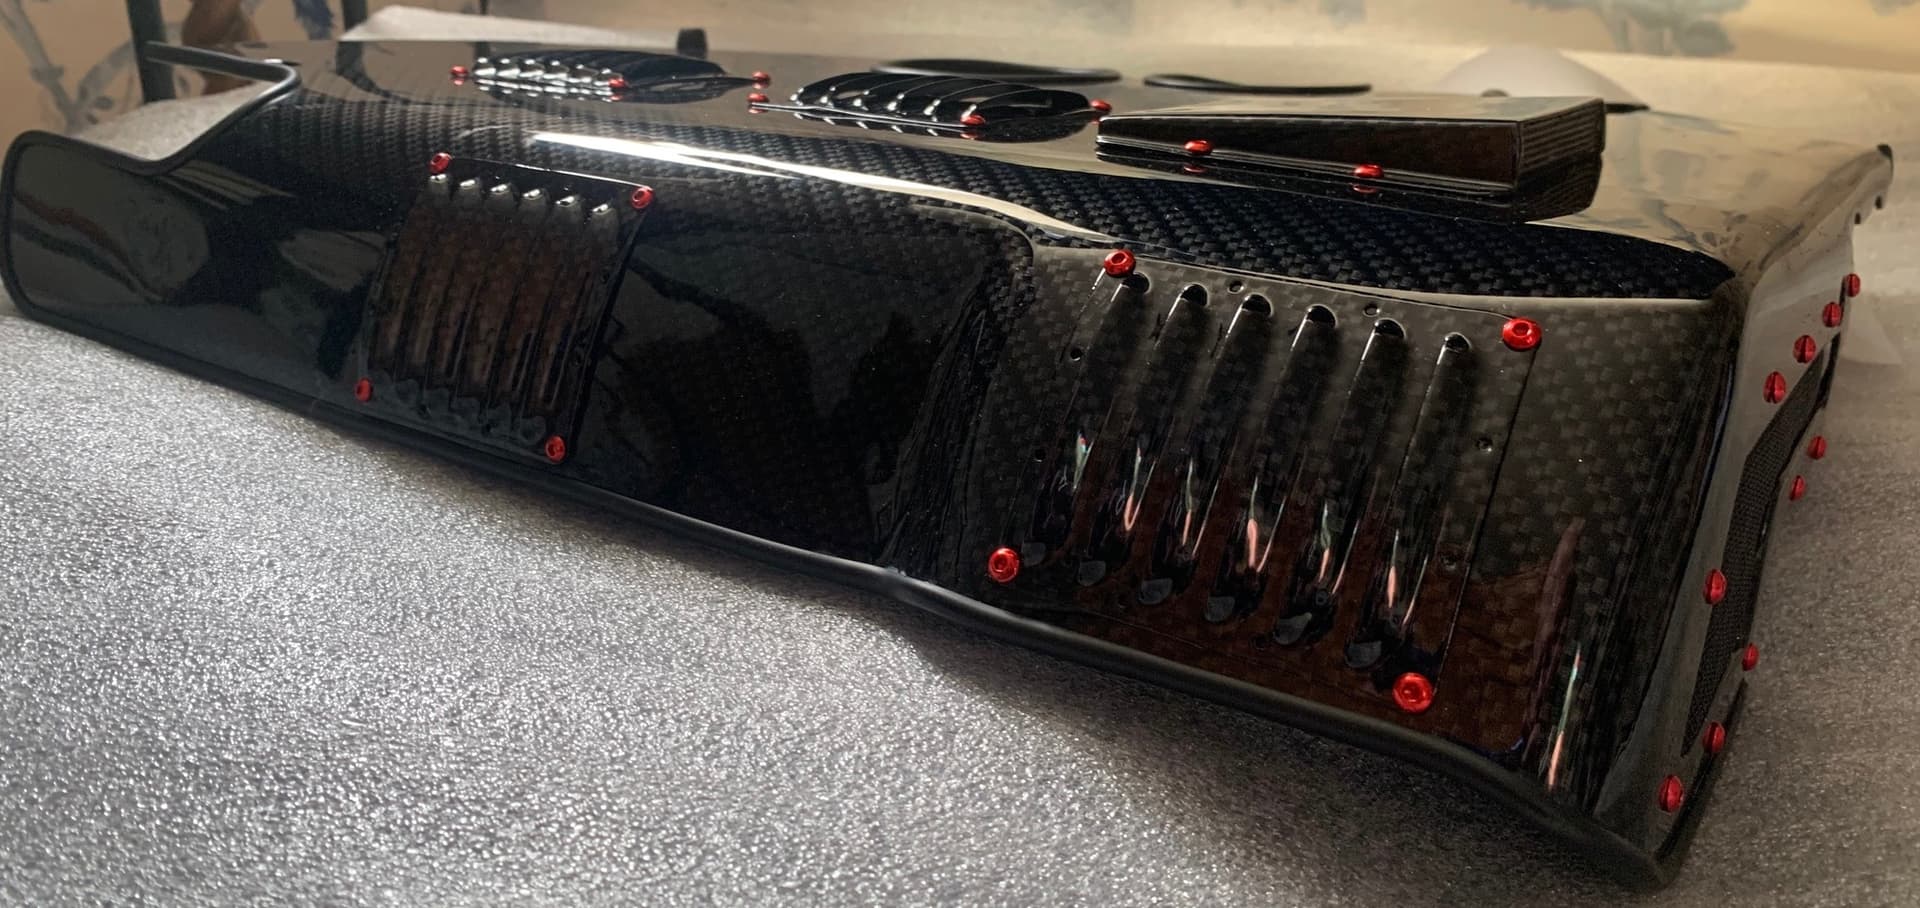
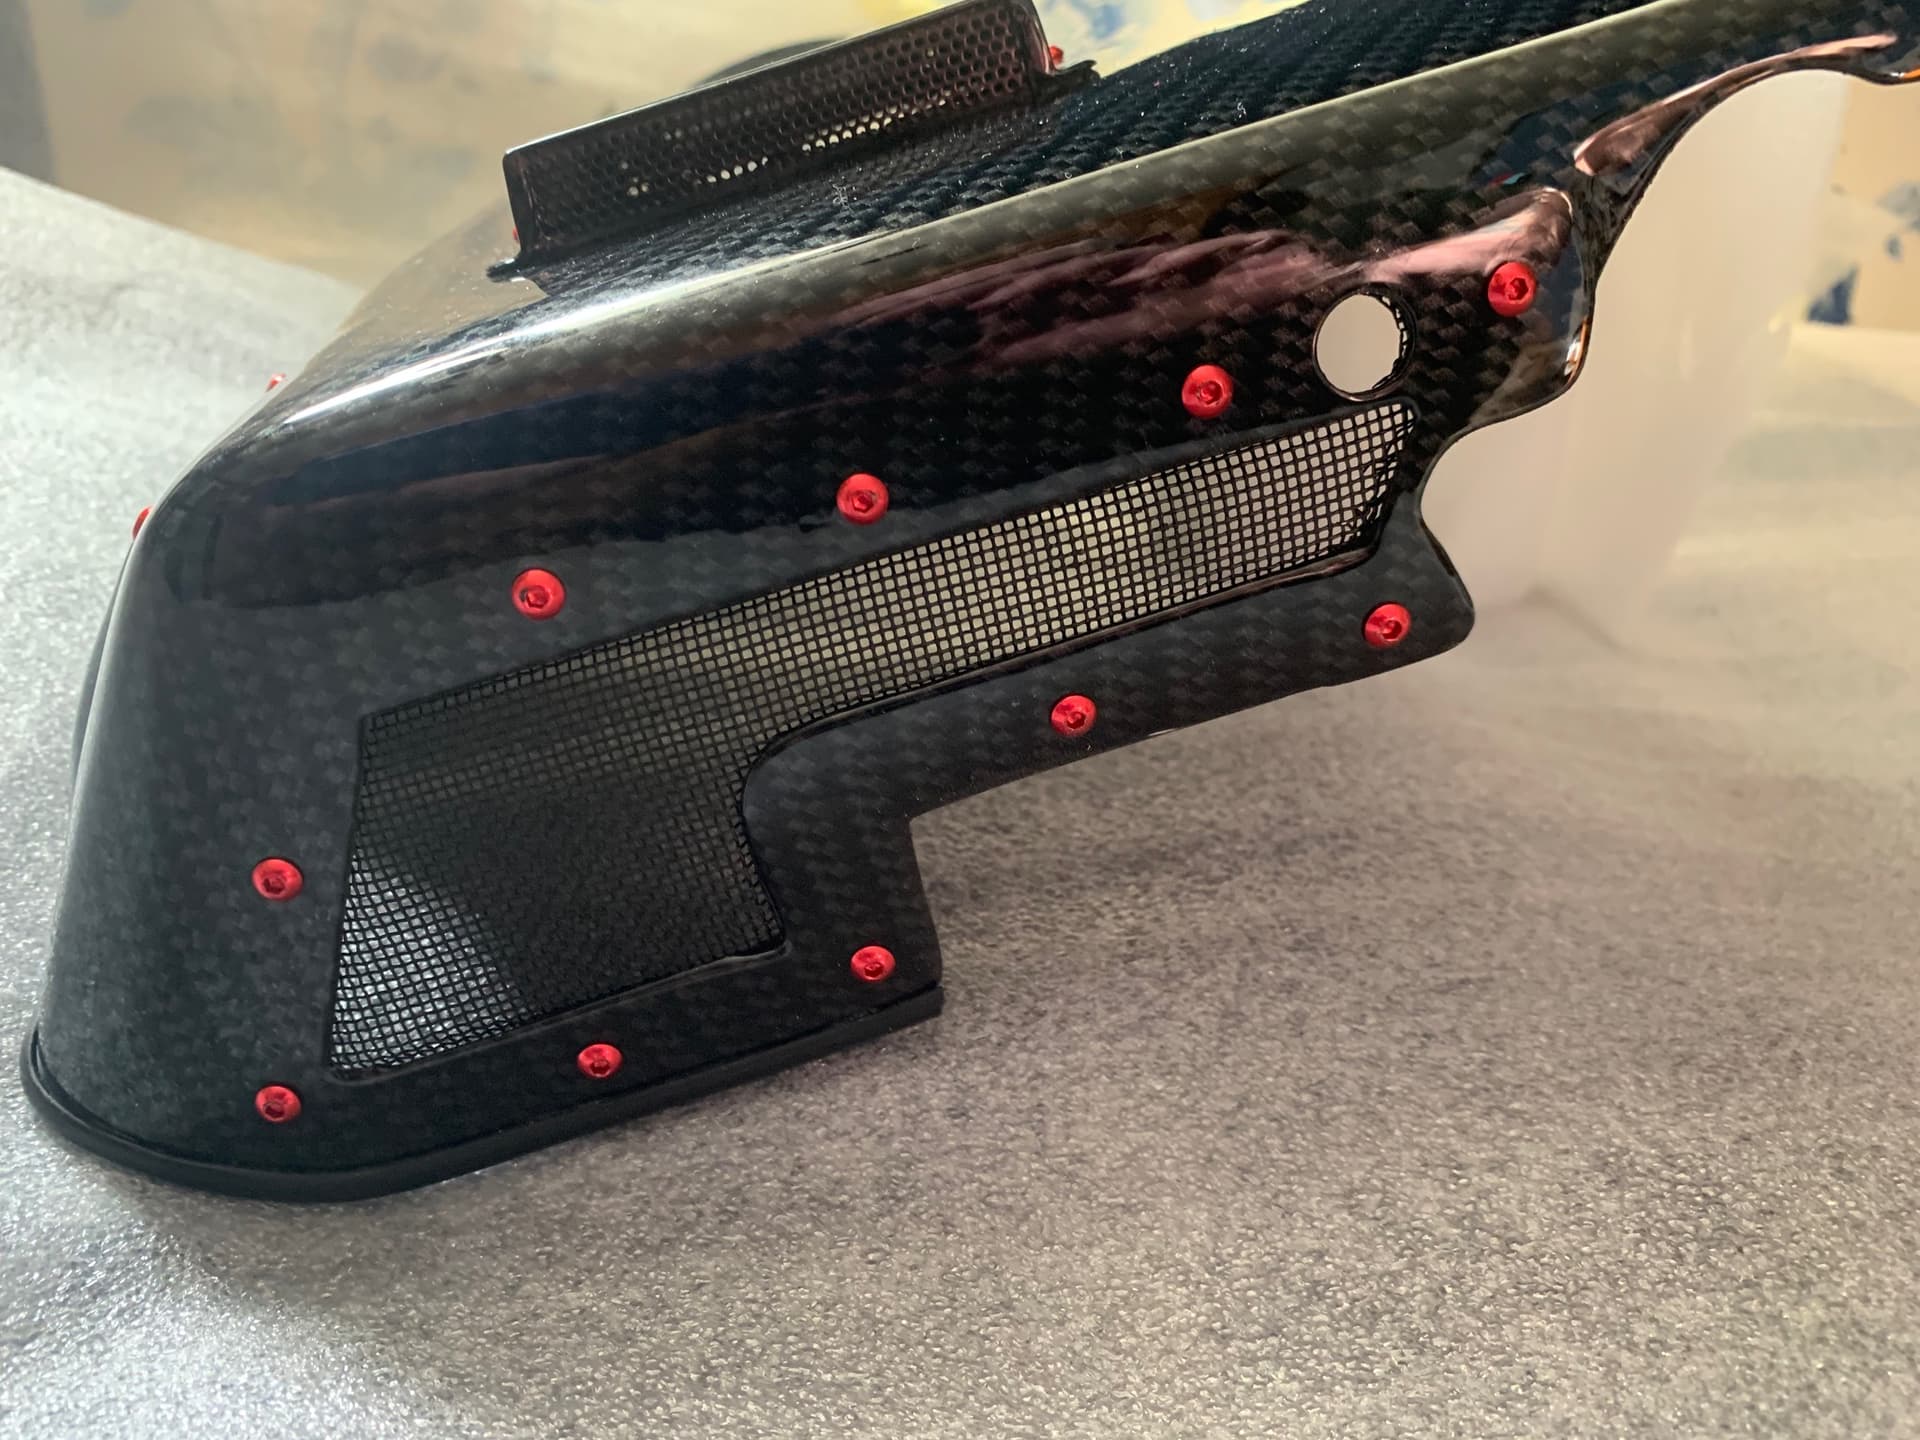
I have Never Liked the black plastic blanking plate (fake window effect)
So I got to making something to clip over that area I have always liked the fin effect that early American Ford cars had the one in the film bullet comes to mind …
Then guess what some Chinese factory makes somthing along those lines but the item was fixed on by 3M double sided tape No way I can see that comming off at 100mph and cost twice the price… nope I can do better…
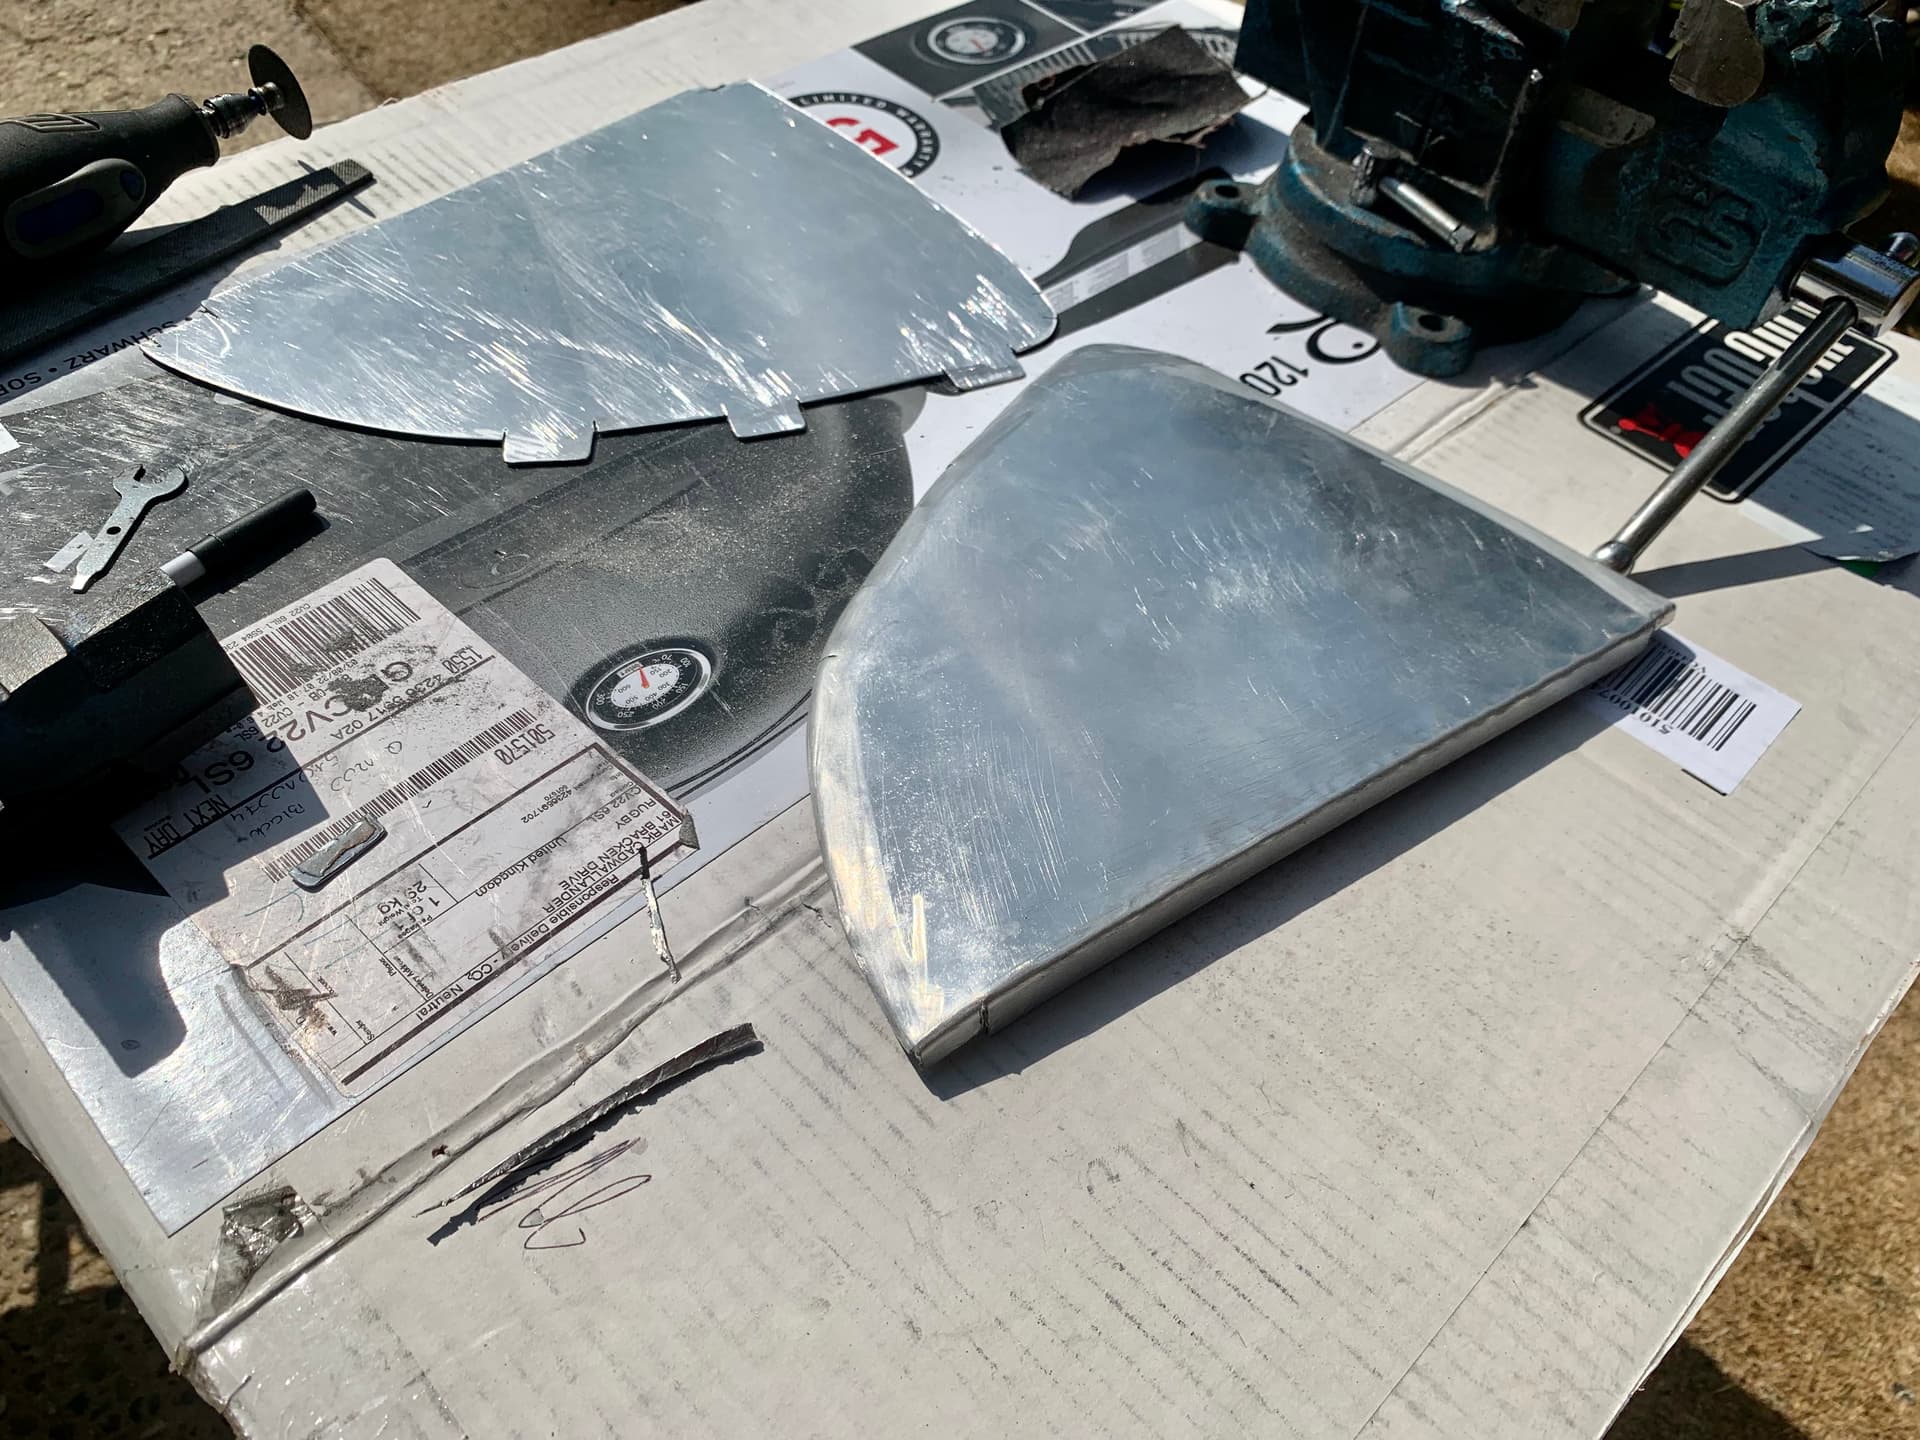
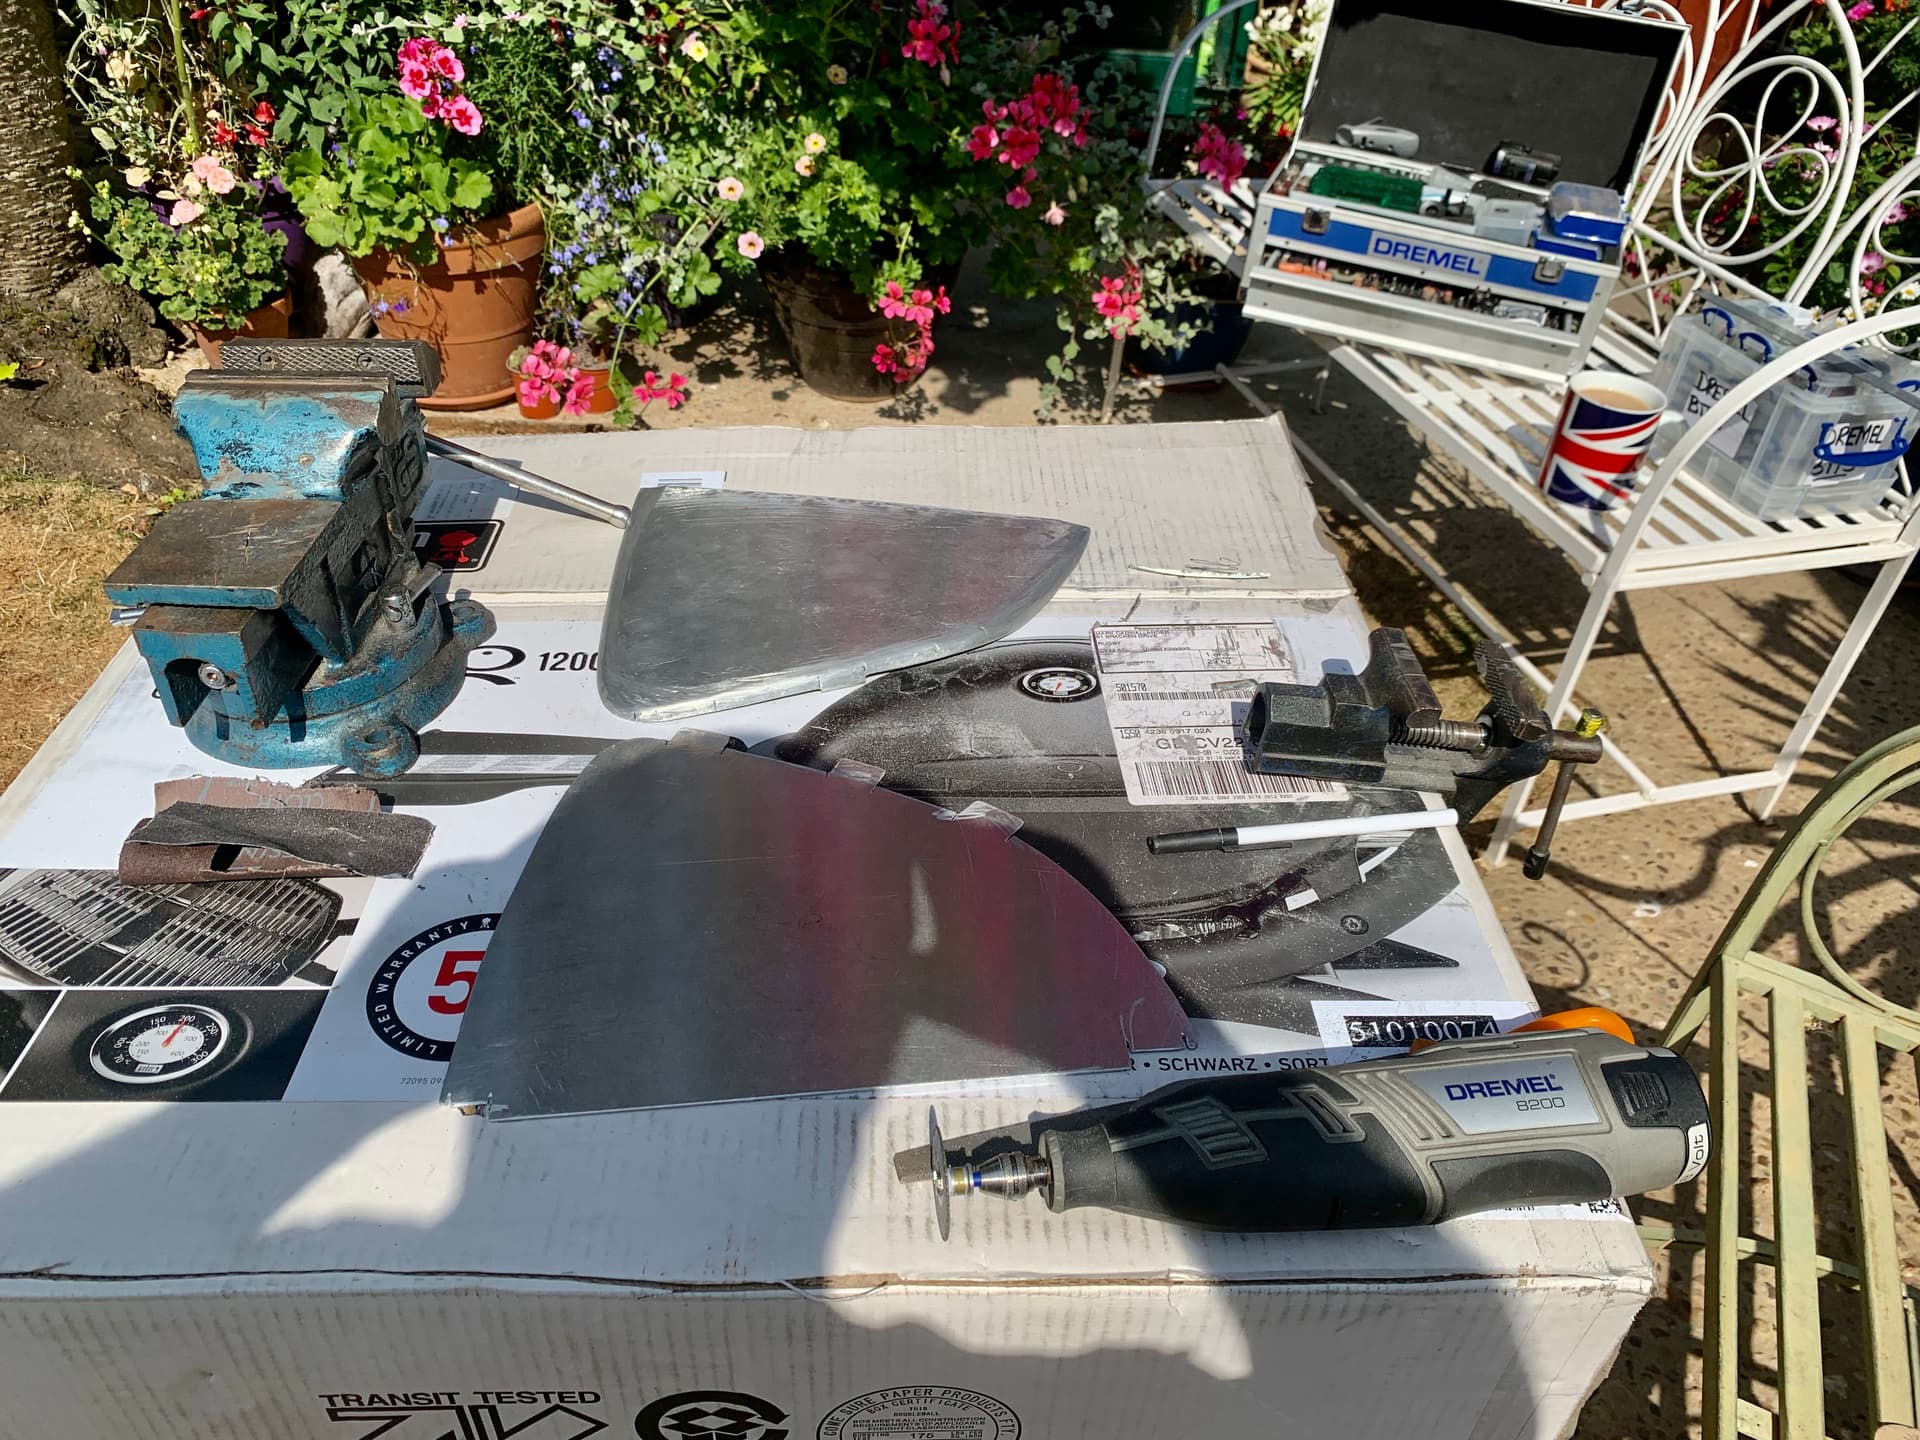
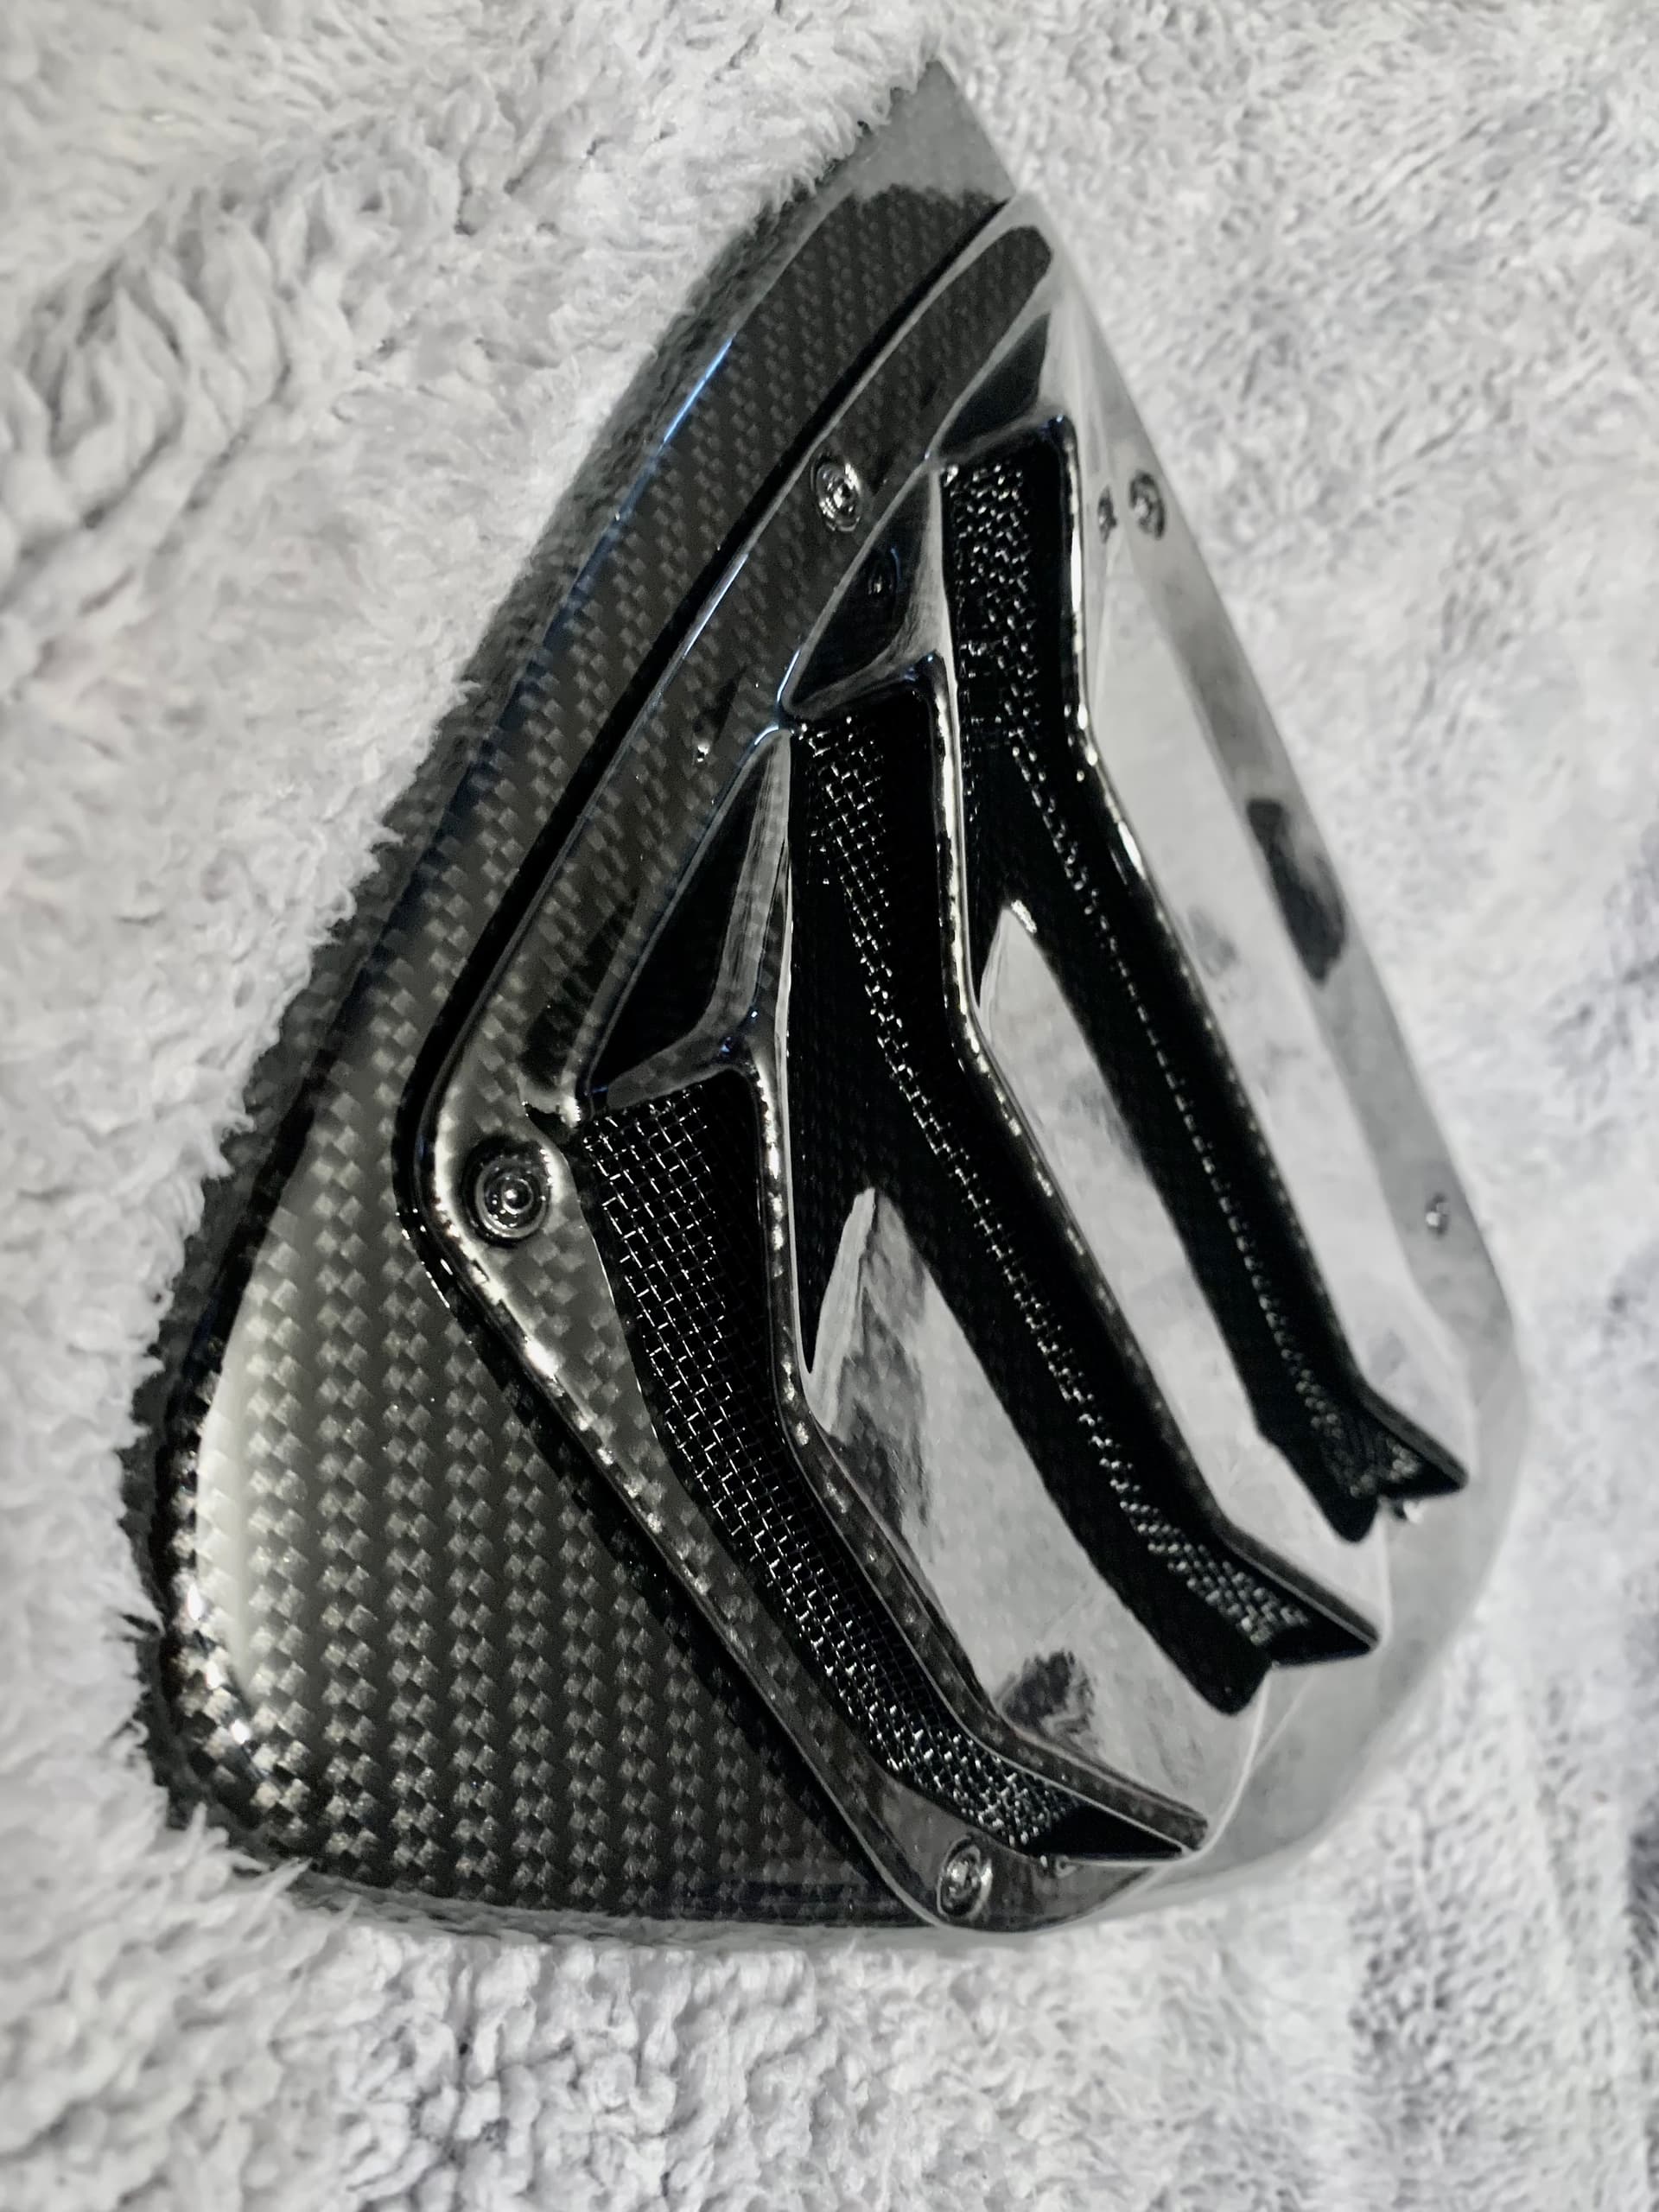
they are secured by 3 small tabs and 2 grommet screws…
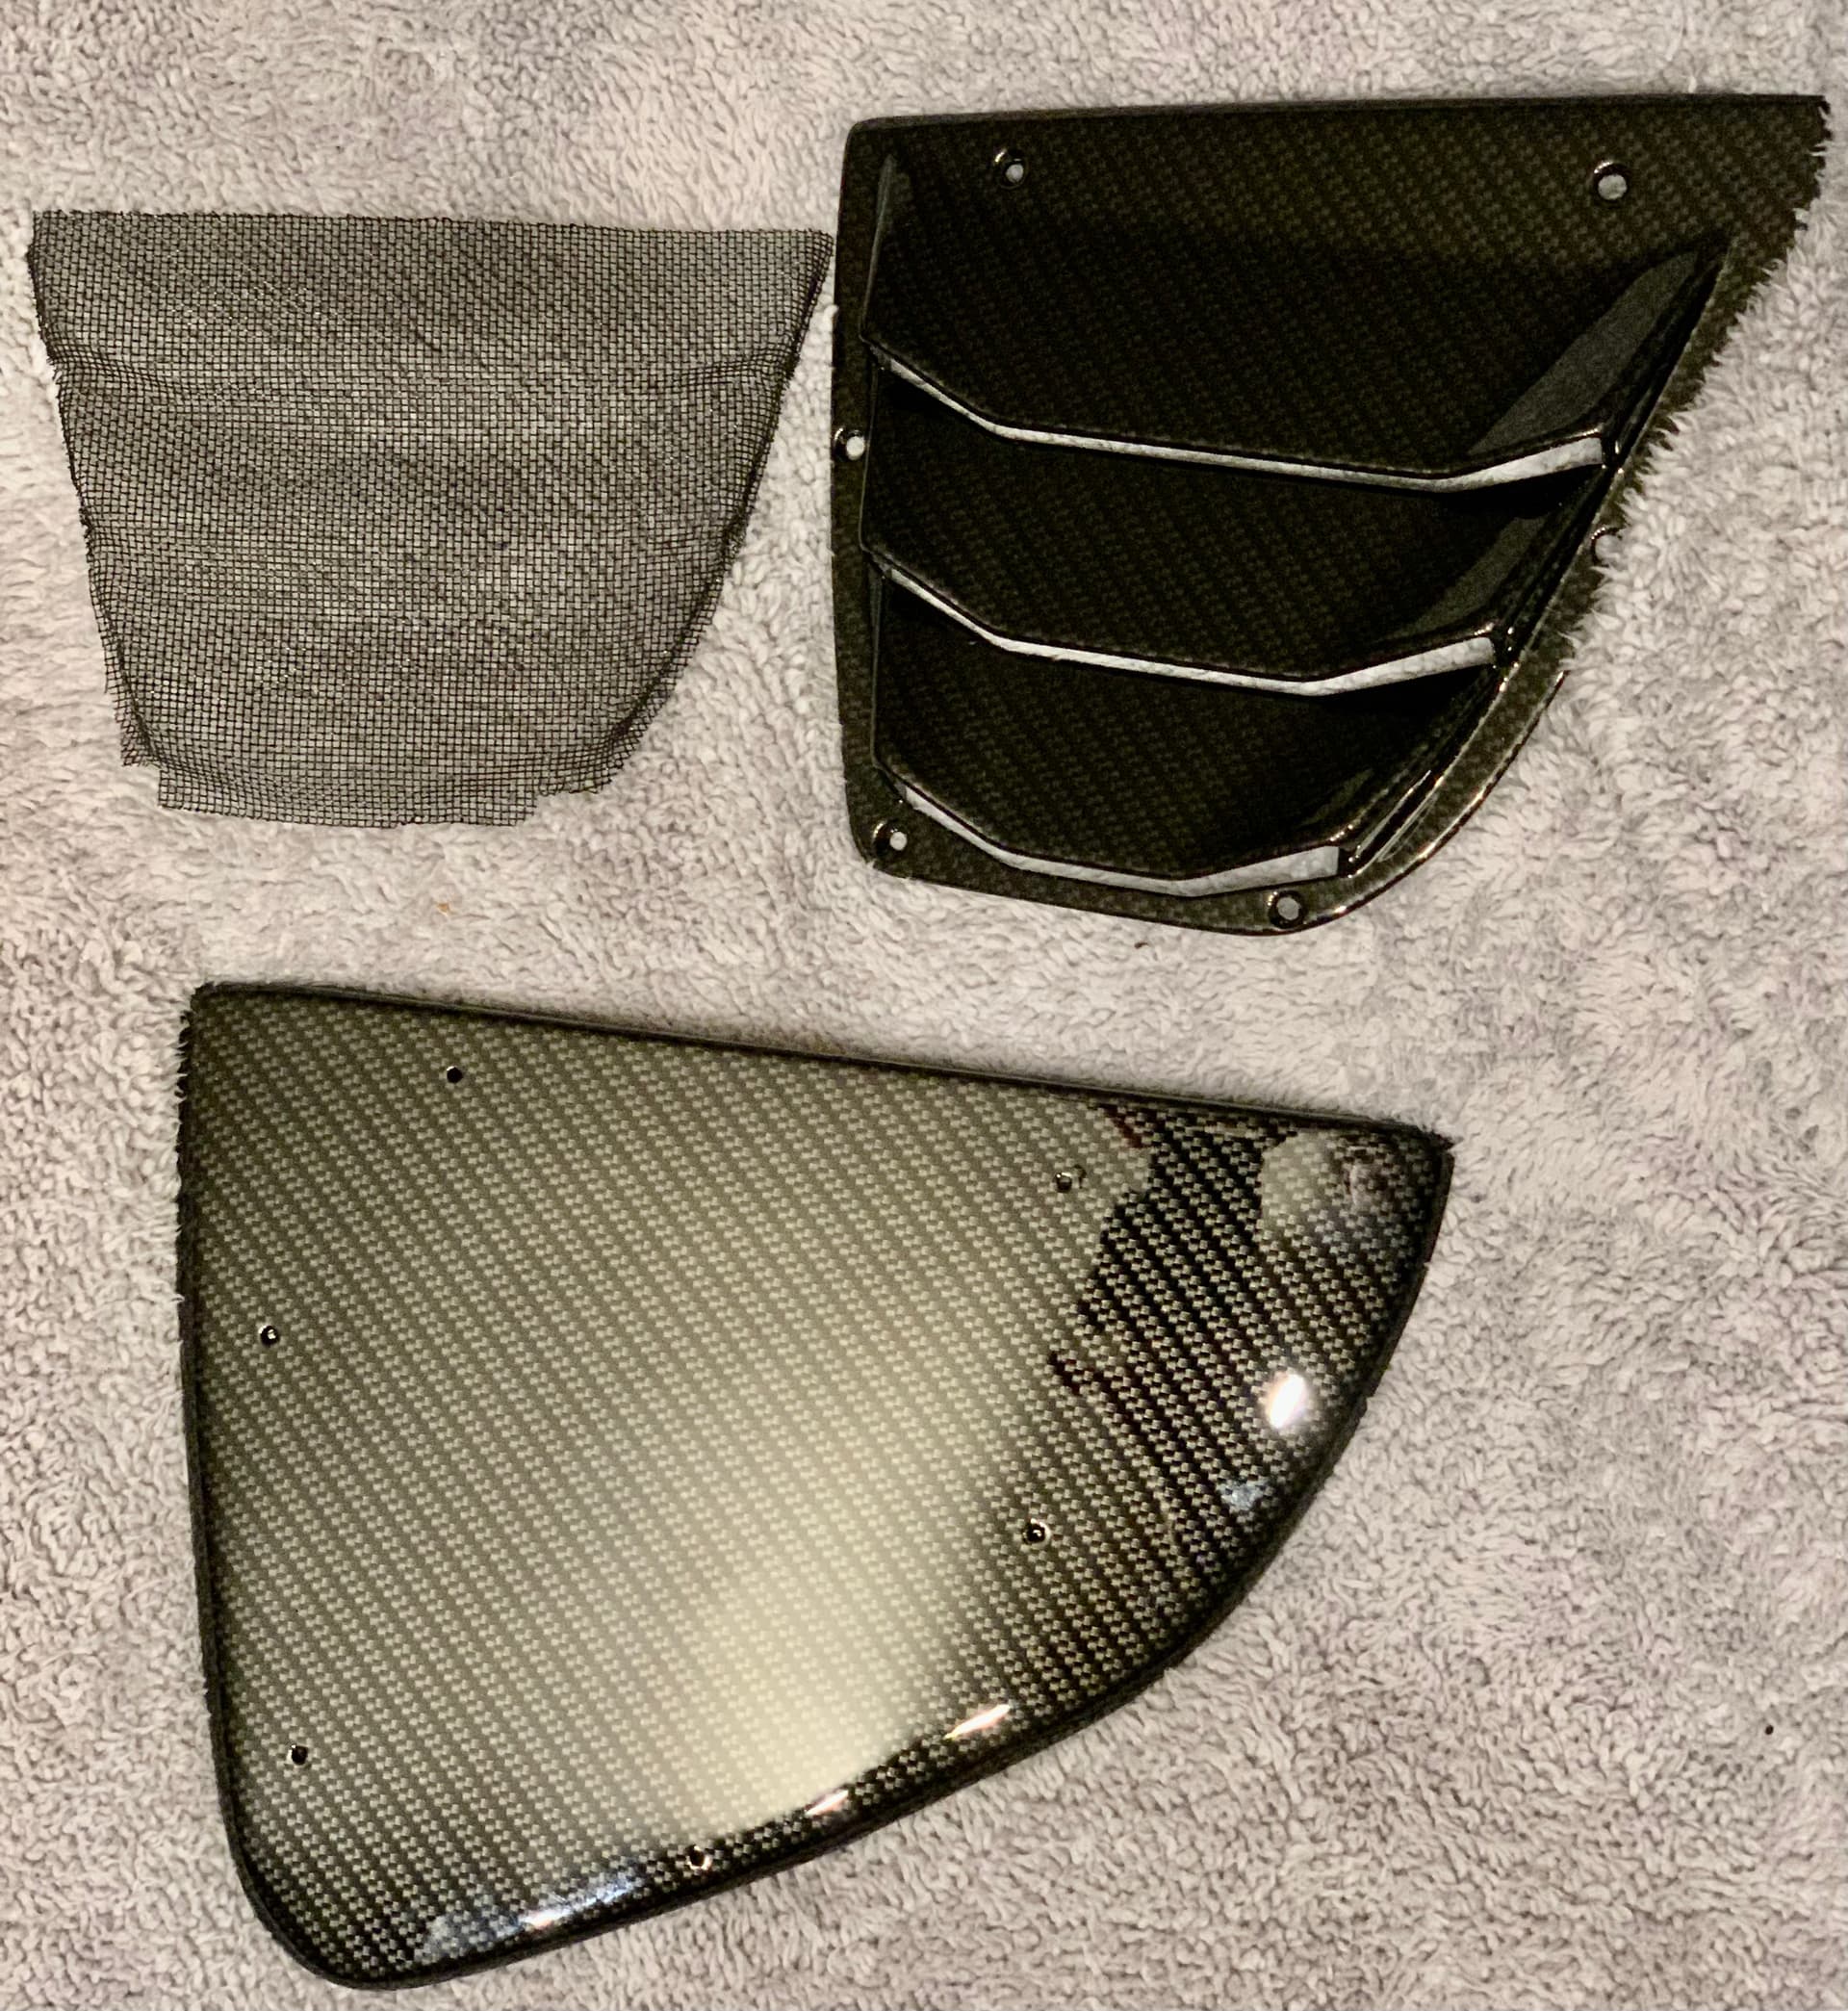
made in 3 parts so you can take off the fins to clean
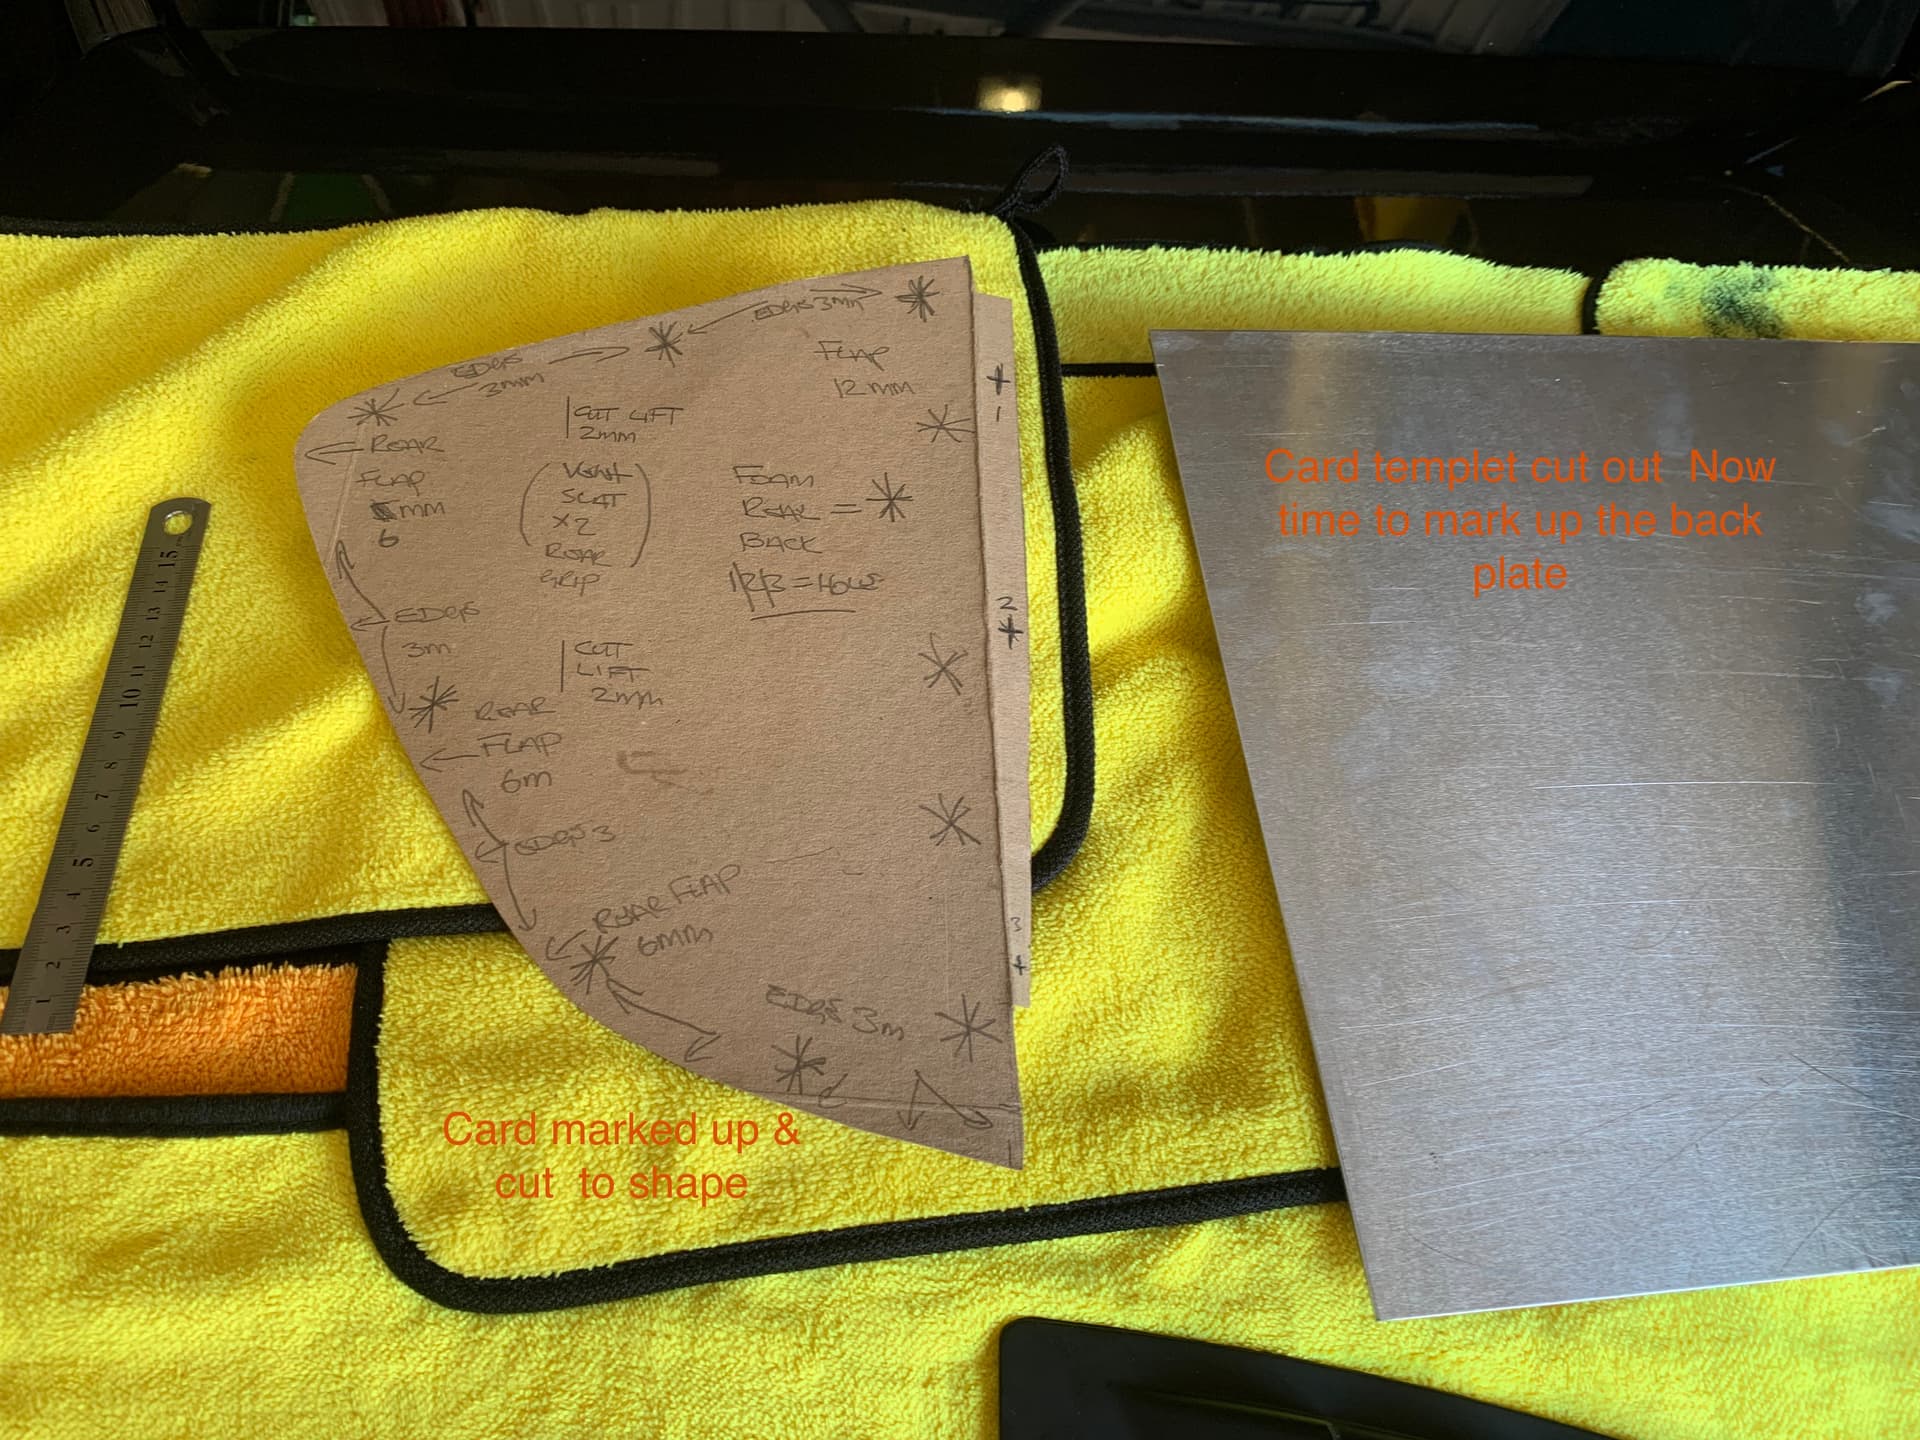
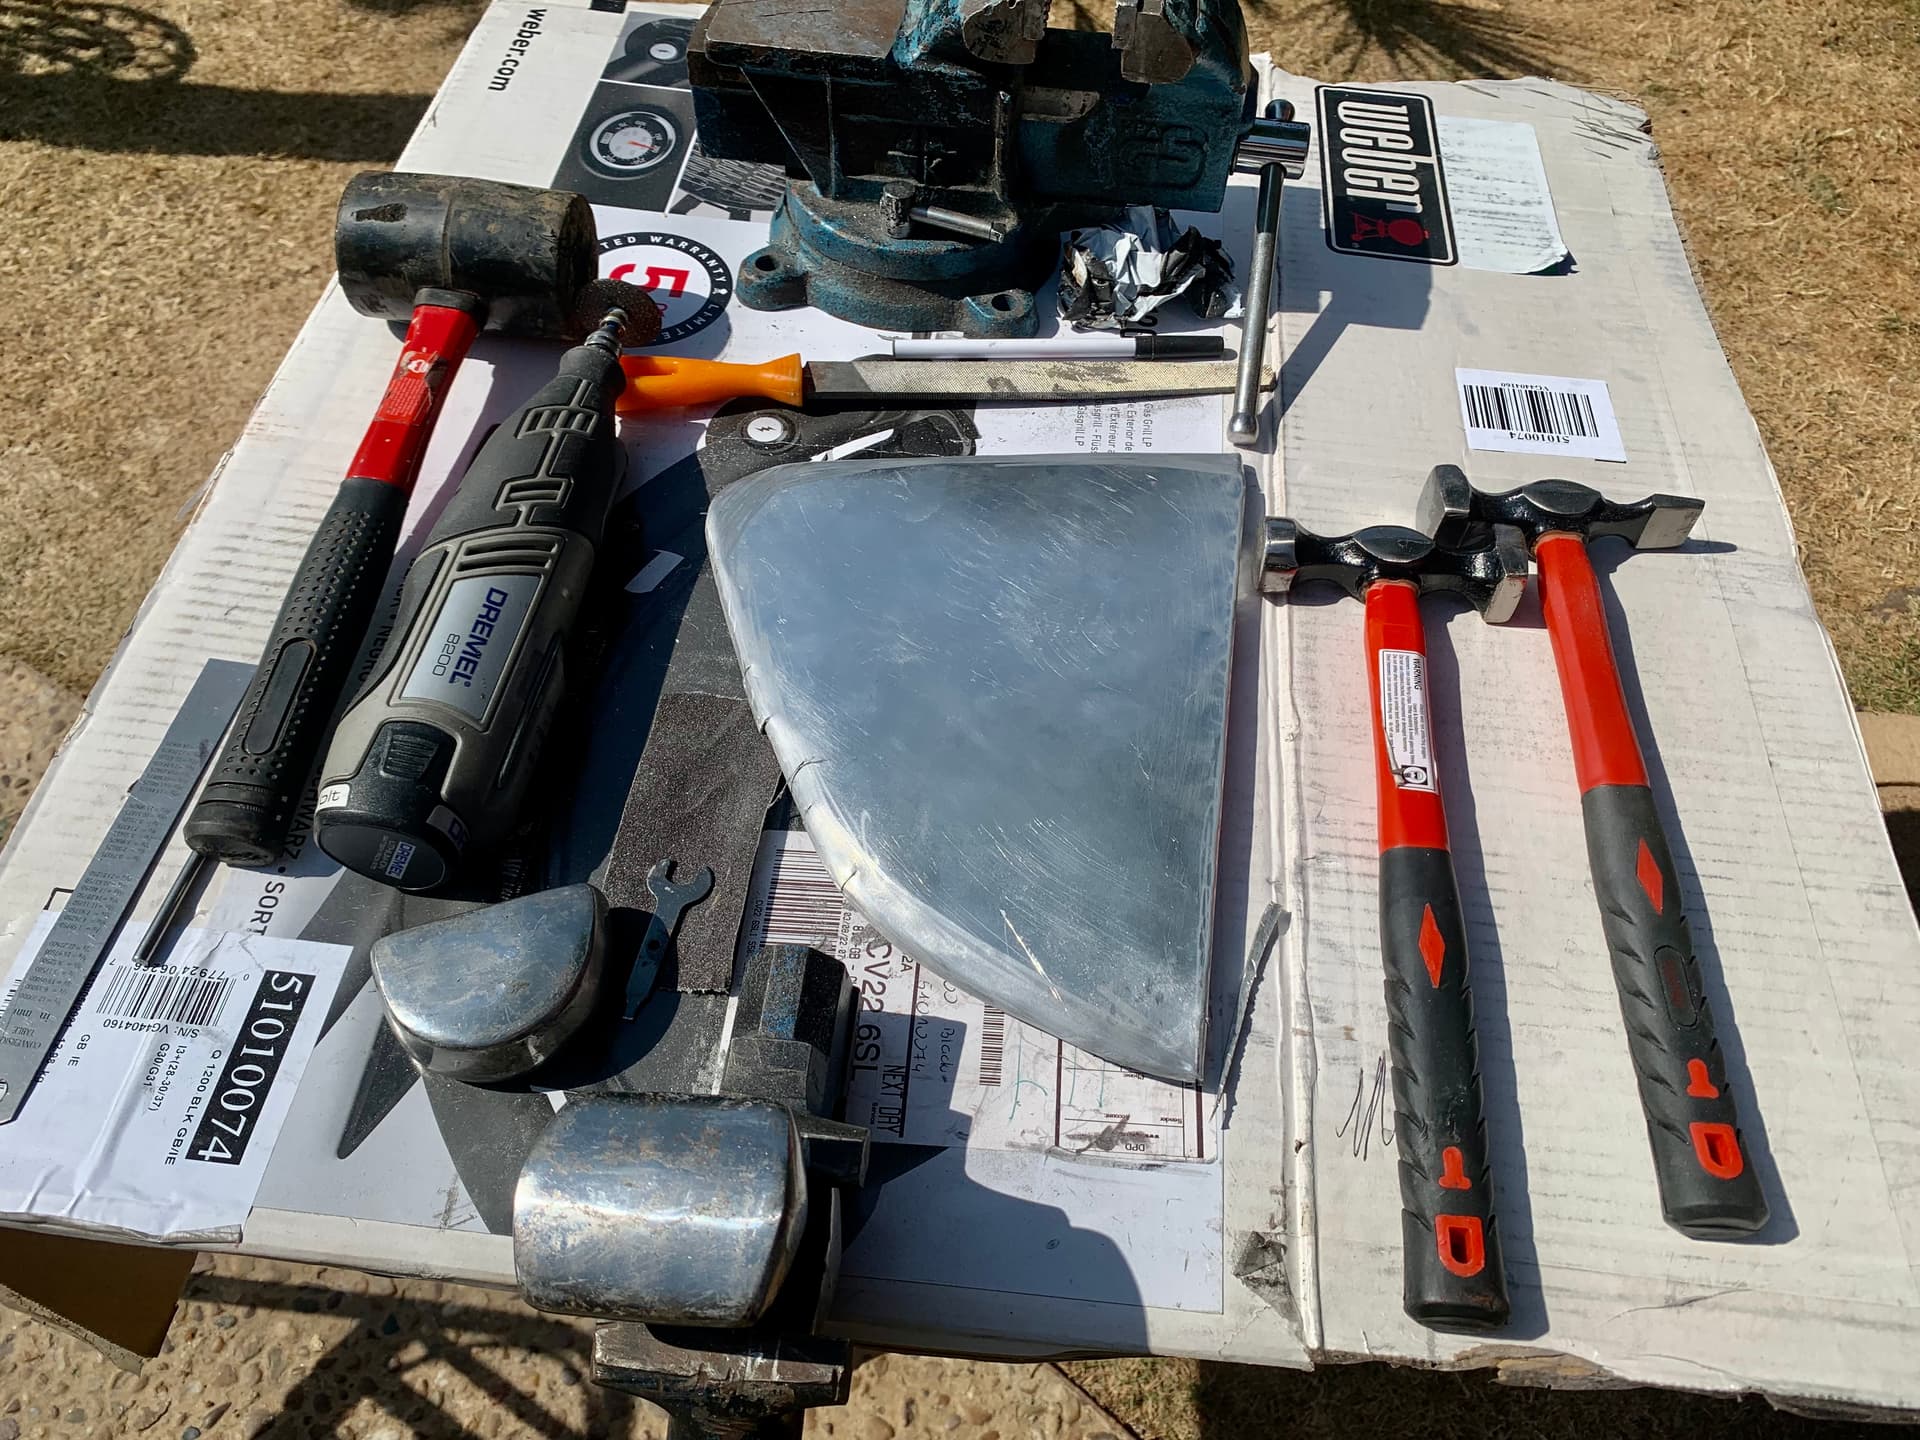
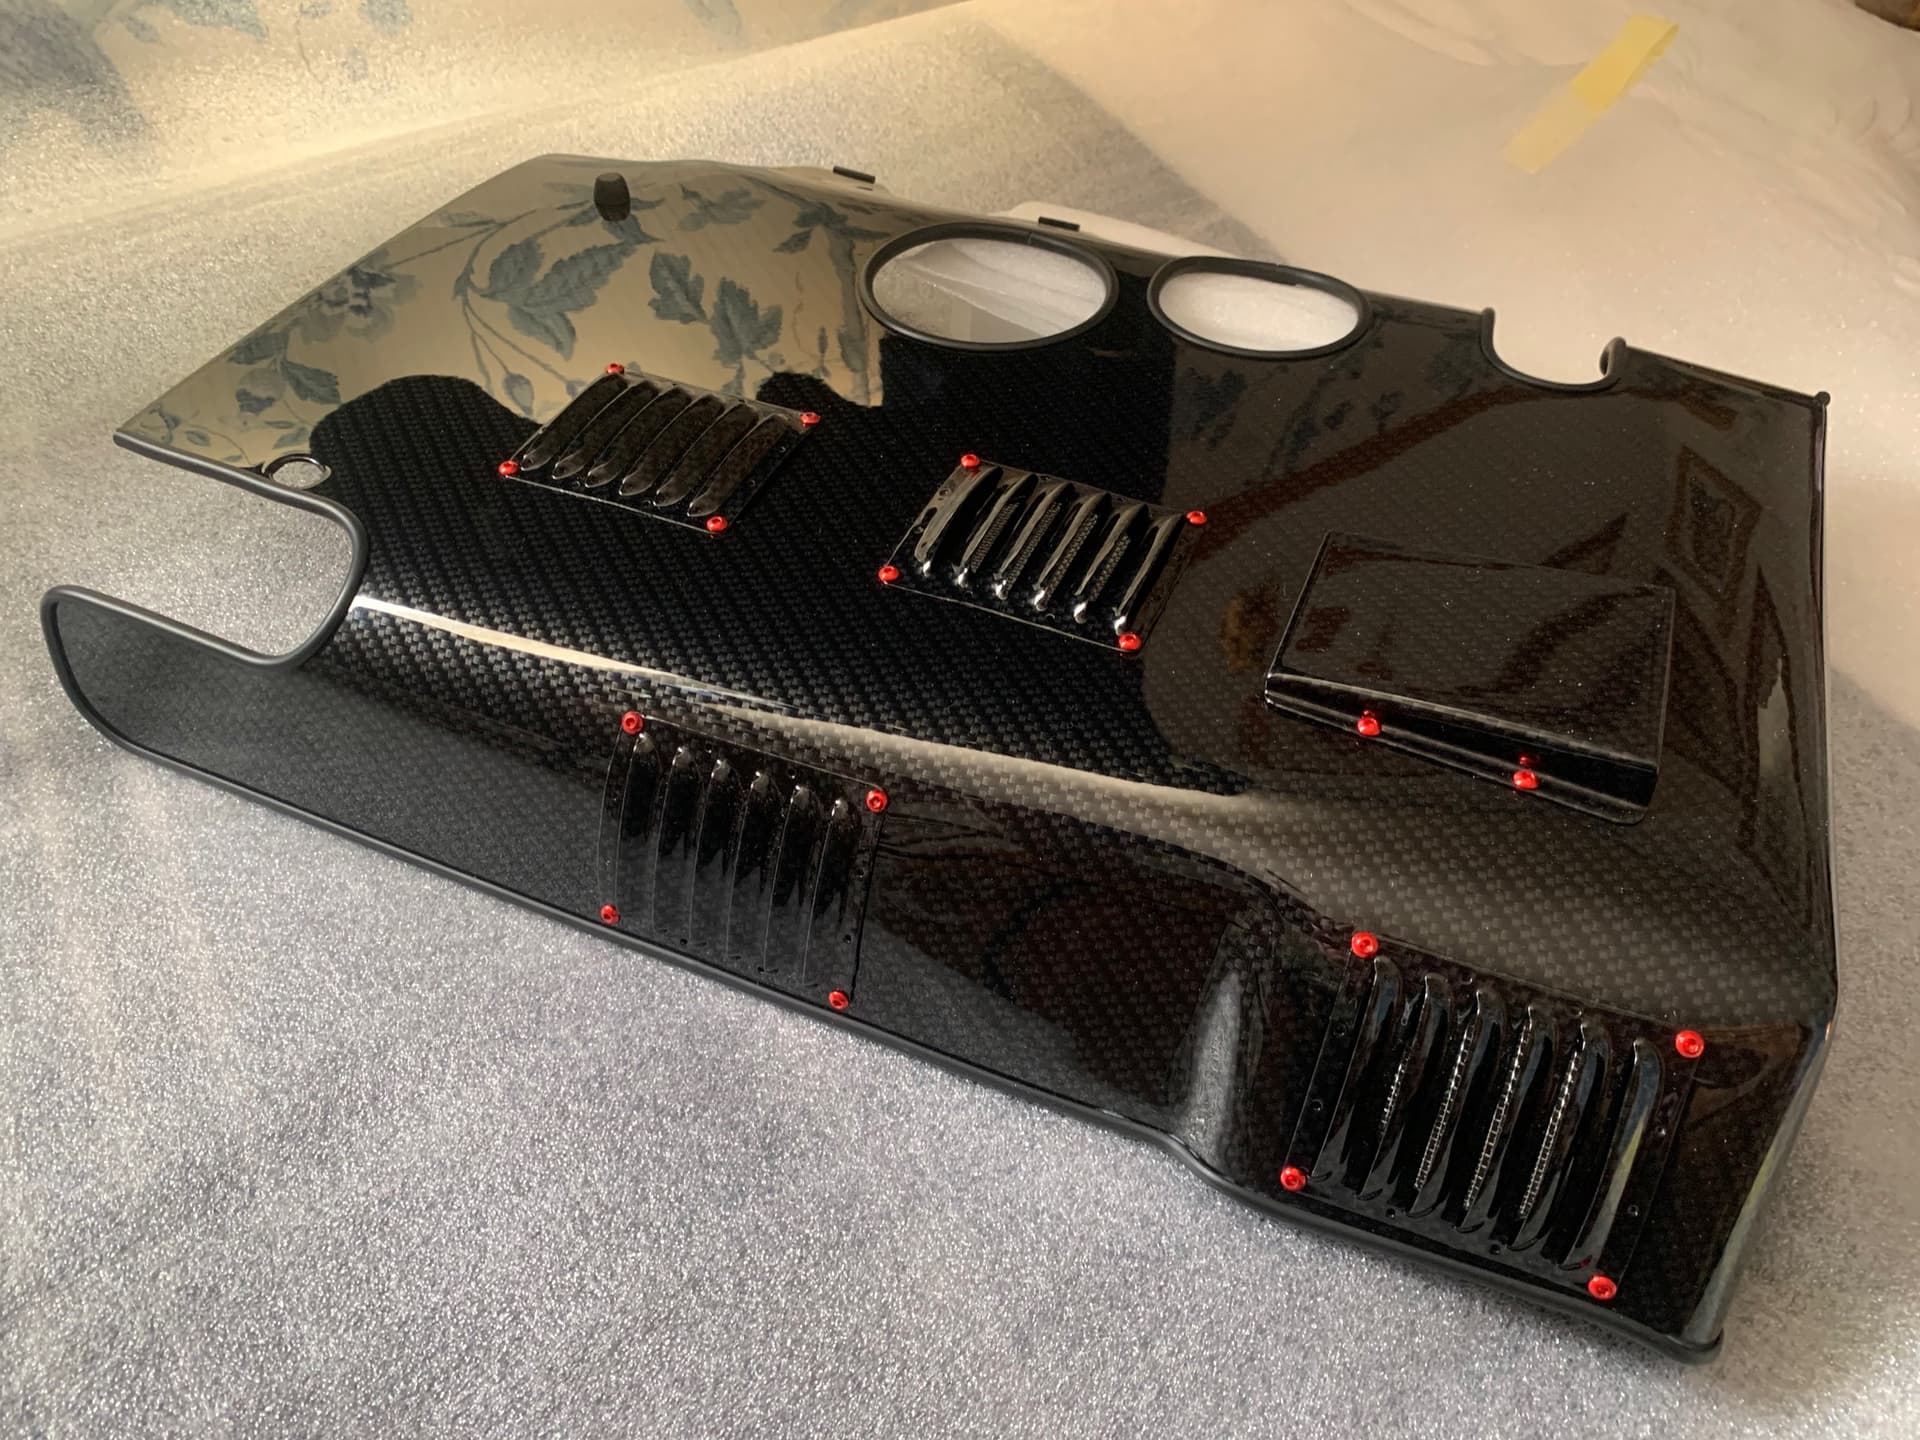
I got to making a card board cut out then fab-ing it out in ally and Frp plastic, and 3d wire mesh effect once completed I would have it Hydro dipped in my signature carbon fibre effect…by wicked coatings of poole Dorset …!
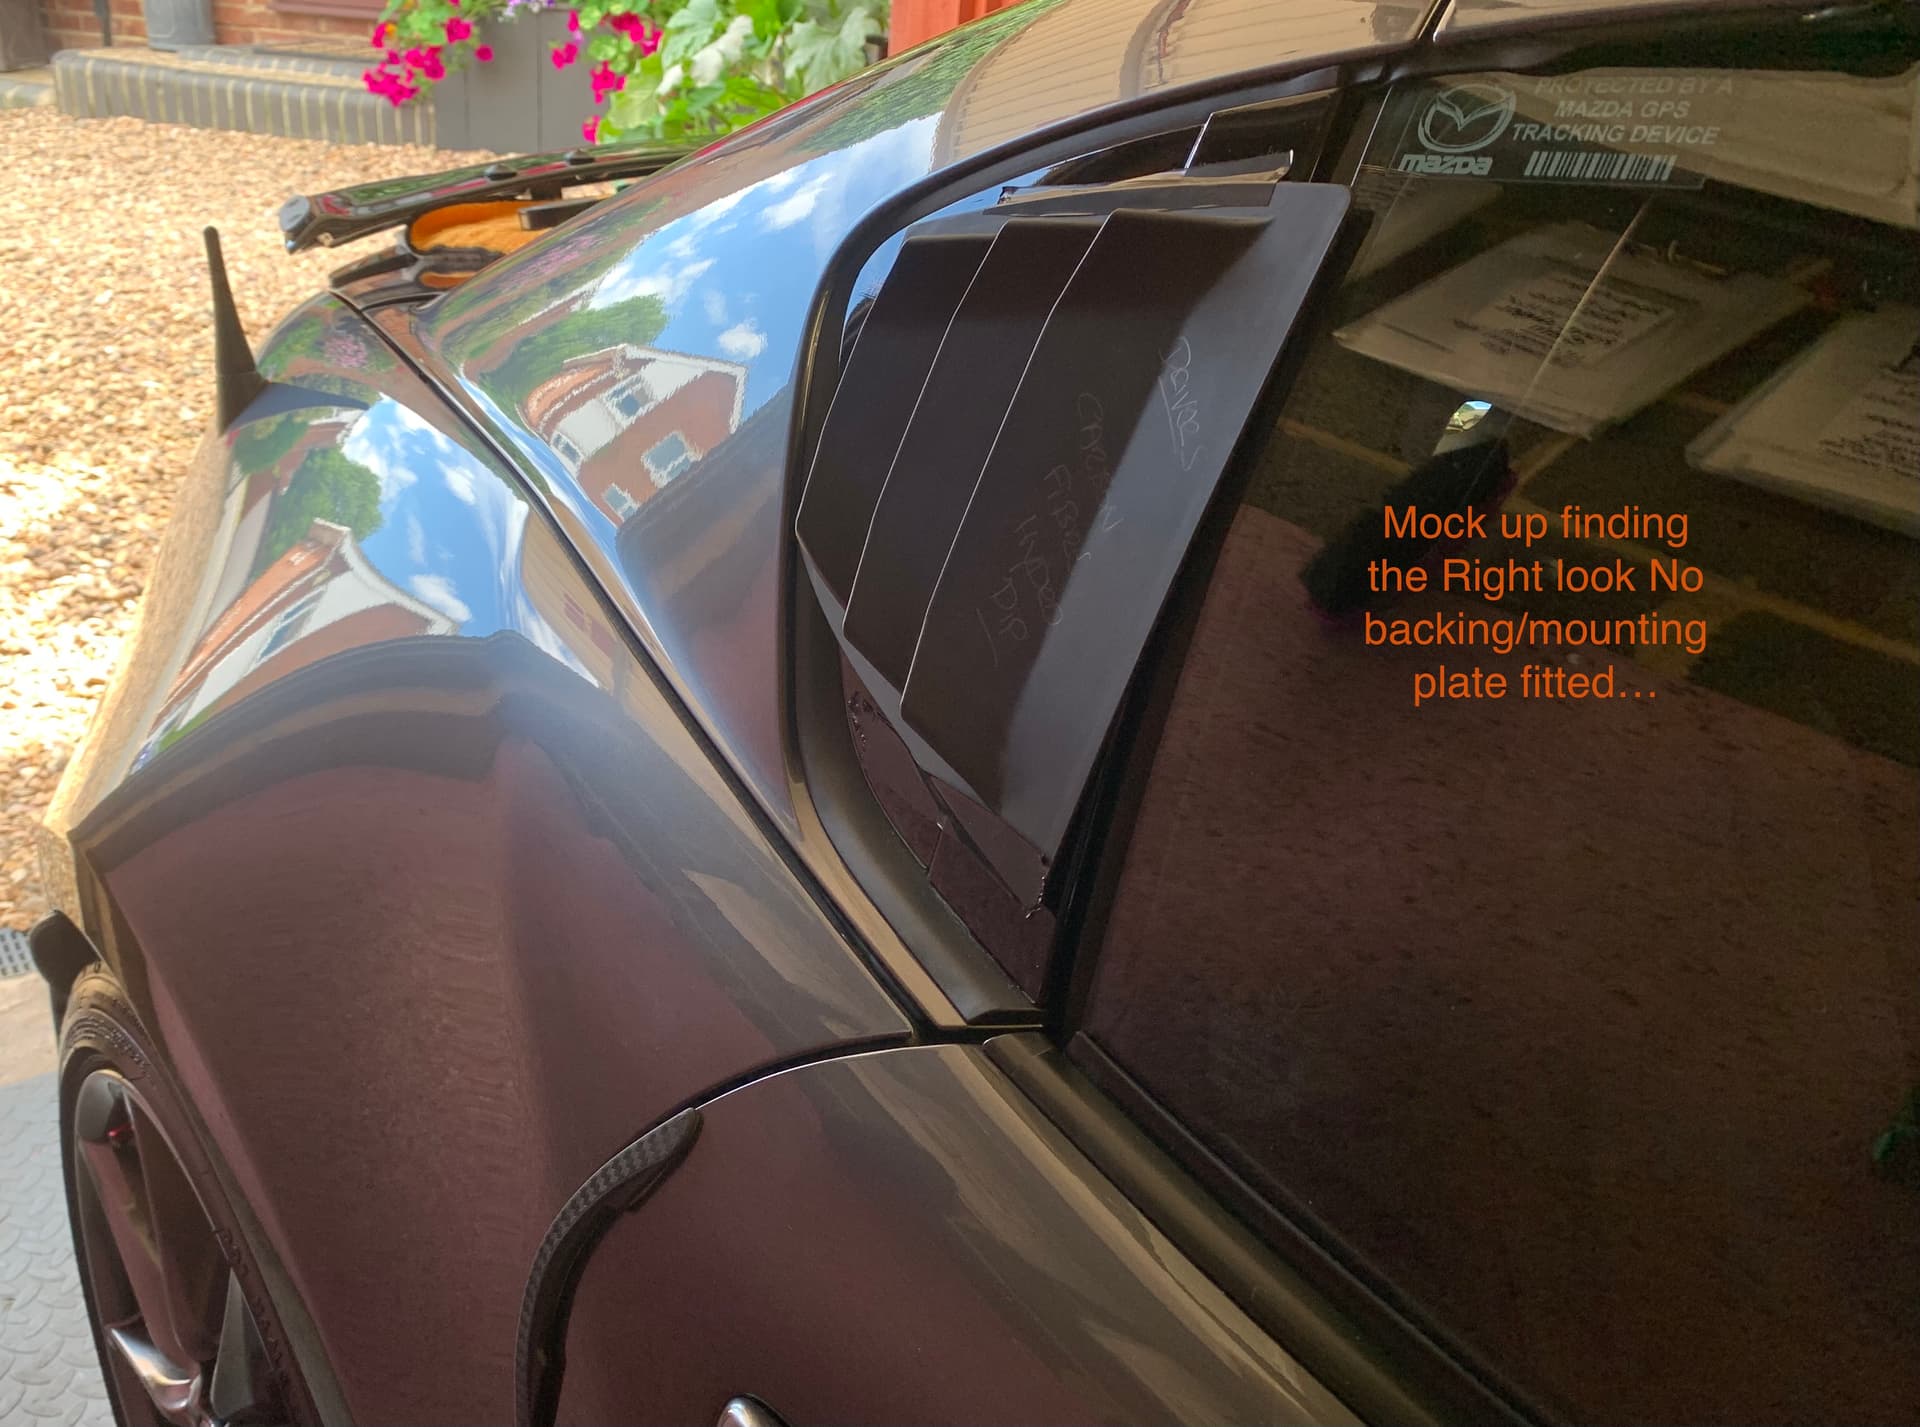
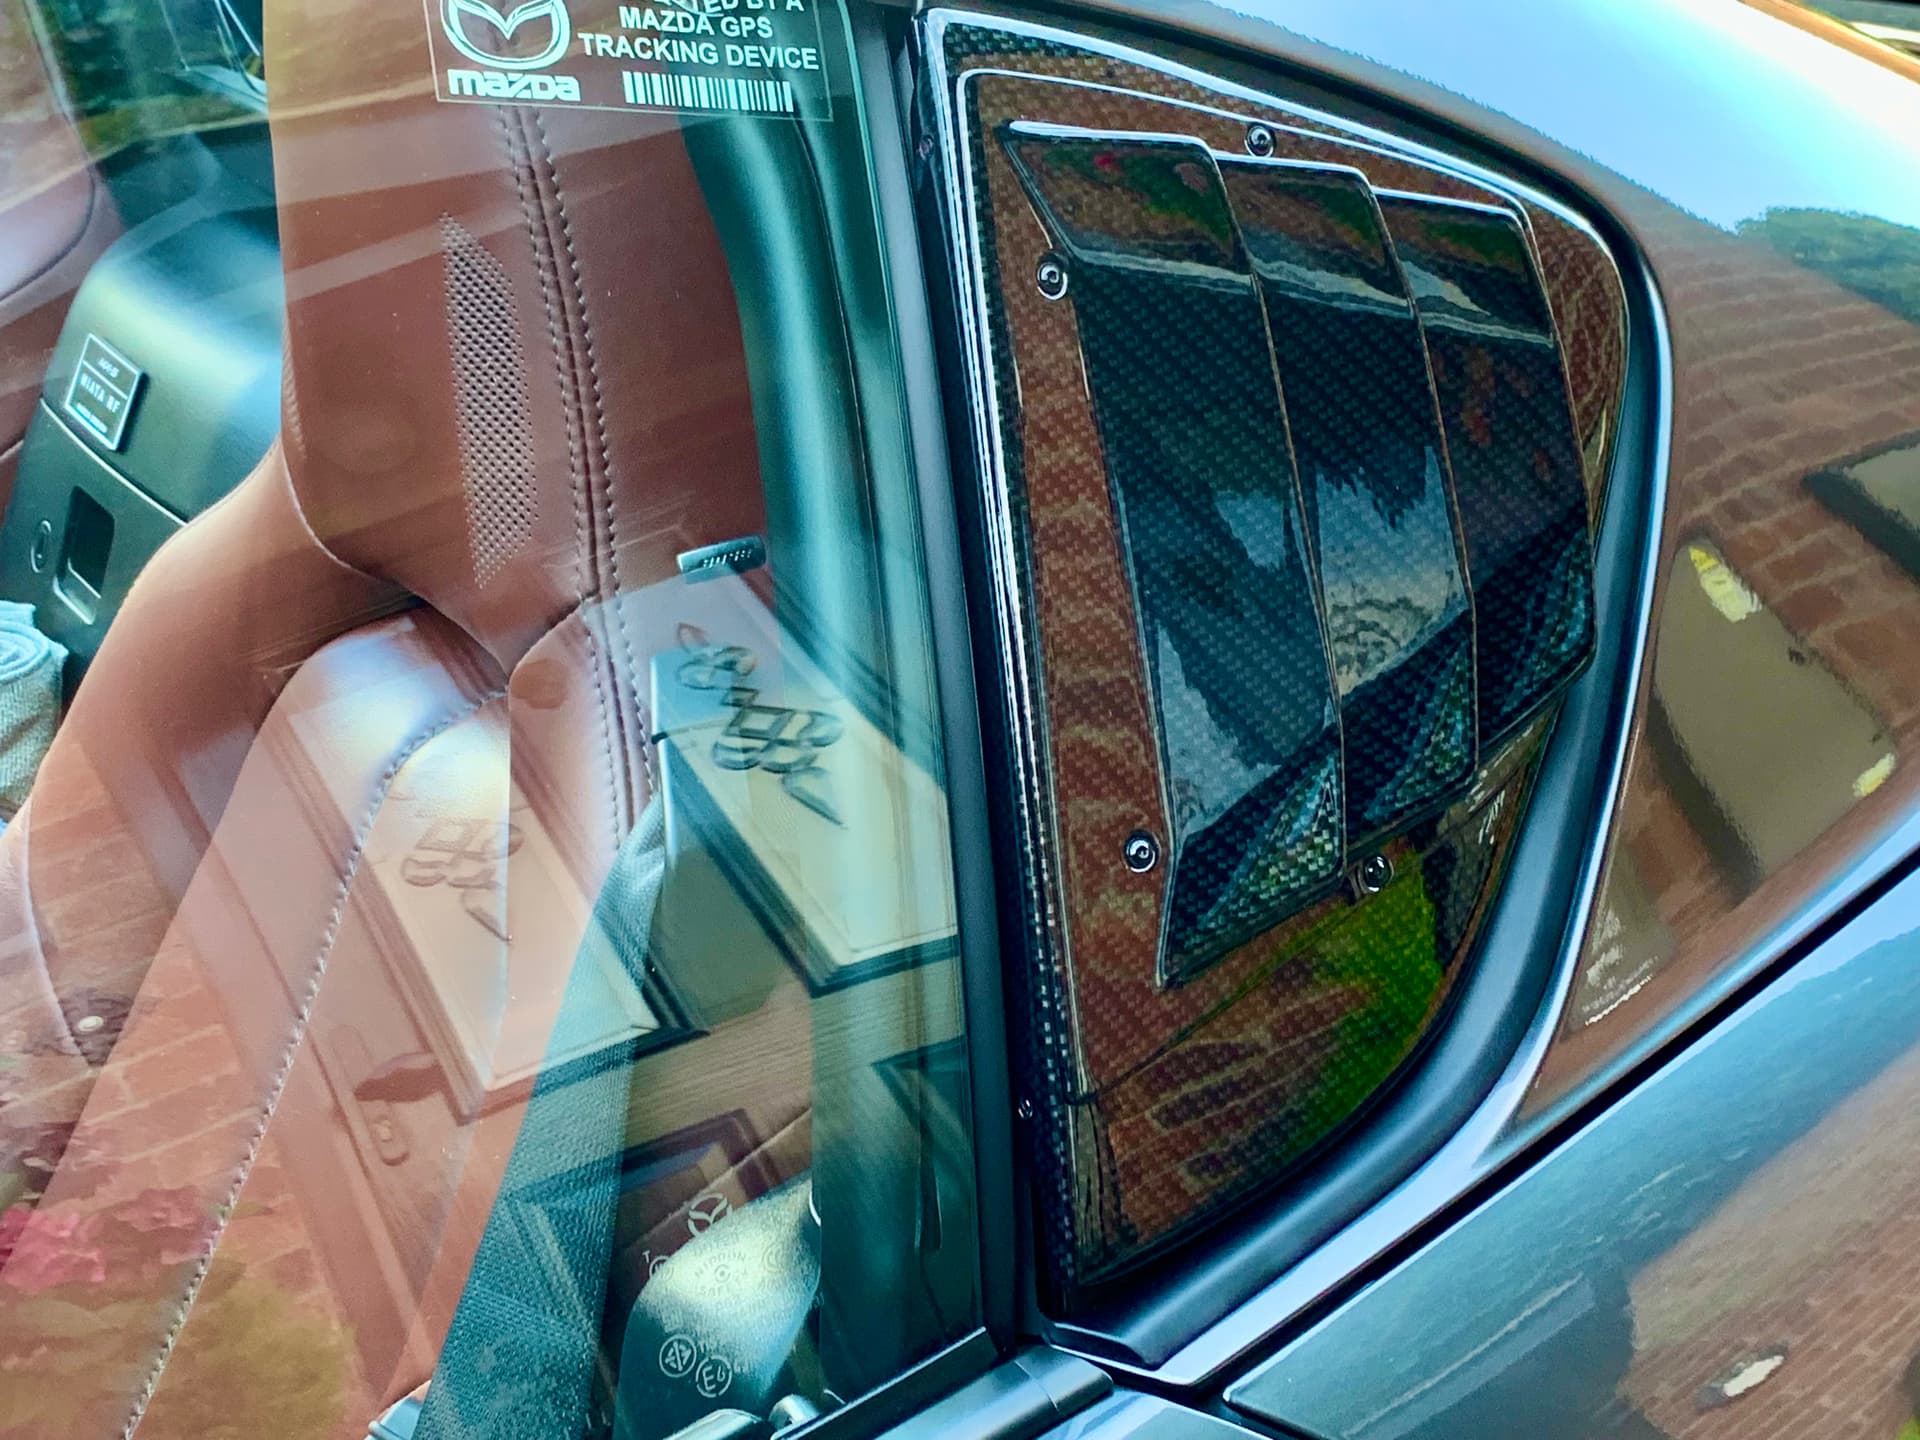
I have had the Car above 130mph roof down & up No noise from the fins …
Thay took a few months to make doing a few hours a week when permitted
cost under £50.00 I got mates rates for the hydro dipping carbon fibre effect.
They been on the car 2.5 years with no problems there not to everyones taste but I like them …I could have just cover’d the blanking plate with carbon fibre wrap …which would cost about £10… but I keep these for now…
thanks for taking the time to look …and for the above feed back on the previous thread…!
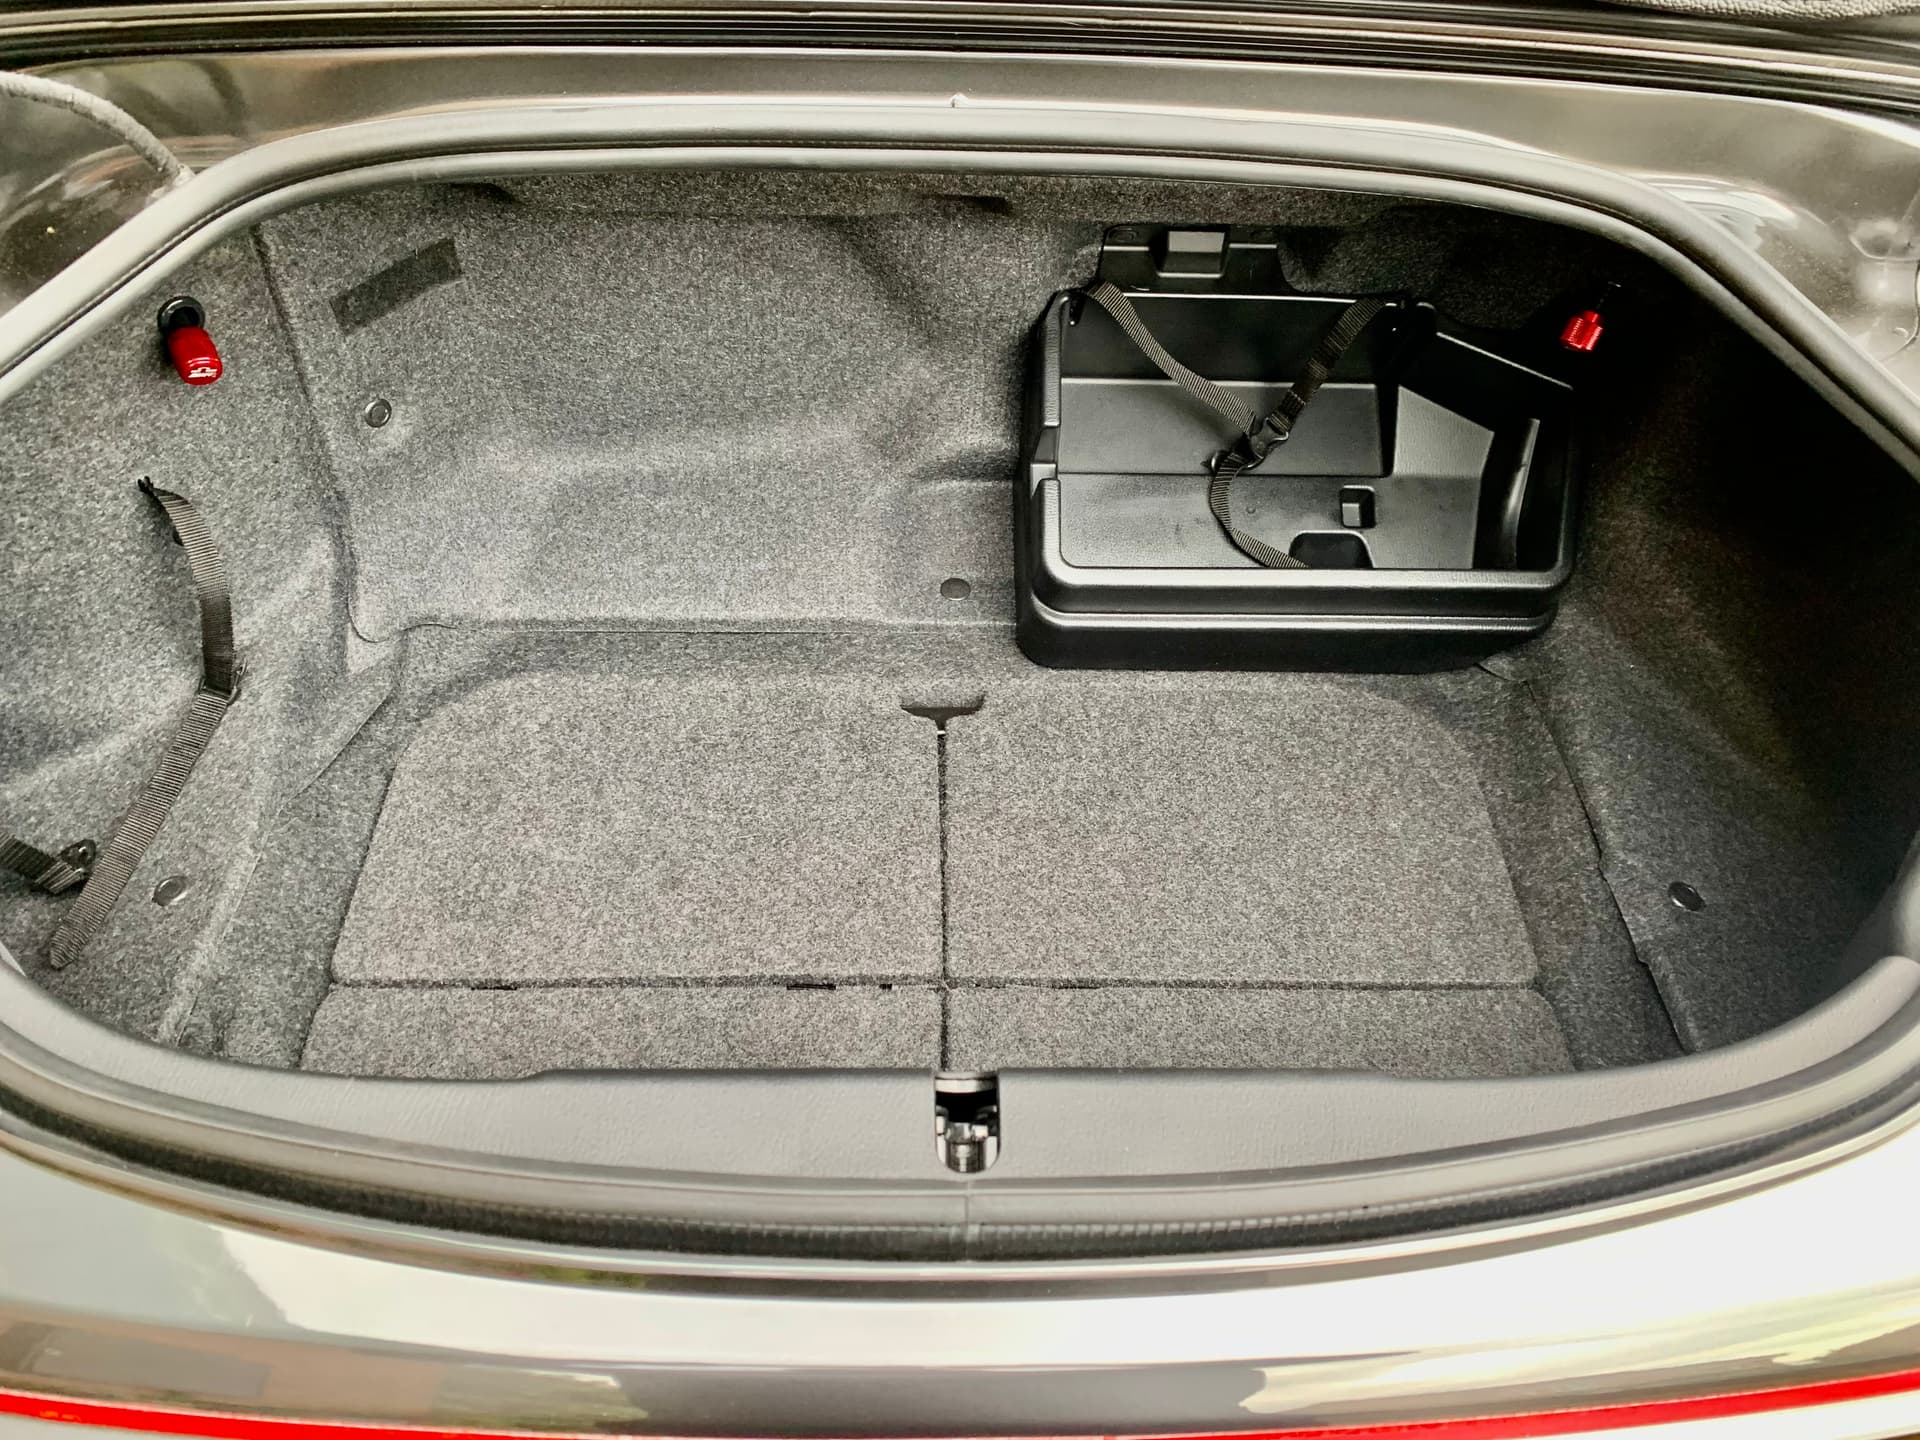
Hi very nice, apologies don’t wish to copy but where did you get the box from in the boot as looking to keep one or two items in the boot, also the rear wing looks awesome, all I can find is the lip spoiler, new owner and all that
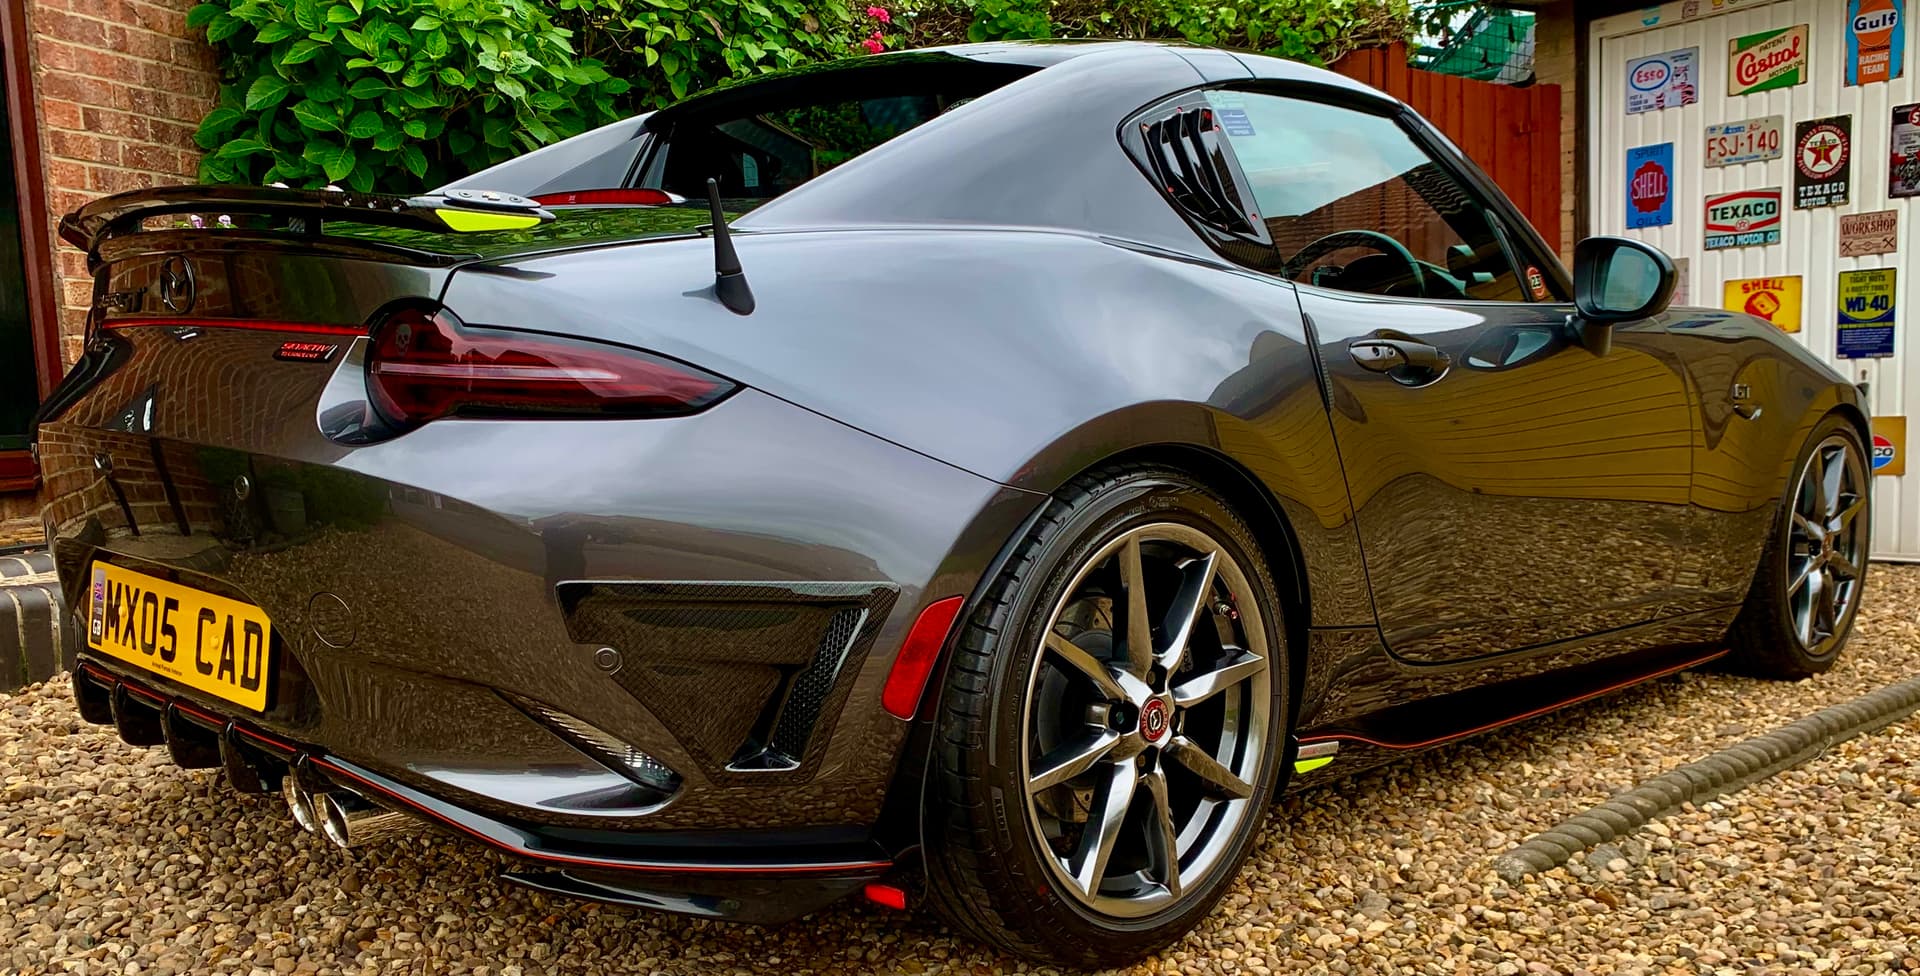
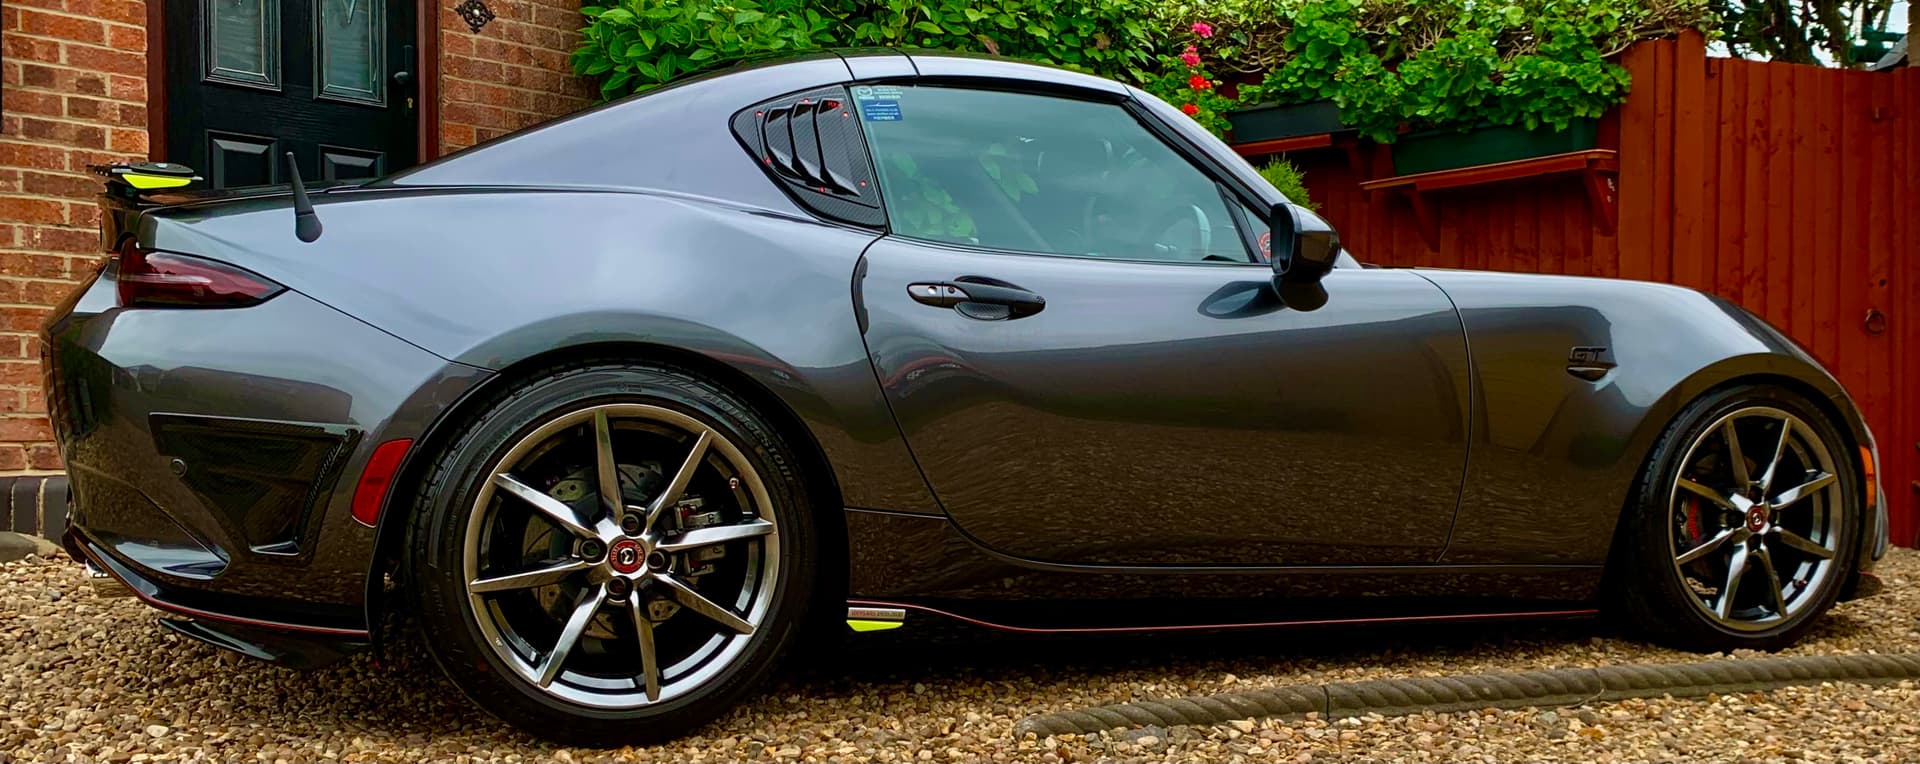
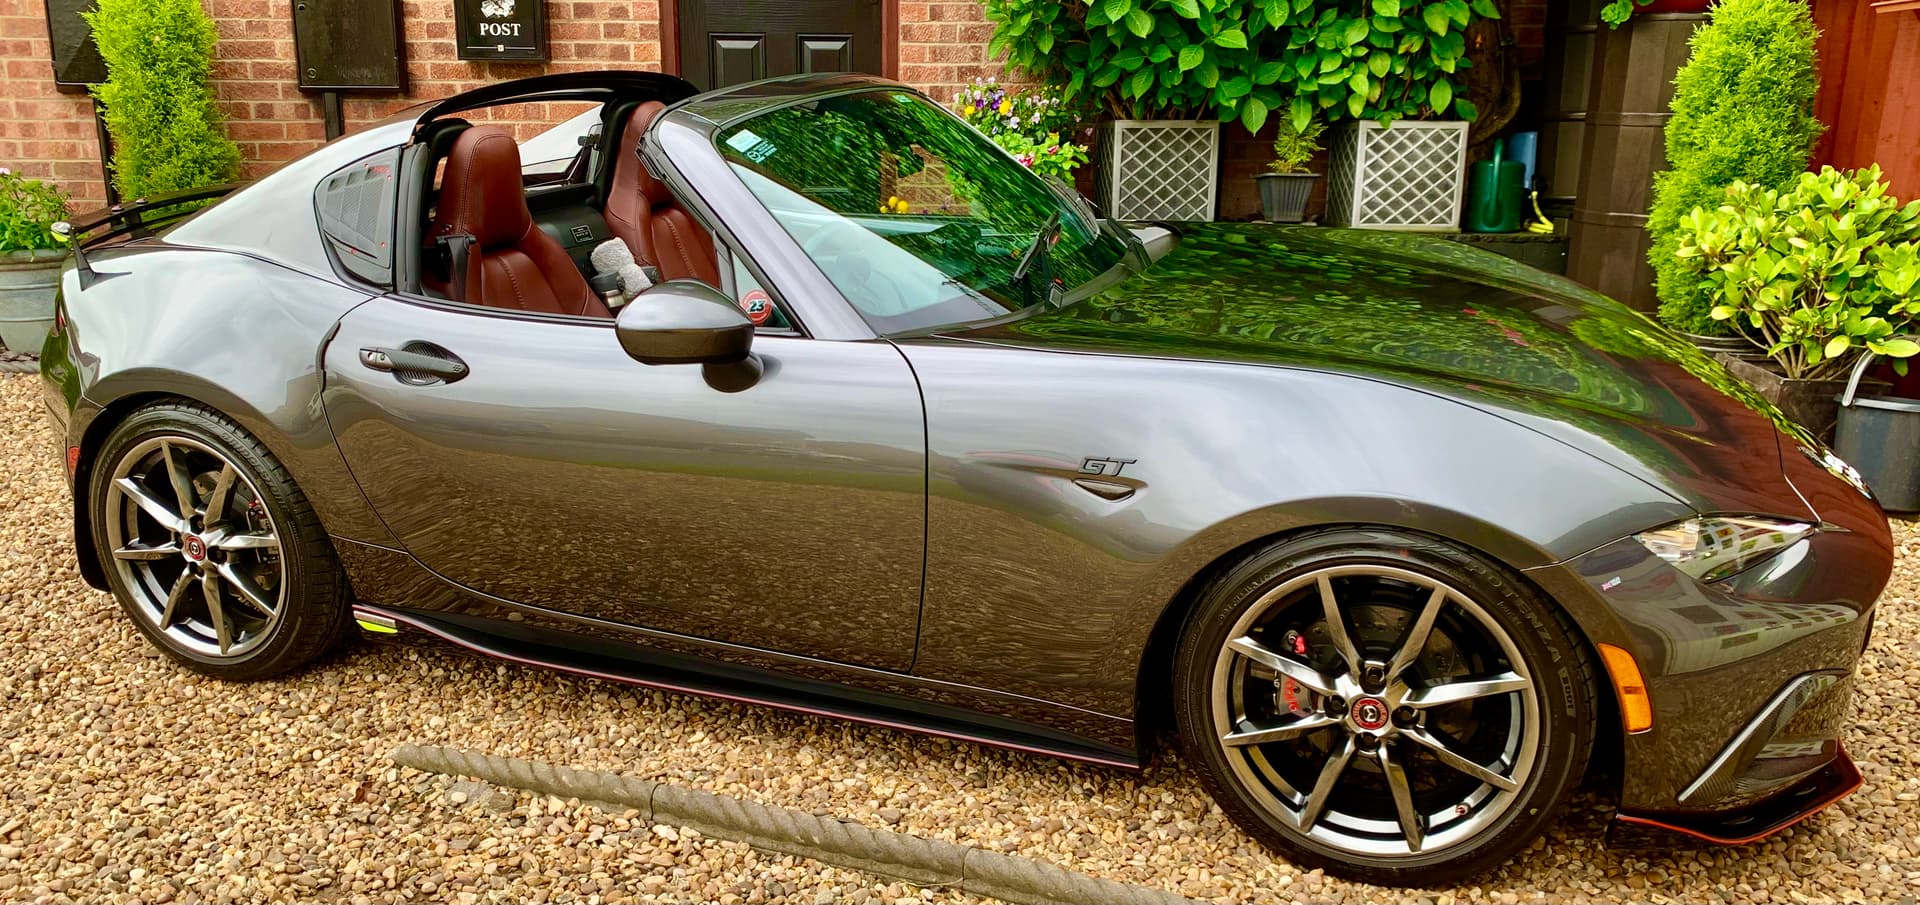
if you mean the tray on the top Right it came with the car…I dont know if MX5 parts sell it you get them from time to time popping up on e.bay…the rear wing / Defuser/rear bumper inserts are hand made projects that l have made……over the last few years……
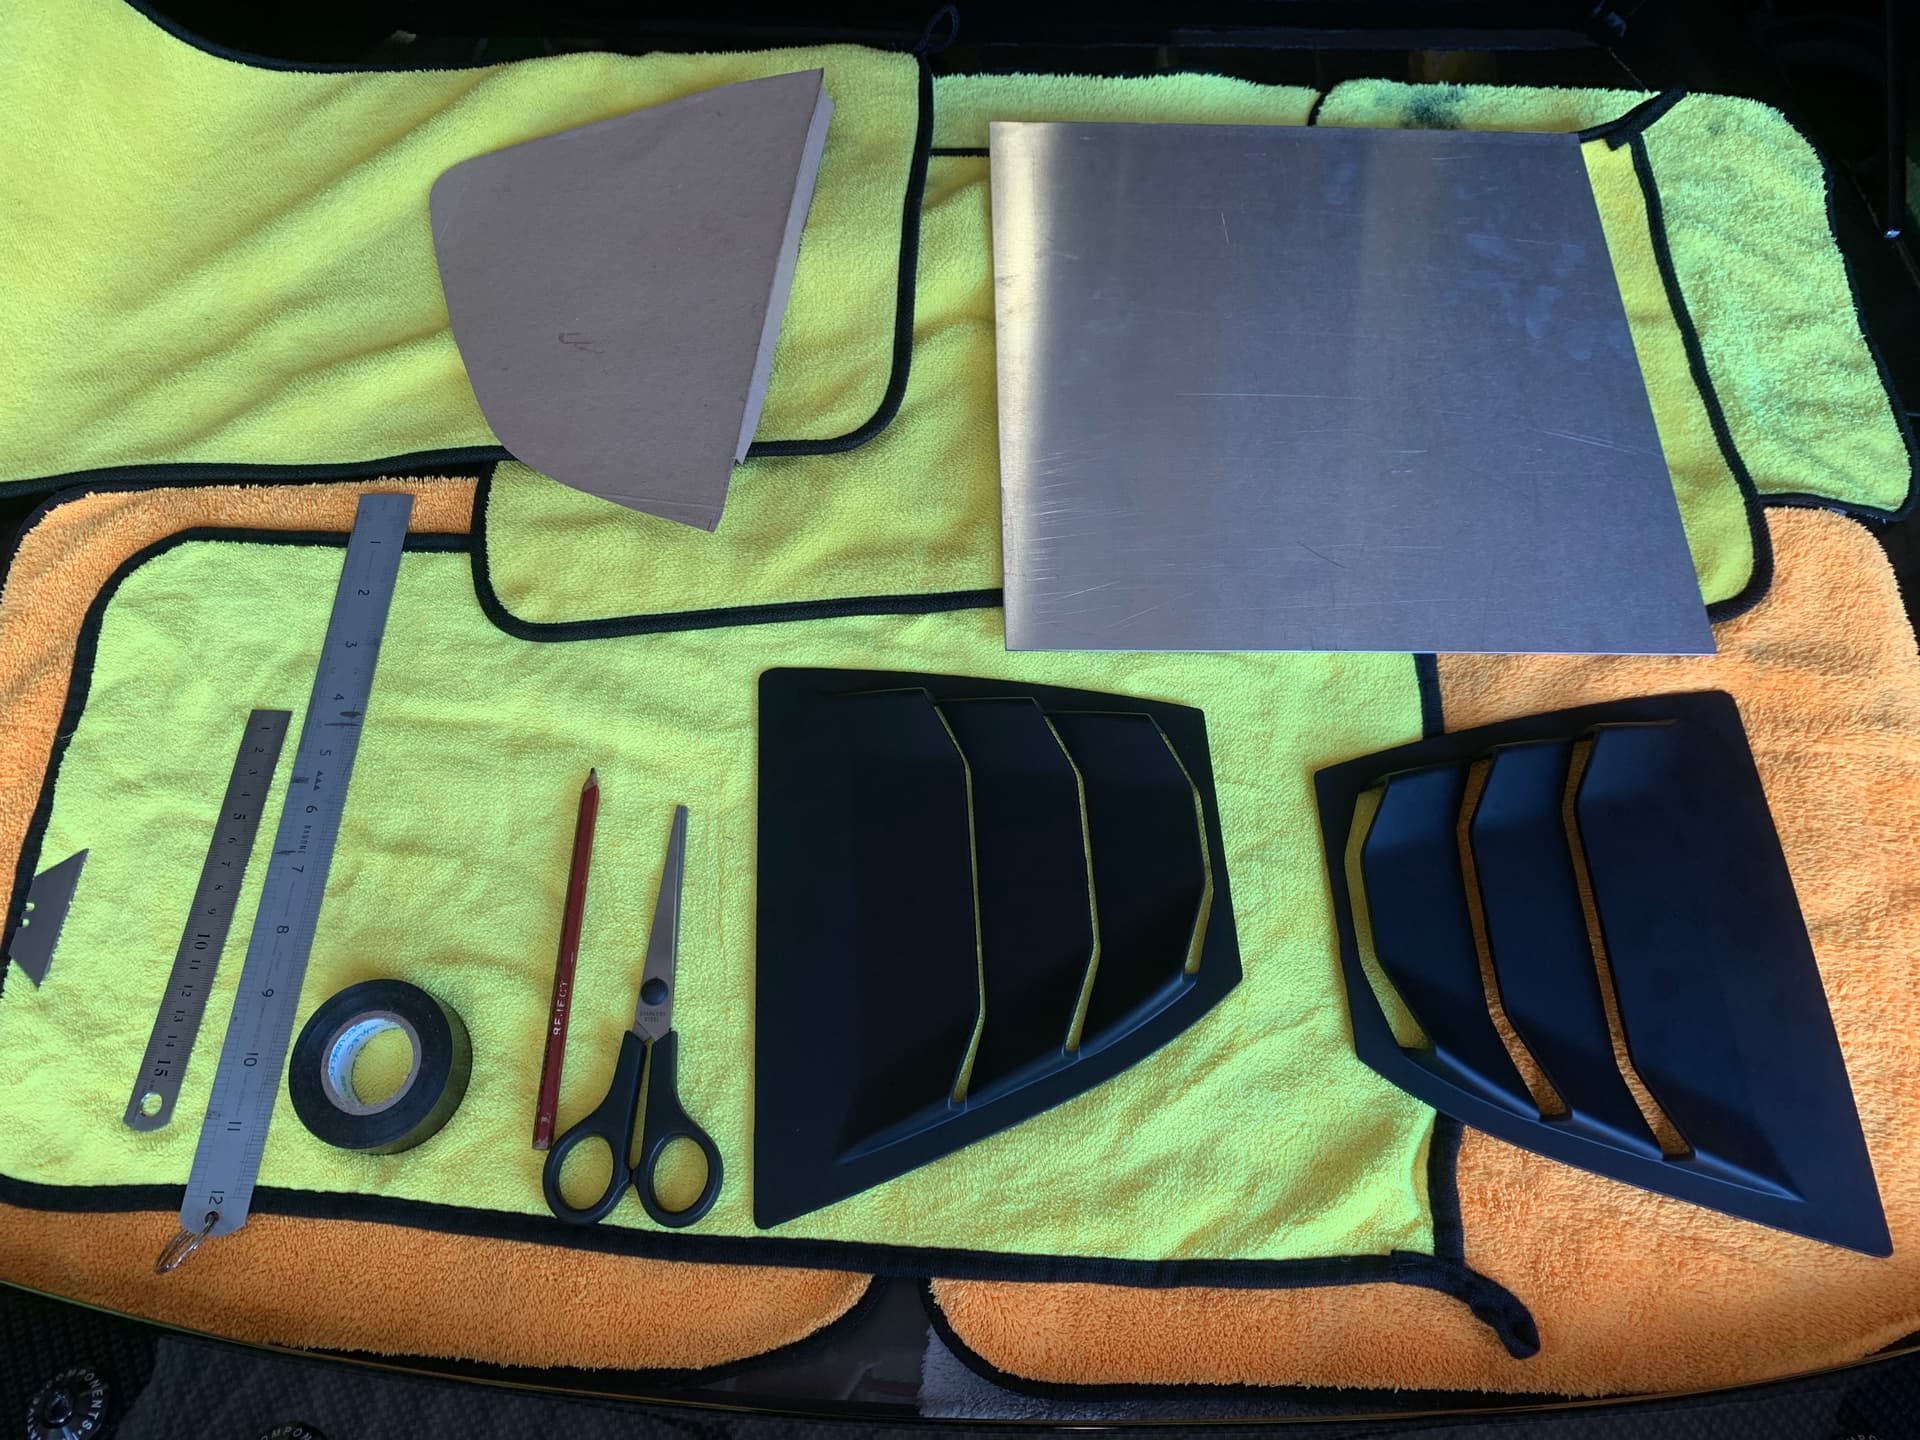
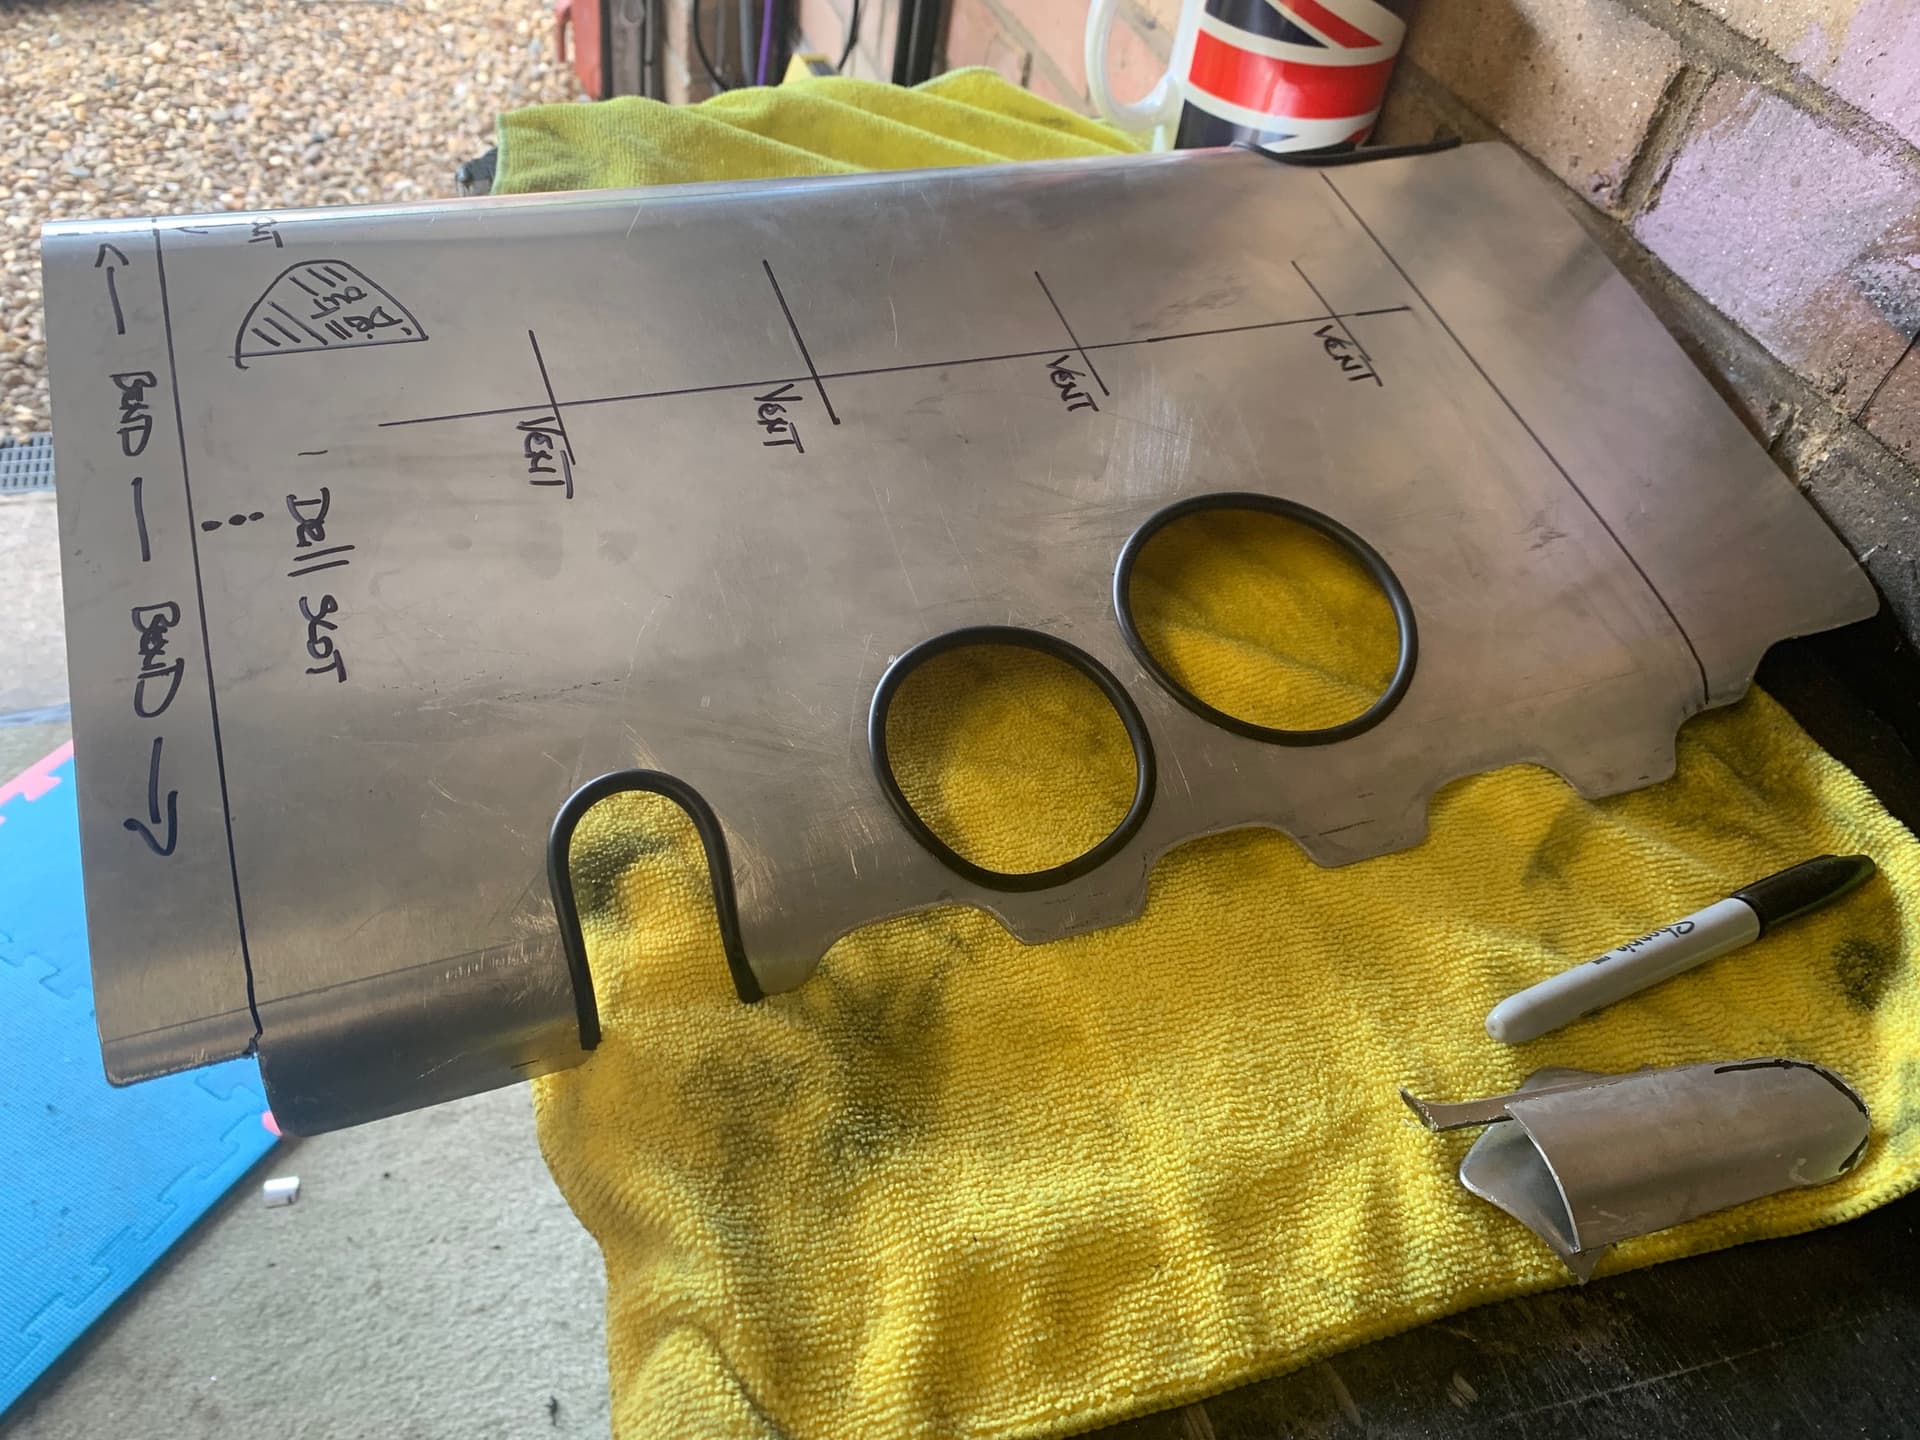
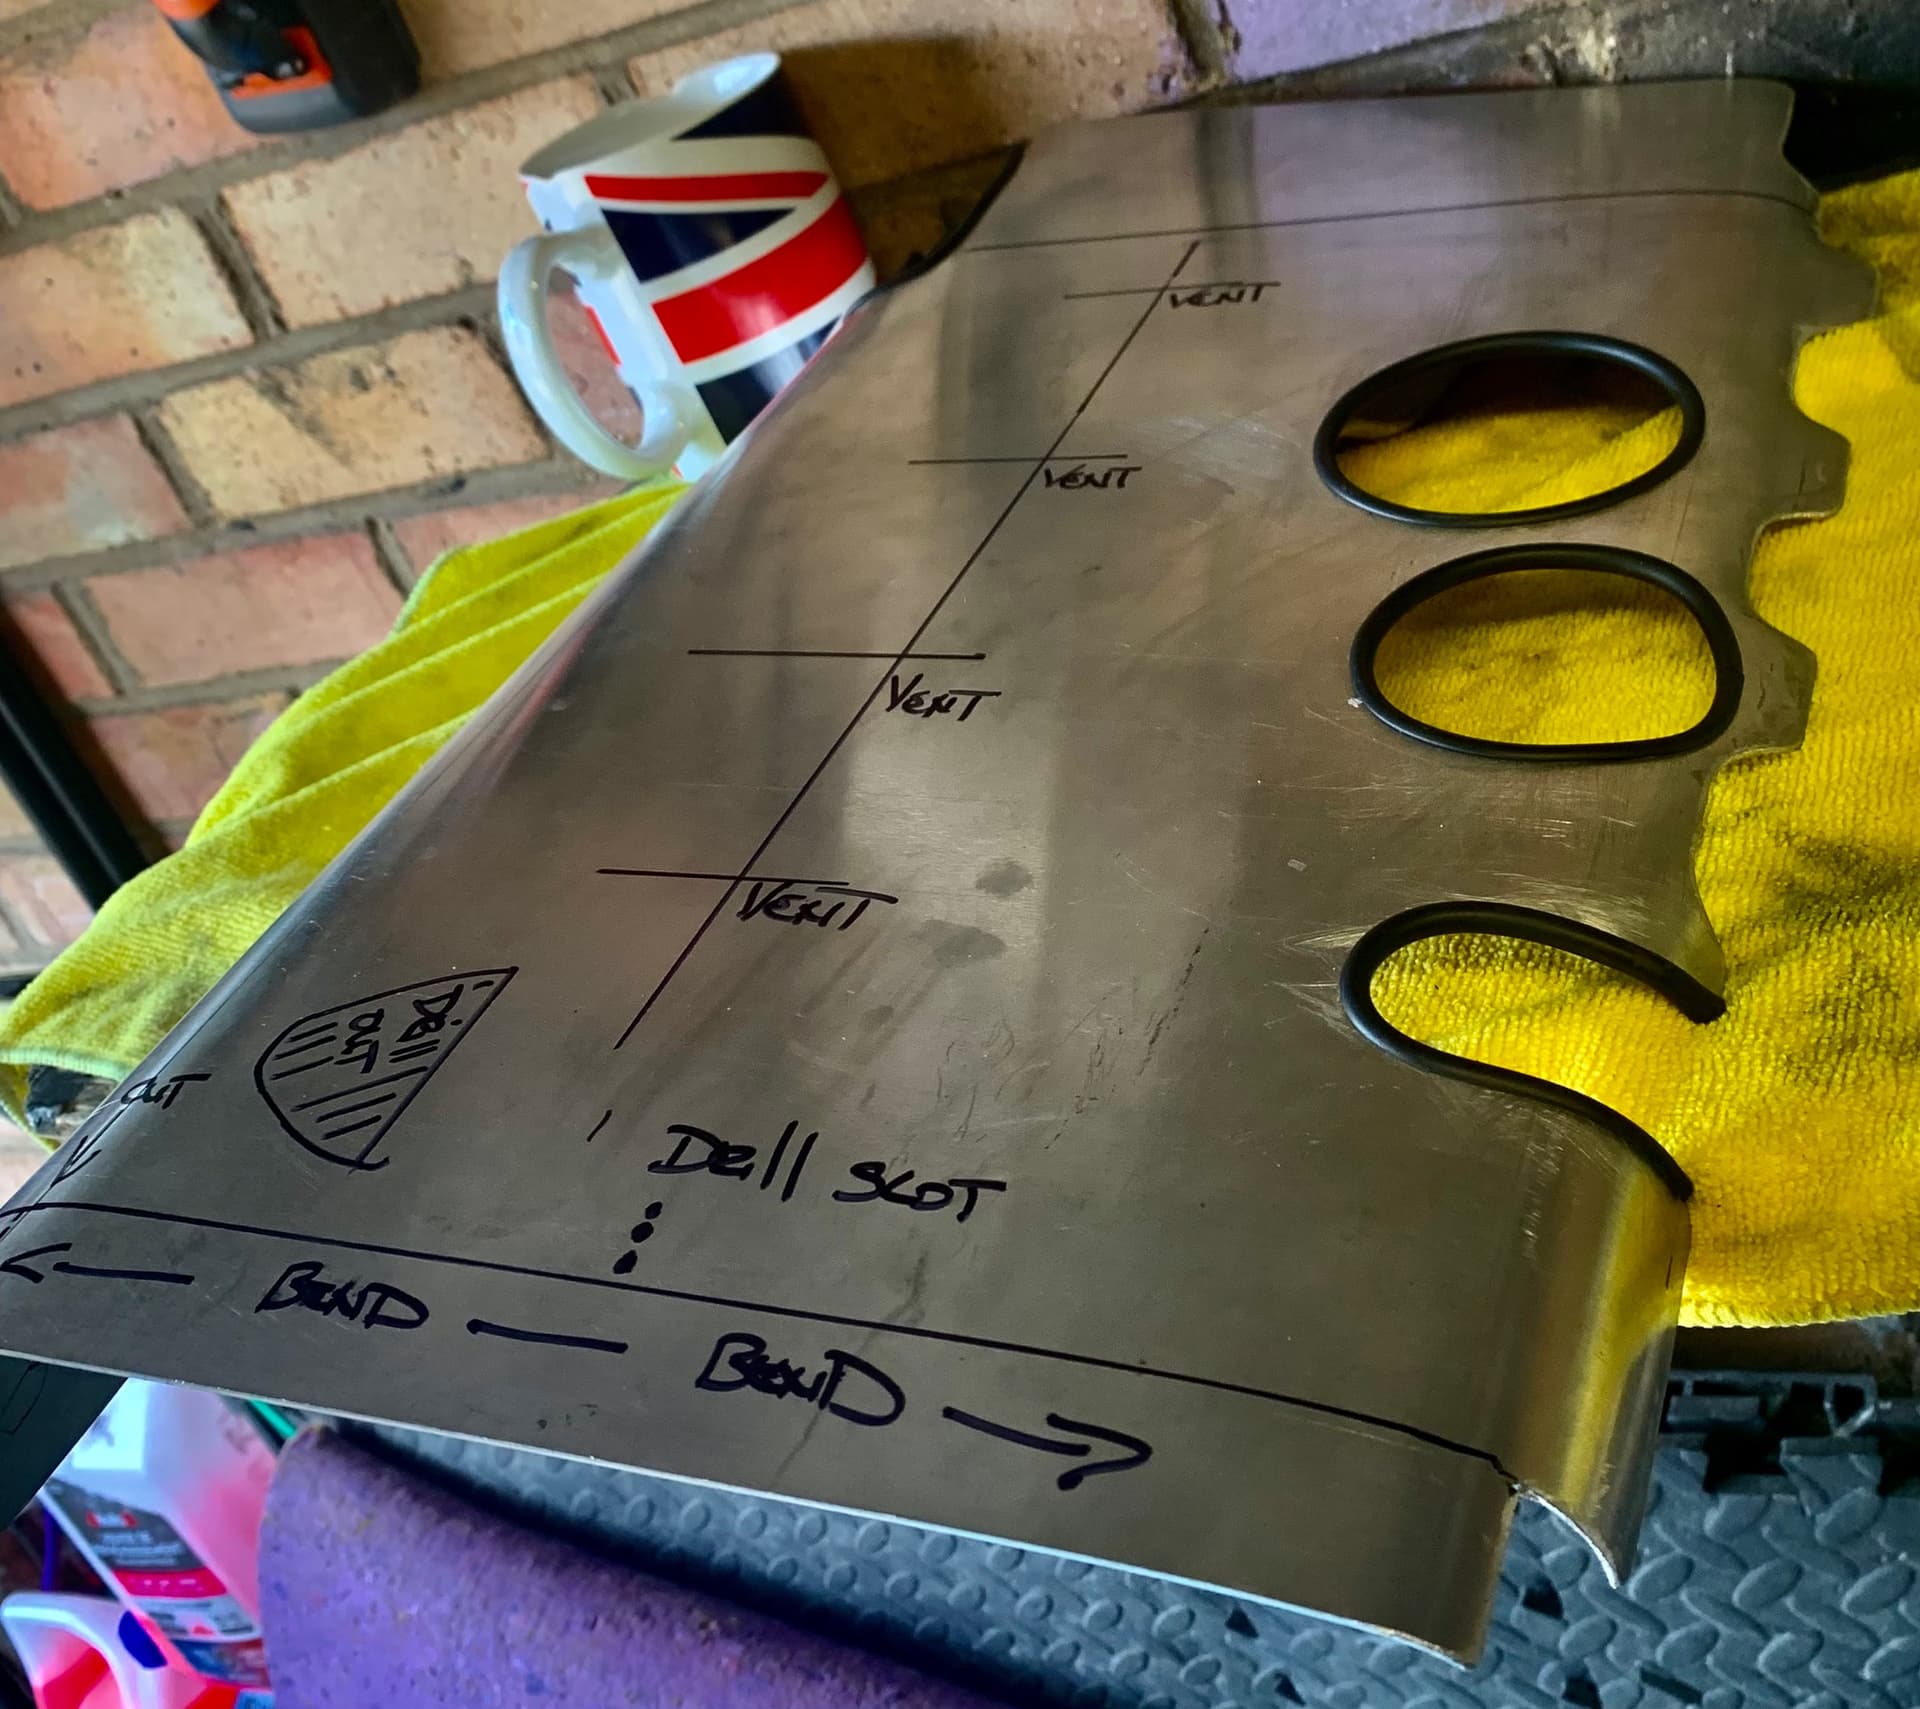
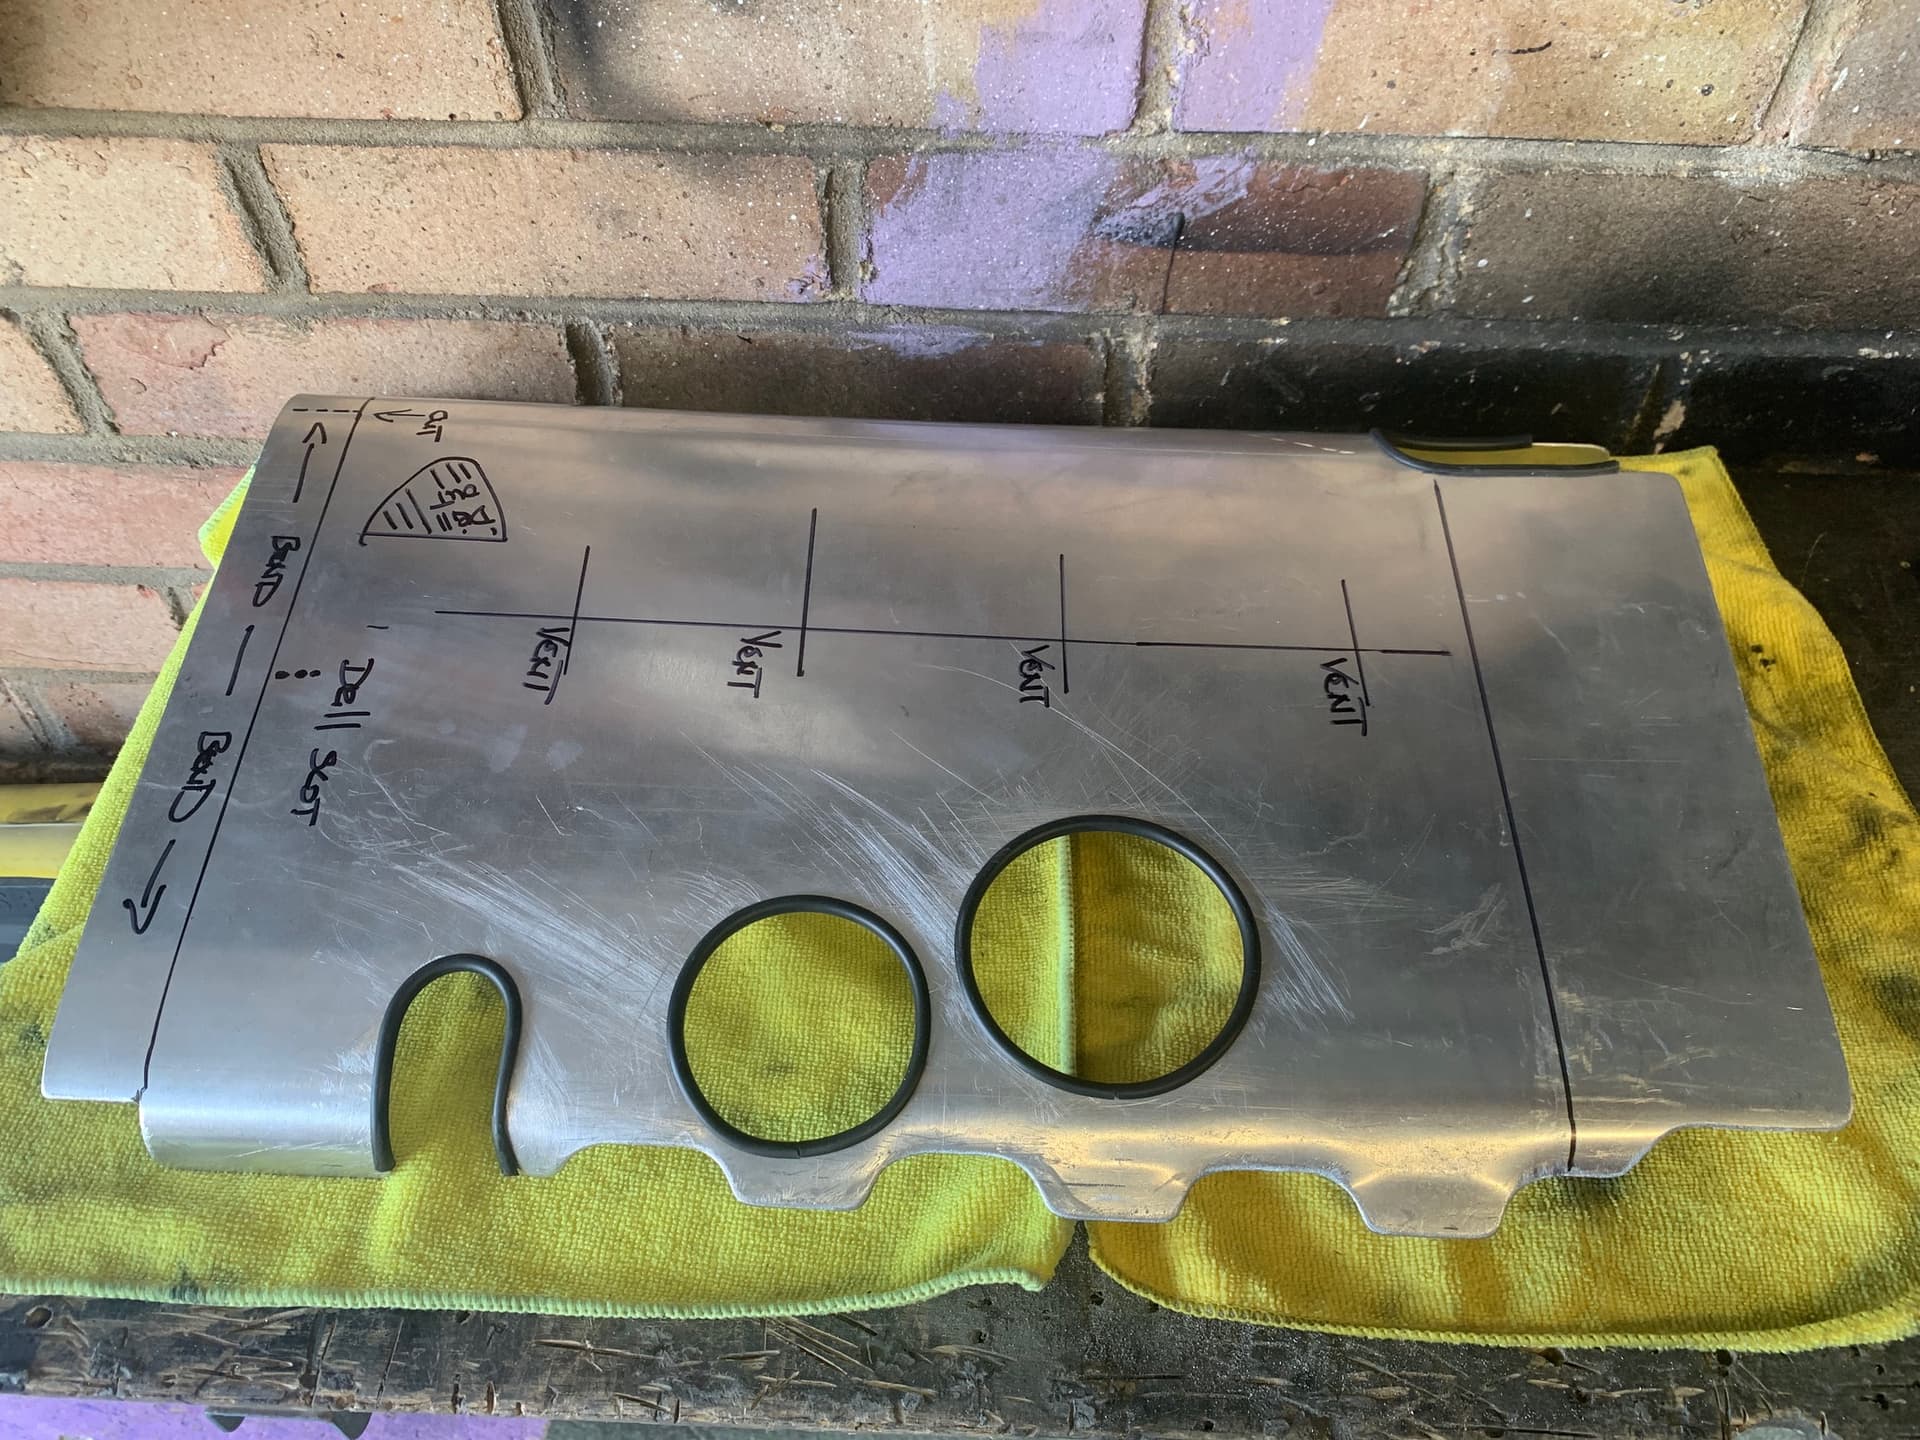
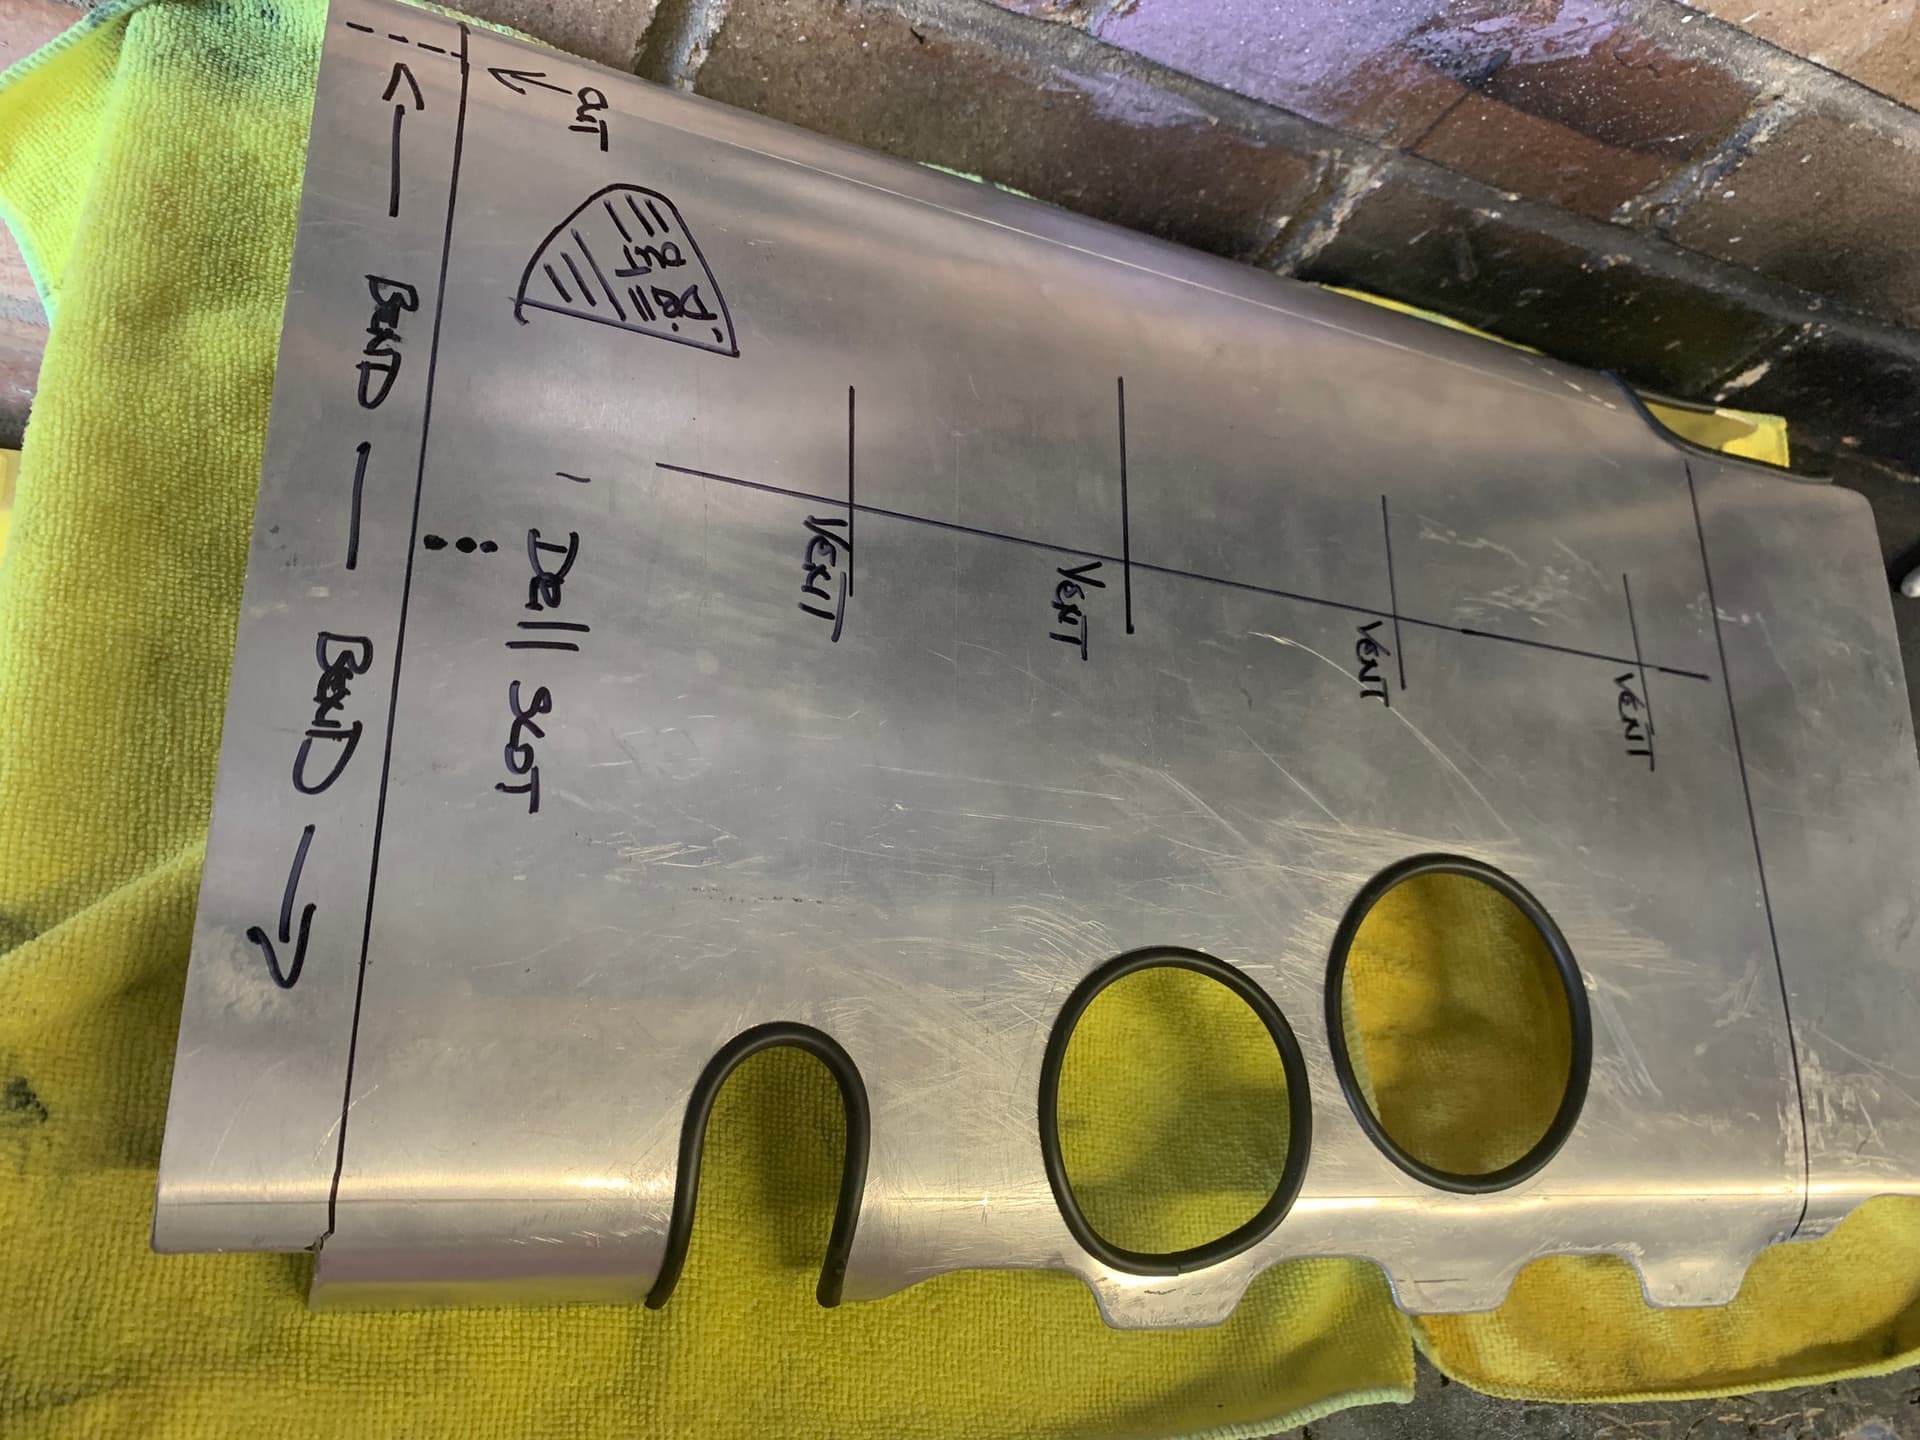
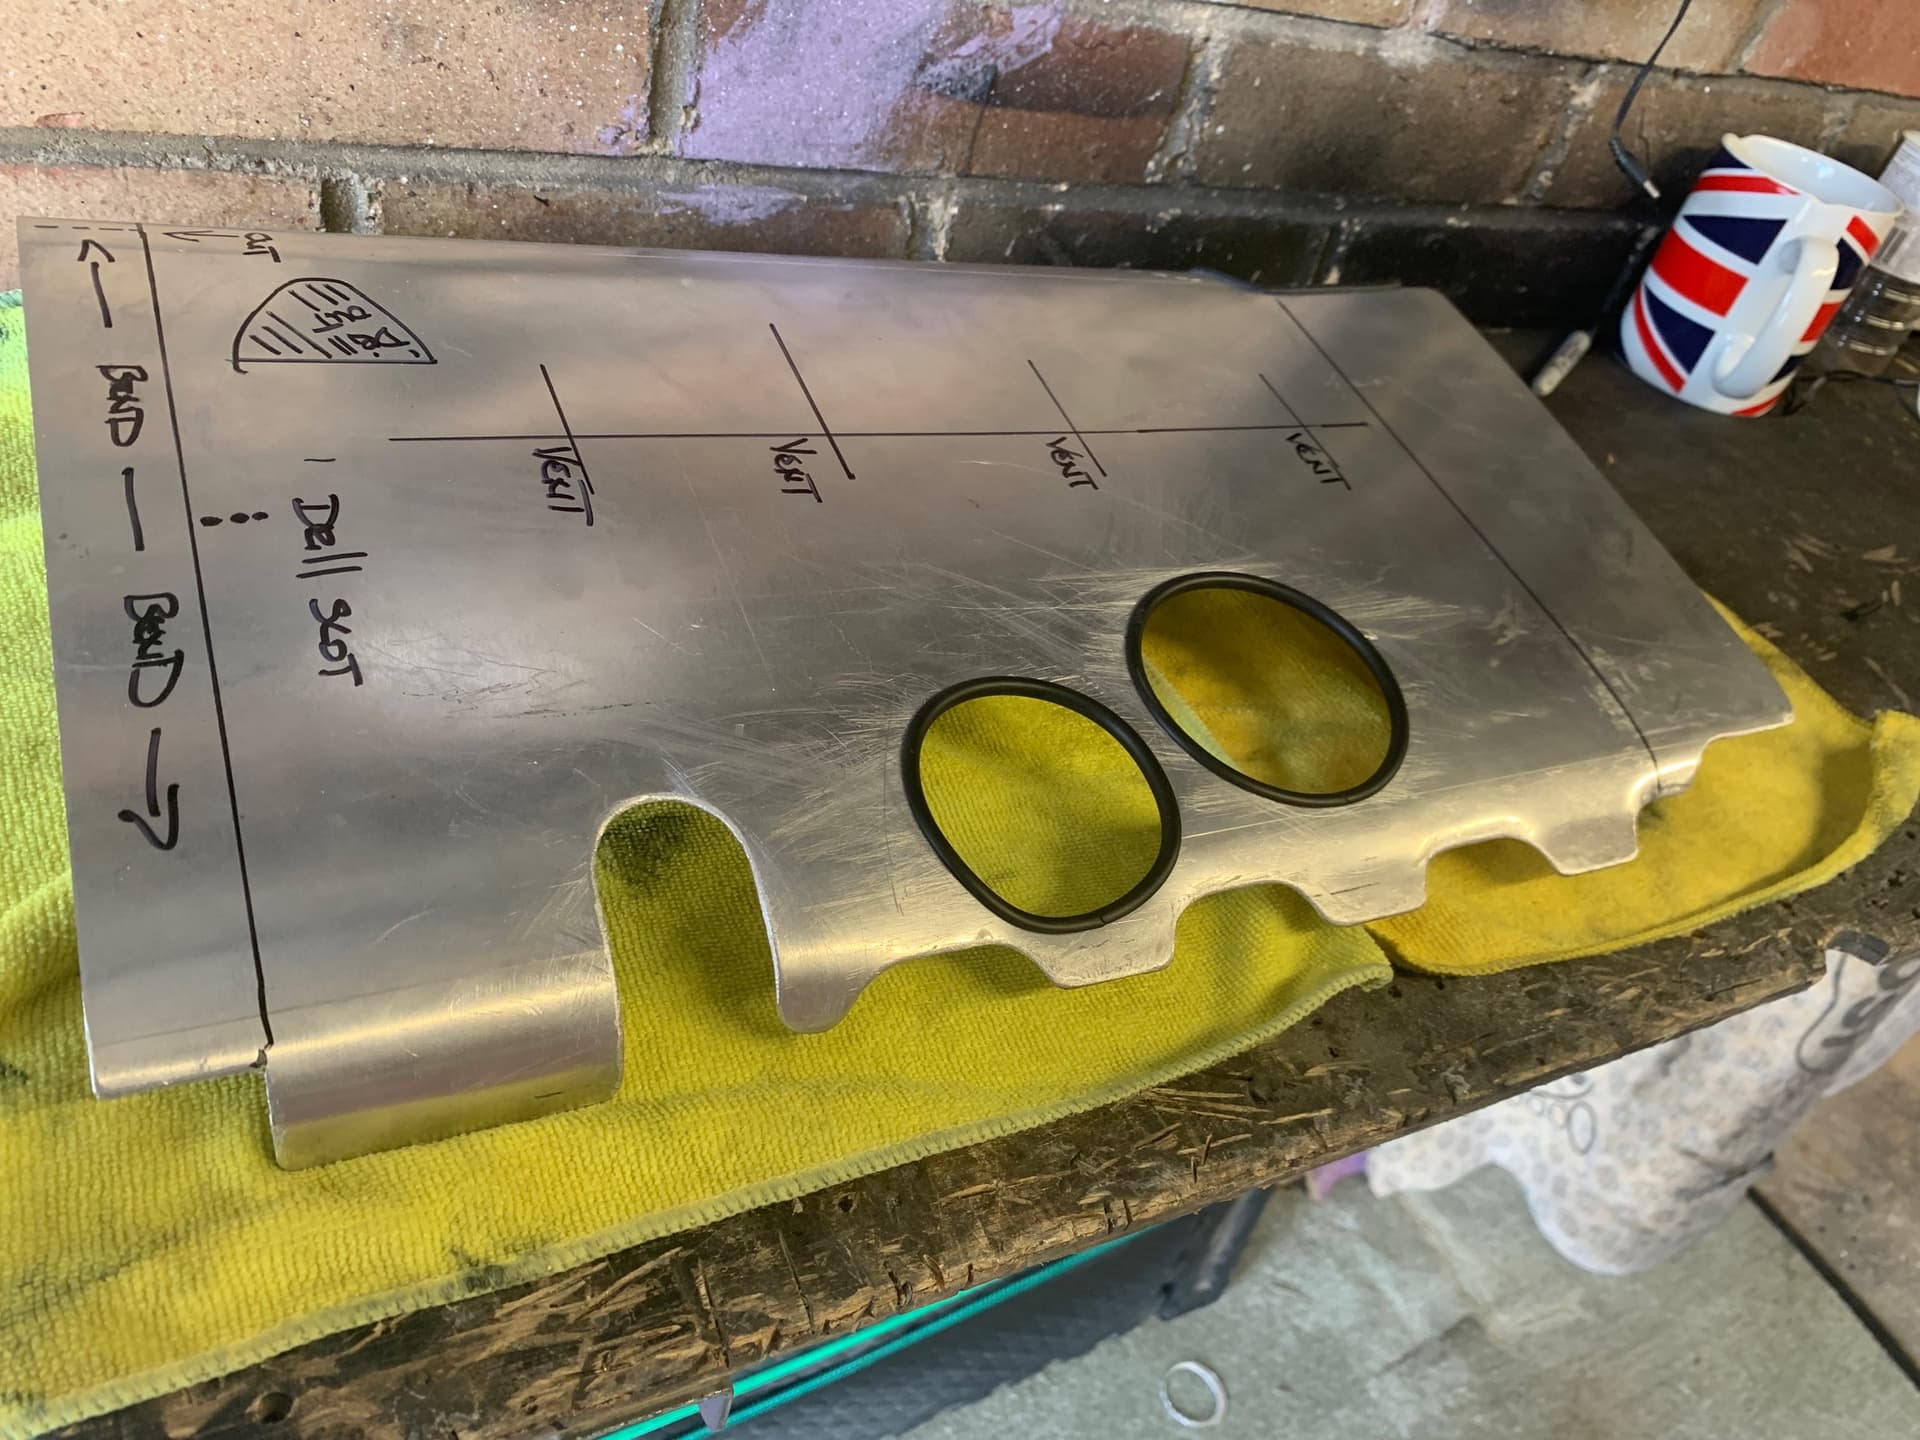
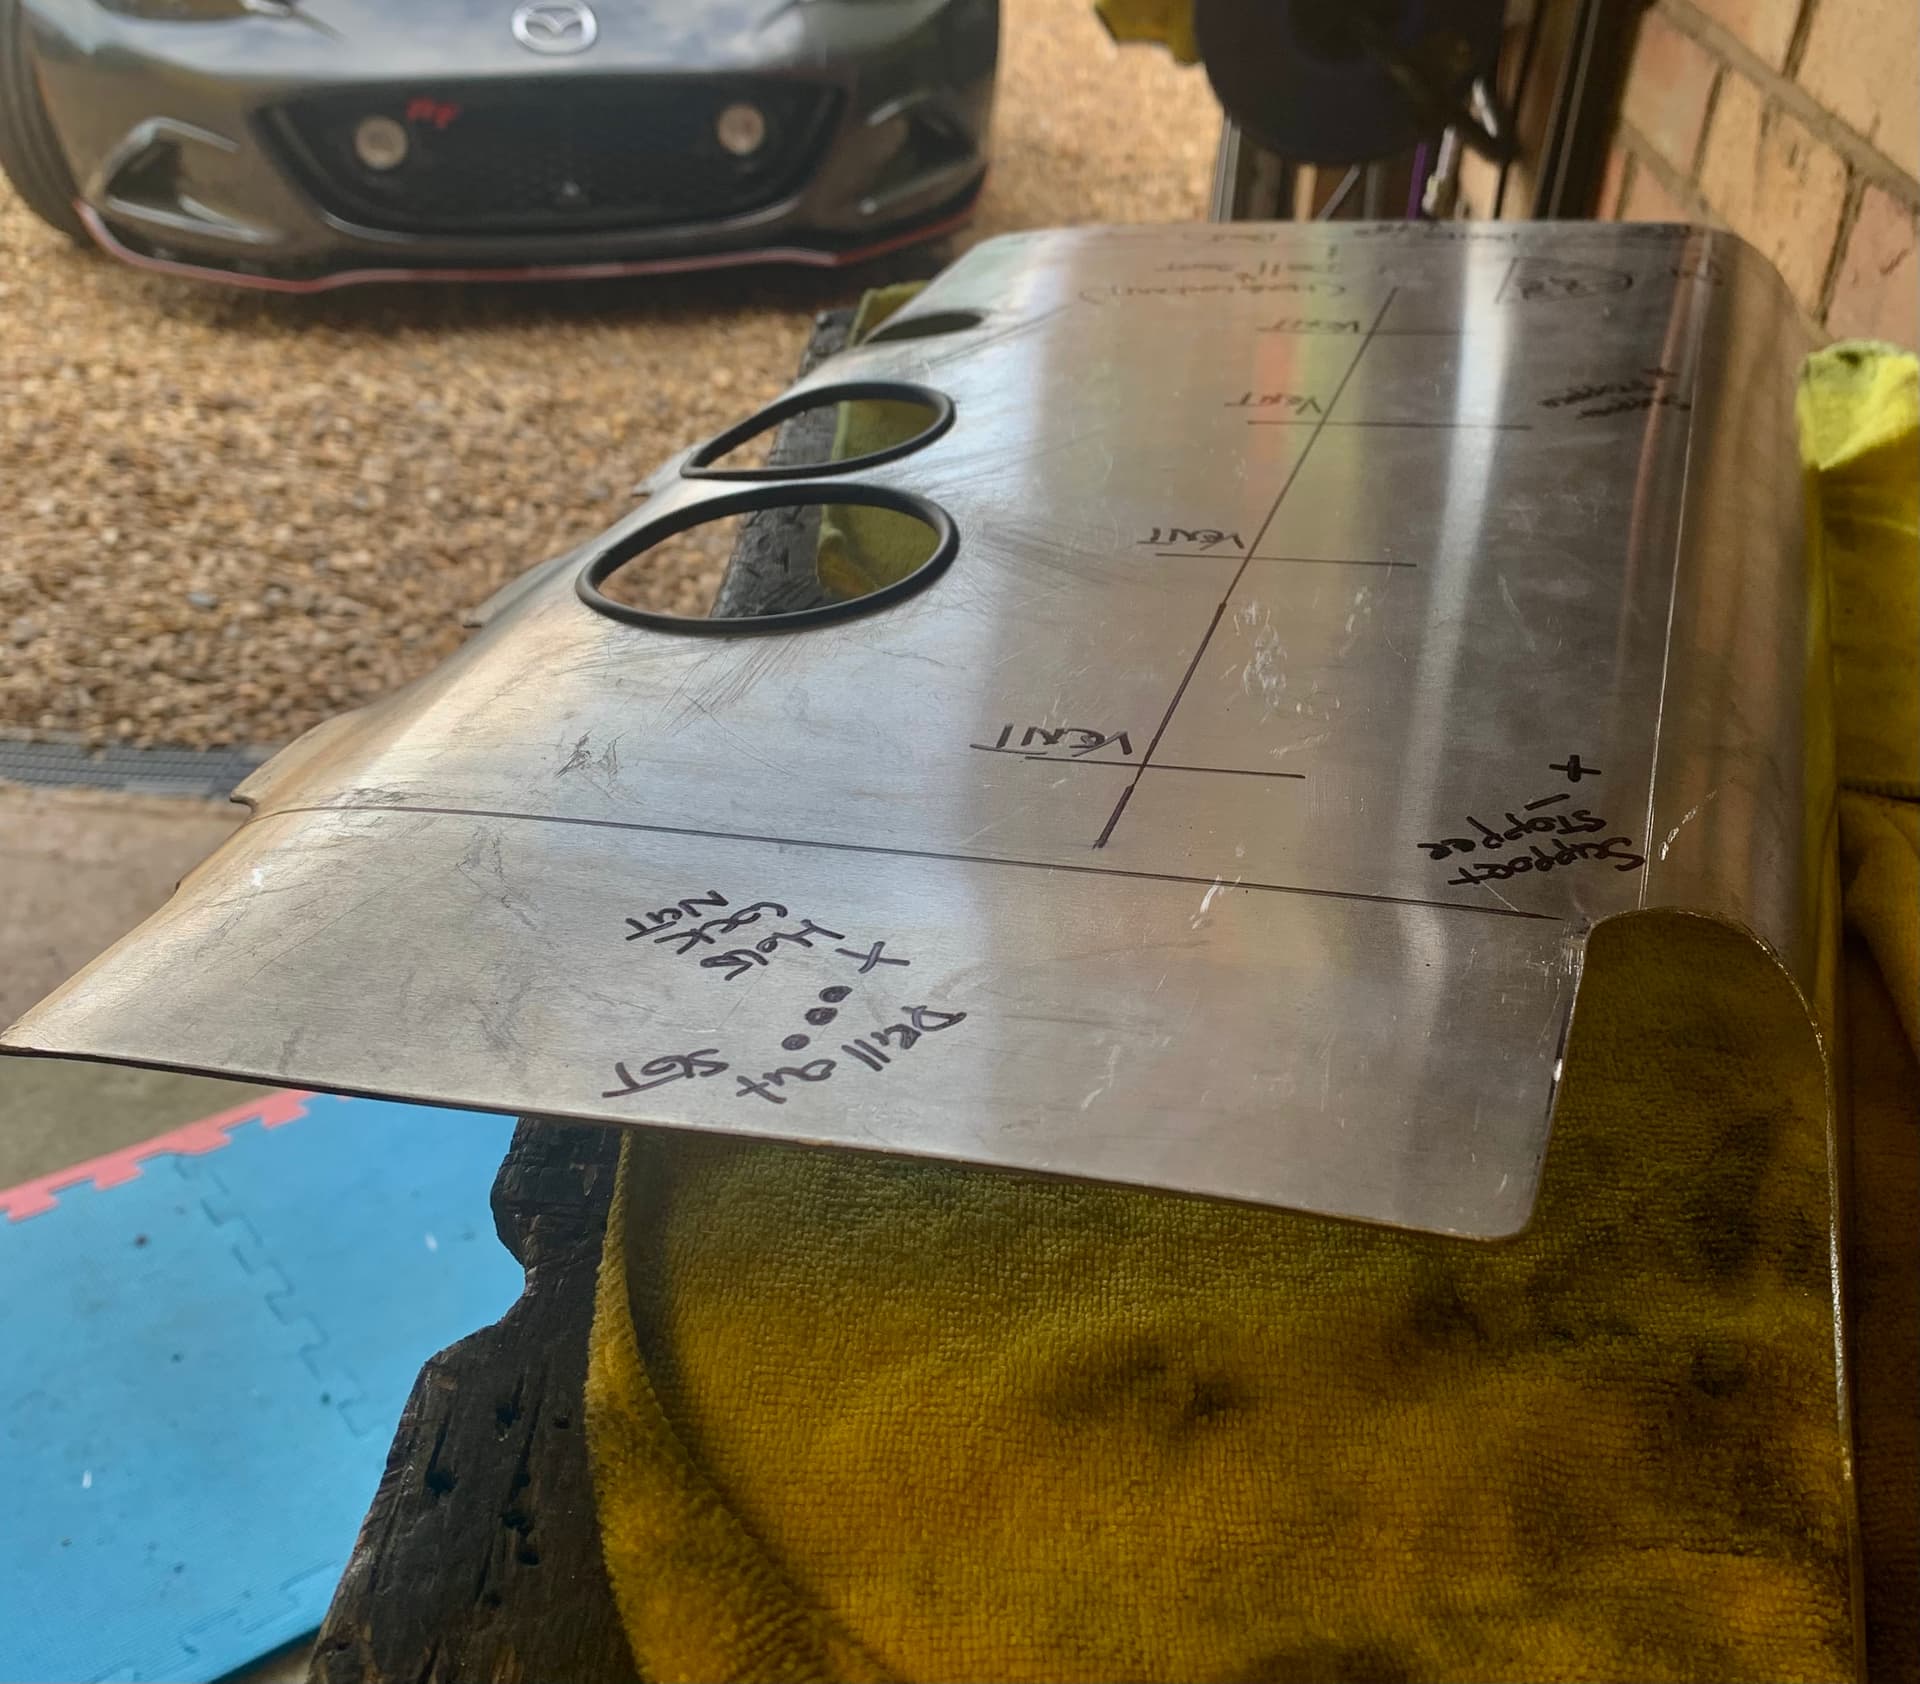
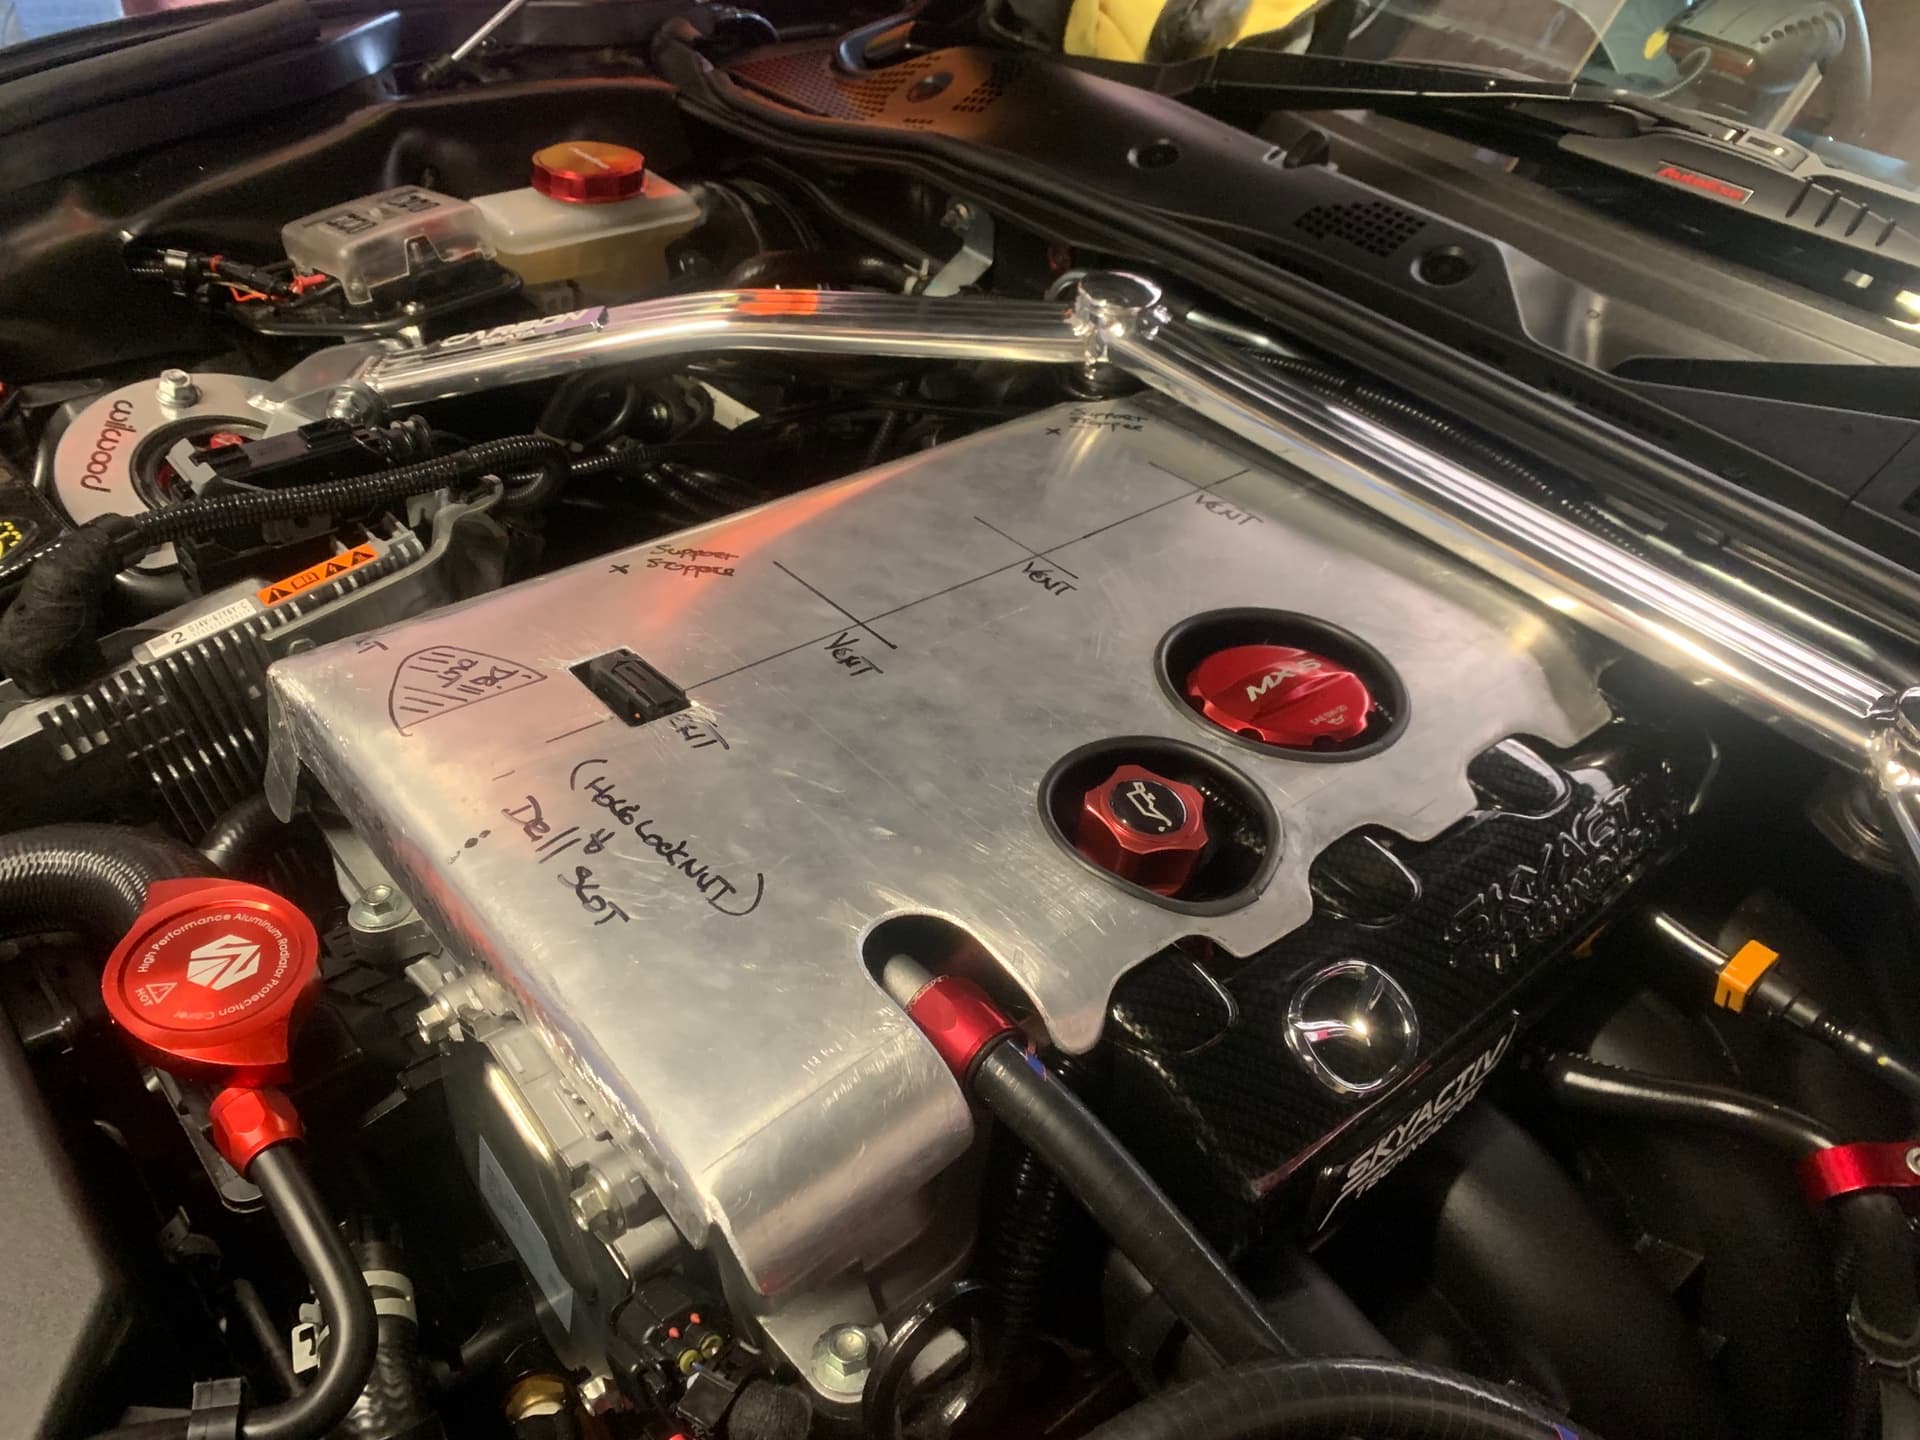
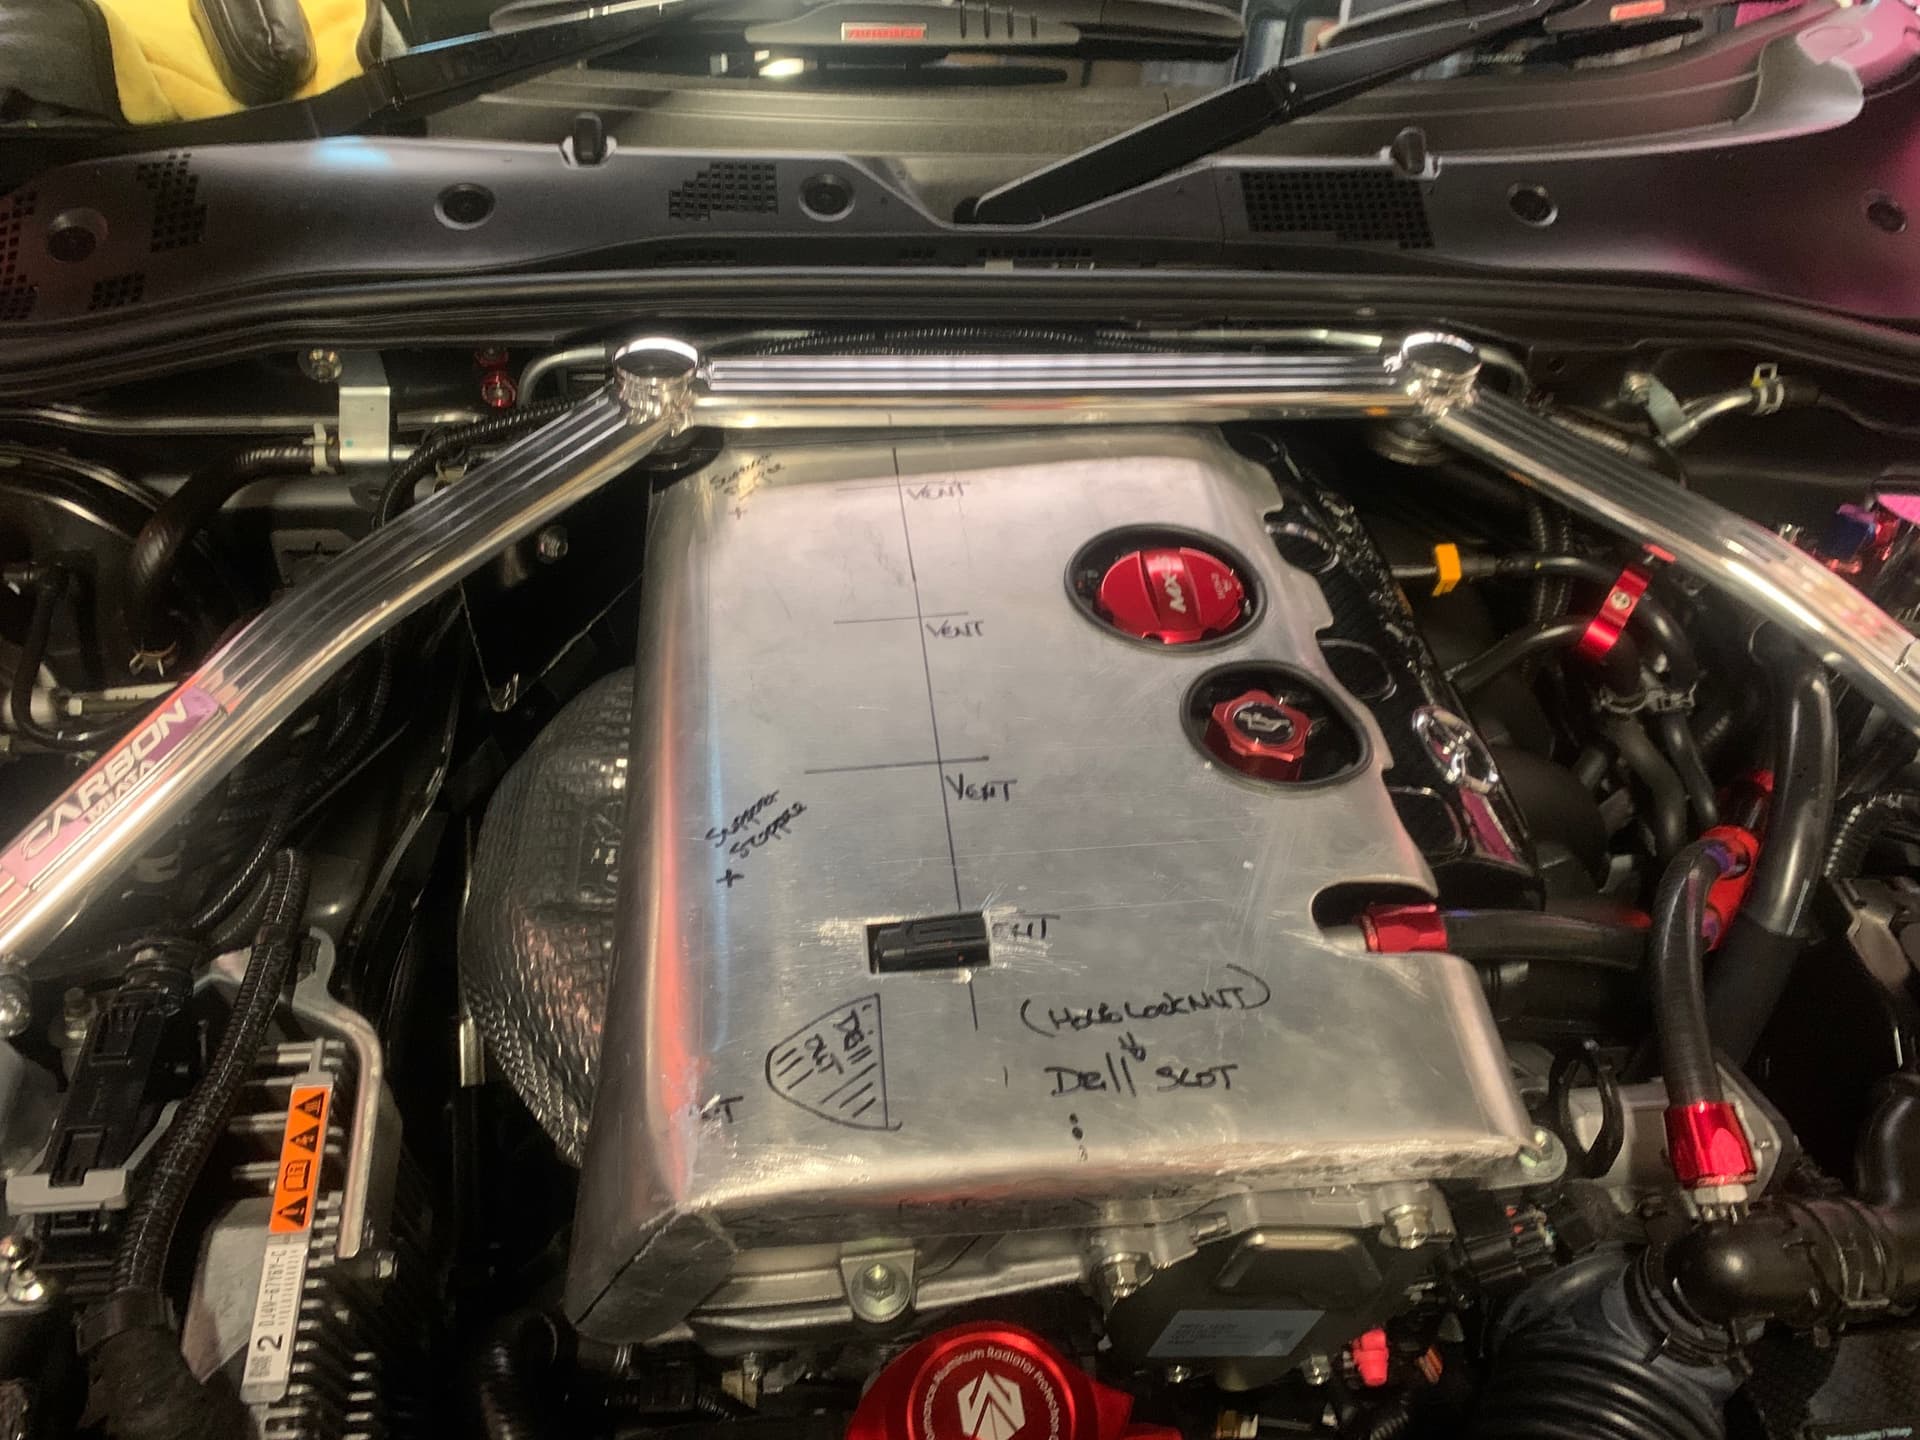
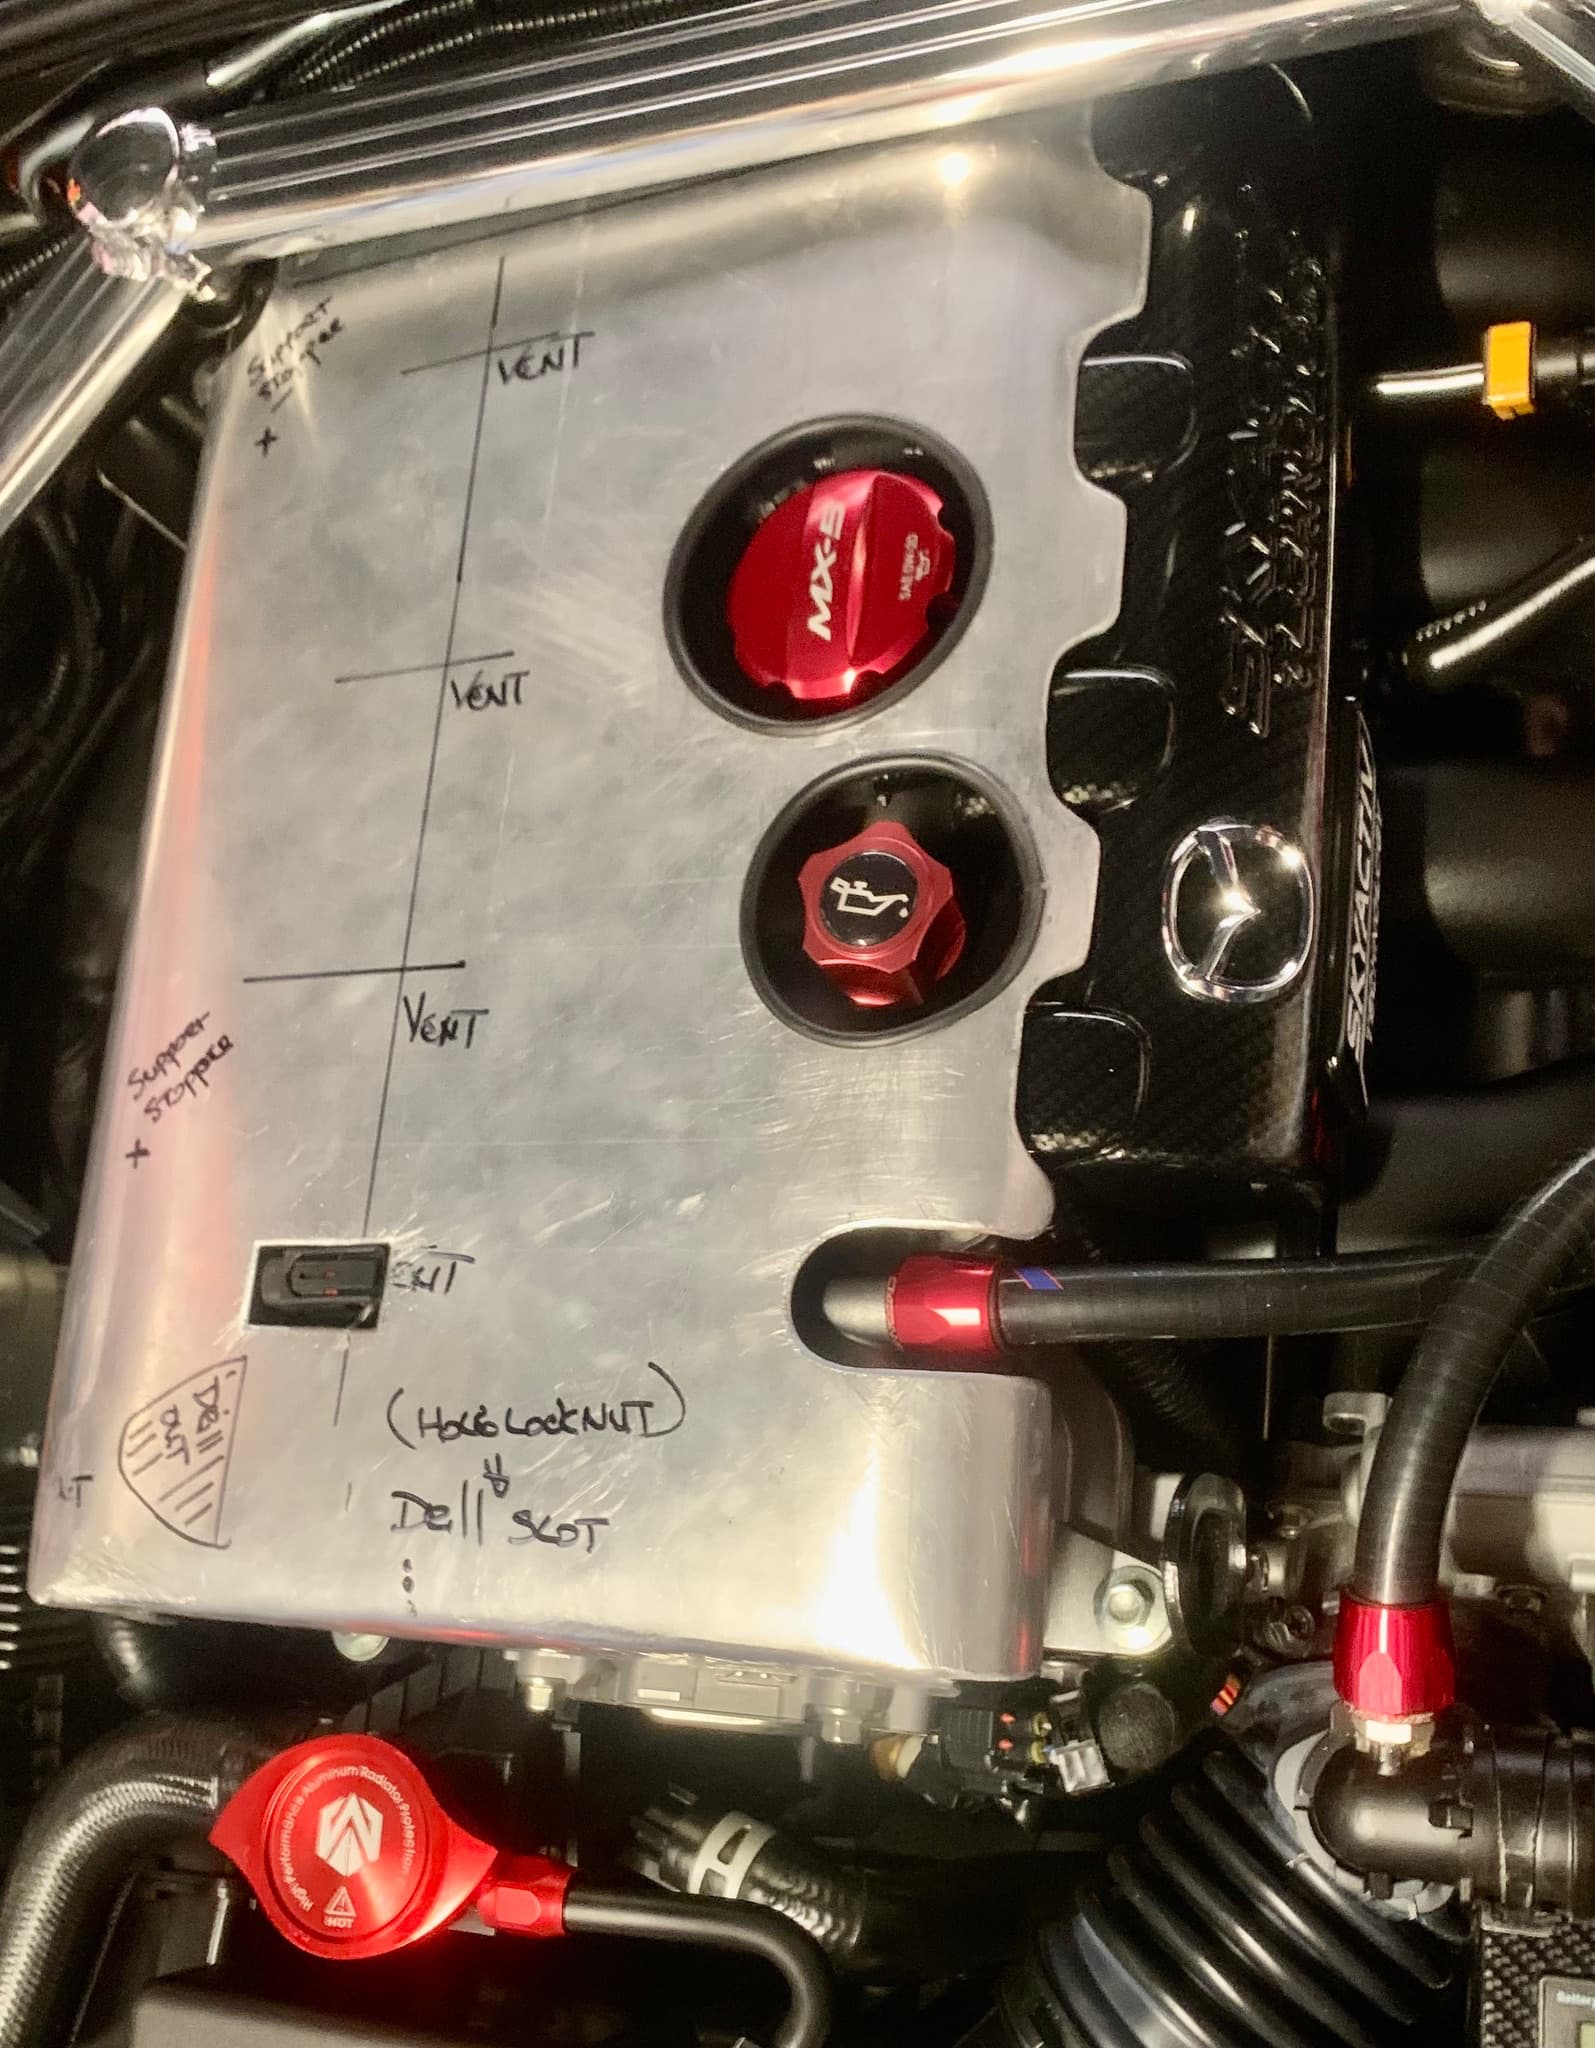
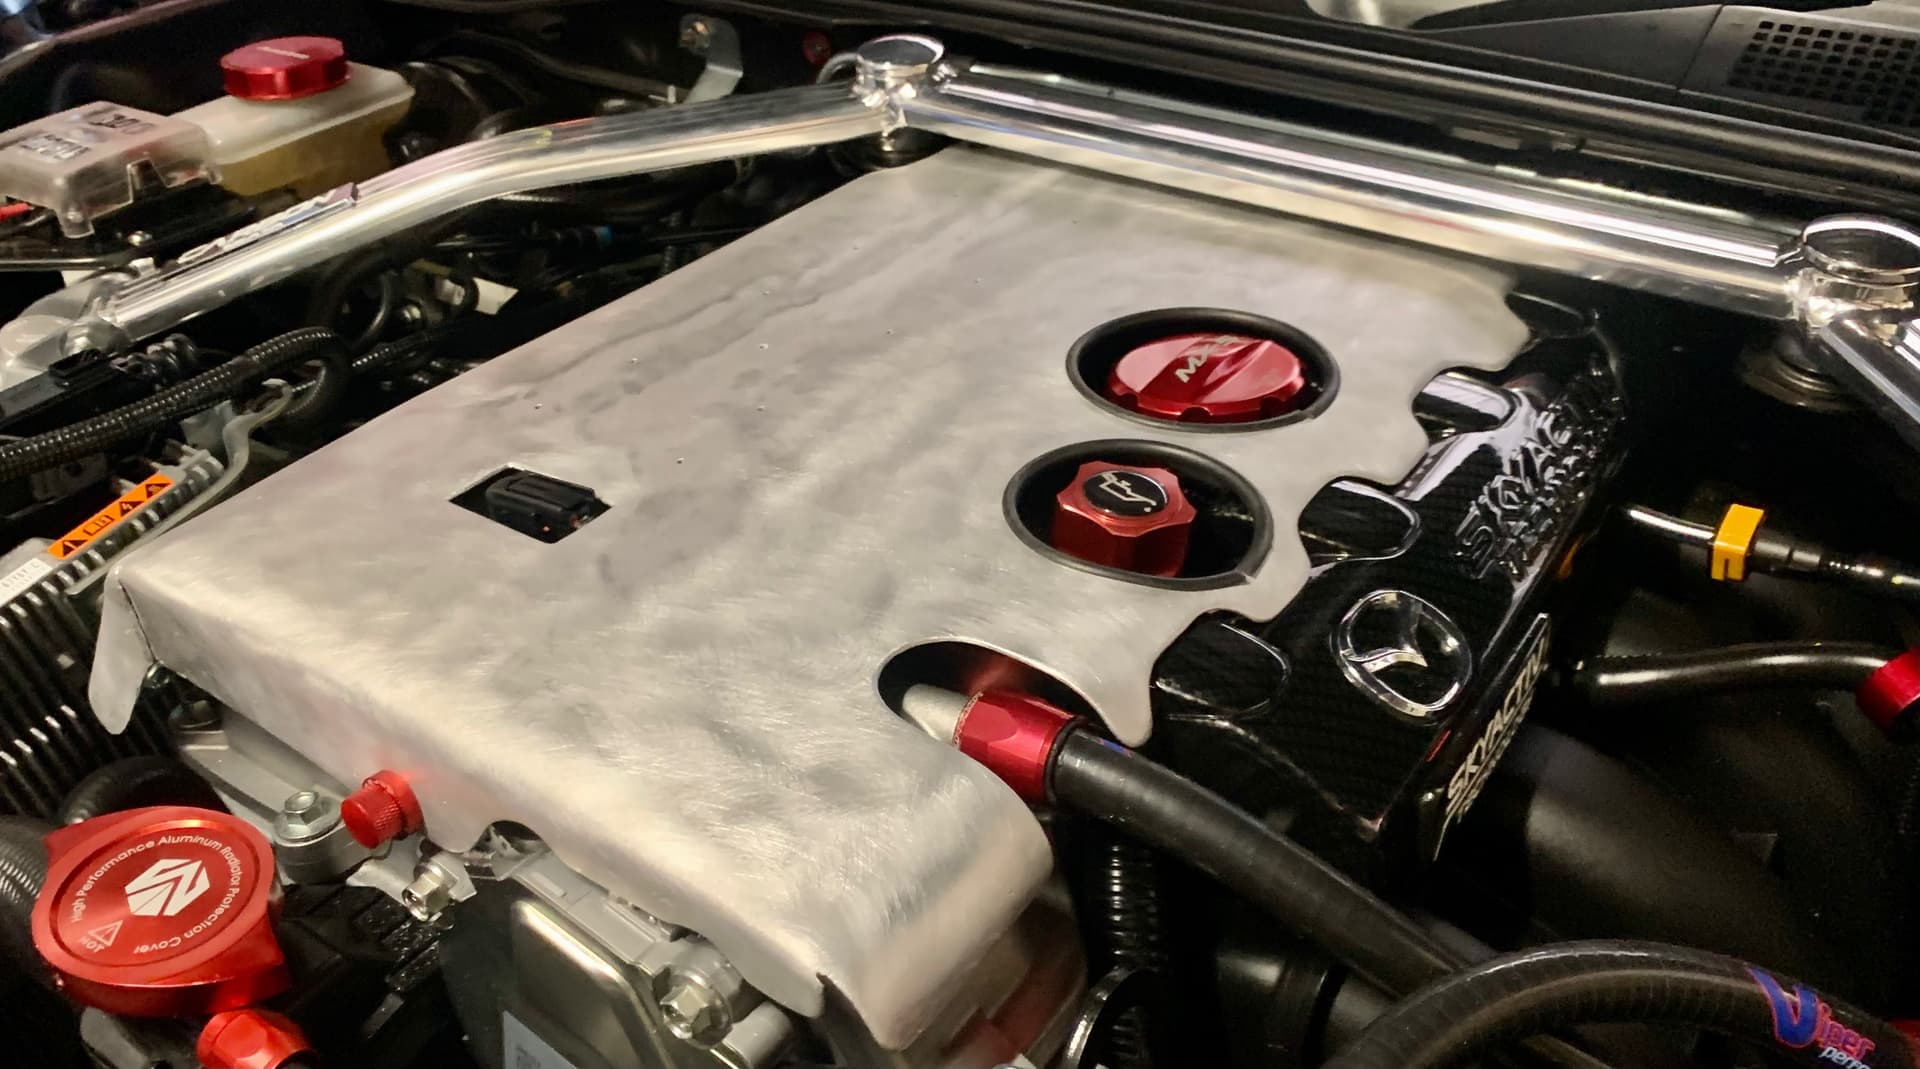
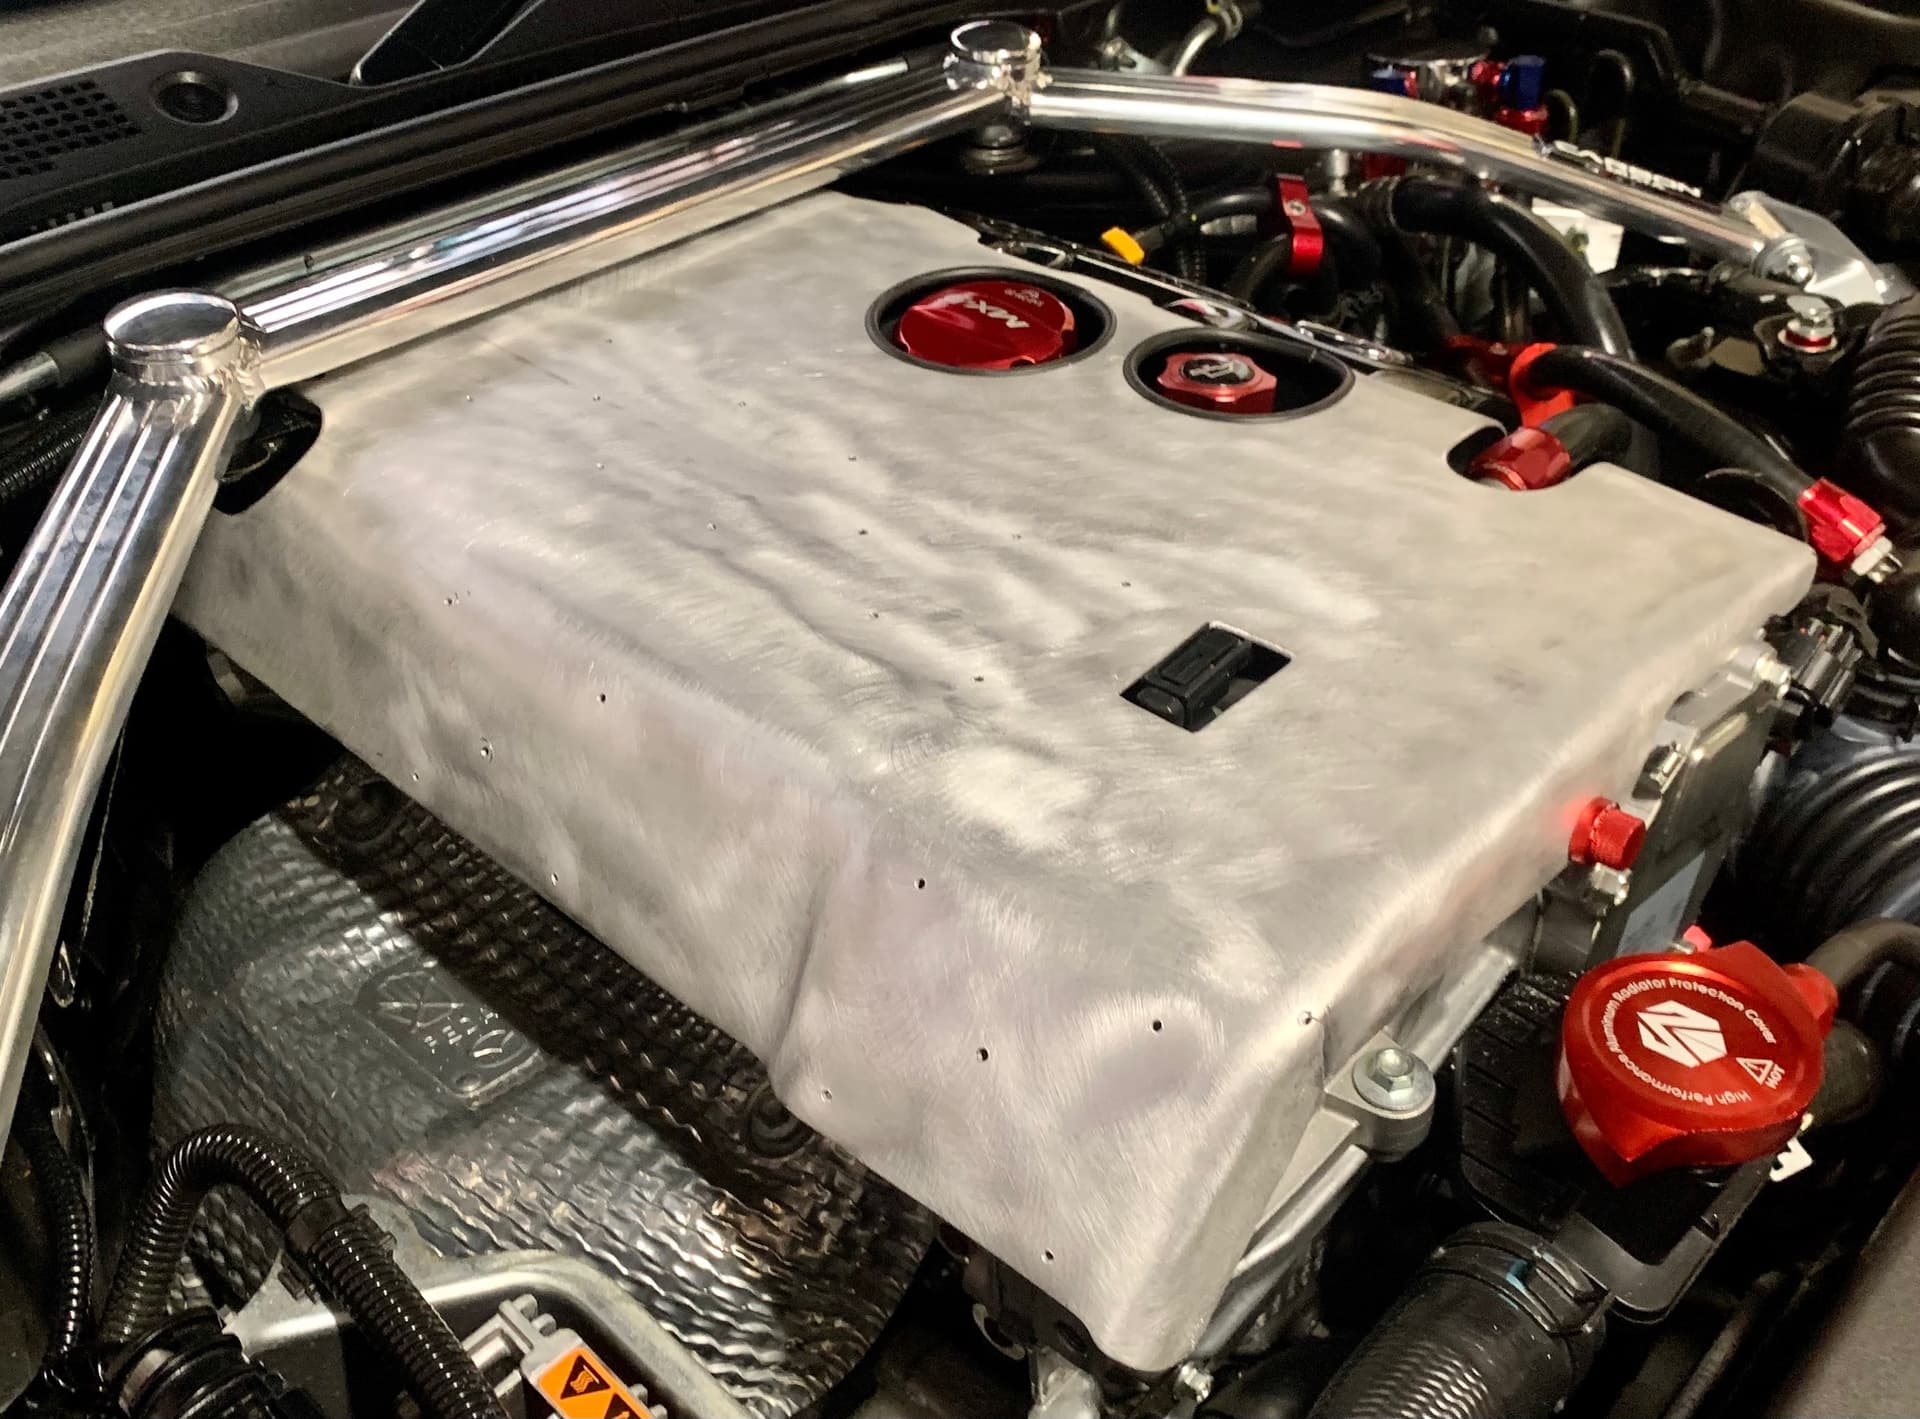
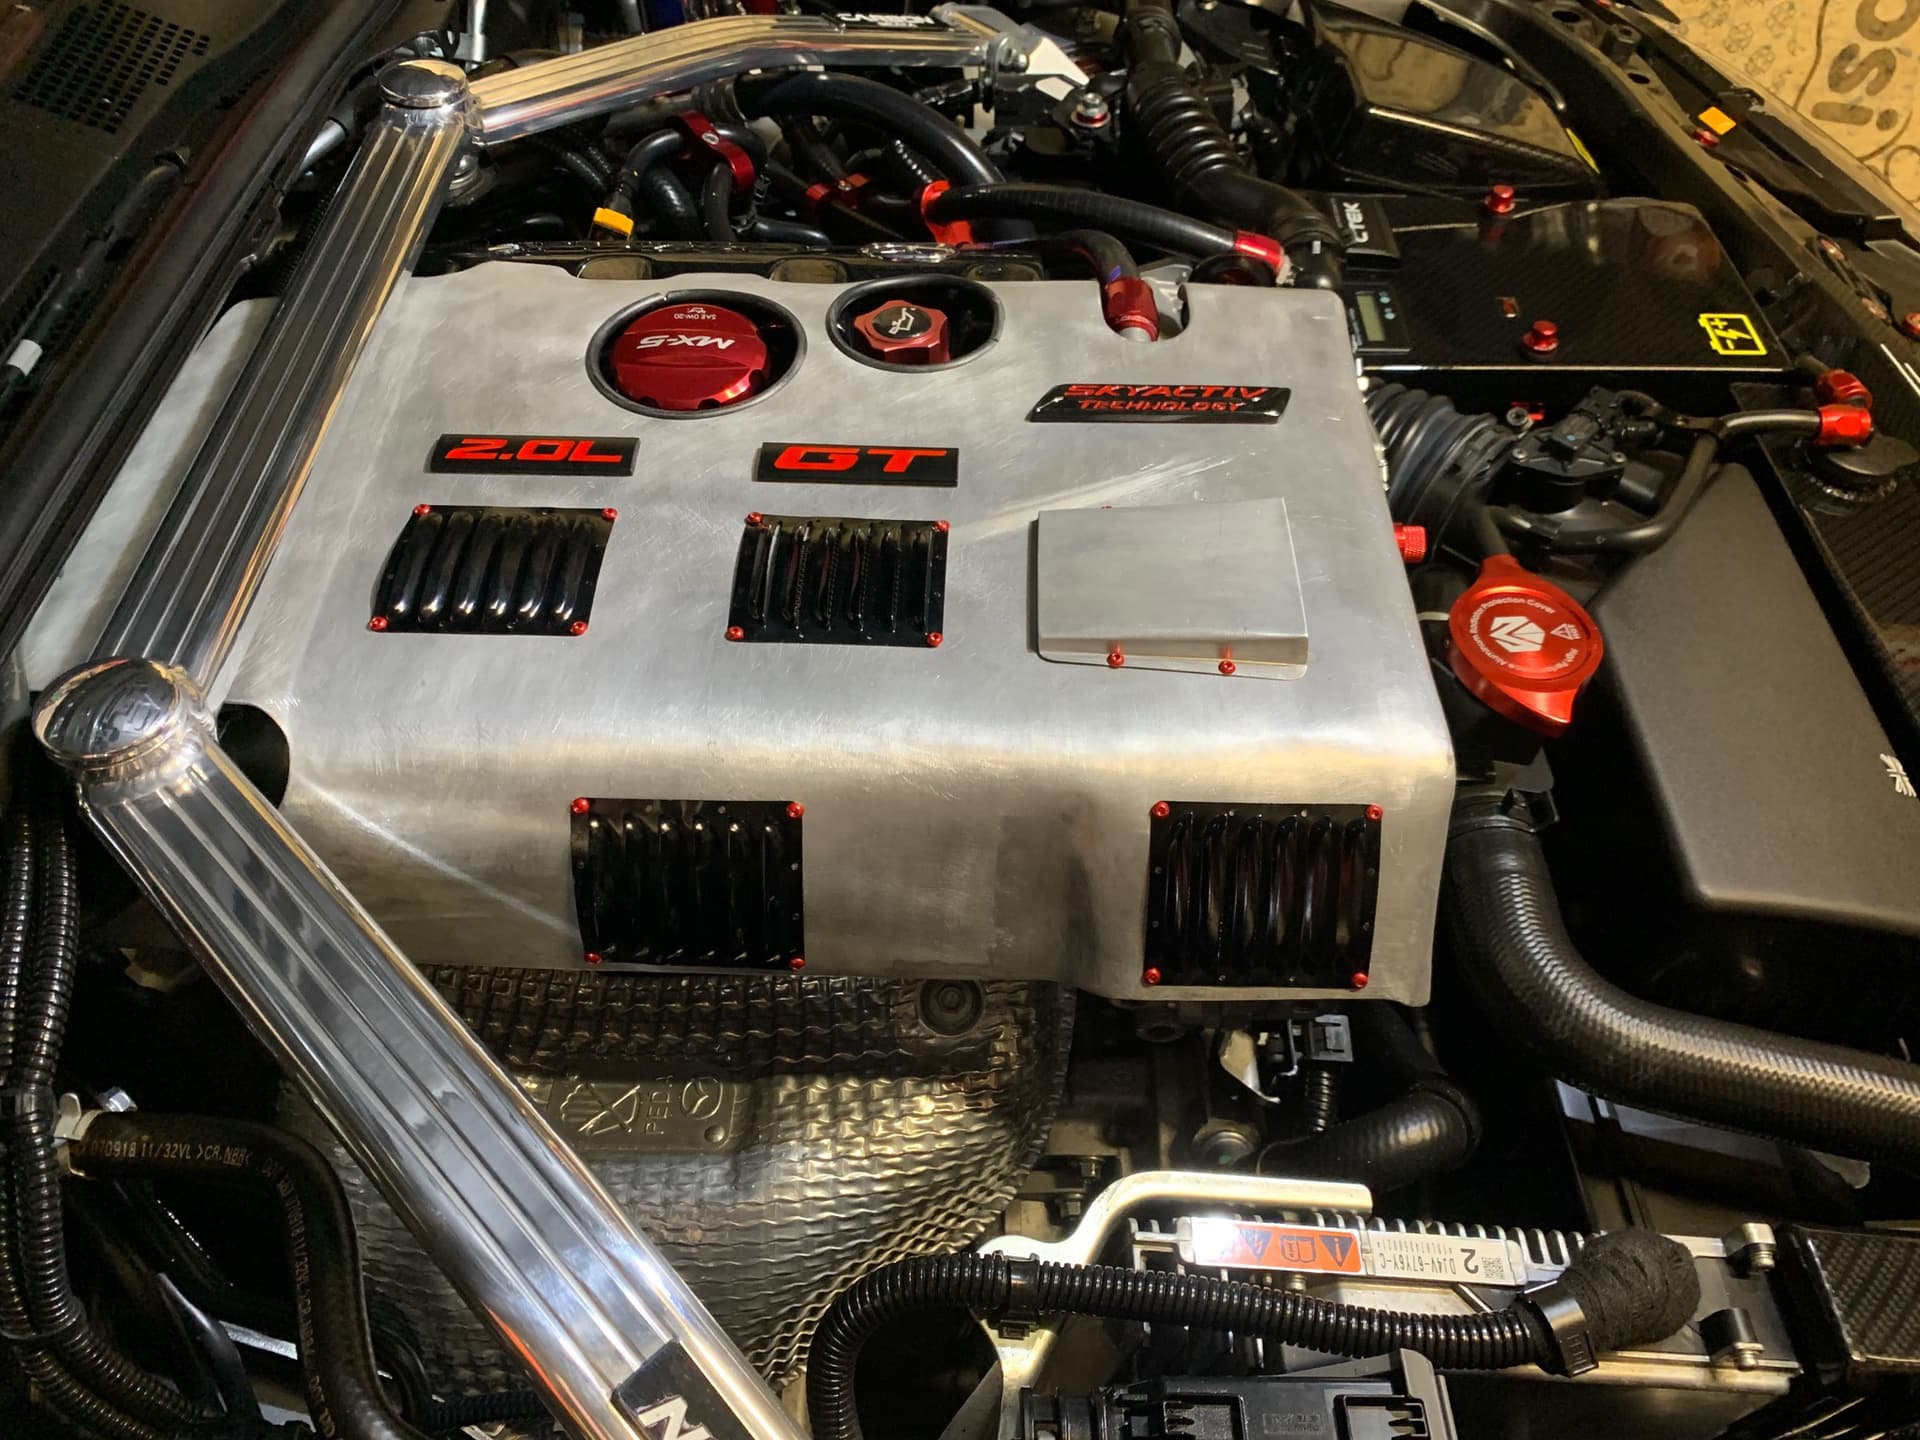
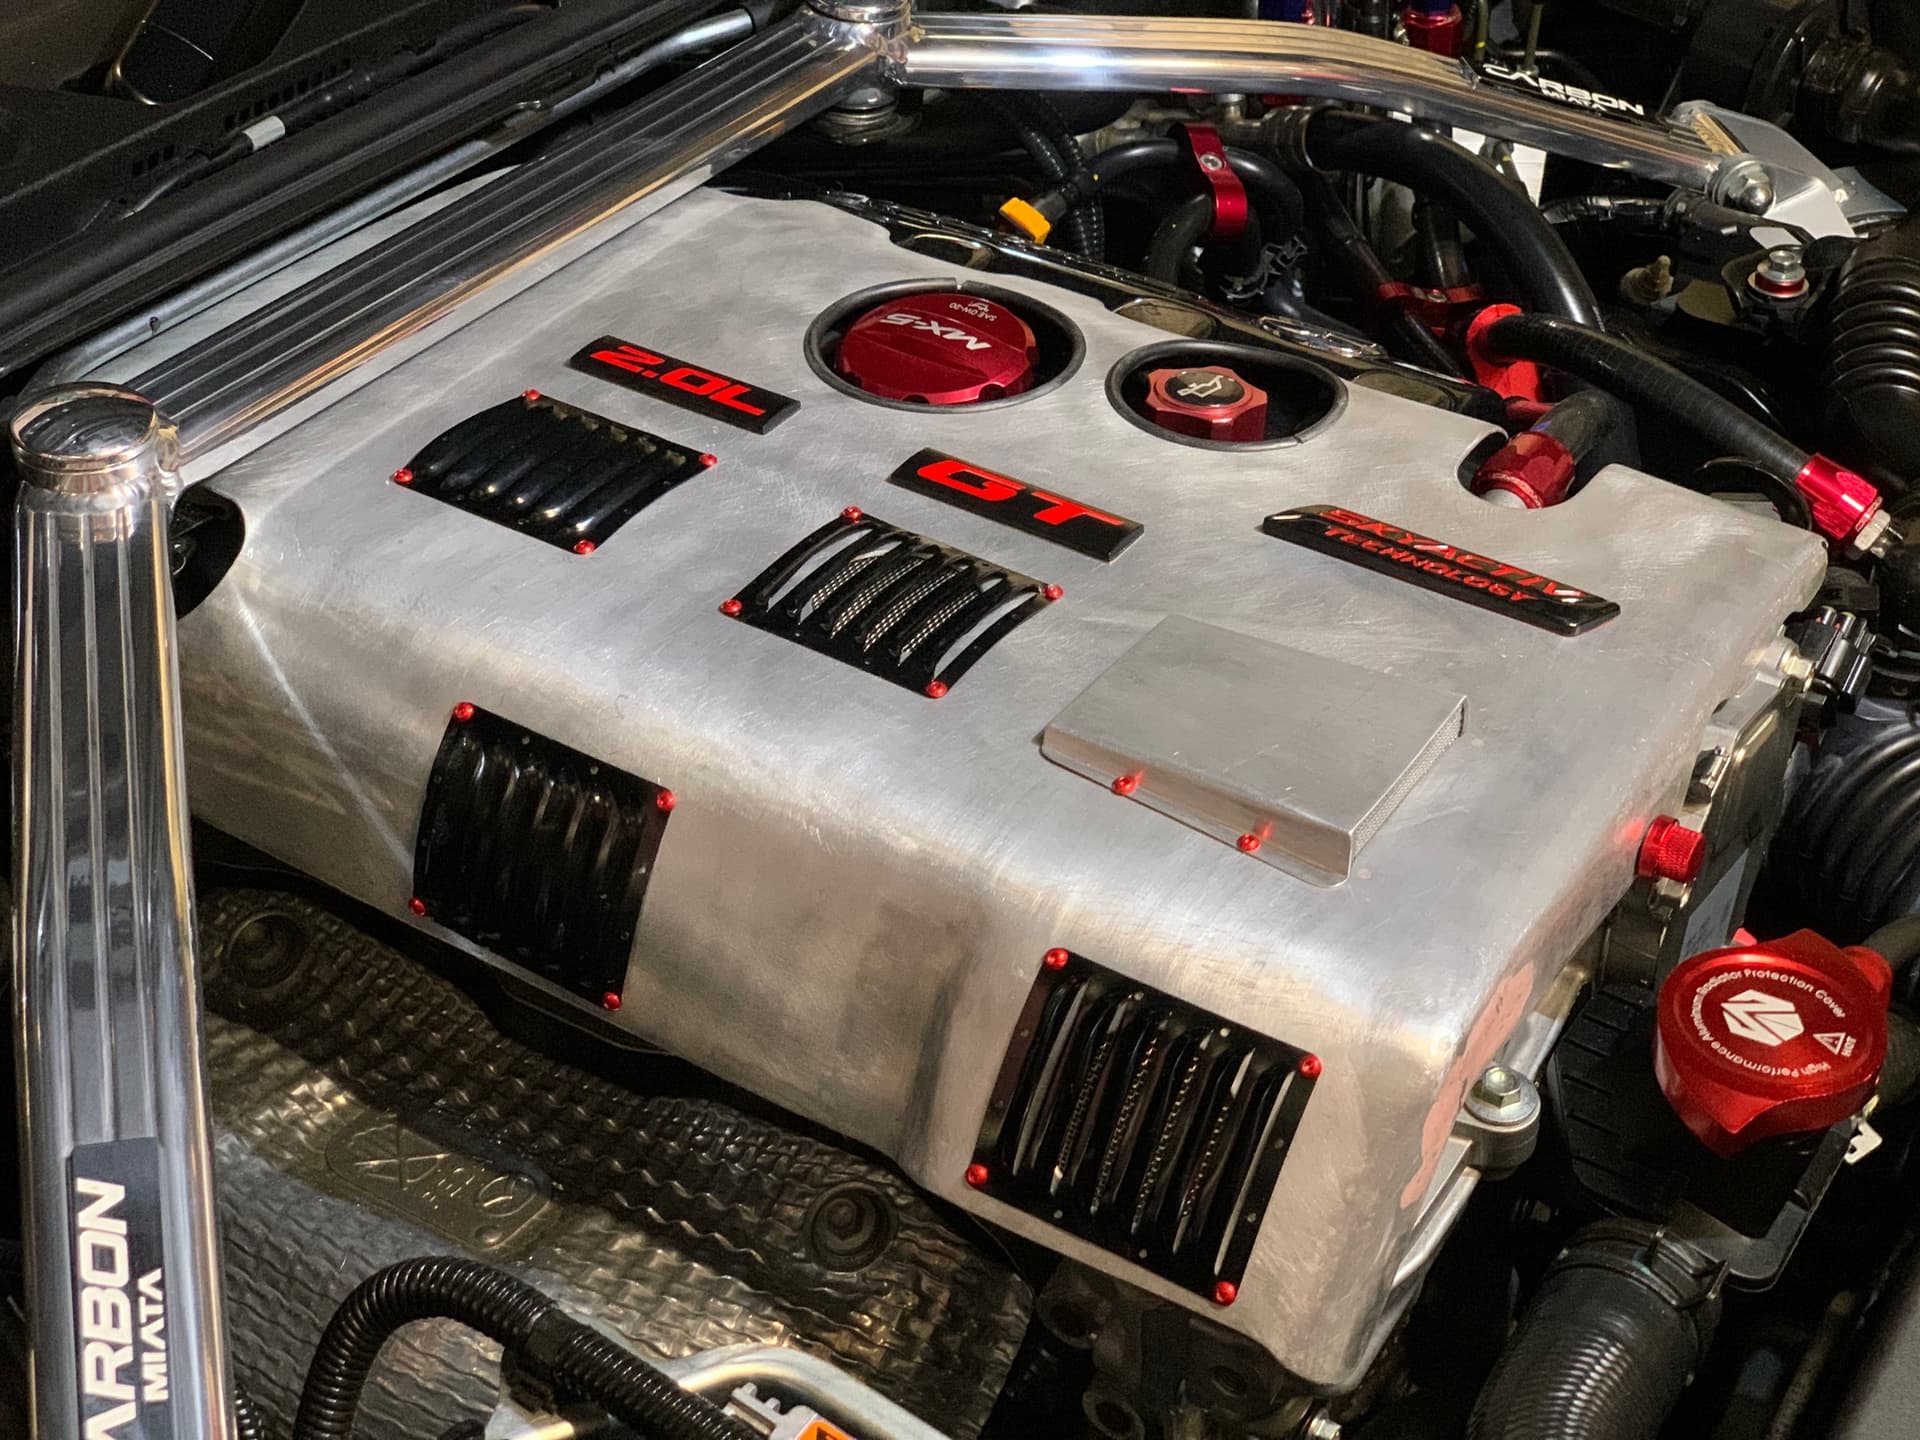
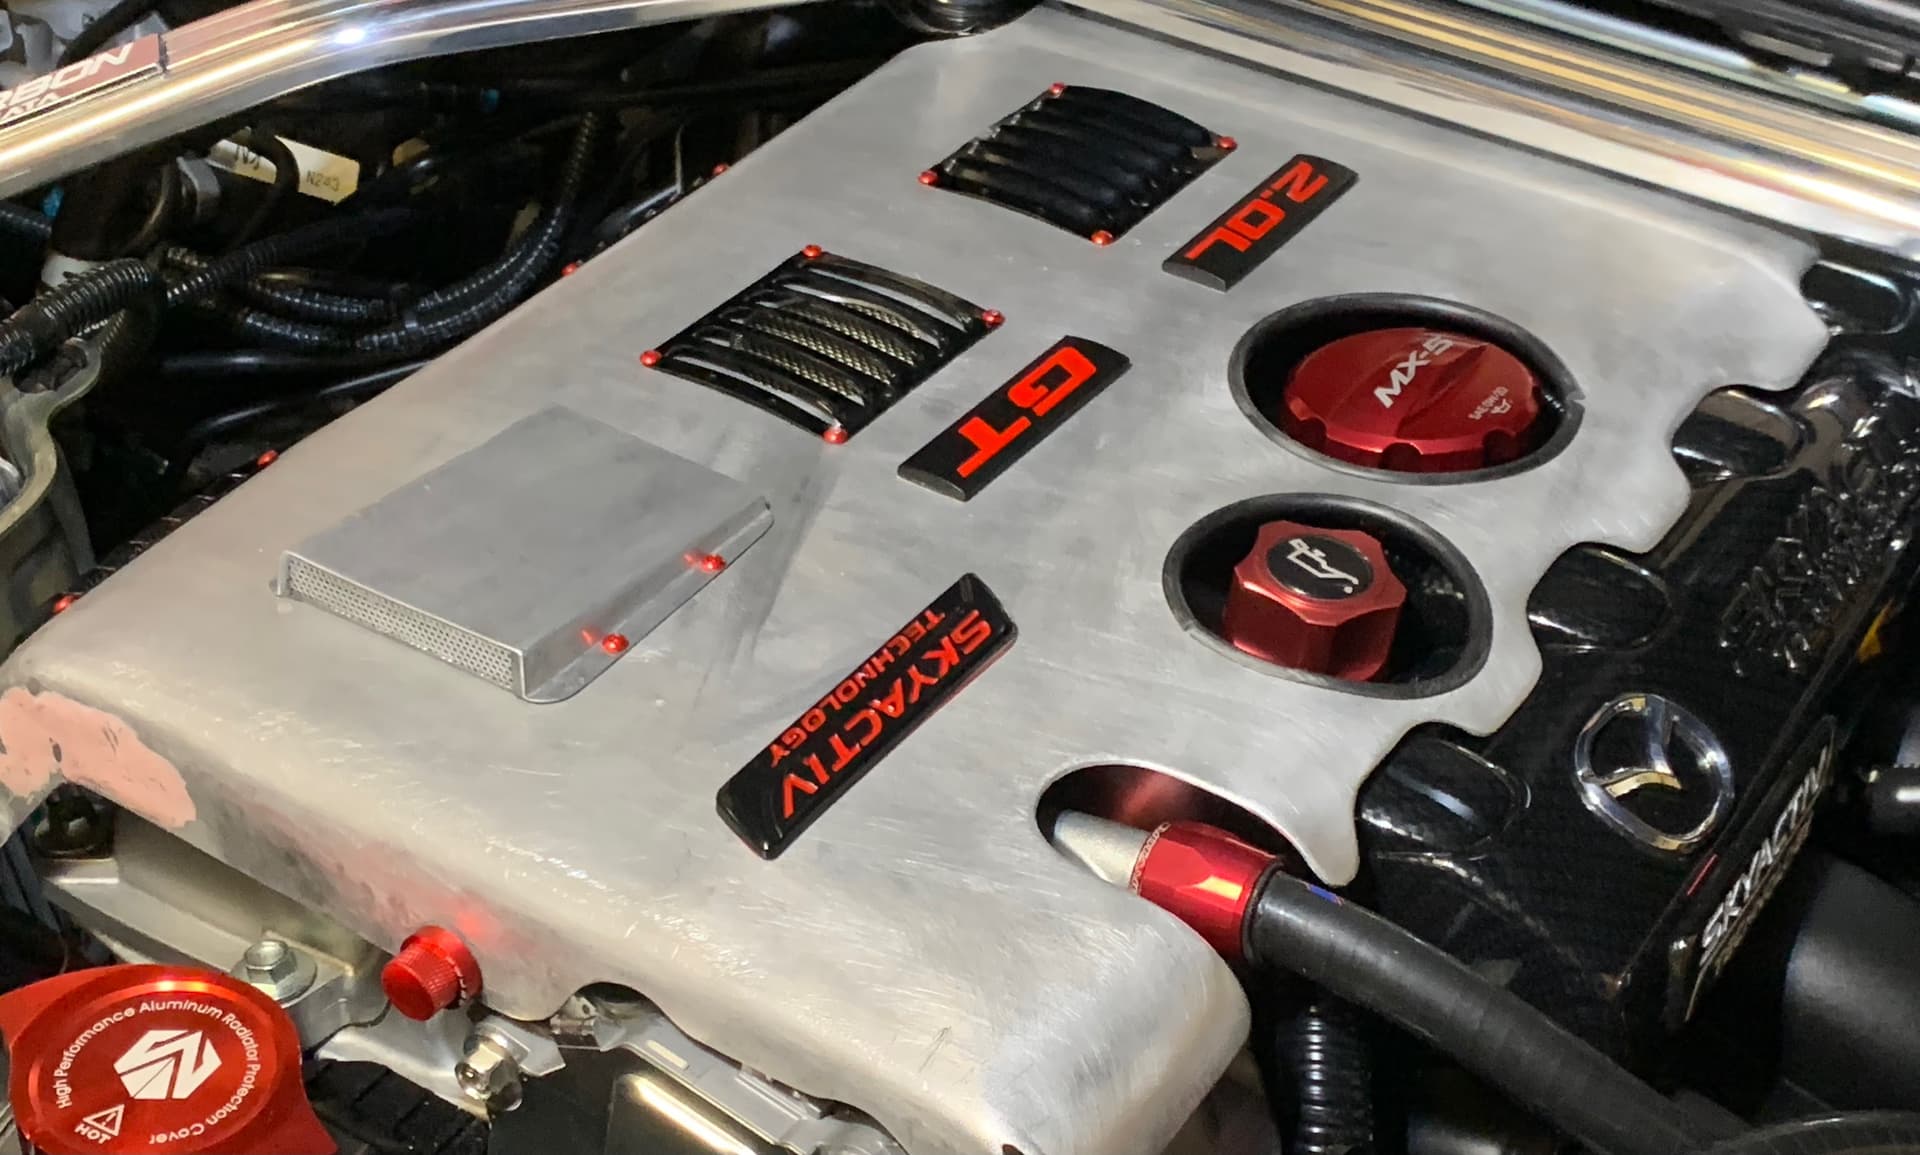
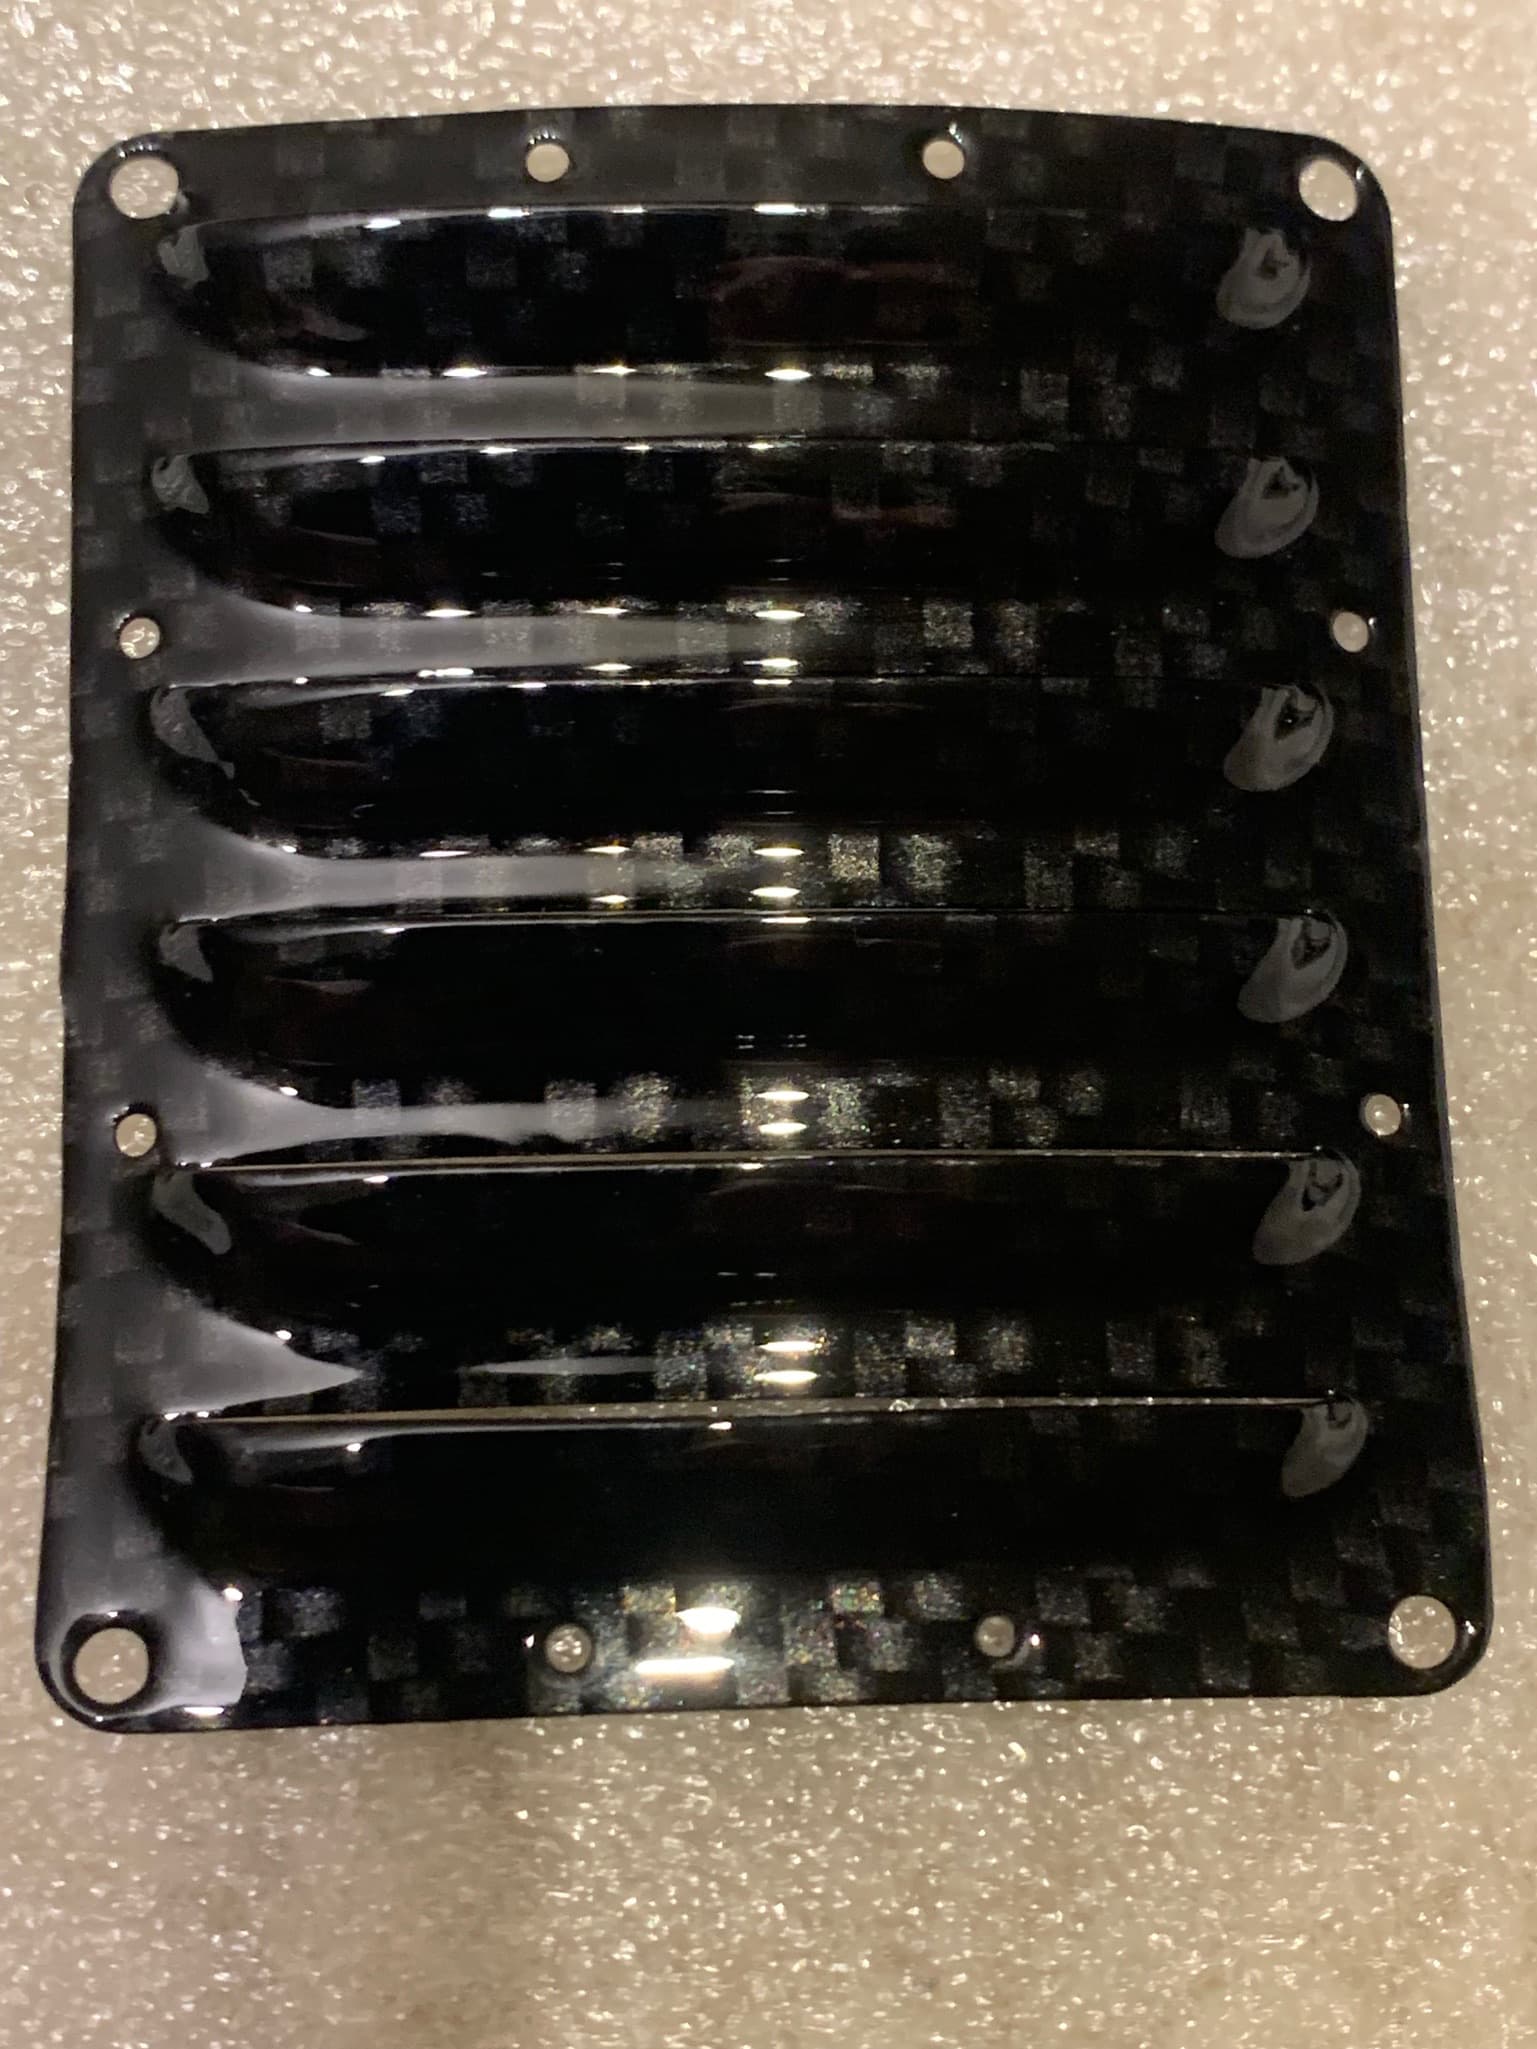
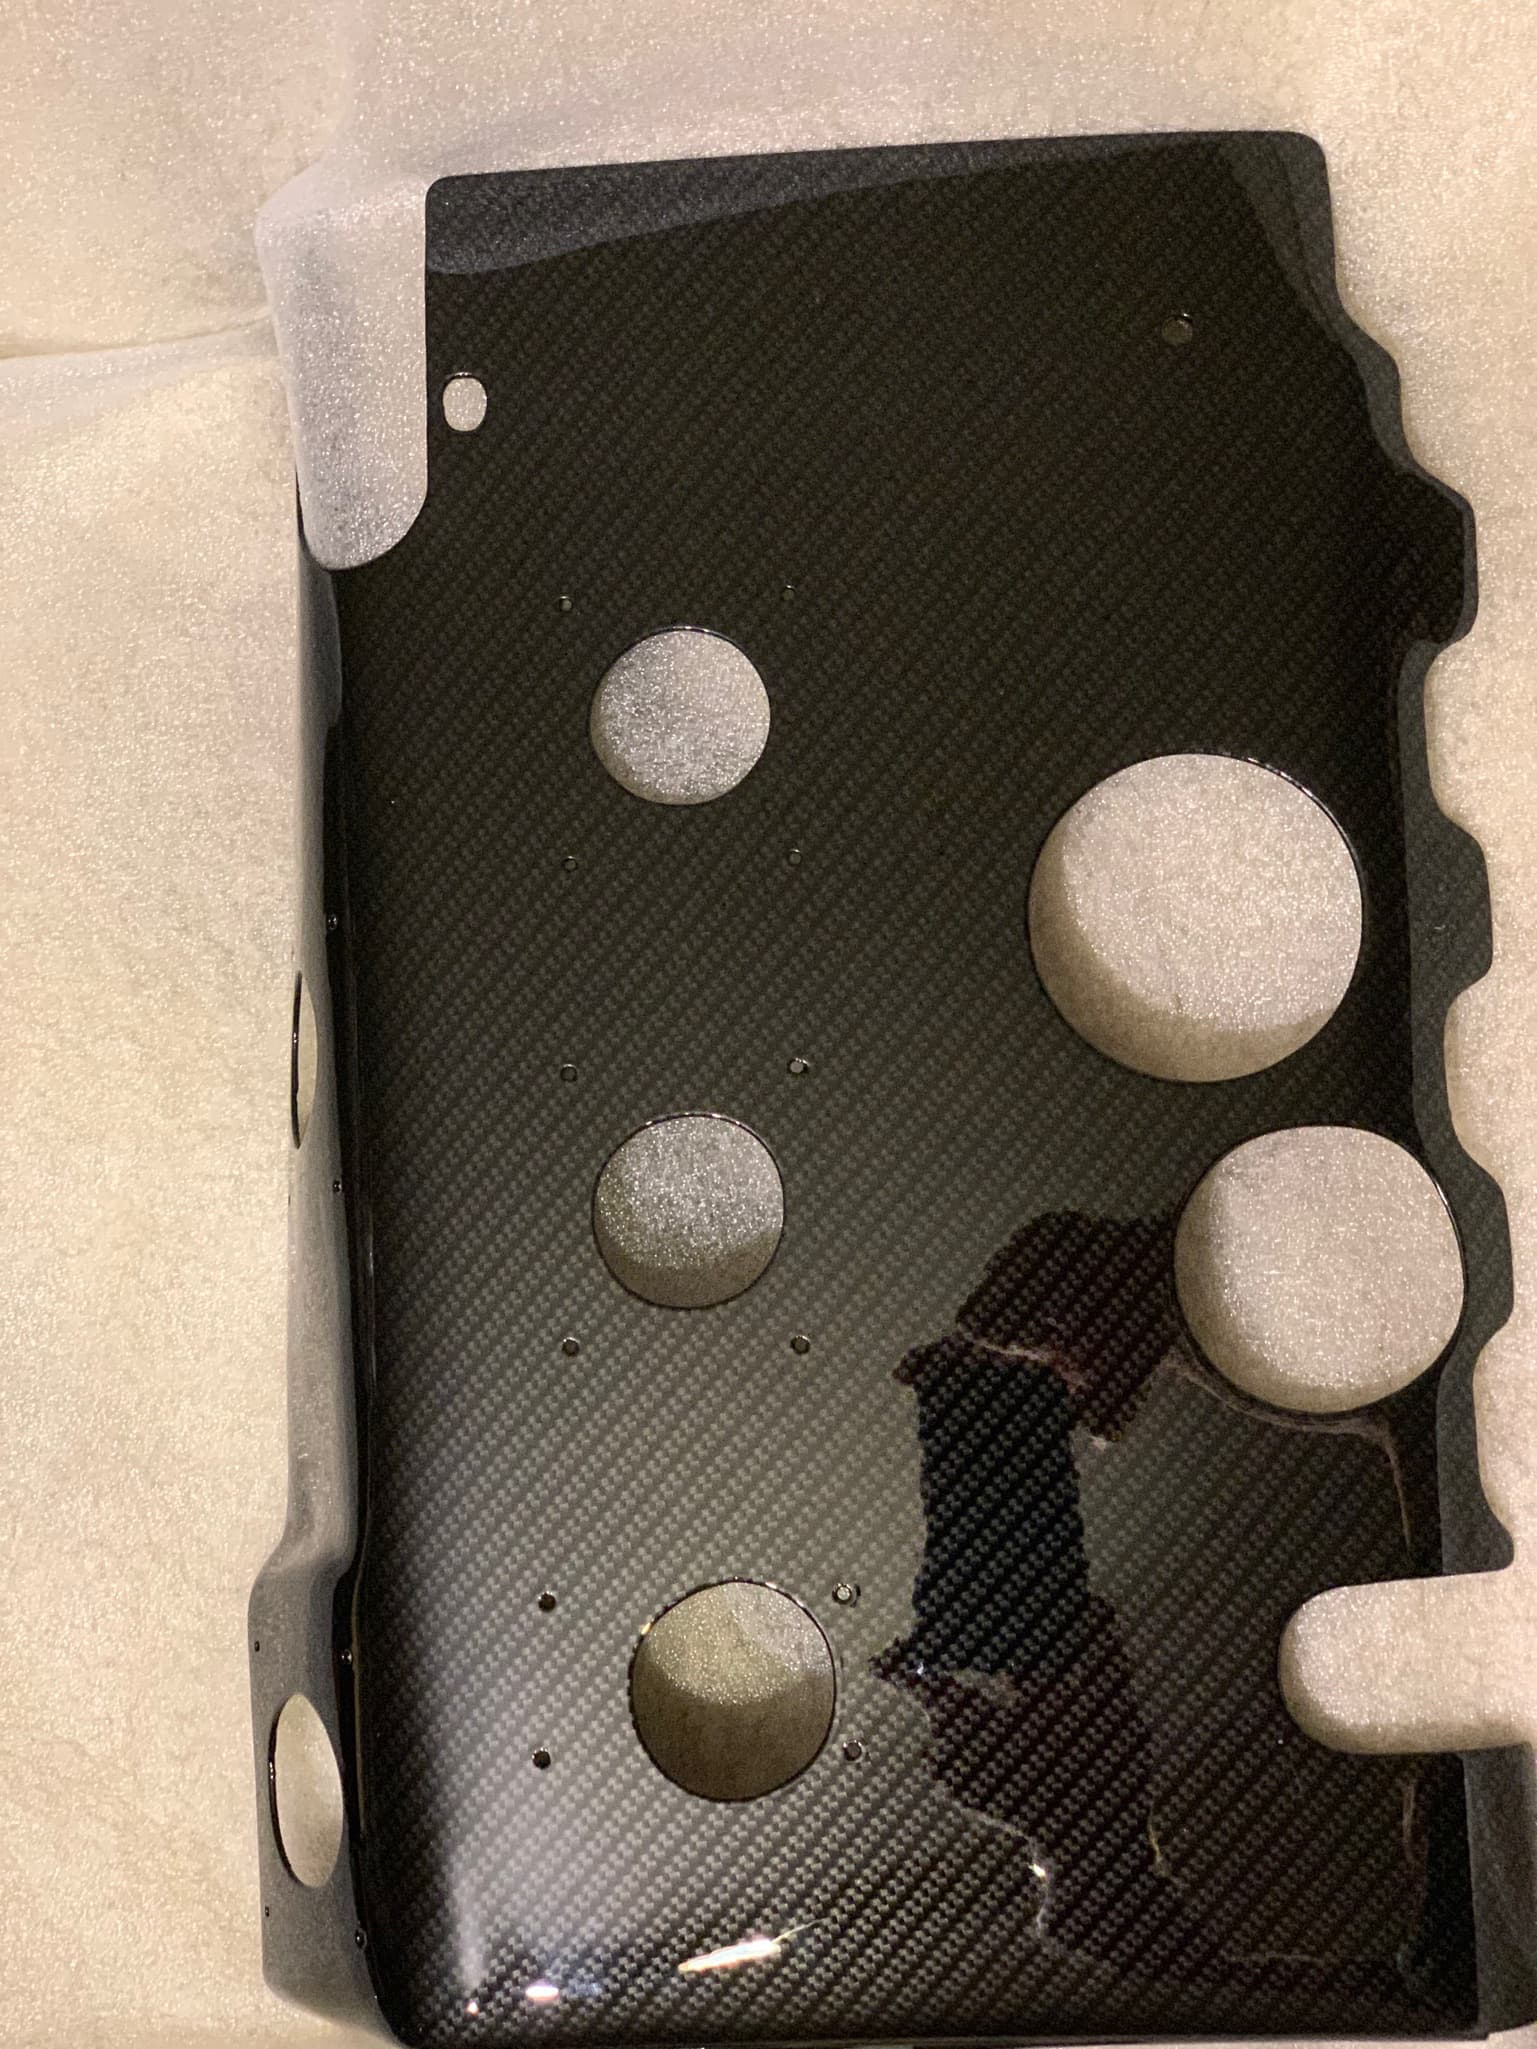
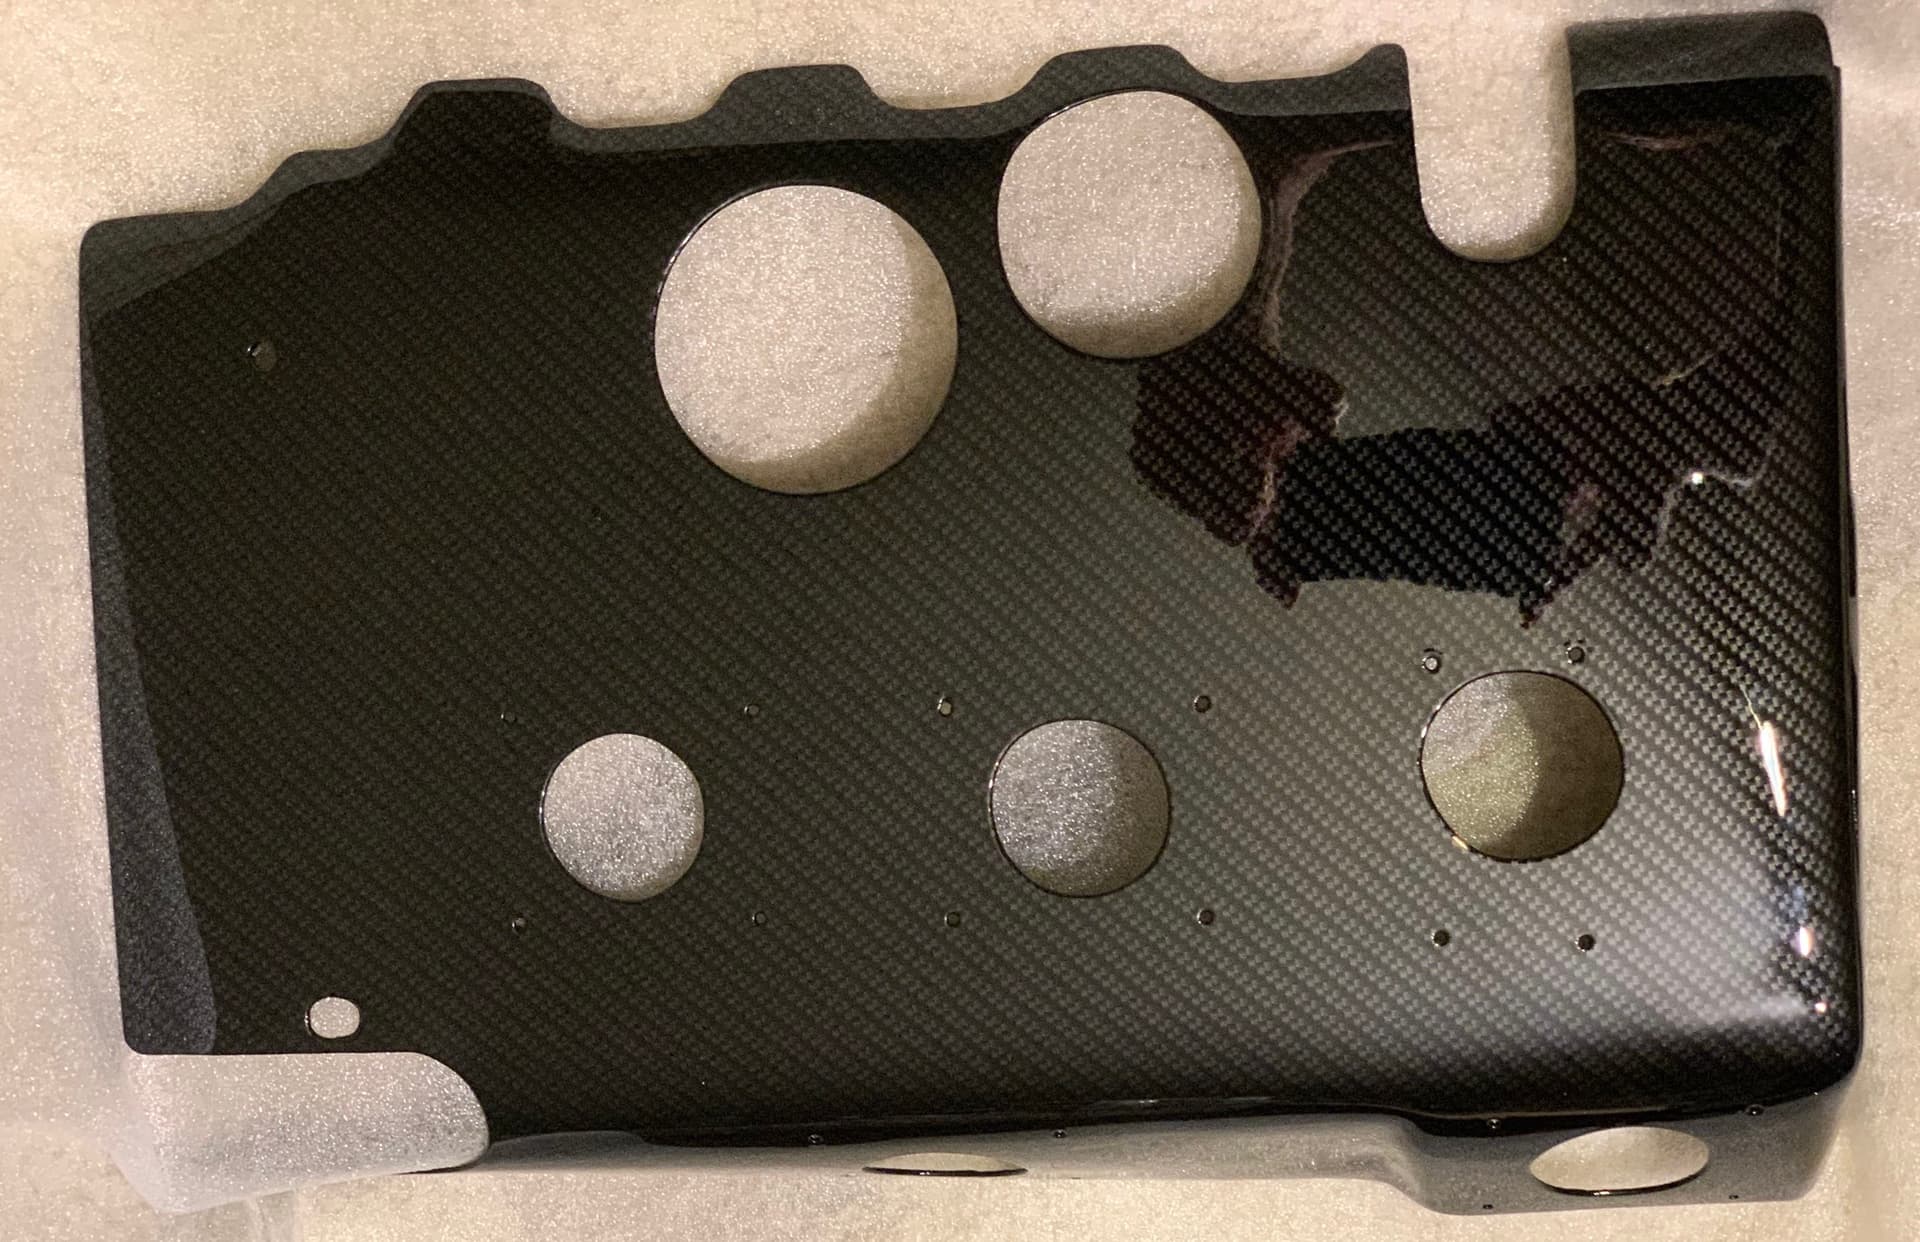
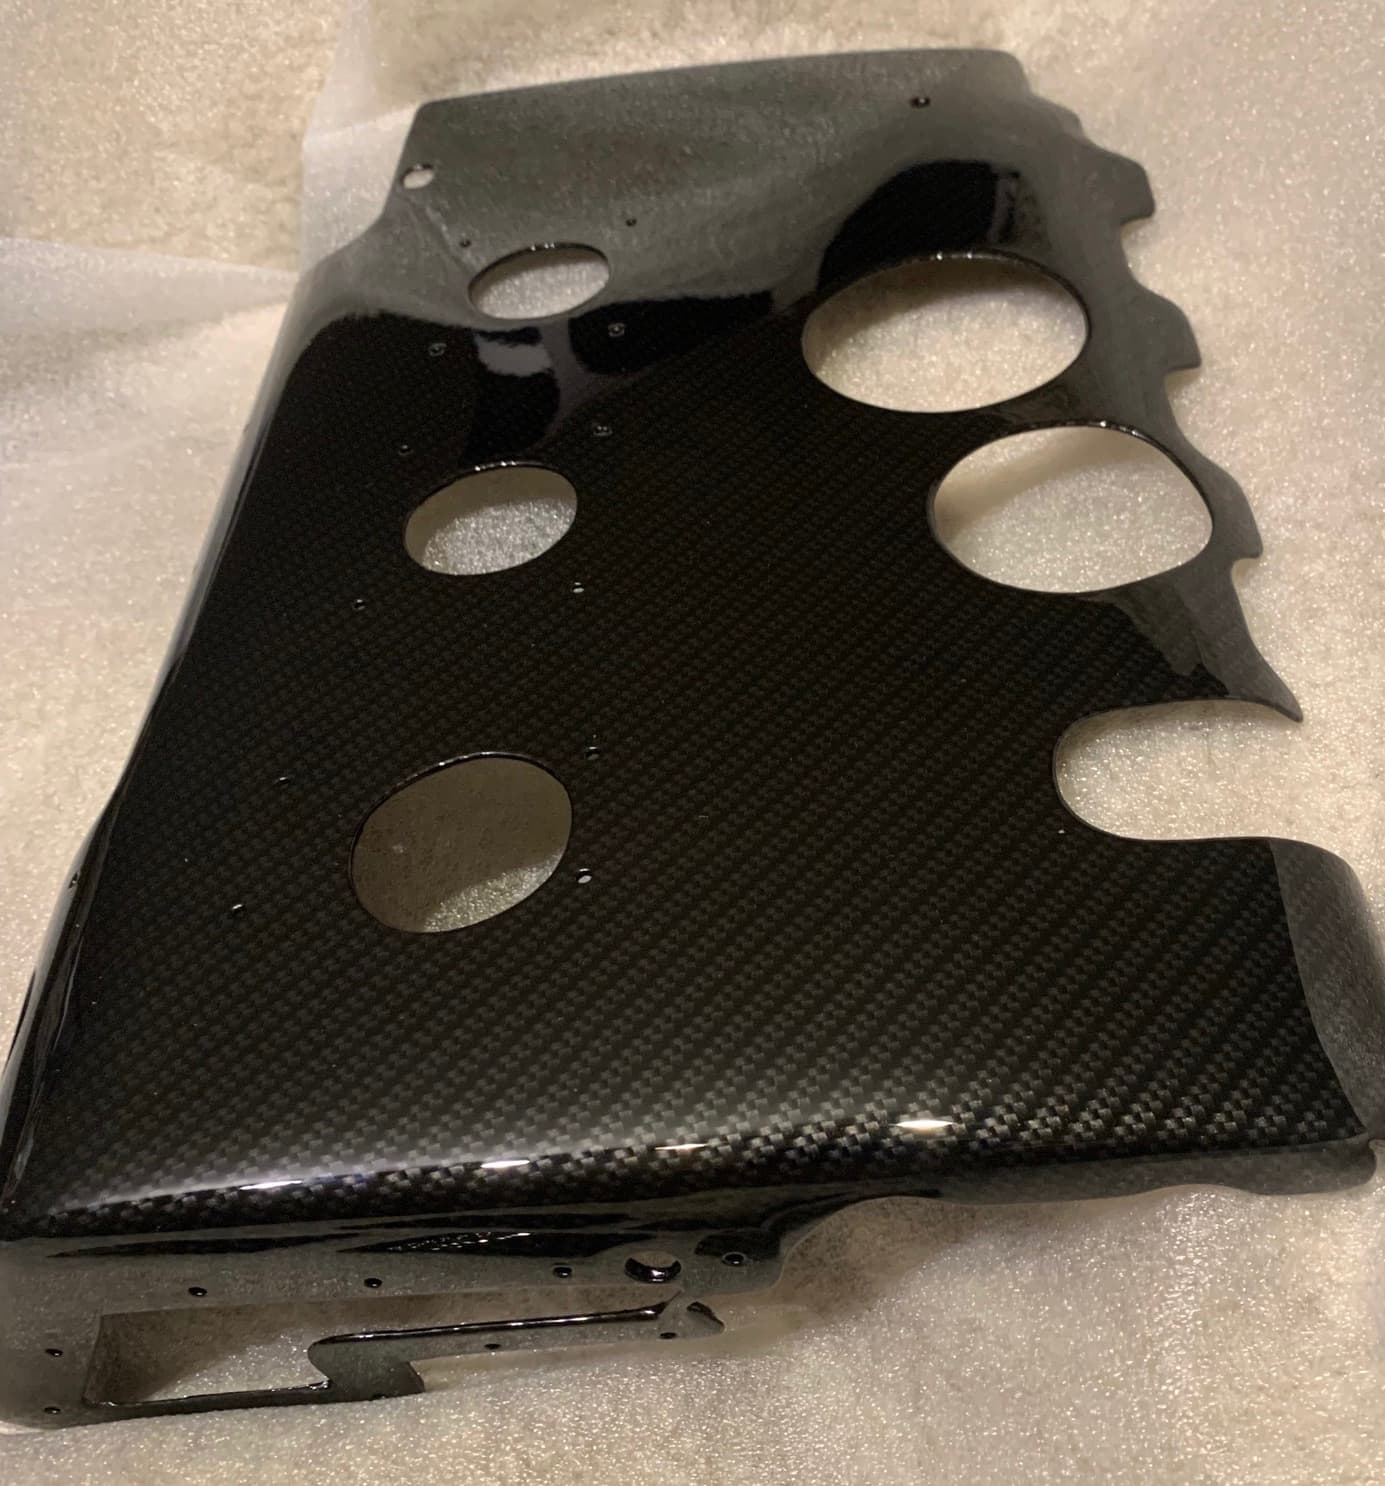
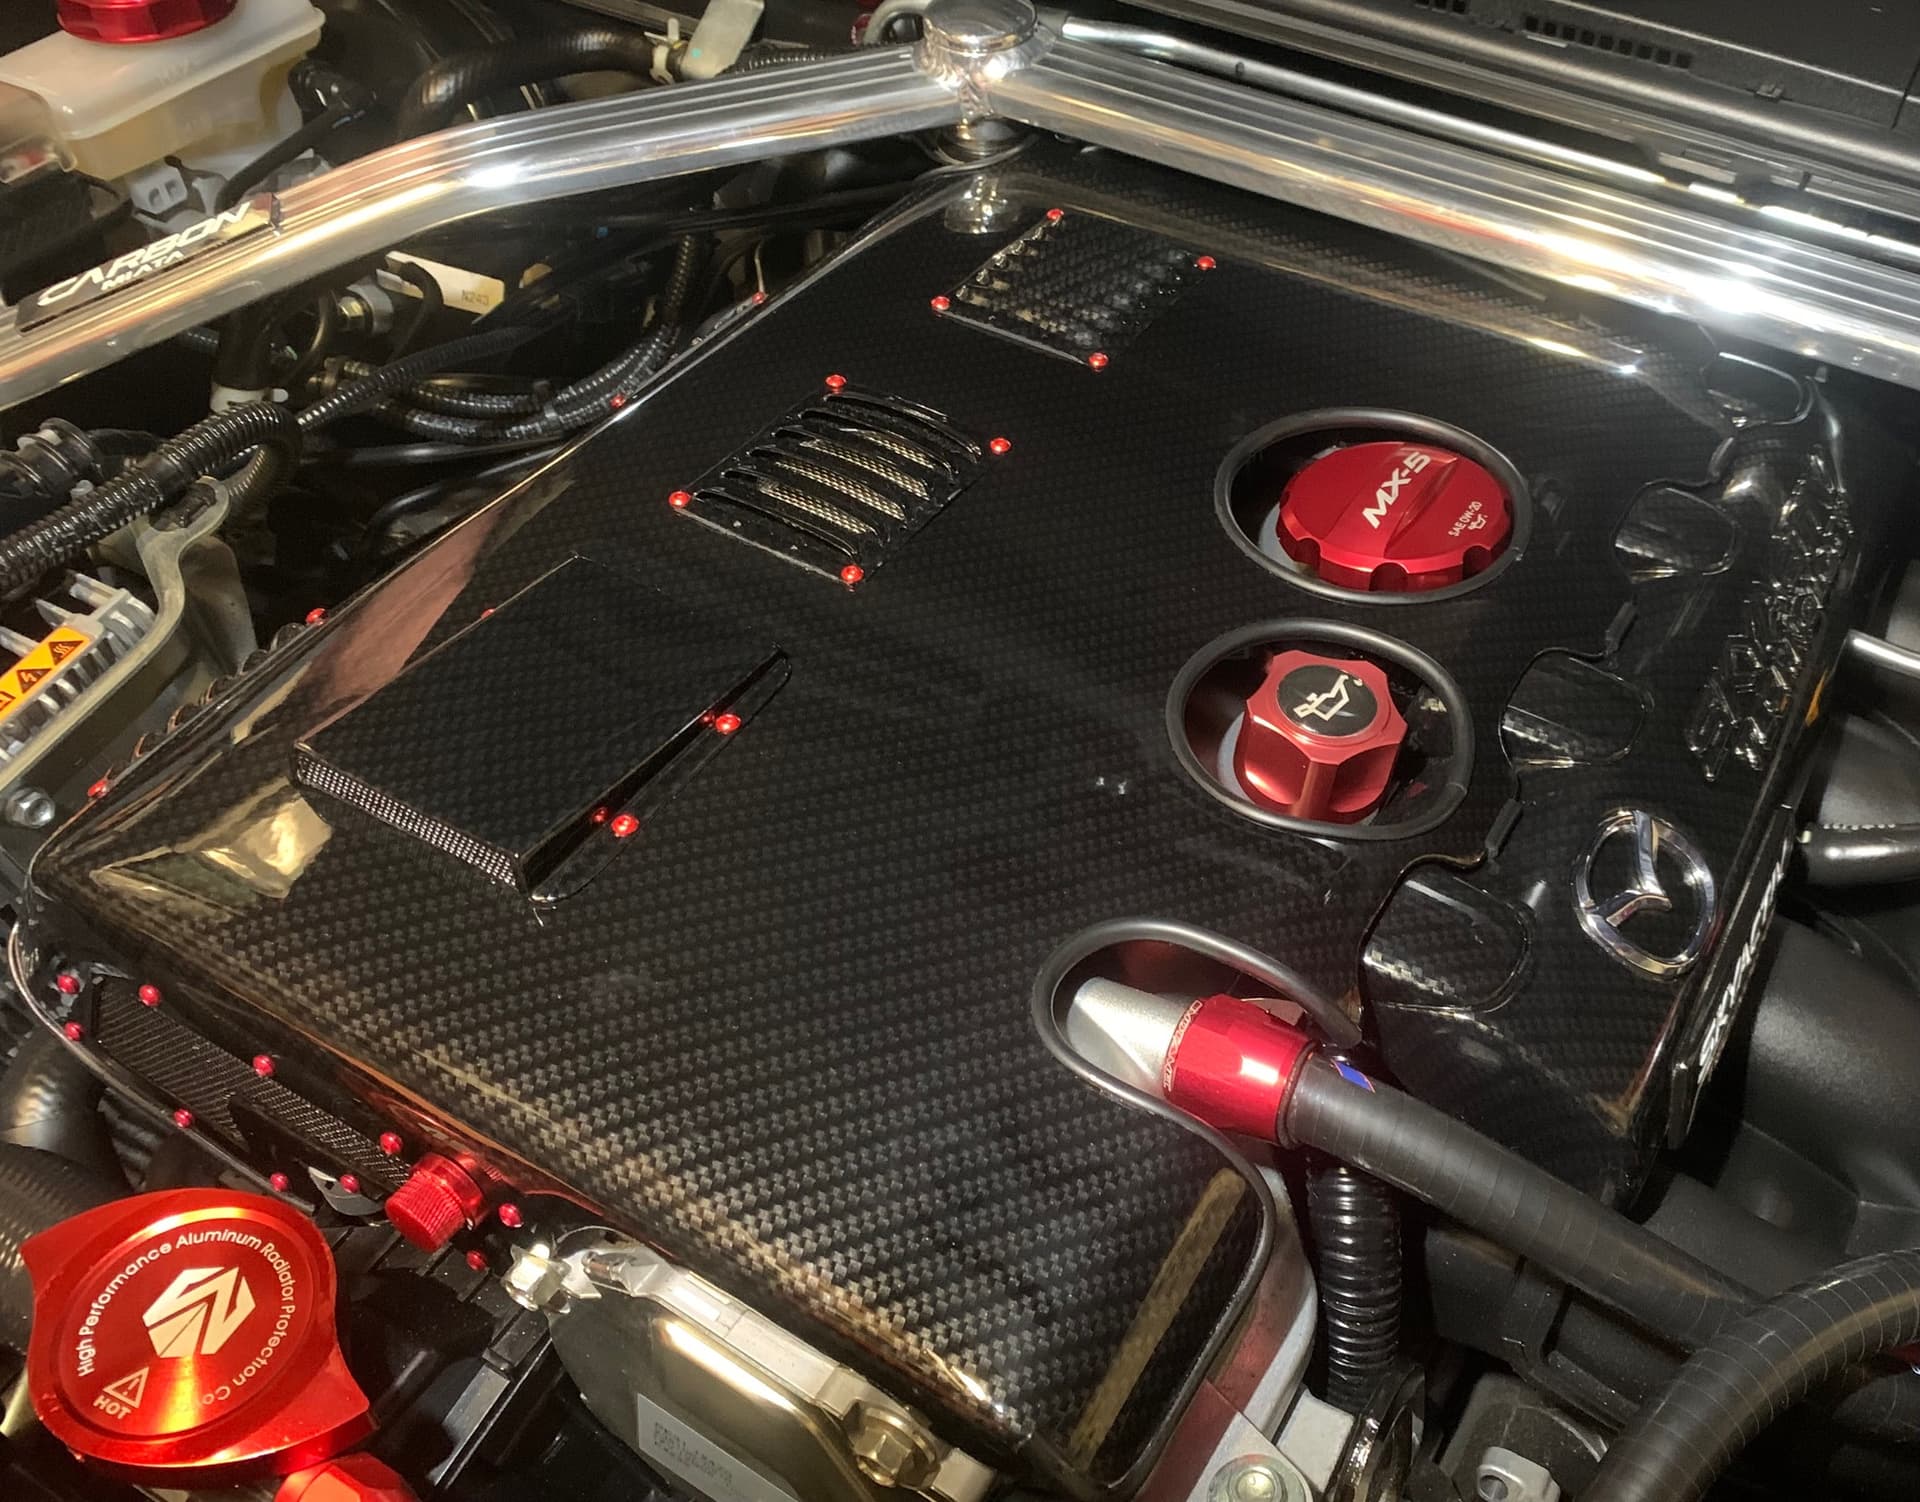
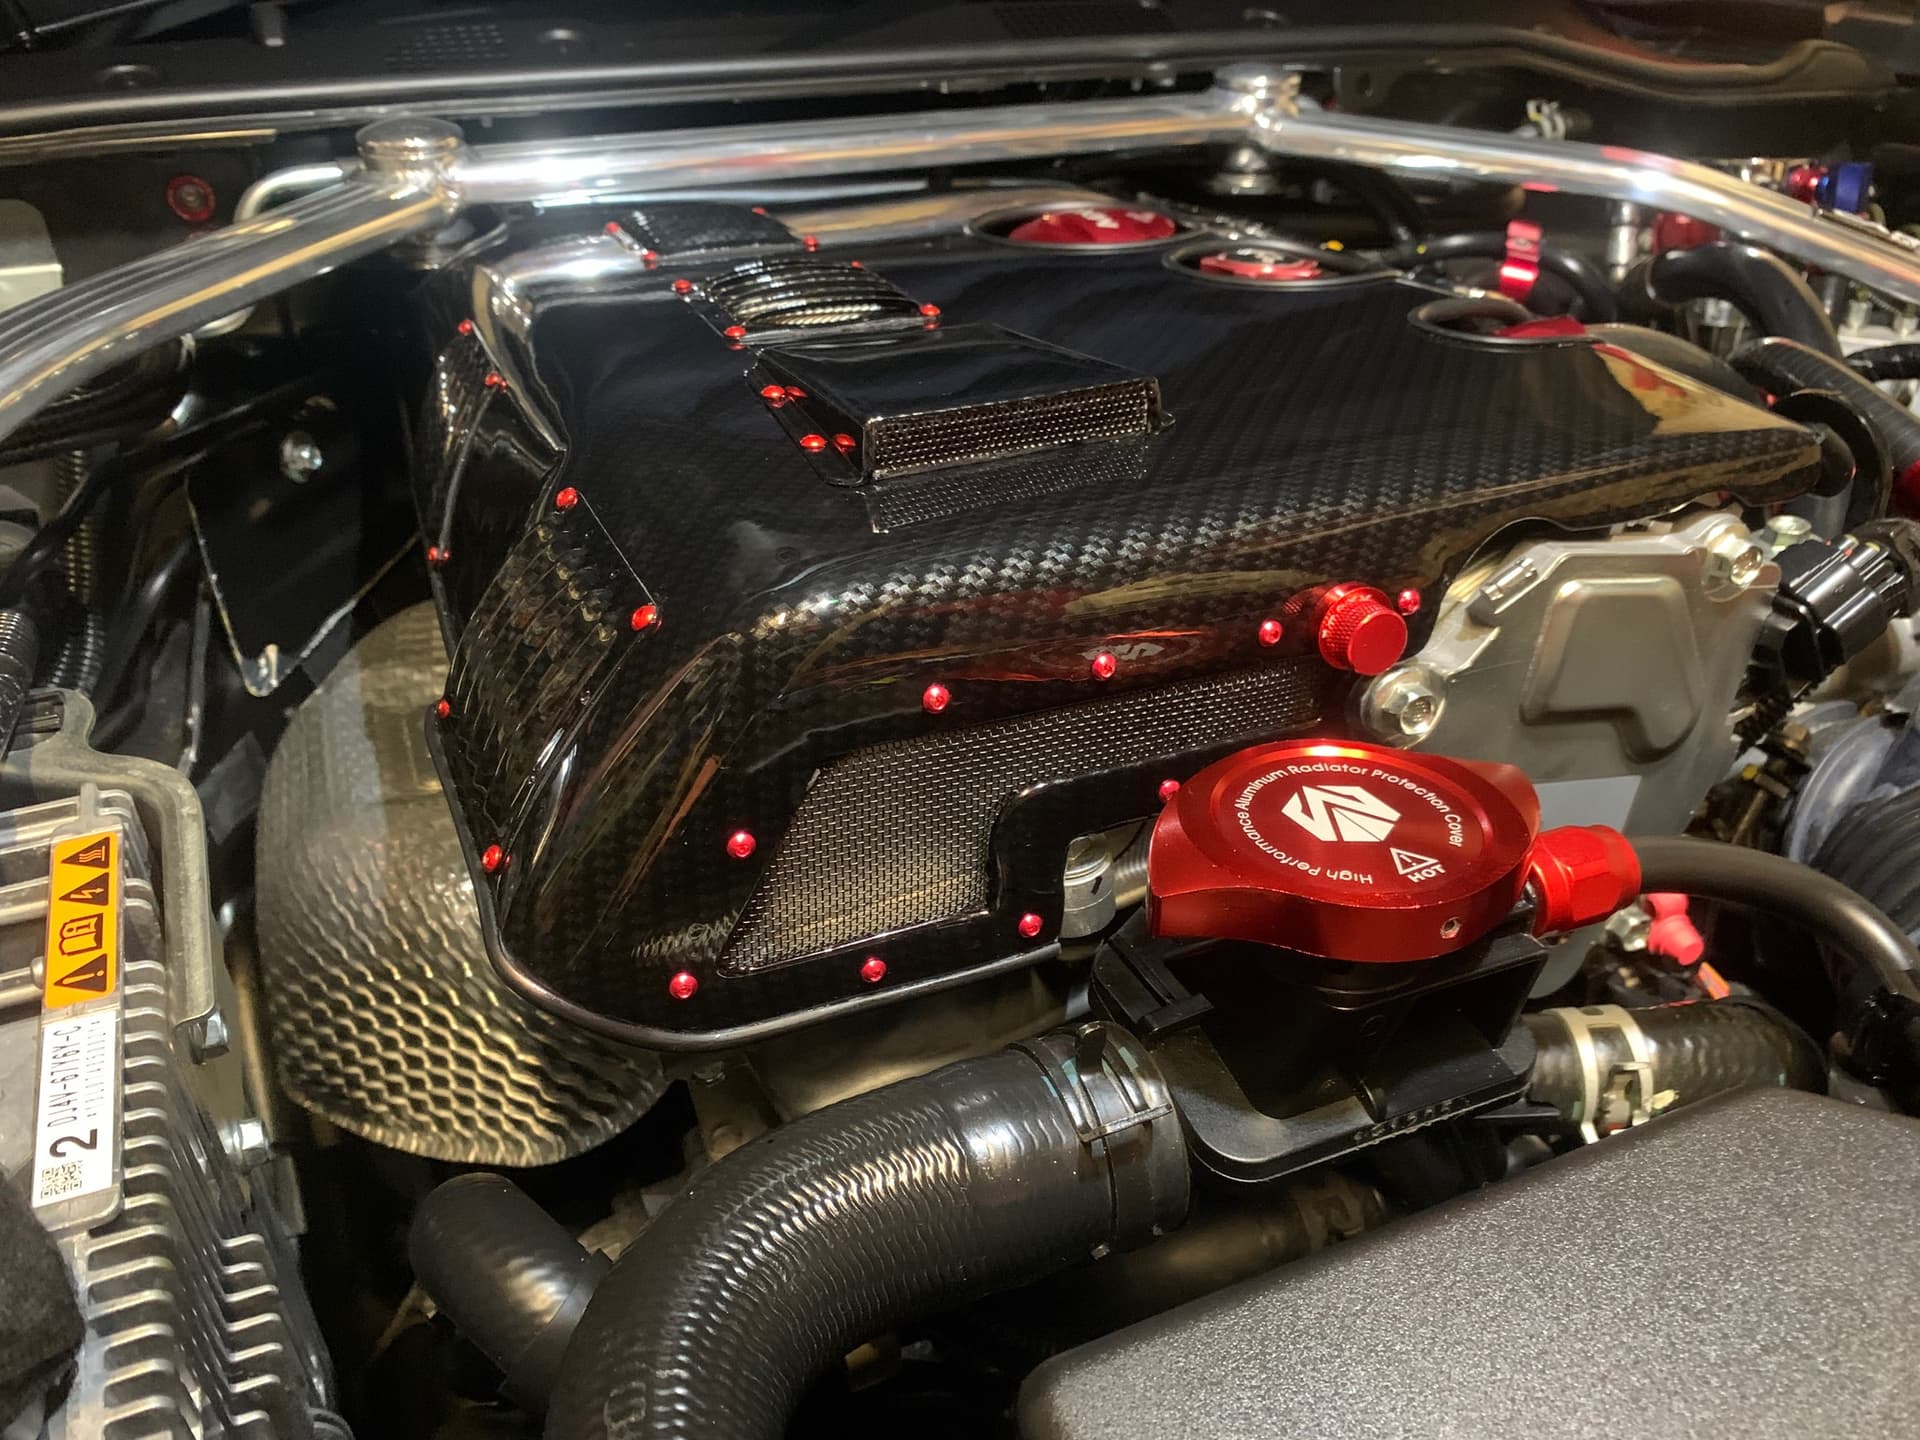
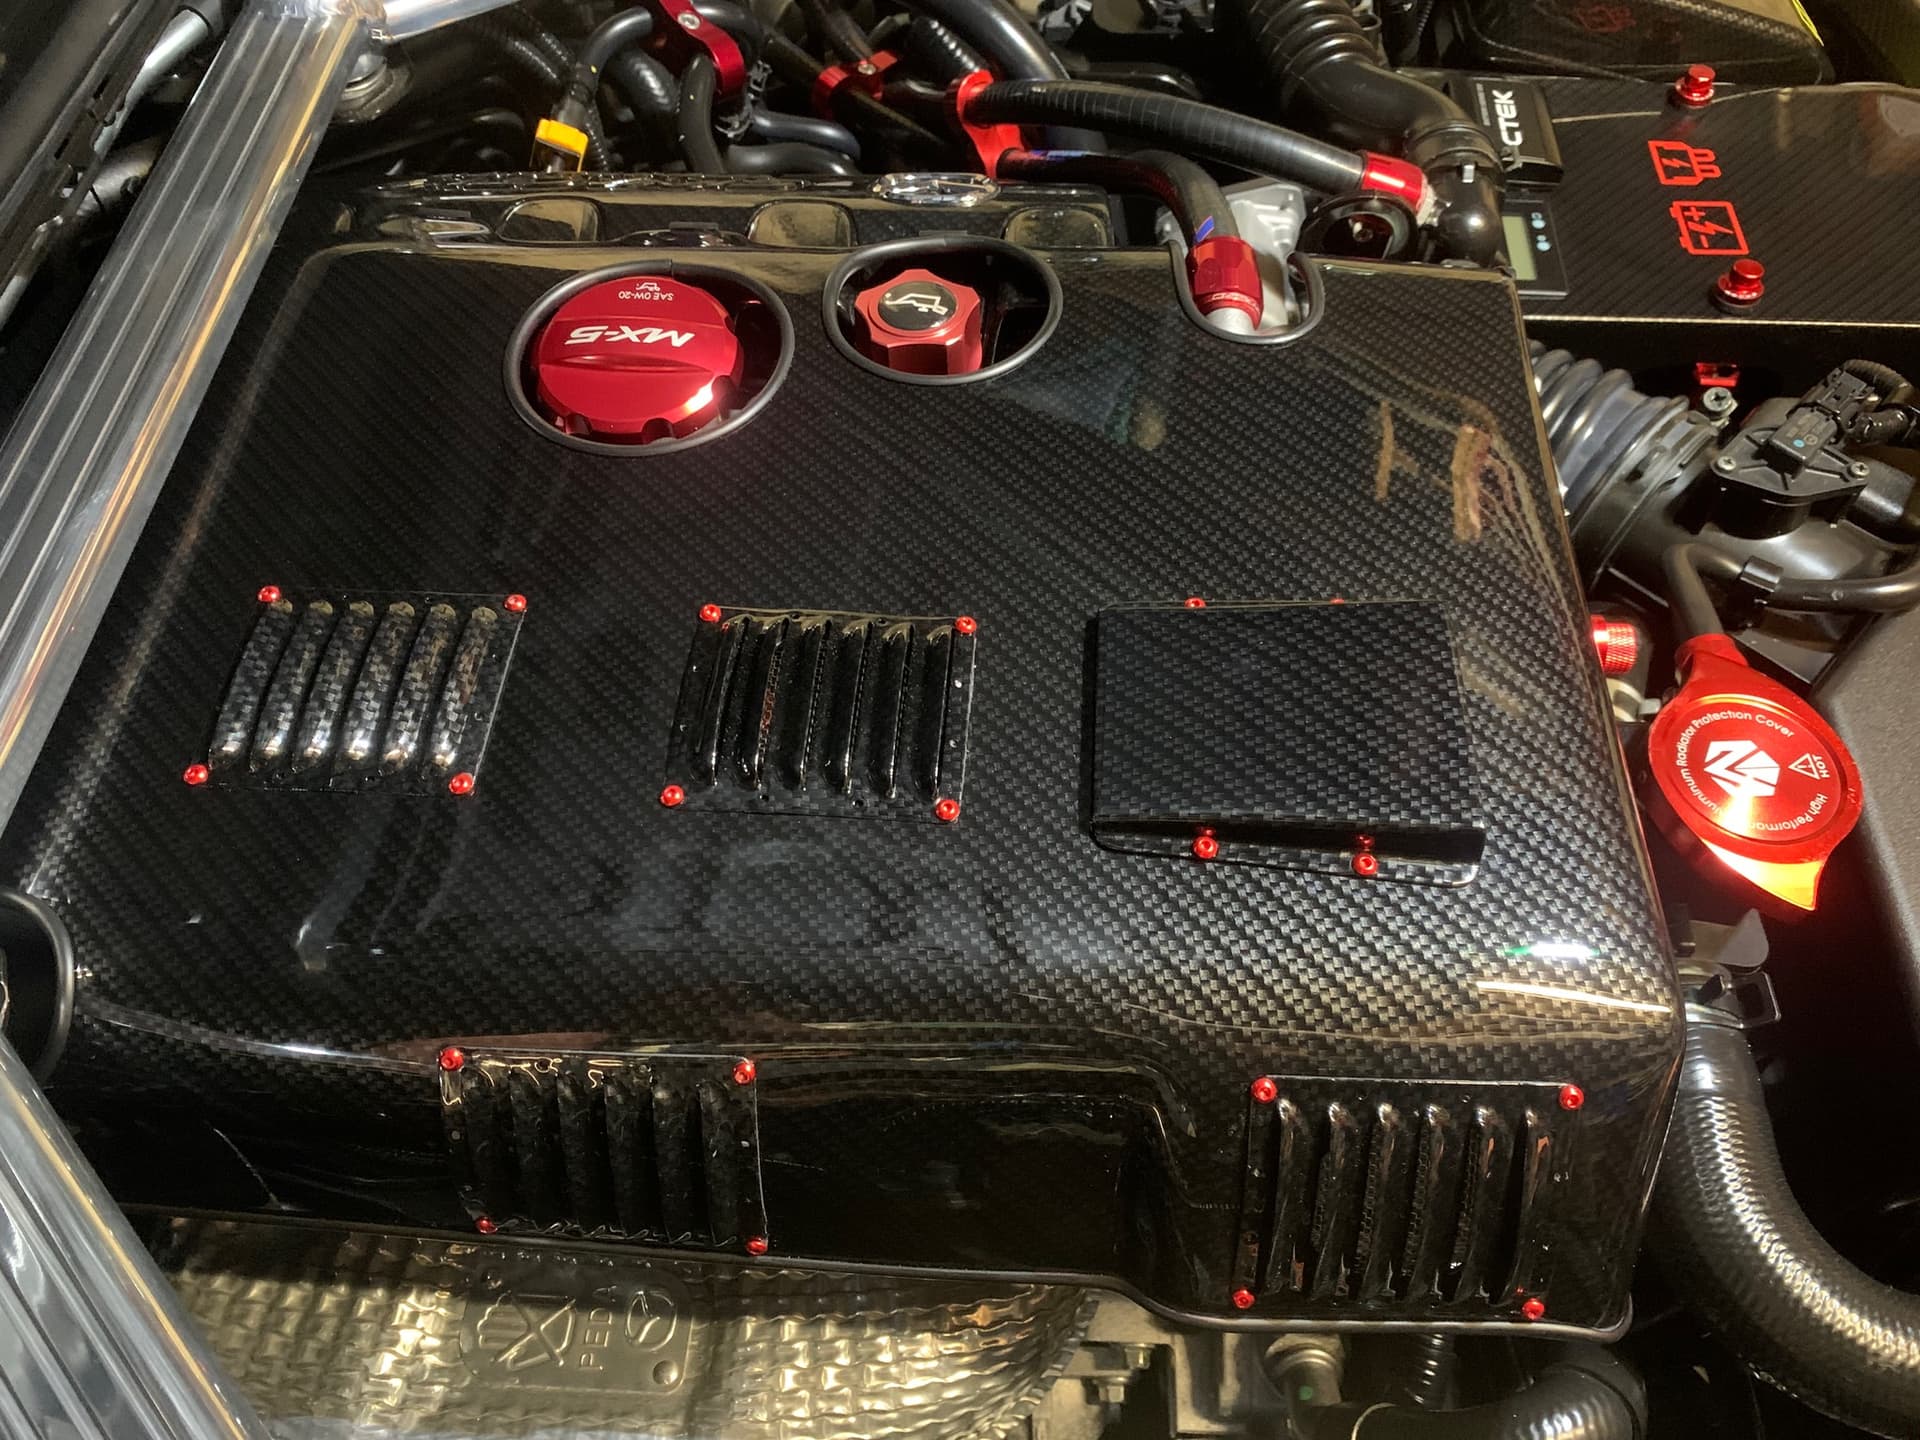
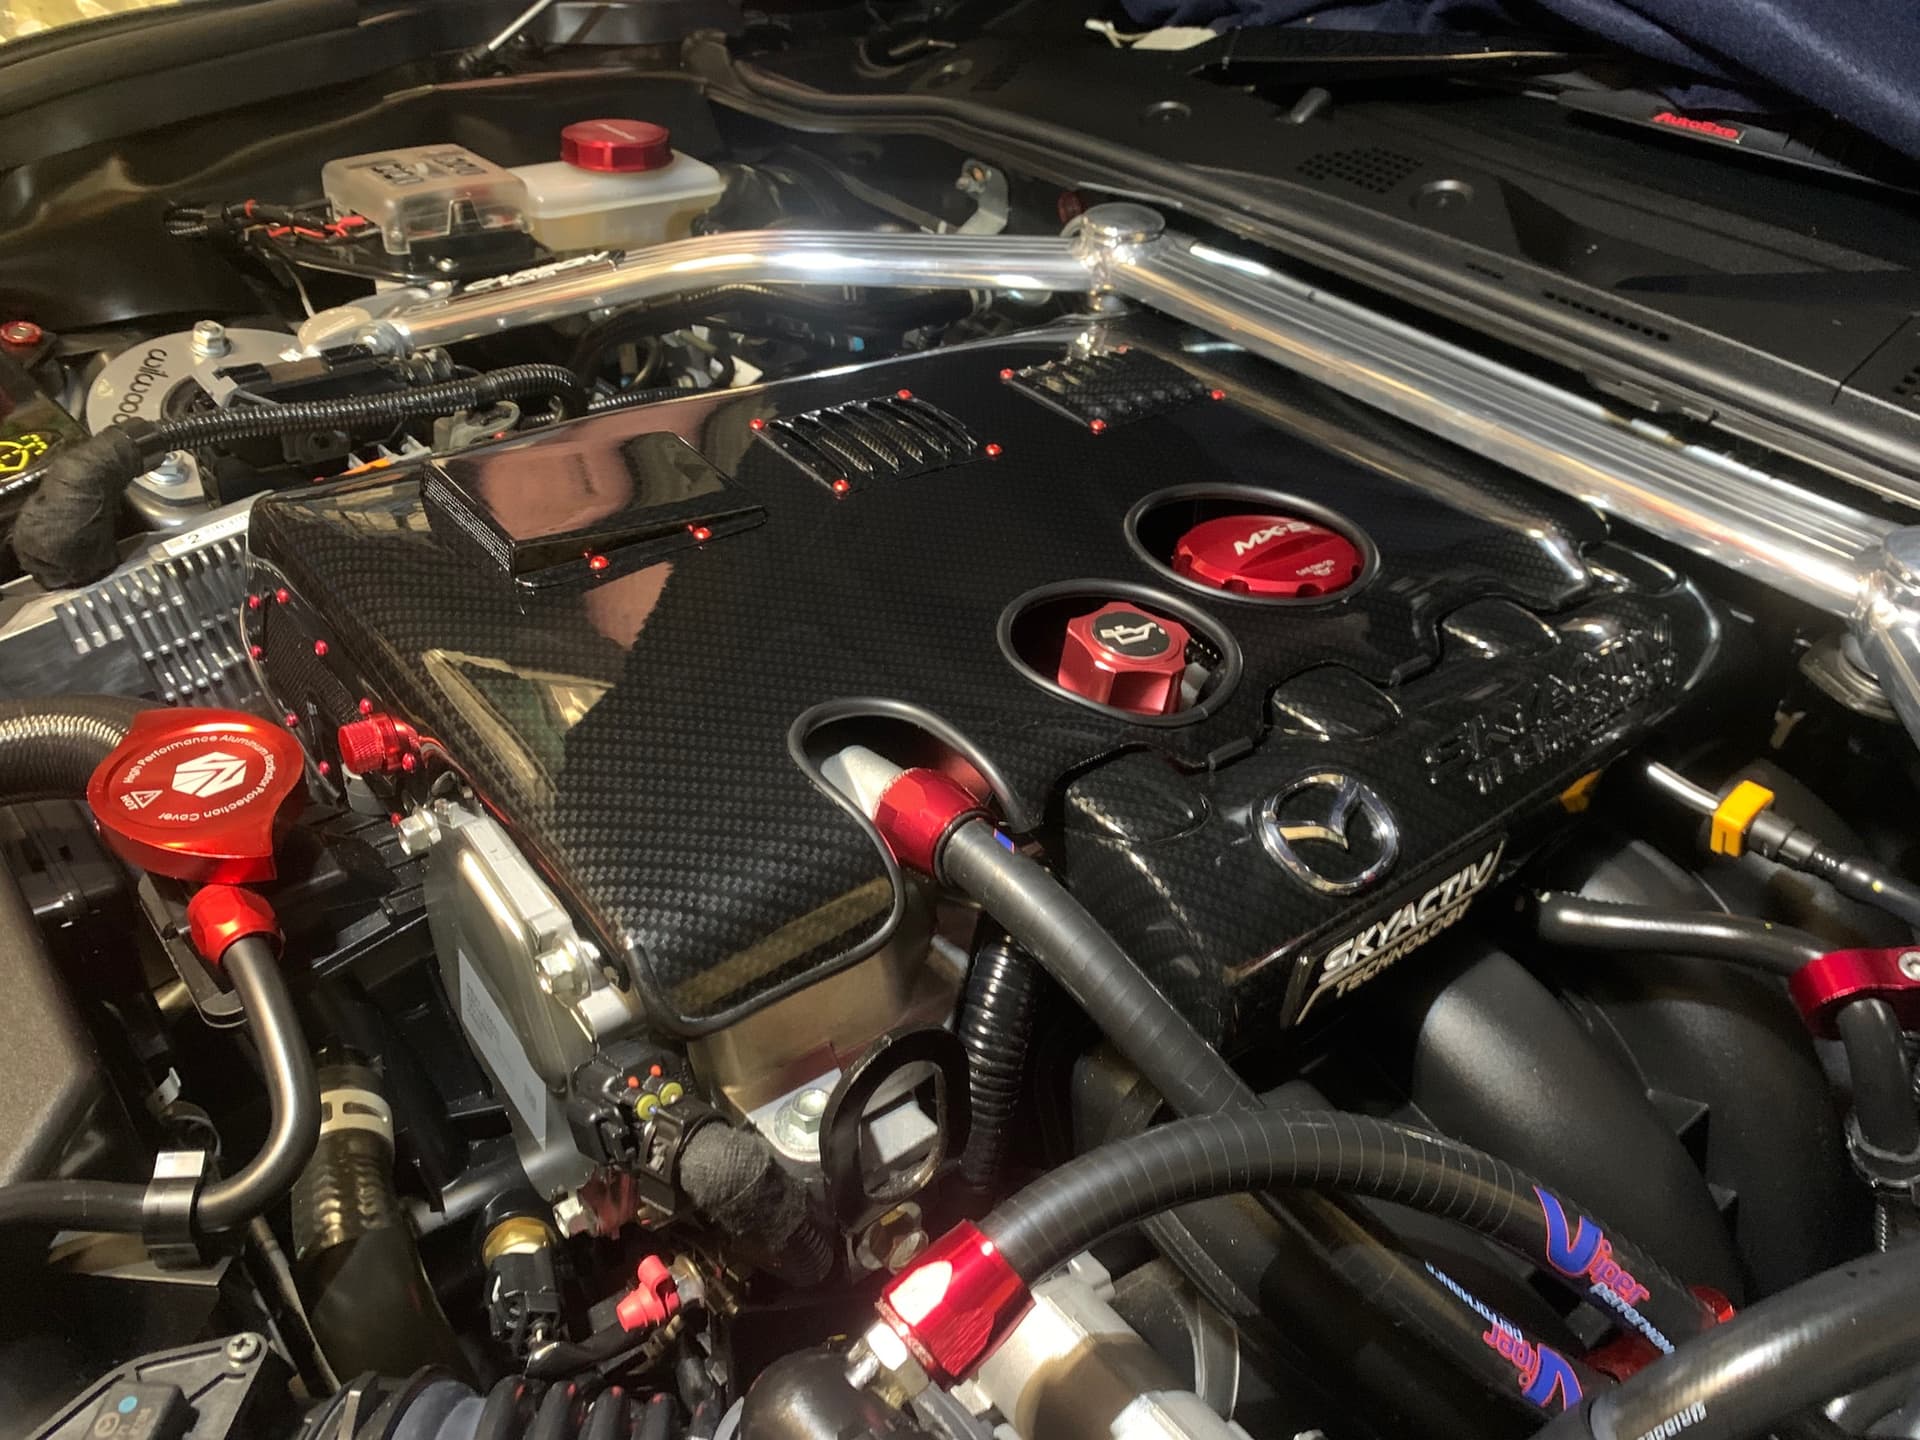
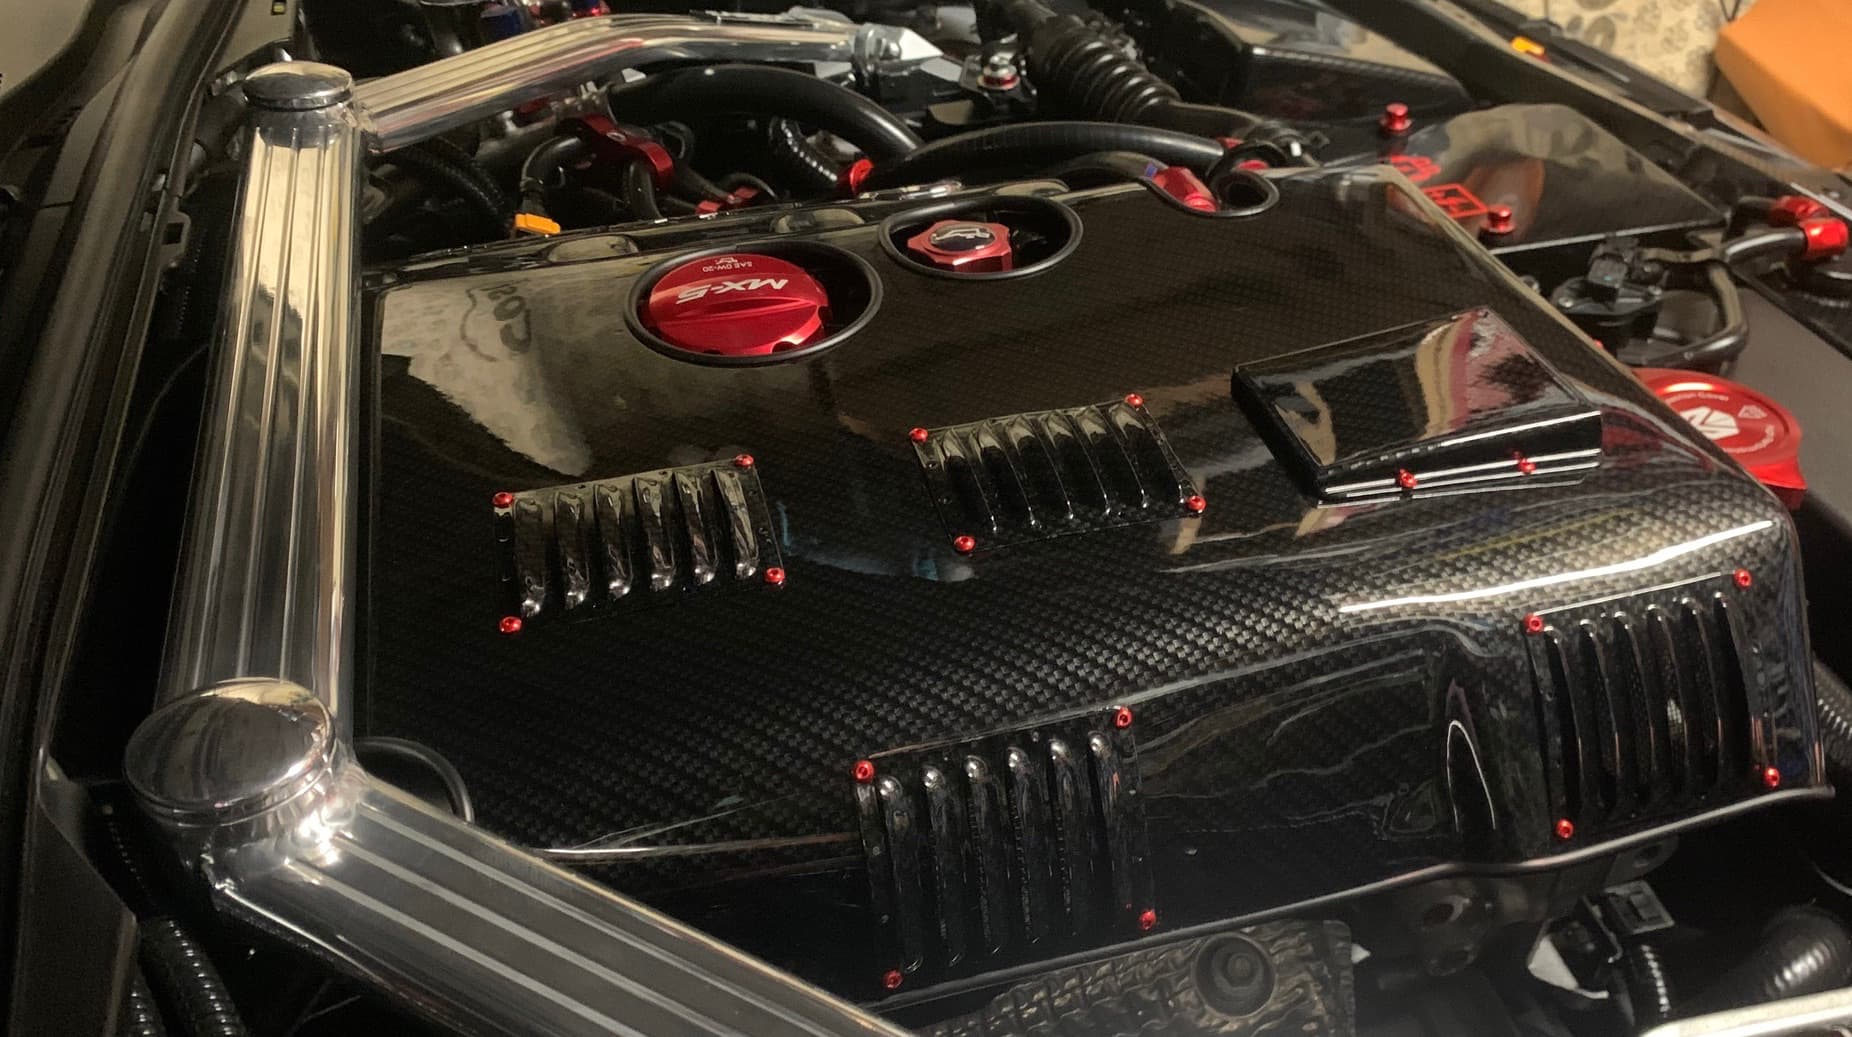
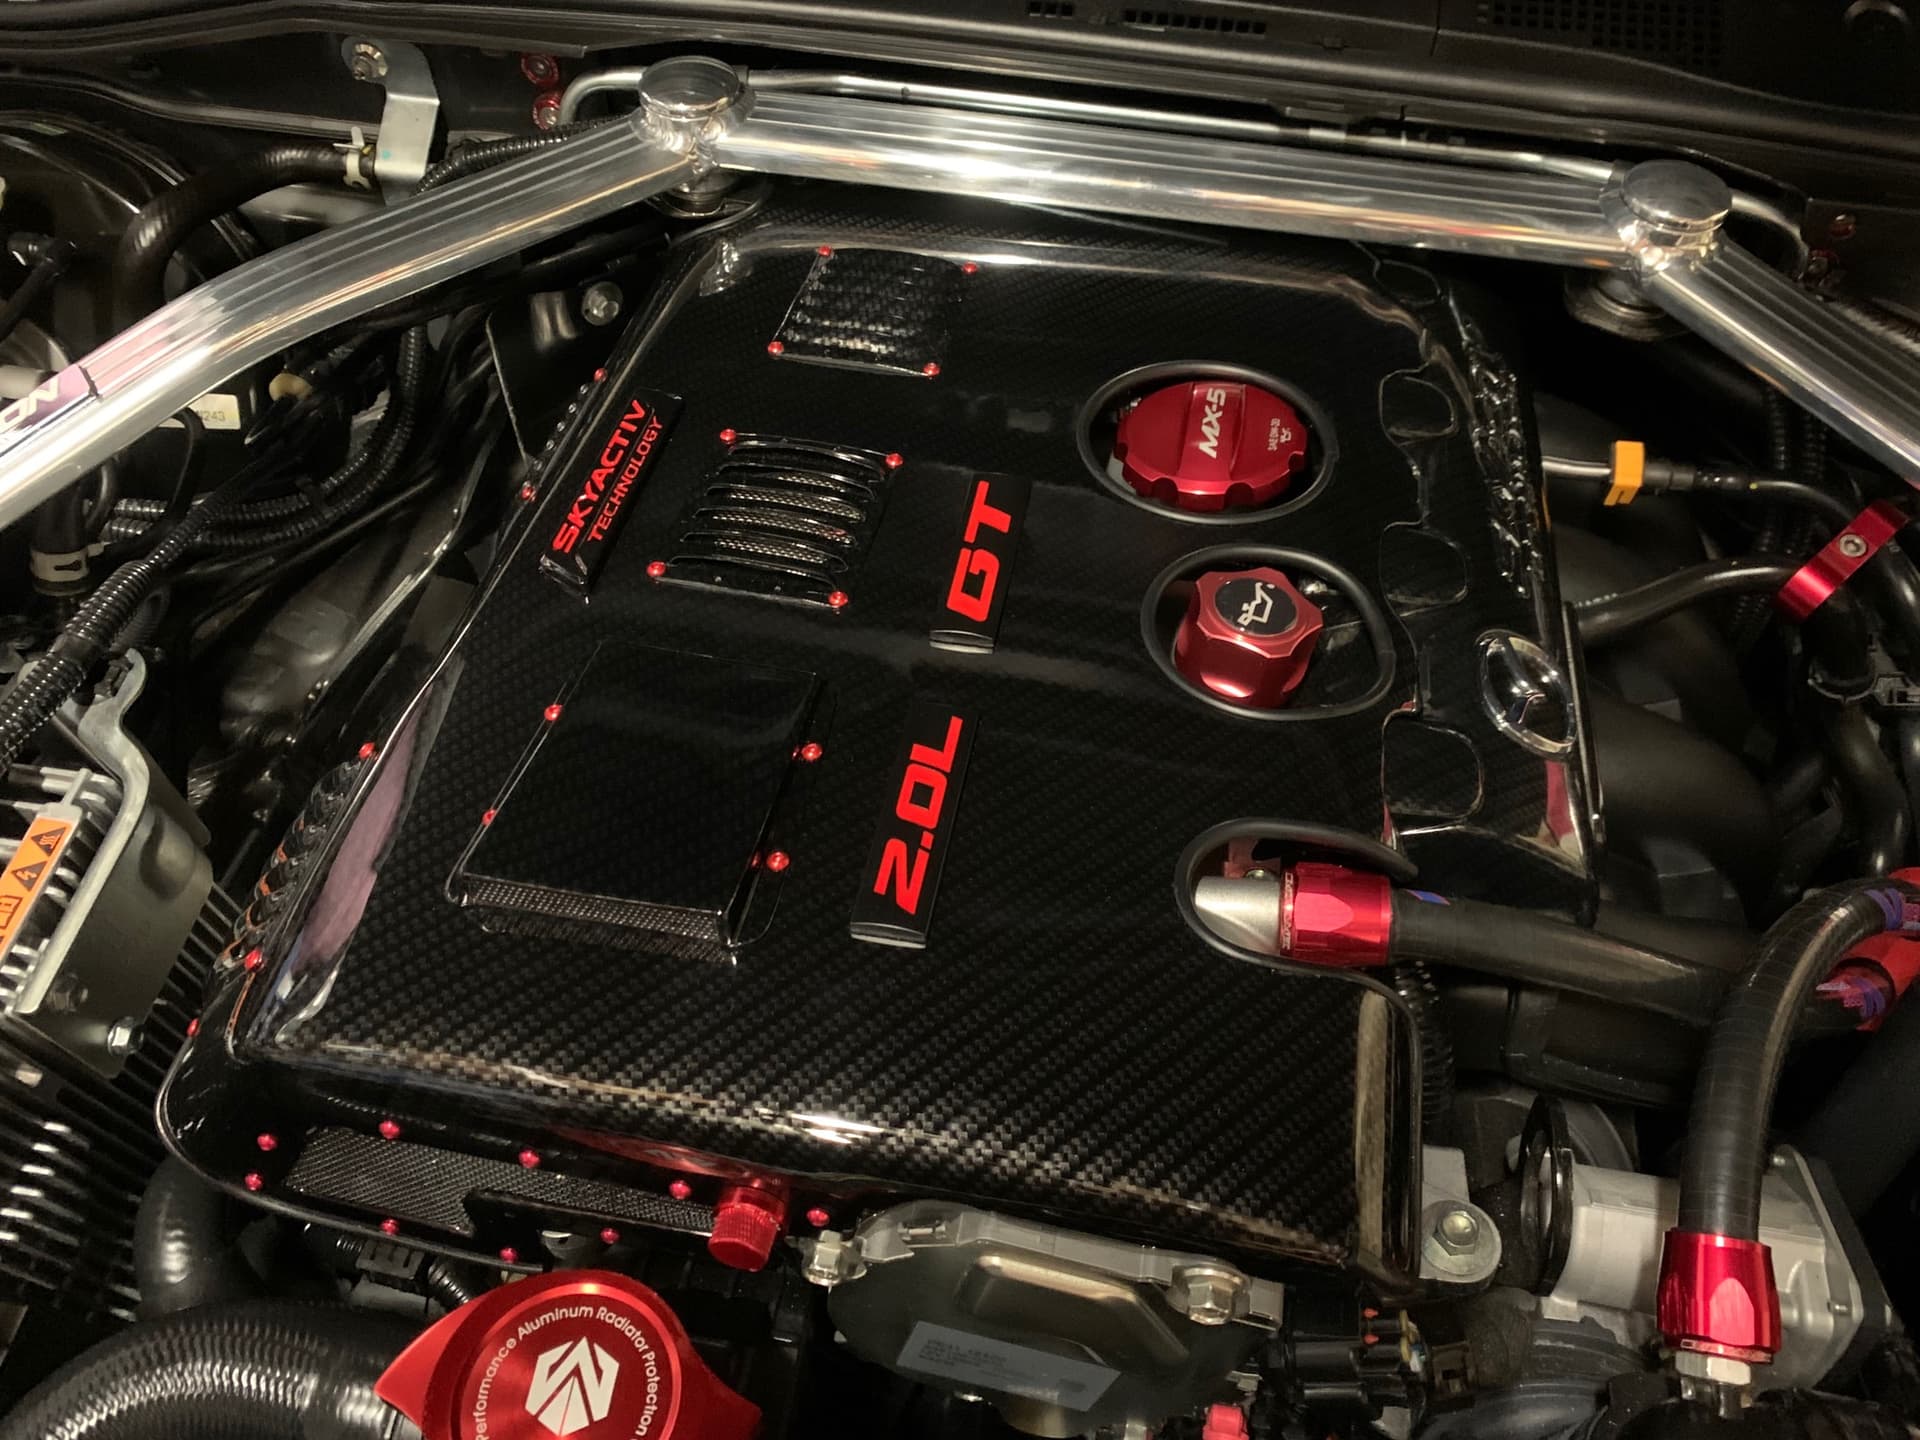
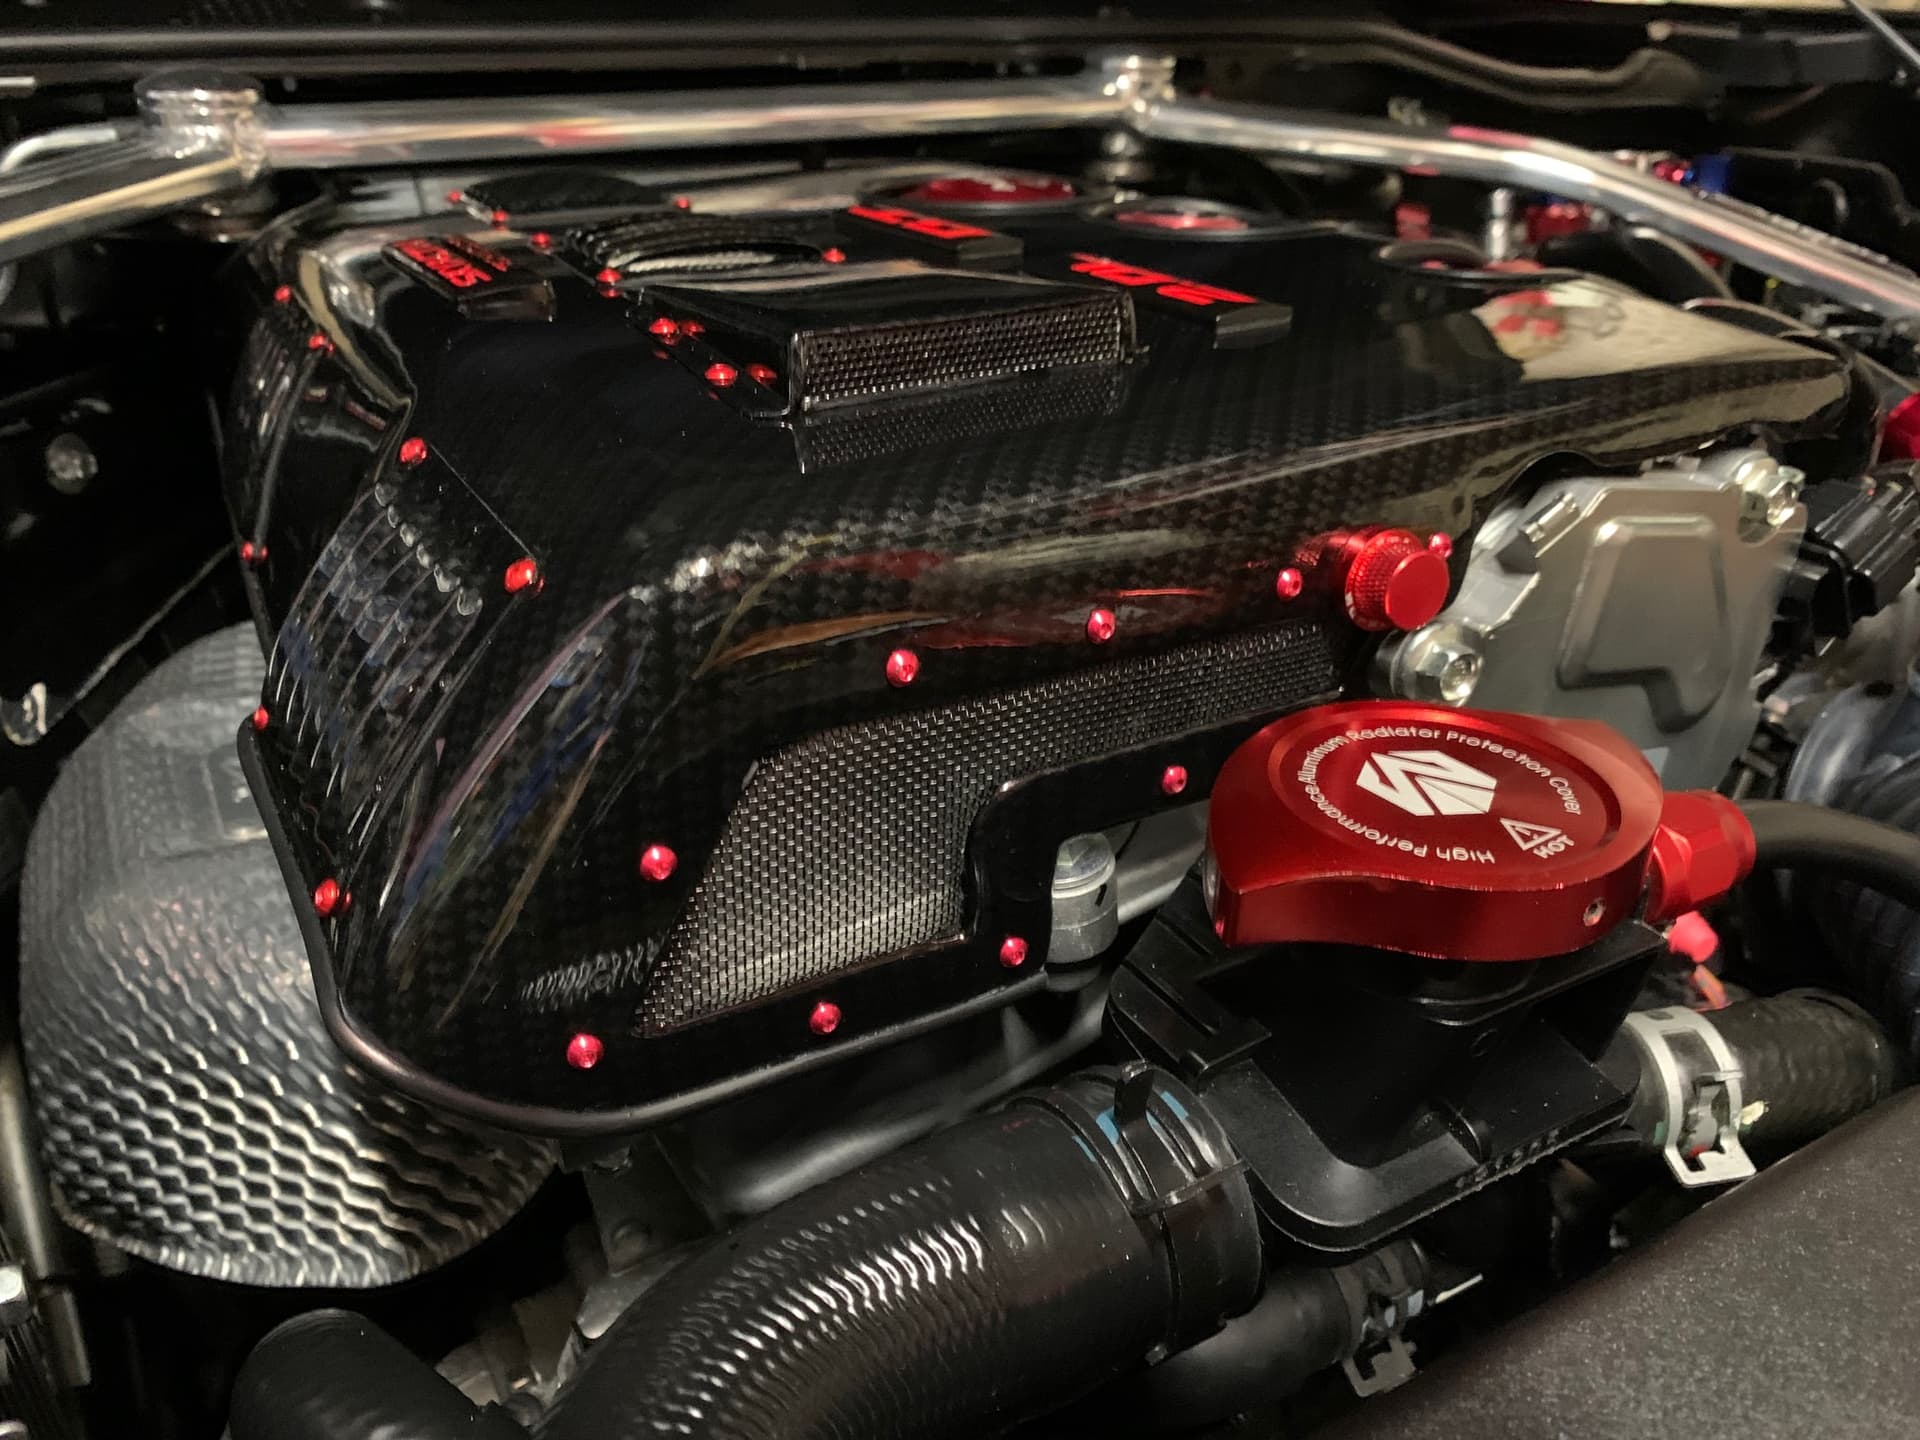
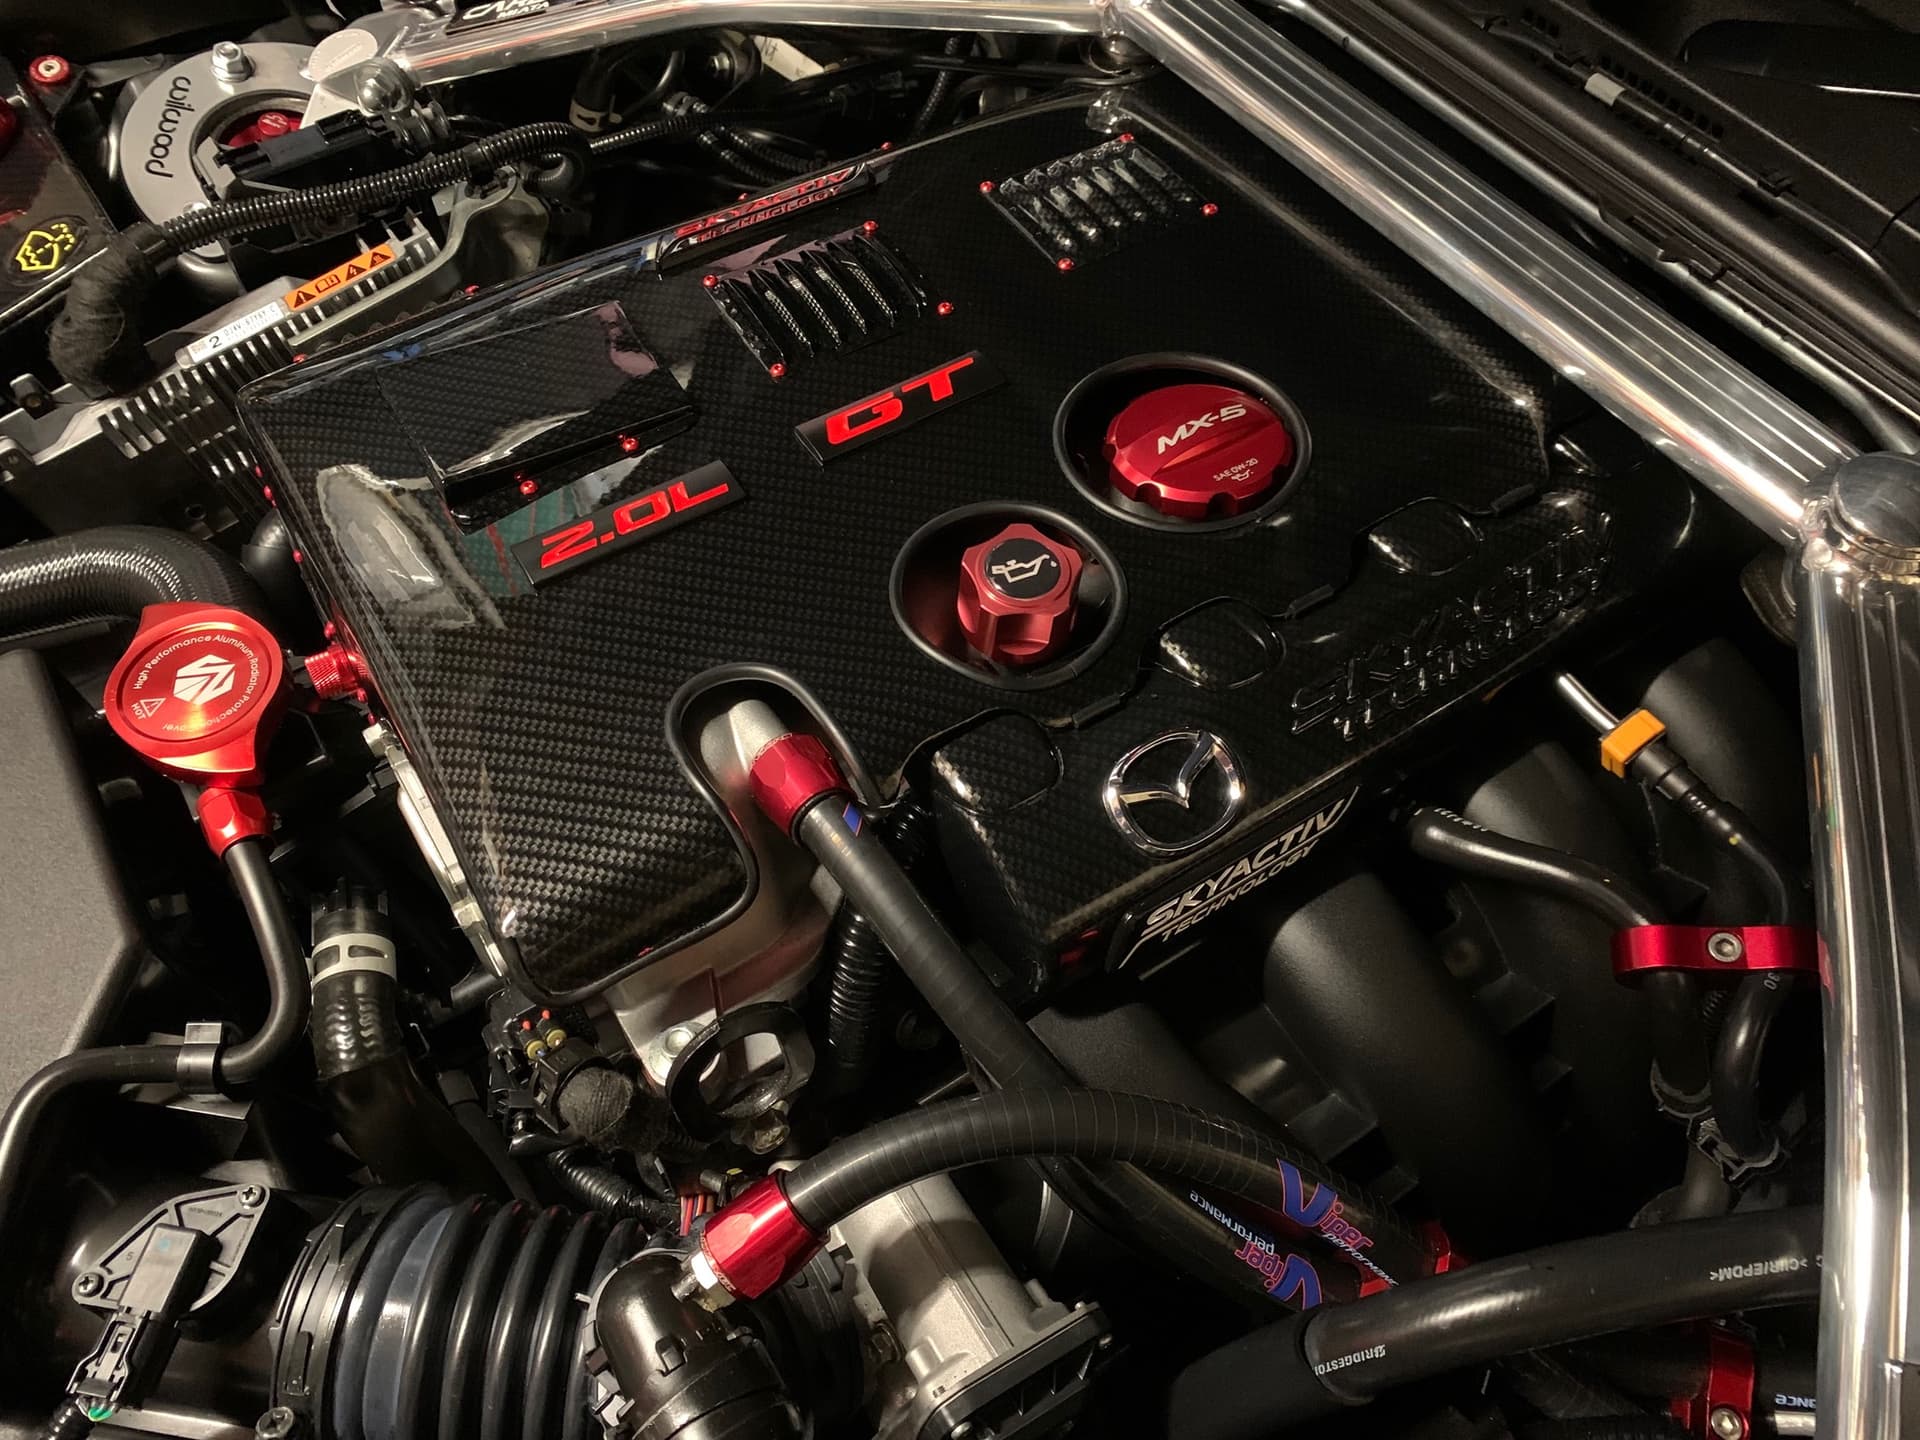
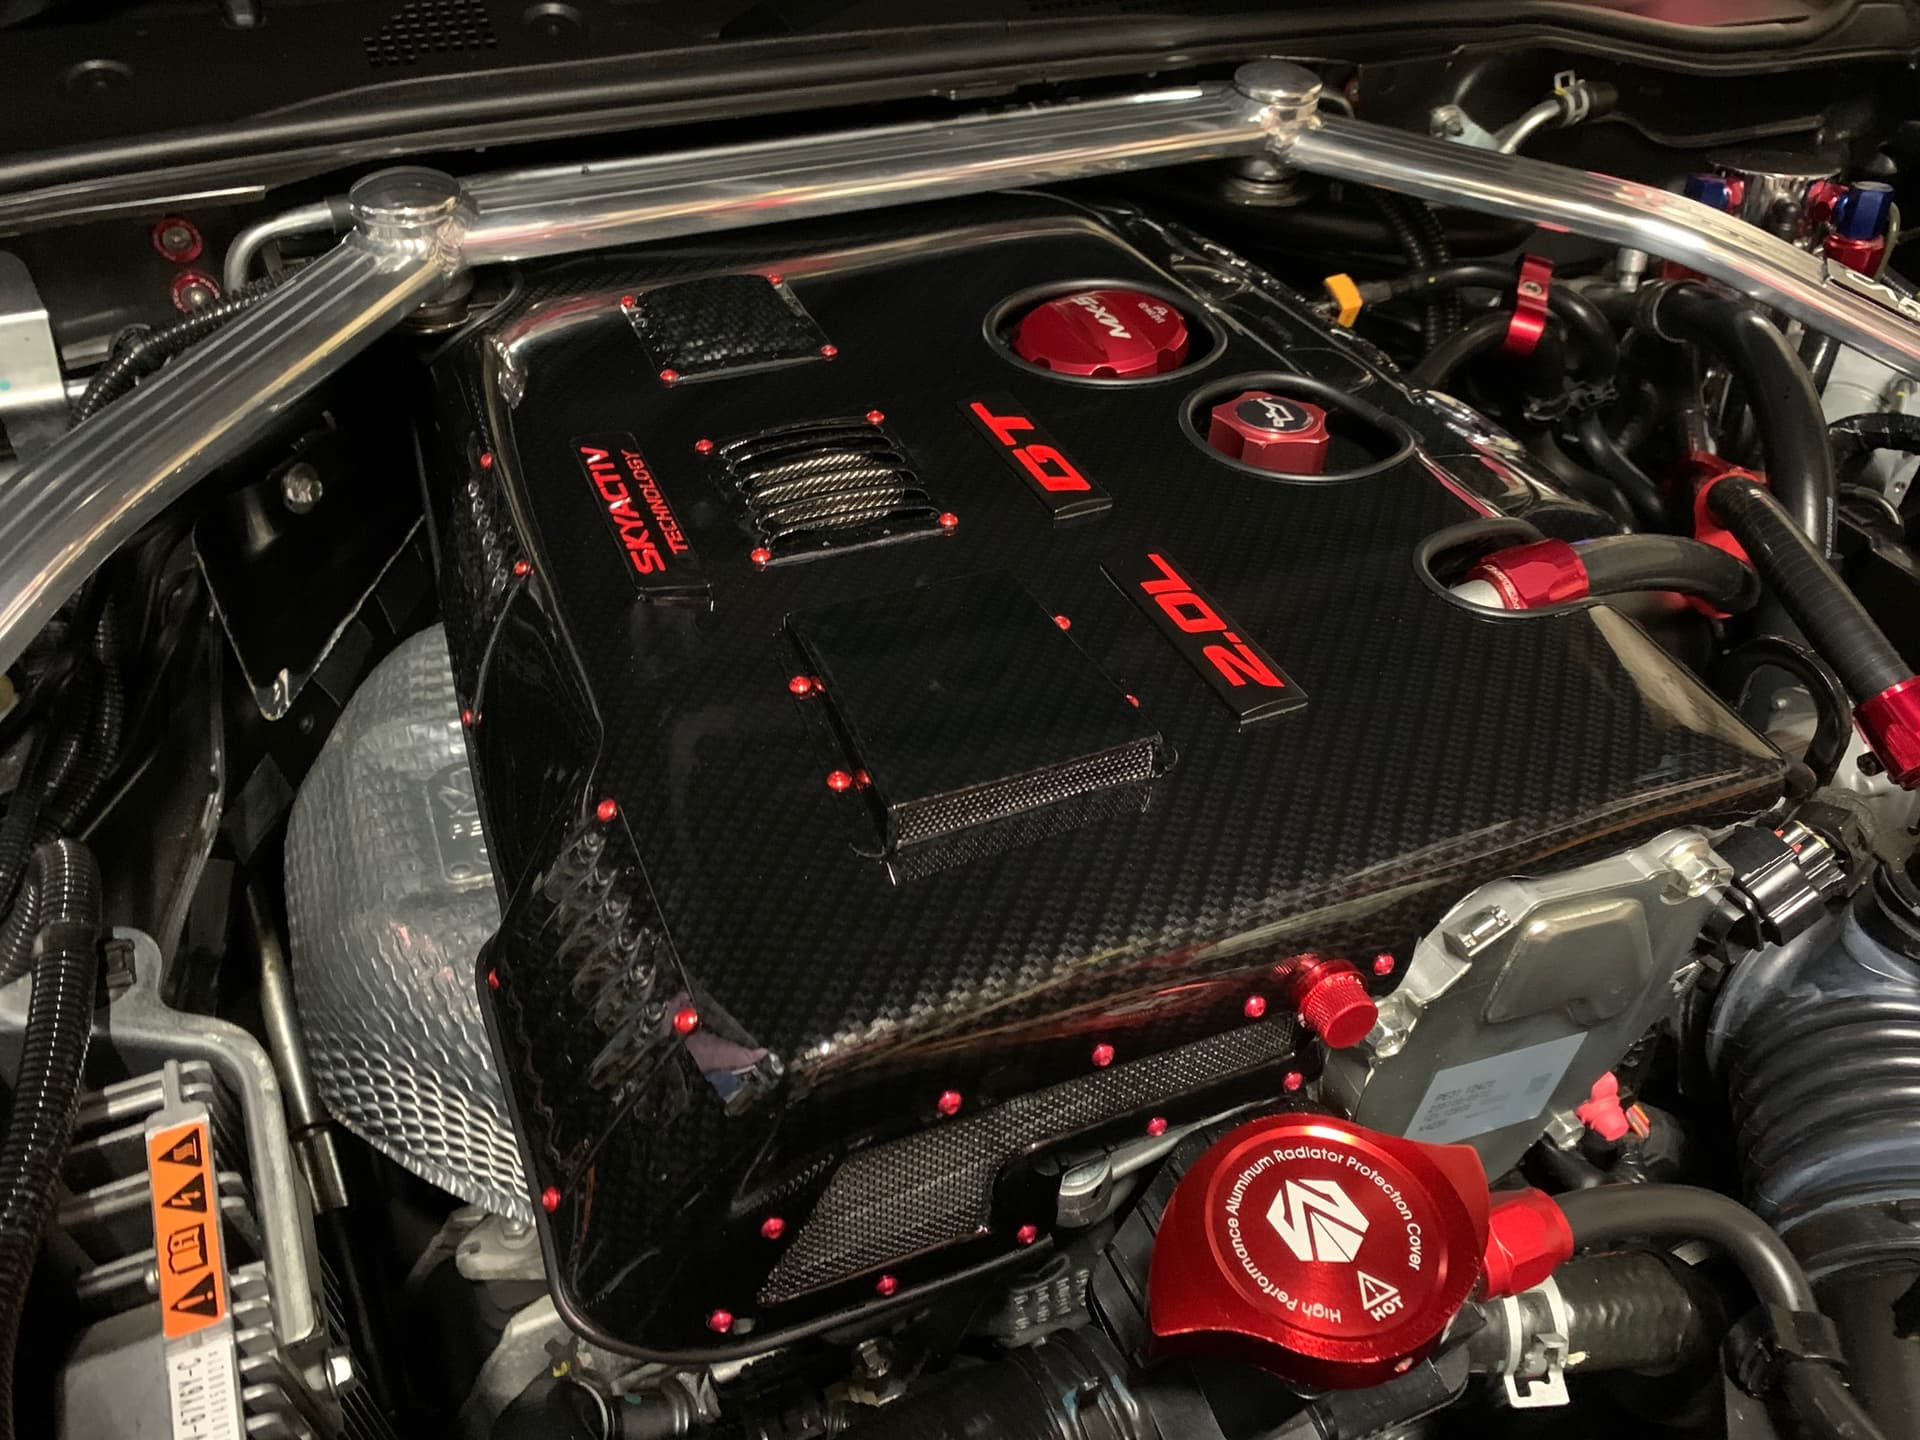
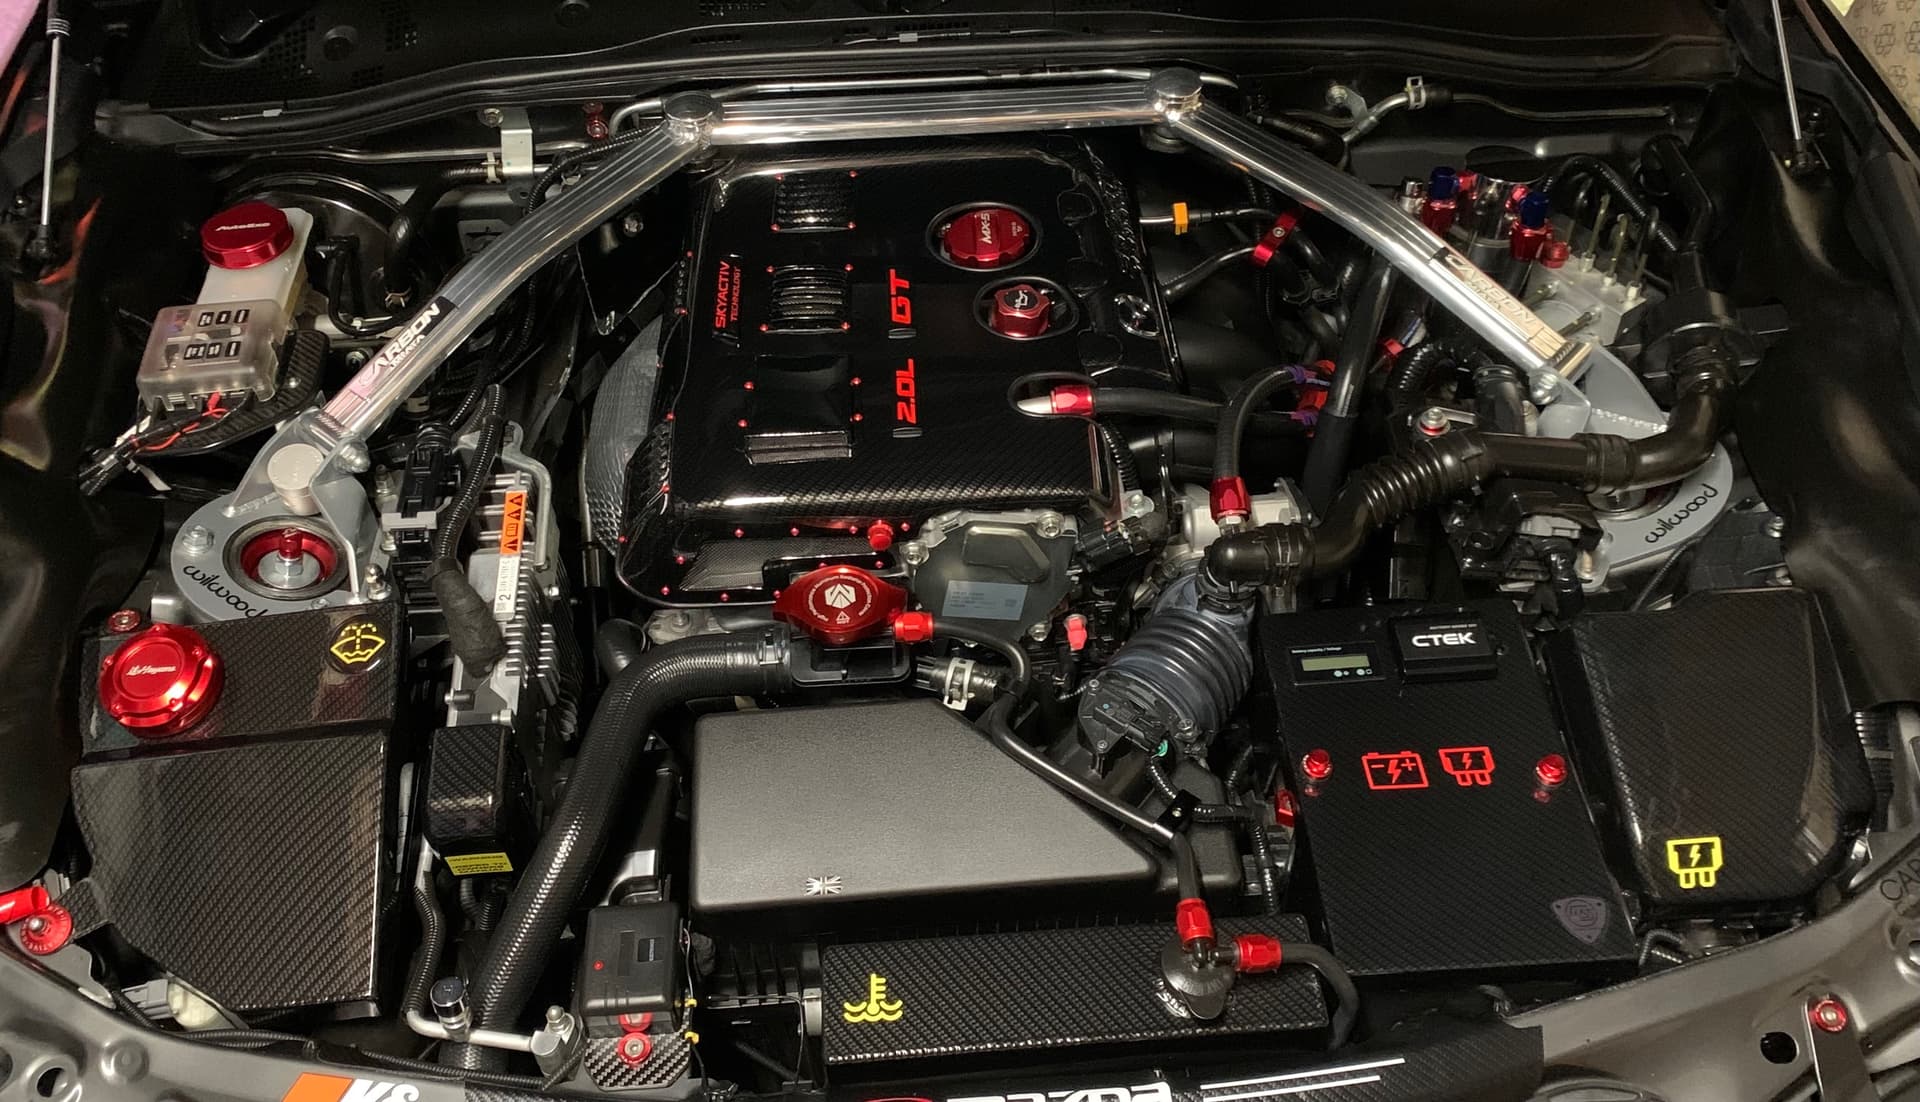
Making of the Engine Cover…Cosmetic for under the hood …this Is pic Heavy …
.Why when we have the bonnet cover I tried to get hold of an Auto EXE cover but they had sold out and stopped the production Run…& I got sick of cleaning out the dips in between the coils and I thought it would look better as well I have loads of off cuts of aluminium sheet from 1.mm to 4.5mm eventually I will be making some underbody trays …
Its taken quite a few months of making this item but I was in no Rush … Normal for me… I made a sort of cardboard cut out and added parts but I wanted to make the cover that I could remove within 30sec’s to a minute so…
A lot to think about not wanting to raise the engine temperature so vents needed… the need to make two lugs to locate the cover with one thumb screw fitment to keep the cover locked down …
Truly fabulous - and I can see hours of work. One of the things I like about the forum is you get to see other people’s cars and how they have upgraded them.
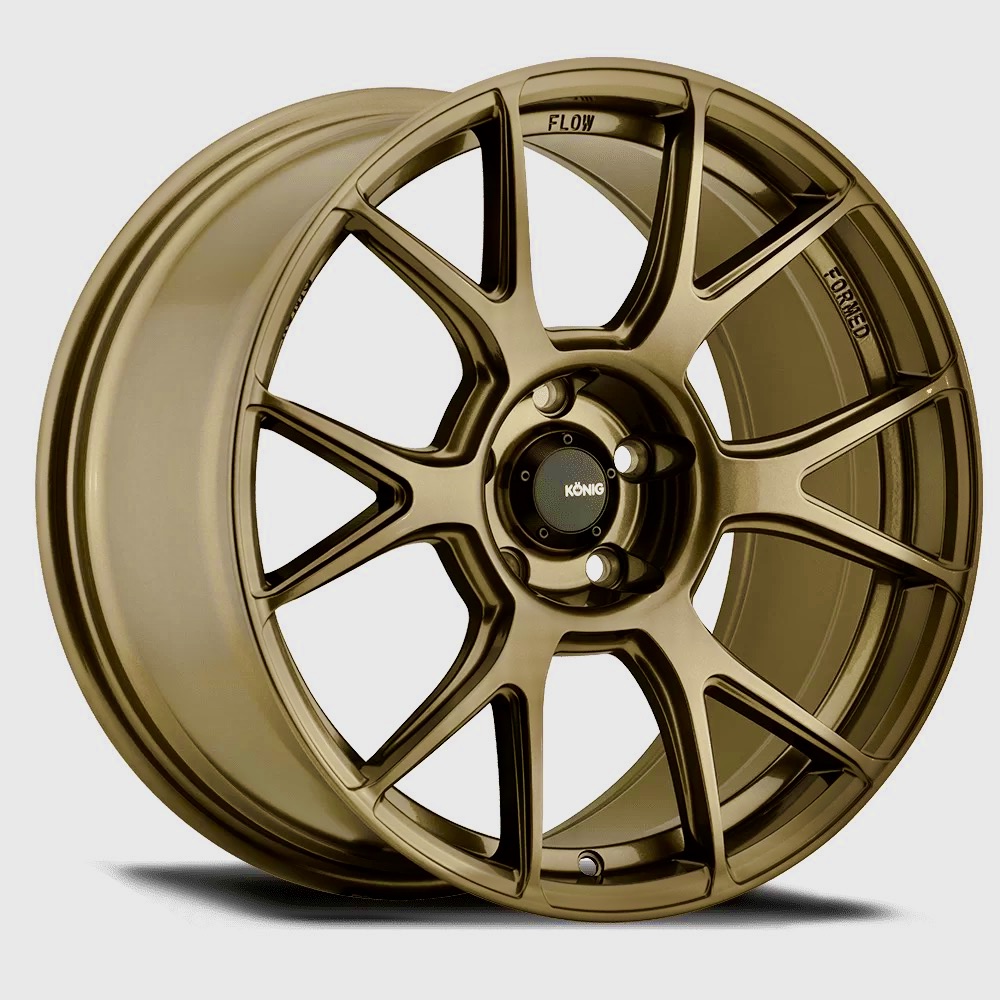
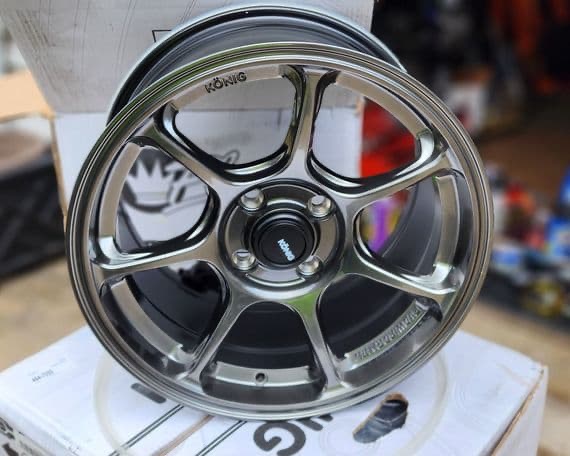
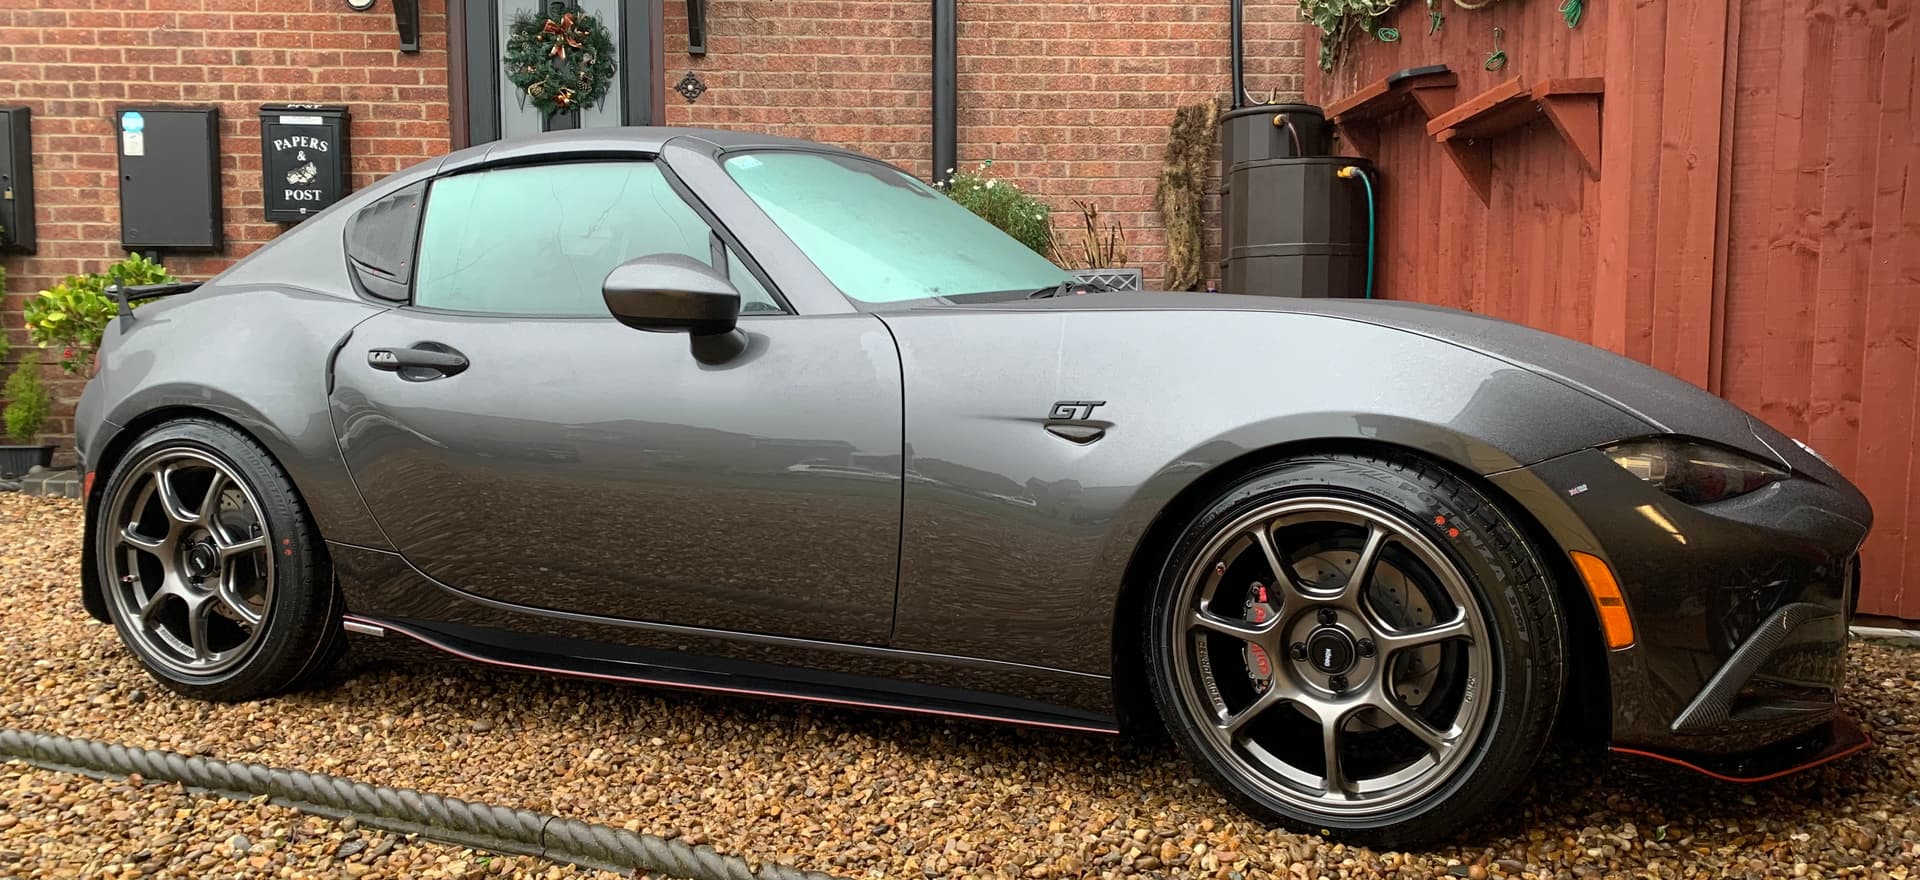
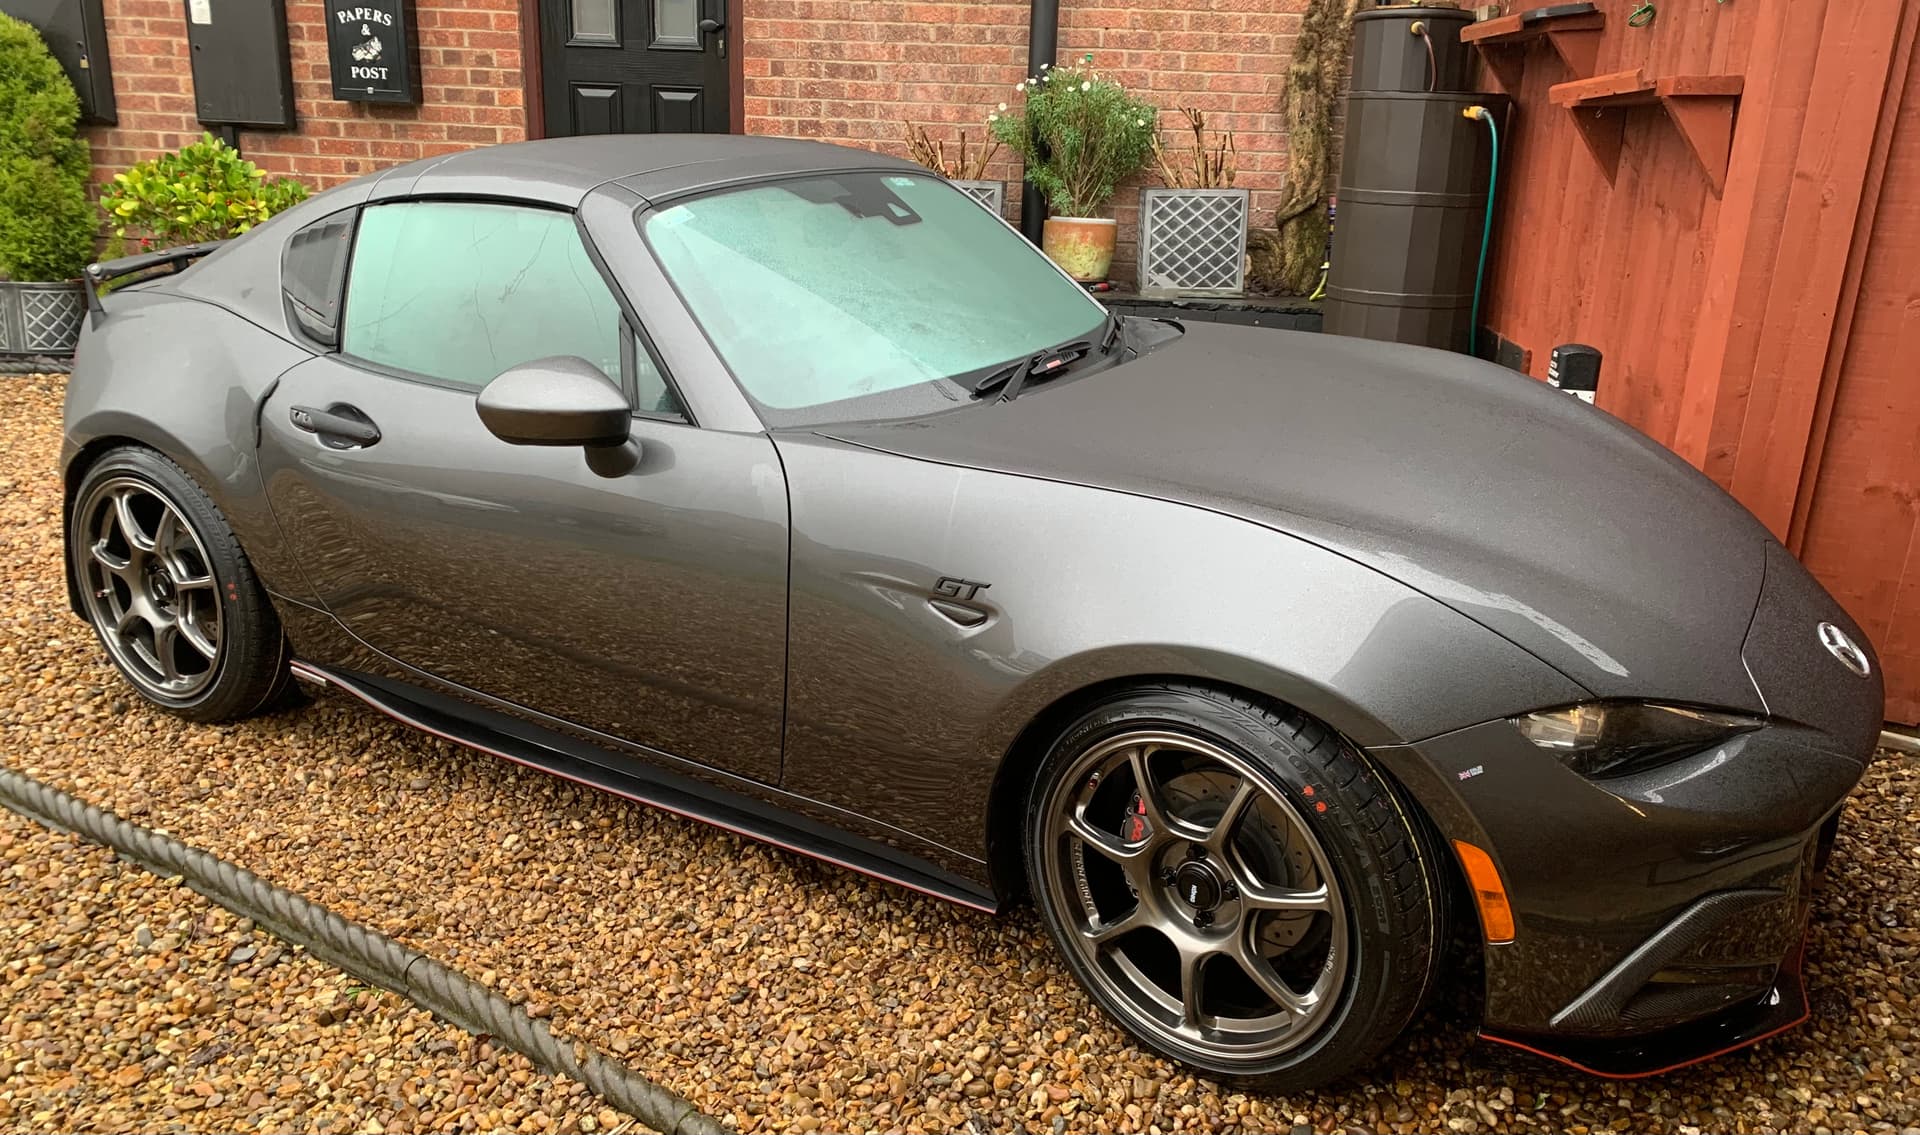
SO drizzly Day but had to see what the New wheels looked like so took the car out of its winter box got to work it was only that fine rain so us Yorkshire lads call that mist …
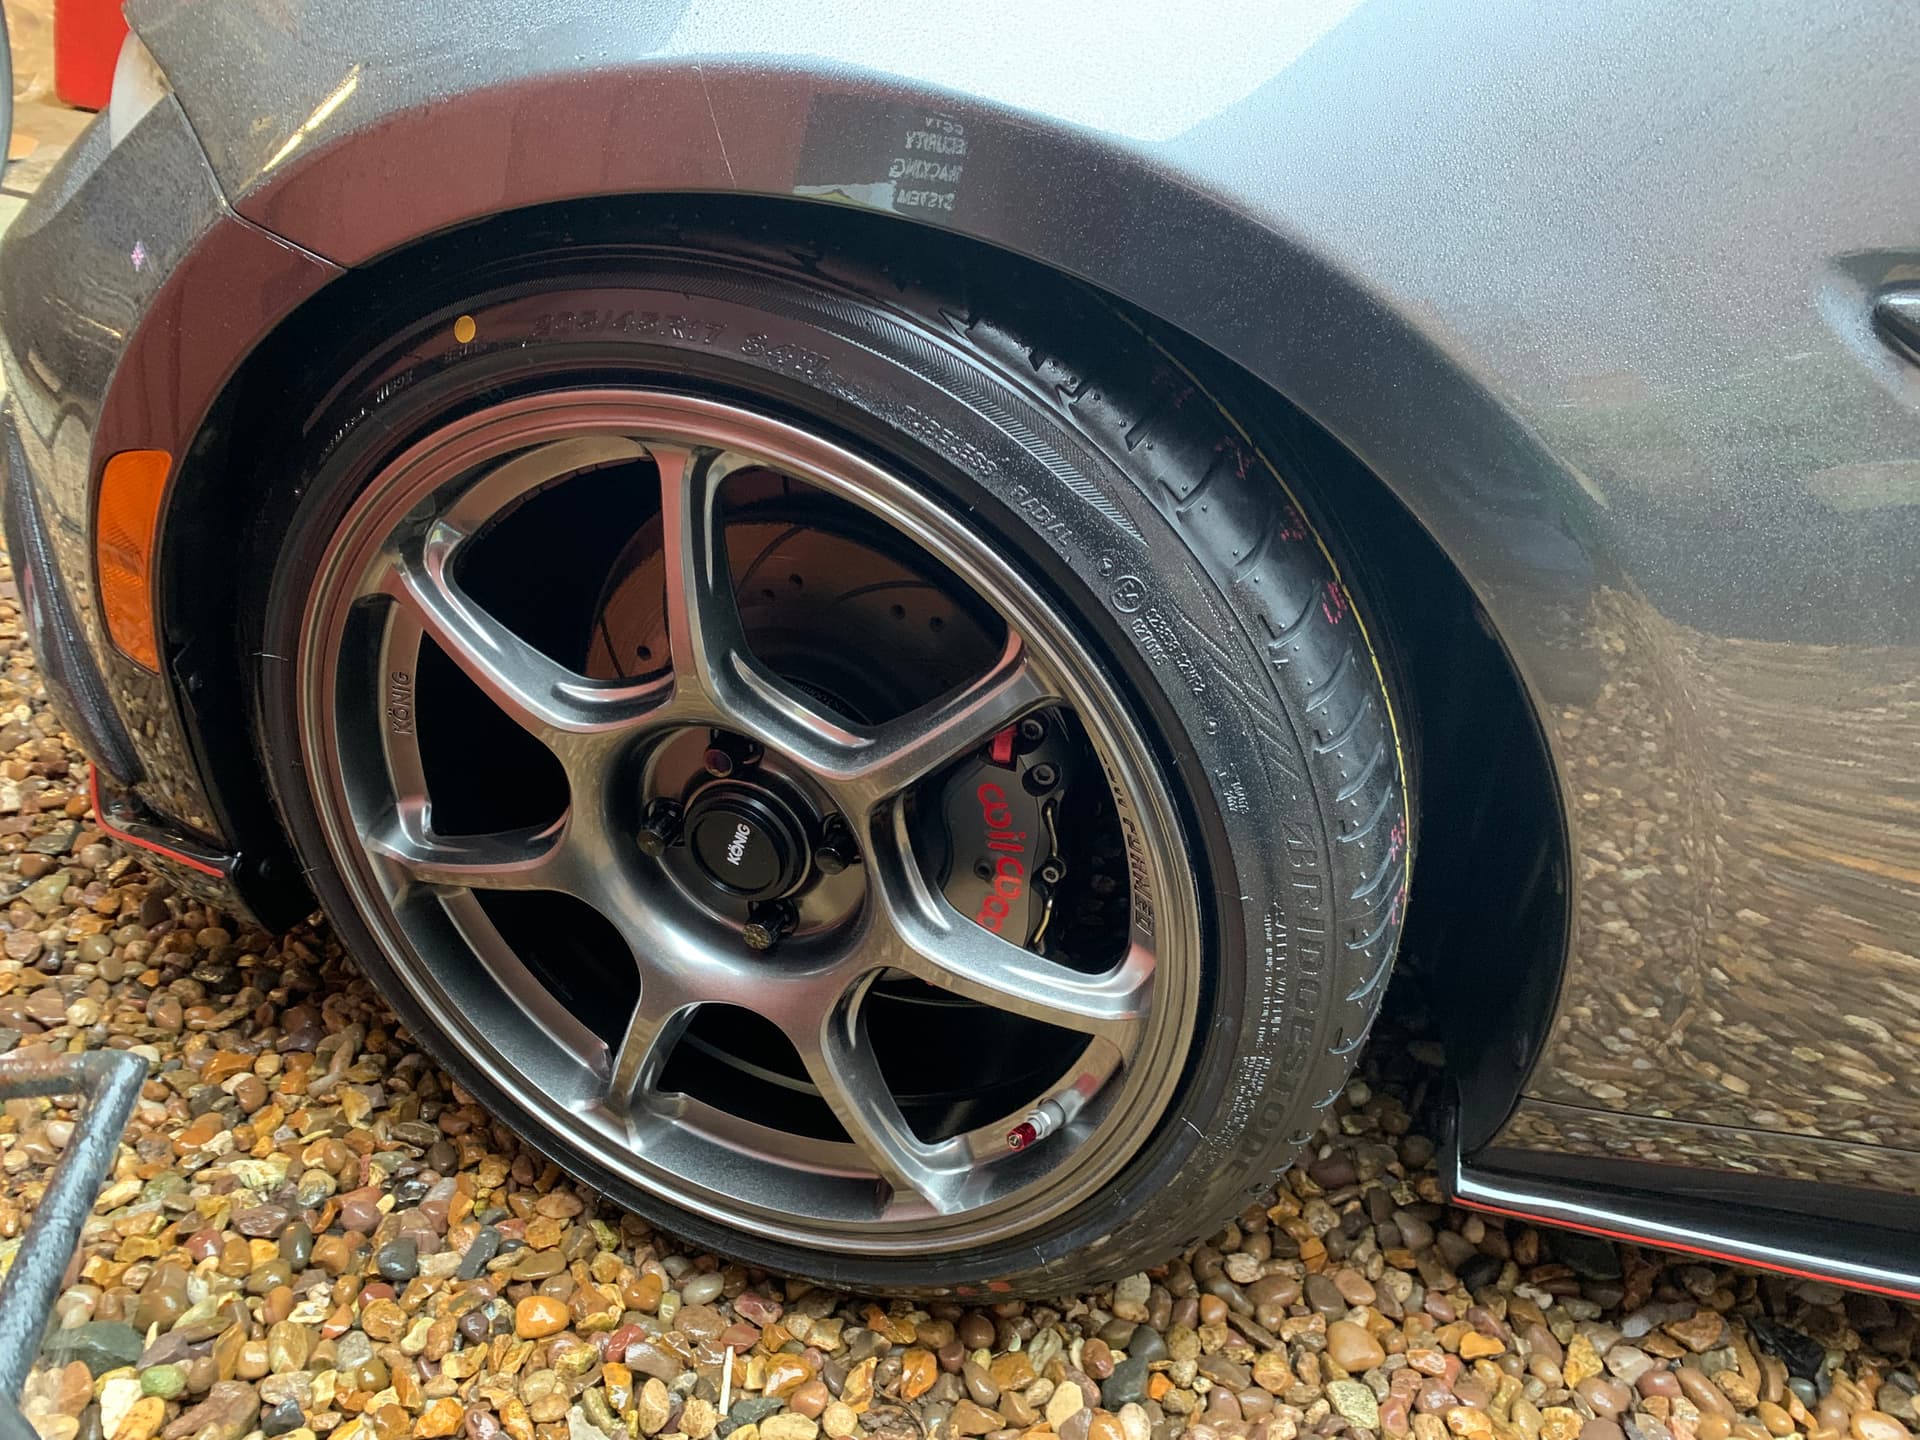
Konig Ultragram 17x8 4x100 +45 - Carbon Bronze Metallic so some pic’s show the bronze effect coming through other show how much of a match they are to the ENDs machine grey metalic paint work
But I messed up folks I forgot that I had gone from a 7inch to 8 so my tyre size is wrong after enough hints from Chris the penny dropped my tyre fitter mate this morning said the same I just was in fog mode
I looked at the spec’s again they size I can got from and too is 225-245/45/17 so I be fitting the sport version of 225 Bridgestone …next week need to get new hearing aids …
hi chris just checked I messed up a little I going to drop the 20mm spaces out then I just have room to fit 225 tyres on without clashing with the wheel arch then get the wheel geometry alined again plenty of room at the rear however front is 3mm gap to the front calliper somthis to do inspring time so I will have more tyres to sell good that I have a mate that can get them cheep lol…thanks for pointing this out I had for got the 8 inch not 7 cheers man