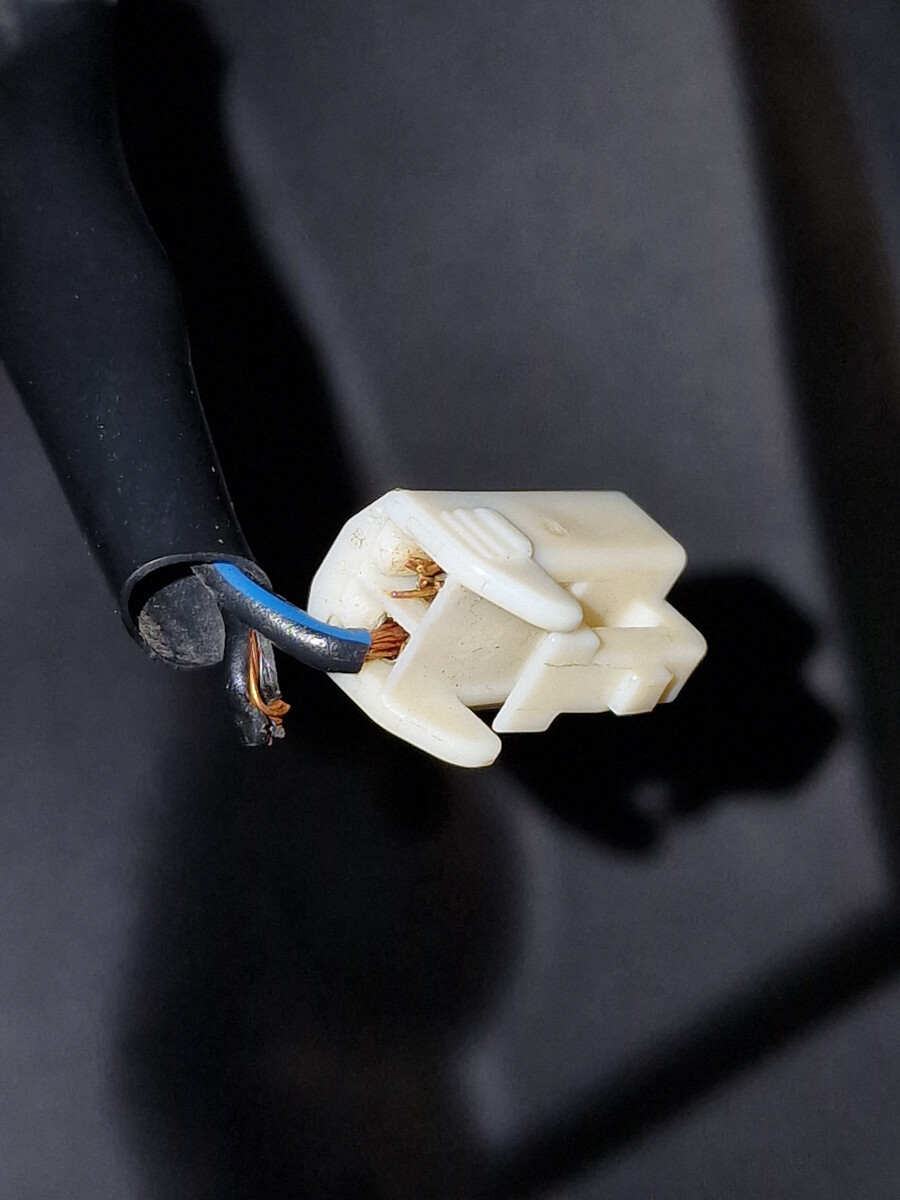
Does anyone have any tips on how to repair the wire for the rear windscreen defroster. It has broken at the connector. I cannot seem to remove the broken section of wire from the plastic housing - but I think the copper wires just go into a metal clasp that makes the connection? It is so hard to work back there due to the location and the space!
Welcome to the form. I hope you find it and the club useful and enjoyable .
To repair this you will need a soldering or professional wire stripper and crimper.
It is vital to get a very good connection as the current passing through it quite substantial and for a reasonable length of time.
It a good picture you posted, can you send one of the other end? The reason being i can talk you through extracting the terminal from its housing.
Hi Andrew, thanks for the swift response! I didn’t realise they were soldiered in place, but had considered they might be. I did think I’d have to strip the plastic back to expose more of the copper wires.
Do you mean a photo of the other end of the white plastic plug/housing in the photo?
That is a heavy duty wire, relatively speaking; how did it break?
I ask just in case the other wire is in danger of going the same way. From your picture I would guess the other wire is fine and not fatigued.
Remove the broken off connector from the white plug. Probably need a compass point or similar to relieve a plastic sprung retainer.
Find a similar connector that will fit back in the plug with a sub of similar guage wire already attached. Make sure the copper is the same thickness and number of strands.
Solder the new connector and stub wire to broken wire and finish with heatshrink. Make sure it ends up the same length as original.
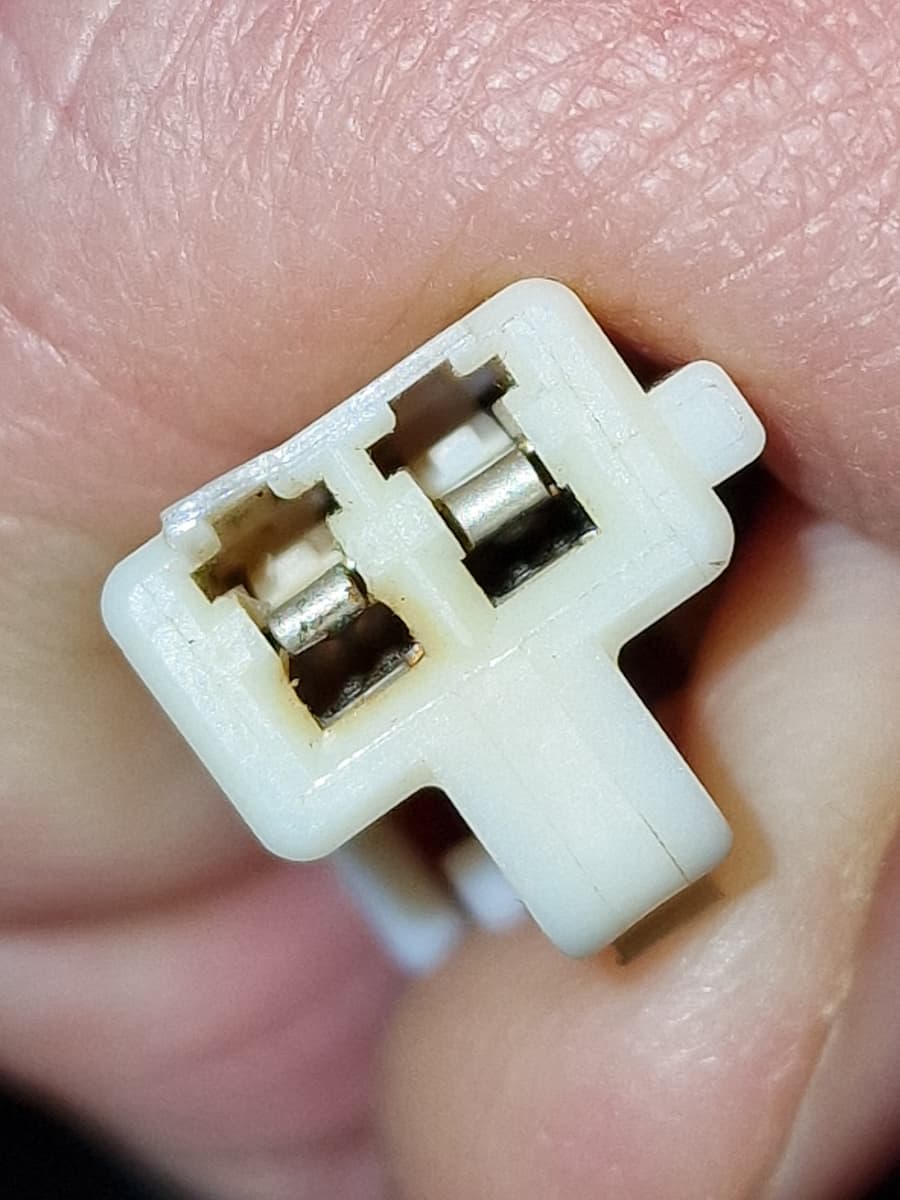
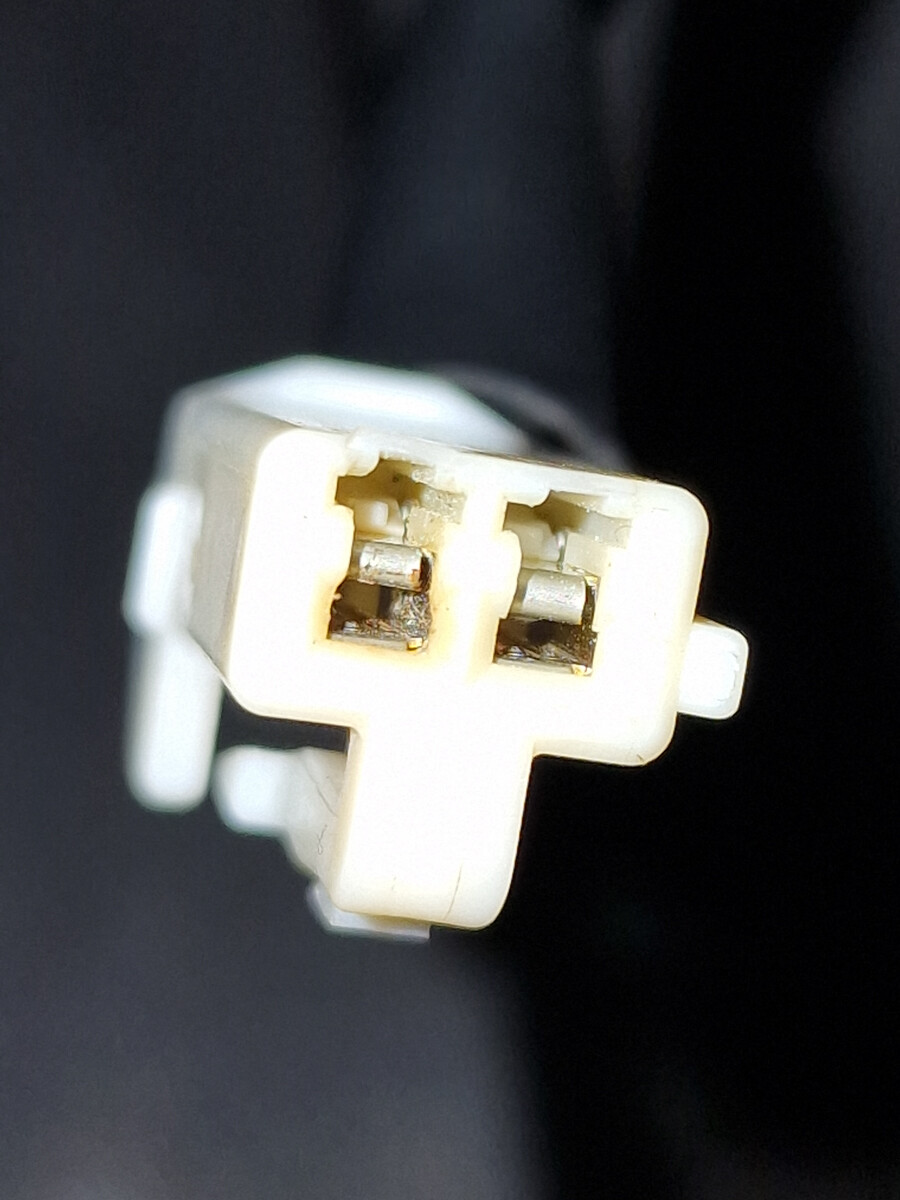
Looking at the plug, the left terminal has been overheating , you can see yellowing on the plastic from the heat. Therefore i would be reluctant in reusing this connector.
Try and get a replacement white connector with the terminals and length of lead so you can connect it to what is left from your screen.
Mine has done exactly the same as yours, it is a right pain in the ar*e to work on, to be fair I just bodged it by stripping back the wire and shoving it in and holding it with gaffer tape, yeah I know… but it’s working for the moment until the weather gets better. Don’t judge me
Thanks for all the helpful replies to this, hopefully I’ll be able to get it sorted now. I’ll post updates when I do, although it may not be for a few weeks as those parts are coming from elsewhania!