NC Retro fit heated seat kit

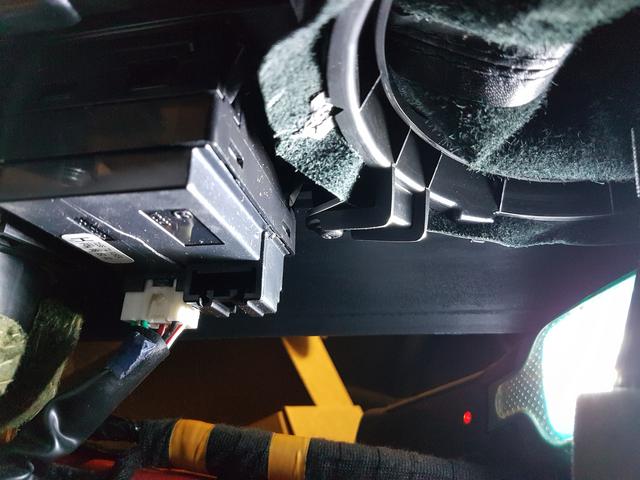
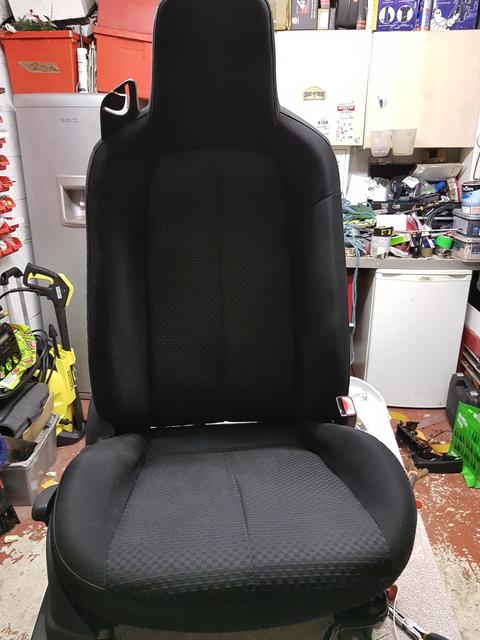
Hi everyone, if you look at my signature, you’ll see that I have a base model NC 1.8 roadster with " option pack" One of the options it doesn’t have, is heated seats but I’m about to address that issue. Postman just been and I’ve opened the box from Amazon that I ordered last night? My mate called round the other day for a coffee and a chat (hood down of course) and we chatted outside for ages, it was very cold! When he left, he just popped on the heated seats in his car which has OEM fitted heated seats and off he went! Got me wondering as I think my cockpit is warm, as the heaters are very good, but the added warmth from heated seats seemed a great idea? So, off to Amazon I went!

Here are some first pics of the contents as I laid them out on the kitchen table. 


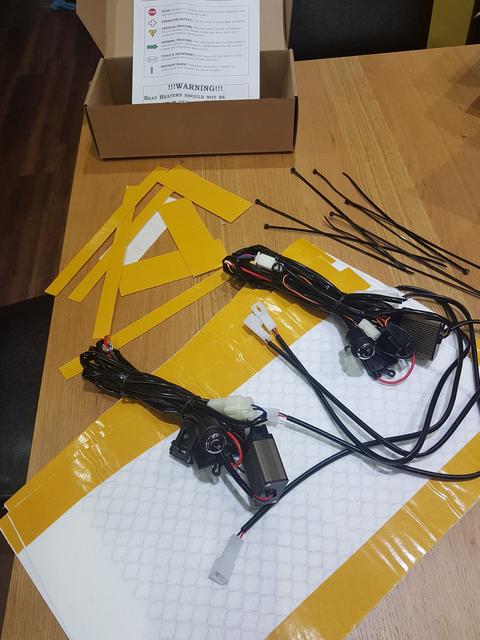
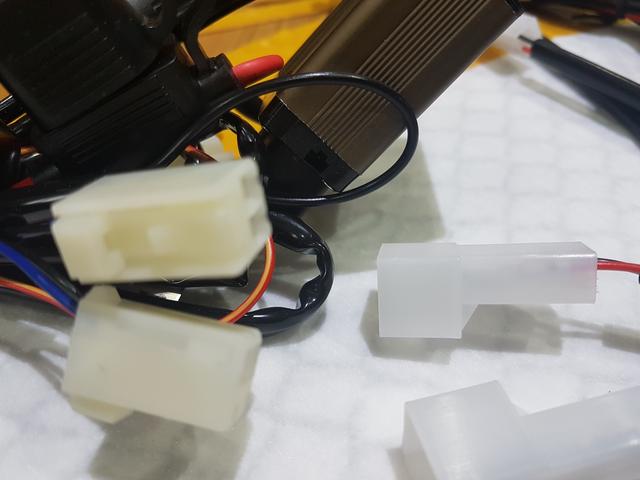
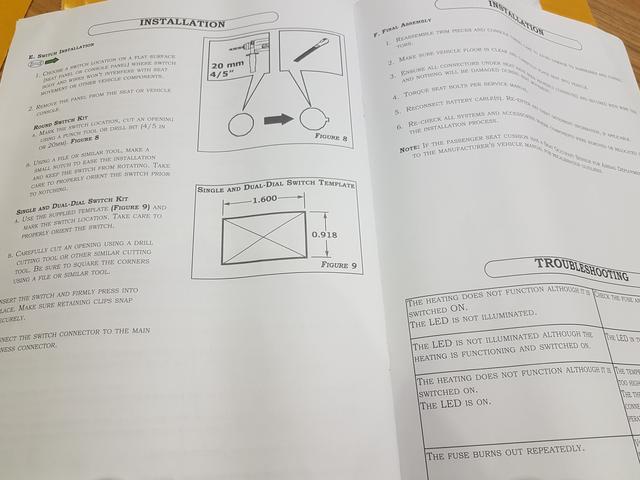
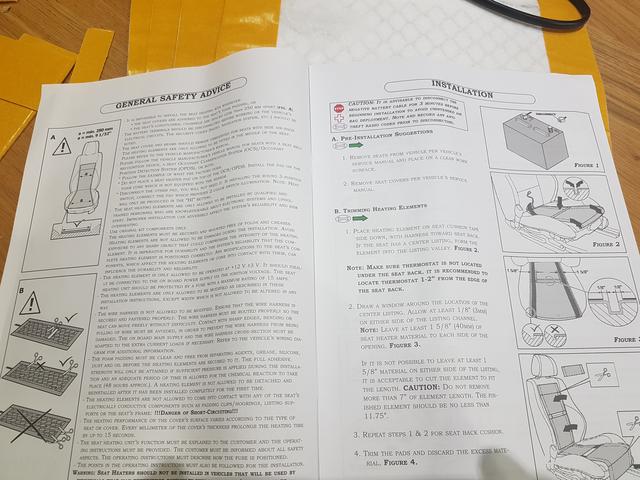
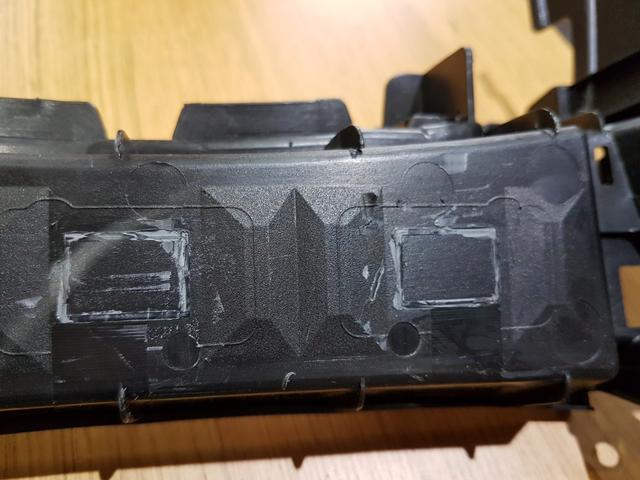
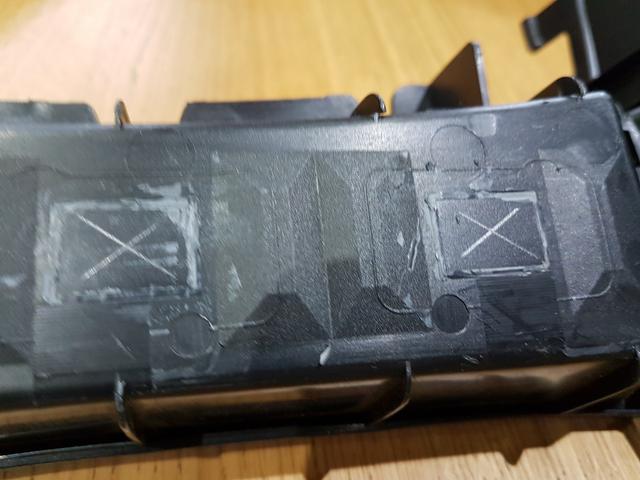
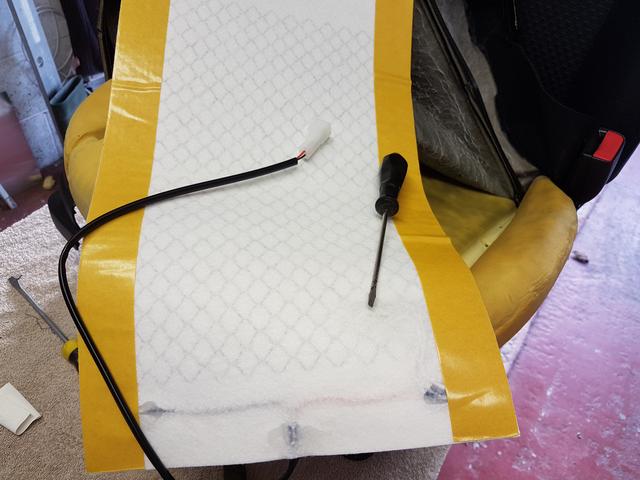
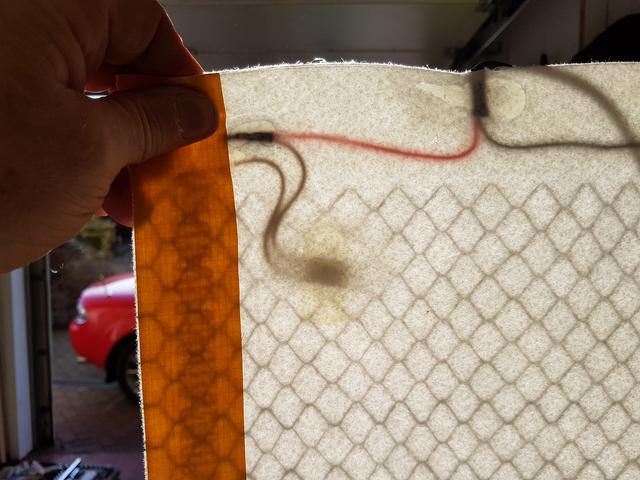
As you can see, quite a comprehensive and quality looking piece of kit? Very pleased with it out of the box. The heating elements contain a thermostat for temp control and the pads can be cut down to size if required, plenty of adhesive tape ( both pre applied and loose supplied) so securing the pads in place should be easy? There is also a very comprehensive set of instructions ( written in English ) included.


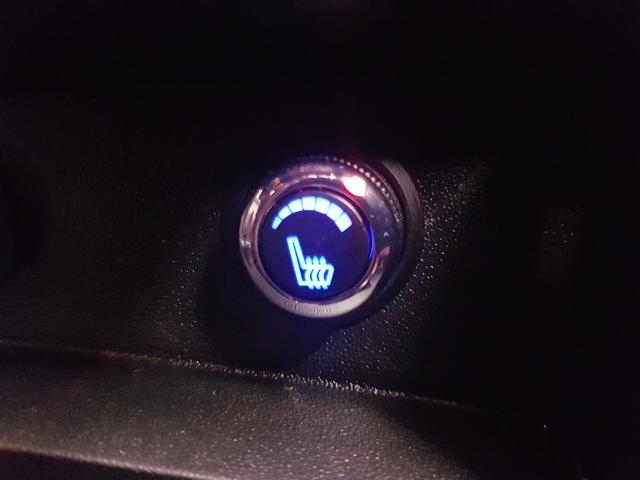
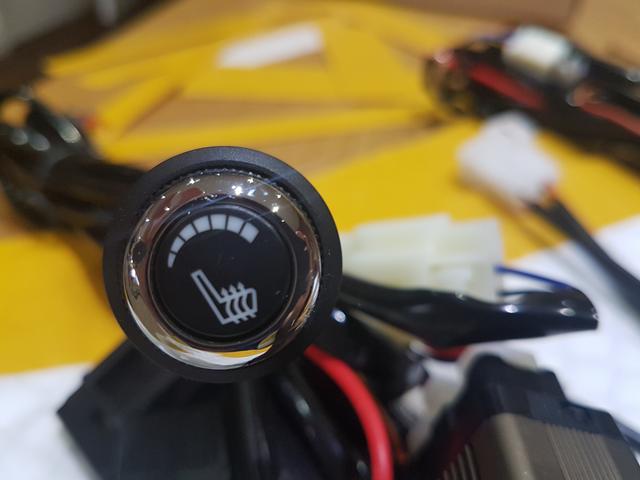
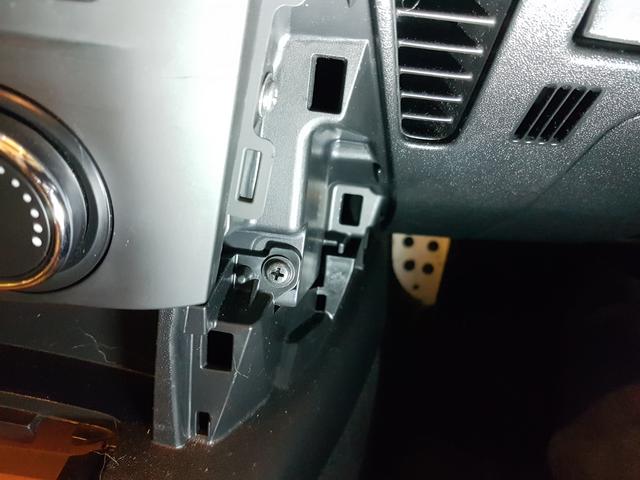
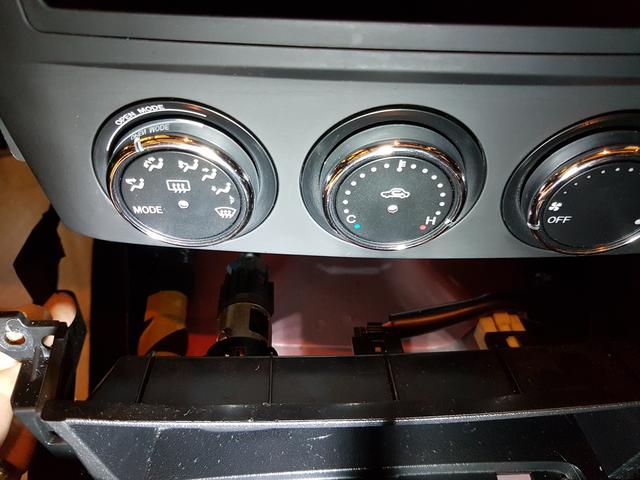
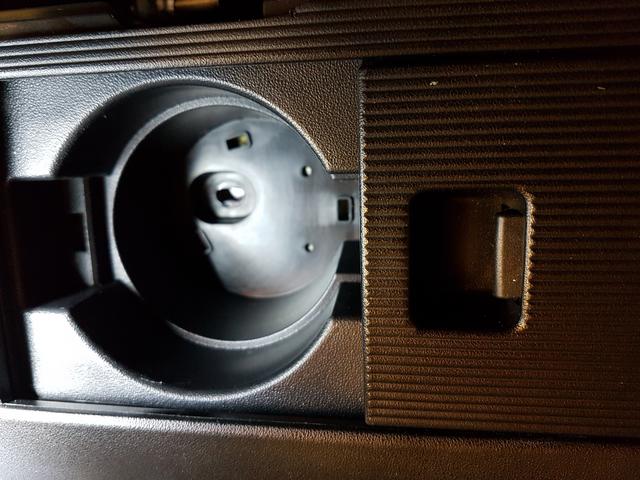
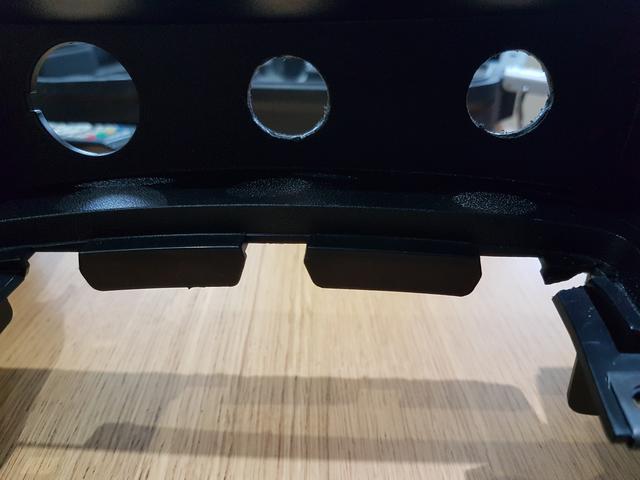
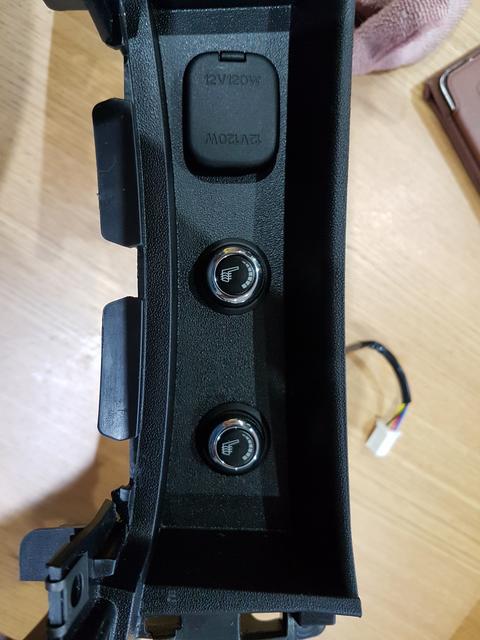
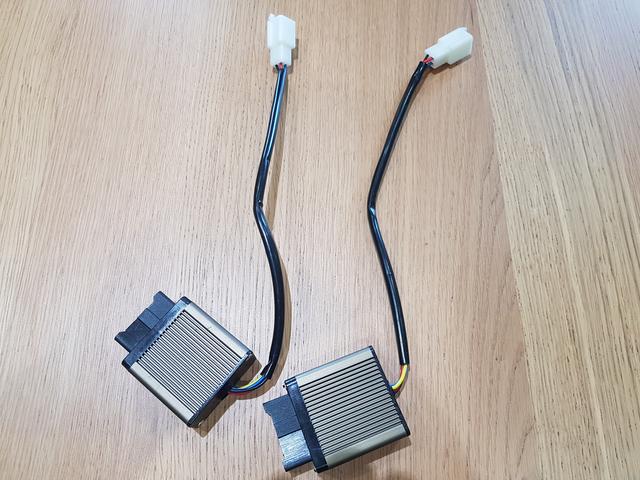
Obviously there are many suppliers of these around, probably a lot that are just resellers of the same kits? I found these to be manufacturers and “spares” are allegedly available, should something go wrong? In America they are sold with a lifetime guarantee, unlike here in the UK? 12 months I believe? Anyway, I went for this kit because of the control switches (one for each seat). They are 6 position rotary with chrome surrounds which match up with my radio knobs and heater controls  They also have an illumination in the chrome ring for verifying position, the same as the heated controls surround! The same colour too! Unfortunately, the seat symbols light up blue but not a big deal, they don’t illuminate when off? some kits have 2 position round bezels with a rocker switch, others are rectangular, all without the chrome accents. I was also concerned whether the rectangular ones would fit in the OEM switch positions next to the 12v accessory socket?

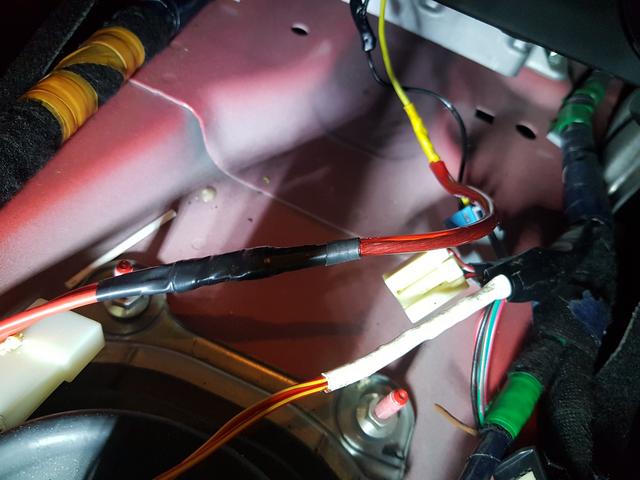
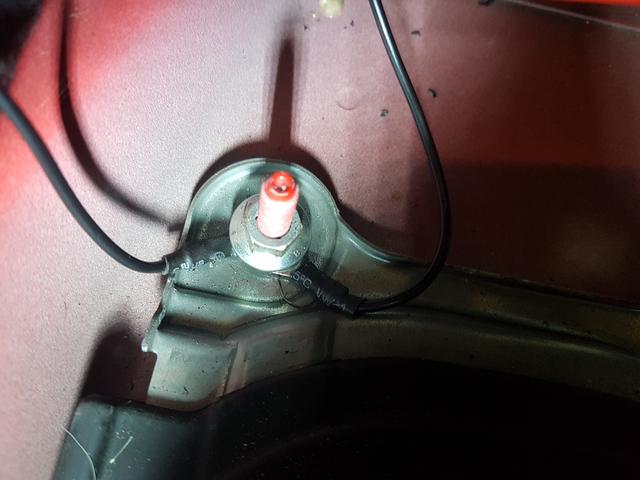
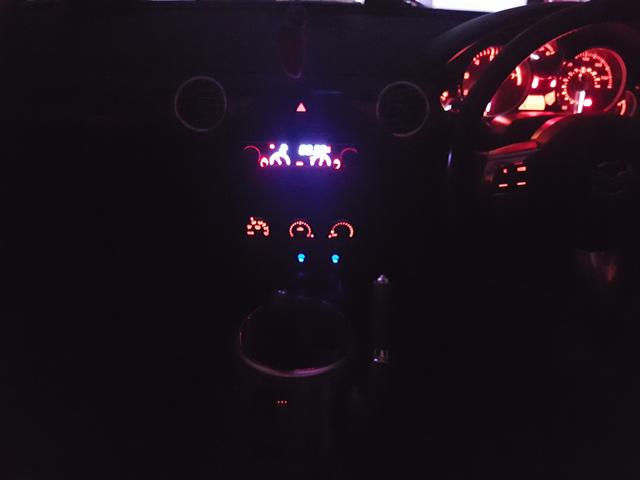
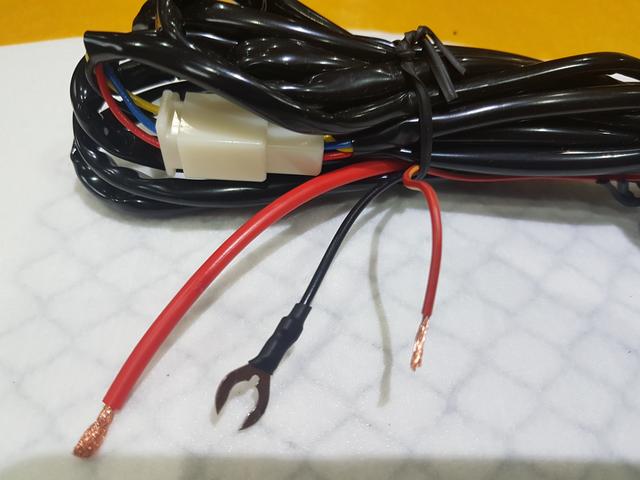
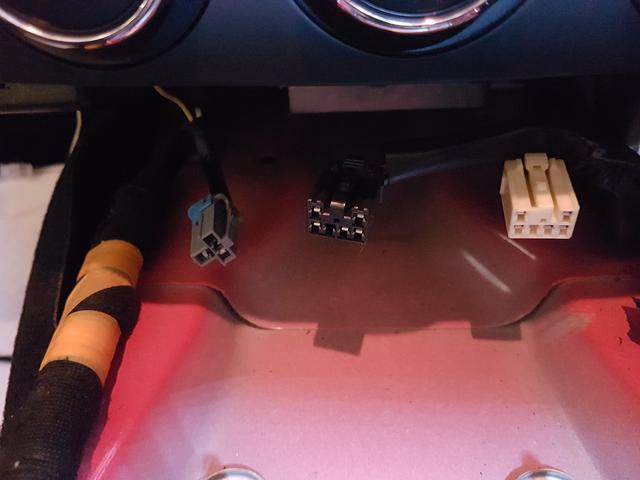
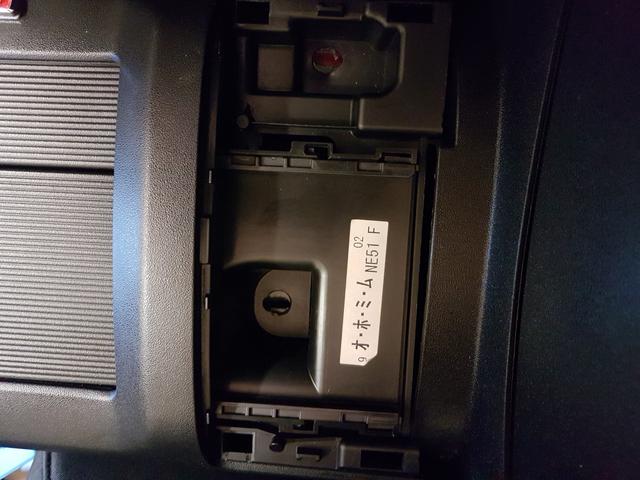
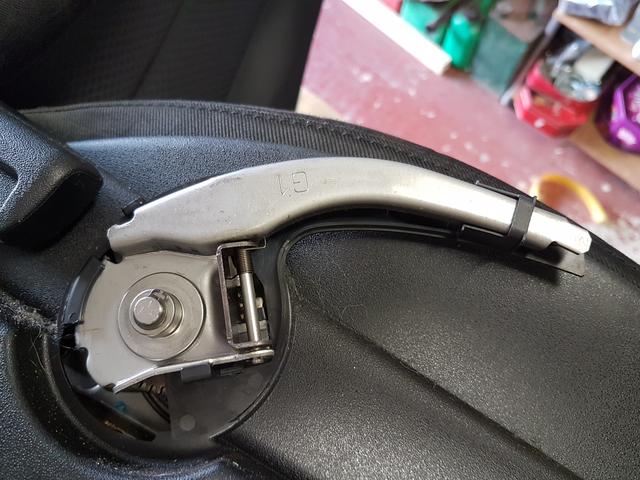
Plenty of cable so will easily mount in OEM position. I will keep updating as I go along with pics for anyone that’s interested? Thanks for looking 


good luck with fitting these barrie…they will be a nice addition …especially with the chrome .

Morning all ( or at least it was when I started to update this thread! ) anyway, I’ve been busy over the weekend so not had chance until today to make a start on the install. First job, after reading the instructions thoroughly, was to remove centre console and bottom fascia trim ( where the 12v socket lives) so I could mount the switches from the kit. I started by removing the 2 triangular side covers either side of the fascia that was to be removed.

These expose 2 screws that need to be undone for the lower fascia to come away.

I then moved to the rear of the centre console, another trim piece to remove, gaining access to 2 more screws. Already removed in this pic but you can see where they live?

Just a note on the trim piece, I’ve read several reports of the lugs/clips that hold it in place can snap off very easily? Maybe I’ve been lucky but not had any issues? Gently does it seems to be the way and I have a set of inexpensive trim removal tools to help here. Next screw, moving towards the front of the car is under a cover at the bottom of the front drinks holder, slide the top cover back and there is a little slot to help prise the cup holder base off. This reveals the relevant screw. Again, already removed.

Moving forward again, the next bit is to remove the little rectangular coin tray at the front edge of the centre console, again easy to prise off gently. This exposes the last two screws that hold the centre console in place. Once again, screws already removed.

Next is to unscrew the gear knob, anticlockwise, it might take a bit of force but is only screwed in place. Then, using a trim tool, prise off the handbrake gaiter and slide it off over the handbrake assembly. The centre console will lift up but is still held by the window switch harness. This needs unplugging but is a PITA to do? Easiest way for me was to access the plug (its white) from the driver side after tilting the console up and away from you.


Once the clip is released, the plug pulls off, freeing the console to be removed completely.

Moving to actual panel that needs removing for switch fitting, this is held in place by 2 screws and some clips.

Undo the screws and gently pull rearwards, this will release the panel, however it is still held by the 12v socket wiring and surprisingly for me, the OEM harness wiring plugs for guess what? Heated seats! I’m not sure what else is OEM in terms of the heaters, so just left them to be tucked out of the way as I have the new sub loom and switches with the supplied kit.

Next, I cut away the two rear switch blanks from the fascia panel with a craft knife.

I then marked the centres.


Using a 20mm spade bit, I drilled to openings for the new switches.


I tidied up the holes, which were ever so slightly smaller than the switches, using both a half round and a rat tail file and cut a very small slot on the 3 0’clock position on the side of the new holes. this is to receive a nib on the switch which helps locate it and stop it turning? Fed the wires through the hole from the front, pushed the switches in to position and hey presto! that bits done!


I feel like its taken longer to do this post than it has to do the work so far? Not to worry, I’ll be back with more when I work out where to pick up the feeds for the switches? I have a 12v 10A accessory live, a 12v 5a ignition live and a Ground wire, was thinking of using the 12v socket live for the 10A one although its a switched live itself so might not be correct, ground is obvious but where do I get the 5A ignition live from? I did check the plugs for the OEM heated seats and they do have a switched live? Perhaps I could use that? don’t worry I’m not going to blow either myself up or the car, proceeding with caution here! the rest of it is very straight forward if not time consuming? Thinking of sorting passenger side first as I can drive the car in and out of the garage in case I don’t finish a seat in the time I have? 

Thanks


Barrie


Nice job 

that’s the easy job done 

fitting the pads in the seats will be the challenge 

great post thou 

Absolutely fascinating!! Keep updating us on this please!!


Cheers!

Russ

I did this mod a couple of years back on my MK2. Best mod ever in my opinion. Warm seats on a cold morning are great. There’s a great post for helping to fit the pads on a MK2 here  https://www.miata.net/garage/upholstery.html

I imagine the MK3 seats would be similar. First one took about an hour, second about 40 mins. I used plastic cable ties instead of hog rings and it worked out very well. You can fit the cable ties then tighten them bit by bit as you go then cut the ends off. I hope it goes smoothly for you. Good luck.

Thank you guys!  I need all the encouragement I can get! Just got back in from garage after fitting the pads to the passenger seat? I’m now off to upload the pics I took so I can share the next part with you all. I’ve done several sets of MK1 tombstone seats over the years in terms of recovering them, so I have a supply of hog rings and pliers? I knew they would come in handy one day!  Ill try to show the various fastening options used on the NC seats? Some Hog rings, some plastic strips, Velcro and hook type thingamabobs

Barrie 

great job barrie
looks a very time consuming job , but will be worth it.


OK then, the next part of this project. Seat removal is very straightforward, 4 bolts and a couple of electrical connectors under the base.

Once the bolts were removed, there is enough room to tip the seat sideways towards the centre console and unplug 2 connectors, I don’t have airbag seats and obviously they’re not currently heated? See what I did there?

I set up a couple of trestles in the garage with an offcut of worktop that I have saved for just such an occasion! Here is a pic of the underside of the seat on the temporary workbench. It shows the connectors, I think they are for seat occupancy sensors and the seatbelt warning chime?

I have never stripped a mk3 seat of its covers before so had a quick look around it all to see the best way to attack it? I didn’t need to split the seat base from the backrest, or take the covers off completely so that made things a little easier. I did have to take this off which is on the outer edge where the seatback tilt lever is?

Its held in with one machine screw in the recess behind where the lever would go? you can just see the hole for it. Also had to take this off which was a bit of a pain?

It fits over the metal lever mechanism and it looks a bit gnarly along the top edge where the lever engages? I ended up levering between the rear edge of the handle and the seat back with a piece of wood, while trying to disengage the metal tab from the handle (it locates where the little rectangle is on the handle, top left on the pic) Anyway managed it in the end. The large plastic cover has a couple of concealed fixings too which are difficult to disengage.

This is what the seat looks like with the cover and handle removed. Just gives better access to the seat cover for removal.

I got a bit carried away and didn’t get actual shots of the pads in place before recovering ( will get some when I do the drivers side ) I did get some shots of the hog rings in place which I cut through with wire cutters and some showing the plastic strips and hook arrangements for holding the cover neatly in place.


This is the weapon of choice for the hog rings, they are basically like a big staple, the fit into grooves on the jaws of the pliers and when you squeeze the pliers it forms a ring. You really have to push hard into the foam of the seats though as there are wires embedded in the foam to engage the hog rings? Had one or two that I missed so had to have another go 

The seat back has zipped sides which help enormously, I only rolled it up and held it out of the way while fixing the pad in place. Didn’t have to remove the whole cover.

Pic of the seat back with the cover out of the way


Like I said, will post up pics when I do drivers side, of the pads in place prior to replacing the seat covers. Here are a couple of the finished seat. The one with the seat back in the car looks very faded but its the sun ( I know, what sun?) 

Not had chance to look at the wiring, however I have the lead from the seat heating element routed up into the area of the centre console behind the transmission tunnel carpet and alongside the main wiring harness so its safe and wont get snagged. Have to say, the kit is very good in respect of it being sectional? short switch cables to connectors, main loom with relay and hard wiring for OEM loom, another section to seat plugs, it all makes for ease of install and there’s probably enough cables to do rear seat install? not that we have rear seats 

Right, that’s it for now. Hopefully back on it tomorrow? Meanwhile any electrical guru’s who can help with the wired connections? I know, its only three wires but don’t want to get it wrong!

Thanks

Barrie

Morning all! having a coffee break after this mornings session in the garage. Managed to finish the drivers seat heater pads install. So, first off, here is a pic of my “ahem” workbench 

My garage is small, so any work usually involves getting the car out so I can work inside the garage? Anyway, I got the seat out and onto the bench, its slightly different from passenger side as it has manual height adjustment too? Not an issue but I initially thought the trims would have to come off to undo the seat cover?

This was going to be a bit more involved than the passenger side? I managed to release the plastic handle cover from the mechanism

This revealed the mechanism like this?

I still thought at this stage, i needed to remove the trim to get at the seat cover fixings, so on closer inspection, i could see a cir-clip holding the gear wheel in position? like so


So, i broke out these guys from the tool box! 

I removed the clip and started to ease the retaining collar off the mechanism, having been in a position previously of dismantling HLA’s on one of my MK1’s when one of the springs flew off into the unknown, never to be seen again? I paused, took a breath and decided I’d try without removing all the gubbins. Glad I did in the end 

I started with the seat base, the cover this time is mainly held on with plastic strips that either hook over or push into grooves? funny the difference between that and the passenger side? Hers a pic of the seat base cover being removed. The outer grooves in the foam are where the hog rings attached to metal wires in the foam? The rings encircle the white plastic rod you can see on the left of the pic, pass under the metal wires in the foam and clamp around them, providing a secure and concealed fixing. 

Here is a close up of one of the grooves, revealing one of the metal wires that the hog rings attach to.

Right, i did say previously that I would get some pics of the heat pads being installed as I forgot on the other seat?  So here we go. The first one is the full pad prior to fitting, the screwdriver is pointing to the thermostat which is contained within the pad itself and is a fixed position. Not easily seen here in this pic. You can also see the connecting loom where it exits the pad, and the connector plug.

To make this a little clearer, i held a pad in the air where you can see both the thermostat and the carbon honeycomb arrangement of the heating element within the pad. EDIT: forgot to mention earlier, the thermostat needs to be sat in the foam of the seat rather than on the seat foam? Craft knife to cut out a small piece of foam corresponding with the thermostat position when test fitting. It smooths out the seat cover too, no lumps!

The next stage is to cut the pad to size, it has a surplus on one edge with no heating element in it but you can actually cut it down further in length, cutting through the actual carbon element. I just needed to remove the surplus bit using a pair of Mrs B’s scissors?  On the rear (face down) side of the pad are self adhesive strips along each side, these are the orange strips. Peel them away and press down firmly onto the foam of the seat. Apparently, the adhesive reaches maximum strength in 48 hours.

I refixed the base cover and moved onto the backrest, same procedure as base. the connector wires need to be at the rear of the base cushion and the bottom of the backrest cushion. They then exit the seat together, i tie wrapped them under the seat, making sure that nothing fouled on refitting the seat in the car and that there was sufficient slack on the cables so if tilting, sliding or height adjusting, nothing is going to be damage.

Finished seat pic, ready to go back in the car  again, i fed the connector cables behind the transmission tunnel carpet, up into the area of the centre console, which is still out of the car. This will allow me great access to sort out the wiring. Oh, did I mention wiring? I’m the worlds worst at electrics, having looked again at the instruction, there is a 5A switched live, Ground and a 10A accessory live? I presume the switched live activates the relay when switched on, allowing the 10A accessory live to power the heaters? I’m going to check the OEM harness plugs that I found behind the fascia for OEM heated seats. There is definitely a switched live there? might be an accessory feed too?  I’ll be back either with working seats  or a burnt out shell! 

Barrie


1 Like

Good reading so far Barrie, I’ve had my bum burners on this morning, up in the Peak District.

It’ll be worth it when it’s done

Ha! cheers Mick! its just the electrics bit now and then putting the bits back into the car, hopefully wont be long before i’m back posting the final chapter of this saga? 

Barrie


1 Like

Barrie, great read, great photo’s now all I have to do is ask SWMBO if I can have then and find them on Amazon

John

Ha!  That’s great John! Hang on a minute, why am I laughing? Mrs B is totally unaware that I have these and that I’ve spent the last 2 days faffing with them! She goes out to work while I’m retired and look after things at home? Including the transport obviously  I’m hoping when she experiences the sensation of a warm seat ( I won’t tell her they’re fitted ) I can break it to her gently 

Barrie


nearly there now barrie, your doing a grand job , as always…
great pics too,

Barrie, the problem I have! is she will know right away as I can here the comment now when she gets into the car next time… “I think I have wet myself the seat feels warm” - I rest my case… but I’m still going to look at getting them.

Looking forward to your next installment on fitting.

John

Well done on the project and for creating a great thread.

Thank you, I’ve still to sort the wiring and get it all back together so fingers crossed! 

Barrie


Blimey! how time flies 

Good afternoon fellow ( and fellowes’s, not sure if that is even a workd? )   MX5 owners! welcome back to the penultimate chapter of my heated seat install! Yes there will be a concluding chapter to follow 

Anyway, during the night I had an Epiphany! Mrs B is in London on a work related conference and I don’t sleep very well on my own, so I was laid awake considering the way forward on the wiring of my install when, PING! I had a light bulb moment!  I realised that I’ve been worrying unnecessarily about the accessory feed to the wiring? I was thinking it had to be a permanent live ( like the radio supply that keeps the memory alive when the main unit is off? Totally not required, the 10A supply now comes on at accessory position on the ignition switch and the 5A when fully on 

So, with that in mind, after taking the St Bernard for his morning constitutional

I started the electrical connections with this


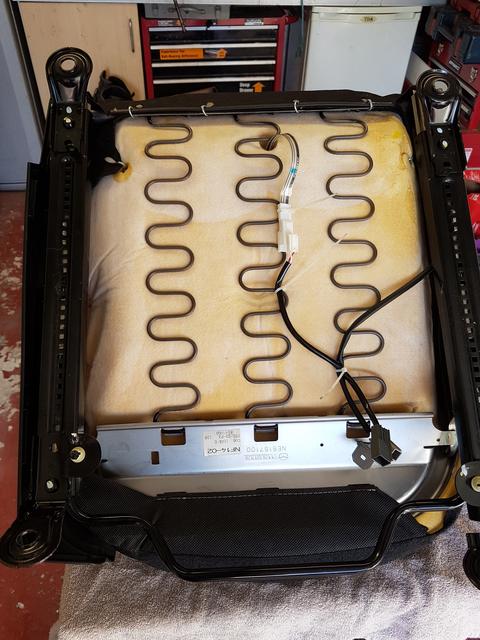
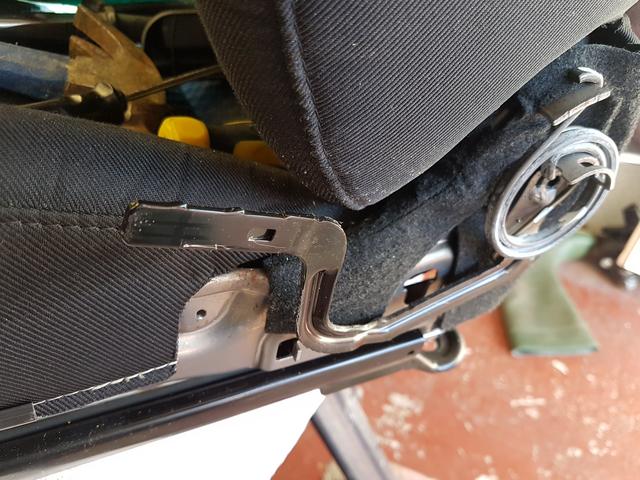
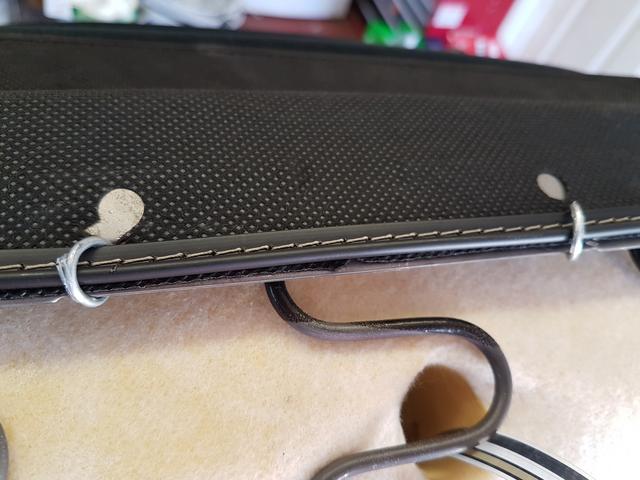
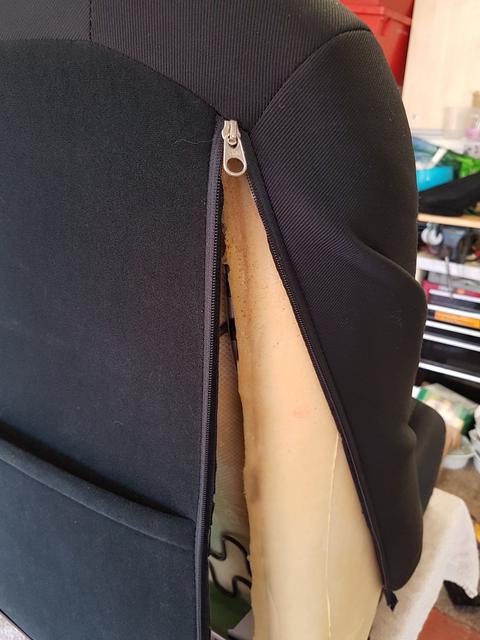
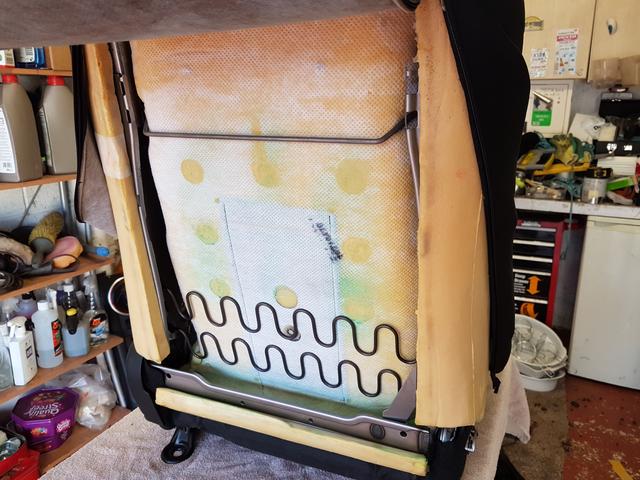
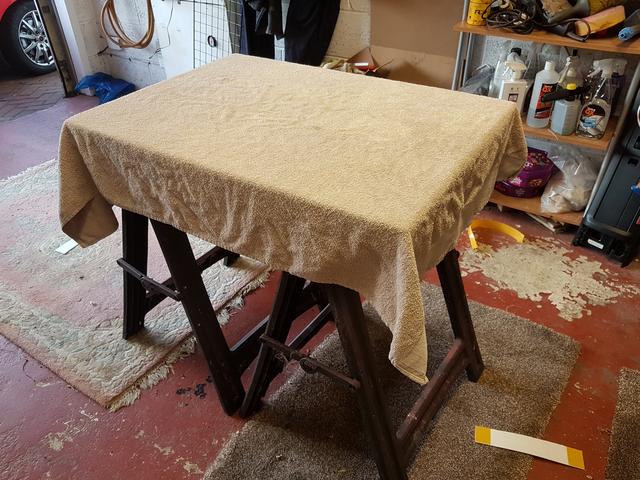
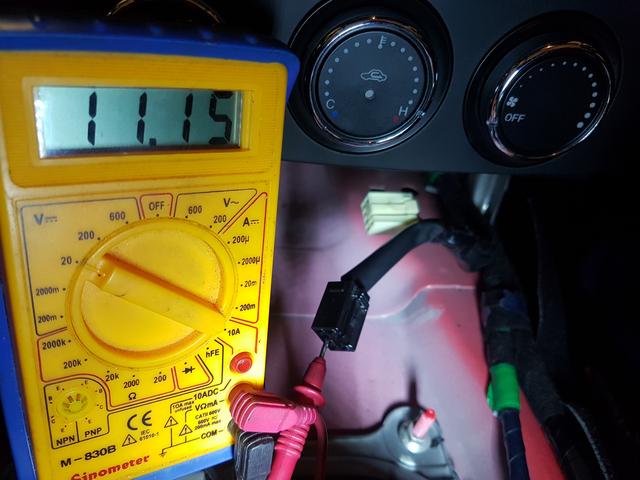
Always a good place to start . I joined the two 10A accessory feeds together and formed one connection, soldered and heat shrink applied Although, i did not have a large enough diameter heat shrink sleeve to go over the entire joint so sealed the end of the insulation wrap with a short piece.

This is one of the 5A switched feeds, again, I joined these together using the heat shrink and solder, then spliced into one of the OEM heated seat plugs that I discovered when dismantling the car?

I checked the terminal corresponding to a switched supply on the plug. Voltage is a bit down but the car has been stood a while? Confirmed it was brown wire.


Finally, ground connection  This was the only one I was sure about?  Used one of the 10mm captive bolts around the gear turret, this makes a direct connection with the chassis. Here is a pic also of the relays provided in the kit, quite nicely finished in aluminium casings with a heat sink on the back?


So, there I was, all the wiring laid all over but fully connected both by plug/socket in the aftermarket sub loom and by direct physical connections onto the car. Holding my breath and crossing my fingers, i switched the ignition to accessory position and this happened. 

Then I switched to the next position ( normal running position everything live ) and this happened

You can see the orange dots in the chrome bezels showing position 1 of 6 on the heater controls! Here’s a couple of other pics of the controls illuminated.

Got a bit excited on the last pic and turned up the drivers seat heater to 6!! within a very short time I felt the warm ambient feeling that I’d been craving for?  That’s all for now folks, i need to get back at it and fathom a way of getting all the wires/relays/connectors tucked away safely and then fit the panels back into their respective locations on the car. Once all that’s done, a few more pics to conclude and job done!!

Barrie


1 Like