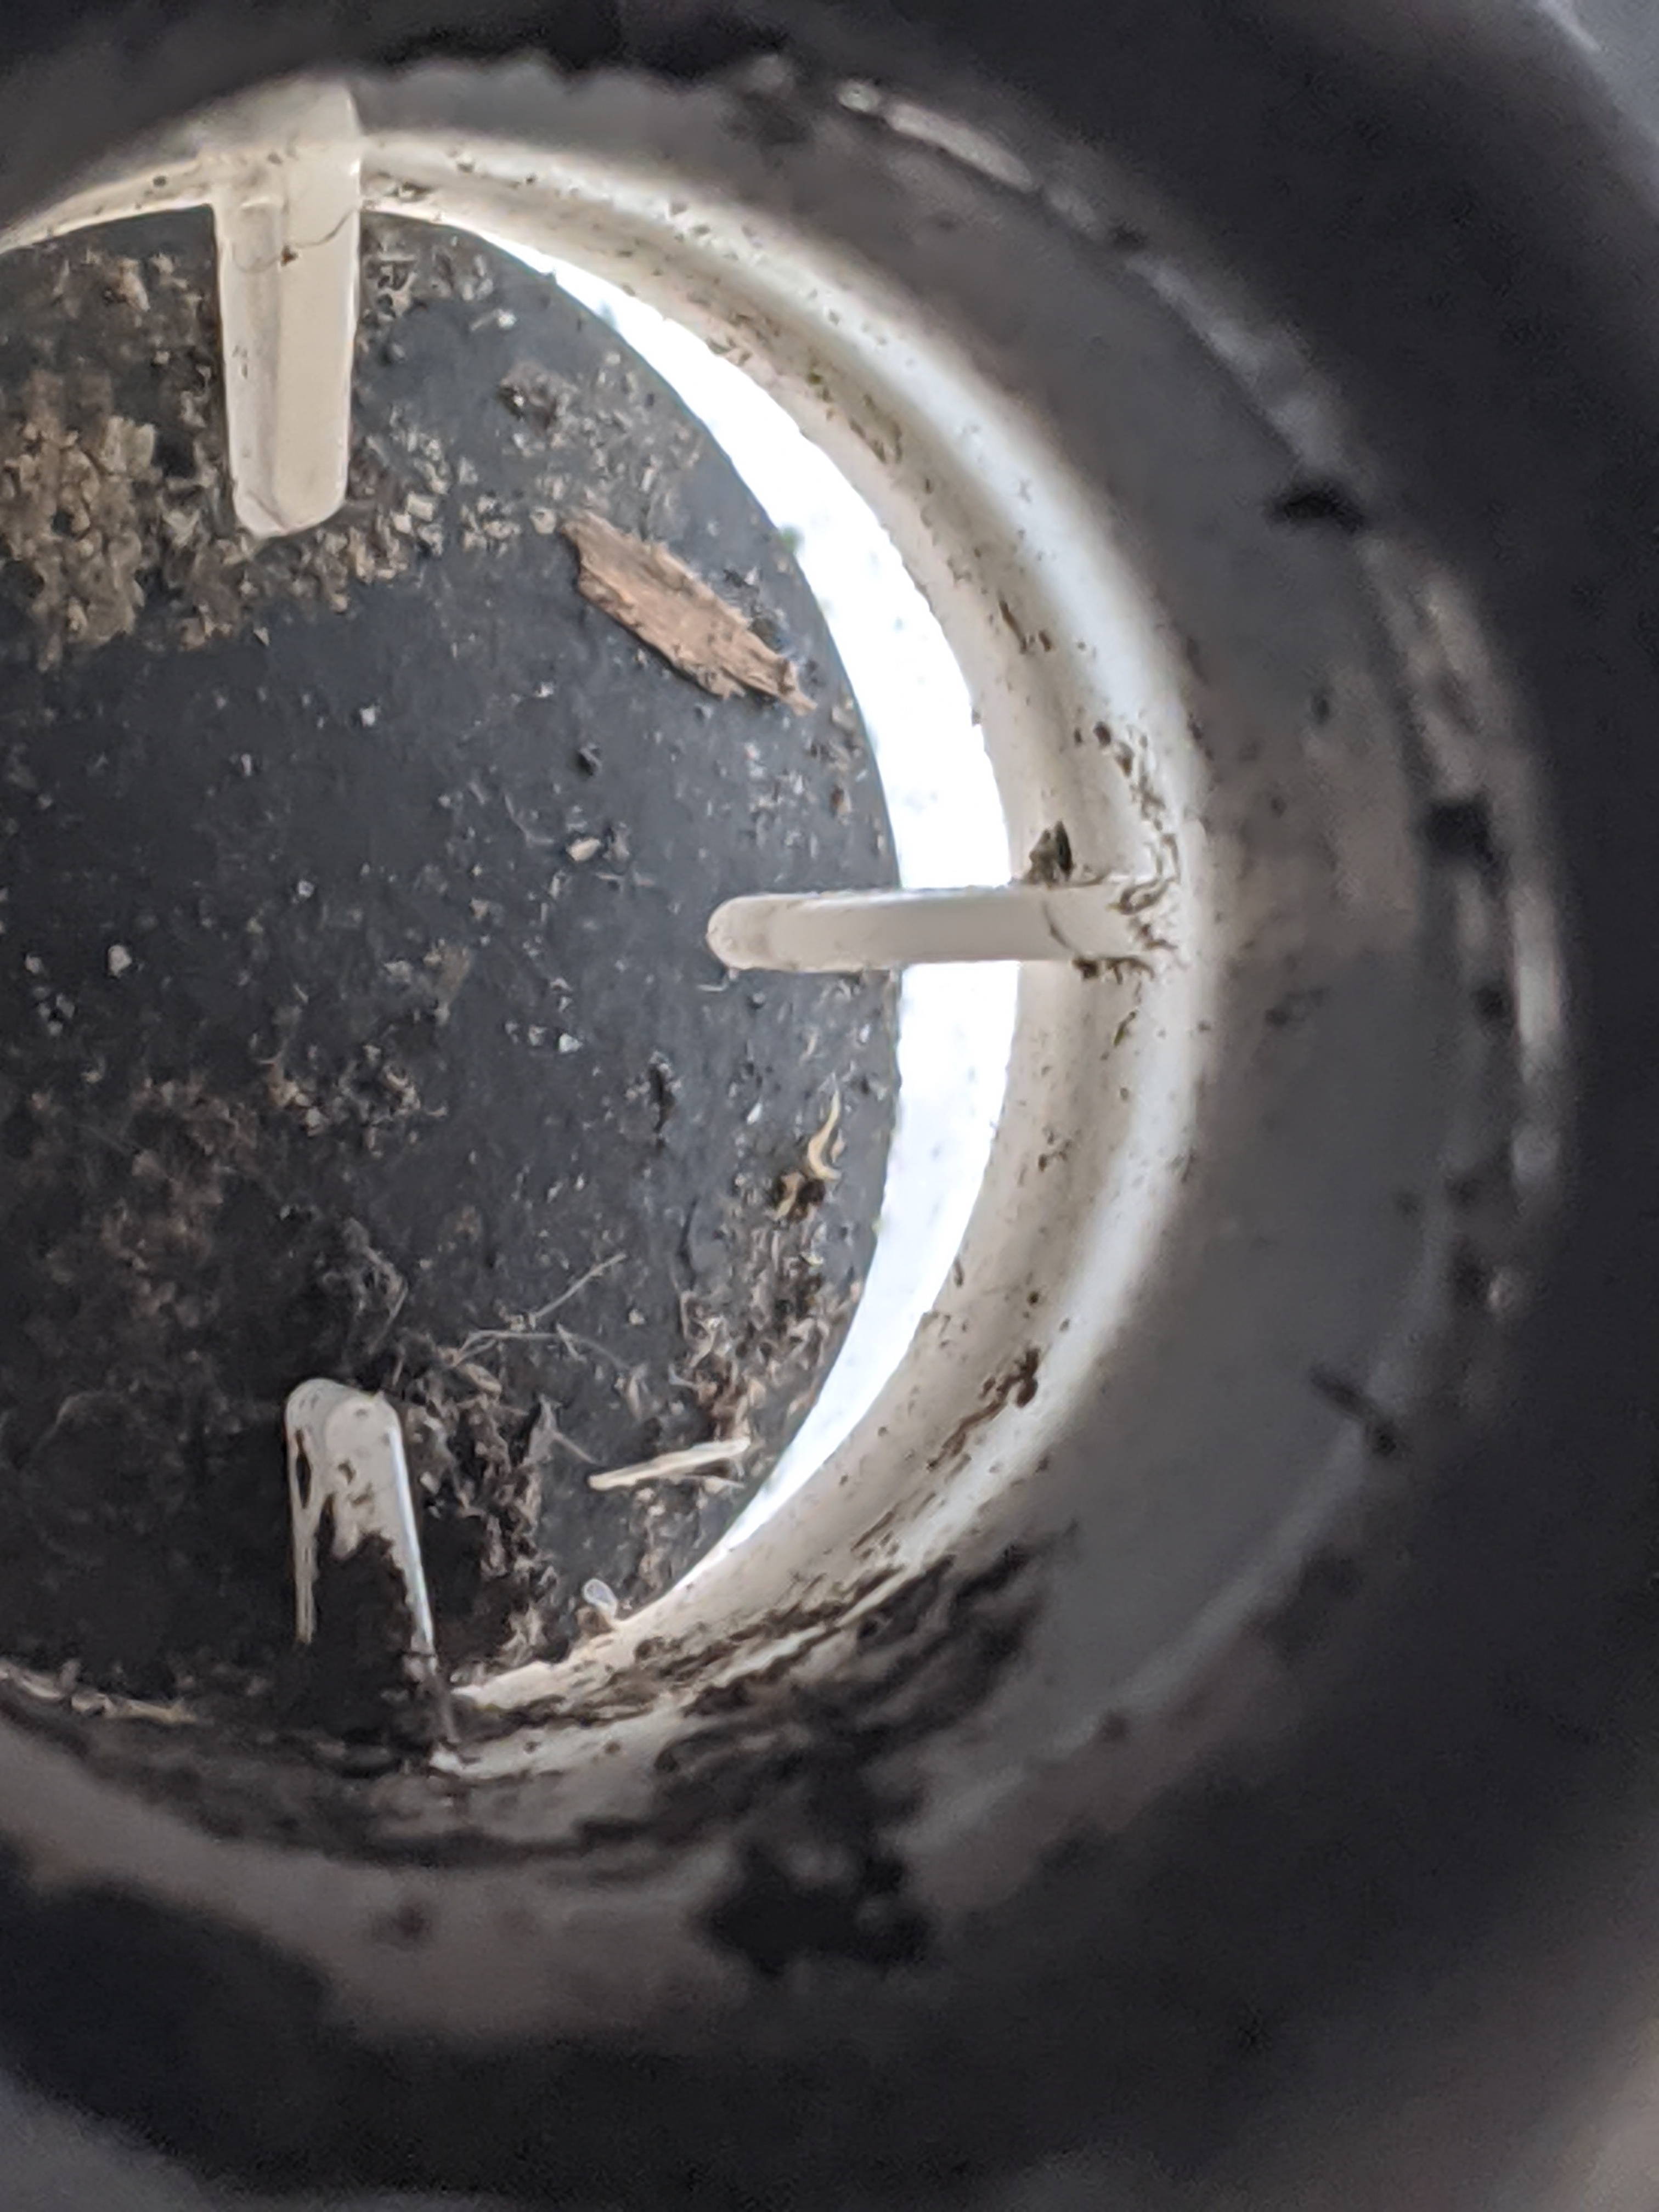
As I was dismantling the rear chassis like you do… I came across the often mentioned drain holes and the one way flaps.
As most people will never get to this level of dismantling I thought it possibly helpful to show you what is being talked about rather than trying to visualise this benign object.
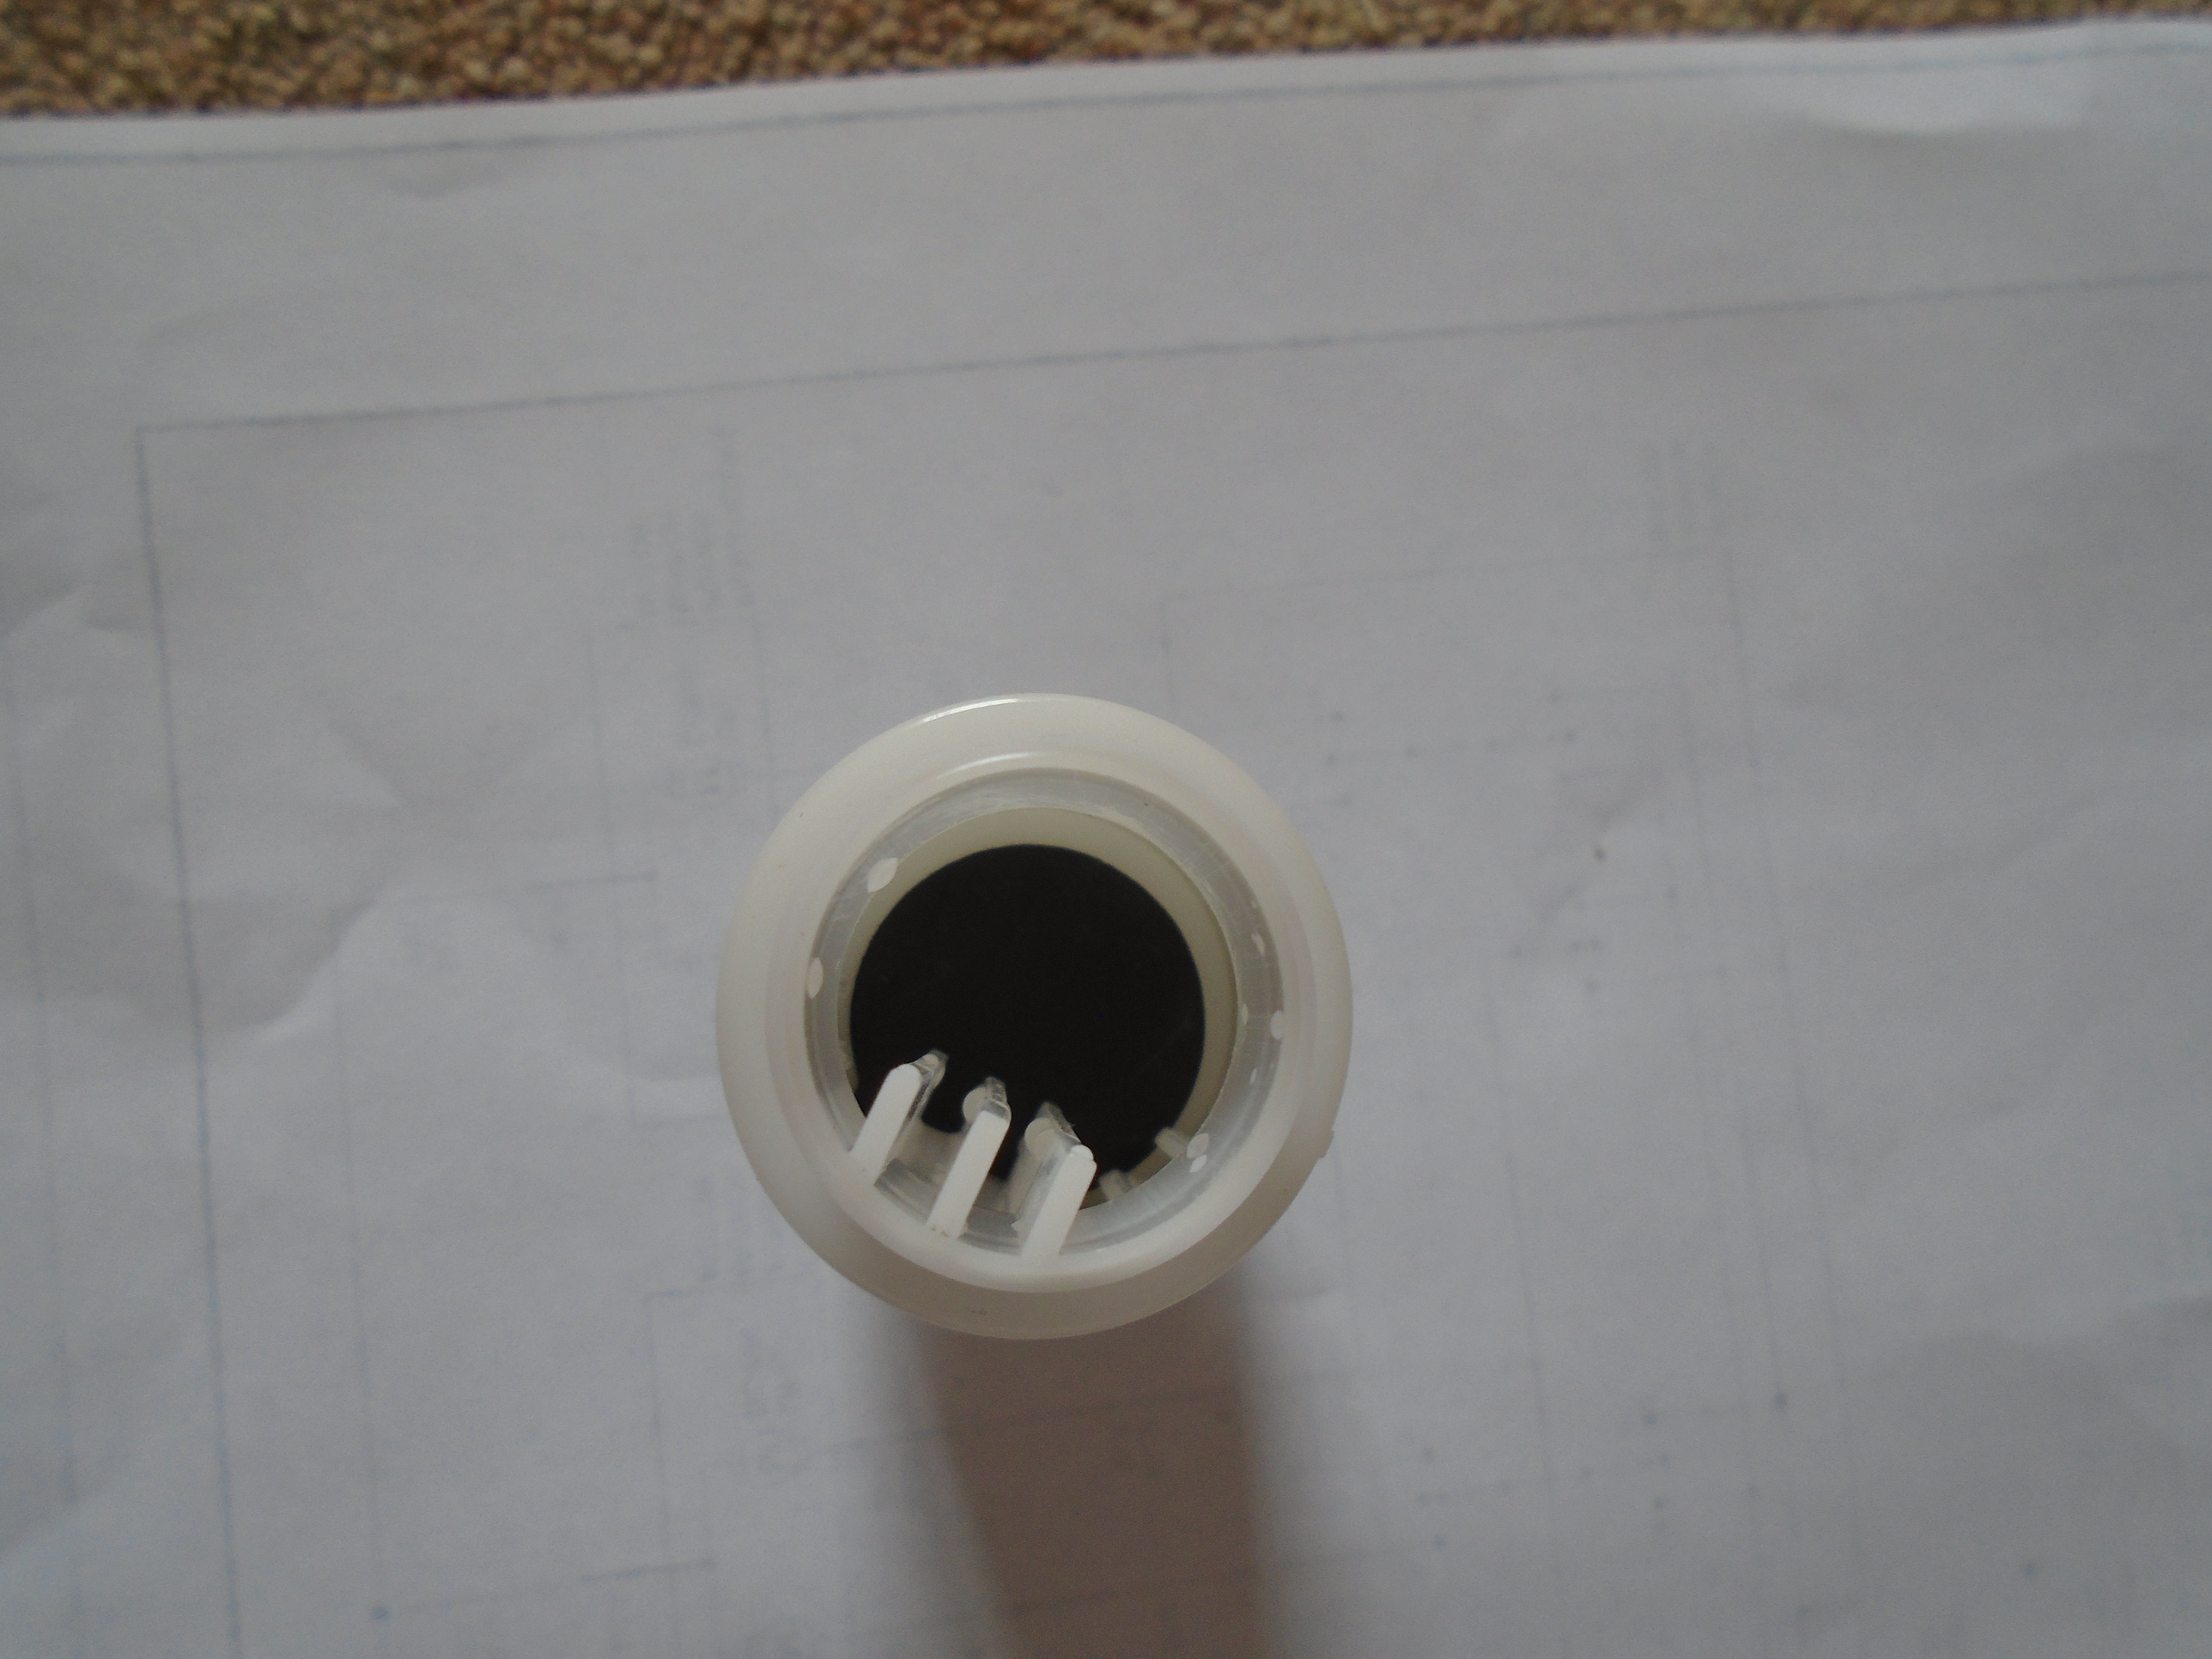
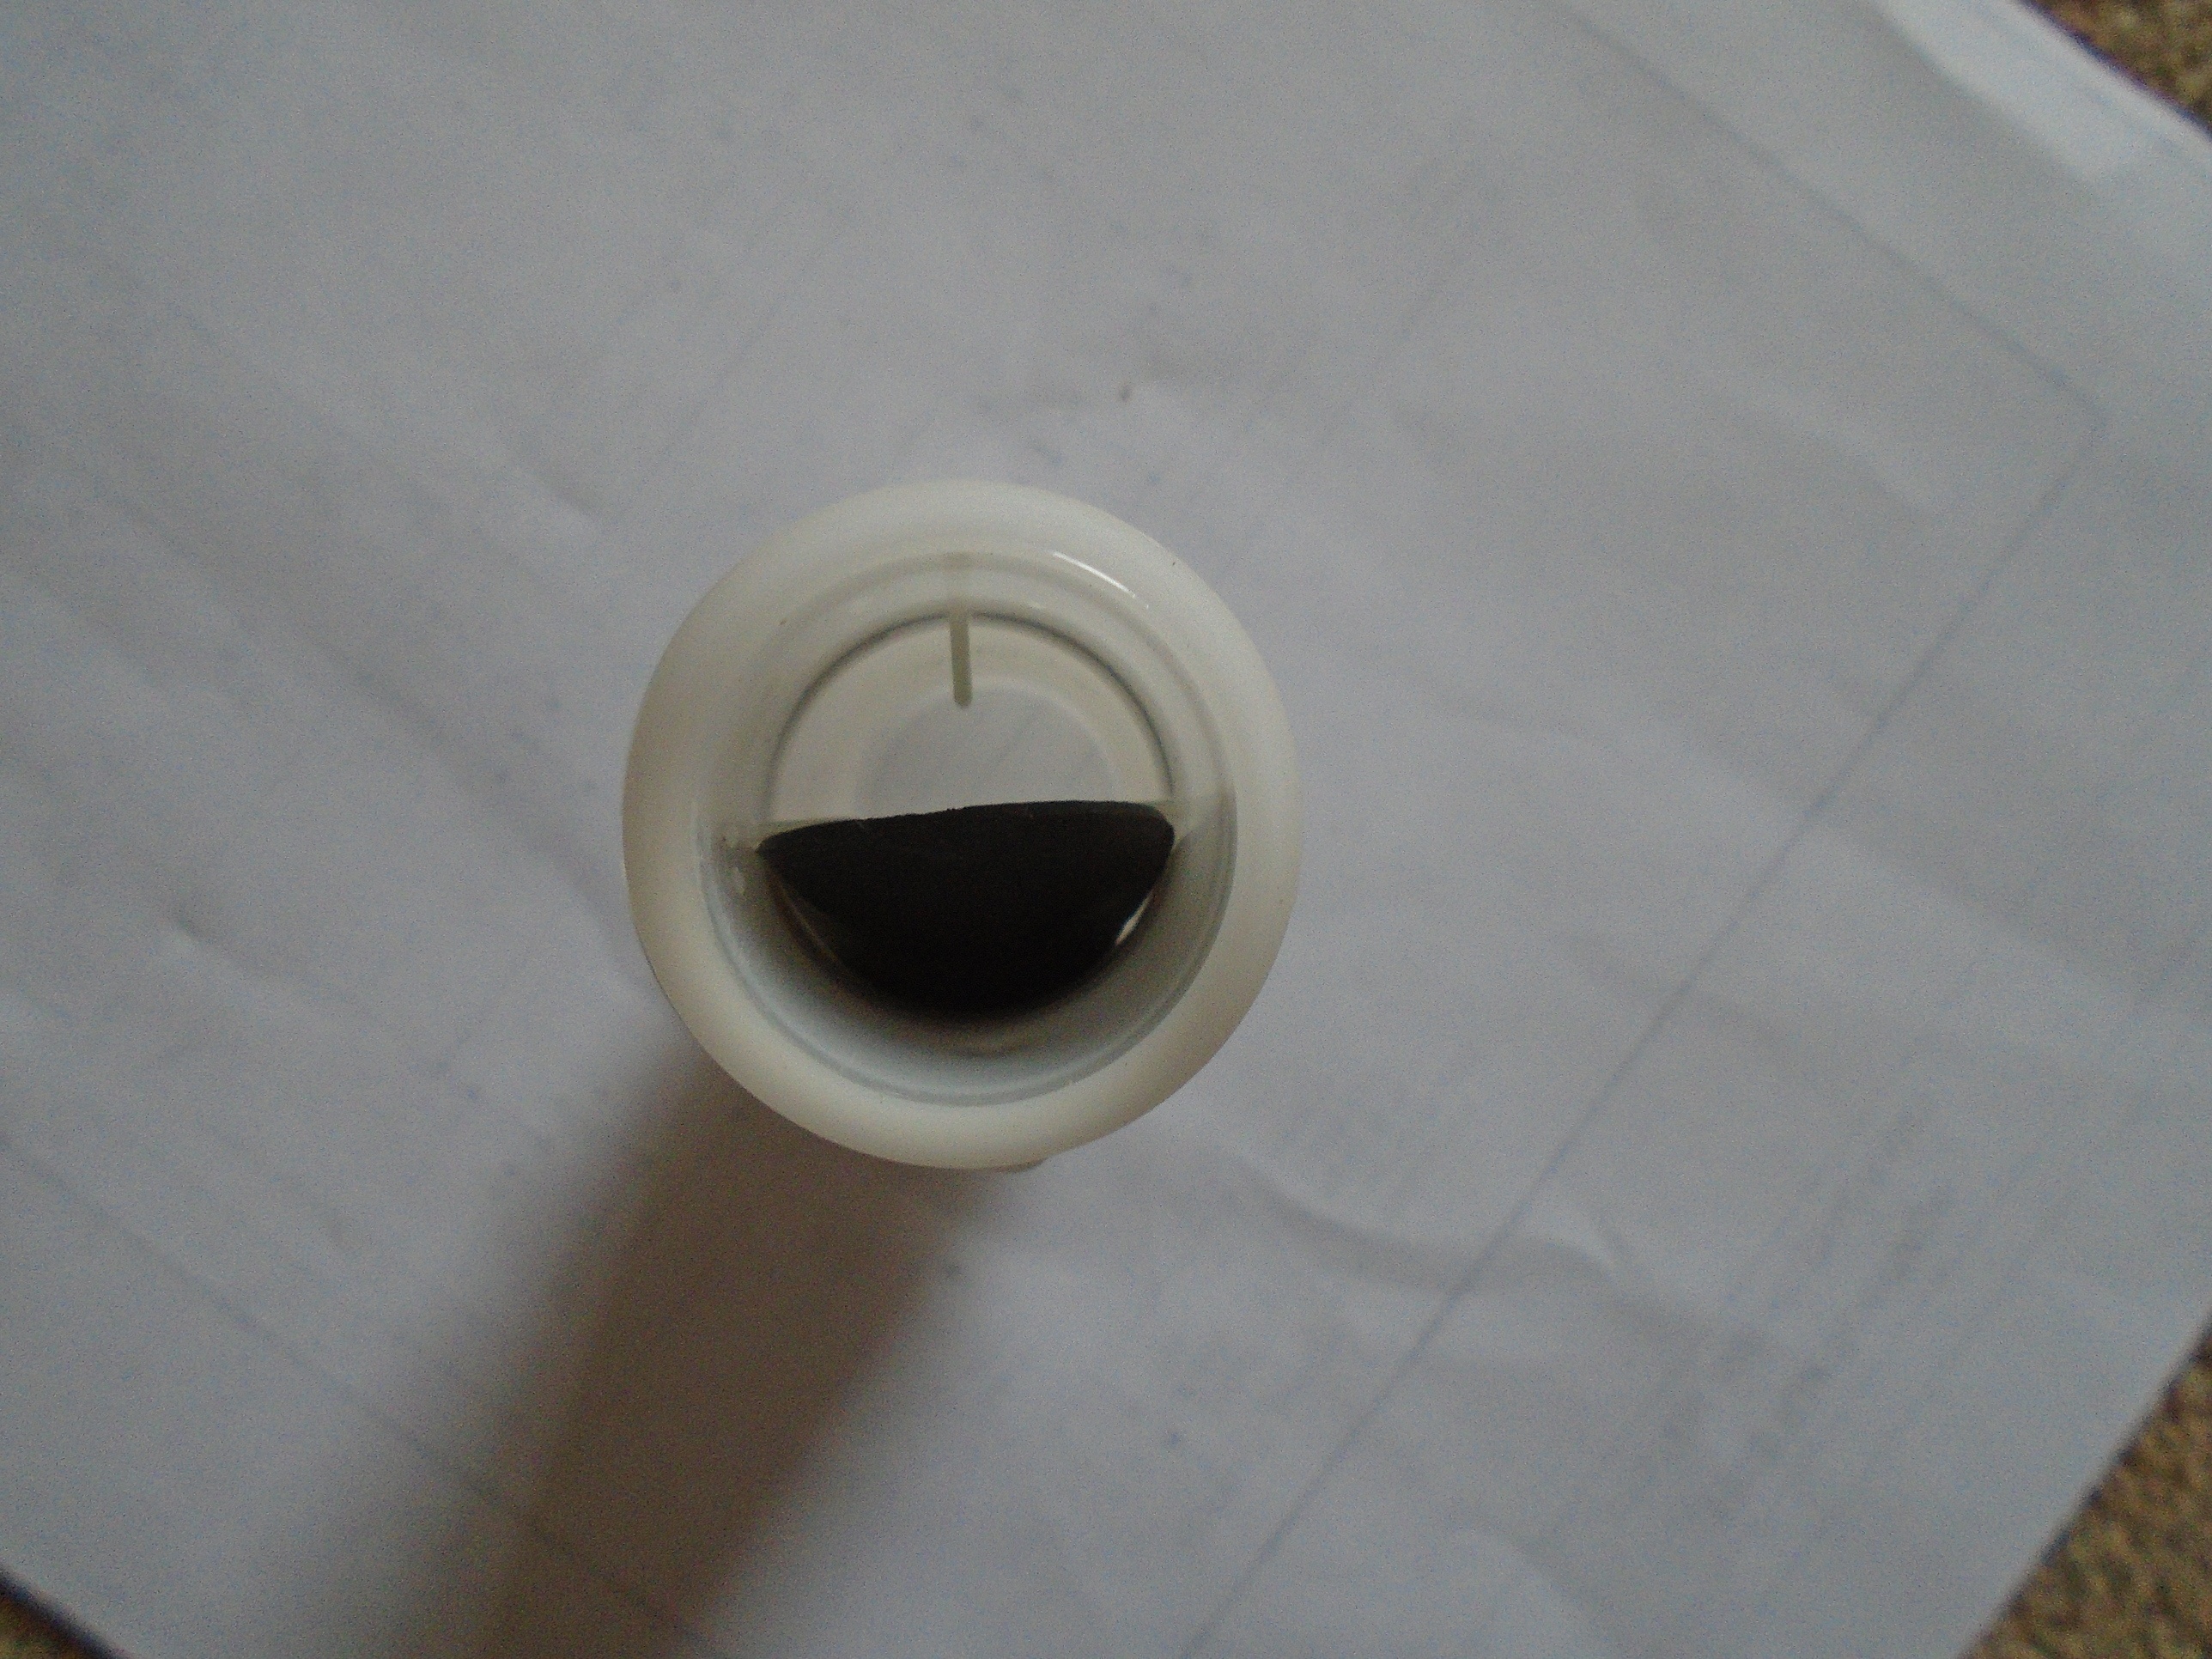
There are two pipes that direct water from the inside of the rear hood area out through the chassis rail through two one way valves and reputedly prevent road noise interfering with driving bliss.
What I did not realise is there are two flap valves.
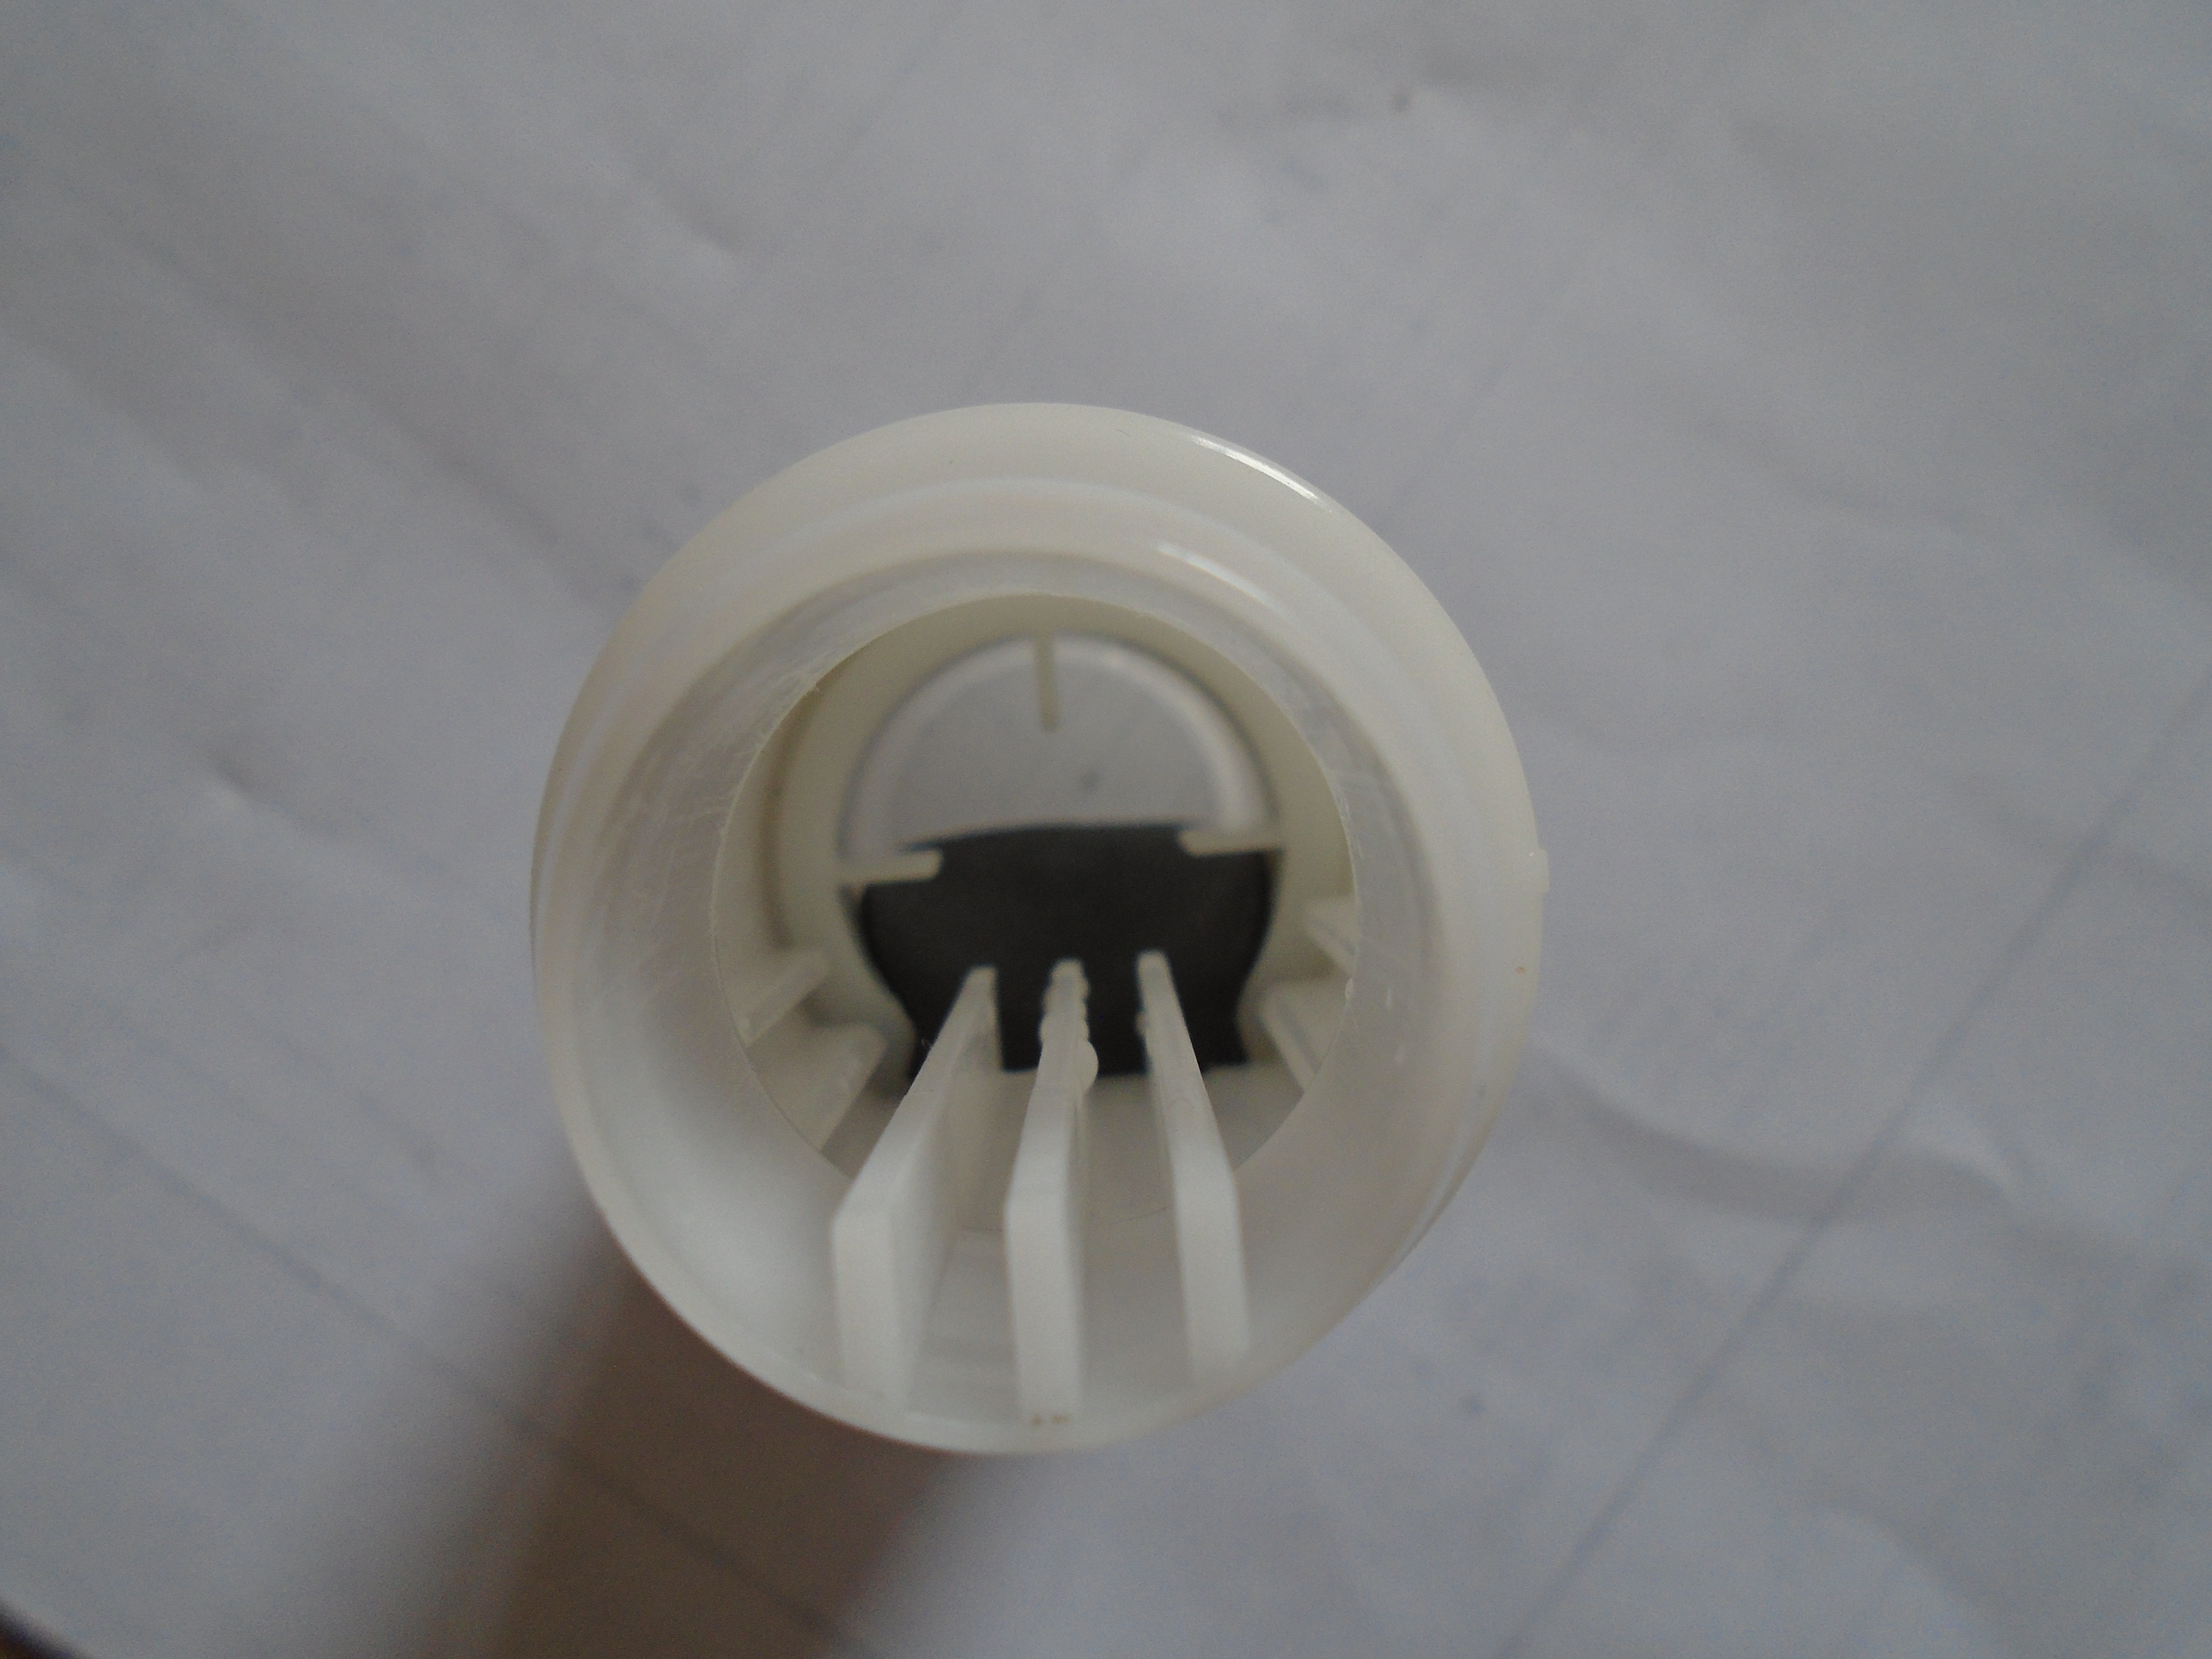
I hope the pictures shows you what you will probably never see for yourselves.
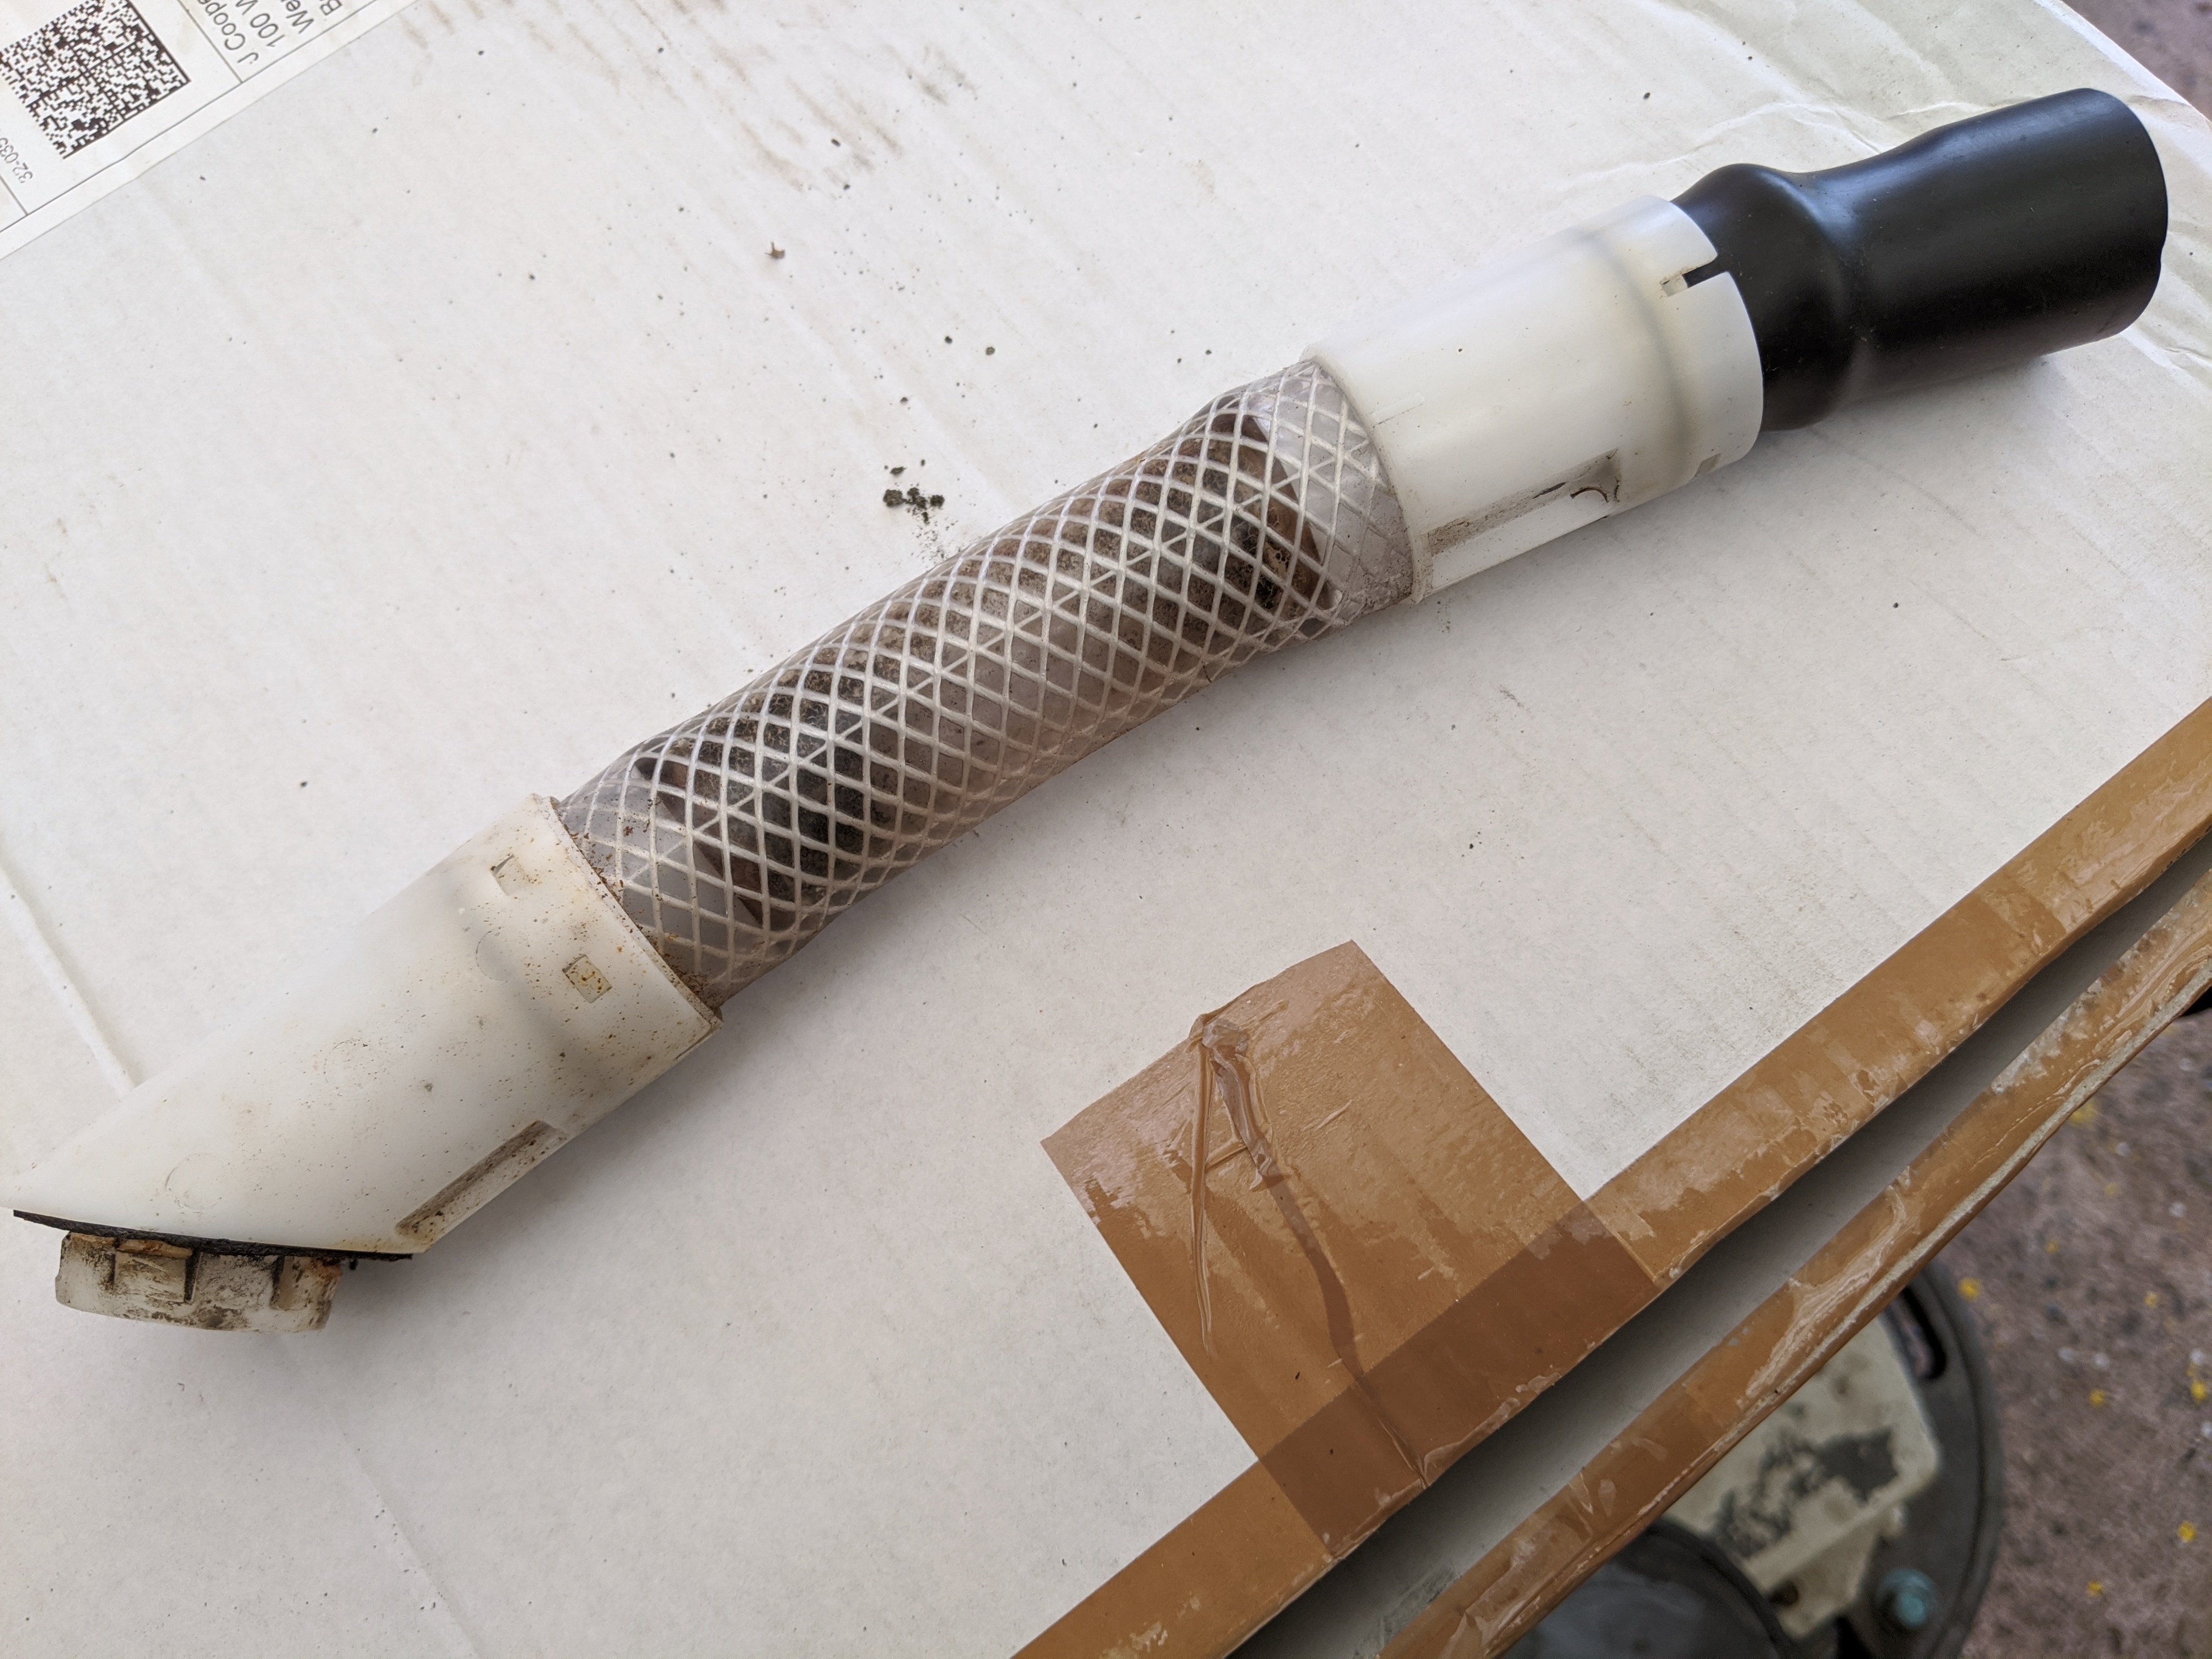
If anyone wants a spare I have two, replaced by removing the seat belt and the plastic box behind it, to gain access to the inside of the rear chassis chamber and the pipe running through the middle.
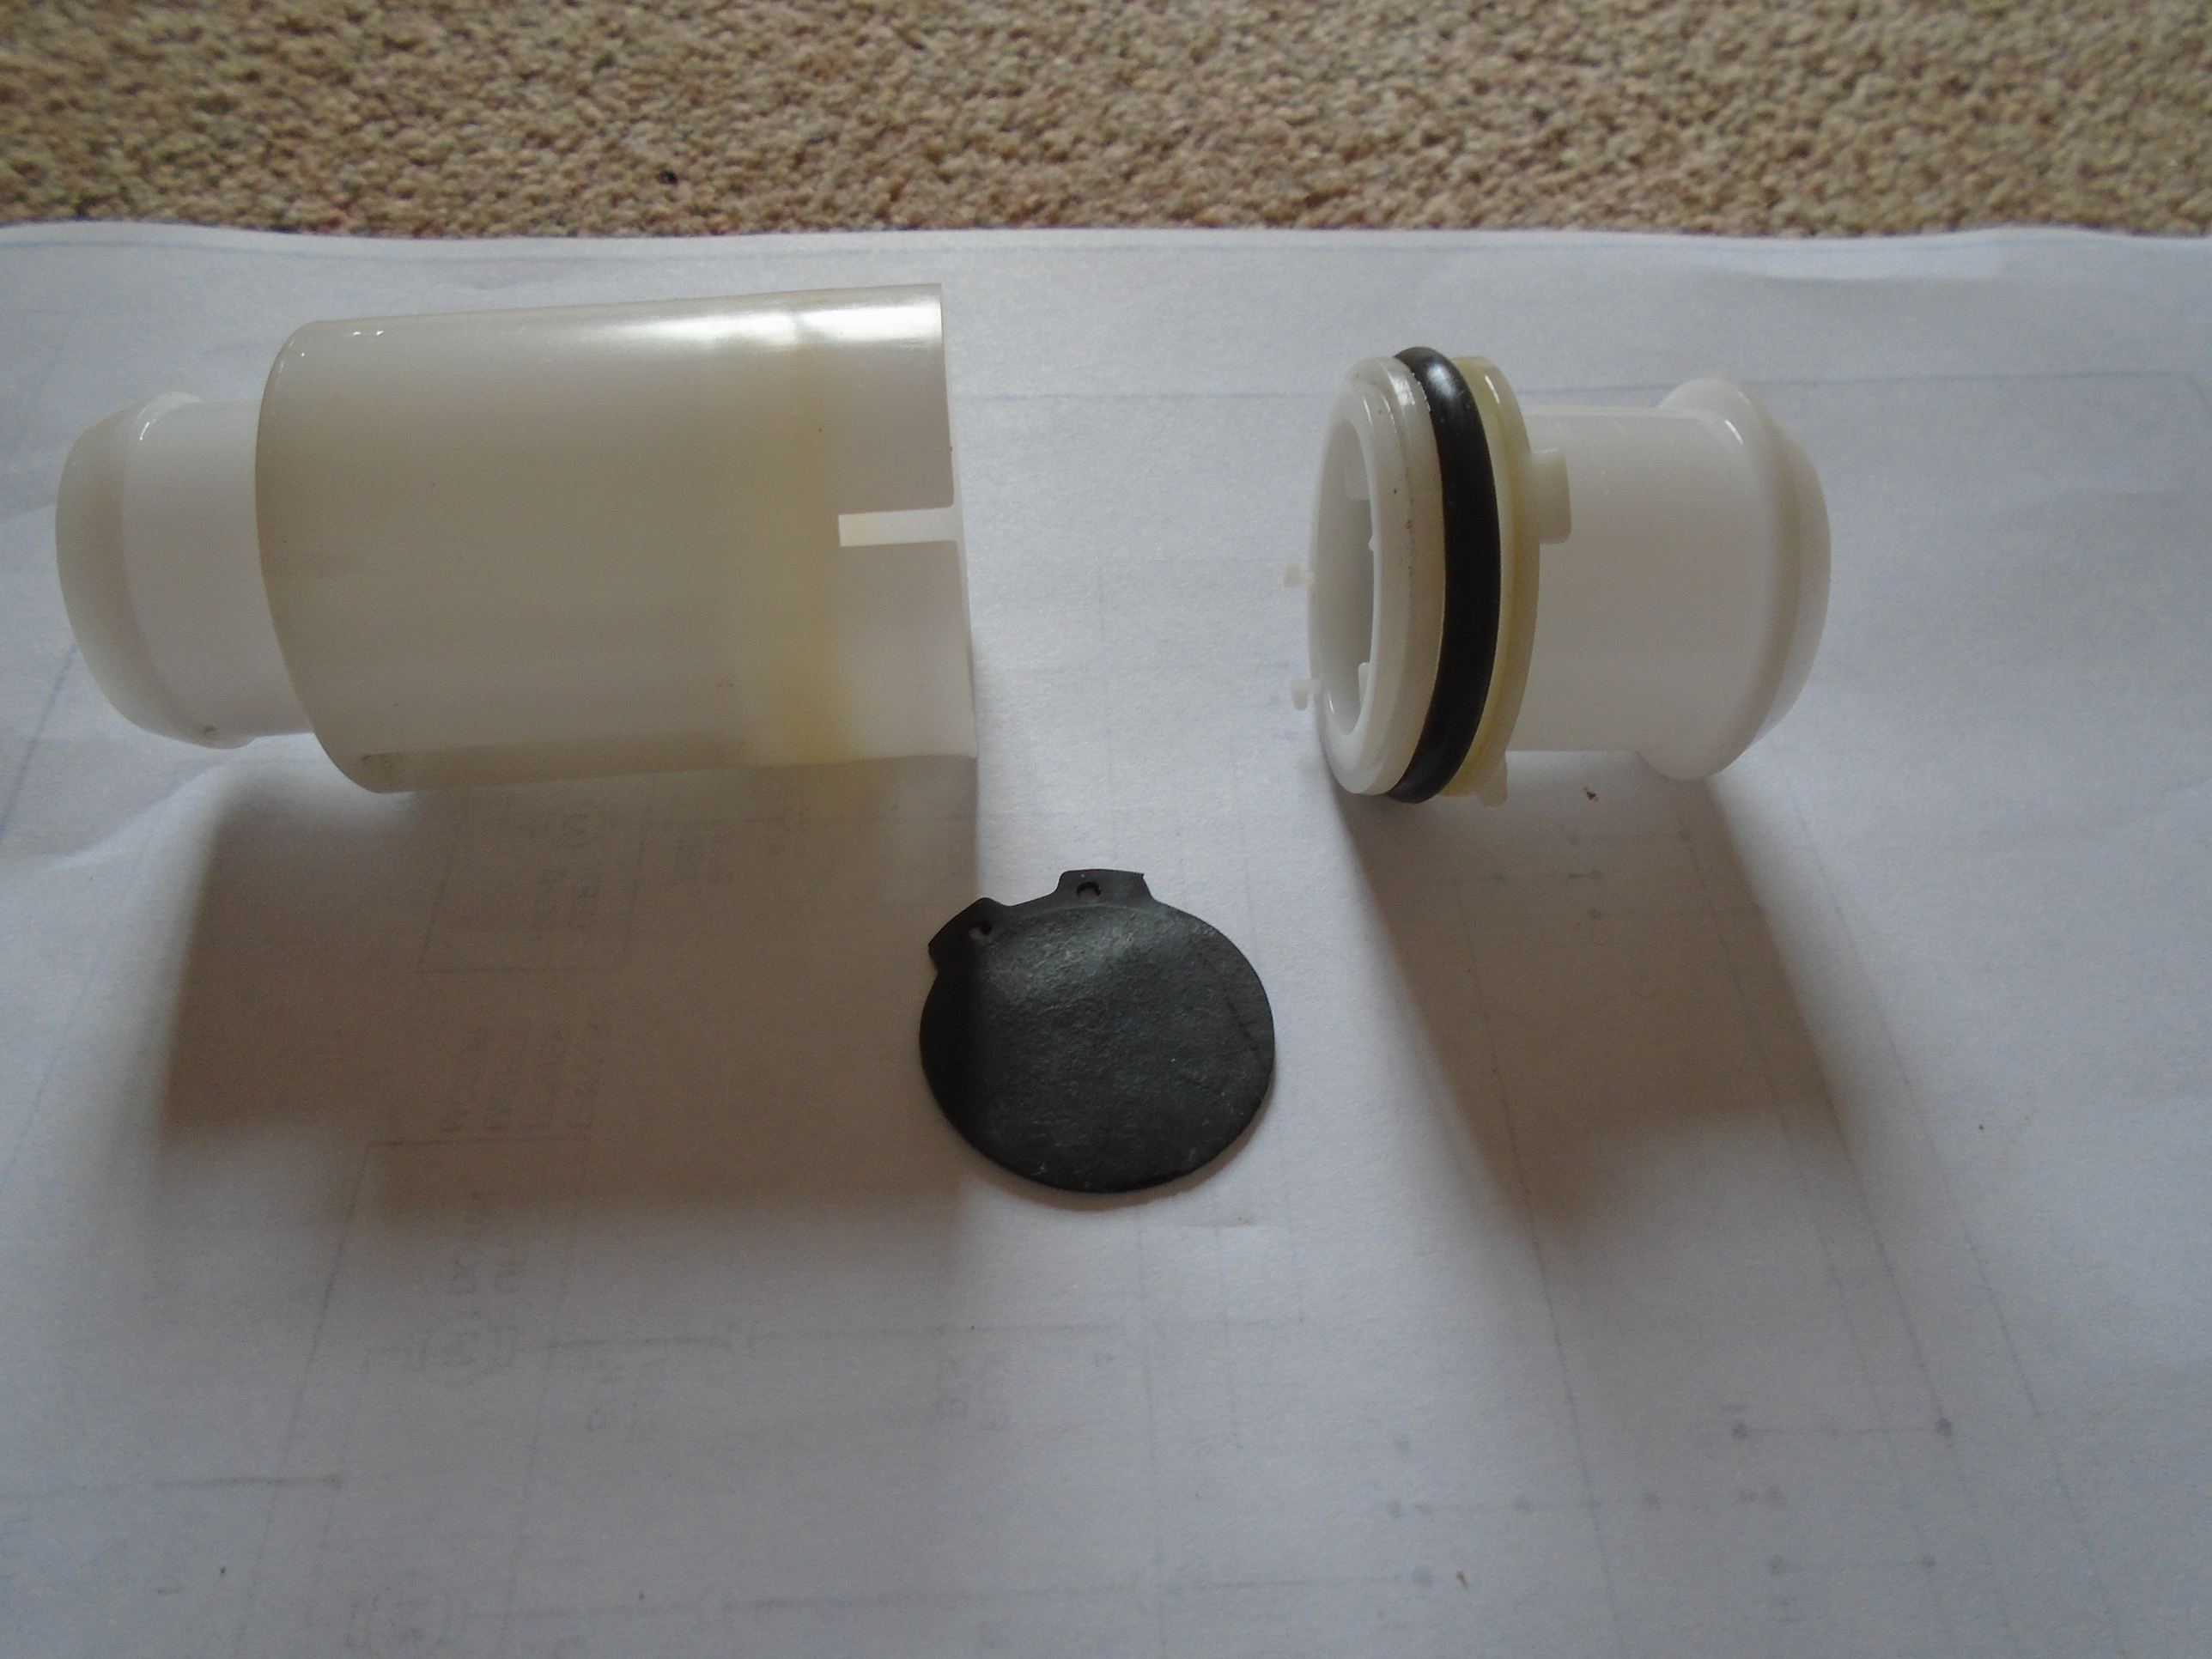
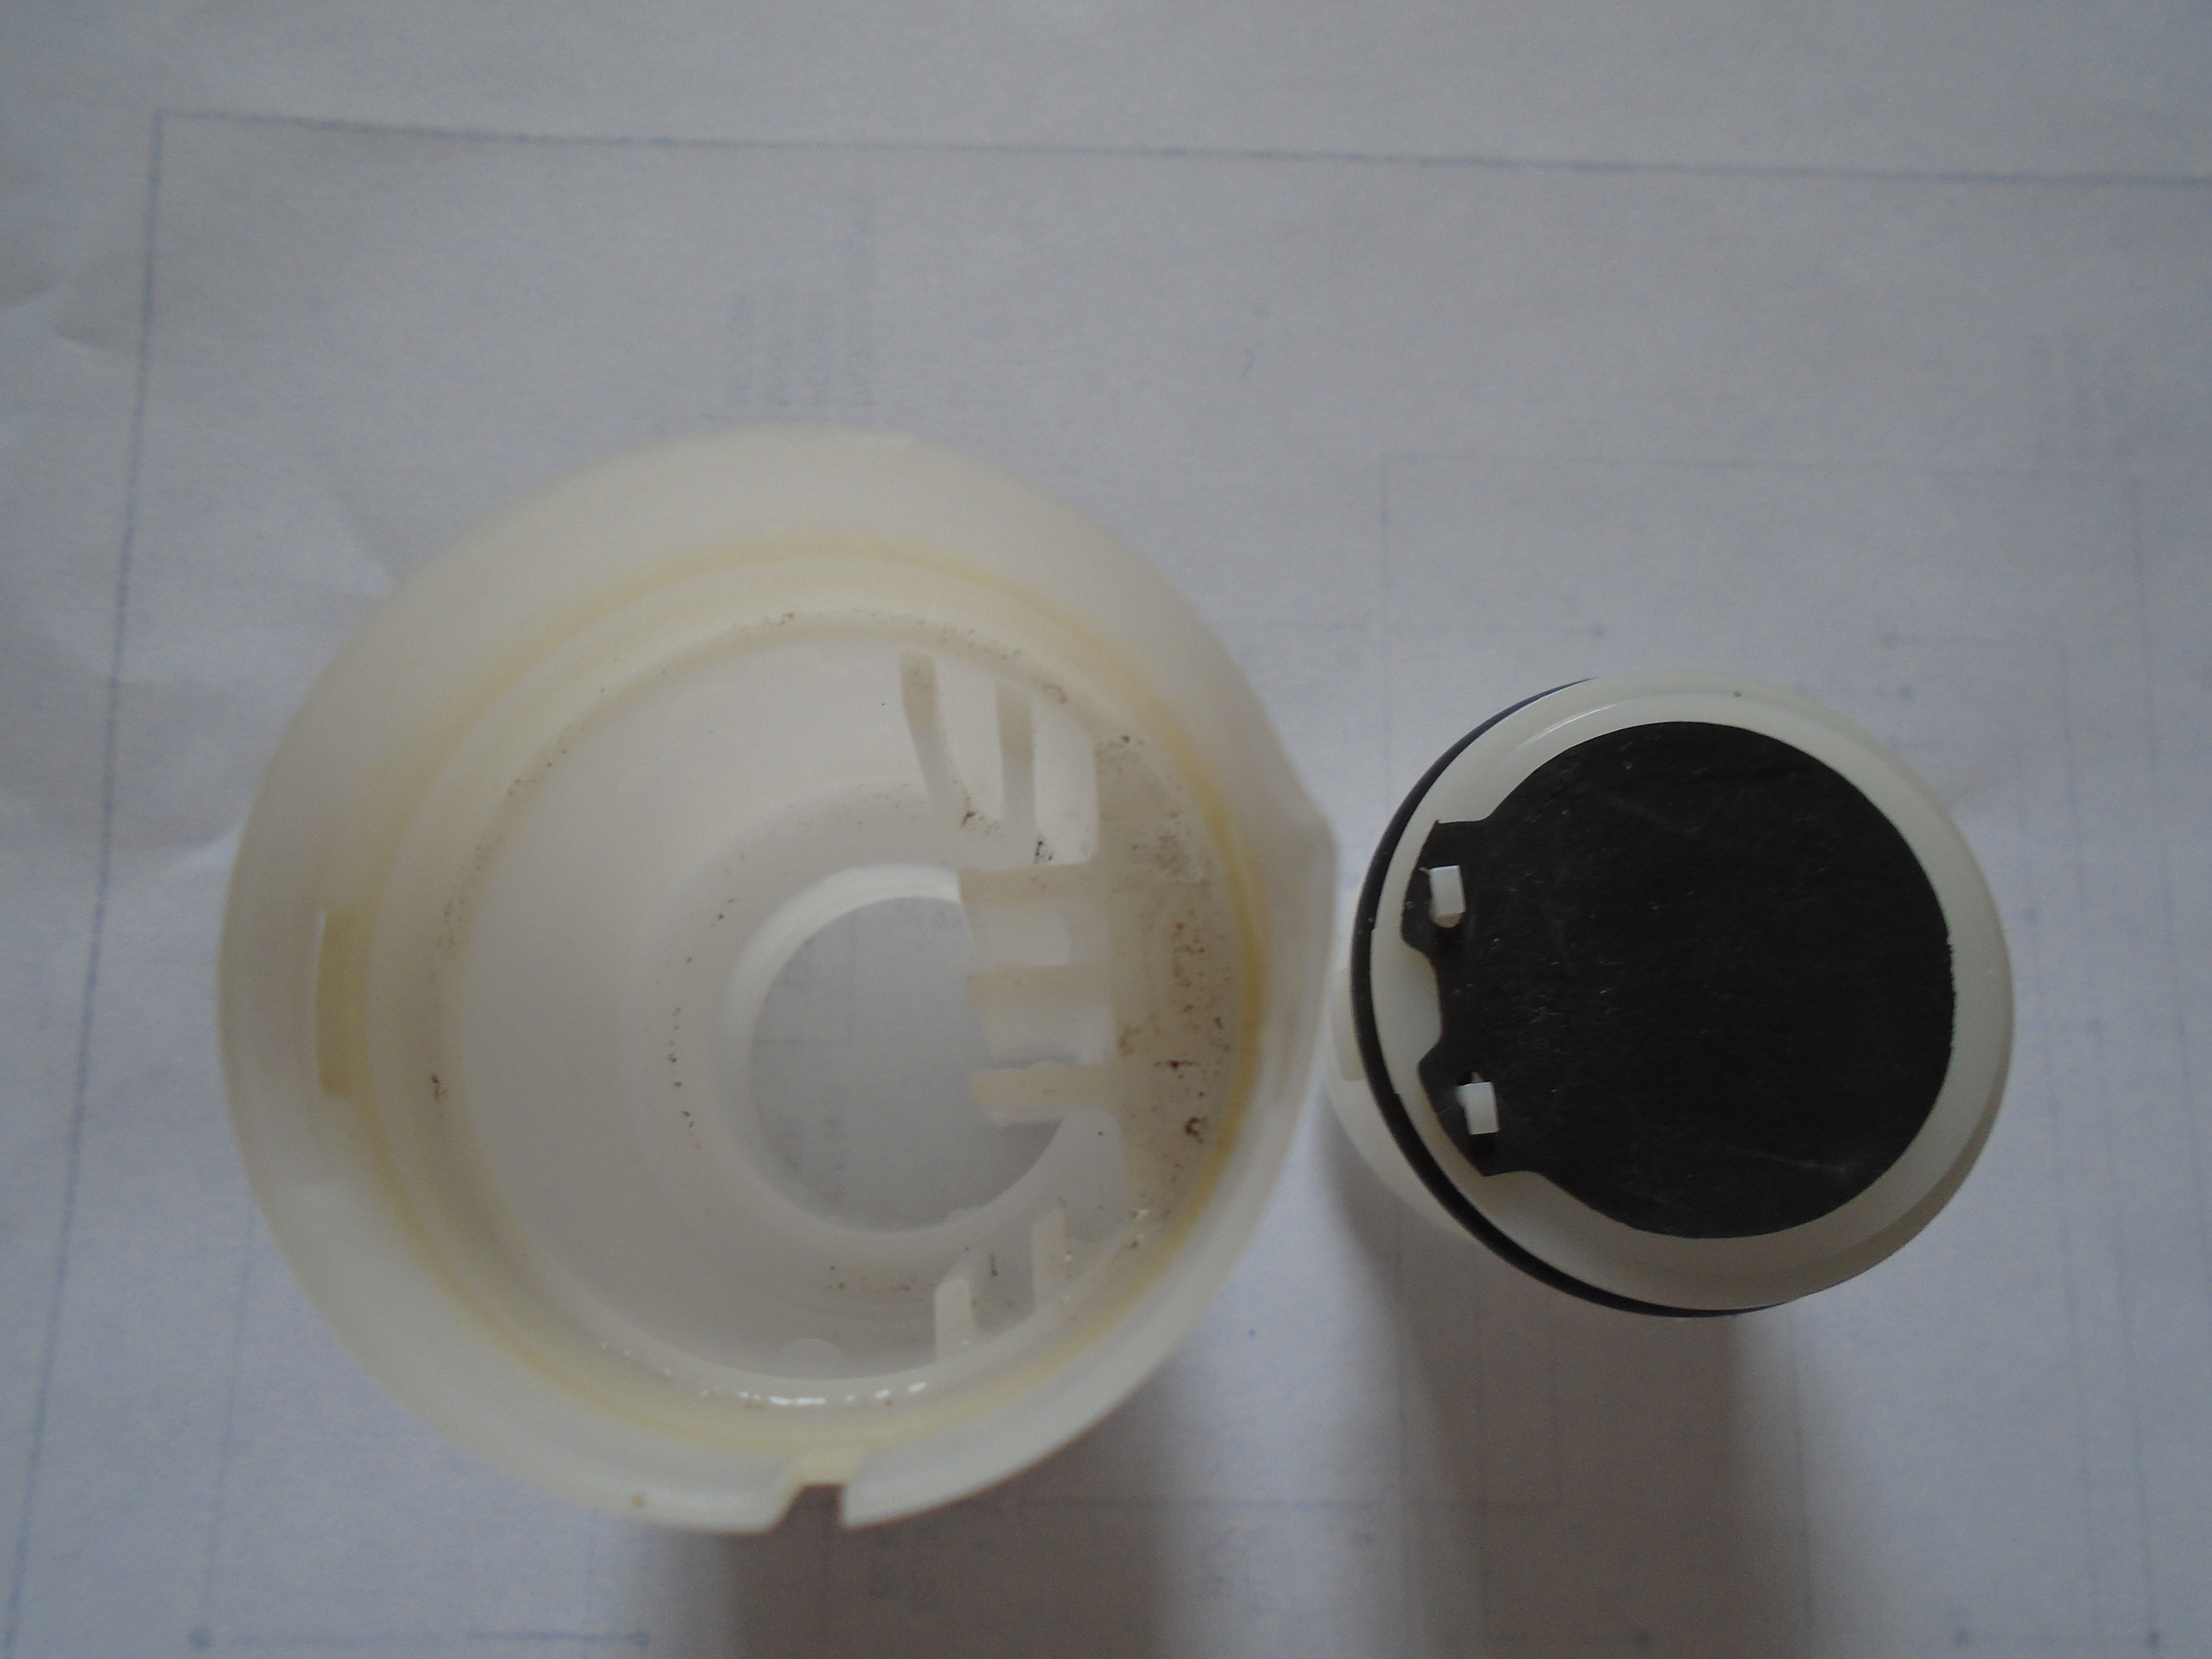
I was surprised how much solid detritus came out when I shook it and further how tight they seal when snapped shut.
Rodding in the wrong direction would certainly damage the flaps, now you can see why.
I decided to do a full disassembly like this rather than messing around with getting the brush through. If you remove the seat belt bottom and the plastic cover behind it you can get direct access to the assembly pictured above. I found it easier doing that and giving it a real clean out, make sure rubber is in right position rather than struggling to find place to push brush down… just my 2p’s worth.
Sorry to be dim but I still don’t properly understand how this valve works.
Presumably it opens under weight of water in the pipe but what makes it snap shut so positively.
Are the plastic lugs below the flap and do they act as springs?
Thanks.
If its trapped backwards, do you think it needs to be disassembled to correct it?
If you stuff foam up there, is it likely to damage the assembly do you think??
My prediction is you will never know if its seated wrong or not unless you can use an endoscope to peer down and look to be sure.
It is possible that if you poke a bottle brush down from the top and pull it all the way through it ‘may’ re-seat a miss-seated flapper but you still will not know if its seated or not unless you look.
Its a pain to get too:- seat out, back trim and ‘B’ trim off, seat belt out, seat belt box out, then you can remove it to check.
Unless a very sharp object has been poked ‘up’, it not likely to be damaged per’sue just not seated, its not a big deal as long as the water gets passed down, which is easily tested, or you have bigger problems at the top.
Very useful photos thank you.
Can I ask what year is the Mx these were fitted to?
Reason I ask is that I don’t remember the top white pipe being fitted to our early Dec 2005 NC,although think there was a mod which dealers fitted to early cars.
Haven’t needed to investigate this problem with our later Aug 2013 Mx, and of course it’s a long time(14 years) since the problem first reared it’s head with the 55 reg and once found initially regular maintenance solved it.Cheers.
We suffered from puddles in the passenger seat well of our NC so we rodded the drains with curtain net spring. This unblocked the drains but caused one valve to stick open resulting in a wind howl from the drain, only noticeable when the hood was up.
We discovered that there is a Mazda technical note “Mazda MX-5 Mk3 Bulletin 09-001-07-1736a - SOFT TOP DRAINS” and a drain upgrade kit https://www.mx5parts.co.uk/hood-drain-modification-mk3-p-3352.html available. The upgrade includes four new valves and two sponges and two plasic grids.
The new drain valves have ribs inside to prevent their diaphragms from being bent backwards when clearing of debris is attempted by compressed air or a trombone brush. The foam filters and grids sit in the drip trays to prevent leaf debris from blocking the drains. These foam filters would on their own be a really good idea for those of you who have not yet had the drains get blocked.
It took us about four hours to complete disassembly and reassembly.
Parts needed:
Two drain upper valves
Two drain lower valves
Two drain tray foam sponge filters
Two drain filter grids (one LH and one RH)
Reuse the existing drain hoses, comprising four sections
Tools and assorted bits needed:
Plastic panel removal tool or stiff plastic spatula
Steel palette knife or feeler gauge with smooth edges
10mm ring spanner
14mm ring long-handled torque wrench approx. 60 N-m
Phillips screwdriver no. 1
Bungee straps to keep seat belts out of the way
Large Bulldog clips to prevent seat belts retracting
Gaffer tape to tie down loose or fragile wiring
Push the seats as far forward as they can and lean the seat backs forward.
Remove the small poppers at the top of the door frames by first pulling out their centre buttons then gently pulling poppers off
Pull up to remove the seat belt top hat covers. Pull forward on the two door frame rear covers.
Remove the plastic cover inside of the door pillar, between the top hat covers and the side sills.
Prise upwards on the windbreak to remove it.
Pop the front cover from the anti-roll hoops, these should just pull off, then undo screws to remove the rear covers (note how they hook over the mounting point).
On the rear of the transmission tunnel between the seats is a U-shaped cover secured by a latched lug at the centre front and two long lugs at each side. Gently prise the sides up with a plastic removal tool taking great care to not shear off any of the lugs. Use a thin shim or palette knife to hold the centre front latching lug back.
Pull off the handle for the hood release.
Remove all the poppers from the large plastic transmission tunnel cover panel behind the seats. Remove the panel by prising then leaning forward from the top. Note for reassembly that there is a tongue at the centre of the lower edge which hooks under the plastic moulding over the transmission tunnel.
The drain hoses are behind a plastic shield, which forms the rear of the seat belt reel recess. First slacken the seat belts and use bulldog clips to prevent the belts from springing back onto the reels. Remove the seat belt reels (long handled 14mm spanner needed for the lower bolt, 10mm ring spanner for the upper two bolts). Use bungee straps to keep the reels out of your way and use gaffer tape to protect their delicate sensor cables. Remove the plastic shields and in the chassis cavity you will find the hoses and valves. The valve assemblies will just pull out of the body work at the bottom and the black flexible hoses are push fit onto the plastic drip trays at the top. Reuse the two sections of hose and reassemble with the new valves making sure that each top valve is the right way round, i.e. the ribs inside the tube should be at the top, fitting into the black hose. Guide the top hose with a finger in the drain tray.
To fit the foam filters, you may need to remove the rear tray and the four side shelf pieces. If so, the rear tray needs to be rolled out over the anti-roll hoops under a half-opened hood. Take care to not strain the tray against the rear window heater cables assembly – unplug the heater cable from its fixing hole and use gaffer tap to hold this cable flat to the hood canvas.
Fit the foam filter sponges into the drain trays and secure with the self-adhesive drain filters.
When reassembling, be sure to correctly tension the seat belt reel bolts. The upper bolts are 7.8 to 10.8 N-m, the lower bolt is 38.2 to 78.4 N-m (i.e. really, really tight).
If you’ve got puddles in the passenger footwell I can almost guarantee the leak is from the screw/plastic bung holding the windscreen scuttle panel. The plastic has a foam base that goes brittle and breaks up. For some reason the fault always shows up on the passenger side first. I have re-sealed many of the NCs in this place.
Whilst I have obtained a ‘trombone brush’ but not used it yet I’m thinking isn’t it easy just to blow them out with an airline, or is that likely to cause damage to flaps etc ?
I have the “trombone brush” - it was easy to clean out the drain. I think the main problem with some people is that they put the brush down and then pull it back, which damages the flap. Better to put the brush through and pull it out underneath, and then repeat 2 or 3 times. I have a 2006 NC and the flaps are totally undamaged.
Agree with other comments regarding water in the passenger footwell - it will be the windsreen scuttle panel.
I also have a “trombone brush” but have never been able to locate the inlets to the drains after many many attempts. I gave up in the end and now ask the garage to clean the drains as part of servicing.
For anyone who struggles with finding / cleaning the holes, see attached photo’s. The key is to not let the roof go right down flat, support it (be careful with the paintwork) - the drain holes on each side are then visible. The trombone brush then needs to be inserted but at a slight angle from the rear of the car to the front. The brush then goes down easily.
jeff-jackson wrote: “f you’ve got puddles in the passenger footwell I can almost guarantee the leak is from the screw/plastic bung holding the windscreen scuttle panel.”
Would that only our tootsies were a little damp! The puddles we had were under the passenger seat and caused an unpleasant wet derriere when negotiating a speed bump even at low speed. The water sloshing around in the drain well under the rear shelf was a dead giveaway.
BTW the modified valves are already fitted to later NCs - only the sponges are needed on these i.e. (UK VIN 131736 - 203430) according to MX-5 Parts website.
Not sure if anyone has found a way of fitting the sponges without the painful rear shelf removal. Maybe they could be squished through the drain grilles?
My 3.5 has evidence of tape residue around the grid, as thought the sponge was fitted on the outside, rather than underneath.
No sponge on the outside now though.