If someone modifies their MX-5 and no-one else can tell, is it still a mod? Well, I’ll sneak this in here on the off chance  . This thread is nothing particularly new or revolutionary, and what I did was based on several threads on here and elsewhere, but it might provide some food for thought for those that are thinking of doing something similar.
If there’s one thing I had to say I didn’t particularly like about my MX-5 it’s the booming drone at highway speed with the top up, especially when decelerating from about 70 – 60 (this is an NC2 1.8L with stock exhaust). After studying some threads on here, I thought I’d try adding sound deadening in the boot area to try to mitigate this noise.
The weapons of choice:
Dead Mat Pro butyl rubber sheet – 2m x 0.5m roll
6mm closed-cell foam – 6x sheets, 500x300mm
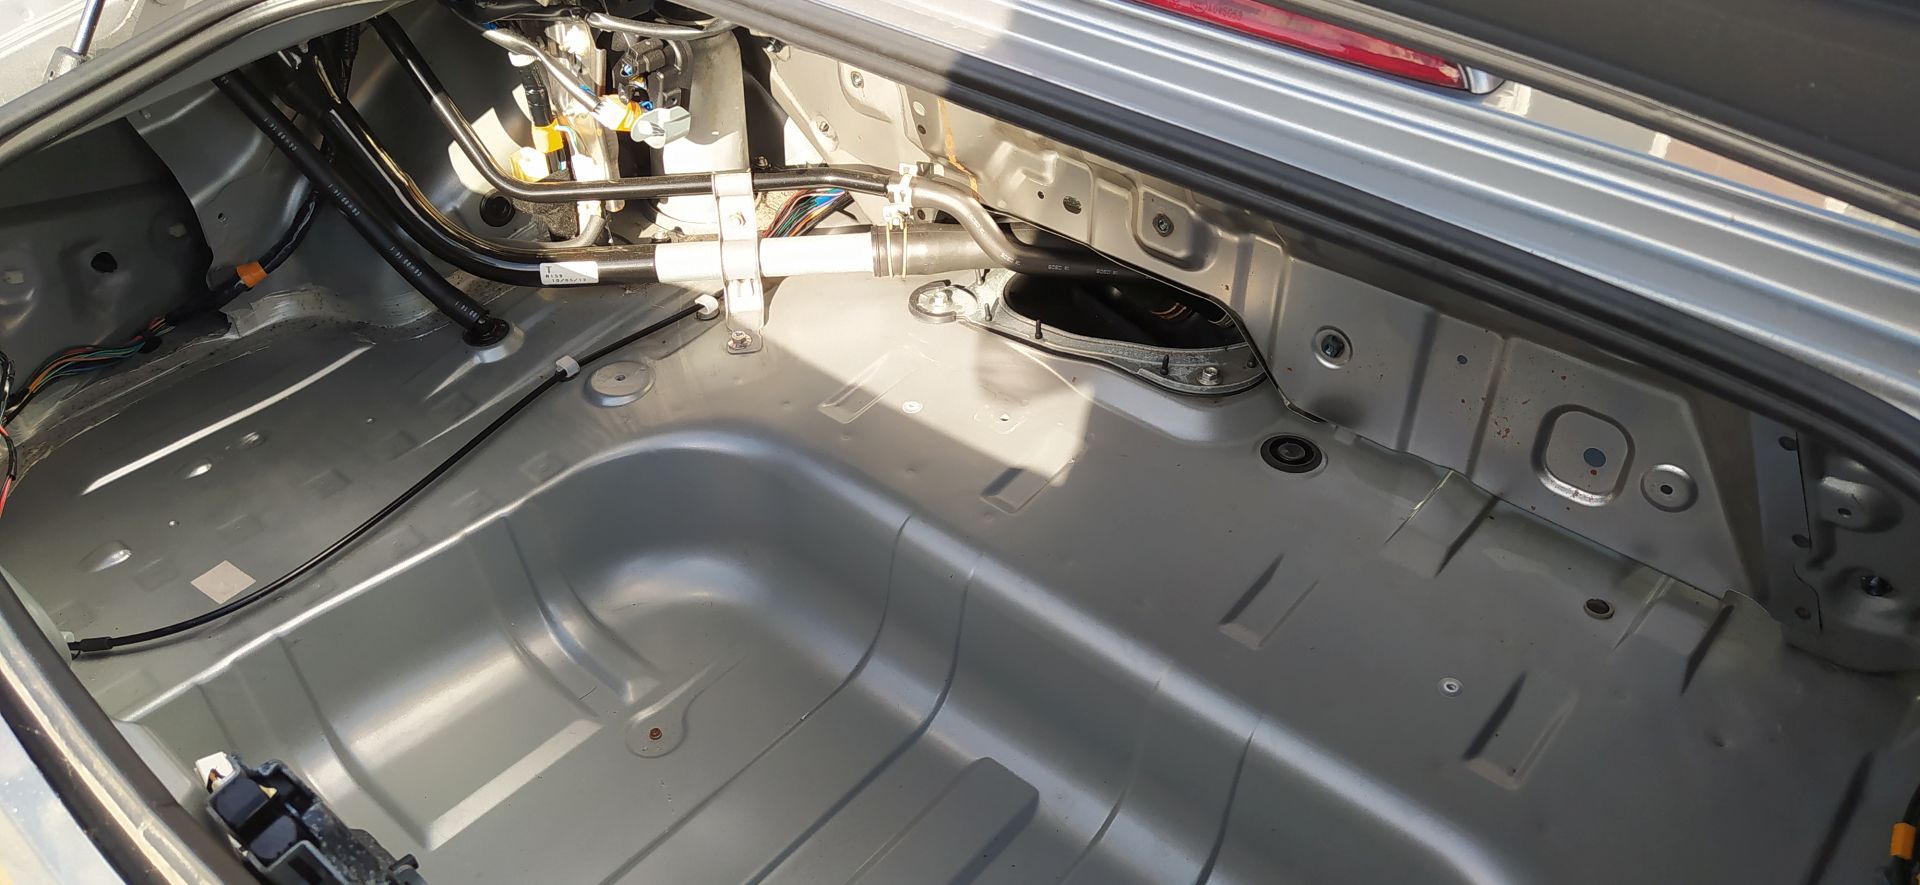
The plan, such as it was, was to strip out the boot lining and address the most likely culprits. Very simple, just 2 push-pins to get the carpet up and then a bunch of centre-pin clips that can be pulled out with fingernails. It only took a few minutes to have a completely bare boot.
Then I thought, “I’ll just look at that, too, and maybe I should…” and suddenly found that I’d gone a little further than originally intended. Whoops.
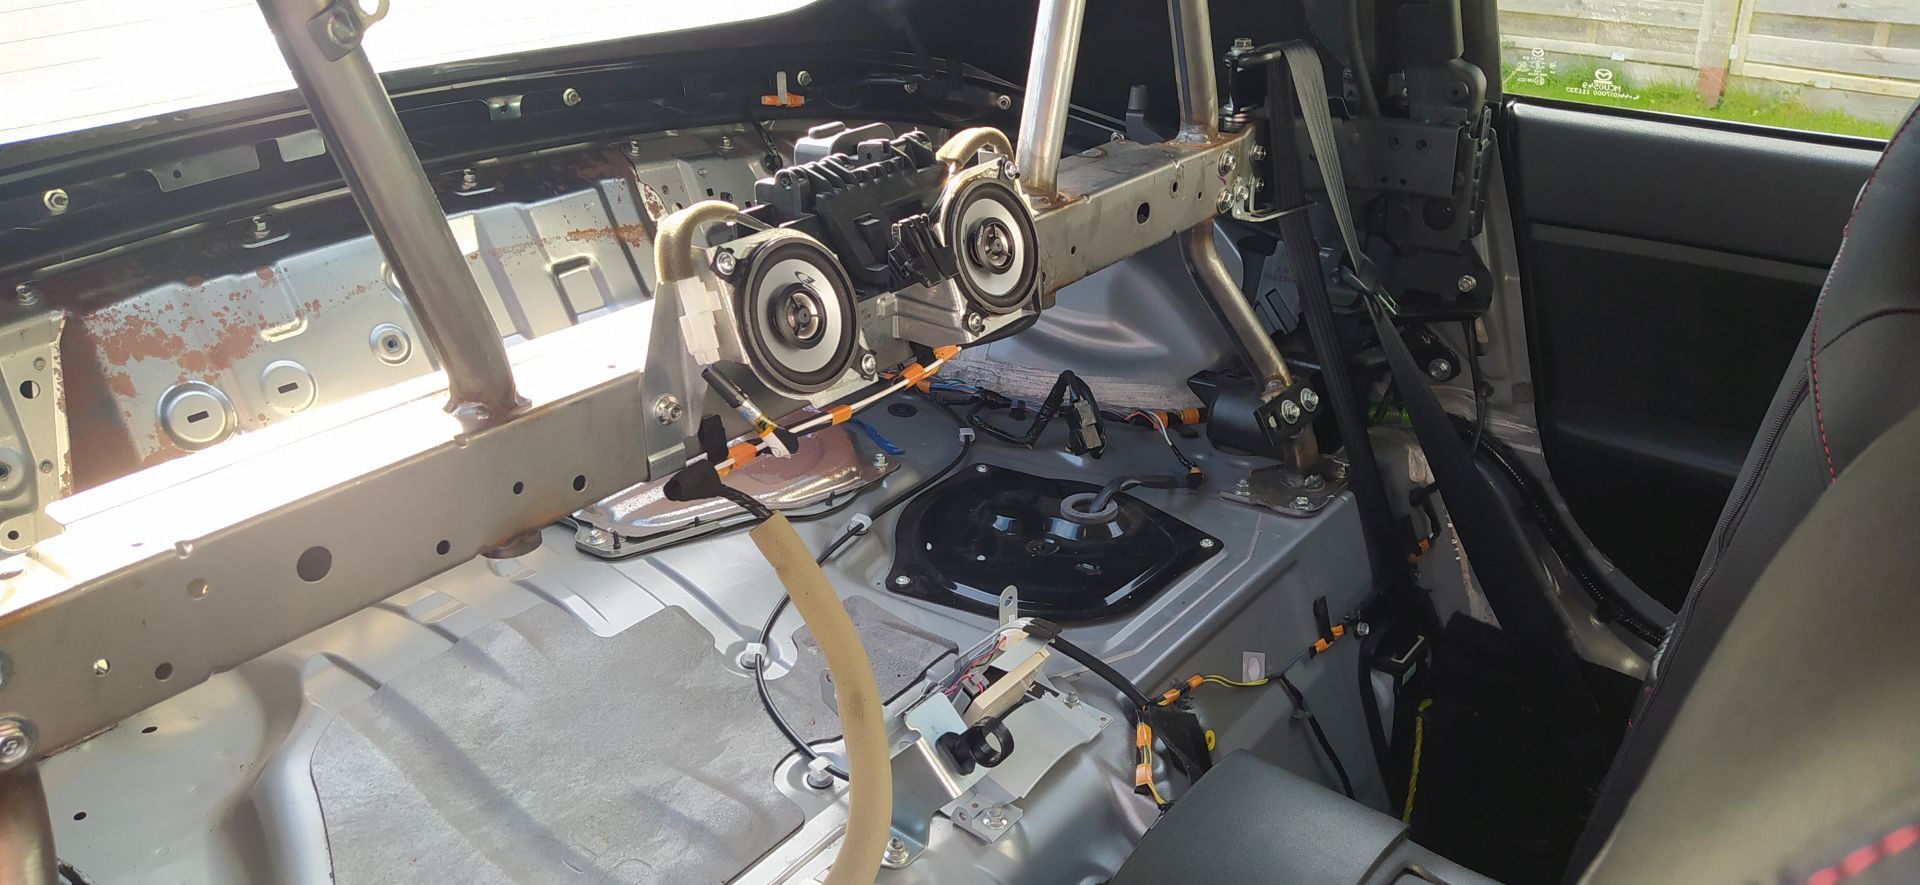
(Yes, I did the rear speakers while I was in there, but that’s another story…)
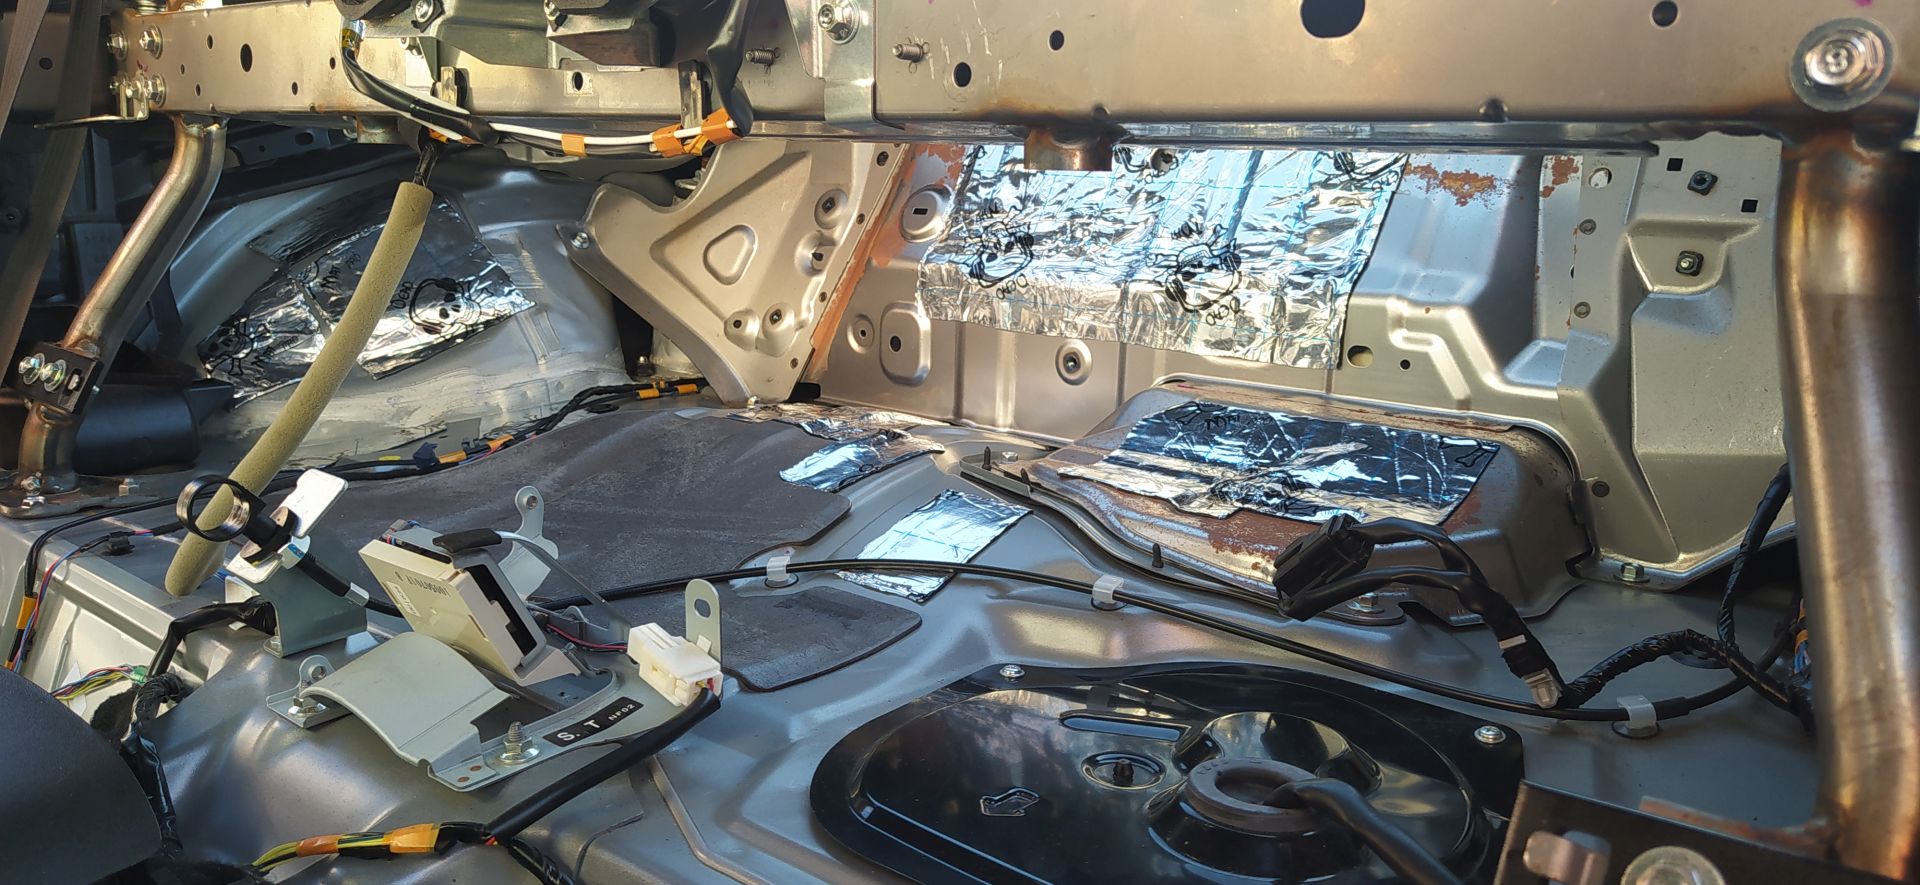
That aside, and back in the boot, everything got a clean, vacuum, wipe down with cleaning spray and meths, then I cut the first bits of butyl and had at it. They say you don’t need to cover the whole surface, just the bits that make the most noise when you ping them with something hard. That’s most of the boot well, and having plenty of butyl I probably went a bit over the top. I didn’t buy a roller for this as I have a bunch of 2-inch thick oak ‘cores’ cut out with a hole saw that I have been meaning to turn into spool clamps. The centre drill of the hole saw leaves a perfect sized hole to slip them onto a 4” paint roller handle, thus solving the problem. I peeled back one edge of the backing paper and stuck it down, then rolled it thoroughly, concentrating on the various little dips in the panels before peeling a bit further, working gradually down until I had the whole thing set out. I found that using the roller handle shank without the roller as a sort of burnisher really helped to stretch the butyl down into the corners.
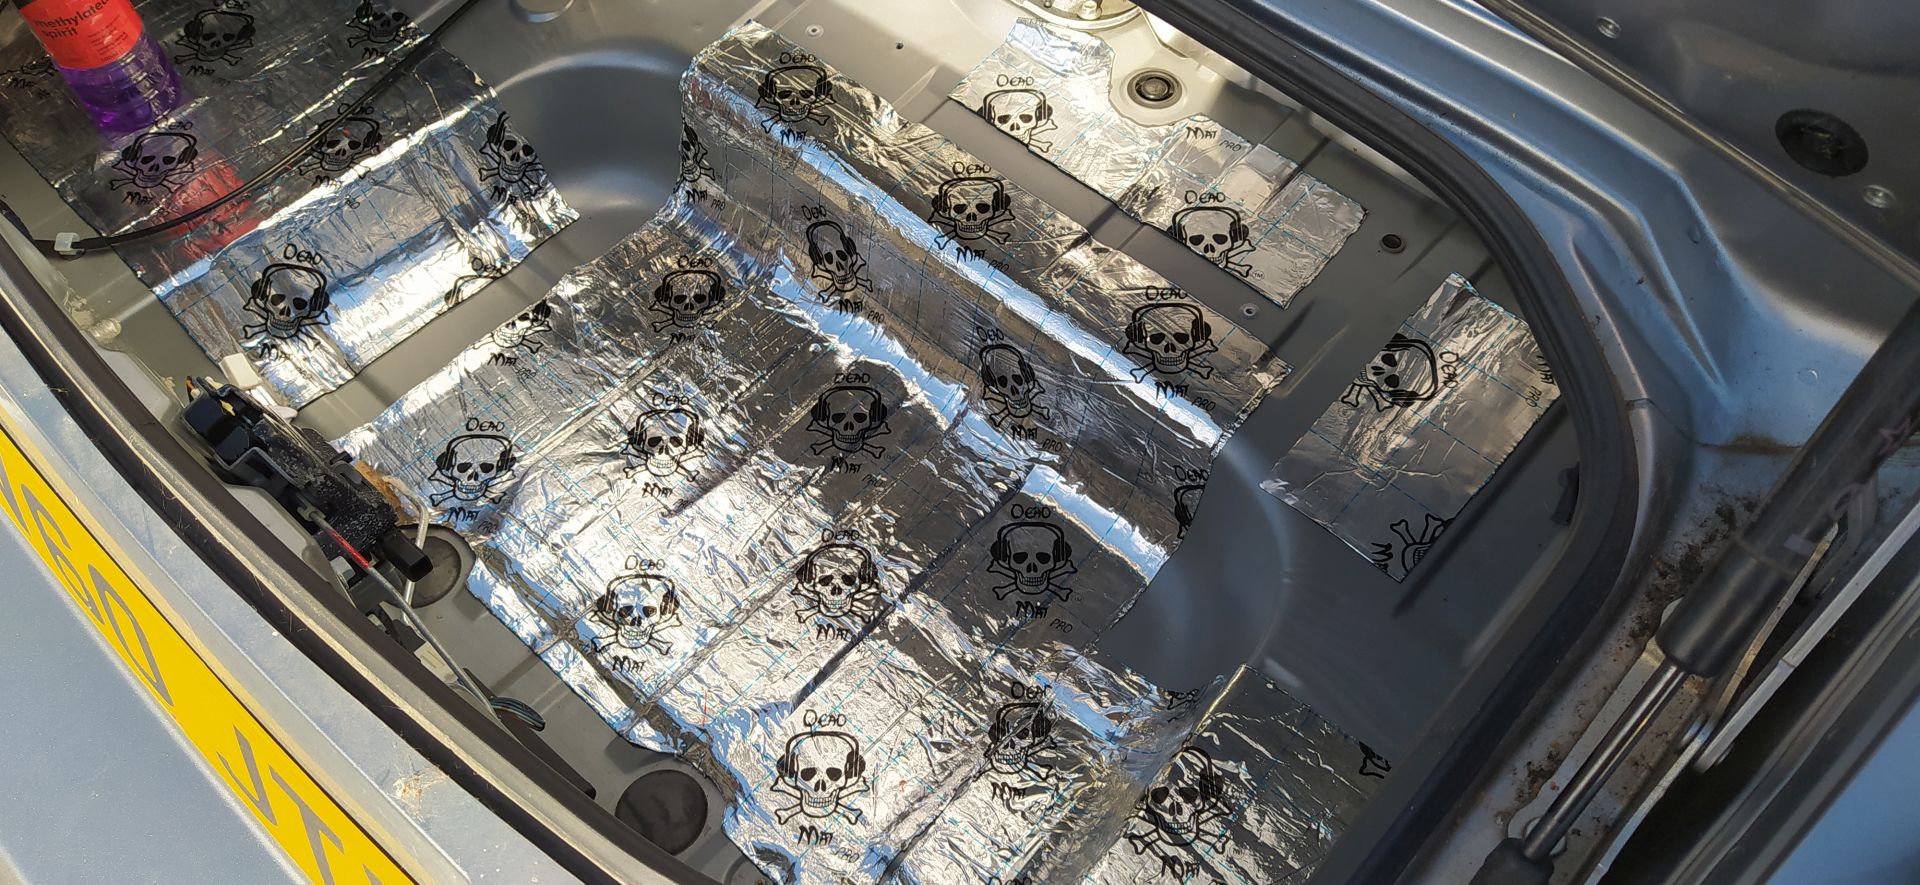
I also put butyl on the wheel wells aft of the strut towers, and the rear bulkhead got a thorough layer. I tried to keep away from anywhere that might get in the way of the trim etc. that was going to go back in. The butyl certainly had a very noticeable effect on resonance when tapping the panels, going from a metallic ring to a dull ‘duh’ sound. To further soak up sound, the boot well got a layer of 6mm closed-cell foam over the butyl, again rolled down thoroughly.
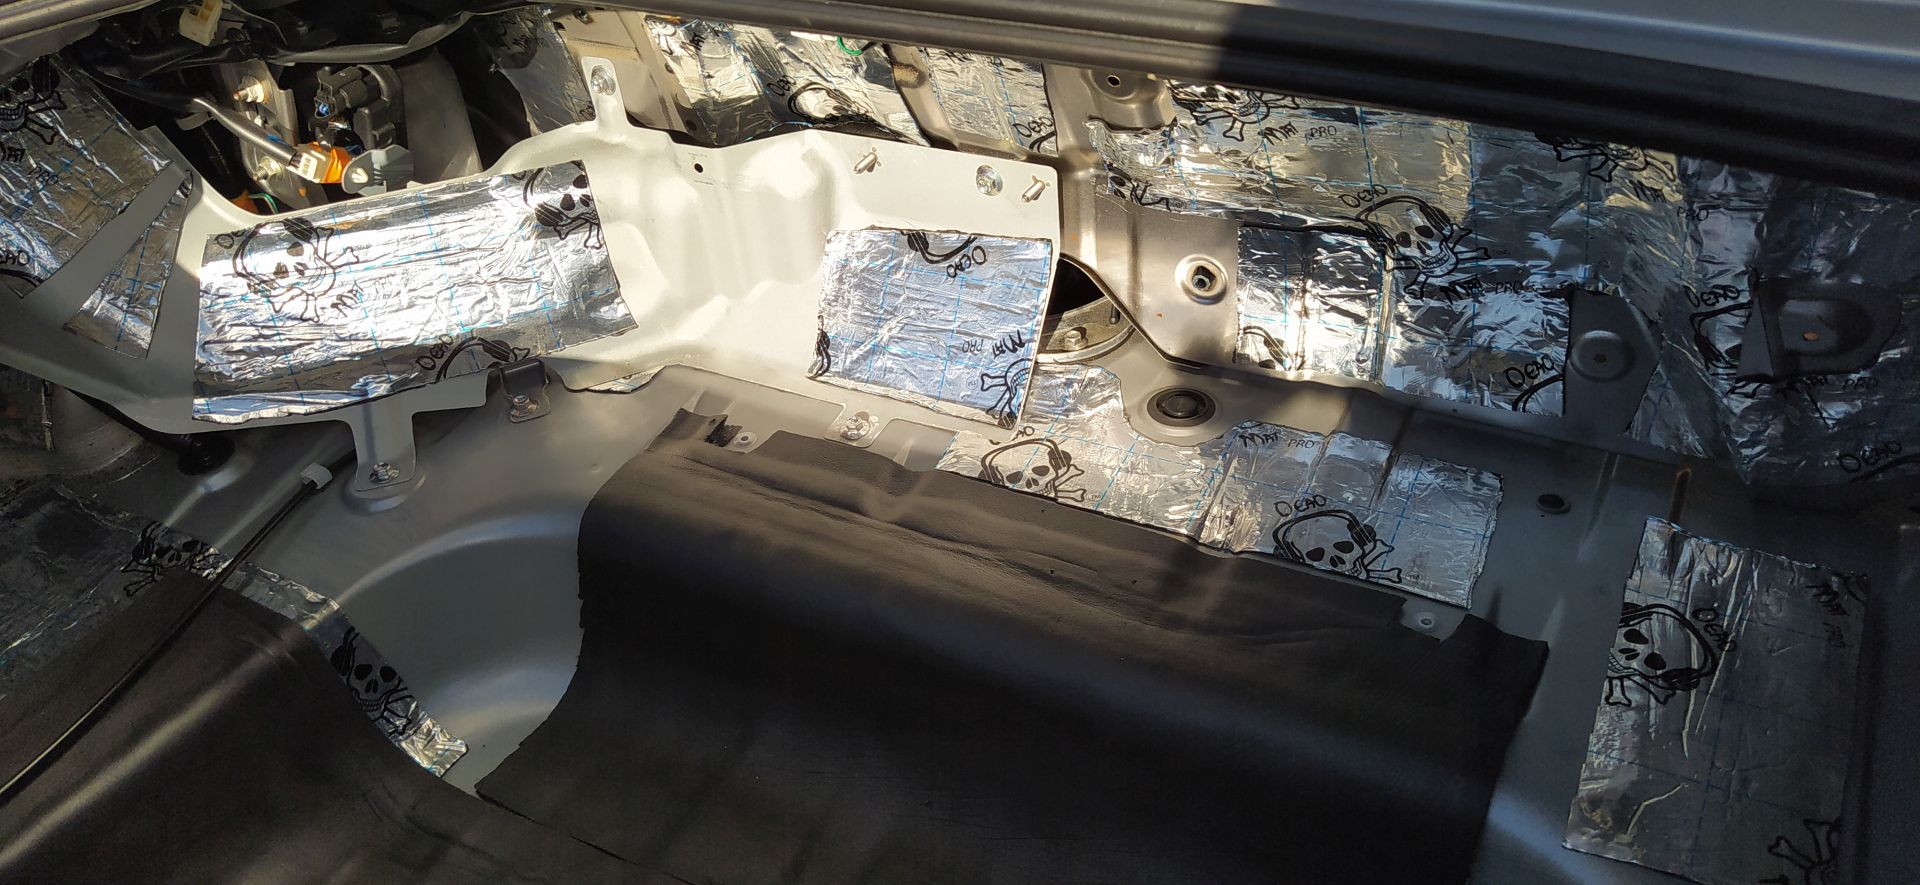
With that, it was time to put the boot trim back in. A few minutes’ work and you’d never know it was there. Moving into the cabin, I focussed on the rear bulkhead (again, just to be sure), the wheel wells, and basically blobbed it anywhere that went ‘ting!’ until I had used up the entire roll.
Then, more closed-cell foam on the wheel wells and elsewhere – no photo this time. Then it was time to put the jigsaw back together and see if I had any bits left over. Oddly enough, it all went together pretty well, until I got to the roll bar trim. MX5OC forums to the rescue again; the rear part of the trim doesn’t go where it looks like it should, the trim hooks over the metal tab on the hoop, not behind it (you’ll know what I mean if you’ve ever done this!). D’oh.
Some other comments/observations:
I took the chance to get the jack out of its perch and grease it up when doing the boot. Just as well, because there was some dissimilar metals corrosion (I think) on the retaining bolt, and it didn’t want to shift. A good clean and lube of the jack and bolt will make it much easier if I ever have to use this thing. Previously, I had also wondered why the car had two tool-bags for the jack, one strapped down inside the boot and one that had been jammed behind the trim panel with the jack. I took the second one out some time ago, but it was only once I got the trim off that I found that one of the tools had come out of the bag and lodged itself where I would otherwise never have seen it. The annoying clanking noise when I go over a bump has now suddenly disappeared – funny that!
I was initially worried about having to dismantle so much of the rear trim in the cabin, particularly as there isn’t a lot of access space and I have somewhat limited mobility. In fact, despite some interesting callisthenics and no doubt some funny looks from the neighbours, it was mostly easy to do thanks to the centre-pin clips. There are the awful, sacrificial white panel clips on the trim on the back of the roll bar centre section and on the large panel behind the seats. When I did my door speakers, I must have spent longer trying to pry/wiggle/drill/whatever the busted clips out than the rest of the job combined. I have had the usual plastic pry bars for years but they can’t handle these clips. This time, I bit the bullet and got the right tool for the job. If you don’t have these panel pliers yet, buy them now. They’re magic – slide them in, heave on the handles, and the clips merrily shoot across the car. You’ll save your time, knuckles, temper, and thank yourself. New clips are available here.
The parcel tray itself has a layer of wool insulation on its underside, held on with T-shaped pegs. I found that mine had come off in places, and while I thought about making up some sort of snap-ring doughnut things to hold it in place, I settled for running some drywall screws halfway through the pegs instead. Quick, easy, and never coming off.
I could have gone much thicker on the foam in the cavity behind the seats, but when I bought it I was thinking about the boot well and making sure the carpet etc. would go back in and sit down correctly. If I had another sheet or two, I would have put some more on the backs of the cubbys on the big panel behind the seats.
One added bonus of taking all the trim out from under the roof is a chance to have a good look at the drain situation. I have paid attention to pulling them through as well as clearing the sill drains, but there was still quite a layer of gunge where the water is collected that I could properly clean up this time. It’s difficult to explain, but on each side, water from the roof collects in one chamber with a plastic strainer on one side that runs into a second, lower chamber that has the drain itself. The strainer appears to have done all the work in catching dirt and debris; there were sponges in the lower chamber, but if they were that clean after 10 years then clearly they hadn’t been doing anything except getting in the way. I chose to leave them out when I put everything back together.
Finally, as recommended here, I put some aquarium foam in the drain outlets. I used squares about 60x60mm; they let water through freely and shouldn’t obstruct the drain flaps. Quite easy to do if you know where the drain outlets are (just above the brace on each side, as shown in this photo).
So, the big question – was it worth it? Did it work? I took Mrs. five-three for a bimble, and she says it’s a lot quieter, which broadly agrees with my own uncalibrated earometer. Result.
For a day’s work and less than £50, I think it is much more civilised at highway speeds, and that booming drone I mentioned has been tamed. It’s not quiet – it never will be, it’s a convertible and I don’t expect it to be quiet – but it should be much more enjoyable on long trips, now.
Hopefully others might find this useful.