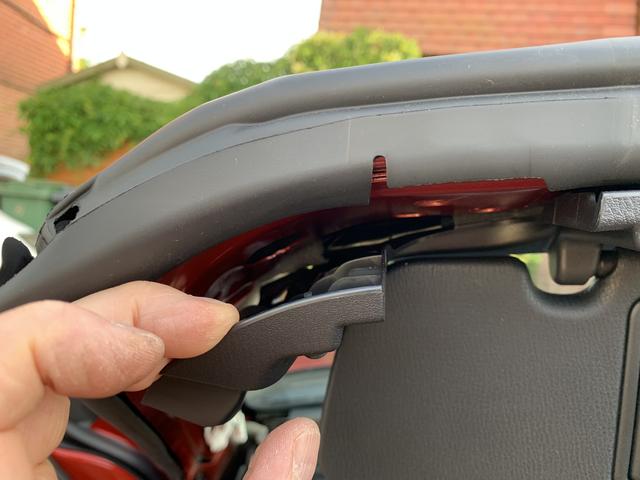
Now that the three Torx bolts are removed gently pull down on the left corner of the overhead trim
and then the middle part of the trim.
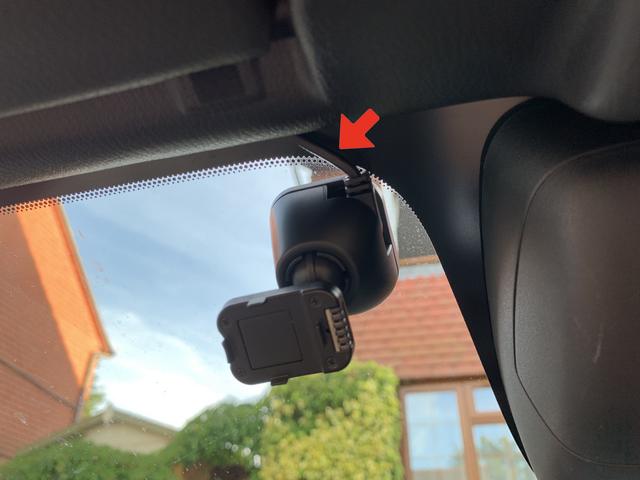
The trim makes a loud click as the connectors pull loose! I only pulled the trim down enough to gain access to that little rectangular hole on the front edge of the trim. I did not want to disturb the trim fitting around the rear-view mirror.
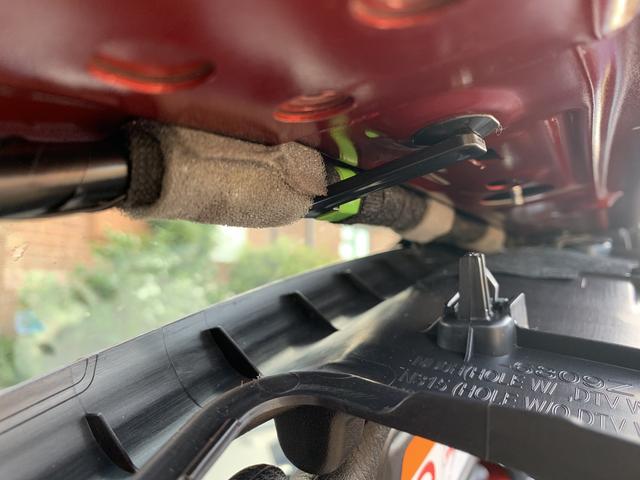
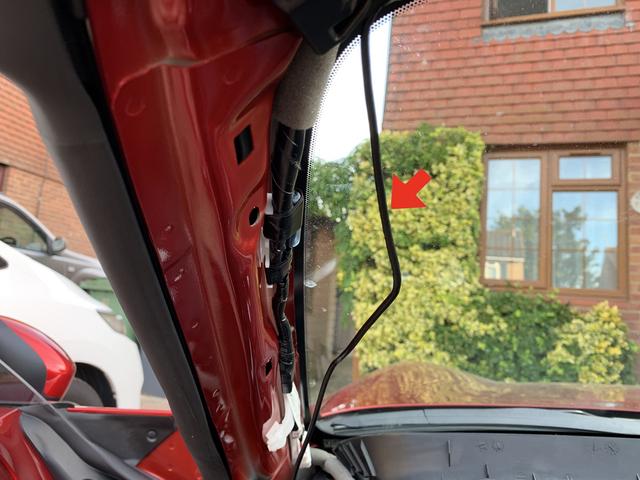
As you will now see, there is very little height space between the trim and the car bodywork.To lay the wiring, push the camera end of the cable down through the rectangular hole so that it is hanging in front of the windscreen. The bulky filter that you clipped onto the cable at 20cms from the end connector can be laid into the space just above the rear-view mirror. Looking from outside the trim this space is (arrowed).
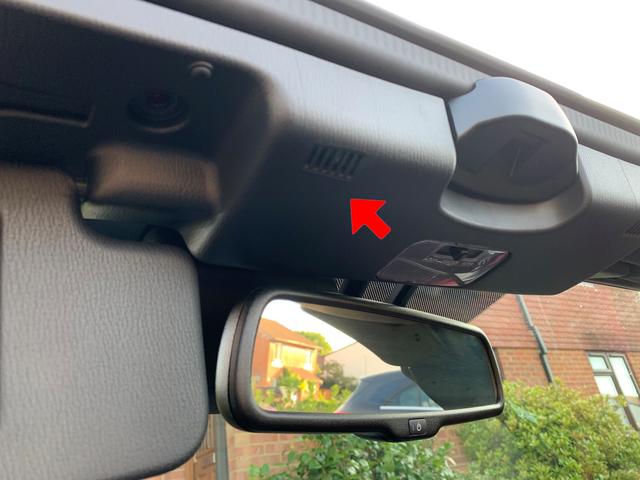
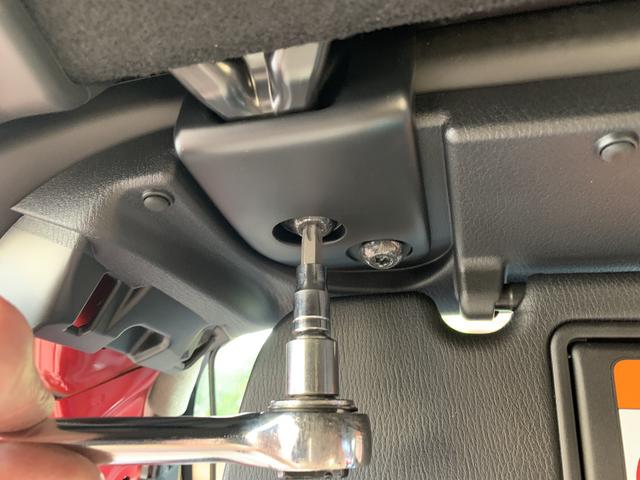
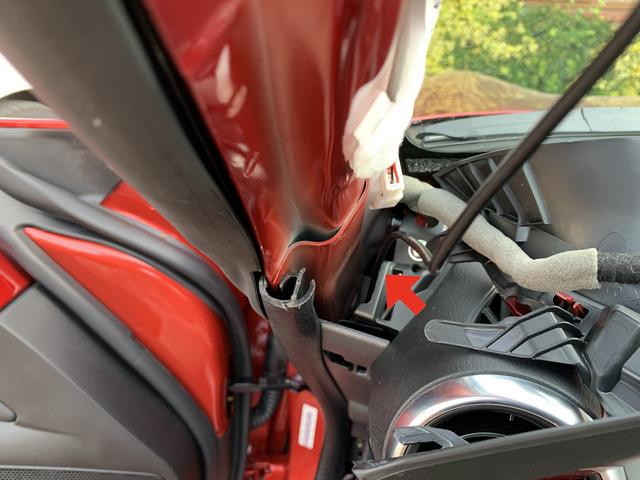
Lay the cable along the trim to the A pillar. I did not clip into the existing harness at any point as I wanted to leave the original wiring alone. Clip the overhead trim back into place and replace and retighten the single T30 Torx bolt. I then refitted the roof catch bracket and loosely hand tightened the two T40 Torx bolts.
Close the roof and lock with the main catch. The bracket is now centralised into the bracket and you can now fully tighten the Torx bolts. I have no torque settings to quote so I did the bolts up moderately tight.
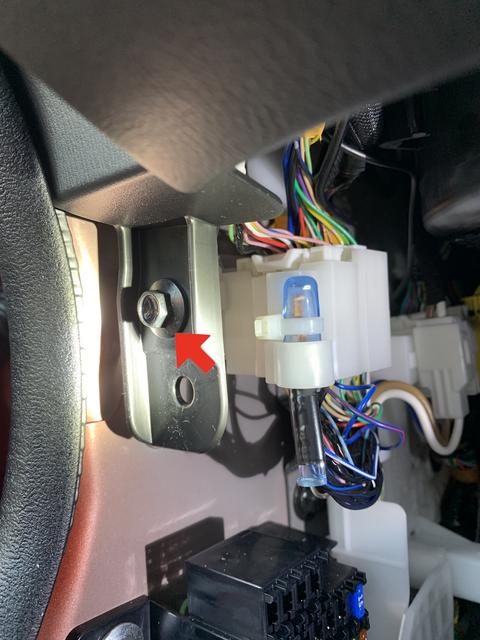
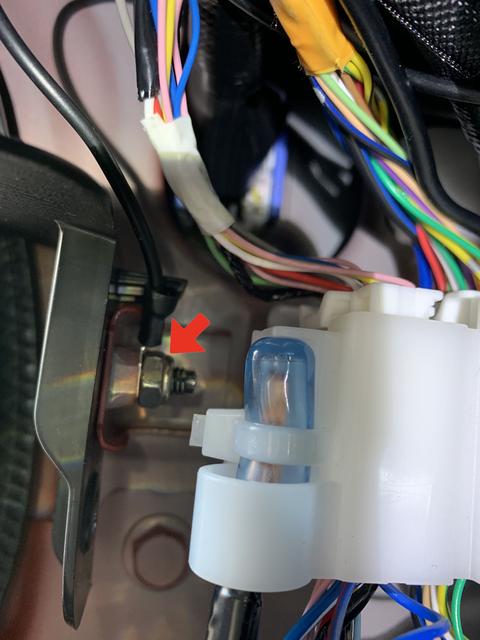
Back to the fuse box and the final connection. For the earthing point I am using the bolt at the left side of the fuse box (arrowed) and as shown earlier.
Feed the black earth cable behind the existing wires to come out by the bolt. The bolt goes through the plastic trim into a captive nut on the metal bodywork. Rather than connect between the plastic trim and the bolt head, I connected on the back of the bolt with a 10mm nylon captive nut, thus giving metal to metal contact on the earth cable connector (arrowed).
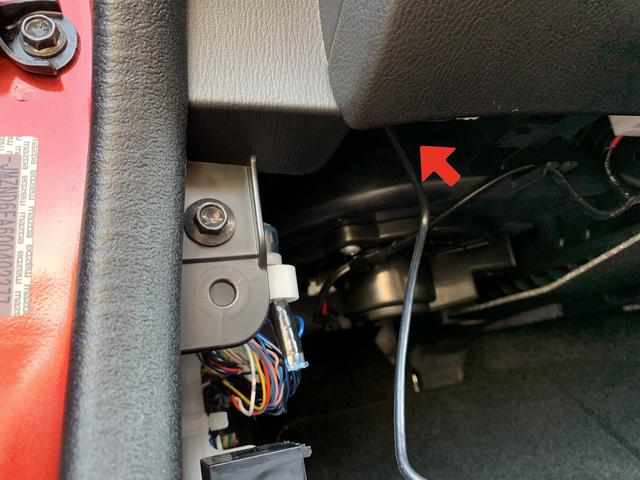
Feed the rest of the wires behind the existing cables to exit at the back of the footwell area.
Rather than placing the considerable amount of spare wire behind the fuse box connections, I used the original black wire twist ties from the hardwire kit and wrapped and secured the wires with the ties and then tucked them behind the carpet under the car mat (arrowed).There is plenty of space there.
Push the new 7.5 amp fuse into the fuse connector that came with the hardwire kit and push the connector into the red connector on the hardwire kit. The fuse connector can be neatly laid behind the fuses and pushed into the correct position in the fuse box (arrowed).
At this point I checked that the camera switched on and off with the ignition – which it does!!
Refit the fuse box cover and push in the clip that was taken out, refit the fuse inspection cover, push the door trim back into place and refit the sill trim and that’s it……neatly finished.
Great write up and well worthy of a Haynes award !
Out of interest, do you leave the camera permanently mounted ? I have the 522GW and the mag mount is so fierce it’s impossible to take the camera off without pulling the suction mount off with it. Unfortunately, my car sits on the drive and it’s another shiny thing for the local scrotes.
Thats strange i have two Nextbase cameras and mine come apart very easily. I just hold the suction body part then with other hand just pull the camera off.
Yes, the magnetic camera mount on mine is also fierce. I have used the 3M sticky mount rather than the suction mount as it is more compact so I do not have an issue with it.
Incidentally, I decided to move my mount after I had stuck it to the windscreen as when I opened the passenger sun visor it was pushing against the modular mounted rear camera.
By moving it allowed the sun visor to open most of the way.
The 3M sticky pad is just that, very sticky and holds firmly onto the glass. I used a kitchen paring knife and slid it back and forth between the glass and the pad to remove it.
No stickiness left on the windscreen and what is left on the back of the mount can be rubbed off.
Thanks for this kool4katz, really useful and gave me the confidence to attempt it! I followed your instructions to the letter until I got to the torx bolts, which wouldn’t move. Then I discovered that I could just push the wire up between the windscreen and the overhead trim and it stayed there. So it was even easier! I don’t seem to need the filter either. Thanks again.
Hi just wanted to pick you up on one point. The piggyback fuse cable you used is the wrong one. That’s why you had to buy a different type of fuse to fit it. The mk4 mx5 uses low profile fuses and the cable you used is for the old style mini fuses, you probably found it didn’t fit into the fuse box as snugly as it should and had a tendency to come out unless you force it in. If the 7.5a fuse you took out fits into the piggyback cable you have the correct cable. I only know this as I made exactly the same mistake. I thought the nextbase kits were all the same but when I investigated further they do provide different kits for various fuse options. Other than that congrats on a very thorough and useful post.
Thanks very much for this. Just for others I had an issue fitting the dashcam where you have as it was taking a view of the grey box on the LHS, my solution was to mount it on the RHS just below the mirror line. Its not ideal but the best I could do