How much fun can you have for £1000?
It
seemed like such a simple question. I was, after all, back in the
country now for the duration so I might as well get something to
drive while I was here. Not just anything, you understand – I can’t
drive just anything.
No, no, no. It needed to be something… special. And different.
Something that I’d be happy to own.
The plan was simple – I’d been there
before: two seats, no roof, engine could be anywhere it wanted and no
oilburners. My snobbish petrolheaded attitude told me that there was
nothing sexy or interesting about an engine that belonged in a Massey
Ferguson! And it had to have sporting pretensions if no actual
pedigree. Oh, and I only had a grand in the hand to get all this
with. To be honest, it was easier than I thought.
Ebay provided. Having sifted through
all the wannabees I’d wittled it down to three options: Toyotas boxy
but excellent little MR2, Rovers rather more refreshing MGF and
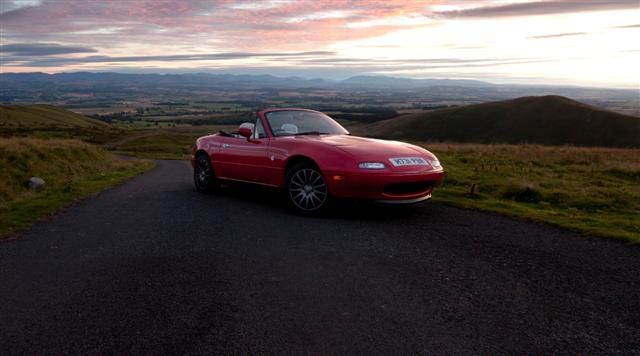
Mazdas venerable Mazda MX5 NA.
This last one had always ground on me
a little. Yes, it was superb – everyone had said so since the dawn
of time - but I resented its nod towards the Lotus Elan as a
facsimilie of one of my favourite cars of all time. The MGF appeared
a better equipped alternative with an exciting (for them) mid-engined
layout and finally there was the MR2 T-Bar, which I’d owned before.
Admittedly it wasn’t a full convertible but the T-bar made it as good
as, dammit, I was happy to let that slide in.
A little bit of research ruled out the
‘F’ almost immediately. Mid-engined it may’ve been but it wasn’t the
drivers car I was looking for. Just a bit too compromised, a little
limp of wrist – bit of a wet bag. And with those three little words
‘head gasket failure’ hovering all over the internet forums it fell
out of the running quickly. The MR2 held no surprises for me. A good
car, yes. A great car even, blazing its own trail even if Lotus did
(or didn’t) have a hand in it. But I’d had one before and trying to
find a rust-free one for the money I had, proved fruitless. So that
left the MX5. Not a disappointing conclusion but in my heart of hearts I knew it wasn’t my first choice. Even so, it was time to find out what all the hype was about…
I’d got off to a good start. As the
most popular sports car in the history of popular sports
cars there were plenty of examples available and, importantly, I was
looking for something that I didn’t have to spend money on
immediately. It had to have an MOT, tax, a straight body with good
tyres and at least some service history. I had neither the time or
money for a project. It had to be unmolested – I wondered if one
still existed. It was a big ask to find something for the sort of
money I was offering but someone came good for me. A retired
gentleman out of Guildford couldn’t fit his grandchildren in his 91
Eunos anymore and so it had to go. We spoke for some time on the
phone, trying to get a handle on the sort of person I was buying
from. He was very upfront immediately that the car was a Cat C
write-off but he spoke with a reassuring eloquence and explained that it had been repaired to a very high standard by his local
‘coachworks’. Just the word: ‘coachworks’. It’s such a lovely turn of
phrase and suggested something so much more than that just a guy who
bangs metal with a hammer. All the details given to me sounded
straight and true, there were receipts to back all of this up, a fair
chunk of service history and almost like a tourettes sufferer I
couldn’t help blurt out the words ‘I’ll have it’’ without really
knowing how I’d get on with it at all. It was bought, sight unseen,
with the Buy it Now option and gave it a week before picking it up
Graham was a perfectly charming
gentleman who showed me around the car as soon as I’d exited the
station, pointing out the slightest little thing before giving me a
fat wad of receipts and merrily sending me on my way. After nearly
six years I was a car owner again. Few things make me happier.
However, my first instinct felt very
familiar – one of having not really thought this through. The
cockpit for instance I felt was a tight fit. Snug. Y’know – really
kept me in place but the centre console armrest just a little too
short for me, the drivers door card a little too high. My elbow would
hilariously slip off the console edge onto the electric window
switch, my right arm held at an awkward angle as if picking at
earwax. You see despite my 5’9” frame I’m lithe and lanky – all
elbows and legs and it forced me into a driving position that wasn’t
entirely of my choosing. Those 20yr old seats were holding up
remarkably well but I had to snakehip a little into the seat to avoid
the non-adjustable steering wheel and when I inadvertently grabbed
the handbrake and tried to select first gear with it,concluded
that the cockpit perhaps wasn’t quite for me. I thought of that MR2
I’d once owned and all the problems I never had with that. Despite
all those little nuances the car just sat there, all happy looking,
and waited for me to find my way.
Things looked up once It fired into
life. A pleasant and not too intrusive rasp from the exhaust made me
smile, power steering that was beautifully weighted and with barely a
ton to push around, it had a lightness of touch about it that
endeared itself to me immediately. The 1.6 was peppy enough. Eager
rather than powerful and for the first time I could remember, I
wondered if that was really going to matter. And then I finally got
to drive the thing…
This felt familiar. I used to race
go-karts back in the day. Nothing serious, y’know - just for fun but
this felt a lot like those Saturday evenings at Daytona Raceway.
Suddenly that snugness of the cockpit started to make sense as I
threaded my way through Guildfords rush-hour traffic - as if I was running through it myself. It felt like I
was part of the equation, of the input - I felt connected to what was
going in a way that felt very alien to the recent euroboxes that I’d
had the misfortune of borrowing. With this in mind, I headed for the
M25 and my journey home. Not the 5’s natural habitat and the
agricultural way a 20yr old ragtop rattled and shook the whole way
home emphasized that but I could forgive it this. It wasn’t going to
spend a lot of time on three lanes of blacktop.
So on first impressions the little ‘5’
had to work hard to win my affections but try it did and affections
were won. Once I was comfortable in my new, narrow surroundings it
became an absolute charm on me. A recent spate of good weather
beckoned to throw the roof back and because of its beautifully simple
design, it allowed the whole process to occur from my seat! I still
found it a bit of a contortion to operate the drivers windows but
that was small beer in the big picture. The car was a delight – it
had been a good choice after all.

So myself and the ‘5’ happily drove
around the county together. I got involved in the excellent forum
here and Eric Terry welcomed me with open arms to The Eagle pub for
North Thames monthly meets. Amongst the 40 or so cars that would turn
up during those summer months I found my one to be in the minority of
being entirely stock. Not a chromed air vent in sight. While I was
quite happy about this, the masses of black on black in the cockpit
puzzled me. I never really understood the acres of black vinyl
mentality and wanted to break it up a little. Having found a
perfectly unmolested example then, the next thing I wanted to do was
change that! Of course. I didn’t have to spend money on it – I just
did - because I do. We all do.

My first efforts with an Alcantara
type product was a small improvement but it still wasn’t what I was
looking for. It was only when I saw a picture of a ‘Tokyo Limited’
edition car did I finally realise what I wanted. By the end of 2011
I’d hatched a cunning plan that, sadly, saw the sacrifice of Dr
Eunos’ Nurburging on a Budget tour for 2012 and set about the
task…
I can raise my hand and vouch now that
I am a dreadful mechanic. Despite my passion for cars, for the love
of God, please don’t ask me to repair one! My only saving grace is
that I know this… finally. But I’ve got passion to make something
more ‘mine’ that I wanted to transfer into the cockpit. Having read
several posts on the forum, most notably from Dan and his £300 MX5,
it gave me an incentive to try. I wanted something more airy, more
personable but without the more bling mentality. Understated style in
my eyes - stereotyped perhaps in other peoples. I am, after all, from Essex, I have a brother called Gary, I’ve owned turbo hatchbacks
and now attempting for an off-white interior on a bright red car.
Trust me; the clichés were there.
It started on ebay. At first it was
just the odd thing or two. A bargain on auction, a ‘buy-it-now’
purchase. I’m sure you all know what I’m talking about. But by the
middle of Winter I was living 300miles further north and hoarding
shiny things like a demented Magpie, solely by way of entertainment.
Every night I saw something else on the bay that I wanted for my ‘5’.
It was only when a full interior was offered that the idea of the
Nurburgring went south and the prospect of a ‘Tokyo Limited’ became a
reality. The seats (particularly the bolsters) were worn but not
ripped or holed and the asking price was well within budget. I took a
chance and picked it all up from Blackburn and began the project.
FurnitureClinic provided the kit.
Despite mixed reviews on the forums about the products longevity
(especially from a darker to a lighter colour) I liked the videos and
results enough to take a chance on the kit. Going from a tan interior
to cream I figured would be a lot easier than if I’d started with
black. As it turned out, it wouldn’t have made a lot of difference.
The kit had several stages: two prep
stages, two colour application stages and two sealing stages but
first I had to make the repairs to the existing trim.

First off, it all needed a damn good
clean. The interior had been stored in an old conservatory for I
don’t know how long but it was musky and dirty. The plastics came up
a treat with just good old soap and water and after disassembling the
seats I began the first of the leather preps to remove the factory
finish to the leather. This is heady stuff, I can tell you. A
facemask would do you a lot of favours here, as would an open window.
Unfortunately I only had the former which meant frequent trips to the
outside for some fresh air. The prep did the job though. The amount
of grime that came out of that 20yr old leather was considerable.
Once dry I did the same thing again with an alcohol based cleaner and
then set about the repairs.

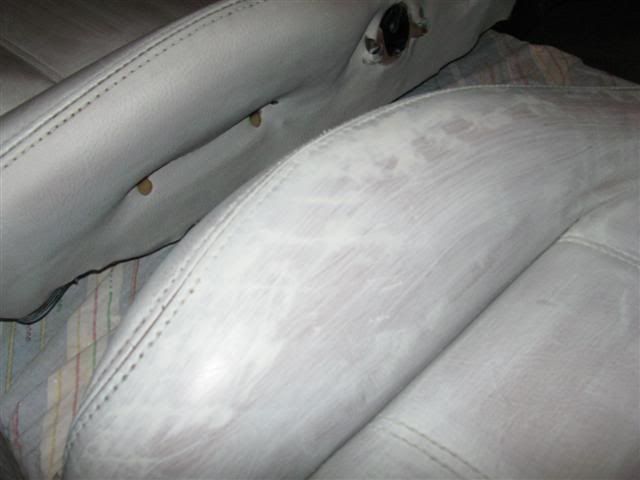
Sadly, the seats had been stacked upon
one another in storage leaving several, deeply unattractive scuffs in
the leather from the metal seat runners. In addition there was some
wear on the driver bolster (show me a seat that hasn’t!) and some
stretch marks in the leather. I kept reminding myself that they
could’ve been a lot worse. You frequently saw seats on the bay in
awful condition for similar money or refurbed seat-covers in excess
of £300. Money I didn’t have. I looked towards my kit that came with
a flexible filler. I applied in thin layers before sanding back again
and again until I got result I was happy with. You lost the grain
pattern of the leather but it gave an acceptable repair.
Having attended all the surfaces in a
similar fashion it was time to apply the colour. I’d opted for a
light cream shade. The reckoning behind this was that flat white
would be too much of a contrast with the Classic Red (not to mention
a pig to keep clean) and the regular cream/beige/oatmeal options a
little too dark for my liking. It is indeed a very fickle business
picking the colours of anything on your car. From the first
applications I was sure I’d made the wrong choice.

You see, the primary applications are
made with a sponge. The thinking being that more colour is applied to
get into all those nooks and crannies and creases and stitching at
this stage than at any other. The results were patchy, streaky and
just not very encouraging at all. You are reassured to a degree. The
kit does tell you that this will happen but it was all too easy to
see the hard work and money that you’d already put into this get
brutalized by that first application. As subsequent colour went on (I
did three coats by sponge) you could begin to see the colour even
itself out. Each layer was dried with a heat gun before the next
application. Once I was happy of a fairly uniform coverage it was
time for the airbrush.
In the kit you got a cute little
airbrush which transformed the finish from streaky and patchy to
flat, uniform colour. It was a relief, I can tell you. With every
pass of the brush the streaks and lines disappeared. The filler that
was so prominent up to then vanished also. It is a very good feeling
indeed when you finish one of the seat backs for instance, stand back
and think ‘yeah, that is ok – that will do’. Just one more seat
back and two more cushions and we were there. Not quite.

As good as the kit was, the problem
was that it was can propelled. Rattle cans of pressurised air powered
the airbrush and I found them A) to spike frequently, B) to change
pressure throughout their useage and C) not enough of them in the
kit. Admittedly, FurnitureClinic know this and recommend the use of a
compressor for the job. My argument to that was either to include
them (and enough of them) for the job or not at all. This
half-hearted option led me into a false sense that I could do what I
wanted with the kit provided. Not so the case. In addition to the two
smallish cans included, I went through a further three larger cans
from my local Halfrauds. The extra £24 spent on aerosol propellant I
wasn’t happy about at all. In the grand scheme of things, it is a
small point but one worth bringing attention to, all the same. If you
want to attempt something like this yourself – get a compressor.

Despite the spiking and spitting from
the airbrush I did manage to get two seats and seat backs sprayed in
three coats of Light Cream. Once they had dried then it was onto the
third stage of sealing in the colour.
You can specify a number of different
finishes: gloss, satin or matt. All very familiar I’m sure but as
these were applied in the same way with the same airbrush, the same
problems applied. Also, this had been where I found most of the
criticisms of this product lay – in the longevity of the colour -
so I gave them 5 coats of sealant (three of the harder wearing gloss,
two of satin) to the heavier used areas and a couple of coats of
gloss to the seatbacks. Left the whole thing to dry and then
assembled the seats the next day. Just a couple of coats of
Plastikote satin black for the plastic seat trims saw the job
complete. Once reassembled I then left the seats for a further week
to cure/dry/harden properly before fitting them. I must say, despite
any issues I had with the kit, the results were better than I
expected. Overall, I was happy with the effort.

As I’d purchased the ‘Medium’ kit I
had plenty of colour and some sealant left over for the door cards.
This was slightly different inthat they were vinyl and not leather
and a quick call to FurnitureClinic confirmed that I could apply the
colour in much the same way but may have adhesion issues. Their
‘adhesion promoter’ that they offered seemed like an unnecessary
expense and so instead I decided to just roughen the vinyl surfaces
lightly, alcohol prep and see how the colour took.

By this time I’d bought a small
compressor off ebay which immediately made more sense. The benefit of
even, reliable pressure through the airbrush made light work of the
doorcards and crash bars. In addition the remaining pieces of trim
from my interior purchase were colour coded also. As these were
plastic and neither leather or vinyl, a quick blowover of acrylic
primer seemed to provide a more suitable base for the colour to take
to. When the sealant ran out I simply use Plastikotes satin lacquer
instead. Installation, as they say, was the reversal of removal.
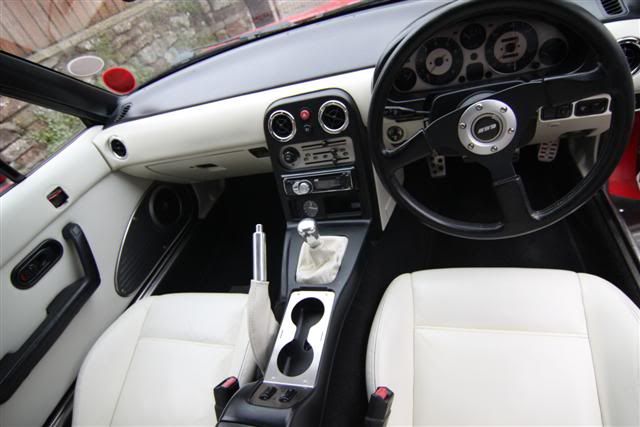
While all this was taking place I’d
been searching the forums for some dashboard attention. MX5nutz.com
had regular posts from Vlad of Jassperformance.com who provided me
with brushed stainless steel instrument binnacle, HVAC surround and
cupholder/electric window trim. I wanted something to break up the
mass of black in the centre console and radio fascia and this seemed
to do the trick. I’d already succumbed to the chrome air vents many
moons before so they didn’t quite match but I was happy for a
brushed/chrome combination if it wasn’t too overpowering. While you
could well describe it as bling I think it remains just the right
side of tacky ;o)
So even with my fingers of butter and
fists of ham I managed to colour change my interior. It’s not perfect
but neither am I or the car – it is enough to be happy with it.
By way of celebration I finally
managed to get most of the fixtures and fittings into the car just as
the clocks went forward and during that lovely spell of Spring
weather that we all enjoyed. It wasn’t so straightforward. Two of
those seat bolts had to be drilled out and a further two only by way
of the mother of all breaker bars but go in they did. In addition to
the interior mods a twin exit stainless exhaust enhanced the aural
and visual pleasure, a de-tango of the lights and shaved and polished
the lenses and reflectors too. A set of smart 15” alloys also sat
in my friends garage and sadly weren’t available for these pics. All
the hard work had been done leaving just a few bits and pieces to
tinker over. The only thing left to do was throw the roof back, like
many others that weekend and take it for a back lane blast. I
finally finished off the dash on the Easter weekend and quickly
managed to bang out a couple of quick photos for here. I liked the
Tokyo Limited but knew I couldn’t recreate it. But I certainly think
I got somewhere close and that is good enough for me.


Afterthought…
And so to the business end – what
did it all cost? For the car on a buy-it-now was £950. A further £77
to FurnitureClinic for the colour change kit and £38 went to Vlad at
Jassperformance.com for the interior trim in stainless steel.
Everything else was bought on ebay. £150 for the full interior
including the leather seats, £112 for the twin exit exhaust, £7 for
alloy pedals (heel ‘n’ toeing is a delight with that exhaust!!), £22
for the TT style vent rings, £26 for the gearknob and handle, £20
for the gear knob surround/Handbrake sleeve and save for a pair of tweeters, that is about it!
There have been many other expenses to the car (air-con regas, Waxoyl
underside to name but two) but all in all the car stands me about
£1800. Not quite the grand that I started off with but it was never going to be that way, was it.
My only concern is the long-term
performance of this product. It’s my daily driver so I’ll be keeping
a close eye on how everything wears but for now I’m happy and that
has to be the bottom line.


 shame, the pics would look great in glossy A4…


 . I can’t say that of any other car I’ve owned (including my