i just changed my softop, frame and all and it seems to be on wonky. when putting the roof up the catches are slightly out of line but will close but then the roof seals are nice and tight on the drivers side but have quite a big gap on the passenger side (see pic)
i assumed I couldn’t put the roof on wrong but it looks like I have.
Do I just need to re torque the bolts on the rain rail?
Thanks ![]()
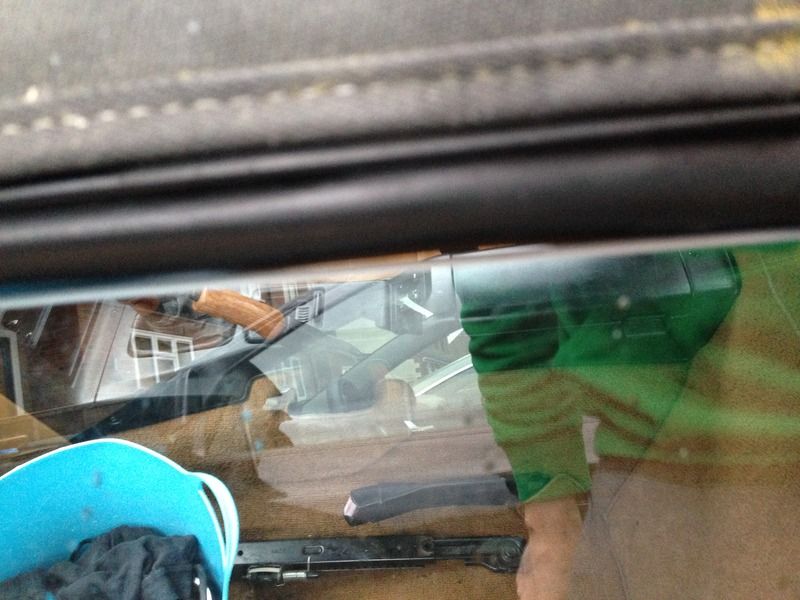
Is that the side window ? If so make sure it is up as far as it will go. You can adjust it on the bars if you take the door cards off.
Thanks. It sure is the side window but I don’t think this is just a window adjustment. The whole roof seems to be on the skew, and the windows were fine on the old roof.
Something isn’t quite right…
Firstly, the roof “sits” best if you close it whilst inside the car so that you can ensure that the catches engage dead centre.
Also shut roof , then close window to the roof, as opposed to dropping roof onto window
Are you sure the replacement frame is “true” ? There does not seem to be much room for adjustment in the existing 3 bolt each side fixing system ( are these nipped up properly? ) as they probably have more influence in squaring up the roof than the rain rails.
Lastly it could just be that your replacement roof sits slightly differently, and a window height adjustment is required.
but the catches should seat accurately
Thanks Mattylan.
Thats part of the problem the catches don’t hit it square. Its also very difficult to close.
I’m guessing I have over tightened the brackets on the rain rail, and not done them in the a very clever order so the roof is a) too tight, and b) no evenly tight hence pulling at a strange angle.
Can anyone advise how tight the bolts along the rain rail should be tightened too? The more you tighten the more taught the roof becomes…
The guide I read said 85 in lb, but that equates to about 8 ft lb if I got my conversion right, which can’t be much more than finger tight…?
Had similar problem when I needed to repair my rainrail.
There are some pretty good how to’s if searched on internet and I’m sure there a download in technical section.
for me, what worked was:-
remove all nuts on rail rail plates, so completely slack
loosen (not remove) each of the 3 hoodframe bolts on either side of the frame
make sure the roof frame is sitting correctly (the web-guides will explain that)
latch the roof
tighten only the 6 bolts of the hood frame
unlatch roof… then re-latch to be sure that roof is lined up
then, with roof unlatched, go back to the rain rail nuts/plates and tighten in the sequence shown… attend to each nut carefully and patiently, and apply torque as reccommened (sorry, I can’t remember what torque, but it was certainly past hand-tight!)
That solved the twist that I had.
But also do consider the window adjustment… it’s easy, and shown somewhere in technical section again.
Cheers, Tim
Thanks Tim, thats flippin’ awesome!! Will have a play tonight. Wish I hadn’t put my seatbelt covers back on now ![]()
I do not think the rain rail bolts affect the adjustment of the hood, but they need to be tight, having done a few there’s no need to torque them. The 3 part metal rail can be put on upside down and that may well affect how well the hood closes, have you got that the right way up?
Apart from that follow the advice above and you should be cooking on gas.
Also, its well worth adding a location to your signature, you may find a local willing to help out.
Thanks for everyones help…
I had a play with this last night and this is what I found:
Symptom - following full roof swap the roof wasn’t closing square, latches were approx 15mm out of line. (towards the drivers side) and difficult to close. Plus there was a big gap between the passenger window and the roof.
Action 1 - Loosen the bolts on the rain rail. Interestingly I thought I had torque the bolts up evenly but I hadn’t, some were much tighter than others. This reduced the tension on the roof so it had more give and was easier to latch. It was still wonky though
Action 2 - remove the 2 straps from the roof to the rain rail studs. These were still tight after loosening the nuts so I took them off altogether. Again this made life easier still but everything was still a bit crooked
Action 3 - loosen the 3 bolts each side holding the frame in place, give the roof a good wiggle and attach the latches. There was a distinct movement when I did this so with the roof latched I tightened up the bolts. This had a positive effect in straightening the roof. Its still not perfect but rather than being maybe 15mm out its now maybe 5.
Action 4 - reattach straps and tightened rain rail bolts. I used the order as specified in the online guides and tightened up using a socket on a screwdriver style attachment. A this is easier to do as you can actually get at the bolts easily and it stops means you don’t use too much force. the online guides say 85 in lbs of torque should be used (which is the square root of not a lot). I went round twice torquing them up in order. once you’ve torque up some of the later ones the early ones become quite loose as you take up the tension elsewhere…
It this point the roof fits much better, its still not perfect but I am comfortable with it being good enough (although I’ve not tested for leaks yet). Something isn’t straight somewhere, not sure if its the car or the roof but it doesn’t really matter. Maybe the roof fabric hasn’t been fitted very well?
The gap above the window was improved, but still not perfect
Action 5 - Adjust the window stops.
That gives a good seal… ![]() now just to leak test it…
now just to leak test it… ![]()