The gearbox is currently supported by a jack and an axle stand.
OK, so you don’t think that’s too out of the ordinary?
Hopefully i’ll get a diff this week and I get everything properly mounted.
Andrew
The gearbox is currently supported by a jack and an axle stand.
OK, so you don’t think that’s too out of the ordinary?
Hopefully i’ll get a diff this week and I get everything properly mounted.
Andrew
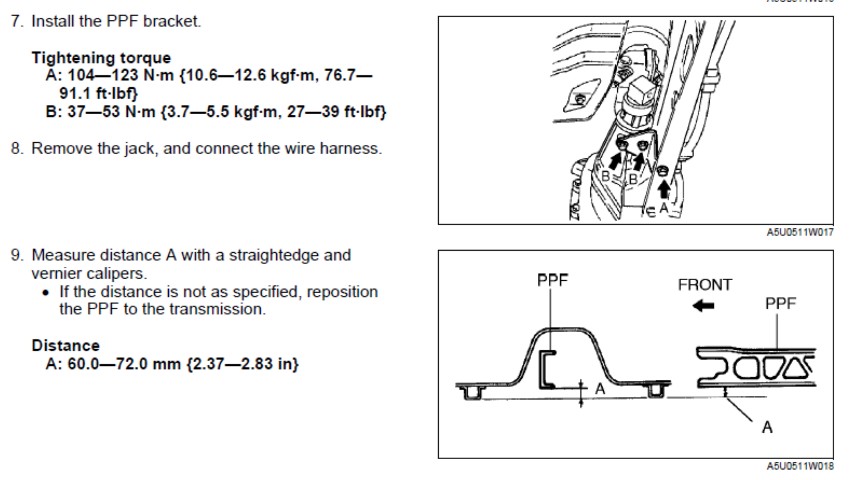
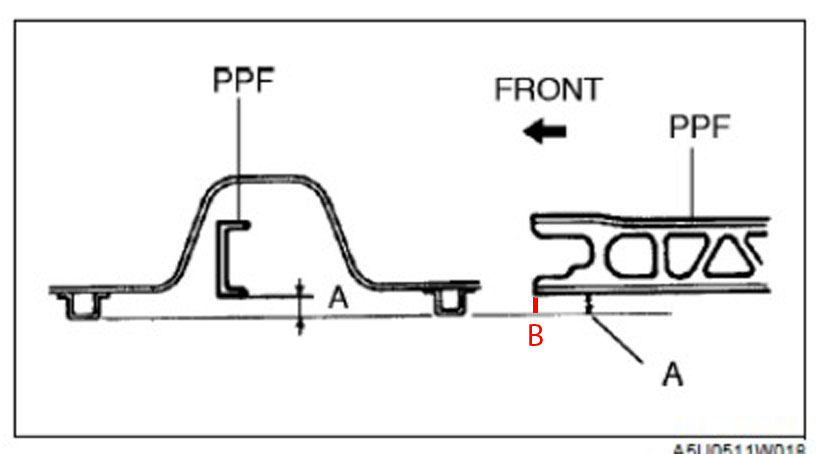
If it were me I’d not worry at the moment, I’d fit the ppt frame, loosen up the engine mounts and tighten everything as one. There is a procedure to set the level at the gearbox to the correct height otherwise the propshaft angle is wrong and you get vibrations & premature wear on the propshaft. It’s been while since I’ve done it but as in the diagram you put a straight edge (bit of metal/wood) across the bottom of the car between the frame rails then set the bottom of the ppt frame at the gearbox end to be 60-72mm from the straight edge. Then tighten the ppt bolts to the specified torque.
(pics from Miata.net)
I had a play with the Miata gearbox calculator, Moving from a 4.1 to a 3.9 diff on a 5speed box only gives you an extra 1.9mph in 1st, and an extra 7mph max speed in 5th. At cruising the revs would drop by about 4.8%
You could gain the same by moving to a slightly taller profile tyre
Great excitement!
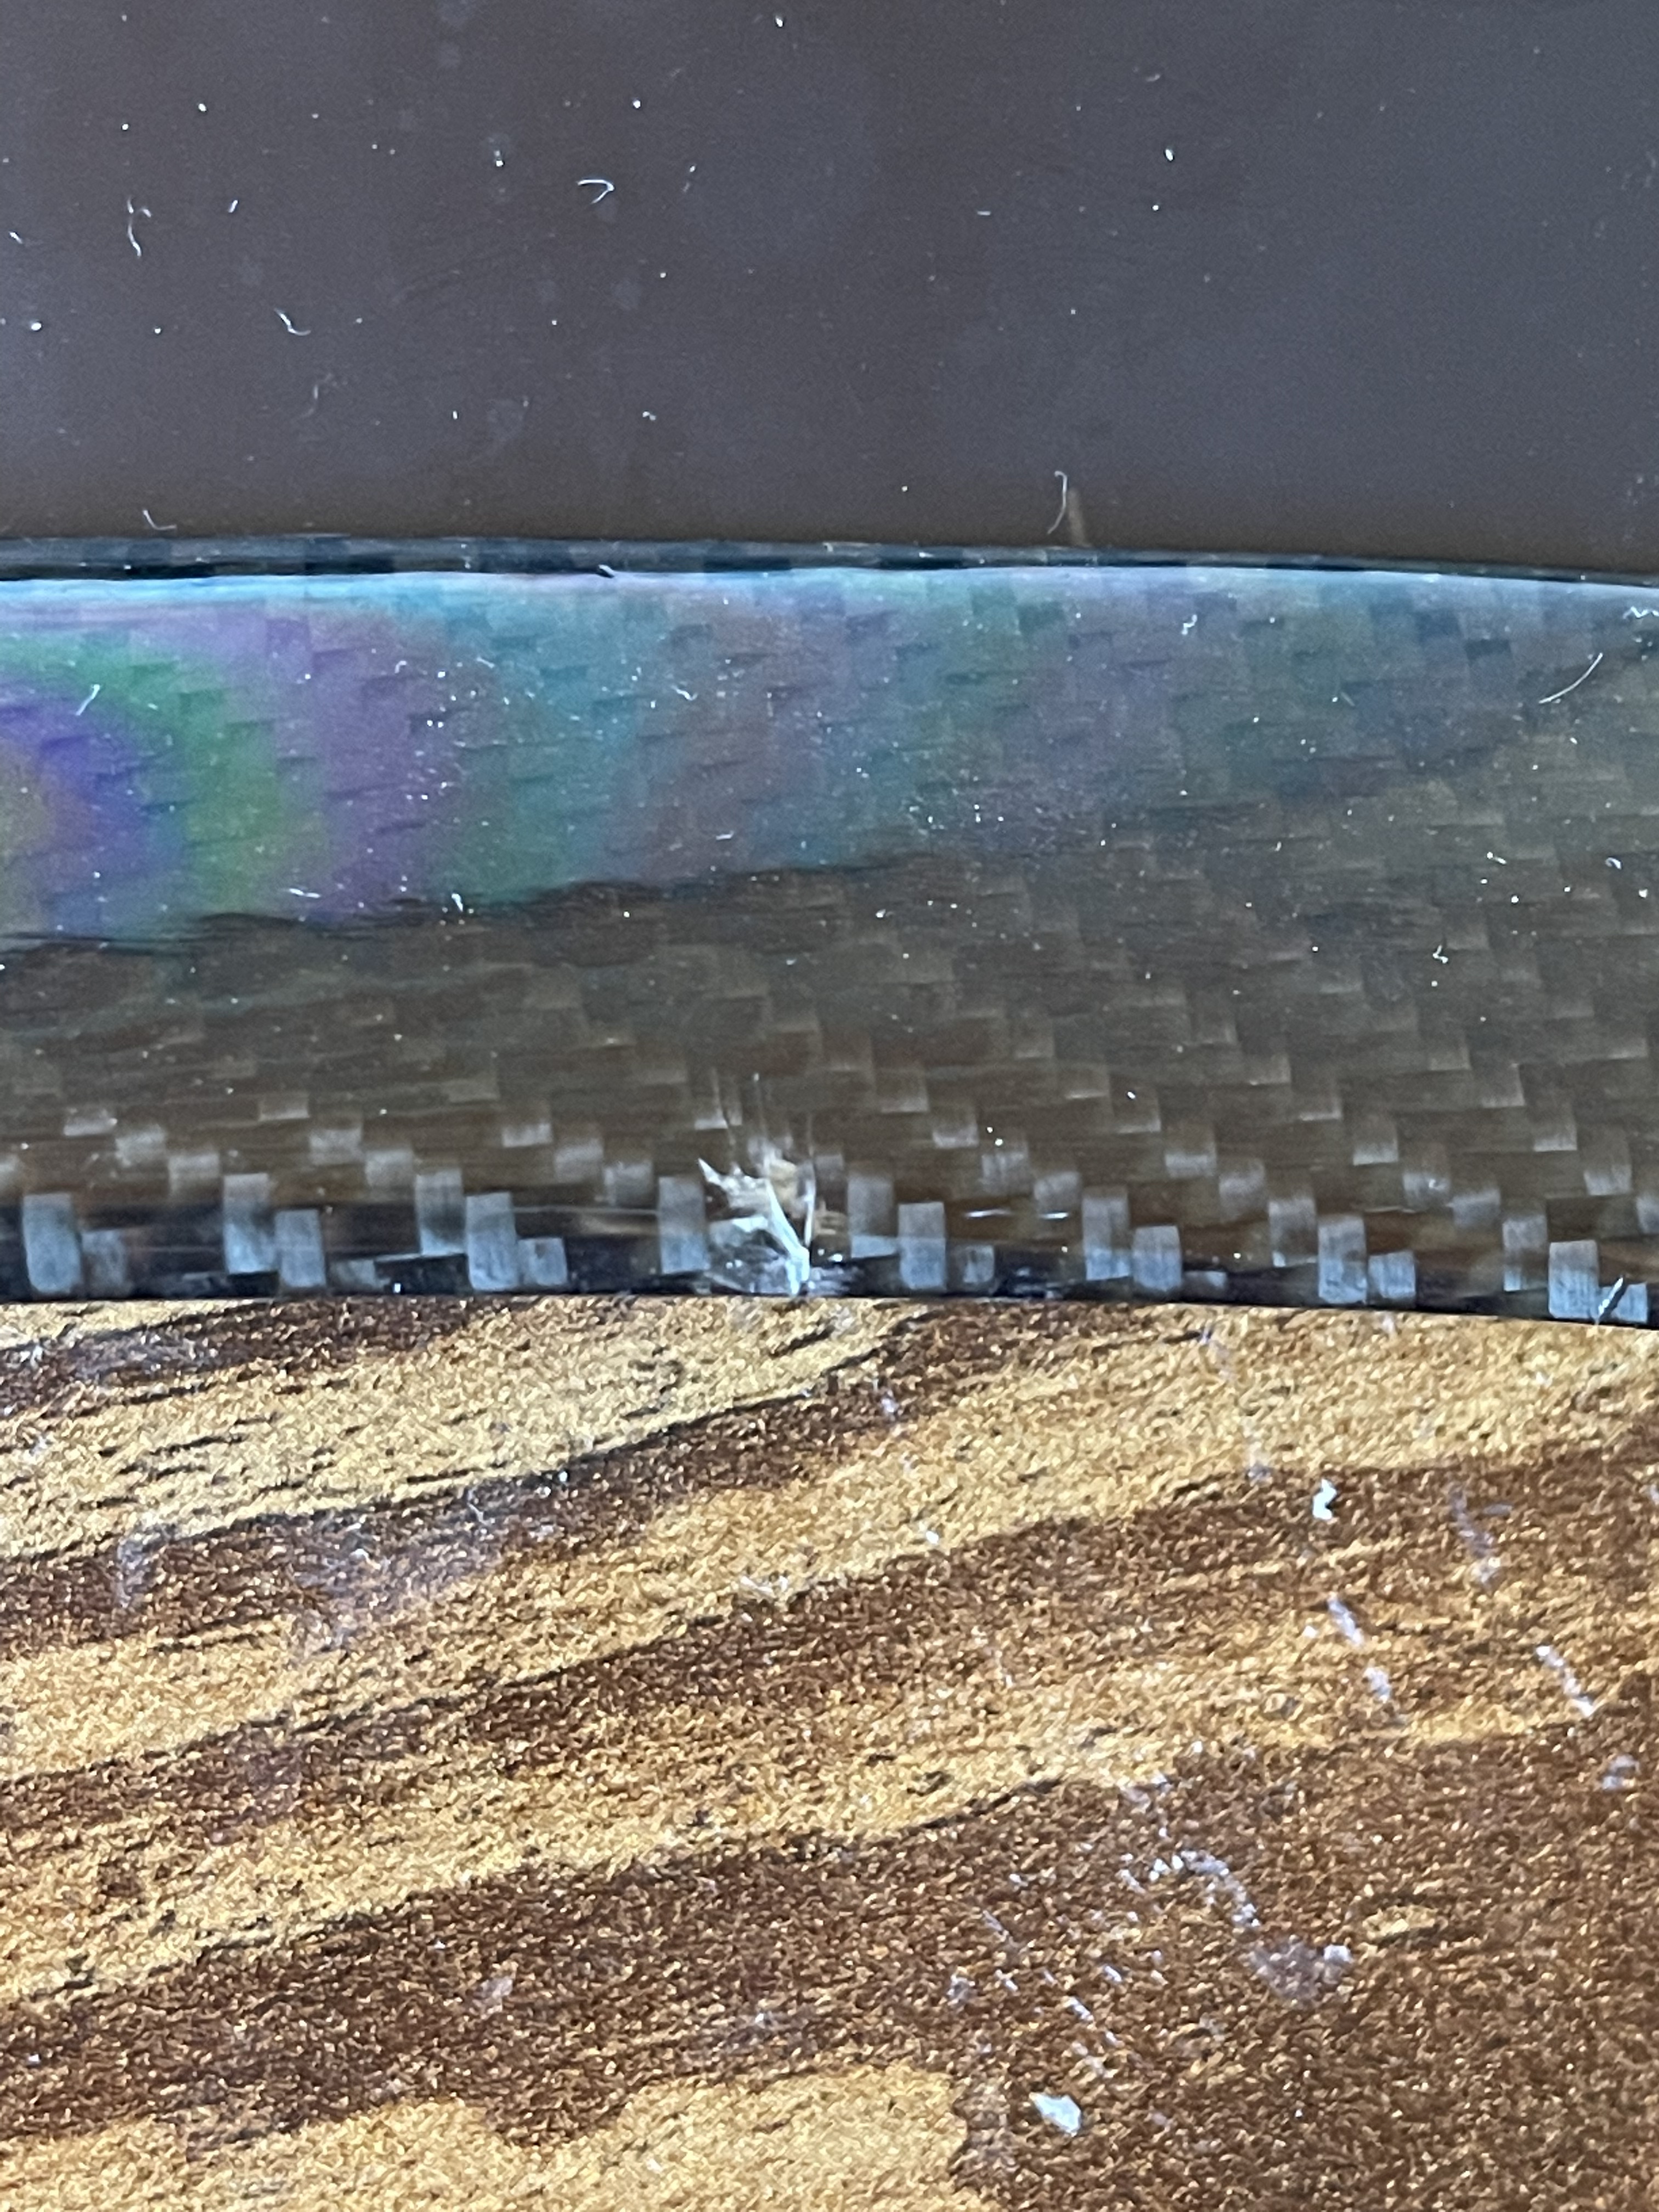
My Torsen II arived! 


I imagine bad words were said.
Can that be welded back together?
haha bad words were said, but I was very calm in the email I sent the selller 
Fortunately (I hope), their feedback and ebay ratings are about the best i’ve seen, so it’s more likely that DHL messed up than any other eventuality. Hopefully i’ll get a refund ASAP and I can order another one!
Oh dear  but interesting that it’s broken at the designed in weak point on the arm as it should do (see the notch). Don’t throw it away as the casings are generic and you can use one from a non-LSD on it. What ratio did you go for in the end?
Yes, they are sending me another casing. they were very helpful actually, which was a nice surprise!
I went 4.1 in the end - swapping over wouldn’t be too much hassle if I decided I wanted to change the diff or gearbox to 6 speed in future.
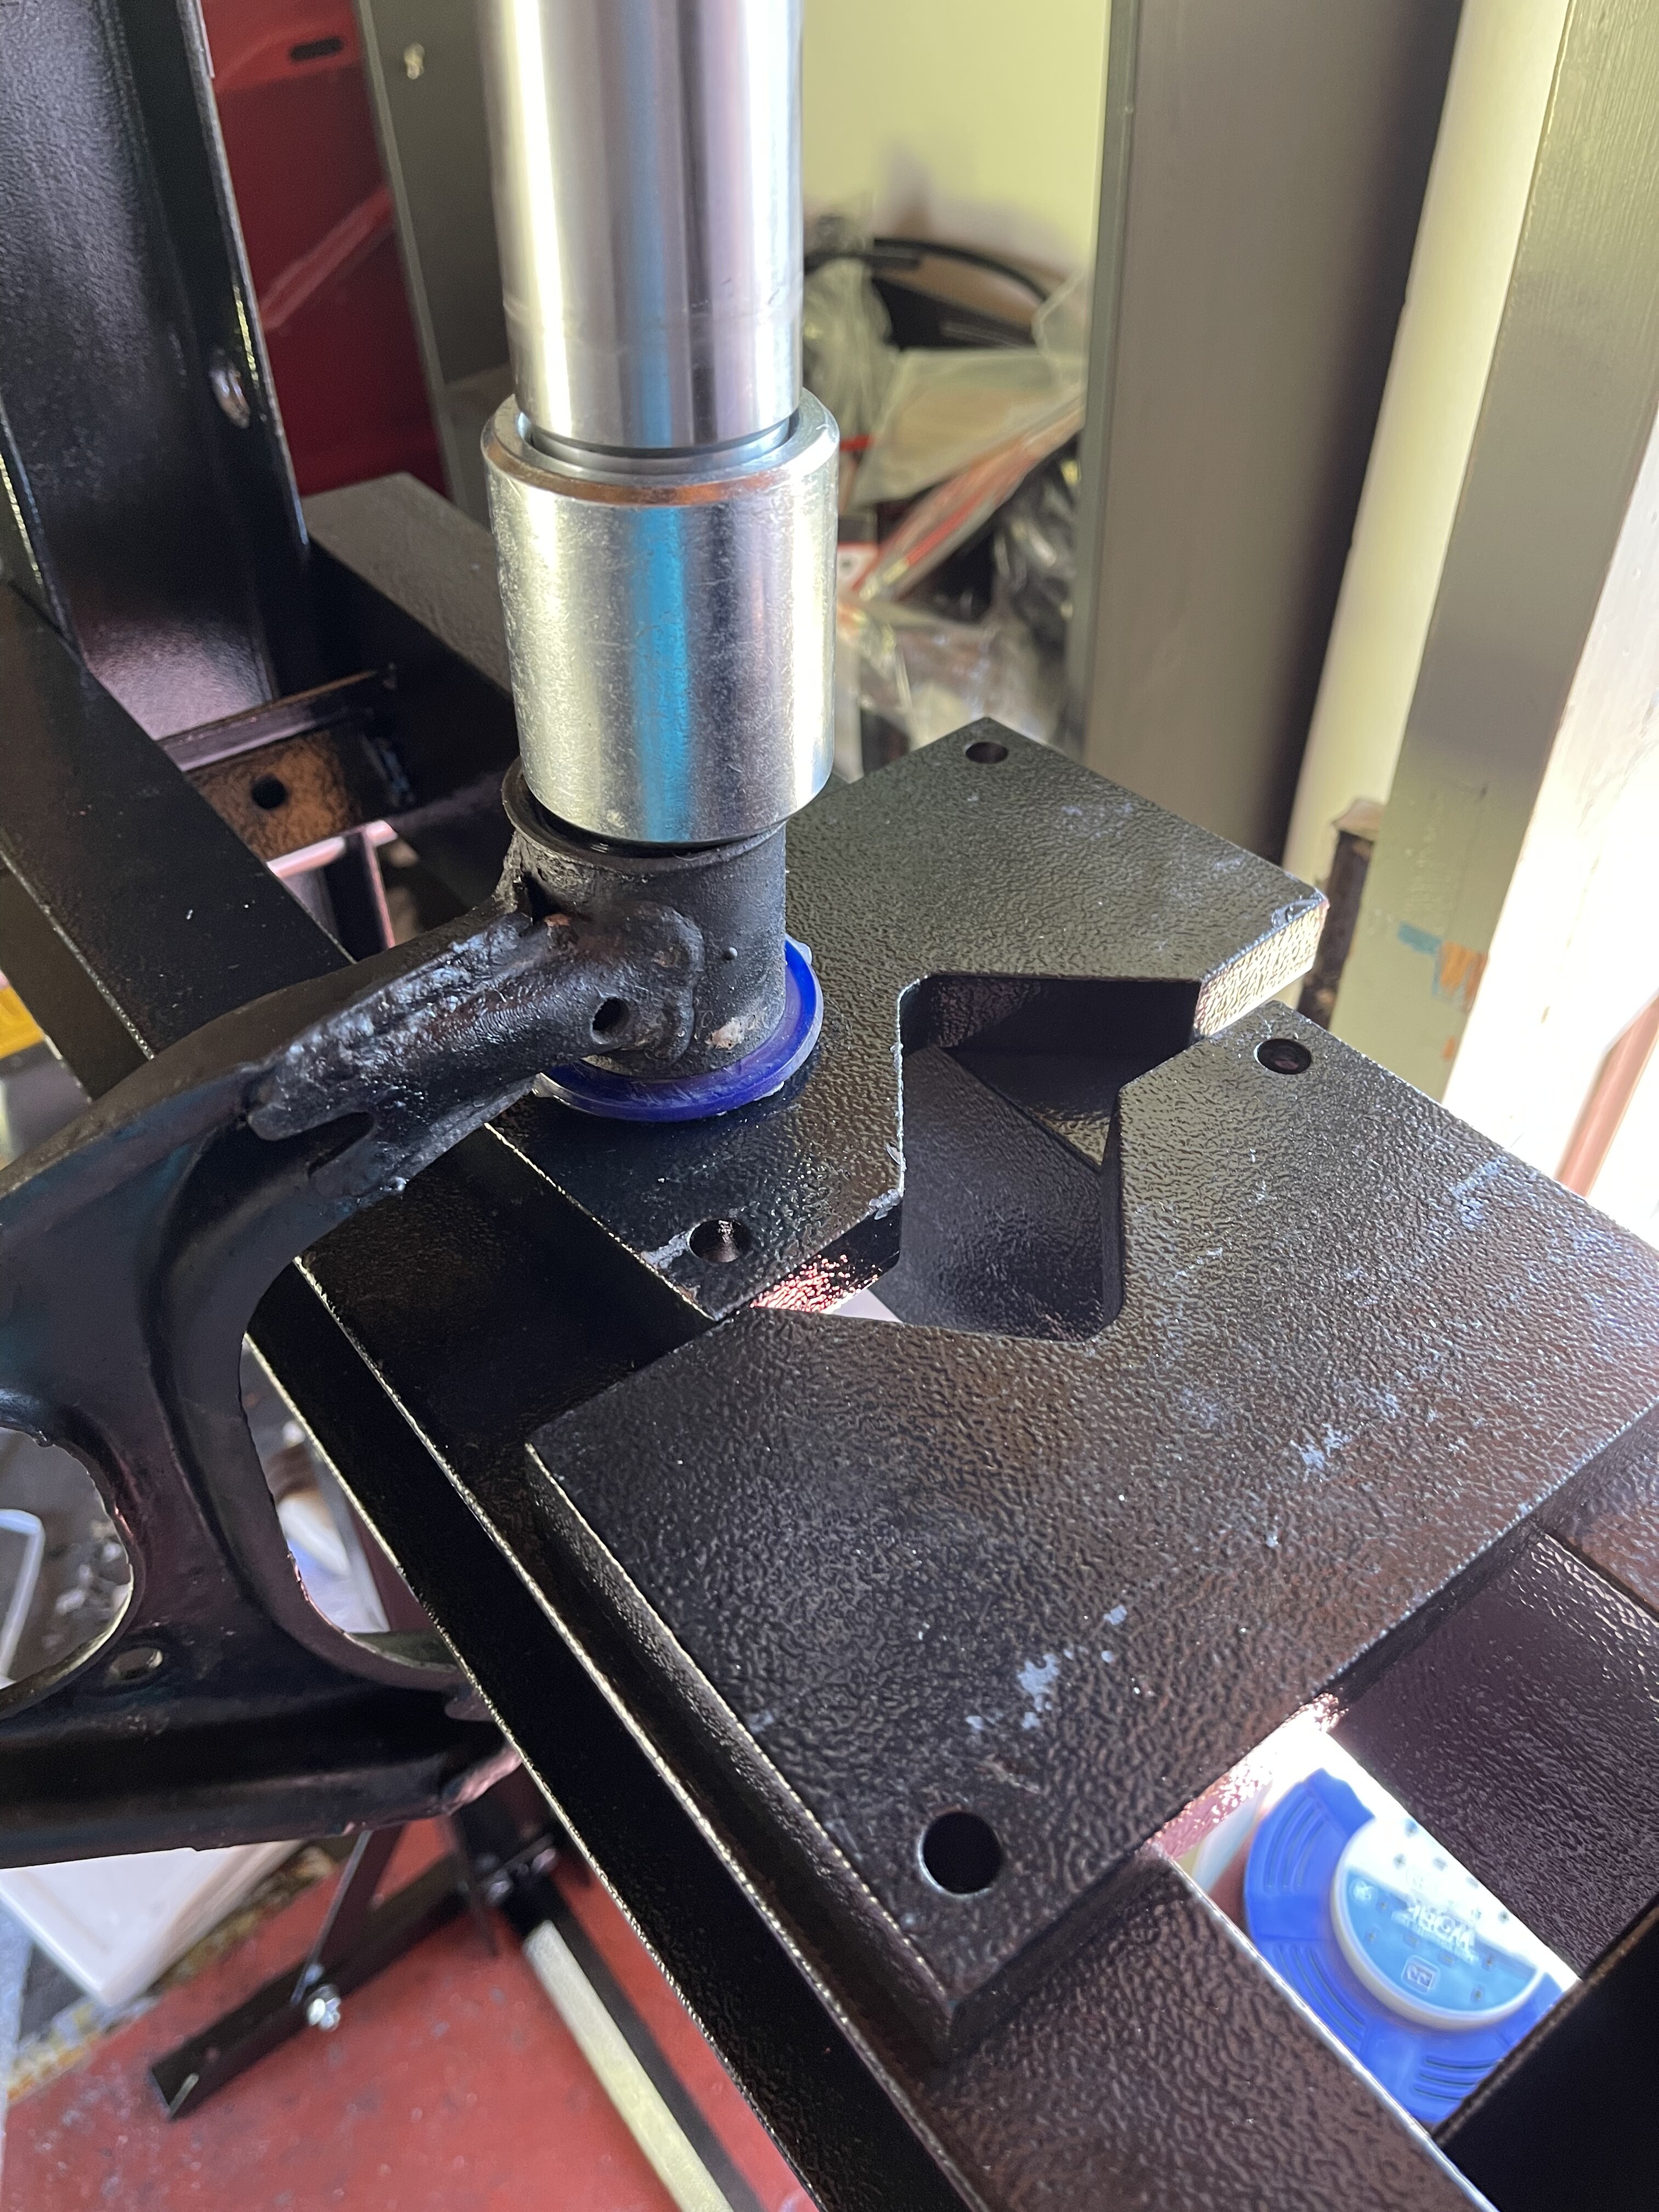
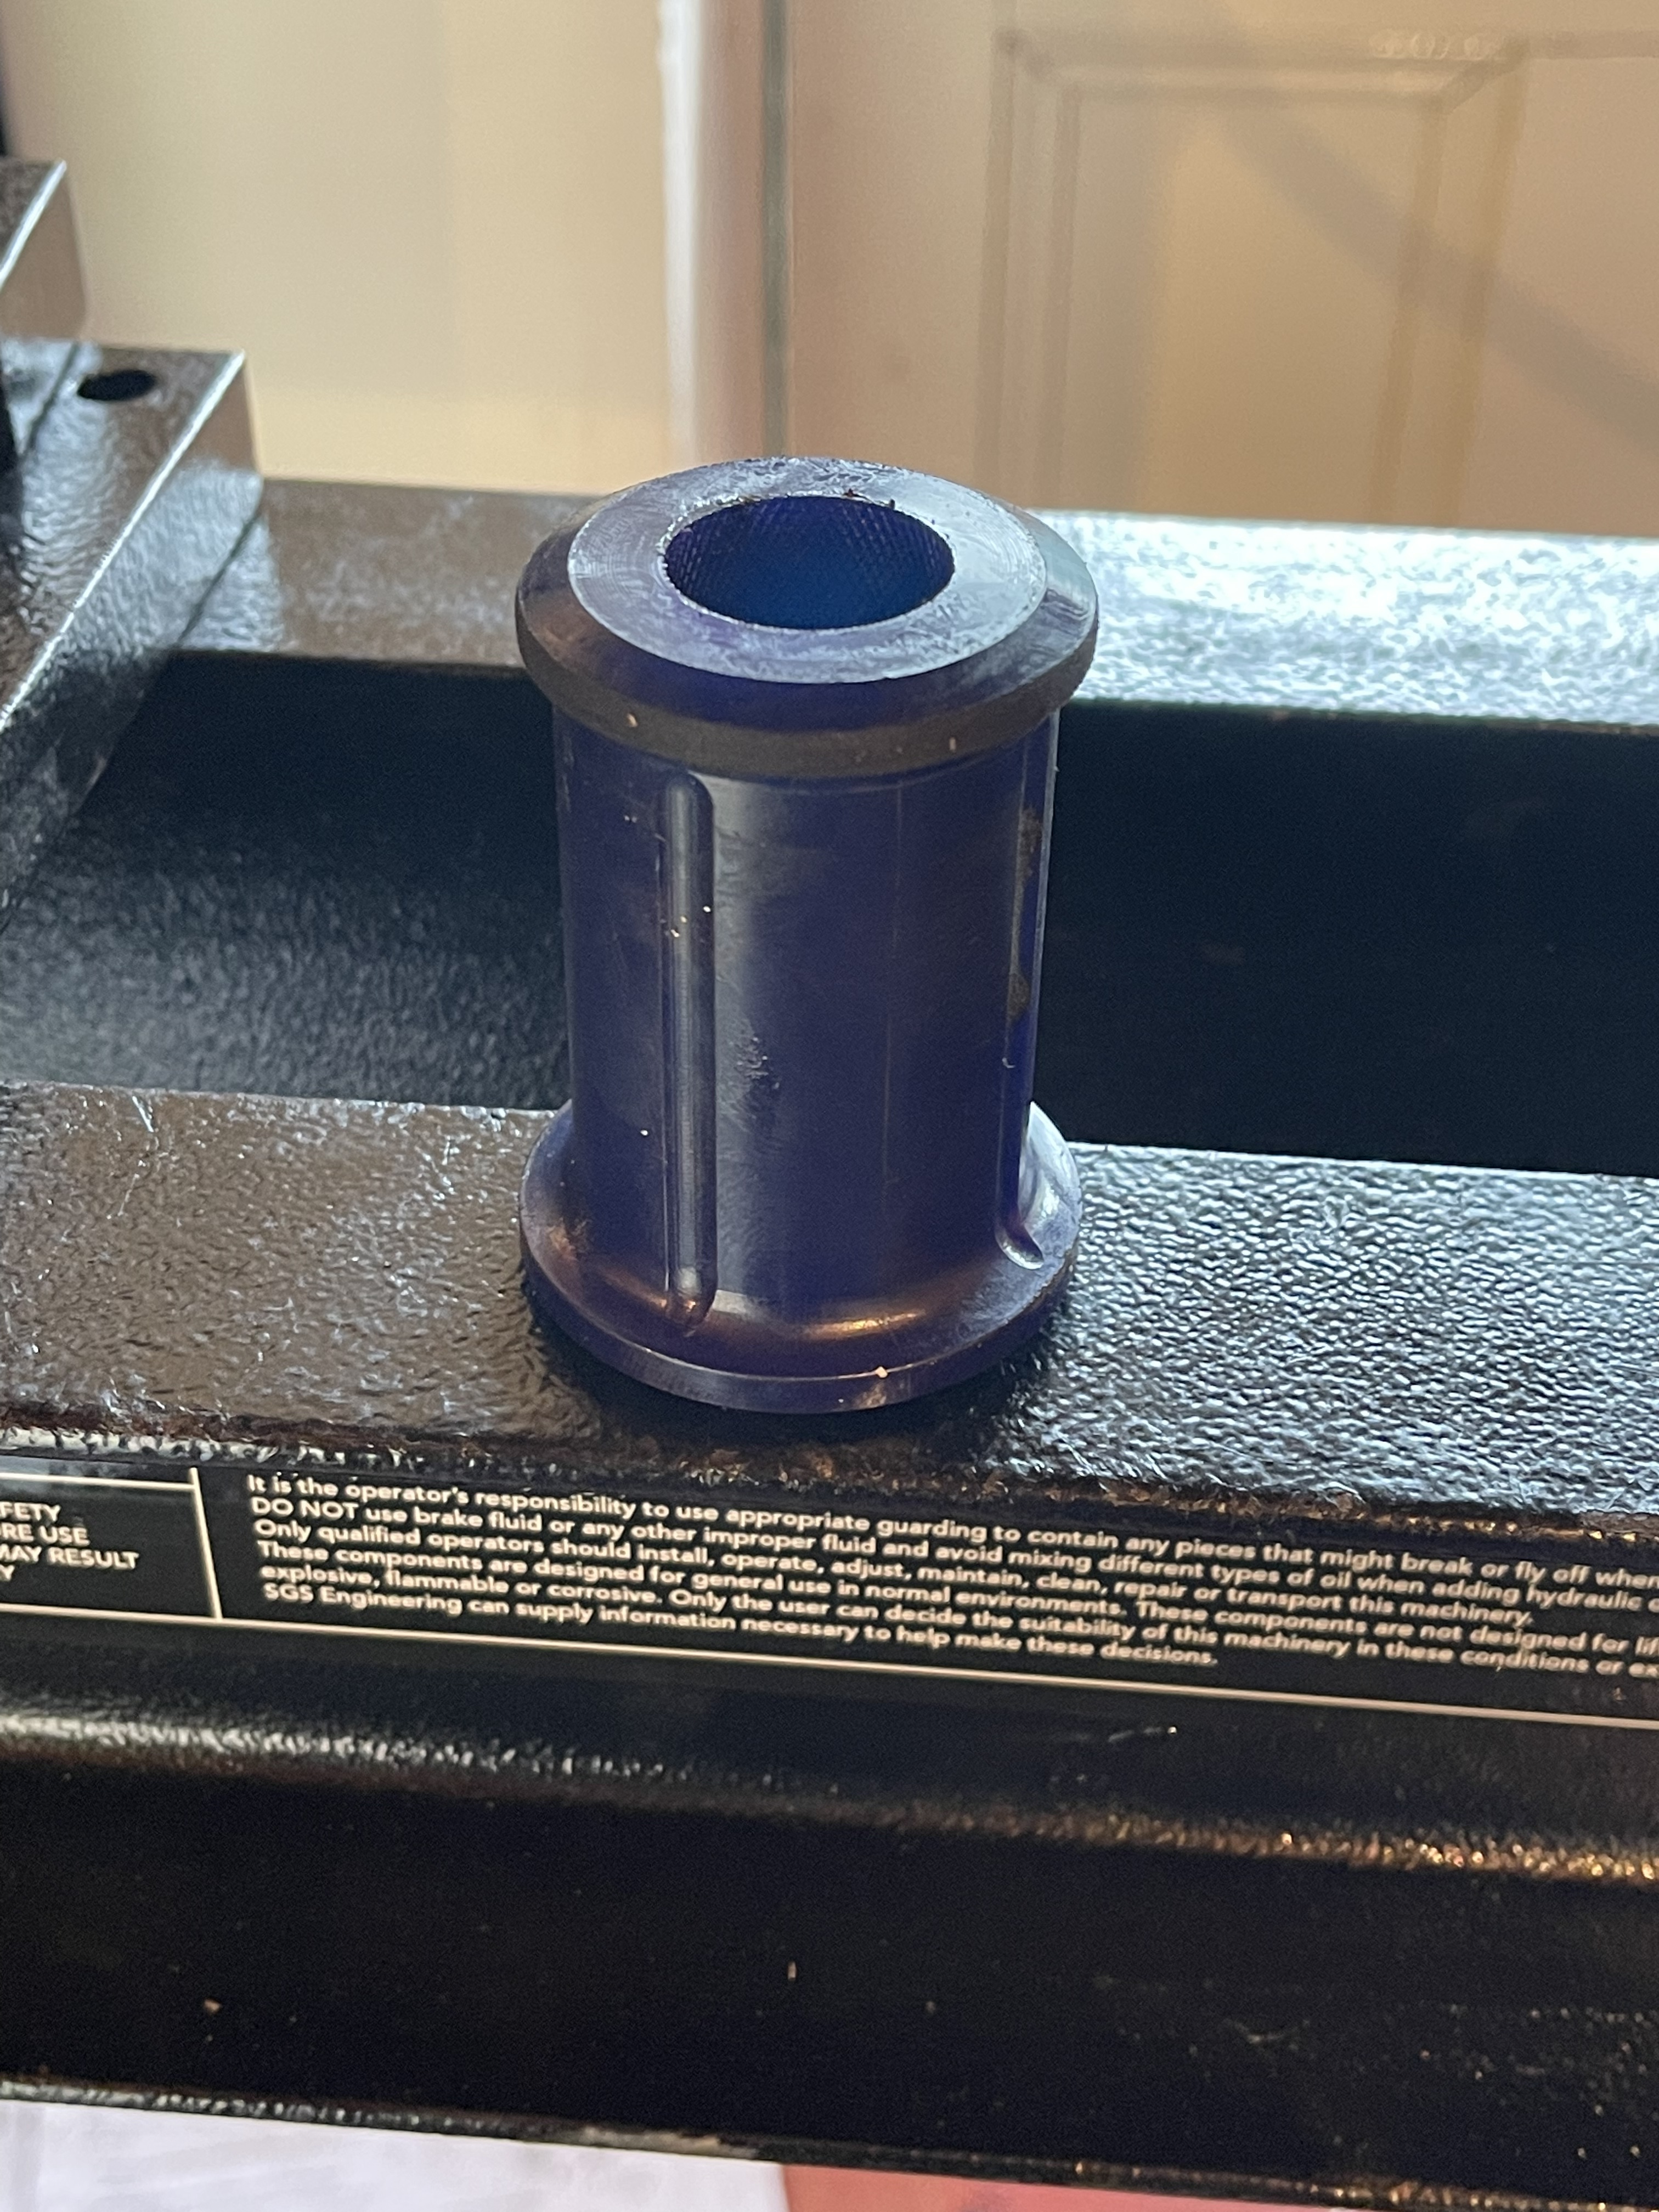
Right, the superpro bushes are an absolute pain in the rectum to get in. Byt the time I manage it with the thread and washer method, i’ll have spent more on replacement threaded bars, nuts and washers than it would cost to buy a press. So, i’ve bought a press.
I’m going to be changing all the rear bushes and the diff bushes too so it’s probably a non-non-sensible waste of money!
Unfortunately, there will be no work done on the car this weekend (might squeeze some in on Sunday night…).
Have a good weekend guys.
I sodding hate bushes. And suspension arms.
With the use of the press, I’ve managed to get the upper control arm bushes in and the rear lower control arm bushes.
However, the front, front lower control arm bushes just do not fit. I’ve tried with the press and the threaded bar and neither method works. I’m sure it’s not helped by access, fitting the control bar around the press frame means I can’t ever get it at true vertical, but it still should be possible!
I’ve emailed Superpro to check that there aren’t any differences between the markets in so far as early control arm bushings. I’m guessing not!
Any suggestions?
I’m pretty peeved at the moment. And I’m not enjoying it! I can’t really get any further with anything until I can get the front wheels on and supporting the car.
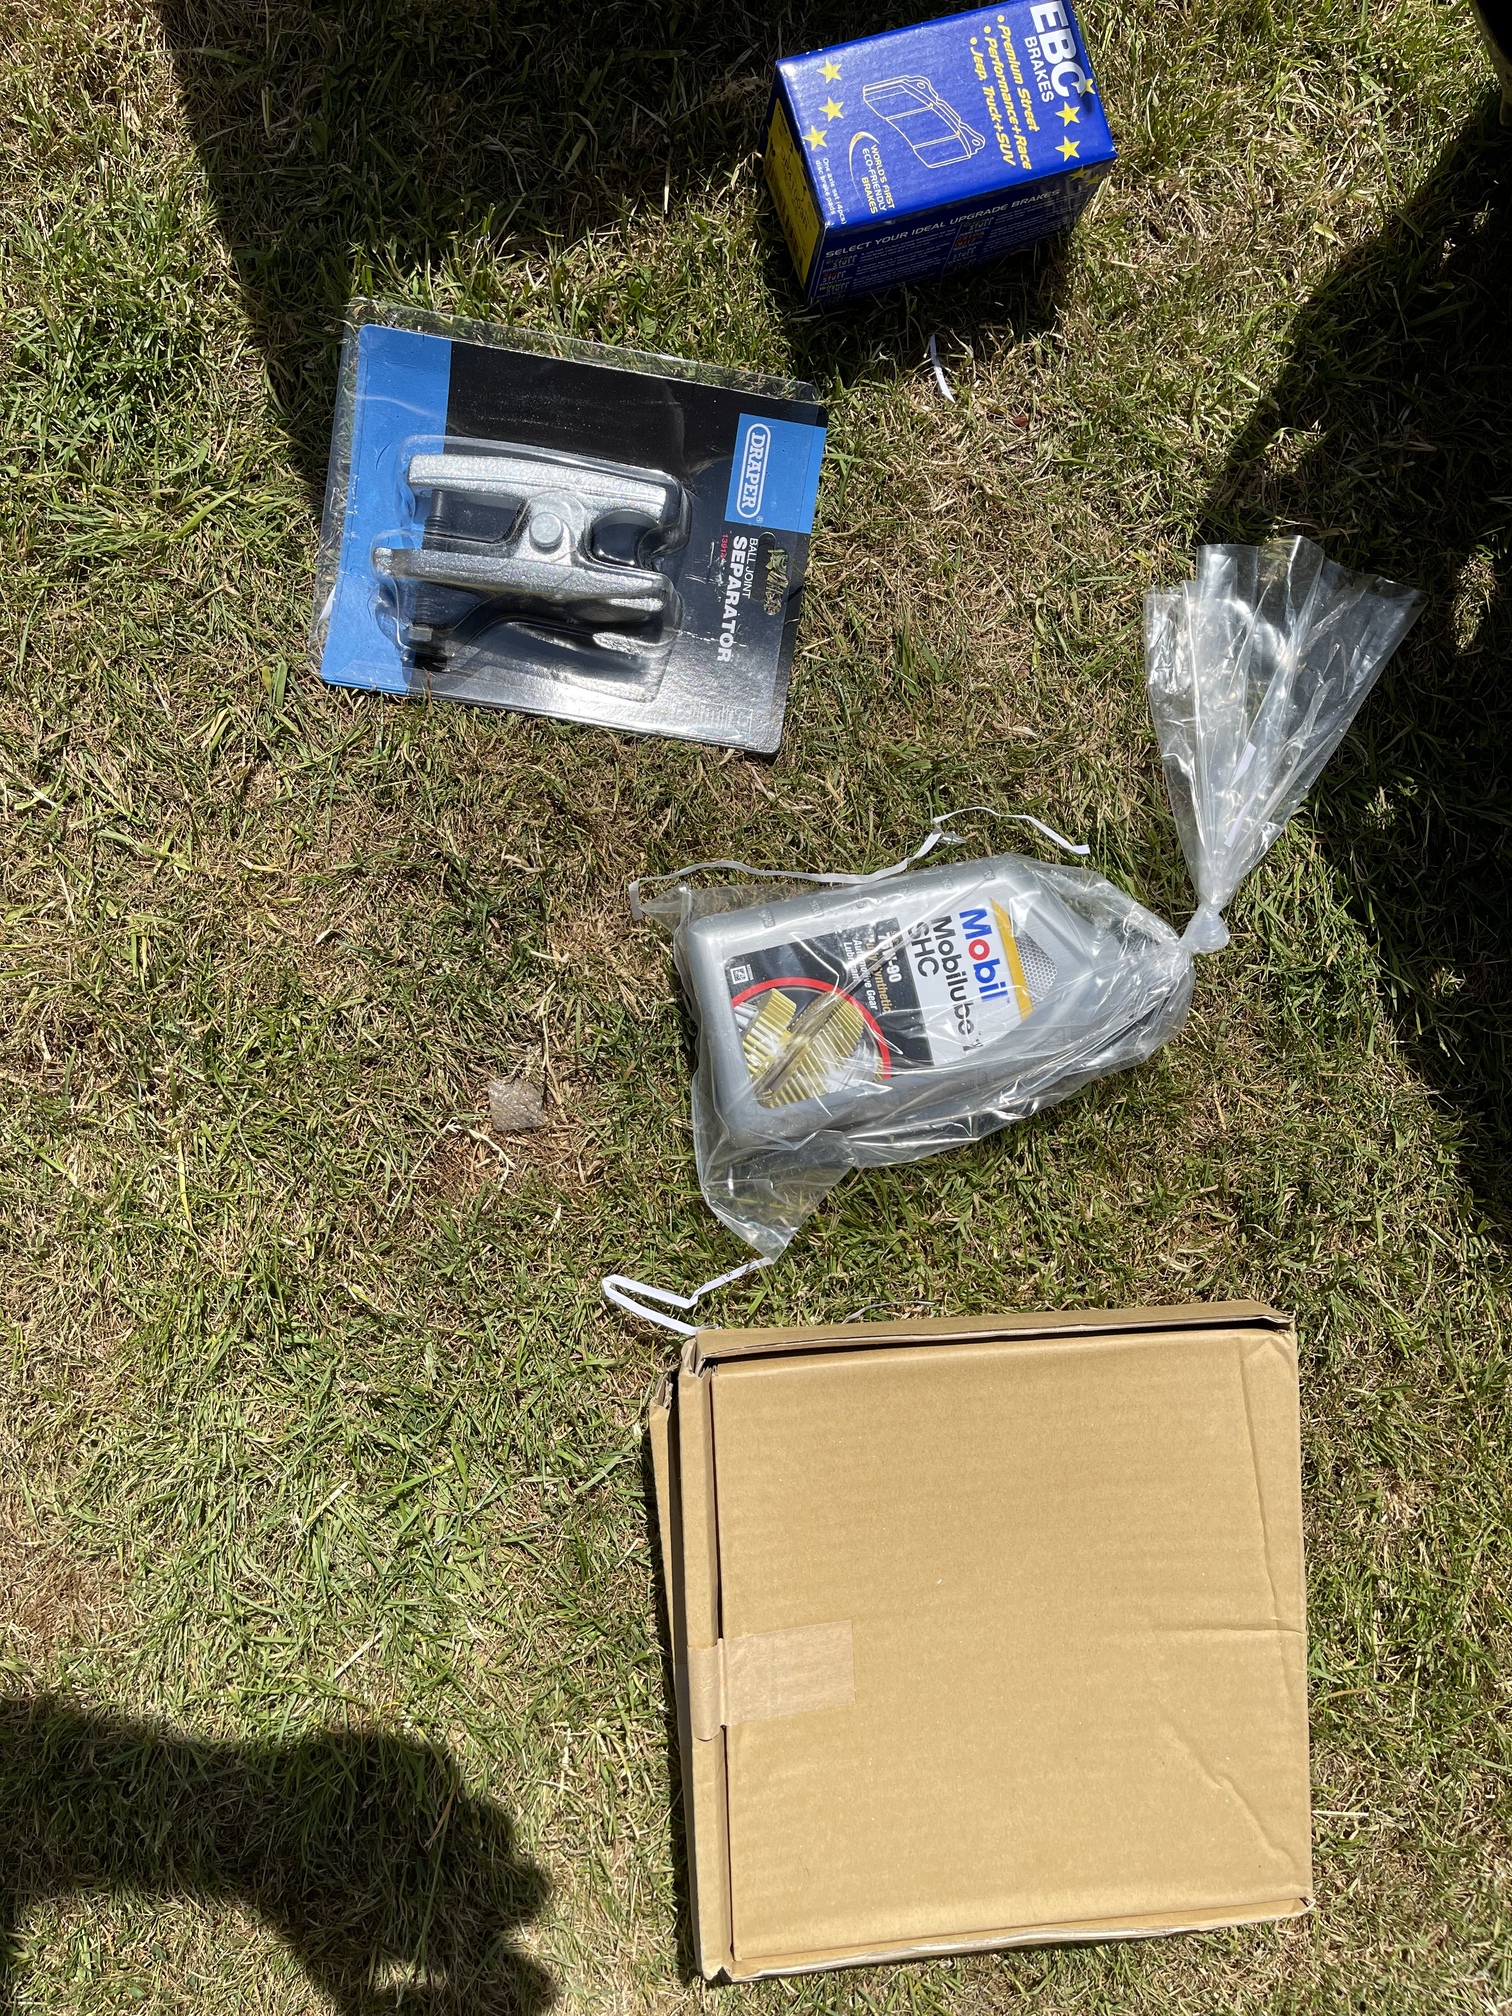
In other news, Ive had lots of parts turn up.
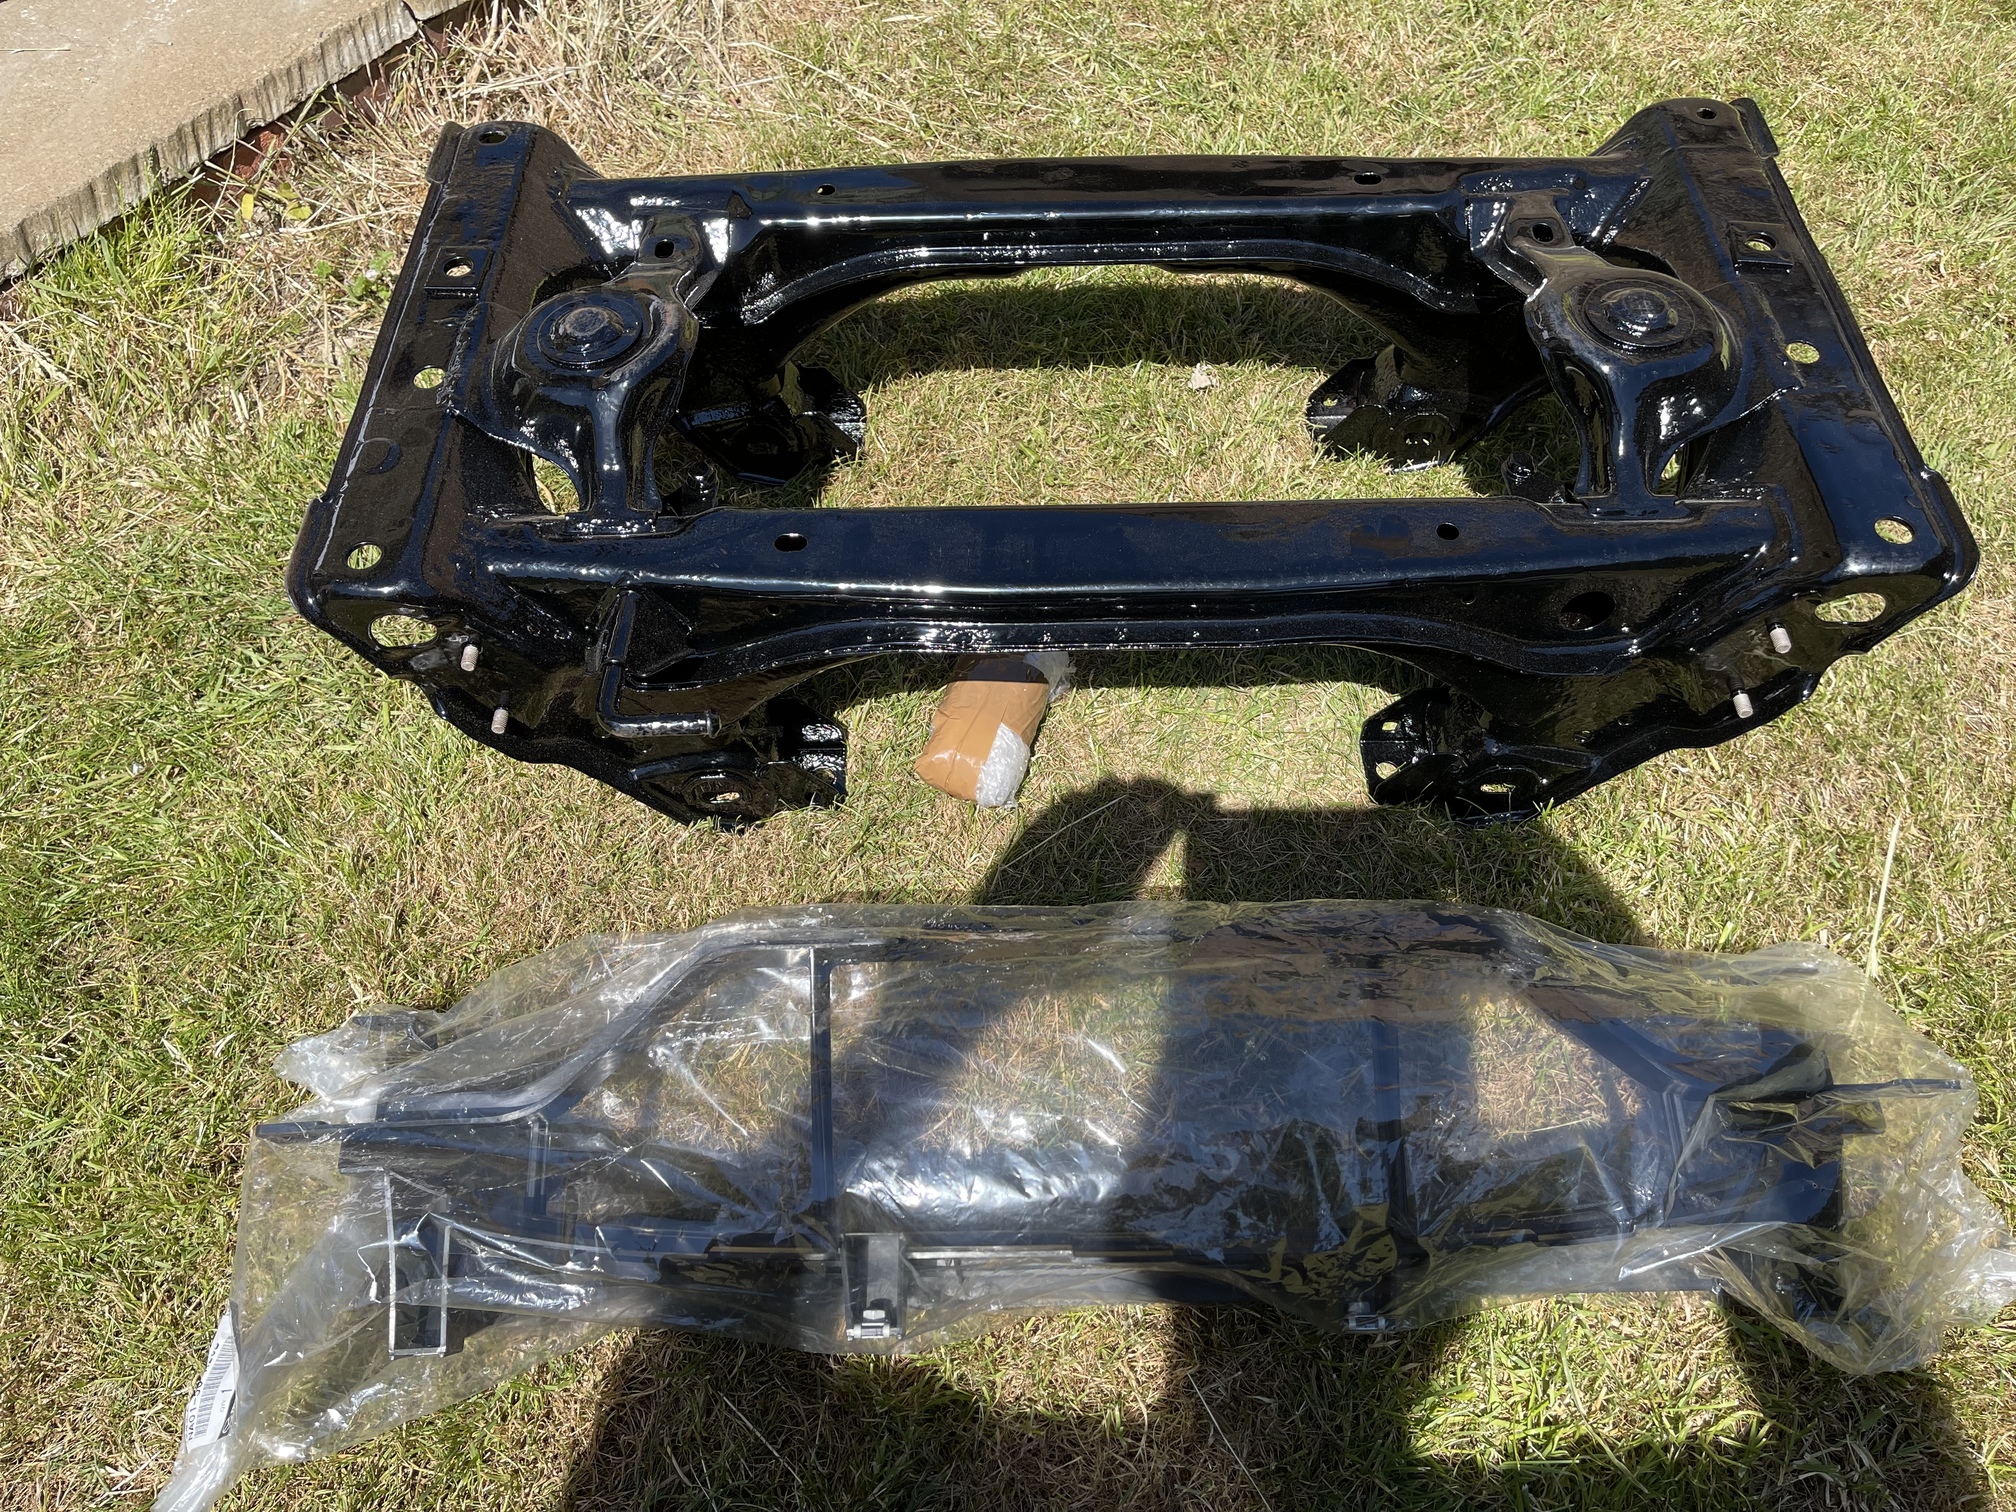
MX5City sell refurbished rear subframes, so I got one of those to match the lovely looking one at the front. All parts of the suspension will be replaced for Mazda or upgraded parts (apart from the arms themselves).
Recommendations need to go out to PM Sportscars (who sell through their website and eBay) who couldn’t have been more helpful after DHL dropped my torsen. When the replacement case arrived, I watched the same DHL delivery driver Chuck that and the prop shaft I ordered out of the back of the van. Be warned.
Also, MX5City who have offered lots of free advice and have an emporium of all kinds of things I didn’t think I needed !
Minus points to DHL and UPS (who have lost a parcel I asked to delay of all things! 
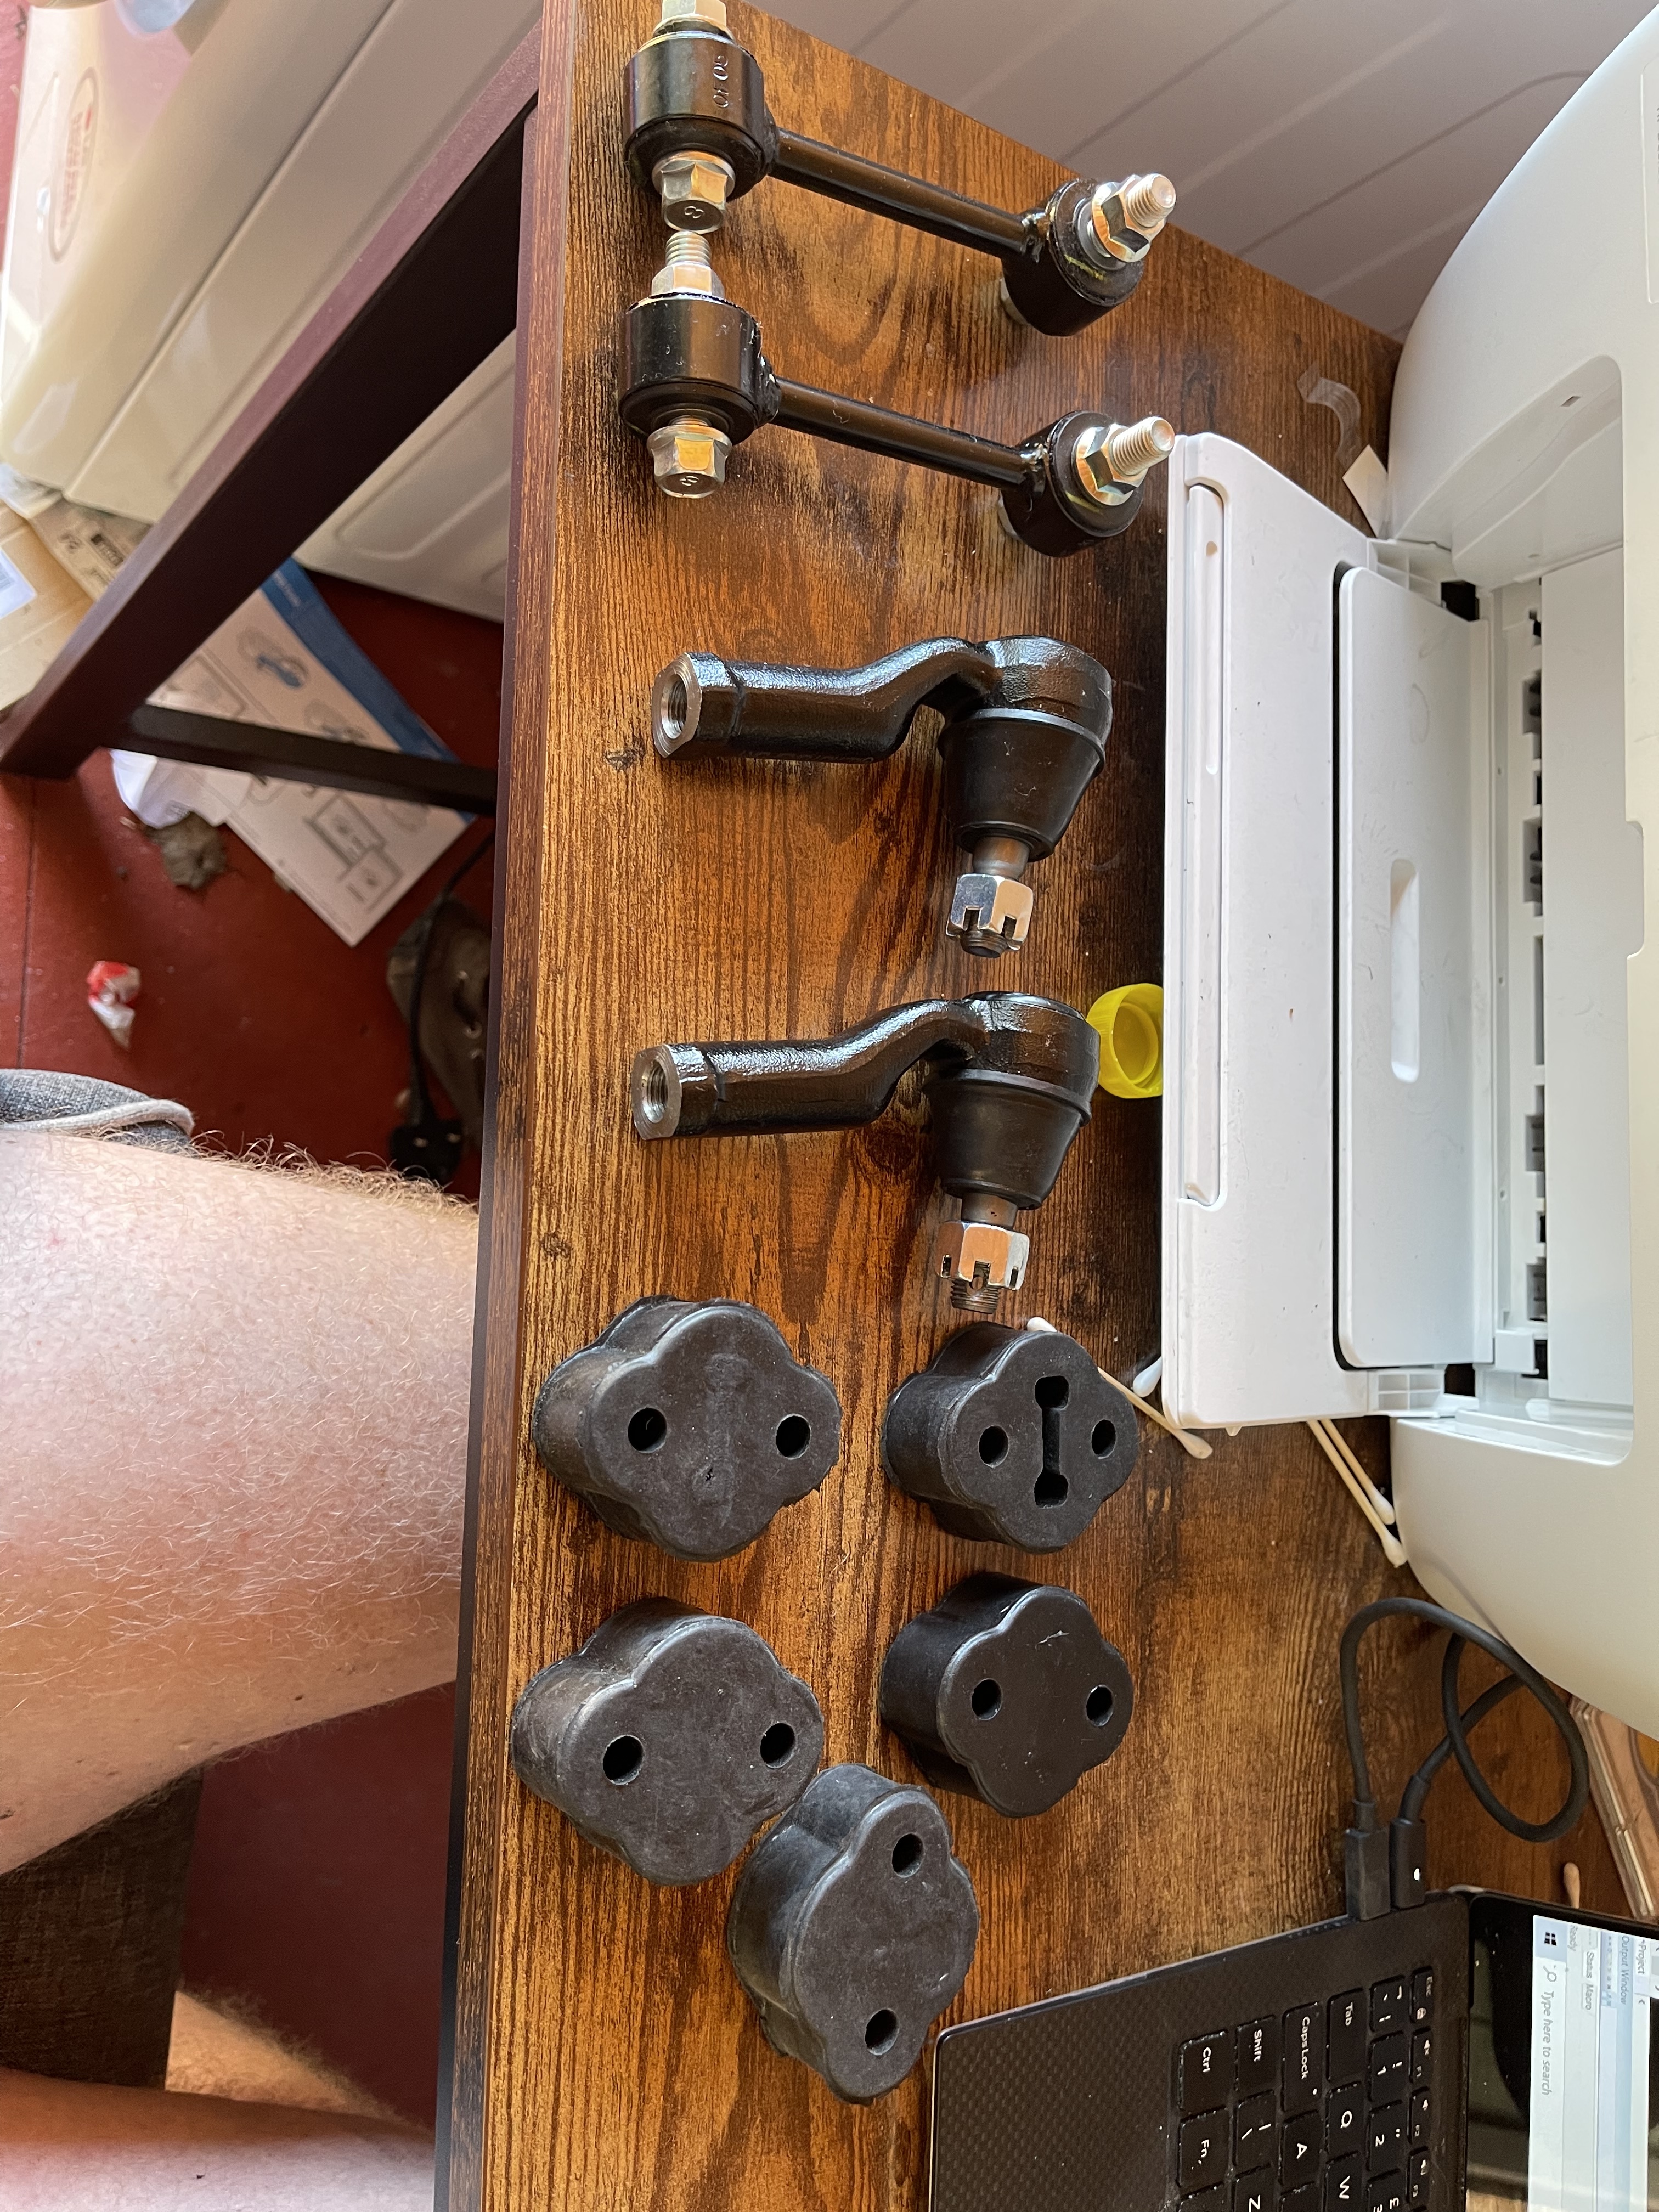
 ) who have my inner tie rod ends somewhere in Northampton!
You’re not going to like this but when I replaced the bushes on my mk1 I went with OEM and they slipped straight in with a bit of washing up liquid and a threaded bar. What did you use to lubricate them going in?
Well, I’m opening myself up here to being a moron, but for this bush the Superpro supplied instructions say to grease only the bore of the bush and the outer of the crush tubing whereas on the others it did explicitly say to grease the inside of the control arm hole and the outside of the bush.
So I didn’t put anything on lubrications wise as I wasn’t told to 
Did I get that wrong?
Andrew
I do wish I’d just used Mazda ones now! I’d have finished the whole thing already 
Bush update!
I’ve got one rear and one front lower arm bush in.


Hopefully today is the day the others go in.
I got a delivery of bolts from MX5Parts - £70 on bolts!
So today, now the paint has hardened on the dust covers, I can set about rebuilding the brakes. Assuming I can get the remaining bush in the passenger side lower arm, I am hoping to offer up the hub to the arms and get those installed on the car. Fingers crossed.

Unfortunately one of the lower arm bushes got damaged in my attempt to install it, and then I ordered the wrong replacements, so the other arm might have to wait until next weekend.
Have a good one guys.
Hi guys,
Happy Sunday!
So yesterday was rear subframe day.
I wanted to avoid doing this until I had the front wheels on the ground, but I changed my mind and got my car back on the 4 axle stands.
This is quite an easy job really, BUT - remember to disconnect all the brake cables first - I remembered al the standard ones but forgot the handbrake cable which almost got me caught out. Every job I seem to do, I manage to forgot one tiny piece of the jigsaw - my aim before the end is to perfectly achieve something, once
So, first off get some support under the rear subframe; a couple of trolley jacks with some wood is what I used.
Then remove the wheels.
At this stage you can remove as many of the components as you like, tyo make it easier to move the subframe when it has been dropped. I didn’t remove anything, cos i’m hard, innit. And because access was limited and some of the bolts were very tight 
I did remove the lower control arm bolts to free the shocks up a bit and then removed the top mounts from the boot.

Once that’s all done, remove the rear ARB. This freees up access to the rear two bolts of the 6 that are holding the subframe in place.

Slowly undo all 6 half way, taking your time to watch whether the subframe drops with the nuts/bolts. I was fortunate in the sense that I had already removed the diff and the PPF, but with those still attached there are a lot of areas the subframe can get stuck on.
Once you’ve got it loosened, remove ALL the brake lines. I had already drained my brake fluid at this point, but there will be some remaining in the lines, so watch out for that.


You can begin lowering the subframe now. Assuming you haven’t removed the shocks and springs already, these can be removed once you get the subframe low enough, which will make it easier to move it under the car.

I lowered it on to a car creeper to make it easier to move around - obviously my gravel driveway was a pain in the ■■■■ as it always is! If you are doing this in your garage, the two trolley jacks should suffice for moving it around.

And there it is, out. Not actually in too bad a condition - i’ll get it cleaned up and repainted and it’ll be up for sale soon!

The aligning bolts are quite tired, i’m going to clean them up and see if they need replacing - obviously alignment is going to be all over the shop when its done, it will be going off for alignment as soon as its back together.

I’d highly recommend doing this - it was a pretty easy job and gives you the opportunity to look closely at, and check one of the major components of the car.
Other things done yesterday - finished repainting the arms and brake dust covers - I will have to modify this to take the bigger brakes; I can’t find any new Mazda ones for sale.
If I get a chance today, I want to get the final bushes in one control arm, so I can build up at leastone side, and get the new subframe mounted to the car so I can get the torsen in, and then go about aligning gearbox/prop/engine. Might be adventurous, but I like adventurous!
Hi chaps,
A fairly large post today made up of all sorts of big and small jobs.
Speakin of a big job - me. I’m not the biggest and i’m not the smallest. Or so I thought. Until I bought my new seats, a pair of M2 Motorsports GTS Bucket Seats. I got these as they were the closest look to the Corbeau LE Lotus Elise seats but anout £200 cheaper each.

Not only could I not squeeze my broad frame in to them, but neither could my diminuitive partner. So, i’ll send them back I thought. £75 to post them! So, they up for sale on here and eBay. Lesson learent and all that!
So, instead - I ordered a pair of Corbeau LE seats, which were the ones I wanted all along, but I didn’t want to spend the money. These are the standard version, and because of the lack of sides, means there is a couple of inches more room. Which means I can continue to eat cake without worrying.

I refurbished my front subframe and it is now up for sale on eBay. I used GUNK degreaser followed by lots of wire brush and wool action. I then used a Rustoleum Primer and then topcoated with a Satin Finish metal paint which should offer some fairly good protection.

After the last update when I removed the rear subframe, I set about refurbishing the suspension arms that came out of the car. Surprisingly (or not, maybe?) they were in far more of a state than the front ones. So I set at those with the trusty sand paper, wire brush and wire attachment on my drill combined with lots of GUNK. As in the degreaser, I wasn’t applying more mess to them…! And actually they came out even better than the front ones, i’m really pleased with how they look, all re-primed and re-painted and ready to to be fitted.


It’s got to the point now where I can put things back on the car, woohoo.
Before I could mount the diff, I needed to change the bushings. These were a pig to get out, but in a different way to the others. The centre crash tube and the bush itself actually moved very easily, but the outer bit that is against the arm was stuck to the point at which it actually didn’t come off with the bush, see below! Anyway once most of the bush was out I could remove with a grinder and then installed the Superpro ones with ease.


So first of all, I wanted to get the powertrain mounted. As you know the engine and the gearbox are already in, so now was the time to attach the new rear subframe, PPF, propshaft and diff.


I included the above, because - and im absolutely not making sweeping generalisations here - 3 of my fmale friedns saw this photo on Facebook and thoughts the PPF was goo hanging down from my car. Go figure!
Trying to do any of this on your own is a recipe for swear words and comfort food, but with the use of multiple jacks, axle stands and after asking myself many searching questions, everything was offered up.
Once that was done, I began mounting stuff to the front subframe. It’s at this point I am starting to lose nuts bolts and my marbles! Even though it felt like I labelled 498 bags of nuts and therefore couldn’t lose any, I can’t find the buts for the banjo bolts anywhere! So, that lot is being held up by another jack. How many jacks do I have? Many.


Now, issues. Of course there are issues. Firstly, as I have mentioned before - the srivetrain is off centre. Having spoken to both Bruce @ Rocketeer and Andy the engine builder, they said it was fine. In fact, Bruce said their demo car displays the same issue and there has been no noticeable problems. They suspect it is to do with the engine mounts.

Second issue - front subframe bolt spinning in its hole. After I fitted all the bits above, I went to tighten all the front subframe nuts and found that the rear drivers side bolt is turning in the hole. ■■■■■■. So, i’m going to have to tap that somewhat and use a larger bolt or re-drill the hole a bigger size. Neither are ideal!
Phew, that took a while, sorry!
Hope you’re all well 
Andrew
You’re doing well, what seat mountings are you going to use for the Corbeau LE ?
Good question! There is a company on ebay who are a Lotus specialist that do conversion mountings for Lotus seats, so i’ve asked them the question. Unfortunately, looking on the Mighty 5’s forum, fitment is sketchy.
There seem to be solutions in the US, not sure what other people are using here. If needs be, i’ll have a go at modifiying brackets to fit.
I also found this shop, somewhere in Europe who sold packages for these seats that would fit the MX5 with their own brackets. However, there isn’t any information on how they fit - i’m guessing using the OEM MX5 brackets?
Ah, I found the description; “With these adapters it is possible to mount Corbeau LE seats Plug and Play in an MX-5 NA / NB / NBFL. The seat consoles are powder coated in black as standard. The adapter allow to use the OEM sliders of the MX-5 NA/NB/NBFL”.
I guess my only concern there is height with the OEM brackets, but then I just about fitted in the MX5 with stock seats so I should be OK!
I installed an Elise seat in my NA a while ago, it made a big difference to the driving position. I fitted mine without the seat rails, the NA has the seatbelt stalks attached to the tunnel and you’ll find that now the seat is lower the stalk comes up too high and the belt buckles halfway over your body rather than down the side of the seat. I found a local company that made seatbelts for classic cars and they shortened the stalk for me.
However the NB has the stalks on the seat rails, so in theory you could knock up some mounts that fitted to the sliders and didn’t have to worry about the stalks.
“The adapter allow to use the OEM sliders of the MX-5 NA/NB/NBFL” looks very simple