Added Parking Sensors

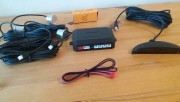
Having become very accustomed to the parking sensors in the Mazda3 I though I’d have a go at the NC, and bought the usual kit from MX5 Parts.  This is generic and will work with any car, and by corollary any generic kit will work with the MX5.  It all went as expected, each sensor works, with steady tone at about 0.3metres and no beeps beyond about 2metres.

I followed the standard Mazda installation guide C841-V7-290A which has a template for the holes, necessary for my earlier bumper which does not have the locations marked on the inside, later bumpers do have these markers.

There are only three points that were less good.

  1. The cutter (marked 19.5mm) takes a long time to cut through the bumper, it is blunt and leaves a hole that is a fraction under-size and with raised burrs.  I used a step drill to carefully clean off the burrs and make the holes that little bit bigger, just enough to be able to start the sensor through them.  Also I took care not to press on the centre of the sensor, just the rim.

  2. The beeper is weedy in its current location as per Mazda instructions, even on the maximum setting.  I might relocate it closer behind my ears at another time, the lead is long enough, but routing it will be a nightmare.

  3. The lead from the reversing light to the control box could have been a foot longer, then it would have been neatly tidied away with the rest of the wires.

Here are some pictures.

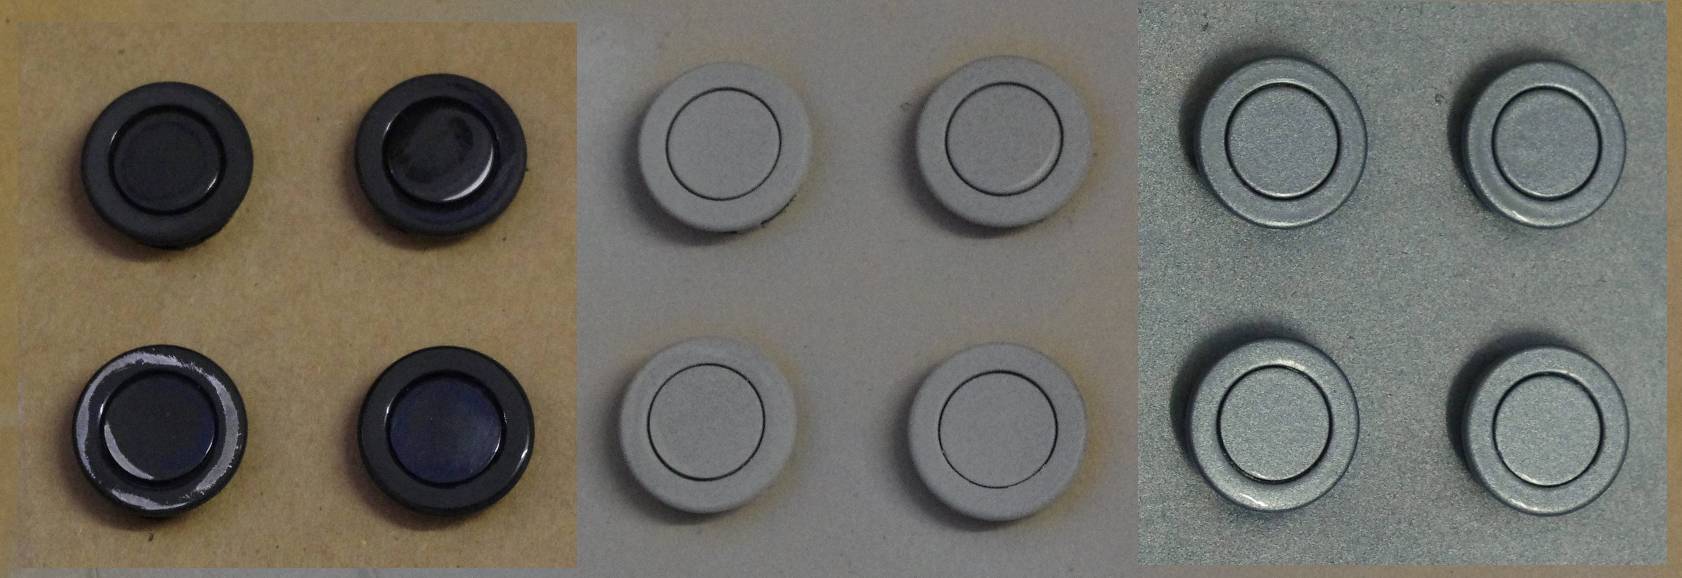
First of all I rubbed down the sensors with 180 grit and 1000 grit wet and dry, just as well, one had almost no paint and it just fell off. Then primer, then base coat and lacquer

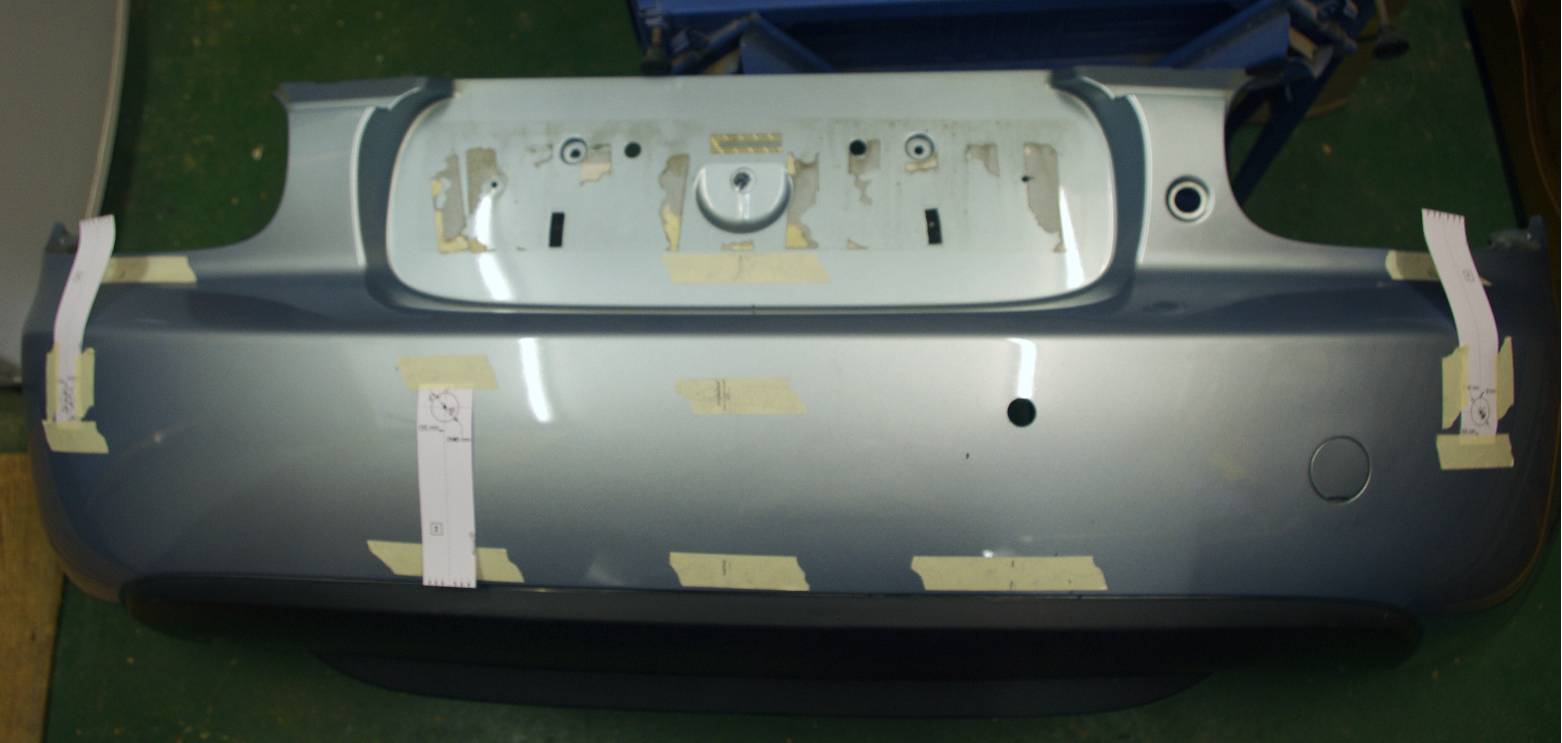
While the paint was drying I dismantled the back of the car, removing all the boot lining, the rear wheel arch lower liners, the rear light housings, and the bumper.  This was then marked up with the paper guides, and much, much, much re-measuring before drilling the holes.  I needed to put in pilot holes because the guide drill in the hole cutter was so blunt it made no impression on the bumper.

Then it gets fiddly.  I inserted the sensors, connected them to their long leads (all almost the same length, but D was longest so that went to drivers side sensor etc), checking that there was a sealing o-ring in each connector, cable tied them in place on the inside of the bumper away from the crash bar, and fed the small ends of the leads through the grommet I’d removed from the back of the car.  Then I fitted the bumper and grommet and leads back on the car, easy enough when everything is clean, tidied the lead length between bumper and back of the car, and sealed the leads in the hole in the grommet with silicone.

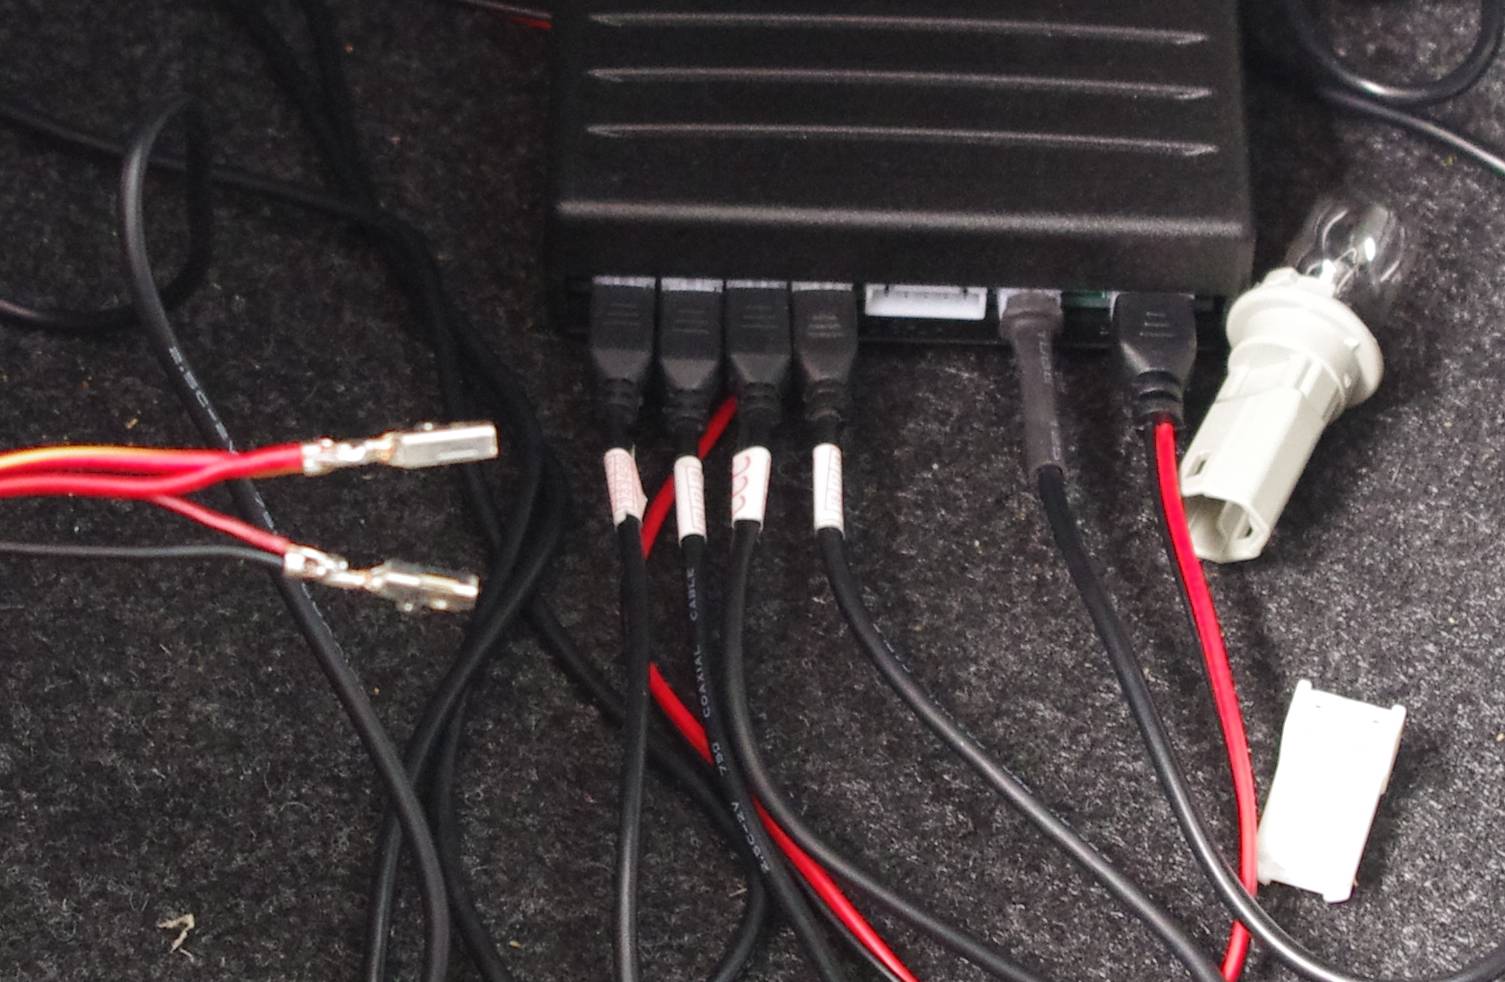
I needed to find the reversing light power, and the obvious place was the contacts for the bulb. So I extracted the contacts and soldered the power lead for the control box onto the tangs of the bulb-connector loom contacts. I then tested it all worked before tidying it all away.

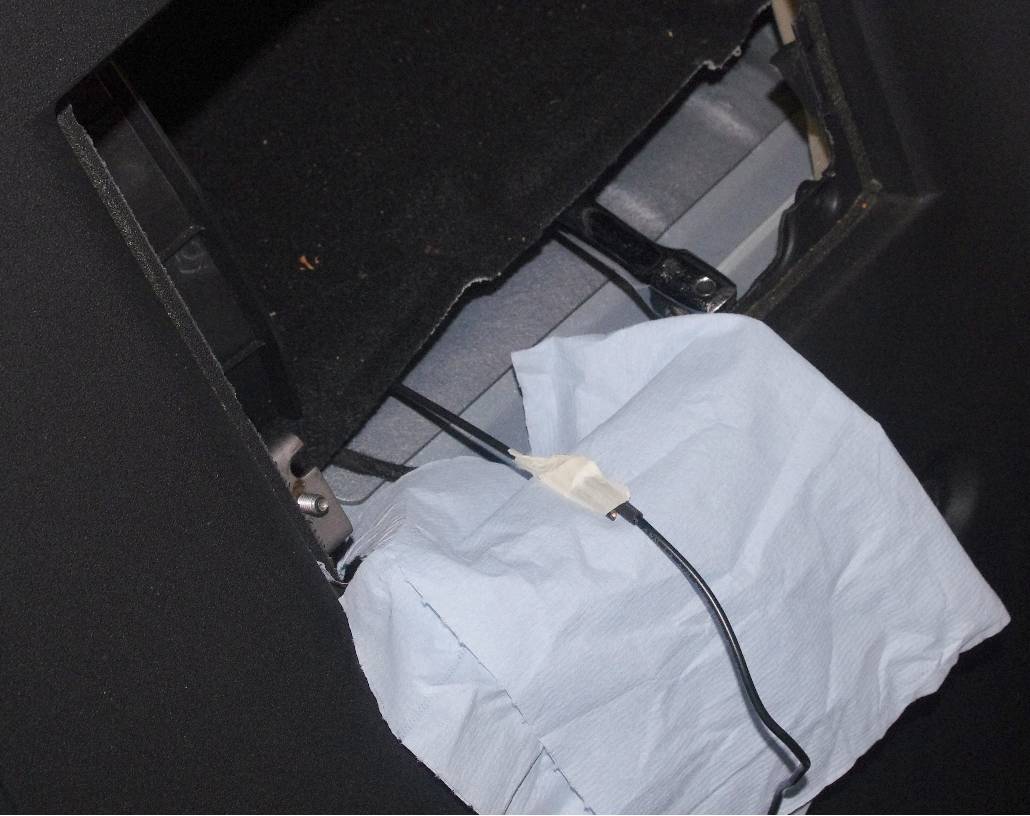
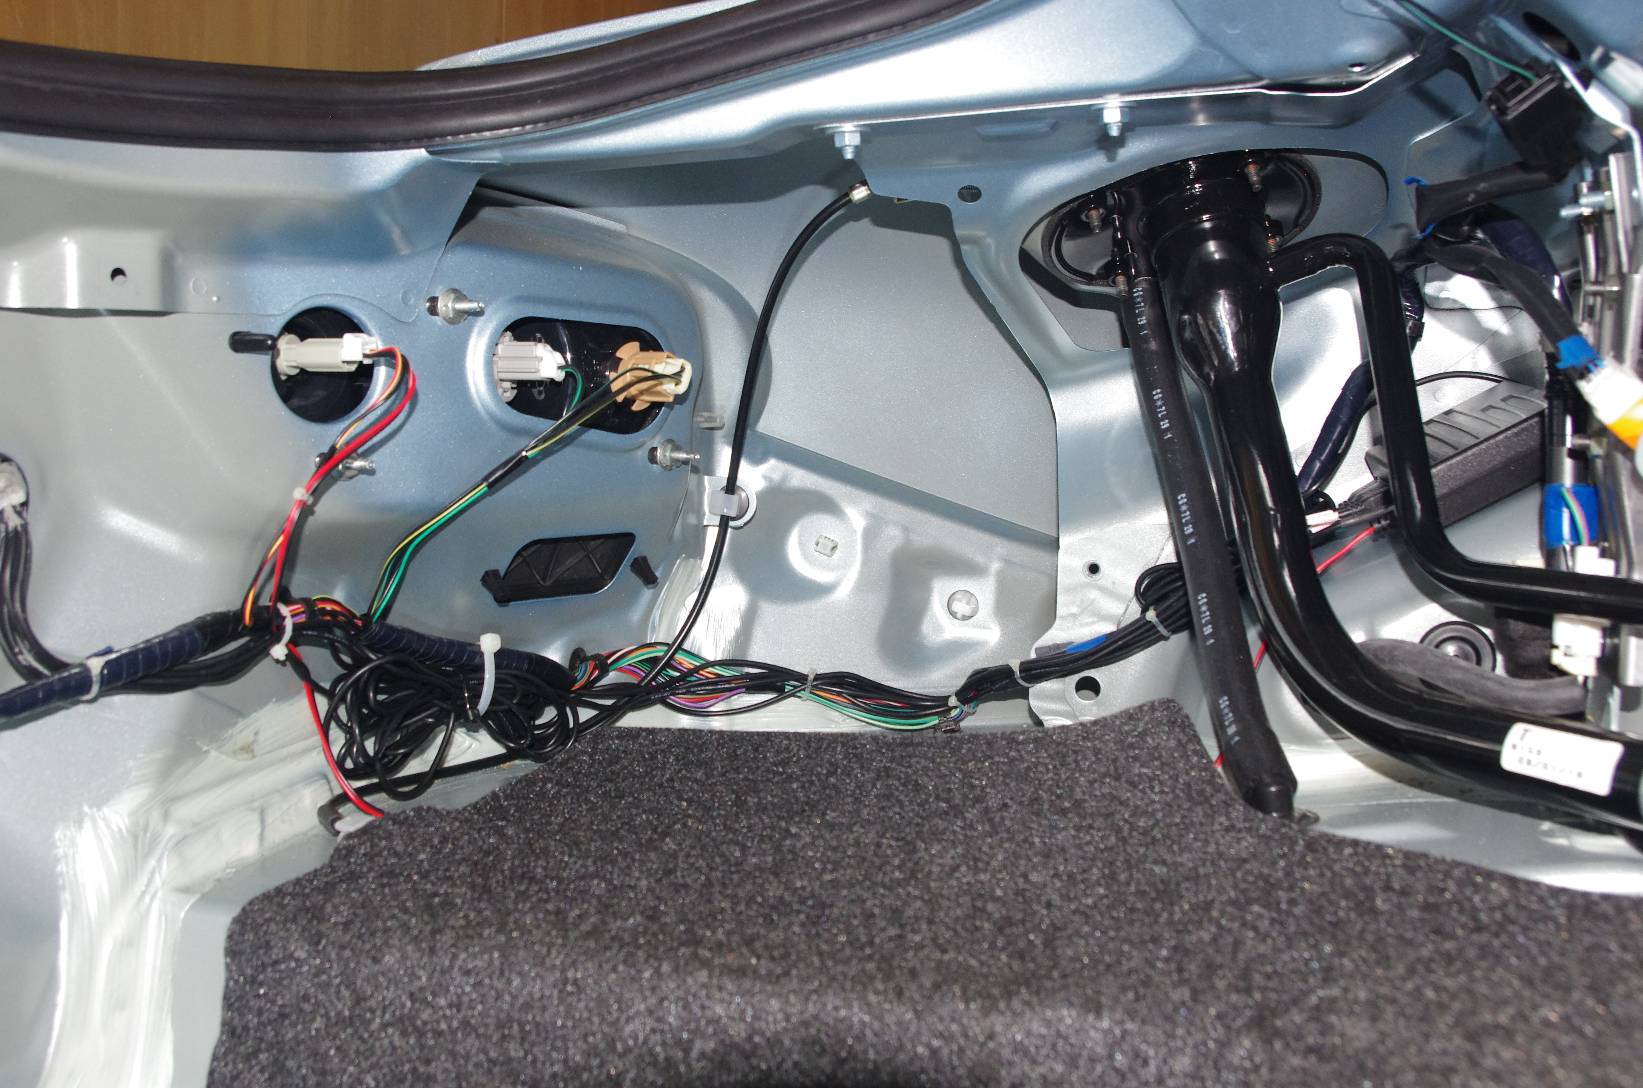
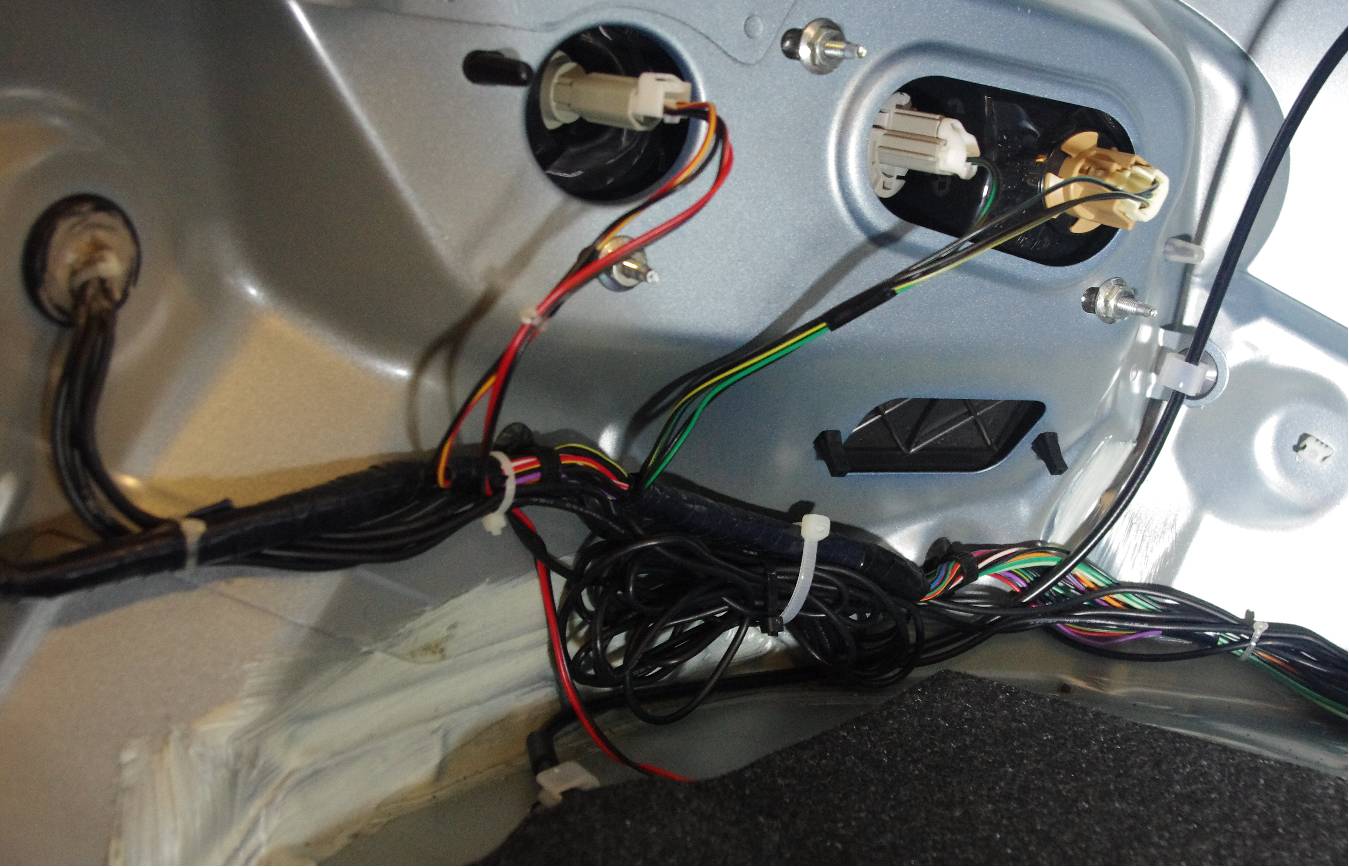
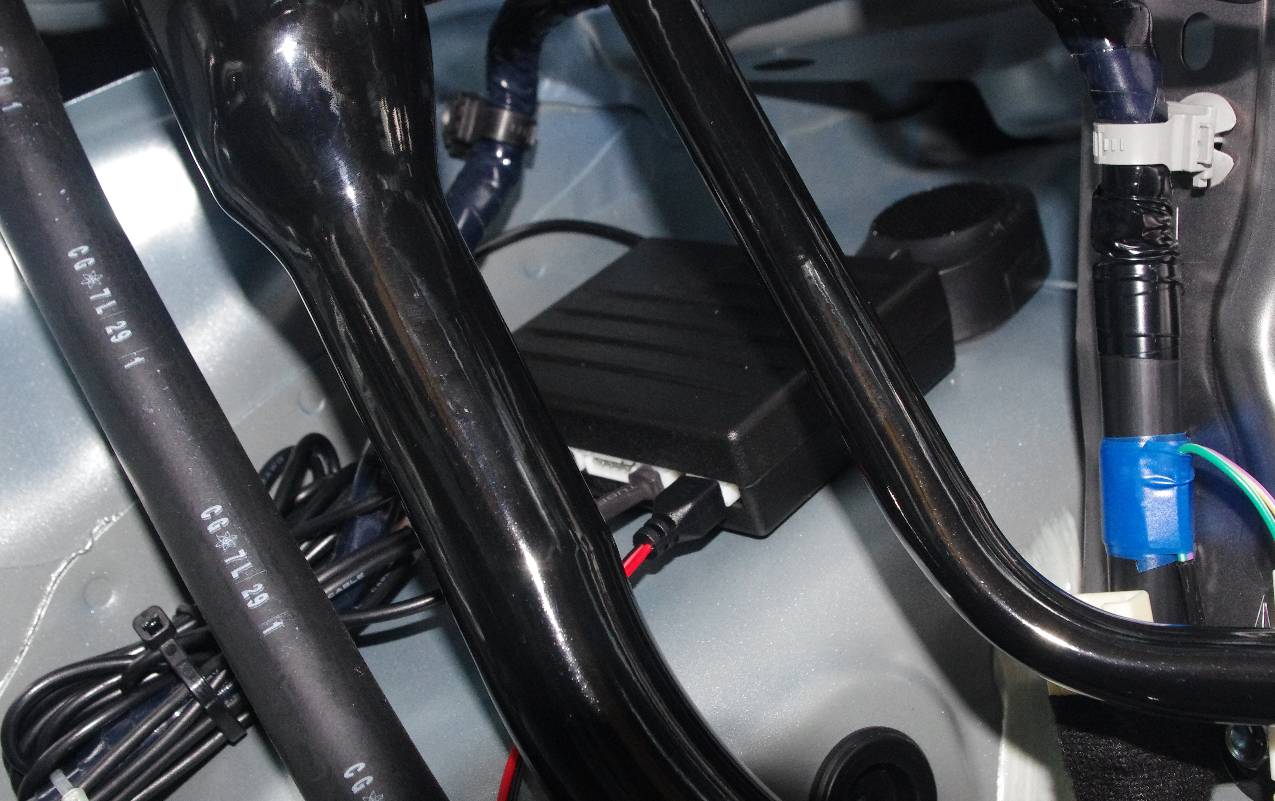
This shows the leads coming in through the grommet on the left and the first part of the loom secured to allow the silicone seal to go off while I did the rest.

This is when I discovered the power lead is a bit too short for a tidy route to the preferred location for the box, so I cheated by putting it under the carpet.

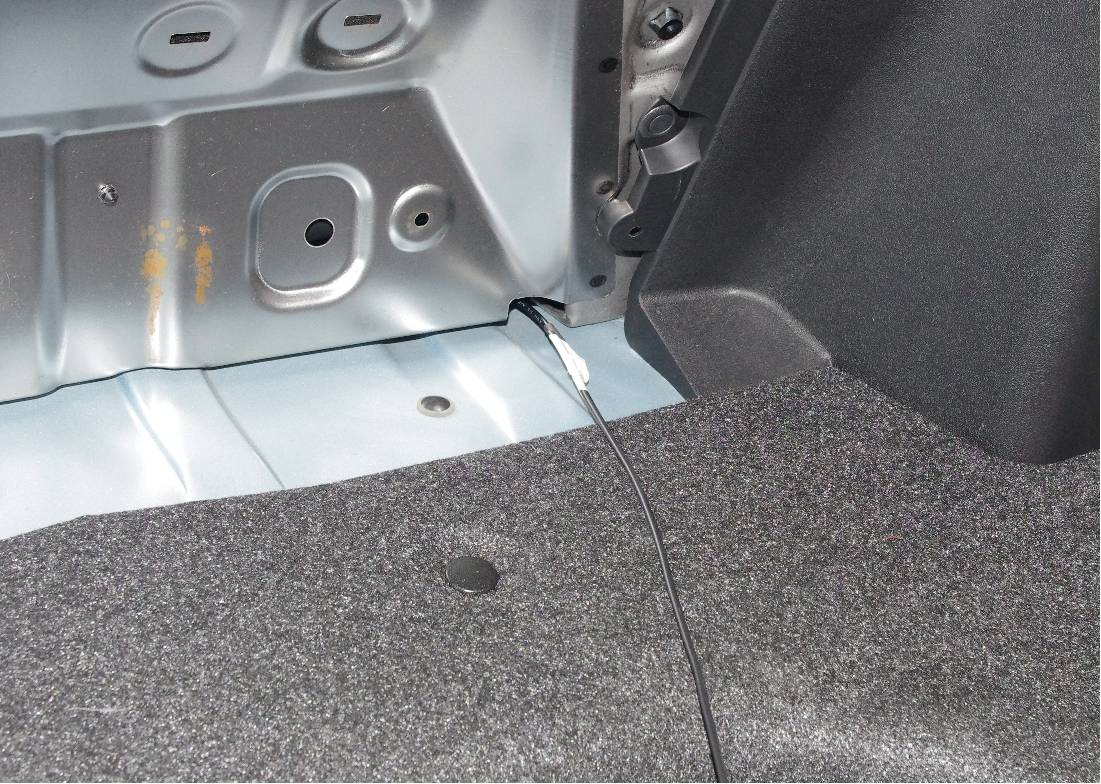
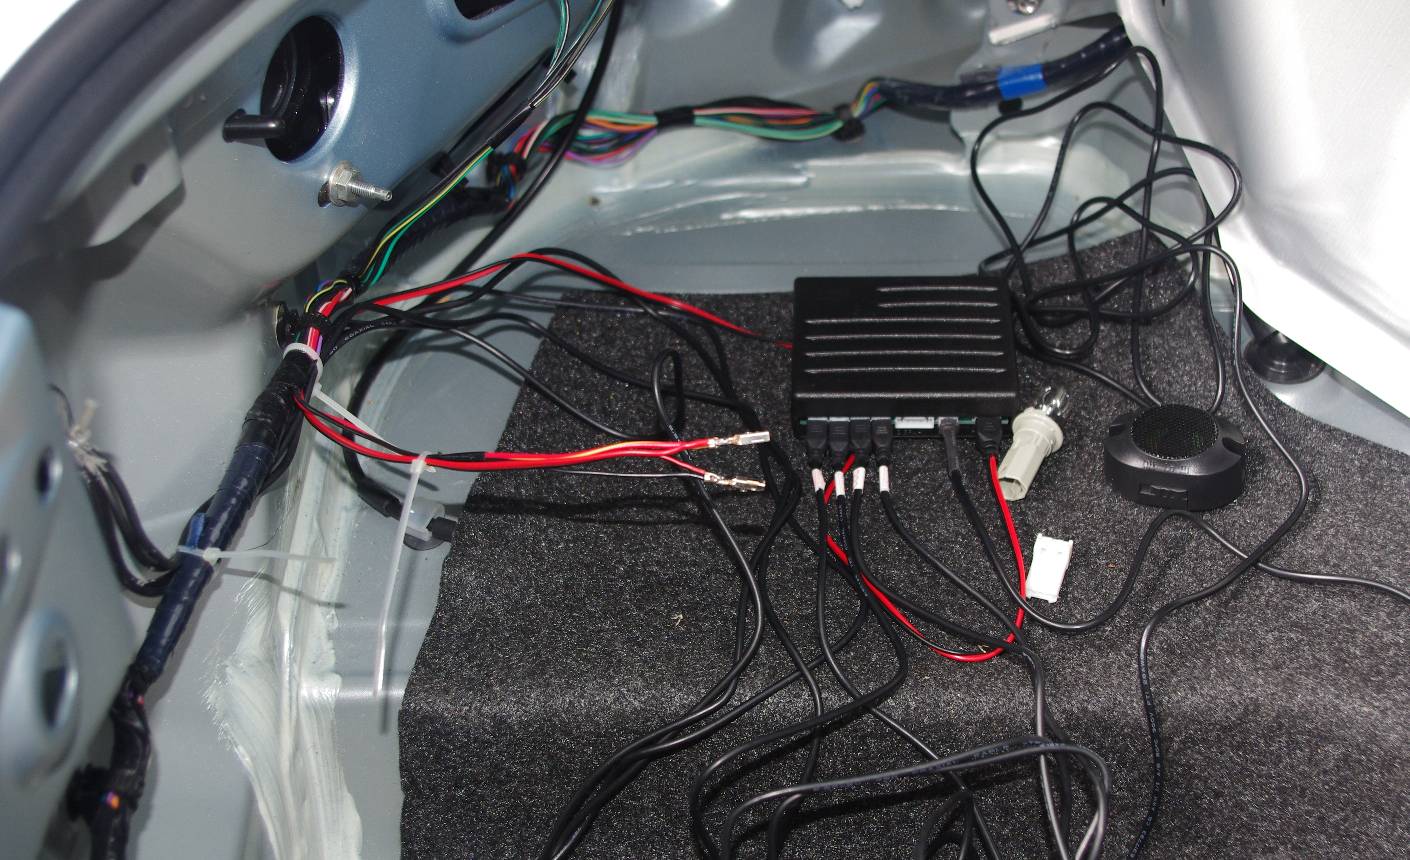
An overview showing how the bulk of the loom can be neatly tucked away with the surplus from the sensor cables bundled into a convenient space.

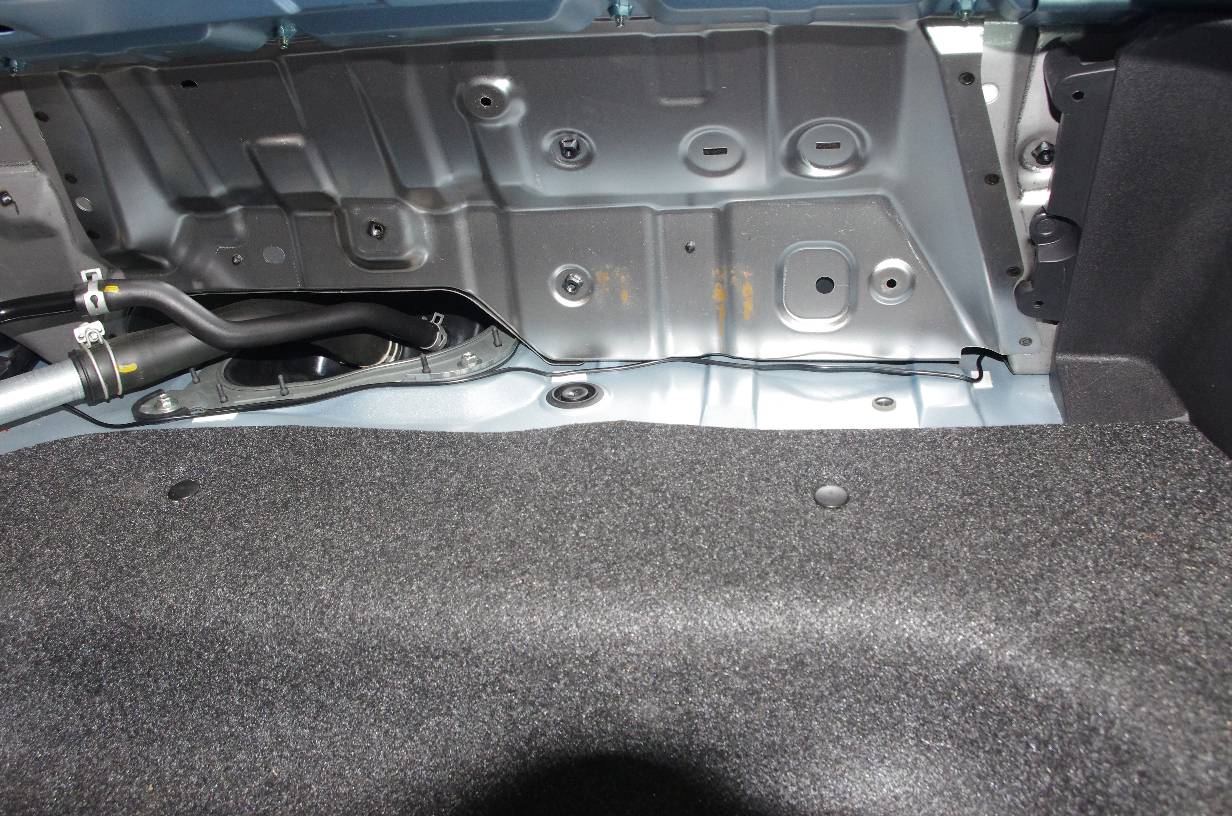
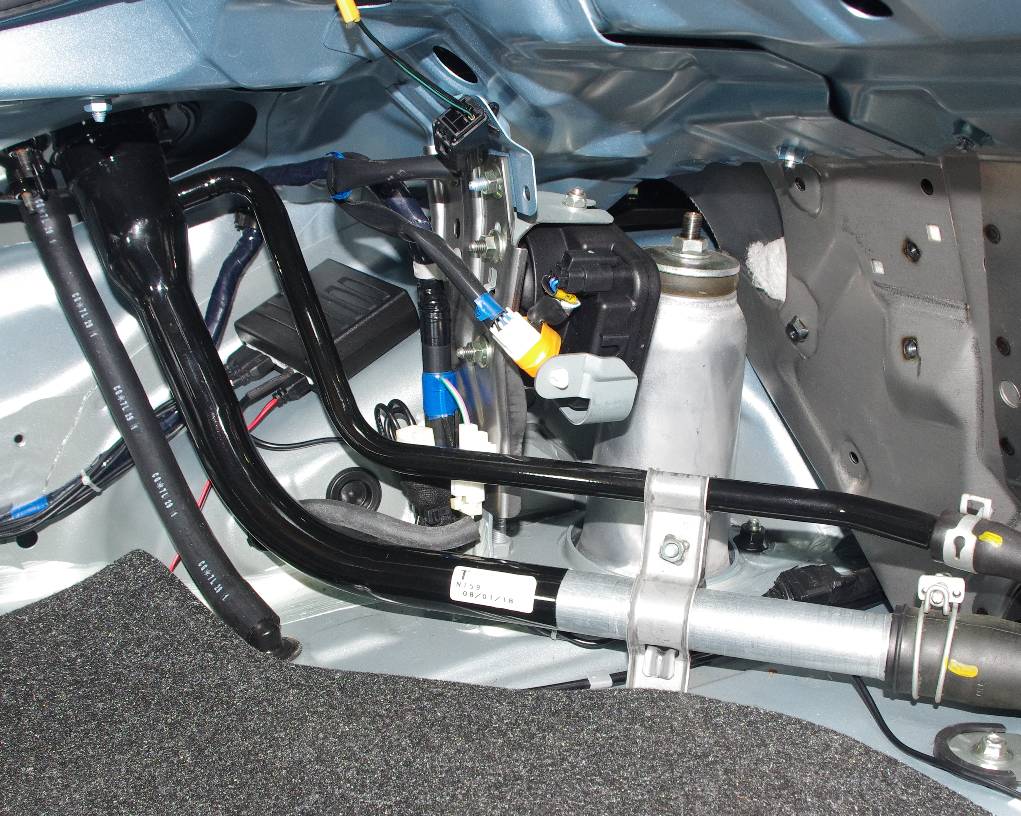
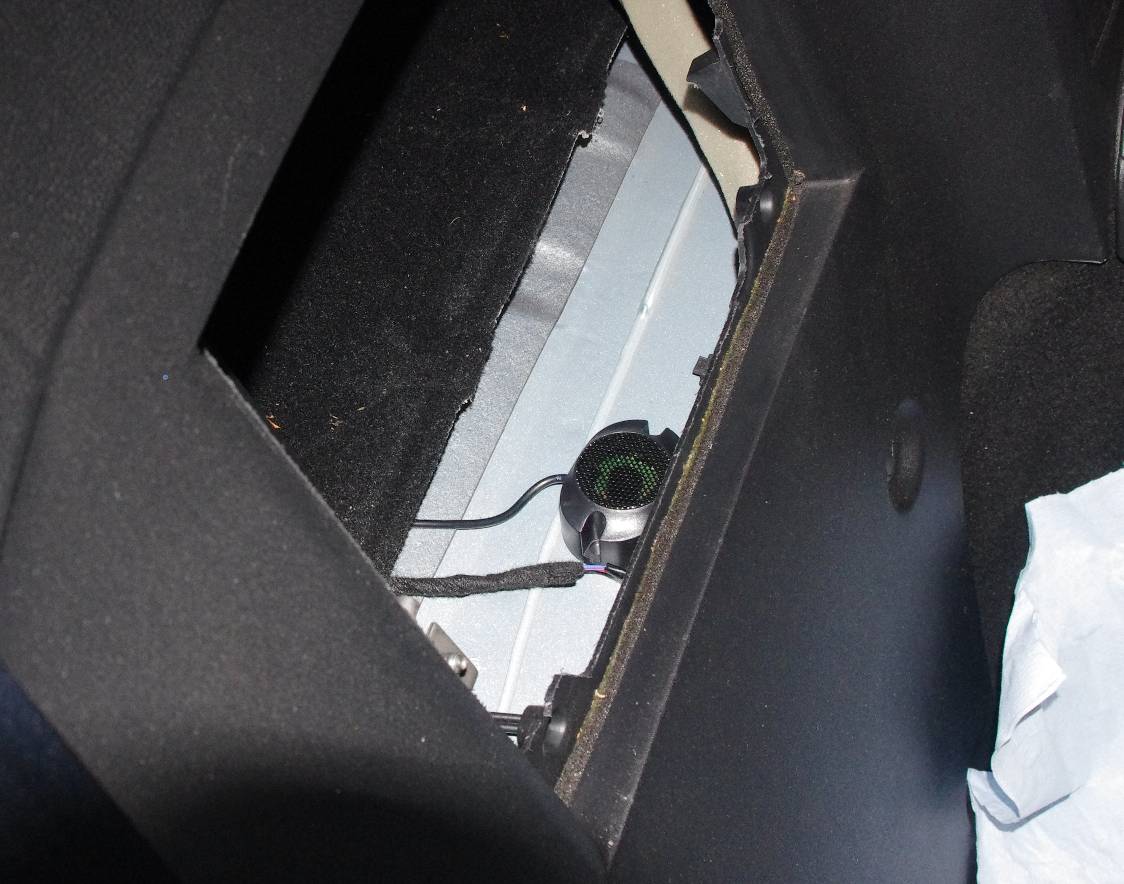
And it is just possible to see the control box and beeper behind the fuel filler system

And the final result

EDIT
Removed some dead links and posted the pictures again to use the new forum properly.
See also my later post where I move the beeper closer to my ears!

2 Likes

Thanks for the write up Richard. Only problem with this forum is it keeps encouraging me to spend!

1 Like

This is a great write-up and how-to guide. It’s something I’d like to do but you post helped me realise it’s not something to get in to lightly. Thanks. Deserves a sticky. 

1 Like

I was fortunate the mx5 rear sensors came in gloss black which were a  perfect match for my Brilliant Black mk3.5 which meant that I didn’t have to paint them.

Agree the speaker is weedy. I might have a look in maplin to see if I can get a replacement. Research indicates they are piezo speakers and maplin have loads 

1 Like

I got mine from a supplier on ebay that offered about 30 different colours, saved me painting.

1 Like

I thought about that but could not find them in the Icy Blue colour. 

Also the eBay prices are a lot cheaper.  However, at least when buying from MX5parts there is support if there is a problem with the bits.

The beeper was so weedy I could not hear it with the top down.

So I’ve now done something about it.  I’ve moved it to immediately behind the driver’s seat, after having had a chat with a couple of people at the Rally yesterday who suggested easy ways to route the wire.  It took me about an hour today, including removing and replacing all the relevant panels and tidying the wire in place so it would not rattle about or chafe anywhere.

First of all I took the relevant covers in the boot off again to gain access to the control box and the wiring!

Then I moved the seat forward and pulled off the driver’s side PRHT access panel, fortunately remembering they have hooks at the bottom, and the spring catches are at the top.  A soft top has a cubby here instead.  I inserted my medium breaker bar in under the carpet to lift it clear of the humps to free up a channel, and fed in a bit of 1.5mm house wire from the boot for use as a draw string.  The picture shows the beeper plug taped to the end of the piece of wire and also the breaker bar peeping out from under the carpet.

I pulled it though to the boot, and this pic shows where it appears. The stiff wire was pushed through from this side because it catches on something if pushed from the cabin.

Then it was taped in place with some good double sided sticky I had left over from another job.  It is important that the lead will not be pinched later by the metal back plate that protects the fuel pipes etc.

The plug was fitted to the control box again, tested to make sure it still worked, and the remaining beeper lead tidied up with cable ties to the bit of loom next to the central bracket.

And this is where the beeper lives now.  It seems at least four times louder here, than when it was parked next to the control box.  So I guess the minimal traces of sound insulation in the boot etc actually do something.

EDIT
Reposted the pictures to better suit the new forum.

1 Like

I bought this kit last week, only £11 on Amazon.

I’ve had a quick look to plan where to place the various parts and if the weather is decent at the weekend will fit it into my MK2.5.

Thanks for the write up

Got a couple of kits from Aldi £14, and did the mk3.5 and now the mk4. No need to dismantle anything,just measure the factory fitted sensors at the dealers, and get a free coffee! Put tape on the bumper before drilling. The hole saws were good quality still using them. Worst part scrawling underneath to solder power lead to reversing light feed, couldn’t find wire in loom in boot. Beeper quiet but ok if you wash your ears out. No chance getting in to the hood space on the mk4, god knows how to clean the drains, probably easier to change the car!

Each to their own and all that but seriously, you need parking sensors when you have the roof down?  Unless you have mobility problems and unable to turn your head to look out the back (there’s always the rear view and side mirrors) I just don’t see the point of parking sensors in an MX5.


I have them fitted as standard on my MK4 Icon, what I would really like is front sensors too. I have them on my Santa Fe as part of the self park system ( takes nerves of steel to use it!! ) and they are really useful when parking forwards, because the MX-5 has a very low front end it’s very easy to catch the air dam on a kerb.But they would need to be ignition live and probably switchable - and then I could forget to activate them!!Thoughts?

Fair comment.  In general I agree with you.

However, my car frequently visits a few places with low walls and awkward high kerbs and somewhat randomly arranged parking bays.  These are just not visible, especially in the dark when reversing into the tight spaces and often we needed to get out of the car to see if it was close enough at the back and yet not be sticking out at the front. Twice I’ve ended up less than an inch from a jagged bit of wall coping when it looked like there was acres of space, and only luck prevented a scag on the bumper. And I tend to be more careful in parking than SWMBO.

It was a cheap enough mod, and quickly and easily done apart from the time spent re-measuring and marking out where the holes were going to be cut and waiting for the layers of paint to dry on the sensors, and then of course checking I’d not made any mistakes when assembling it all.  I was surprised at how fast all the bits came out of the boot and how few fixings there are securing the bumper.

1 Like

Fortunately last Sunday was dry so managed to fit my rear parking sensors, which I had ordered in silver so no painting was necessary.

I checked under the bumper and there was room to locate the sensors above the metal crash bar. Didn’t need to remove the bumper and after measuring the spacing, drilled the four holes with the supplied bit.

I found an air extract vent beside one of the petrol tank brackets. Just press in the sponge bit and you can feed the sensor wires into the boot space without any further drilling.

I took the power feed from the reversing light and cable tied all the wiring around to the area beside the rear offside suspension strut top mount.
There is plenty of room there to locate the control box.

Mounted the display unit on the dashboard and fed the wire down the A pillar and under the carpet to the rear bulkhead. After pulling back the carpet behind the driver’s seat I drilled a small hole and fed the cable through into the boot space.

All wiring was cable tied to keep things neat, I then checked the functioning of each individual sensor.

The kit works perfectly, even the displayed distances are accurate.

There is a buzzer mounted in the display unit which changes frequency as the distances narrow. I found this over loud so stuffed a small piece of sponge into the buzzer hole to quieten it down.

I can understand why people may think reversing sensors in a convertible are unnecessary, but when reversing blind with a steamed up rear window on a wet dark night they could prevent any rear damage.

For only £11 and a couple of hours work I think they are a superb addition.

Imagebam is down so I’ll try and get some pictures up later using a different host.

1 Like

Not sure why everyone is measuring the position of the sensors? The rear of the MK3 bumper is marked from the factory, just drill a pilot hole and then open up with the supplied hole saw/hole punch.

Josh

There were no mounting marks on my Mk2.5.

Plus I fitted the sensors with the rear bumper still I place, so measuring up was essential.

Not the Mk3, I took it off in hope but alas no, just the later ones.

my Mk3.5 had the location of the outside holes marked on the inside of the rear bumper, but the centre holes were not marked.

1 Like