Chris' NBFL

It’s certainly been awhile since I’ve been in the driver’s seat of an MX5.

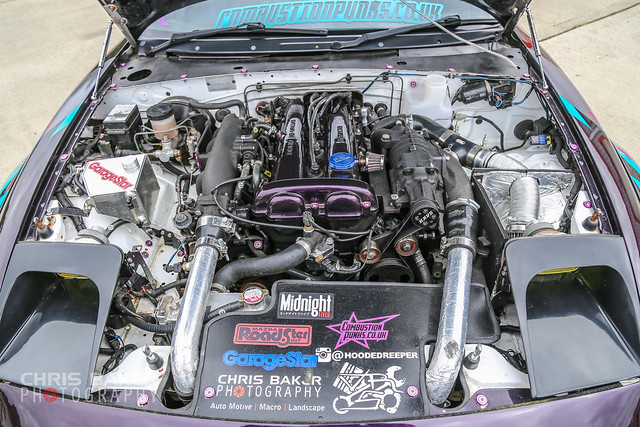
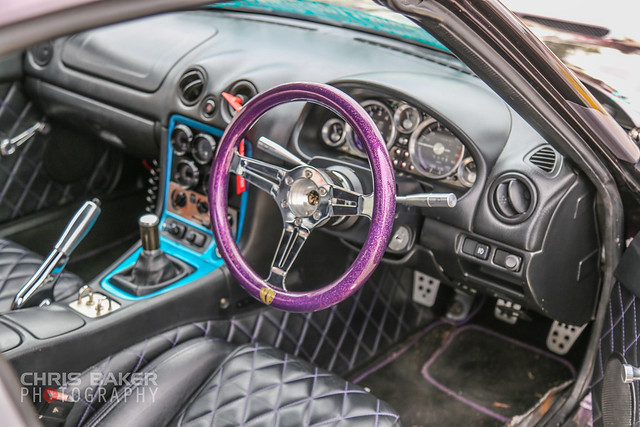
Some may remember my supercharged NA, named The Purple Monster. I stripped this for parts in 2018 to fund my R34 GTT (which I still own).

I did own an NC1 Sport back in 2022/2023 but sold it to buy a ‘sensible diesel car’.

The current daily driver project is a 1996 Mazda 323F V6 which I purchased in January 2024. I’ve been doing Youtube for about 3 years and unfortunately there just isn’t enough content left in it. So I’ve made the decision to sell it and buy another car.

A platform that I’m familiar with, a chassis I’ve not yet done before (well, kinda…to a degree) and something that will help my Youtube channel.

Welcome to my MX5 NBFL project

The car is a 2004 NBFL Arctic Edition with a 1.8 VVT, 5 speed manual with an open diff. Currently on 119k miles.

The chrome fuel filler cap has been badly painted along with the chrome door mirror covers. These will be replaced in the future.

The softtop is in really good condition, the glass window is an added bonus

The car is on stock shock absorbers and lowering springs. These will be the first to get changed, the ride is too bouncy and it could really do with an alignment.

The first thing I checked when viewing the car was checking the condition of the sills. They’re solid and look to have been replaced at some point. The rear arches feel solid but I’ve noticed some minor bubbling. There’s also evidence of sanding marks so unsure if they’ve been replaced/repaired, the inner arch doesn’t look new.

The interior is stock with the exception of the gear shifter and stereo. The heated leather seats will come in handy during the winter months. I wasn’t sure about the blue leather but it’s slowly growing on me.

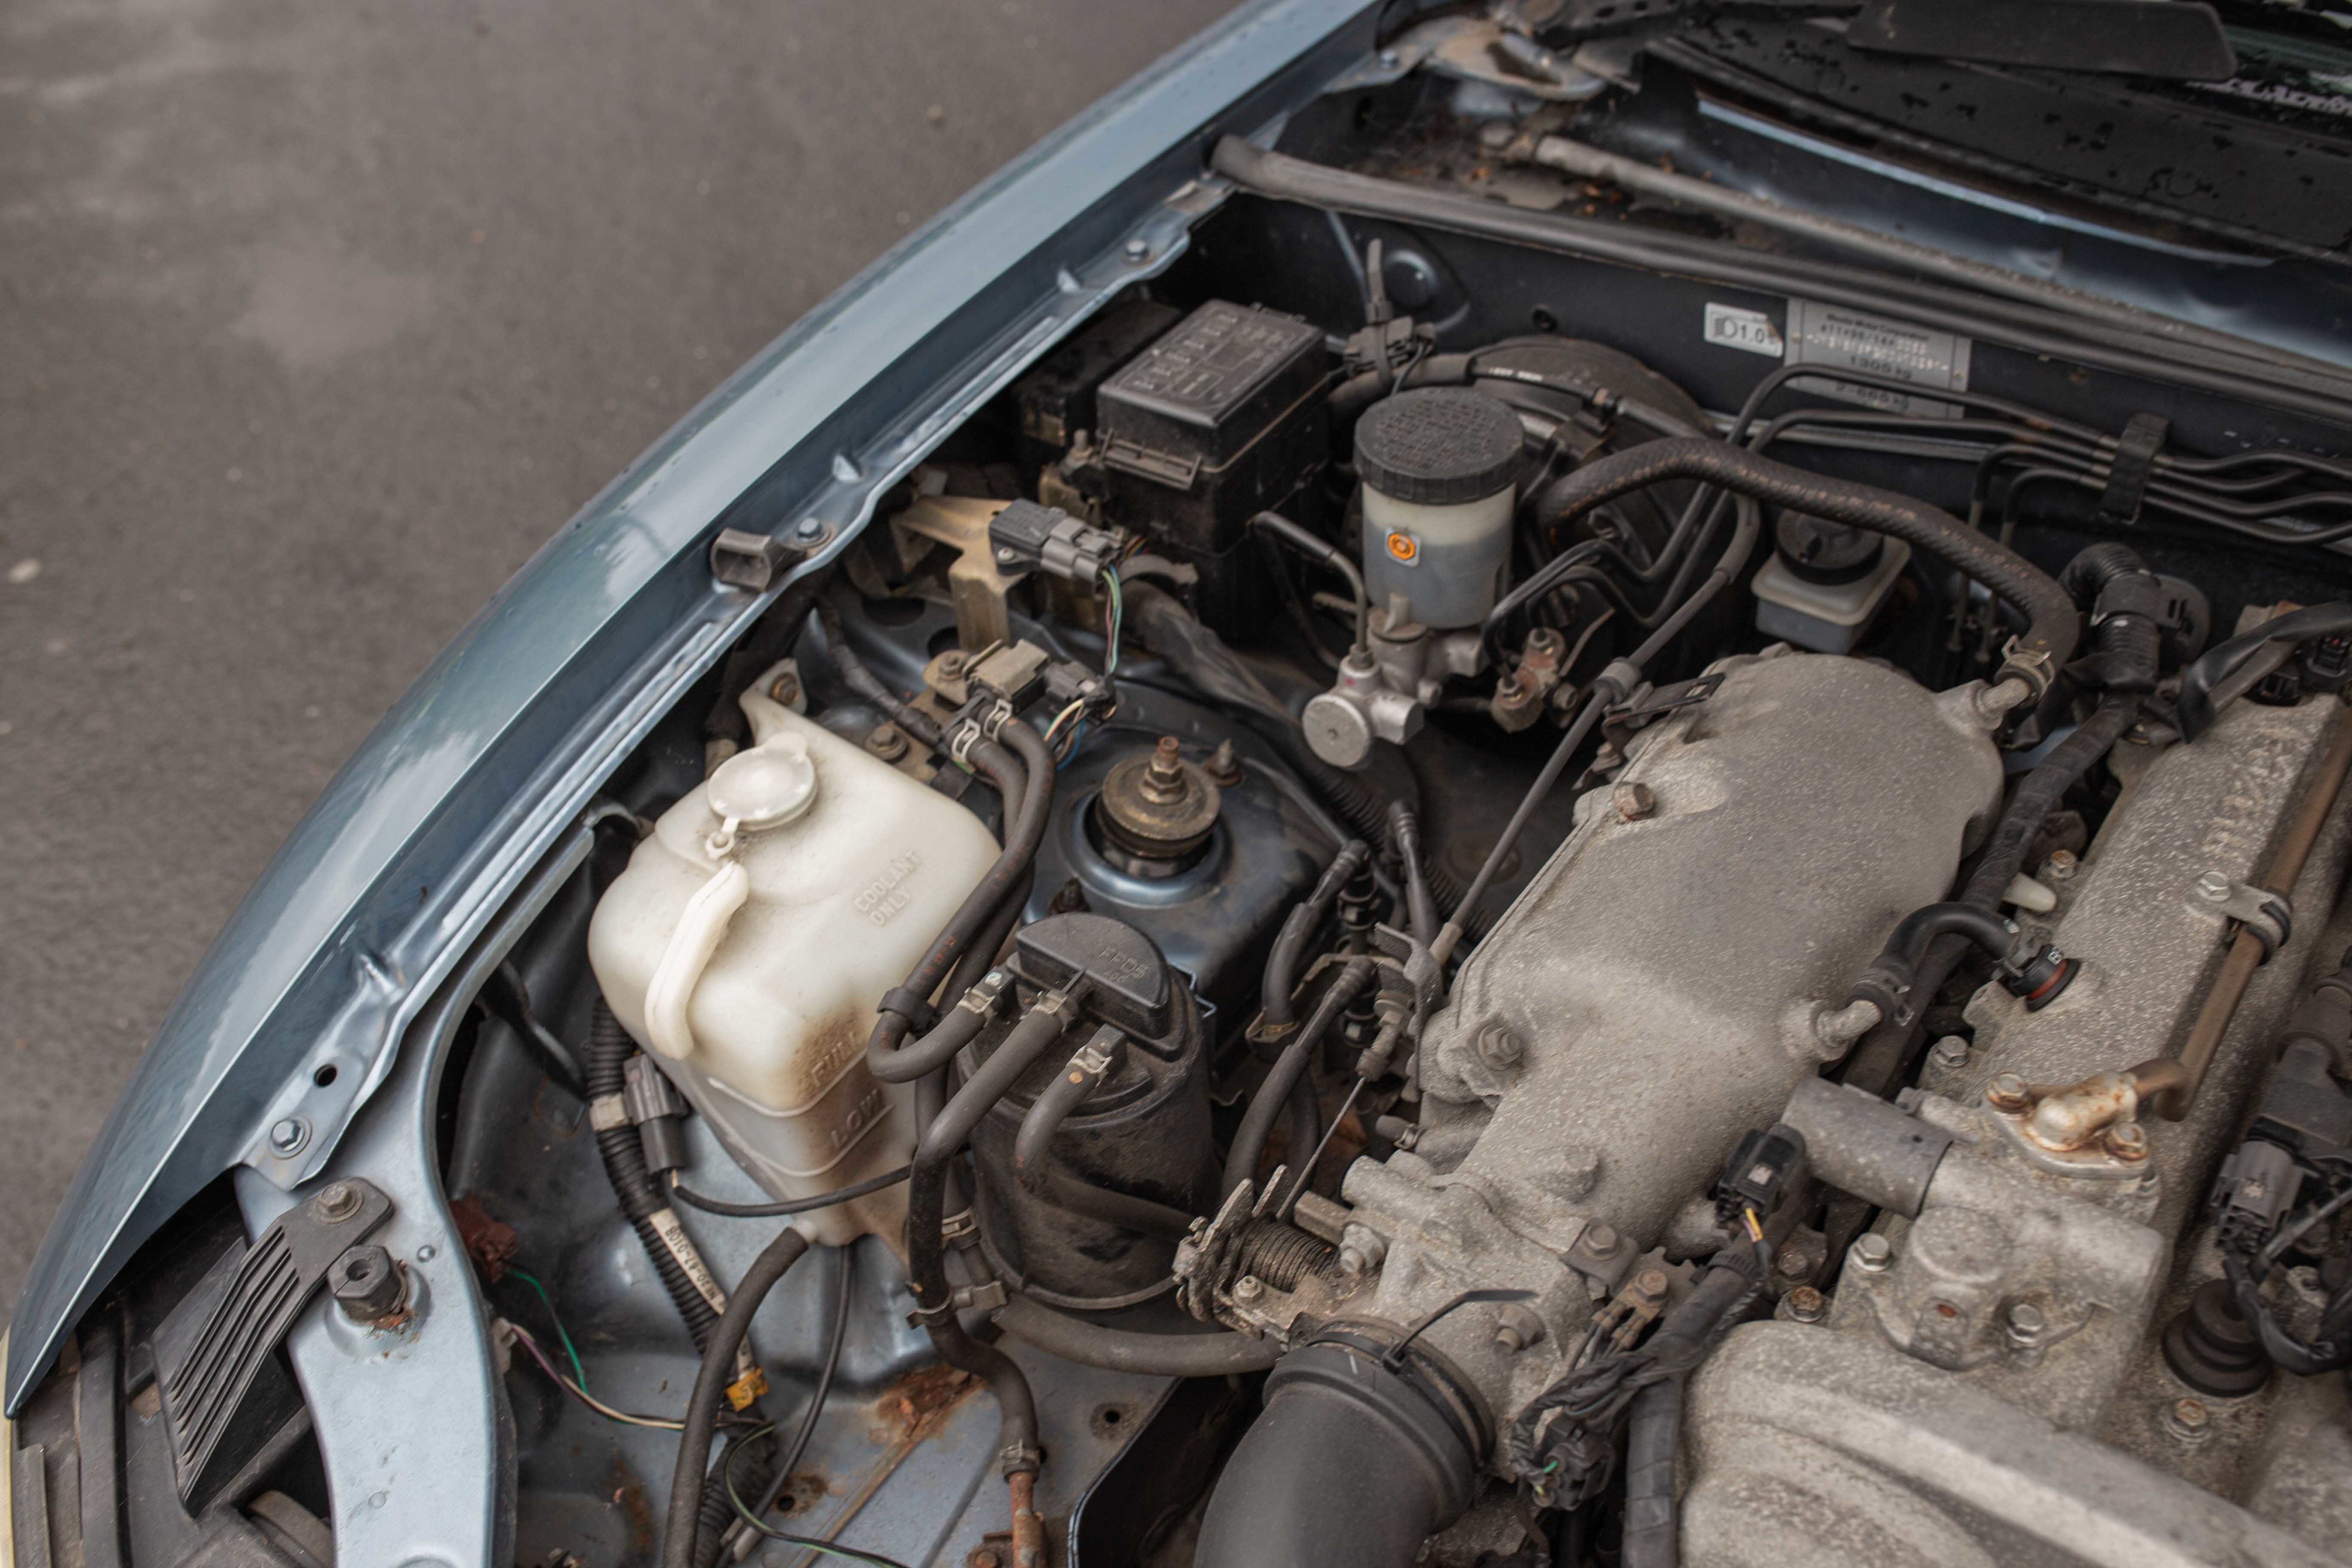
Under the bonnet (or hood) is a very dirty engine bay. A little bit of corrosion below the coolant bottle and around the PAS reservoir (I think thats common?)

I’m looking forward to getting stuck in with this project. I’ll also be documenting the build on Youtube. I’d really appreciate any subscribers, likes,comments and shares

https://www.youtube.com/hoodedreeper

https://youtu.be/PkHV8Vd49Oc?si=sx6vpSNi9Op5r1Q1

6 Likes

I remember the Purple Monster and other projects. It’ll probably be "Project welding " on the NBFL but with an excellent final result.

1 Like

Some good previous projects there…be good to see what you have in store for the NB.

1 Like

Hey Chris
Out of curiosity did you prefer your turbo or SC mx5’s?

The first NA was Turbo’d but was only road tuned to 185bhp. The second NA (purple monster) was 204bhp.

I liked the linear power of the SC, but eventually I would have craved more. Unfortunately that would mean re-doing the whole setup to fit a Mercedes unit.

I do miss the noise though.

Turbo seems more popular, it’s a better daily driver and more power can be achieved.

Saying this… I still couldn’t pick haha. If the turbo’d car was about on par power wise it’d be easier to make a decision

Lol well that doesn’t help!! Am on the fence myself which way to go on an NB! :rofl:

If you want linear power, instant boost but will be happy with a set power level…go S/C

If you want better daily driving and scope for more power…go turbo

Was looking at the kraken kit to be fair but they bump a gt2680 in the kit which everyone seems to think take too long to come on boost…am hearing 5k rpm…if thats the case it would be painful to drive unless flooring it round a track?

I’m guessing that’s full boost at 5k? It’s not ideal especially if the chosen track is twisty.

Thats my thoughts hence the SC thoughts…would a boost controller help bring that down or a different Wastegate spring?

Waste gate spring would certainly help. You’re more than welcome to drop me a message

Firstly I apologise for the lack of updates, which is very unlike me. I’ve managed to achieve alot ‘behind the scenes’, so I’m now playing catch up with photo/video editing and updating here.

Although I had a reasonably good test drive, the drive home was going to be the eye opener especially when it comes to any potential problems.

The main thing I noticed was the car would pull to the side under braking. Getting the car jacked up and on axle stands was a job in itself.

So it seems the caliper slider pins had next to no grease rolls eyes

I also noticed the driver side calipers have been painted red, but not the passenger side? Someone must have ran out of time I guess.

With the slider pins receiving a smothering of red rubber grease, I went for a test drive and it’s much better. The pulling to the side is still there under heavy braking but the discs and pads do need replacing, so it could be from un-even wear.

While the front was off the ground I had a poke around the bottom of the front wings…

The double skinned jacking lip along the sill have certainly seen better days. Luckily they’re still solid despite looking quite the opposite.

I’ll get the front wings replaced and painted and I’ll straighten that lip and repaint the black stone chip along the bottom of the car.

The Youtube Video can be found here:

The driver side headlamp had started to oxidize. In the past I had some good results with the ArmourAll restoration wipes, so I gave them another go. If it comes back I’ll attempt a ‘proper’ resto.

Much better :slight_smile: Time will tell though

On the subject of lighting, I wanted to see what was hiding beneath the duct tape on the bootlid

Ah yes, it wouldn’t be an NB without rust lol

It seems these suffered badly with bootlid corrosion and finding a good used item seems to be difficult. I remember doing a repair on the NC1 (luckily that was aluminium and quite light corrison). It looks like the light units have been glued in too, lovely job! I’ll leave these be for now and will revisit later on.

The Youtube video can be found here:

2 Likes

I’ve been messing around with cars for a number of years and I’ve never changed a cambelt!?

There’s no better time than the present, so here goes my attempt. Knowing these engines are non-interference gives me a little more confidence, but I’ll be checking and re-checking everything.

Gates Cambelt & Tensioners
Gates Water Pump
Gates Drive Belts
Tensioner Spring
OEM Crankshaft Pulley Bolt
OEM Woodruff Key
OEM Thermostat & Gasket
Jass Performance Camshaft Locking Tool

I apologise if I miss any info/steps, this job did take longer than expected and my brain was frazzled by the end of it all.

Starting off by removing the air intake pipe, unplugging the MAF and temperature sensor on the air box along with the crankcase breather pipe. I also unclipped the cable tidies to make as much space as possible.

Moving onto the drive belts, starting with the PAS and AC belts. ** Before doing this, slacken off the x3 10mm bolts on the waterpump pulley **

Moving the PAS pulley so the slot lines up with the bolt on the PAS pump. With that cracked off (making sure you use spanner or socket on the nut the other end of the bolt) you can crack off the tensioner bolts (I unwound the long bolt nearly all the way) . These are mainly 12mm and 14mm from memory. The bracket that holds the tensioner bolt, the bolt on the left nearest the waterpump will need undoing too.

The PAS pump should now push down, allowing the belt to slip off.

The Alternator is a similar job. There’s a 14mm bolt top and bottom that will need to be slackened. The bottom one in particular was an a** to do. I had to borrow a long spanner to do it, even then it didn’t want to move despite alot of Plus Gas penetrant. Once that was done the top tensioner bolt could be undone like the PAS. Once those were loose the Alternator will pivot to the left allowing the belt to be removed. The water pump pulley can now be removed too.

Next up was the rocker cover, from memory there’s x11 10mm bolts and x6 10mm bolts for the coilpacks/brackets. For the VVT I undone the 19mm banjo bolt and the feed pipe lifts off with the rocker cover. There’s a couple of plugs that’ll need unplugging and the PCV hose before lifting it up.

The radiator has to be drained and removed to allow better access to the crank pulley/harmonic dampener. You can either drain the coolant from the drain plug on the bottom of the radiator. Or you can remove the lower hose like I did. Make sure you have a container to catch the coolant.

Remove the x4 10mm bolts that hold the harmonic balancer to the face plate (you may need to use a spanner/socket on the crank bolt to stop it from moving). The pulley can be wiggled back and forth to release it. These can corrode and seize on so be careful. The face plate stayed attached to my pulley, some will split apart (hence removing the x4 bolts).

The next step is to move the wiring away from the front of the engine. Theres a few brackets and cable tidies but nothing too complicated.I moved mine away to the side and on top of the throttle body/inlet manifold.

The timing covers should now be accessable, the top has x1 10mm bolt in each corner. Once removed the cover can be pulled forward and upwards. The lower cover is split diagonally, some times called the middle/centre and lower covers. The middle cover is only held on by x1 bolt to the left. The lower cover has x3 bolts, one at the top near the waterpump and one either side towards the bottom. These are prone to cracking over time so be careful removing them. I do need to replace mine but I was unable to source replacements over the weekend.

With the car in 5th gear it’s time to undo the crank bolt. I used a deep 21mm socket on a breaker bar and it cracked off reasonably easy. It’s also advisable to remove the anti roll bar incase you wish to use an impact gun. My anti roll bar was left off from the coilover fitting so that was something I didn’t need to worry about. With the bolt undone, I rethreaded it into the crank so I can check the engine was in TDC.

For some reason this was one step of the job I wasn’t too sure on, but infact it was very simple. With the spark plugs removed I could turn the engine over without any compression. The backing plate behind has two diagonal markings which need to line up with the notches on the camshaft pulleys. For the crankshaft pulley there’s also a notch which needs to line up with a V. Turn the crank bolt with the socket until all 3 markings line up. The engine is now in TDC (Top Dead Centre).

To stop the engine from moving/turning when removing/fitting the new belt you need to lock the camshafts. There’s a few different methods, the ‘old school’ way is to use a pair of spanners locked together with some locking grips. Another way is to use a tool that goes inbetween the two camshafts, which isn’t any use if the cam pulleys need to be removed. Luckily Jass Performance have developed a tool which goes over the hex sections of the camshafts, locking them together. This tool has two different sized ends depending on the engine. The VVT uses the larger size. With the tool slipped over the camshafts, tighten the two bolts and you’re good to go.

At this point of the job I wanted to replace the camshaft seals. Starting off with the exhaust side, the bolt was removed and the pulley wiggled off. I used a pick and carefully removed the old seal. Make sure you don’t score/damage the camshaft or block. Any damage will lead to a leak which you don’t want!

I purchased a couple of tools from Autolink UK which help fit the new seals. Unfortunately I don’t have a photo, but I’ve included it in the Youtube video.

For the VVT pulley there’s x3 torx bolts that hold a cover on. Behind this is the 17mm? bolt, with this removed the pulley slides off like the exhaust side. This seal is exactly the same procedure except it’s a slightly larger seal.

The crank bolt can now be removed along with the faceplate. At this point I decided to replace the crankshaft seal. There’s evidence of an oil leak on the sump and around the crank pulley so it made sense to do it now.

Jass Performance have also developed a tool for installing the new seal. Unfortunately I don’t have a photo of this either, but I do cover it in the Youtube video.

Moving up to the tensioners, slacken the tensioner bolt but do not fully remove. With a pair of pliers you can remove the spring. Now you can remove the tensioner and idler pulley, the belt can now be removed.

To remove the water pump, the top right bolt of the alternator needs to be removed. From here there’s a further x4 bolts that hold the water pump on. The bottom right corner of the water pump is an water neck elbow held on with x2 bolts. With the water neck pushed to one side the water pump will release with a little wiggling.

Install the new water pump and gasket, I used some sealant on either side of the water pump and water neck gaskets to help. Torque the x4 bolts down to 22nm. Next refit the water neck ** THIS was an absolute nightmare to refit! I recommend unbolting the PAS pump and tying it up and away to give you more room. The bolts go in at an angle and can be tricky start threading in **

Install the idler and tensioner pulleys. The tensioner has a little lug bracket, this sits over a small dowel on the water pump to help align it. Keep the tensioner pulley bolt loose and not fully tightened. Next install the spring using some long nose pliers. Push the tensioner pulley all the way to the left and tighten up the bolt.

Slide the cambelt over the crank pulley and reinstall the face plate and bolt, this keeps it all together for the time being. Wrap the belt around the idler pulley and around the outer edge of the camshaft pulley (exhaust), making sure you keep the belt tight. I borrowed a tip from a friend and used some cable ties on the belt and camshaft pulley. That was you don’t loose the tensioner when doing the other side.

With the belt now on both pulleys you can pull/twist the belt over the tensioner pulley. Once you’re happy the belt is sitting nicely the cable ties can be cut off (be careful not to cut the new belt!) the tensioner bolt can now be loosened off, which will take up the slack. Once the tensioner has settled, the bolt can be nipped up.

Before you torque the tensioner bolt, I removed the Jass locking tool and did two full rotations of the engine, making sure all 3 timing marks aligned. You can count the teeth on the cambelt from the 12 o’clock position on the cams, there should be 19 teeth. Once you’re happy it’s all aligned the idler and tensioner bolts can be torqued to 50nm. From here I did another two full rotations just to double check everything was lined up.

The crankshaft bolt can now be torqued to 160nm

The refitting is the reversal, starting off with the timing covers, wiring, harmonic dampener, drive belts etc.

1 Like

Before I reinstalled the rocker cover, it was the perfect chance to repaint it. I started by removing the VVT feed and solenoid, masking up all areas and then rubbing the surface with a scotch pad, followed by a wipe down with some white spirit.

Two coats of grey etch primer came next followed by two coats of a high metallic base coat. This was a formula I mixed at work based on BMW Titanium Silver but with the medium metallic pigment swapped for a course one.

Next was a type of paint I’ve never sprayed before, candy. I went with a candy apple red. Not knowing how this would spray, I accidently treated it like normal paint. By that I mean I sprayed more to get a good coverage. Little did I know, the more I sprayed, the darker the colour got, doh! So the 2nd or 3rd coat would have been a really bright red, but instead it dulled down. Which in turn kinda works, because it’s a decent match to the Meister R strut mount plates.

So another ‘while I’m here I may aswell change…’ job was to refresh all of the VVT seals and gaskets.

I go through the installation of these in my Youtube video :slight_smile:

With the seals and gaskets installed, it was time for reassembly which is straight forward.

With everything back on and torqued down the last step was to refill with coolant before starting the car. I set the cabin climate control to hot and inside the cab. This allows coolant to circulate through the heater matrix, hopefully minimising the risk of any air trapped in the system.

While the car was running I noticed a coolant leak. This was coming from that water neck that bolts to the water pump. So everything had to removed to gain access again. When I removed the water neck I noticed the gasket got damaged when refitting. Which is the reason I added the ** note earlier.

Although not ideal, I removed the gasket, dried the surface and used some instant gasket. For some reason I really struggled getting the bolts to line up, but I did it in the end.

I restarted the car and let the car get upto temperature allowing the coolant fan to switch on. While the car was up in air I did an oil change too.

1 Like

The videos can be found on my Youtube channel

Part 1

Part 2

Camshaft/Crankshaft Seal Replacement

VVT Seals & Painting Rocker Cover

Part 3 round up

2 Likes

Lovely to see another NBFL being saved :sunglasses: :+1:

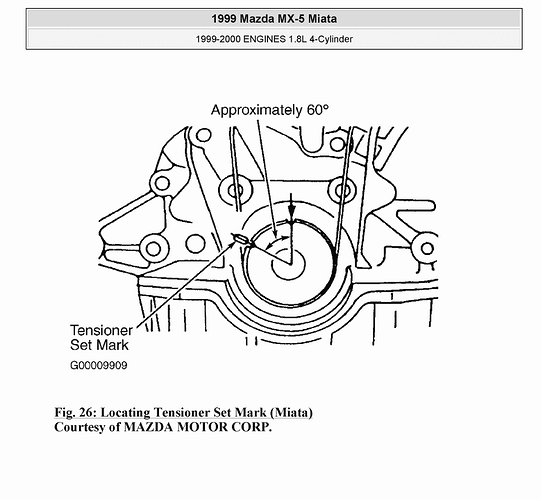
Note that the correct procedure for setting the tensioner is to turn the engine over 1 5/6 turns from TDC, NOT 2 turns. There is a second mark near the crank pulley for this purpose. This is where all of the slack is on the tensioner side of the belt. If you have set the tensioner at TDC, chances are that your belt is too slack. This is a fault that I’ve seen (and commented on) several times on Youtube videos.

Page 36 of the workshop manual (here):

In case you think it doesn’t make a difference, here’s a rough video I made where I tightened the tensioner bolt at TDC and then turned the engine to the correct position and slackened it again. You can see that there’s quite a bit of movement.

6 Likes

I noticed with the car being ‘low’ that the frame rails were taking a beating. I ordered a set of Jass Performance reinforced frame rail protectors and they were swiftly delivered, always fast delivery!

Having owned a pair of these for a previous NA build, I knew the quality was going to be top notch as always. The rails come with a bag of stainless hardware including some stainless fuel line brackets to replace the rusty steel ones.

To begin the sill kick panels need to be removed, these simply pull off. Next is to remove the dead pedal/foot rest, this had x2 10mm nuts. Both front seats need to come out, each seat uses x4 14mm bolts. The carpet needs lifting up and fixing together with some cable ties, just enough to keep the carpet off the floor.

I test fitted the passenger rail first and it went straight on. The key here is to make sure the rail is as far forward as possible. There’s a curved cut out at the front to follow the hump on the floor for the subframe. Once you’re happy with the position, drill a single pilot hole in a front and rear mounting hole, have a look inside the car to make sure there’s clearance and it’s not too far forward or back. Drill the holes out to 8mm and fit a nut and bolt to secure it in place.

I used a trolley jack to help keep the rail protector pushed up while I drilled the other holes. I then used a deburring tool to remove any unwanted swarf and gave each hole a spray of some paint to protect the bare metal.

Back underneath the car I cleaned up the surface and undersealed the frame rail. The protector could then be remounted and secured down with the stainless hardware.

It’s worth noting, if you want the fully polished finish, remove the protective film in the channel where the mounting holes are BEFORE you bolt it to the car. I found out the hard way, doh!

The driver side is the same except there’s two brackets that hold the fuel lines on. Mine are completely seized, a 10mm socket is too big and a 9mm is too small. I ended up snapping the brackets off just so I could get the protectors on. With the driver side protector there’s a lip that needs to be tucked under the fuel lines before the rail can slide over the frame rail.

Once both protectors are bolted on, the cable ties holding the carpet together can be cut off and the carpet refitted. Followed by the seats, dead pedal and sill kick panels.

A very worth while item to fit if you have a lowered MX5, anything to help save the chassis!

The Youtube video can be found here:

The next part of the service was to replace the transmission oil in both the gearbox and differential.

I don’t have a front undertray, only the gearbox one. This is held on by a handful of 10mm bolts. Mine has certainly seen better days so I’m glad I removed it.

The gearbox drain is found on the bottom of the gearbox and is a 24mm socket. The fill plug is found on the side of the gearbox, it’s a square drive and is a 14mm open end spanner. Make sure you can loosen the fill plug before draining any oil.

With the oil drained into a container, I refitted the plug with a new washer and torqued it to 25-39nm. The fill plug is the same, only if you have the correct square socket.

The drain plug is magnetic (same with the diff plugs). It’s a good way to check the health of the transmission, make sure its cleaned before refitting.

To refill with oil I used a Laser Tools oil suction gun. This takes 500ml of fluid. You simply pull back the handle, unscrew the top and fill with EP80W90 GL4. Refit the cap and attach the hose supplied. Push the hose through the fill hole and push the handle.

Gearbox Oil Capacity is 1.8L. Once filled it will slowly seep out, that’s when you know there’s enough. Refit the fill plug and wipe any excess oil off.

The differential is the same procedure, both the drain and fill plugs are 24mm and both are torqued to the same 25-39nm. It also uses the same oil grade.

Differential Oil Capacity is 1.0L

The Youtube video can be found here:

4 Likes