- My model of MX-5 is: 2016 ND 2.0L
- I’m based near: West Sussex
Last week and seemingly out of nowhere, I got the dreaded grinding and eventual slowing to a halt of my passenger side window. It had been fine up until then, and suddenly sounded awful and eventually froze. A search on this forum confirmed the window regulator was to blame, and fortunately MX5Parts had one in stock.
Thanks to a very helpful video from @K8MX5 and a link to the online manual from @Mad_Malc I was able to pull the door apart and replace the regulator.
Some things I observed/learned:
-
Disconnecting the battery and leaving it for 1 min before removing the airbag pressure sensor is vital. It is very easy to go blasting straight in, ripping bits off the door, and ignoring the fact that the sensor is there waiting to blow the airbags. The online manual is very specific about how to handle the sensor, and although it seems obvious now that one should never remove or un-plug the sensor with the battery still connected, it’s an easy step to miss. I assumed for safety’s sake that even disconnecting the sensor with the battery connected would be a big mistake.
-
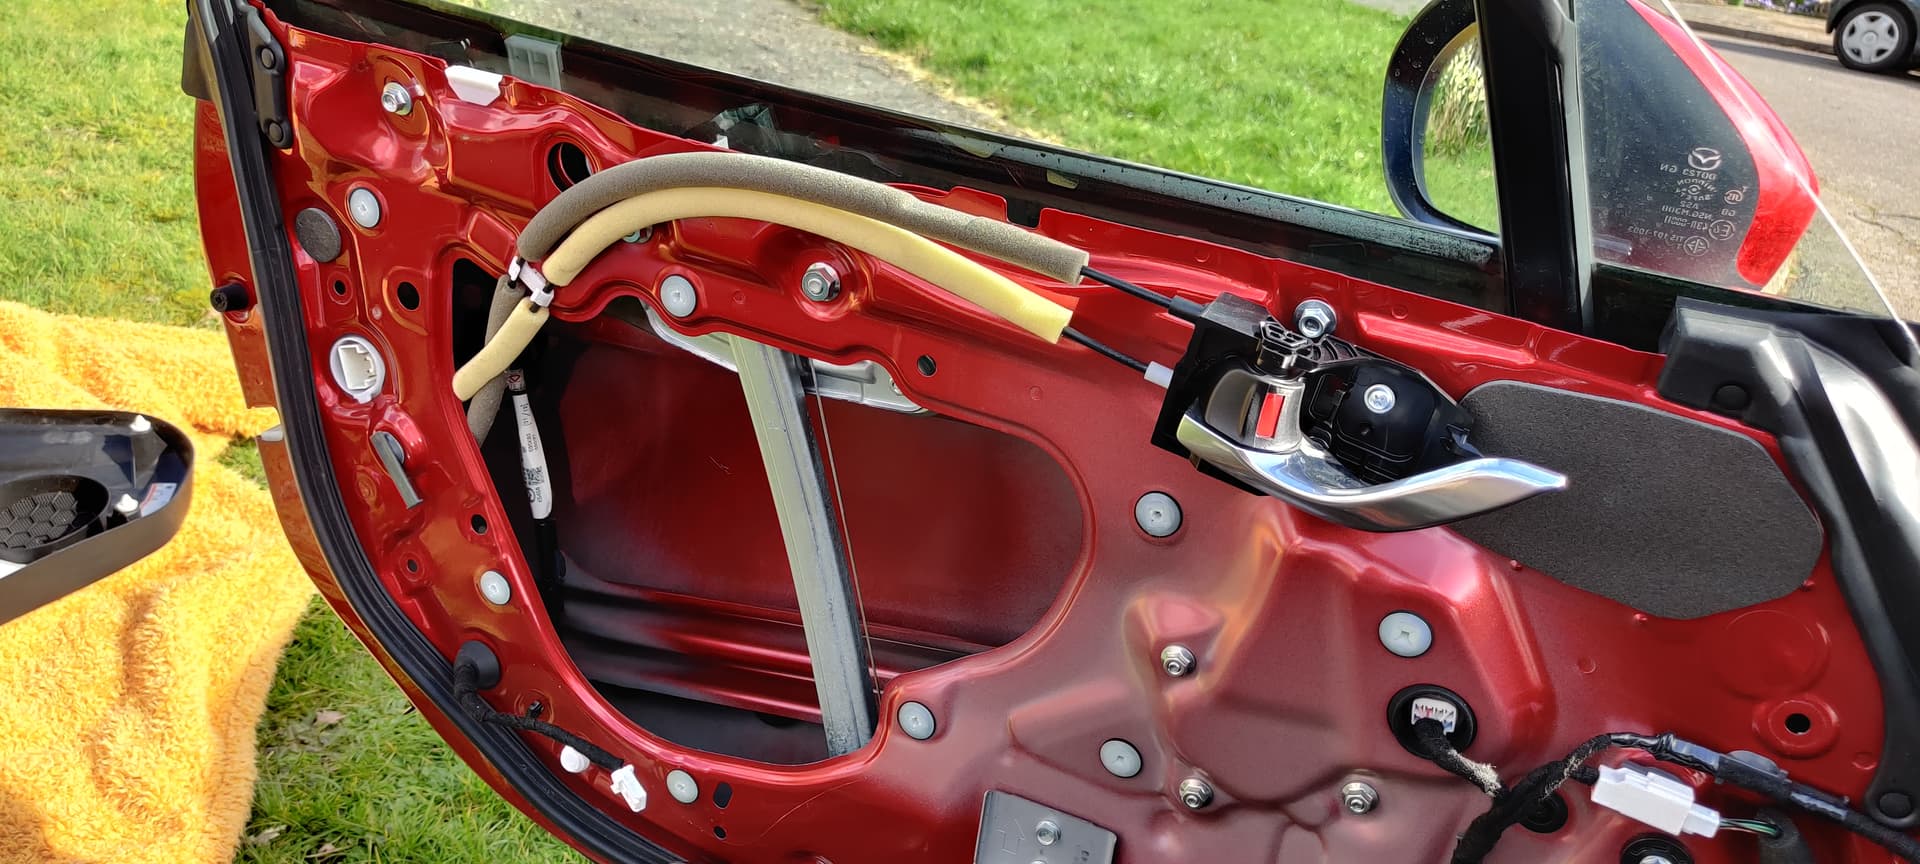
The manual states that the window should be lowered to about halfway down before dis-assembly continues, to allow access to the bolts that clamp the glass to the regulator plate. I could not do this as the window was stuck in it’s uppermost position. However, it is still possible to get to the all the window bolts and remove the glass with the regulator plate as its (almost) highest point.
-
It is much easier to cut the LX tape holding the loom onto the little plastic bracket, than it is to un-clip the bracket. Keep a roll of LX tape handy.
-
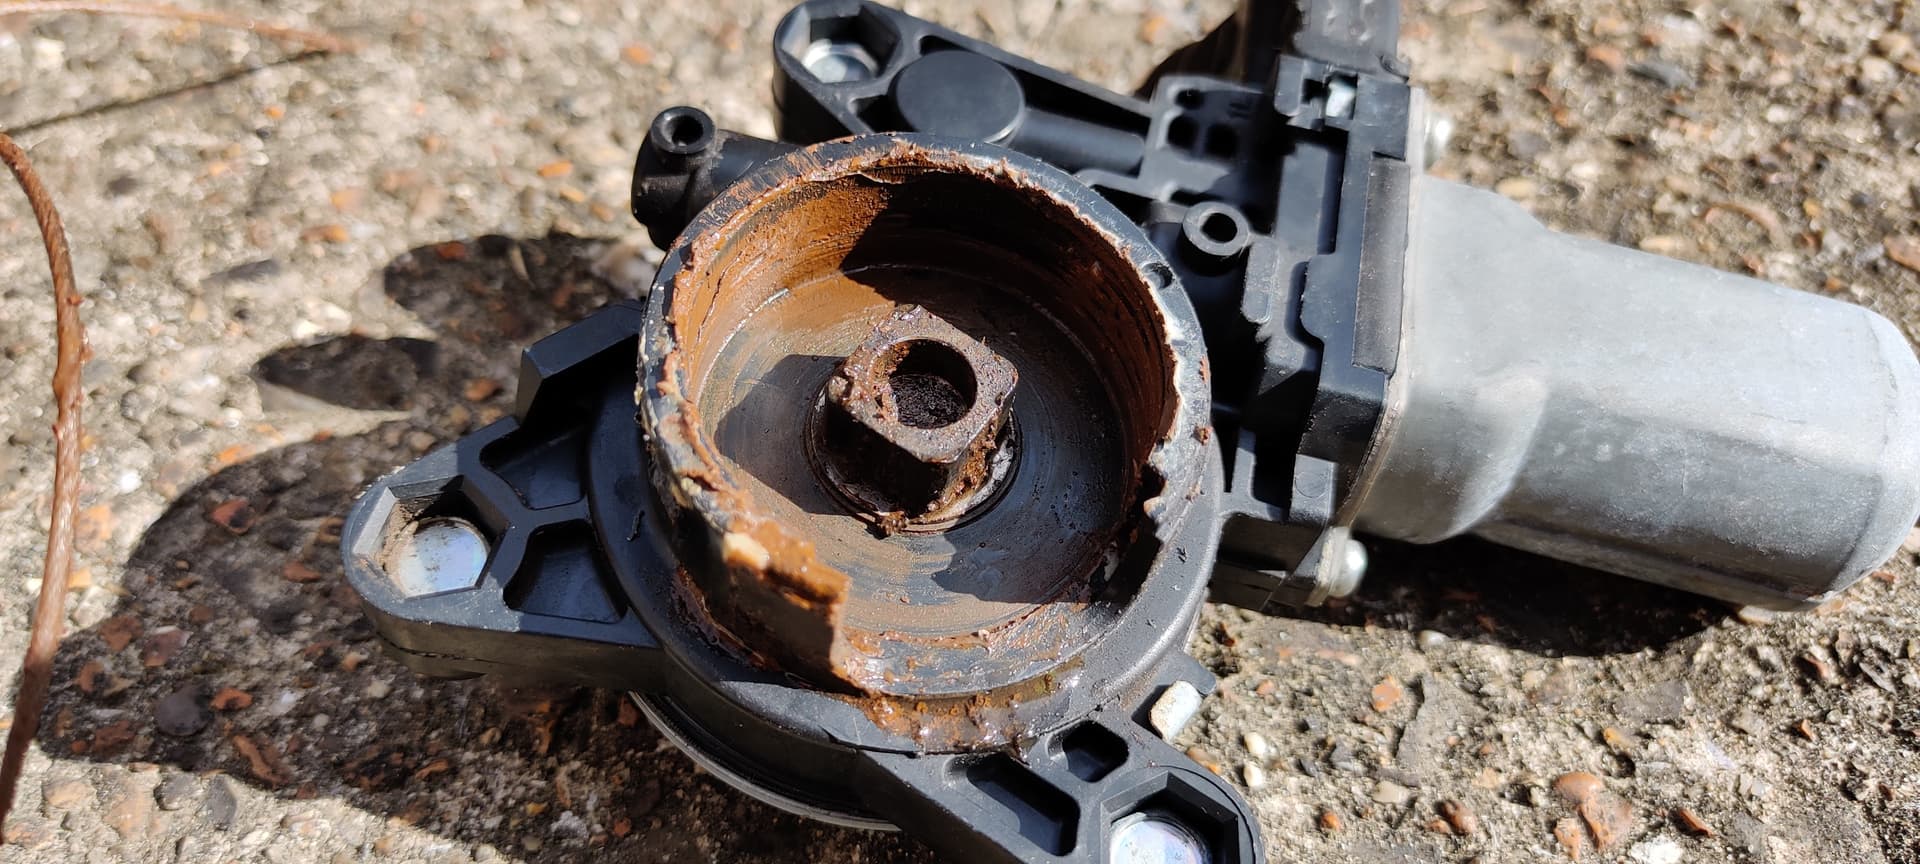
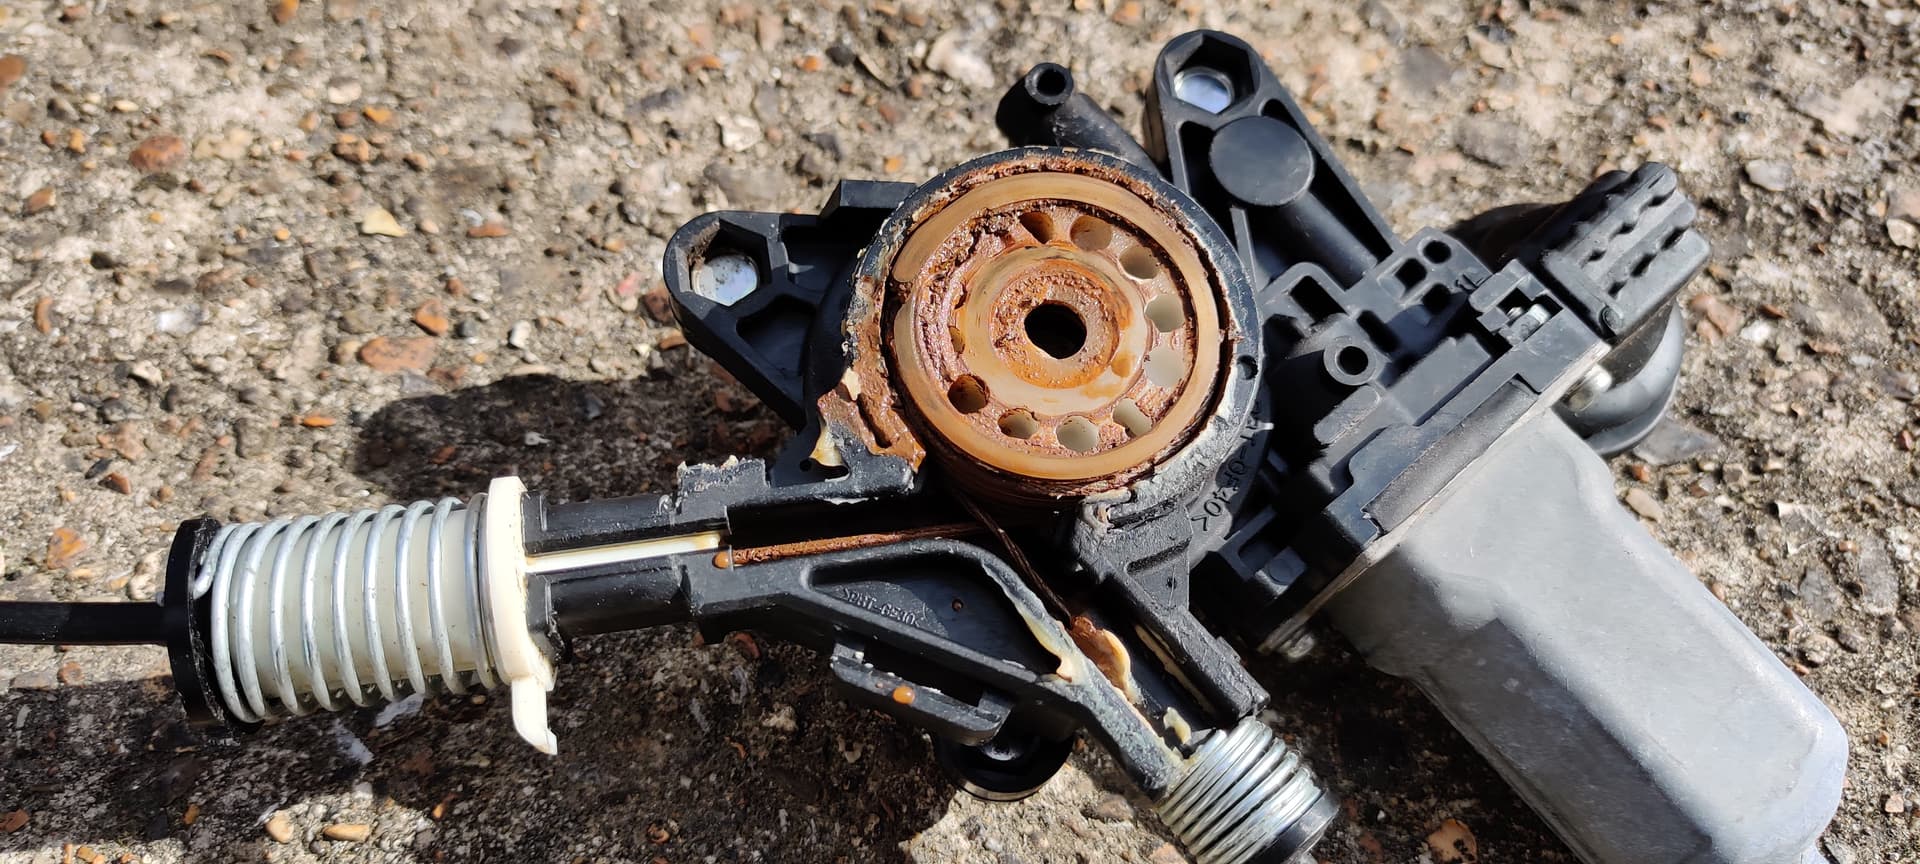
As others have reported, the pulley assembly gathers all the corrosion and crud. See image below. Regarding the cable tie on the new pulley assembly - it is not under any tension, and can be removed once you have a finger on the pulley wheel, stopping it from flipping itself over and unwinding all the cable. It is impossible to assemble the pulley into the motor housing with the cable-tie in place, so care is required.
-
After all was said and done I re-connected the battery and tried to move the window, which it now did, much more smoothly. However I started panicking as the window would not move up any more than half-way. This was with the door open and the ignition on. After reading the manual (yes this is a RTFM moment) I realised I needed to have both door shut - as soon as I did, the window would move fully and I was able to follow the initialisation sequence.
-
I was perhaps lucky that no further adjustment was needed of the glass position. I made sure the various nuts sat in the same place as they originally did, following the marks in the paintwork. The glass bolts sat in their lowest point in the slots in the regulator plate so no adjustment of them was necessary.
Lastly - replacing the passenger side has made it obvious that the driver side is going to fail at some point! Someone on the facebook MX5 group recommended the VX Pro aftermarket window regs, sold by BOFI. Apparently they are much better than the OEM part, but I wondered if anyone here had any experience using and fitting them?
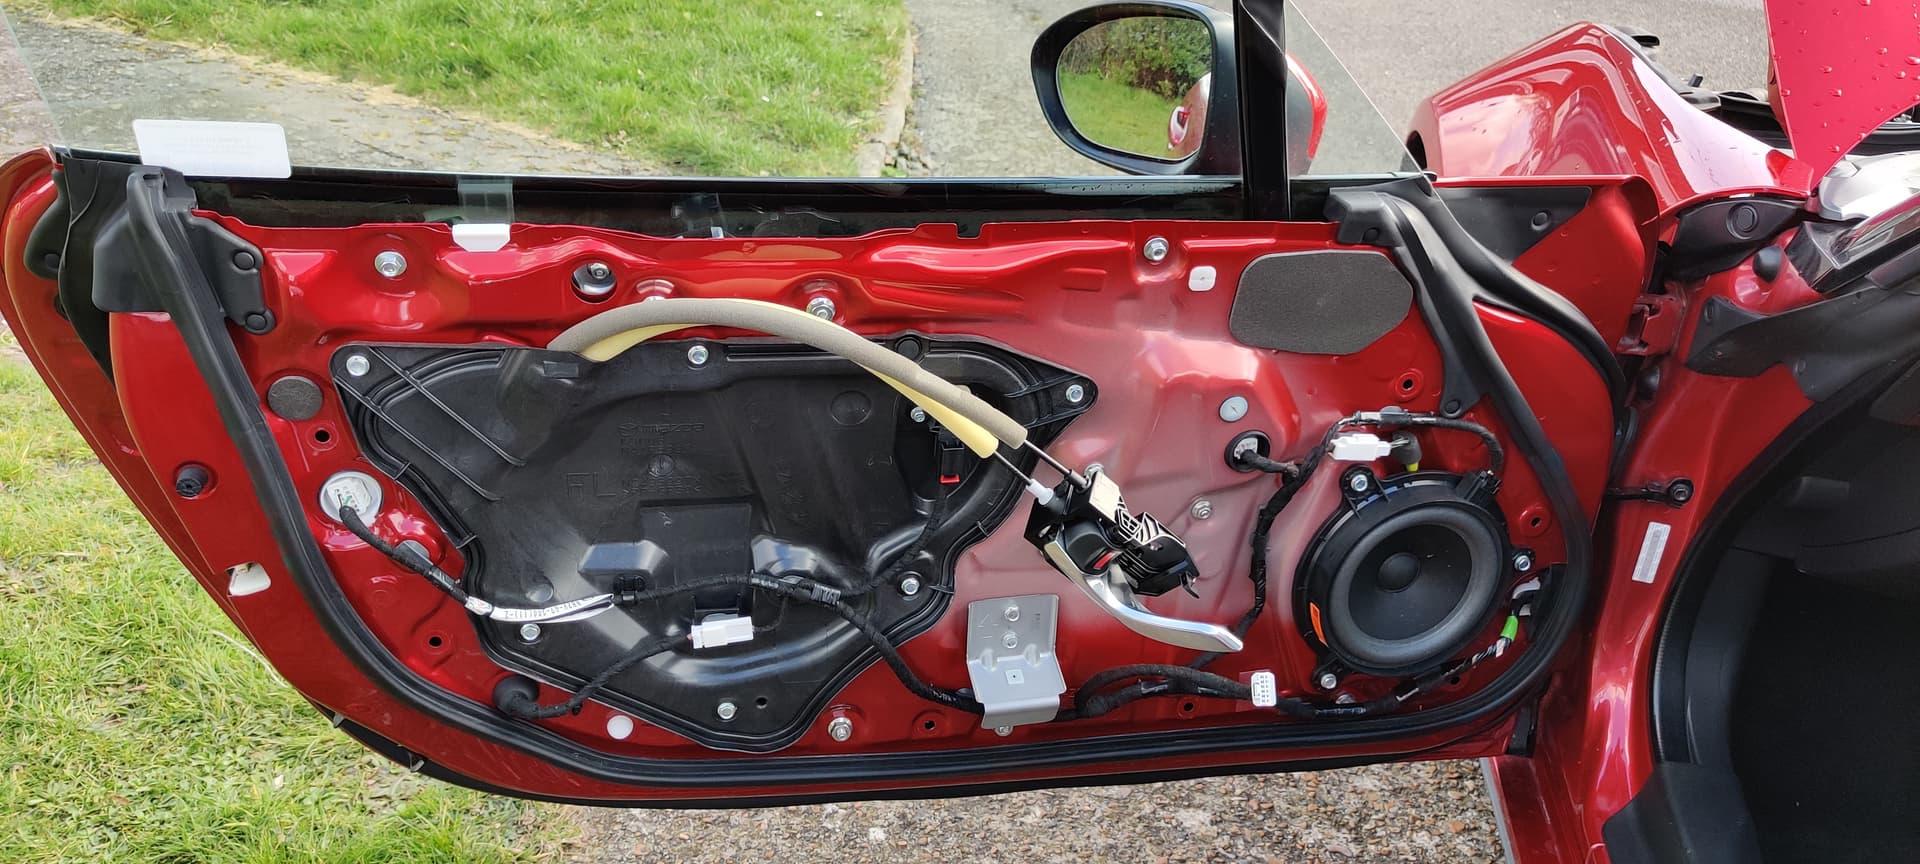
Door panel removed. The handle assembly can be screwed back into place to stop it hanging around, although it needs removing again to access the regulator nuts. Note the white trim clip still stuck in the door, bottom left. This was removed by getting pliers around the clip on the inside, after the black plastic cover had been removed.
One dead regulator cable.
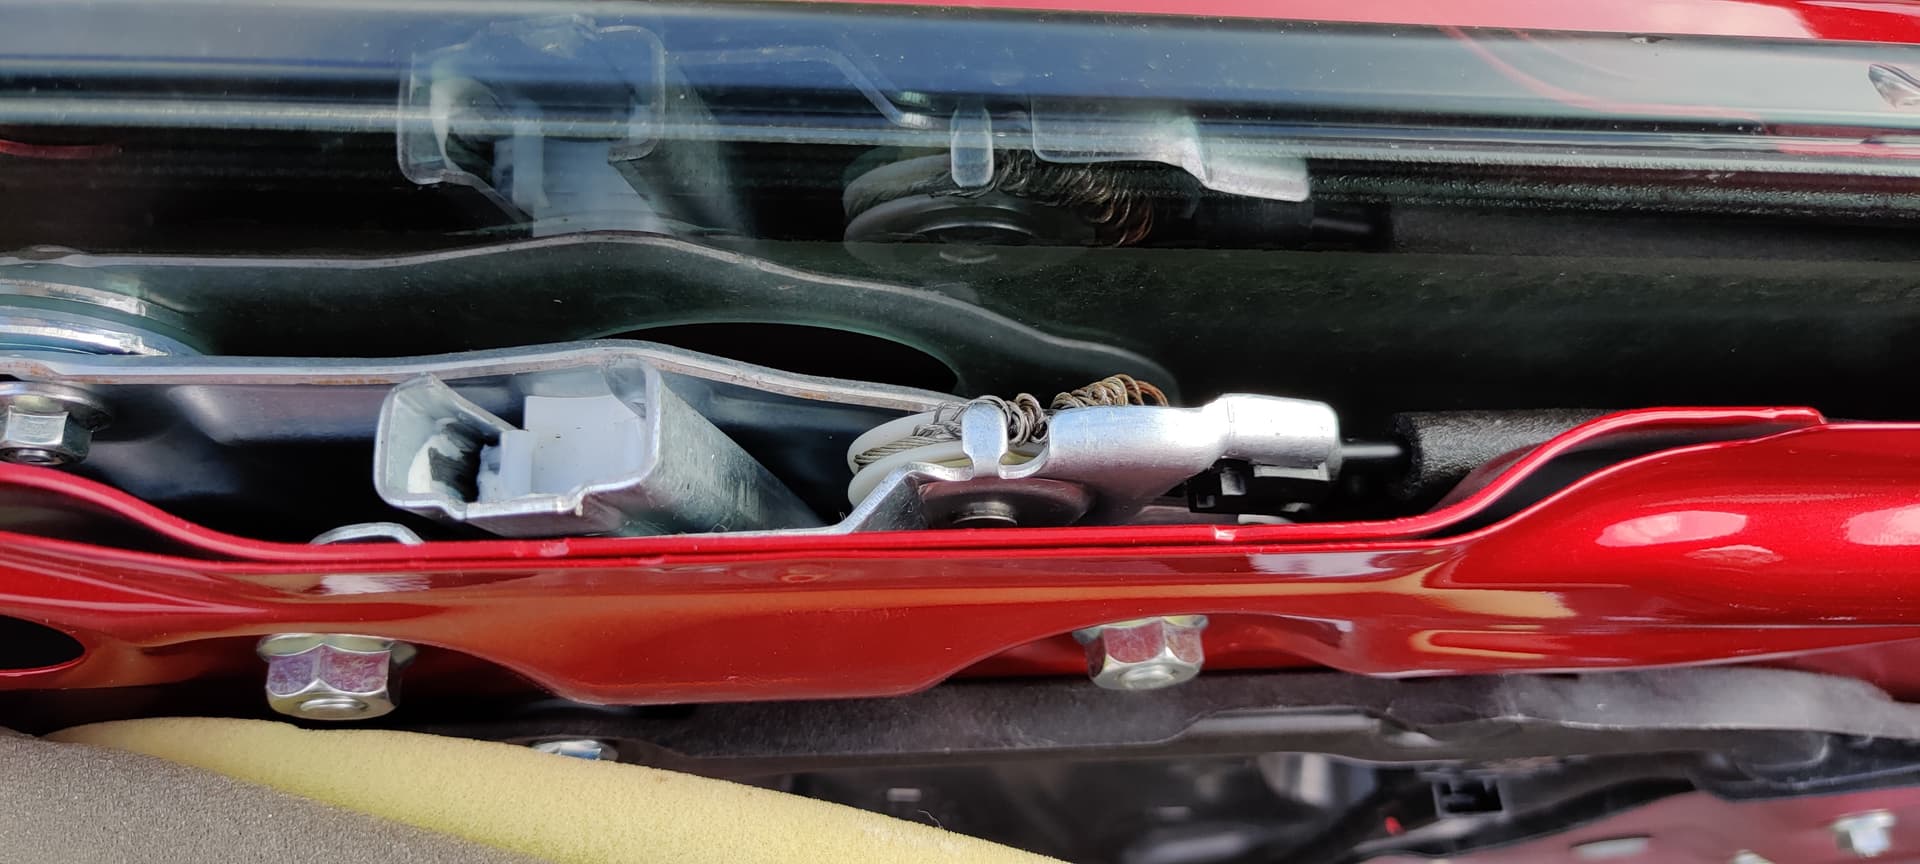
You can see the plate where the window clamps to is right at the top of the door - it should be lowered to make the nuts accessible, but I couldn’t move it as the cable was damaged. However I was able to get to all 3 nuts on the window plate - Mazda have kindly put a clearance hole in the metalwork (just above and left of the grey door handle cable) to grant access to one of them!
Old regulator mechanism after the metal cover had been prized off with a flathead screwdriver. Be careful not to mangle the plastic motor housing when you remove the metal cover. This pulley mech needed some persuasion to get it out of the motor housing - a flathead screwdriver and some patience eventually got it out. I ended up cutting the cables off the make the whole thing easier to handle.
The motor housing after the old pulley was removed. I cleaned this out and applied some silicone grease around the insides before installing the new regulator pulley mechanism.