Intro
After all the helpful comments and insights I’ve had on the site, I thought I would do a bit and write up a how-to for fitting these brackets. There are links on the Jass Performance site to a video blog for fitting the 1” lowering brackets, but the 2.5” ones require considerably more work to fit, and there’s no information online (that I could find).
https://www.jassperformance.com/shop/mazda-mx5/By%20Model/MK3/mx5-nc-seat-lowering-adapters-non-height-adjustable
Apologies if this isn’t up to scratch, it’s my first attempt at a how-to.
Tools/Items Required
A handy list of all the tools and items I used during this exercise. You might have a slightly different opinion or available tools, but this is what I used to do the job.
Portable light
10mm open-ended spanner
14mm ring spanner
13mm & 14mm socket, extension bar & strong-arm bar
5mm & 6mm Allen Key
Small flat-bladed screwdriver
Large flat-bladed screwdriver (old knackered one to use as a chisel)
Hammer
Centre punch
4mm, 6mm & 8mm HSS drill bits
Electric drill
Dremel, with cutting discs and grinders, or an angle grinder. If neither of these, as least a file & a hacksaw and a lot of elbow grease!
Small ruler
Marker Pen (or tape)
Old blanket or rug
Workbench
Wire brushes (for drill is easiest)
Rust converter
Black paint
Isopropyl Alcohol (or your preferred surface cleaner)
Grease
Threadlock
Steps
-
Pop your bonnet and use the 10mm spanner to disconnect the battery.
-
Pump the brake a few times then give it a minute or two for the residual charge in the system to dissipate.
-
Remove floor mats and put on floor next to door to use as a kneeling mat.
-
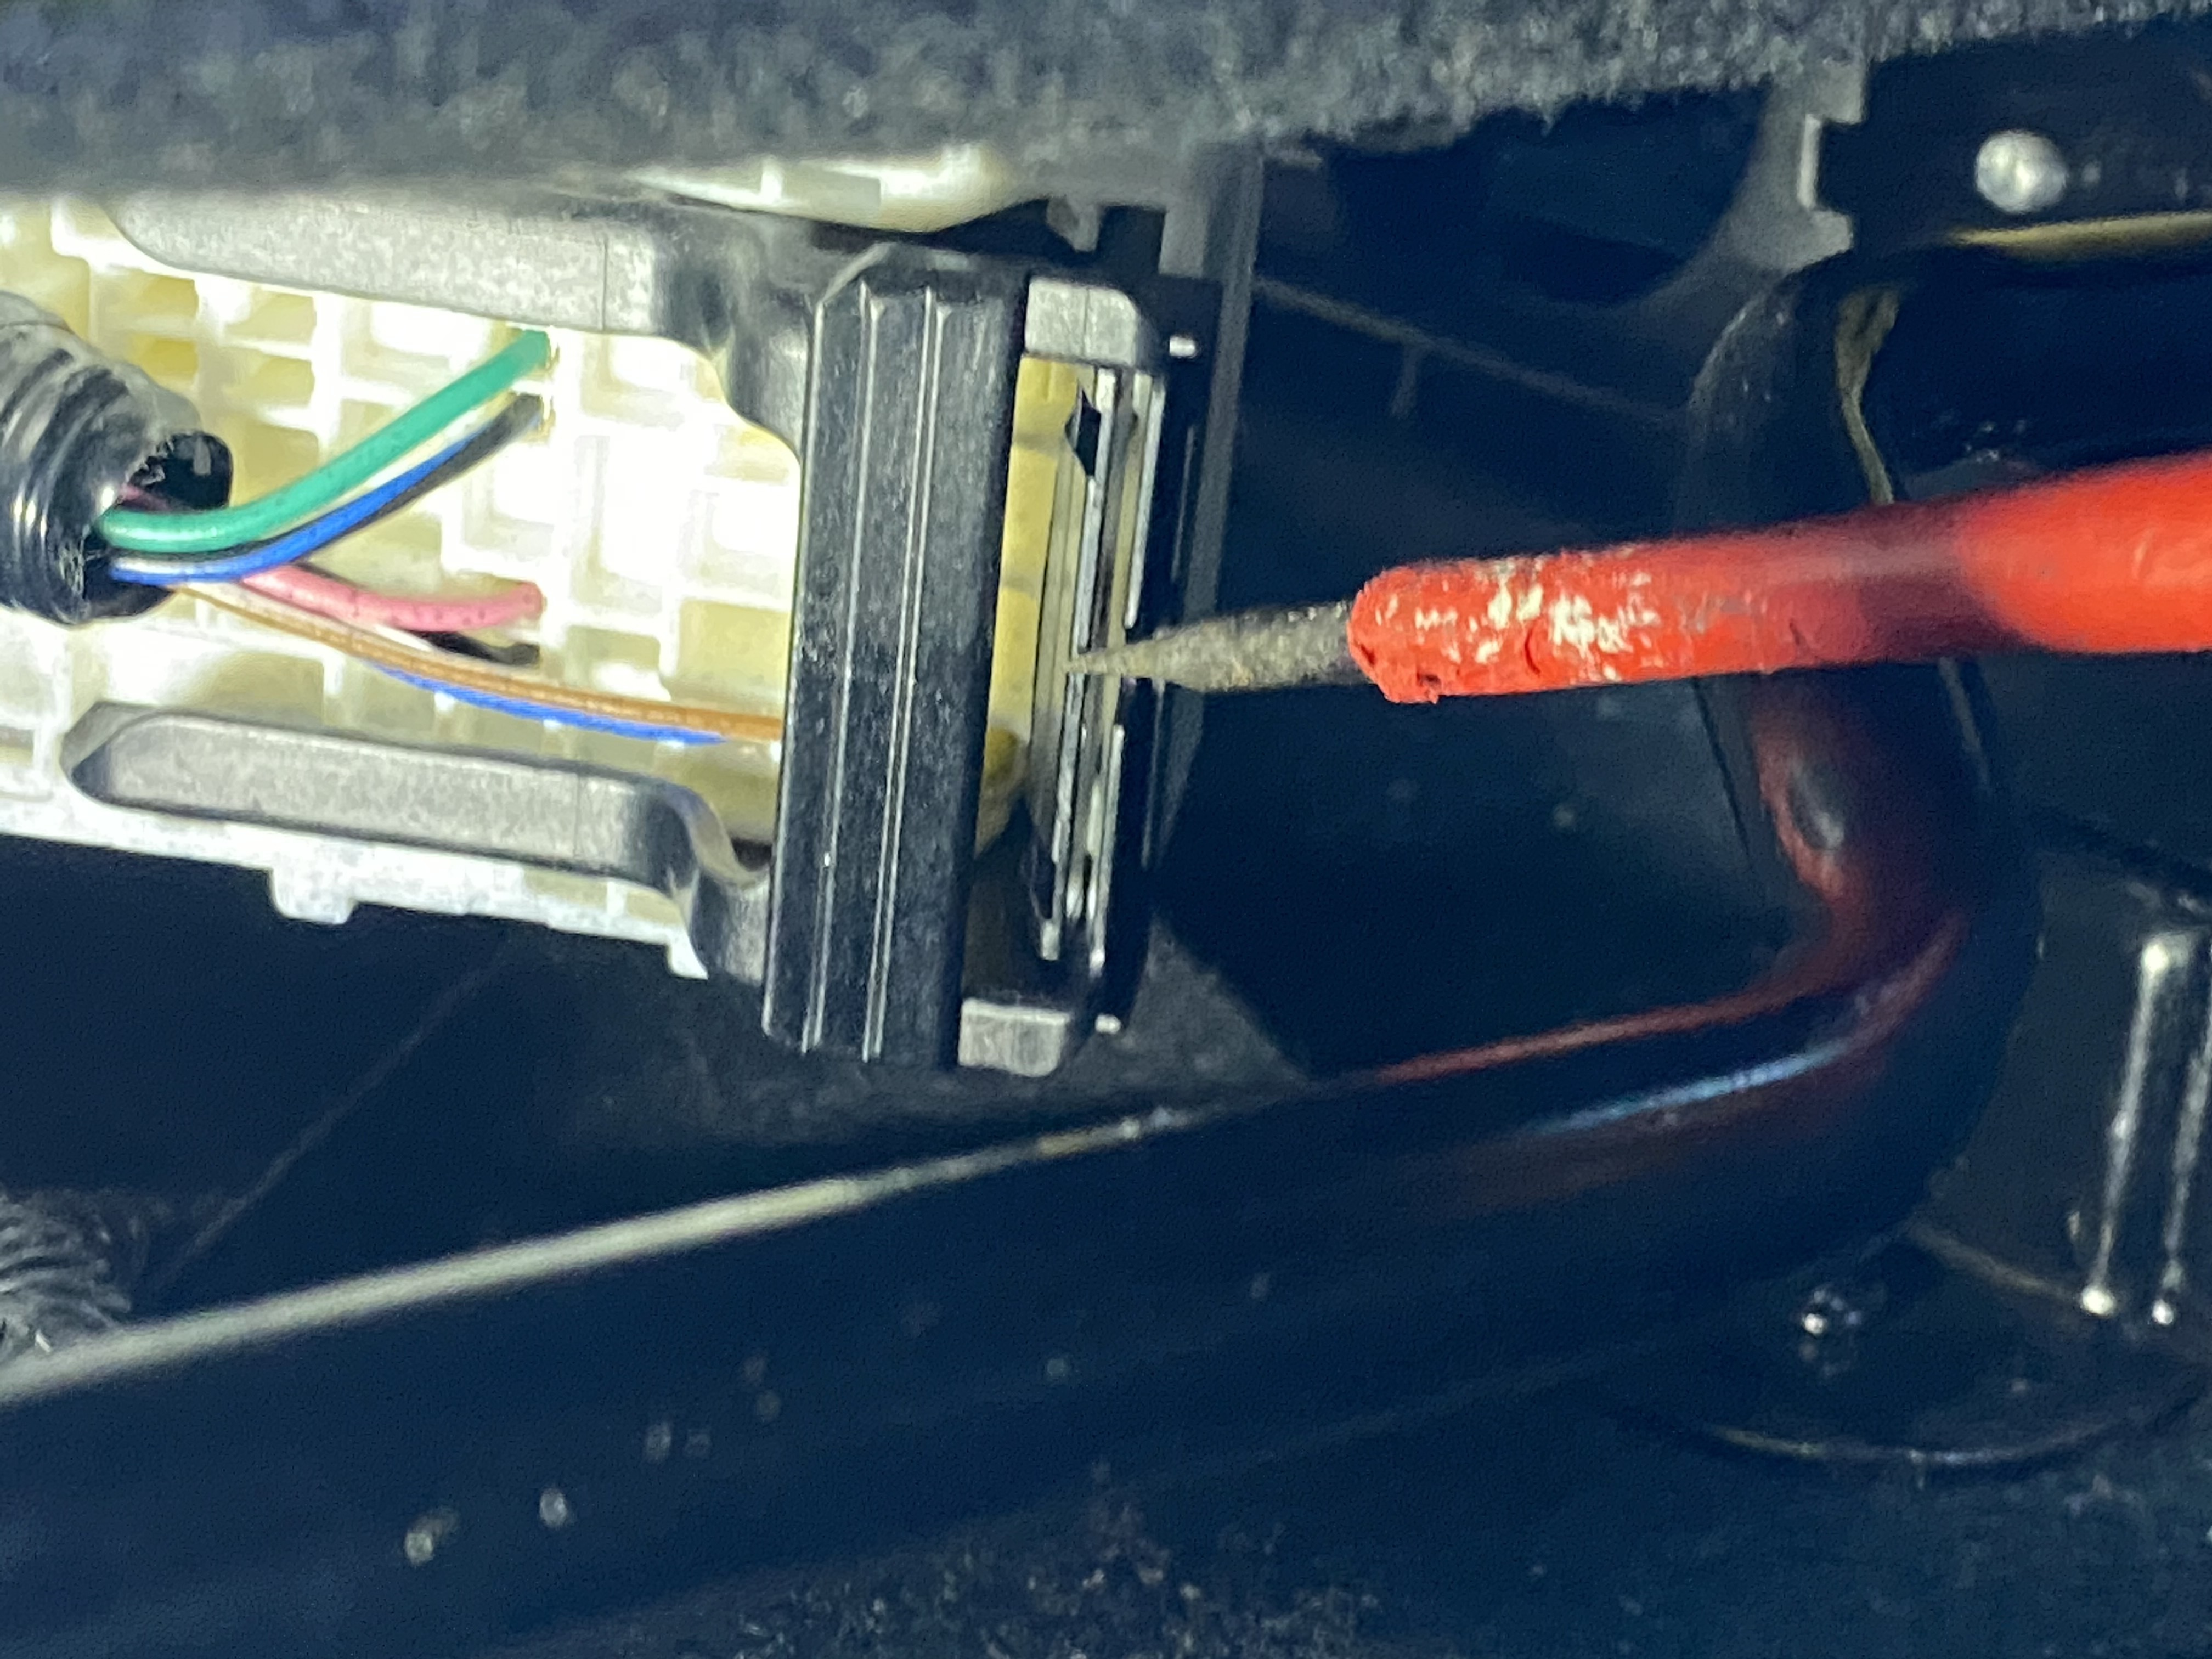
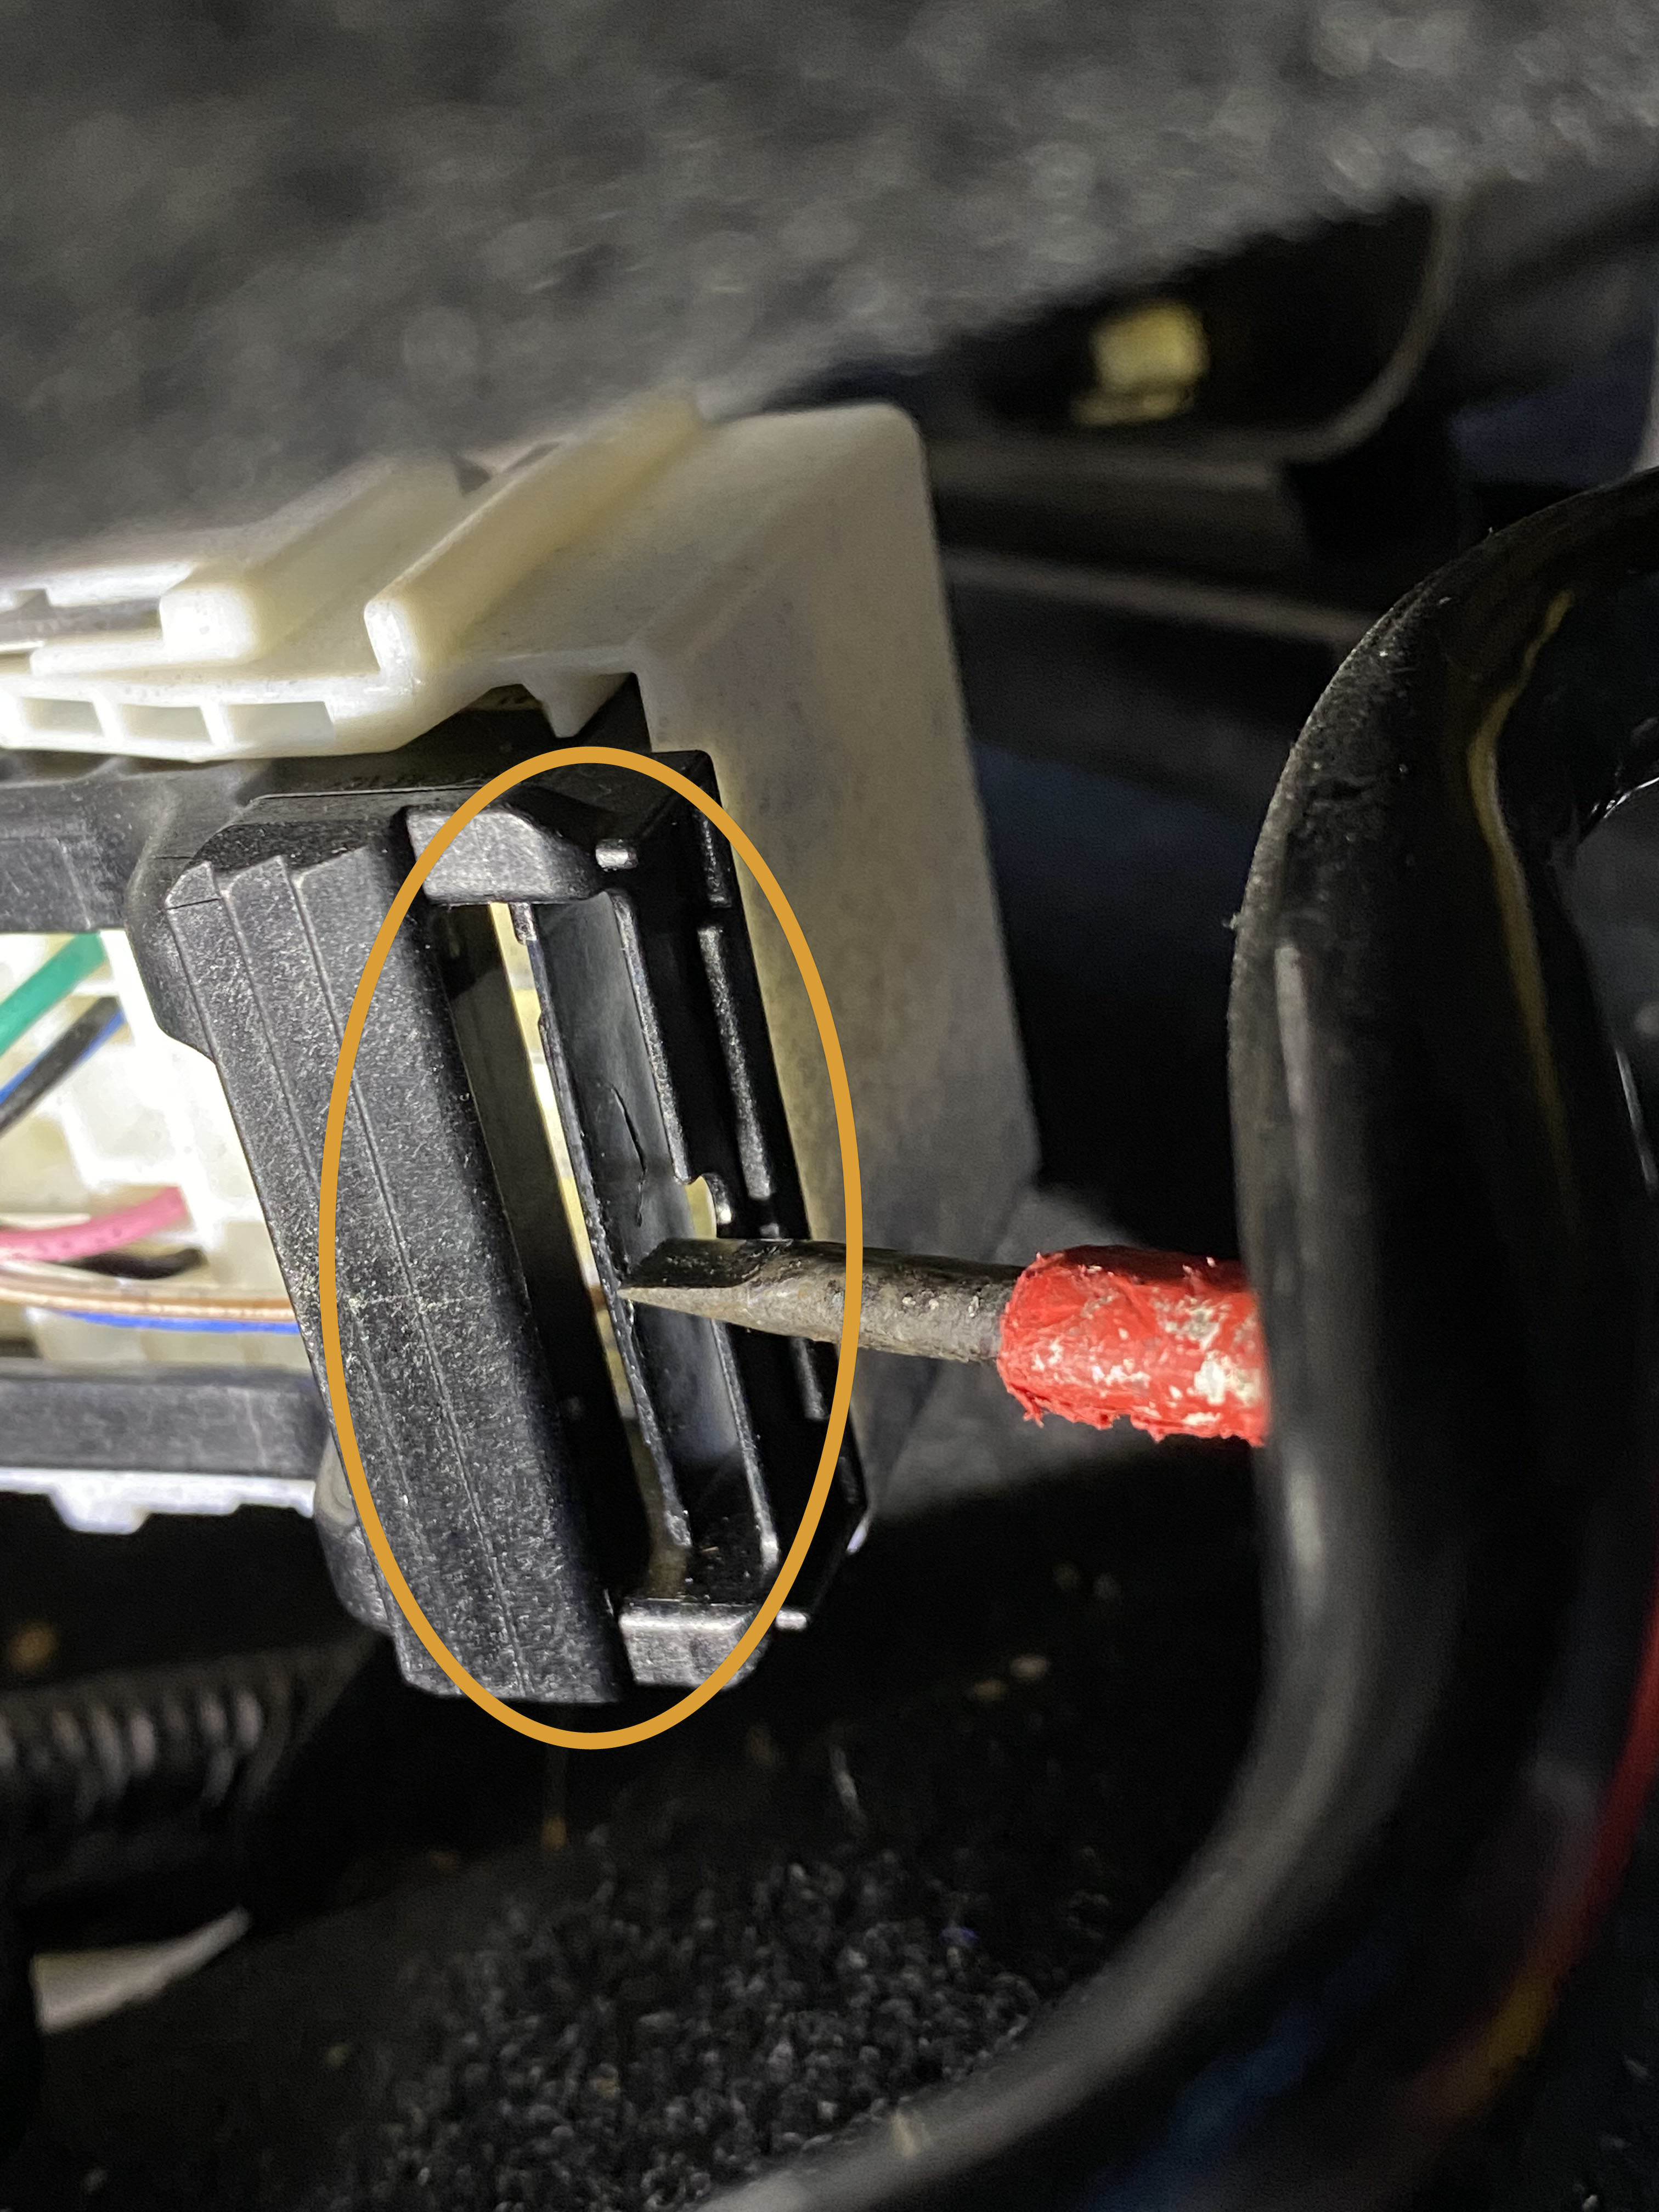
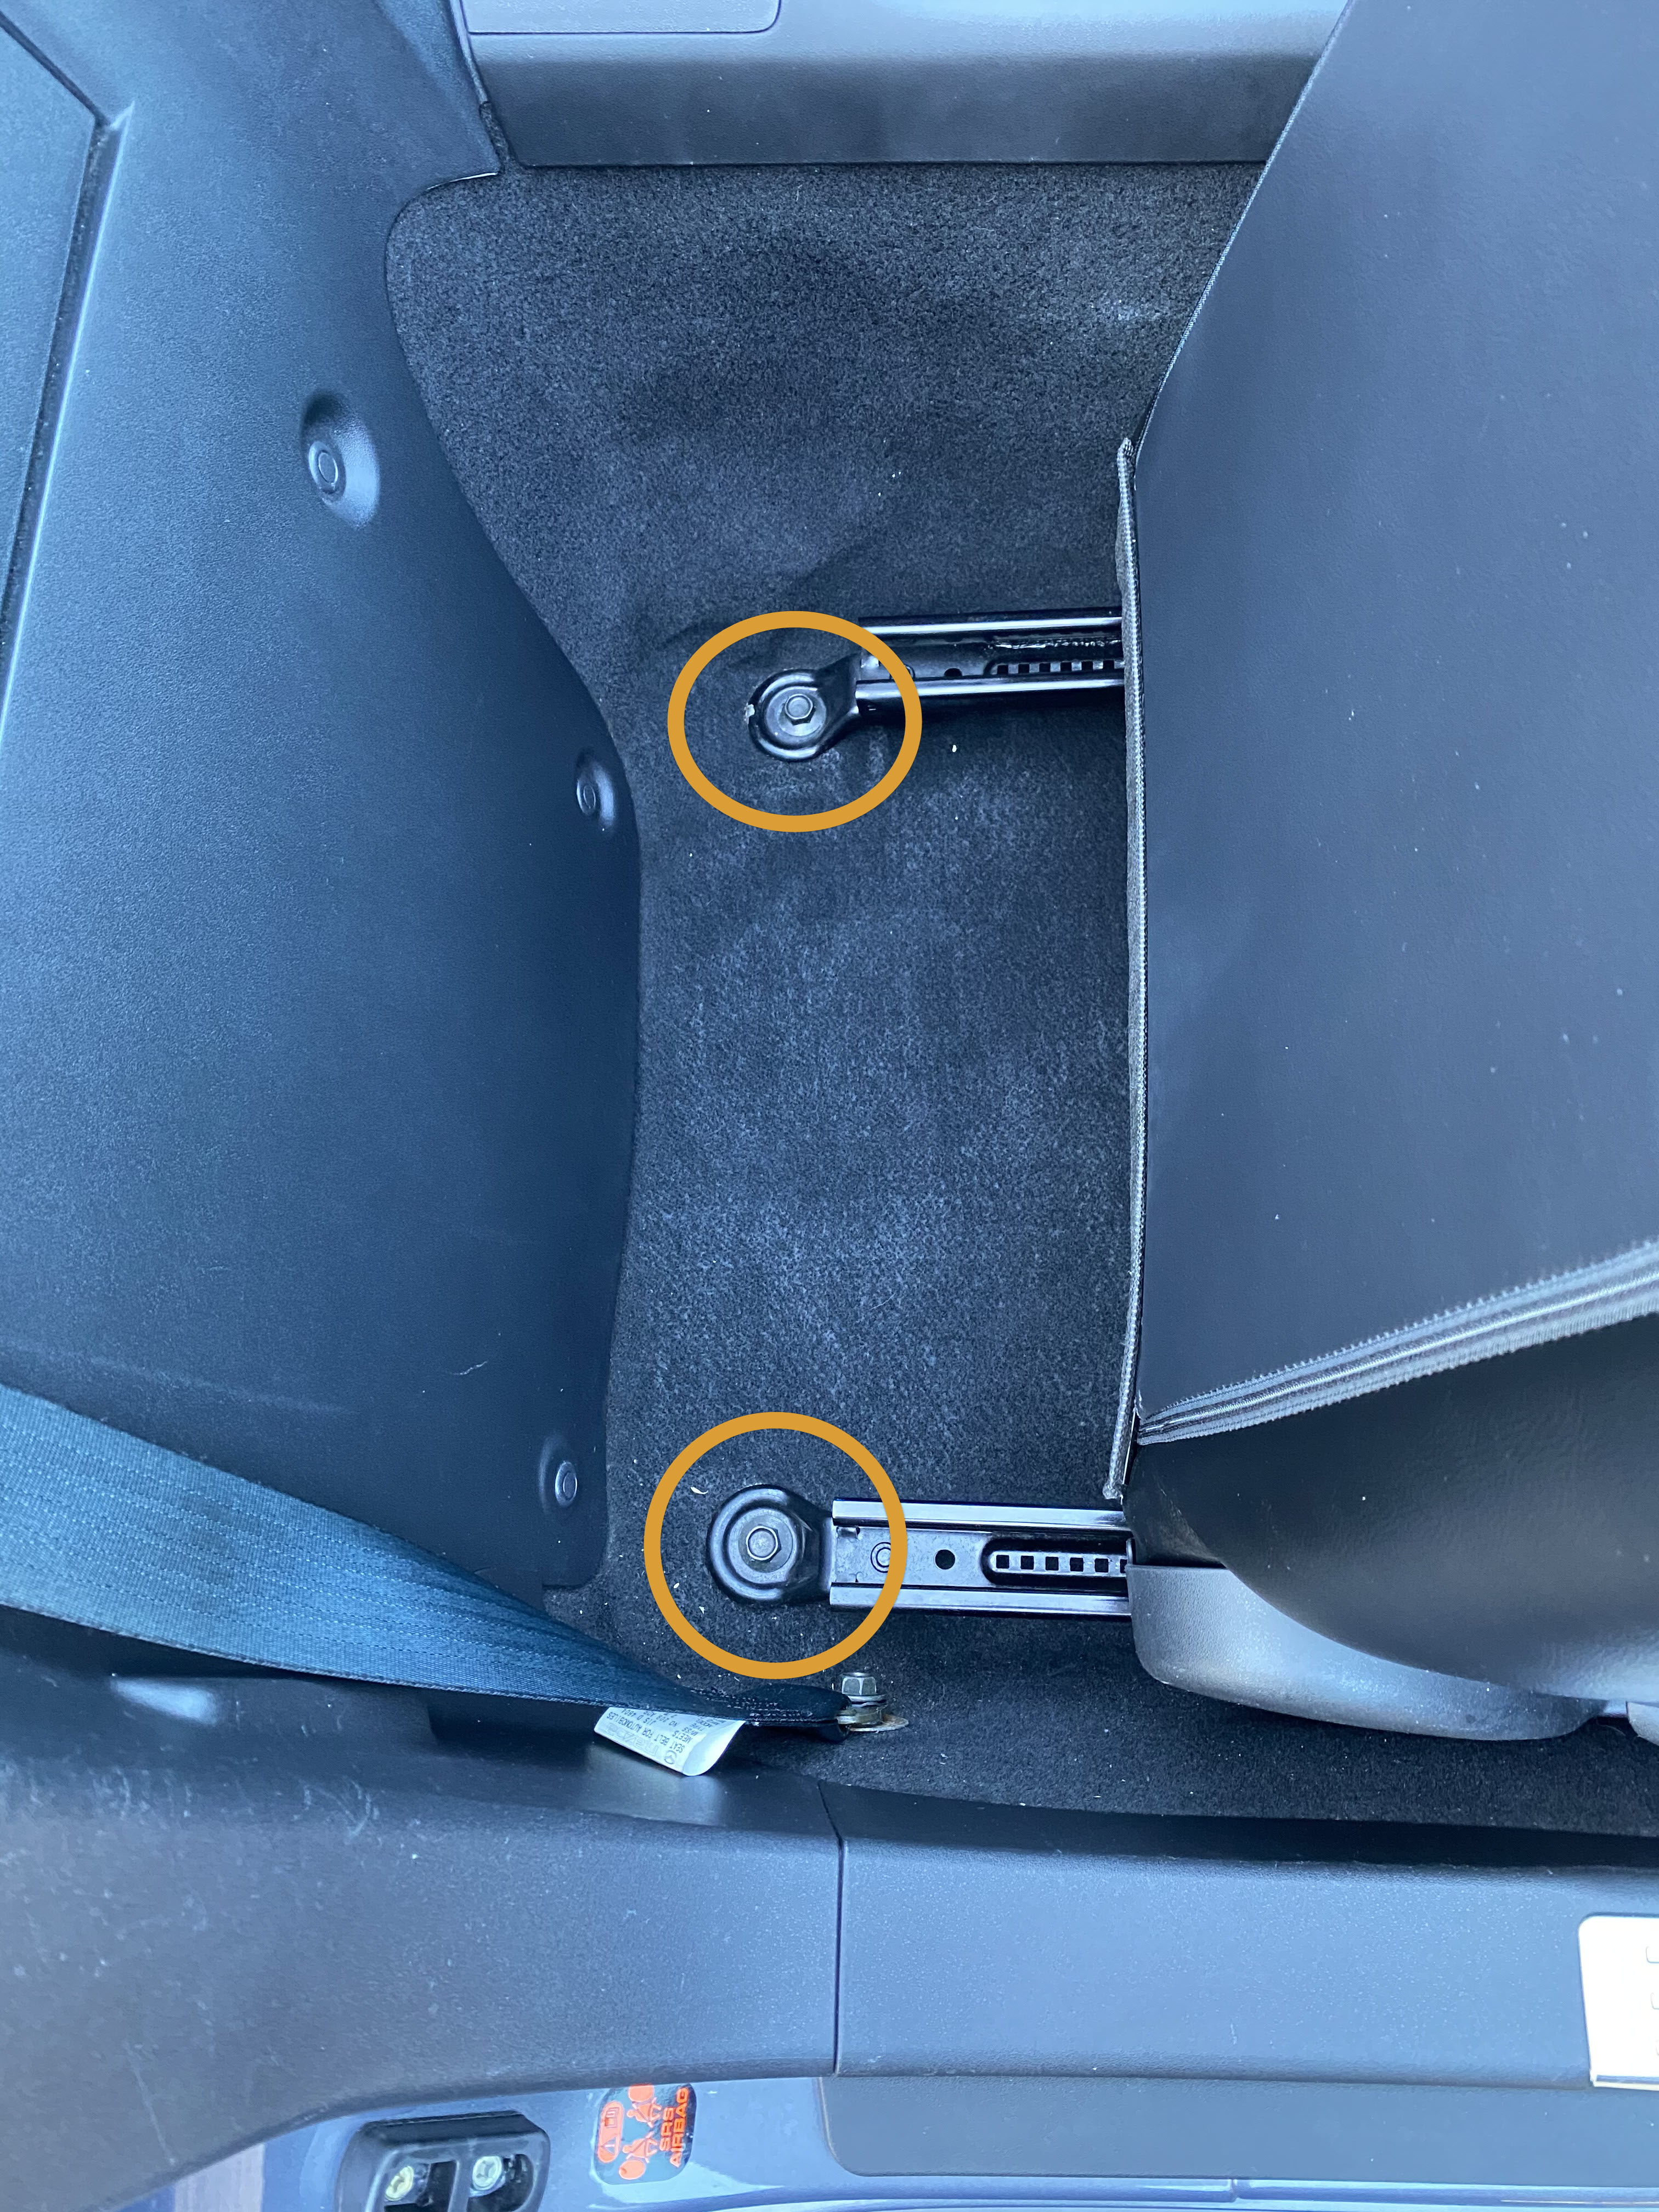
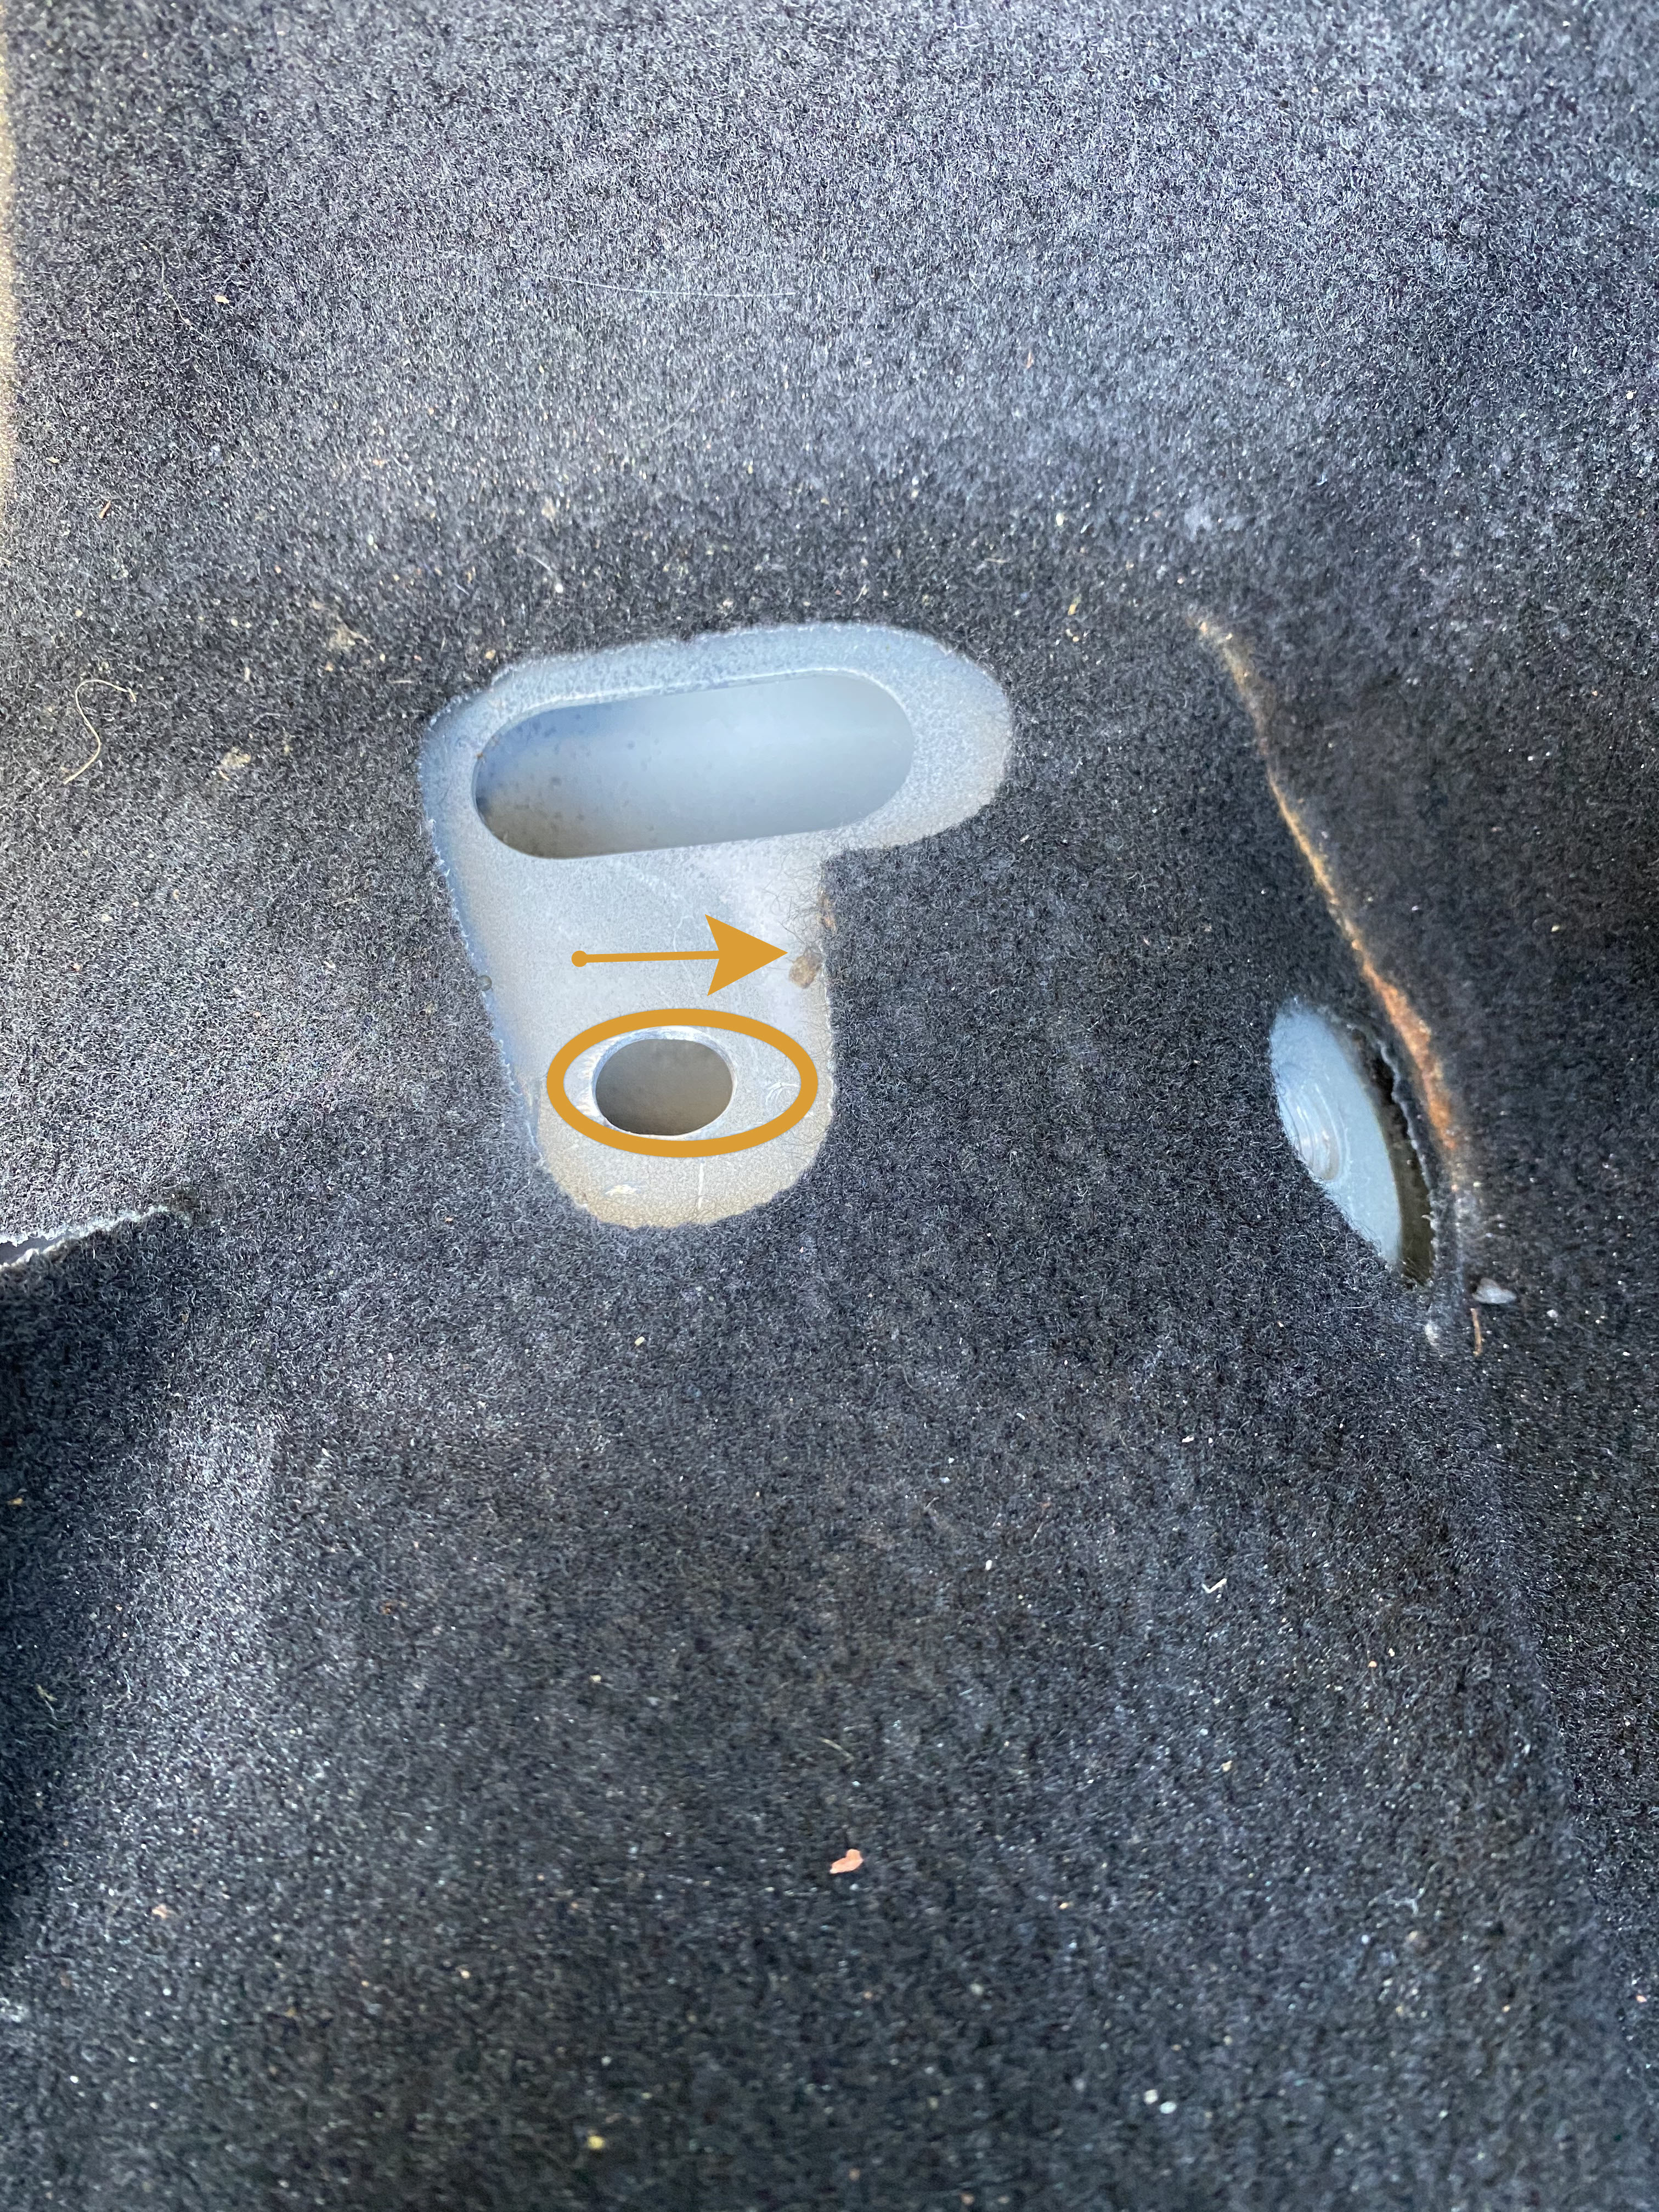
Push the seat back as far as it will go. Take your portable light and put it in the footwell shining the light underneath the seat, so you can see the electrical connector.
-
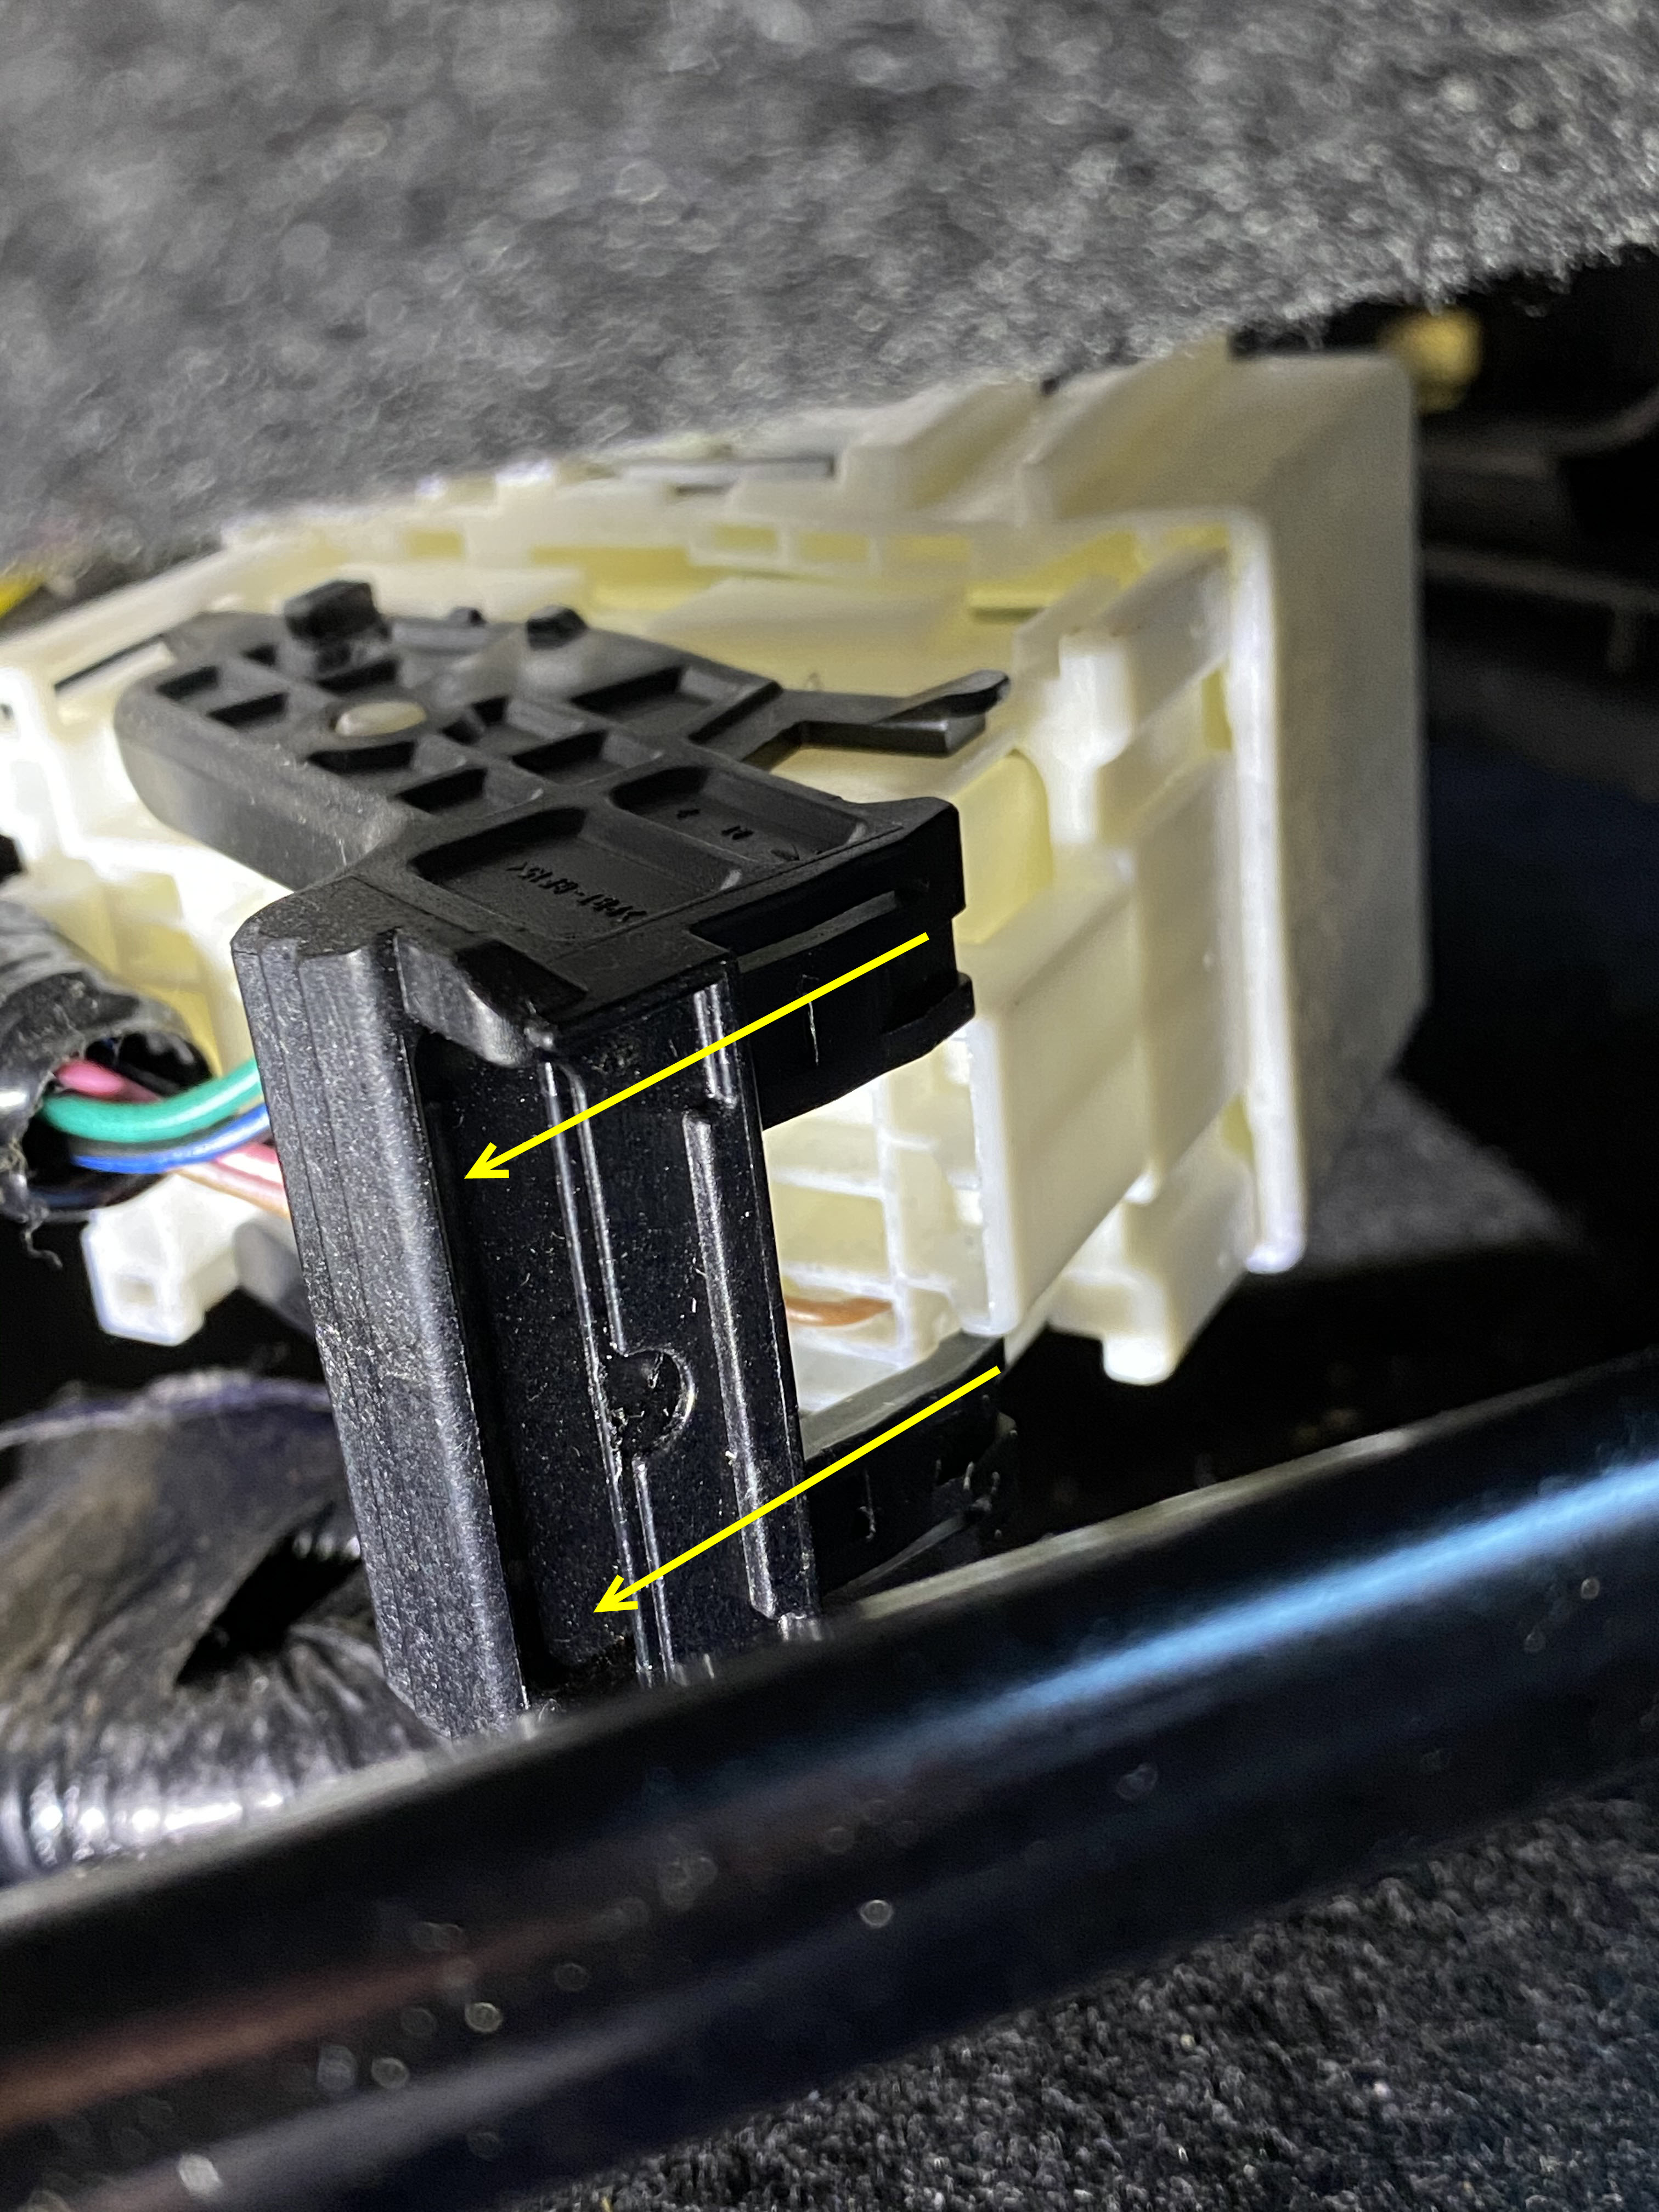
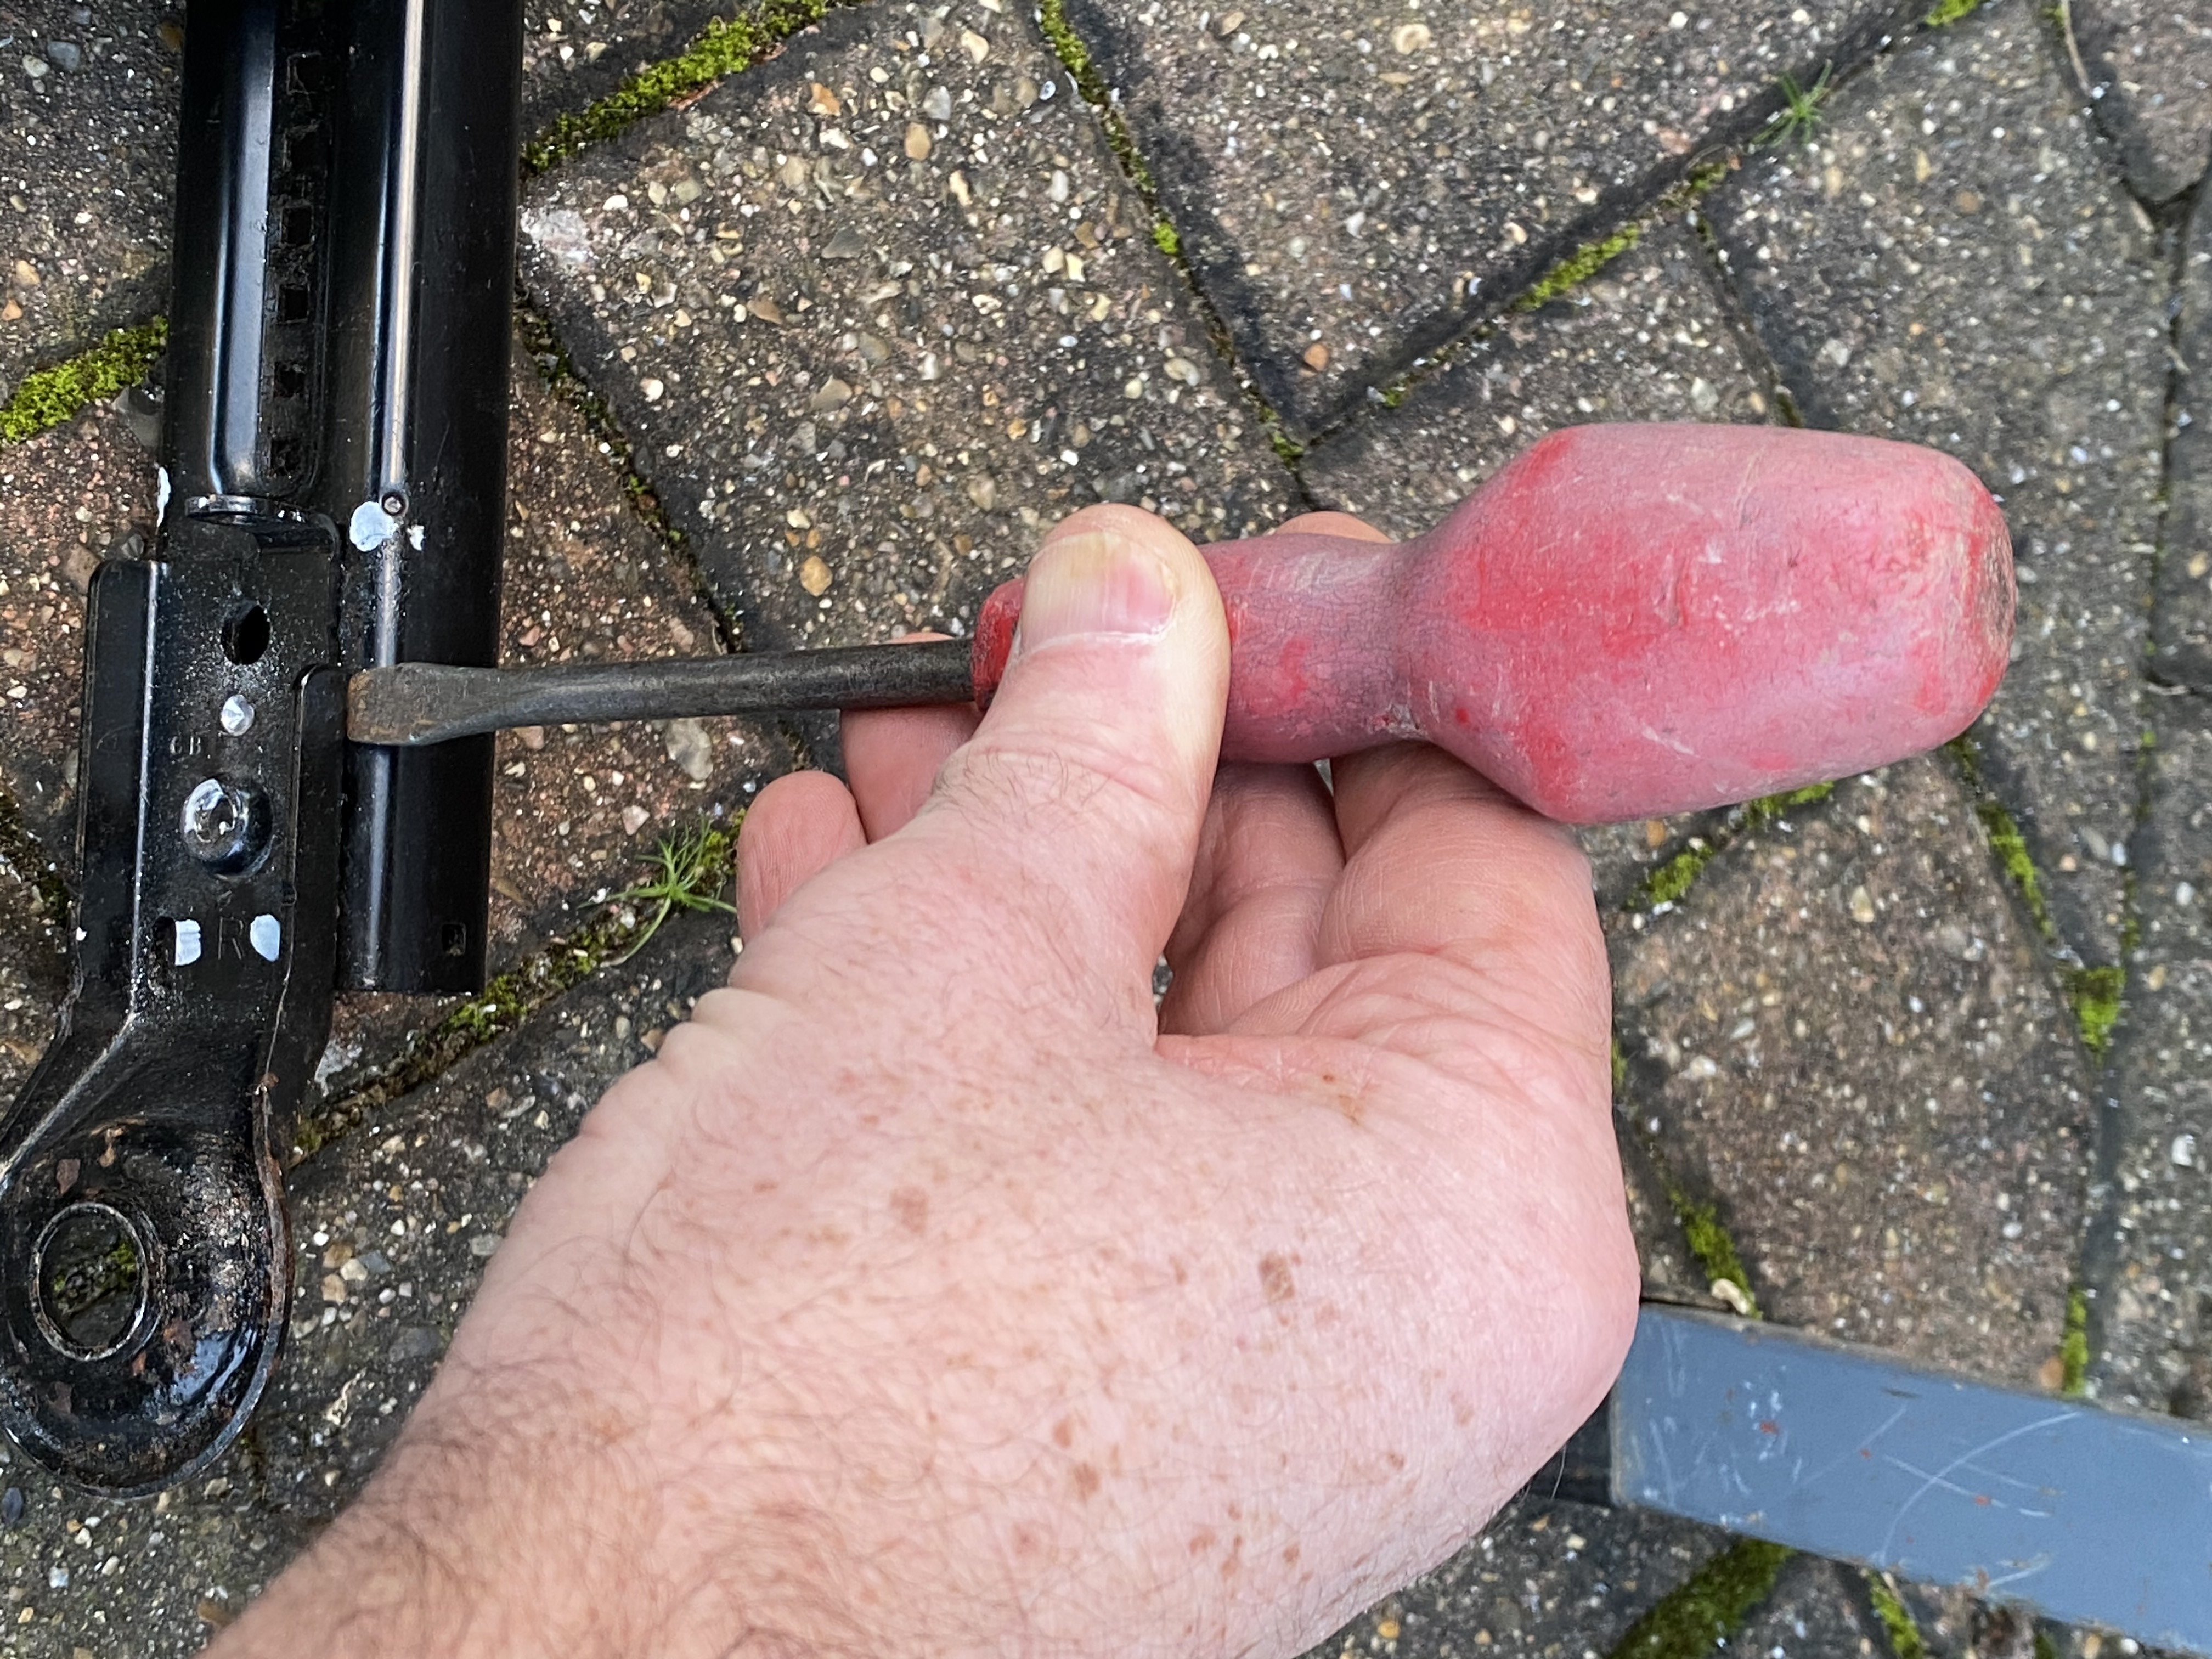
Use a small flat bladed electrical screwdriver to push the tab on the black catch backwards. From right to left in the photos. Once done, pull the black catch towards you and disconnect this fully.
-
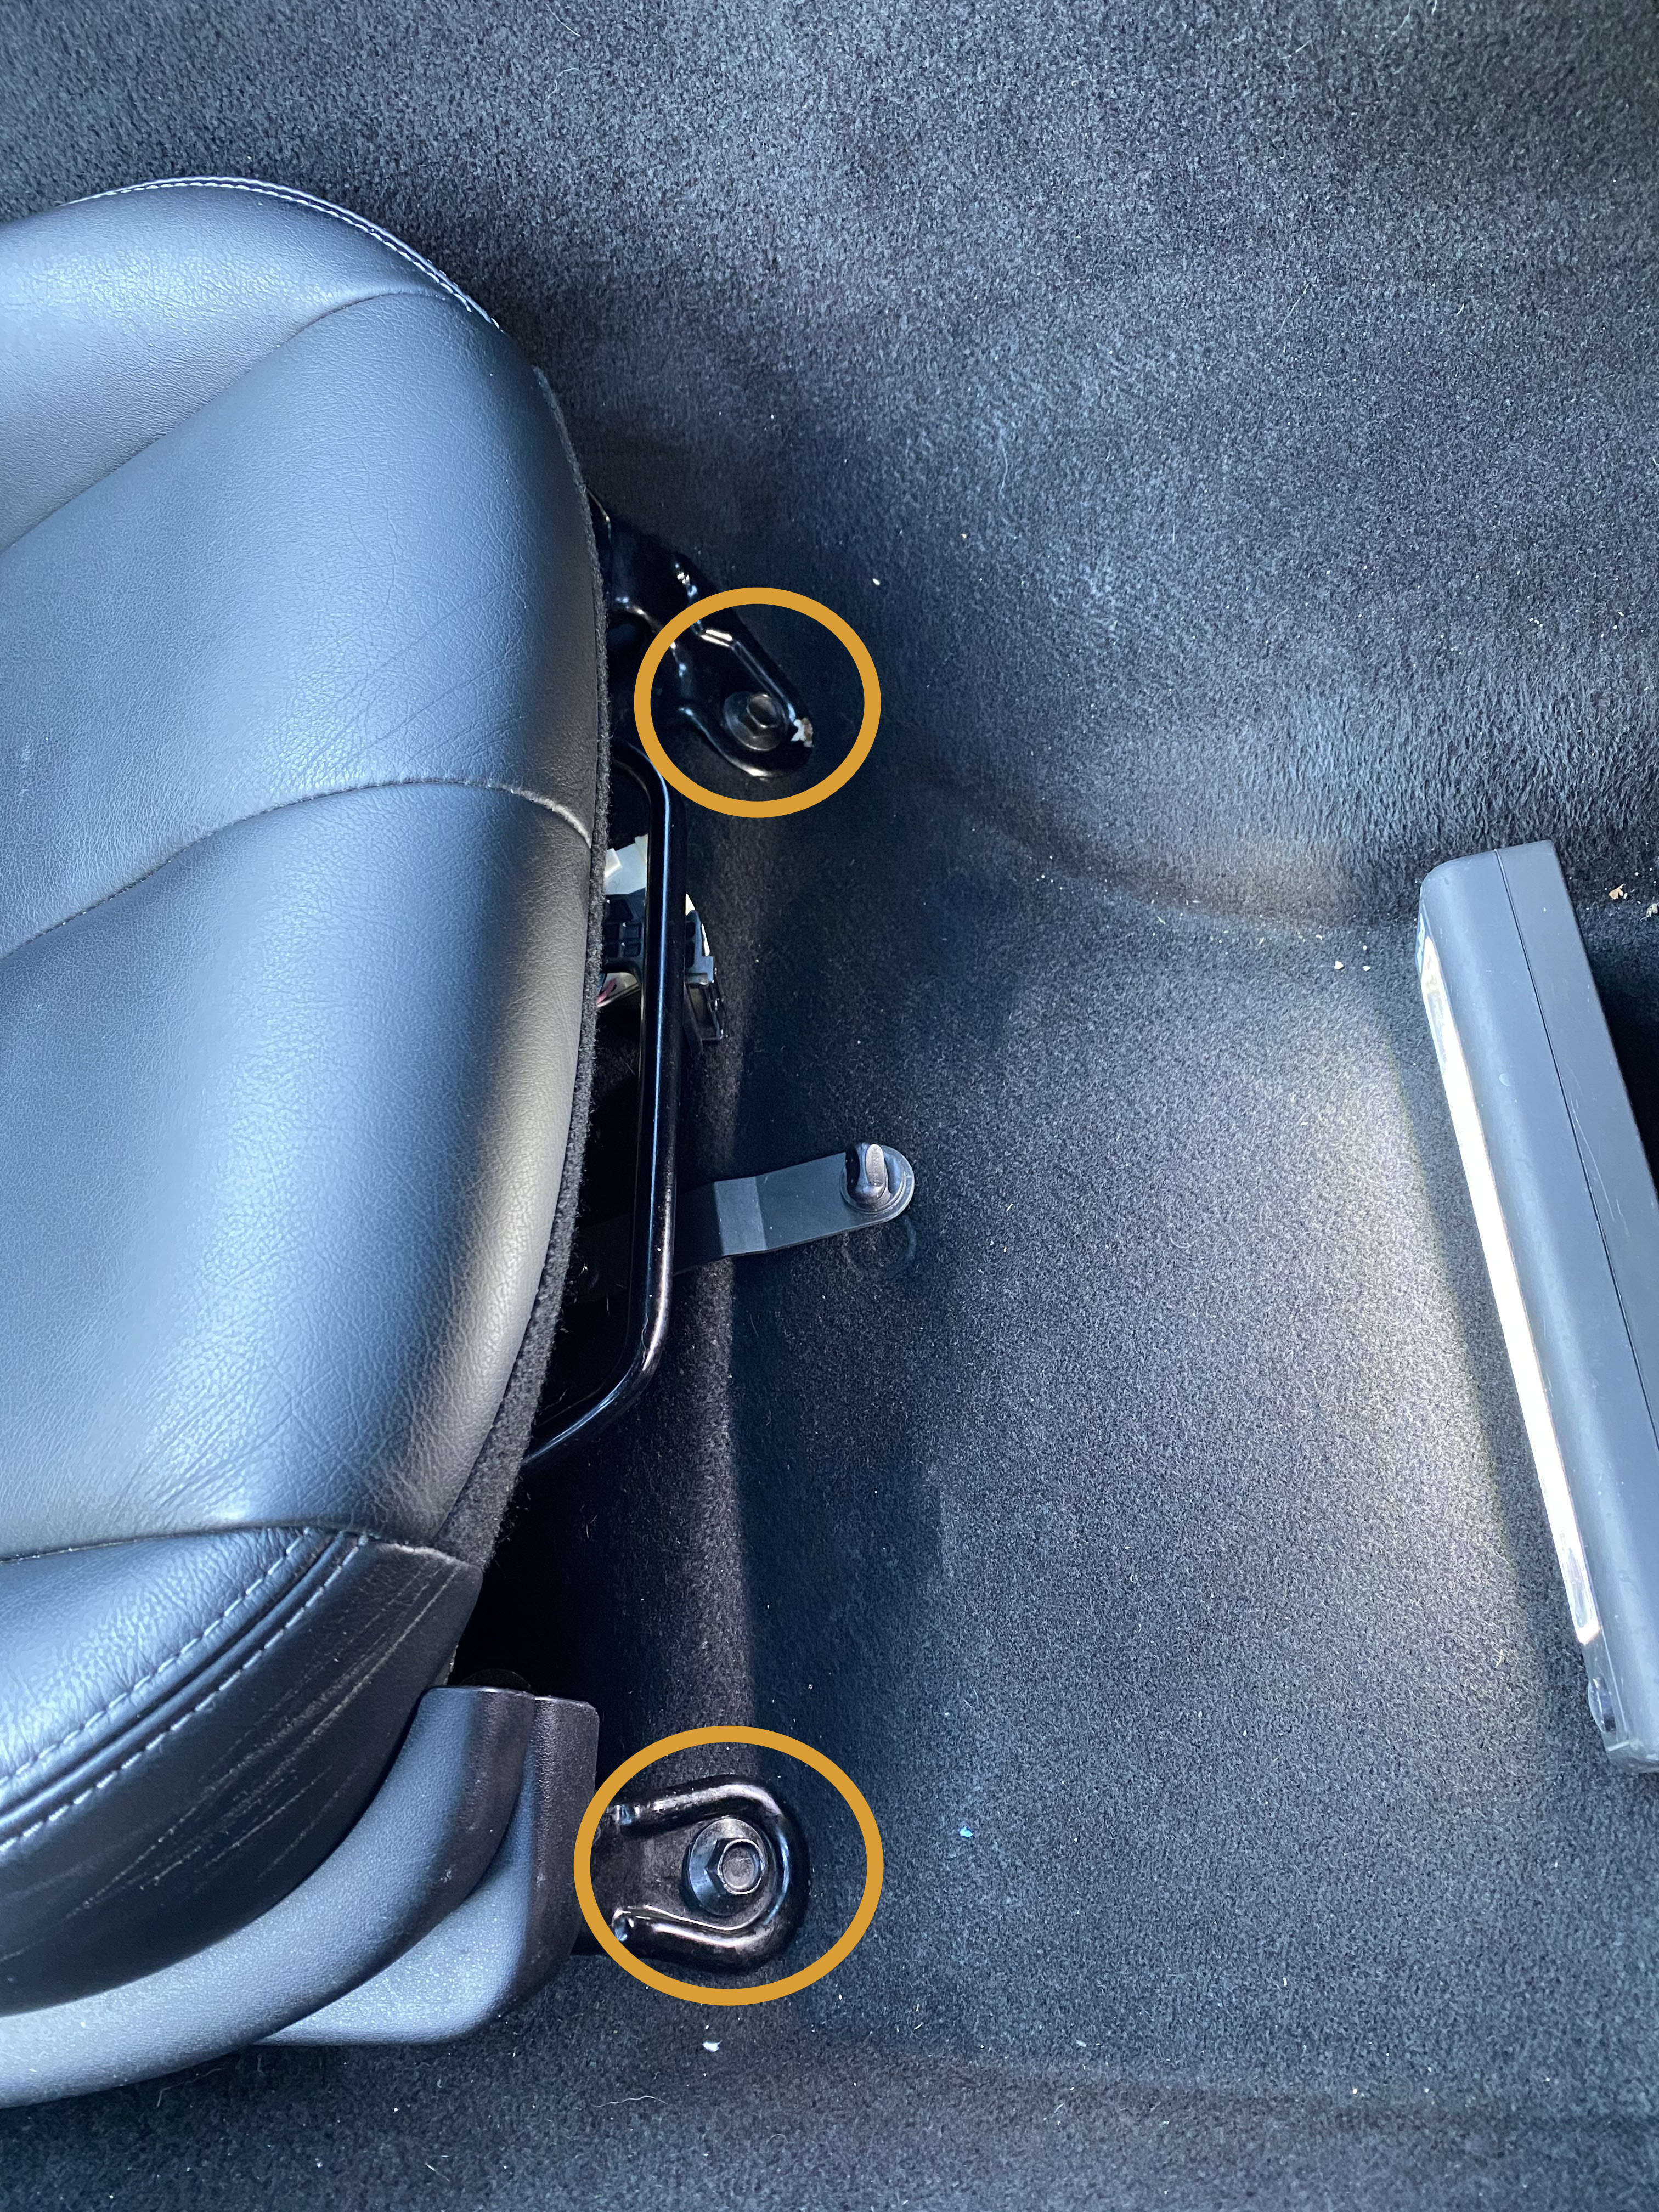
Remove the 2 off 14mm bolts from the front of the seat. These can be a bit snug if you haven’t had the seat out of the car before, so a strong-arm bar may be required. They will have been thread locked in.
-
Remove the seat belt from the retainer on the back of the seat, push it forwards are far as it will go, then tilt the seat fully forwards. Remove the 2 off 14mm bolts from the rear of the seat. Lift the seat out of the car and place it on an old blanket or rug, to protect the material from damage. You’ll find it easier to remove if the roof is down.
-
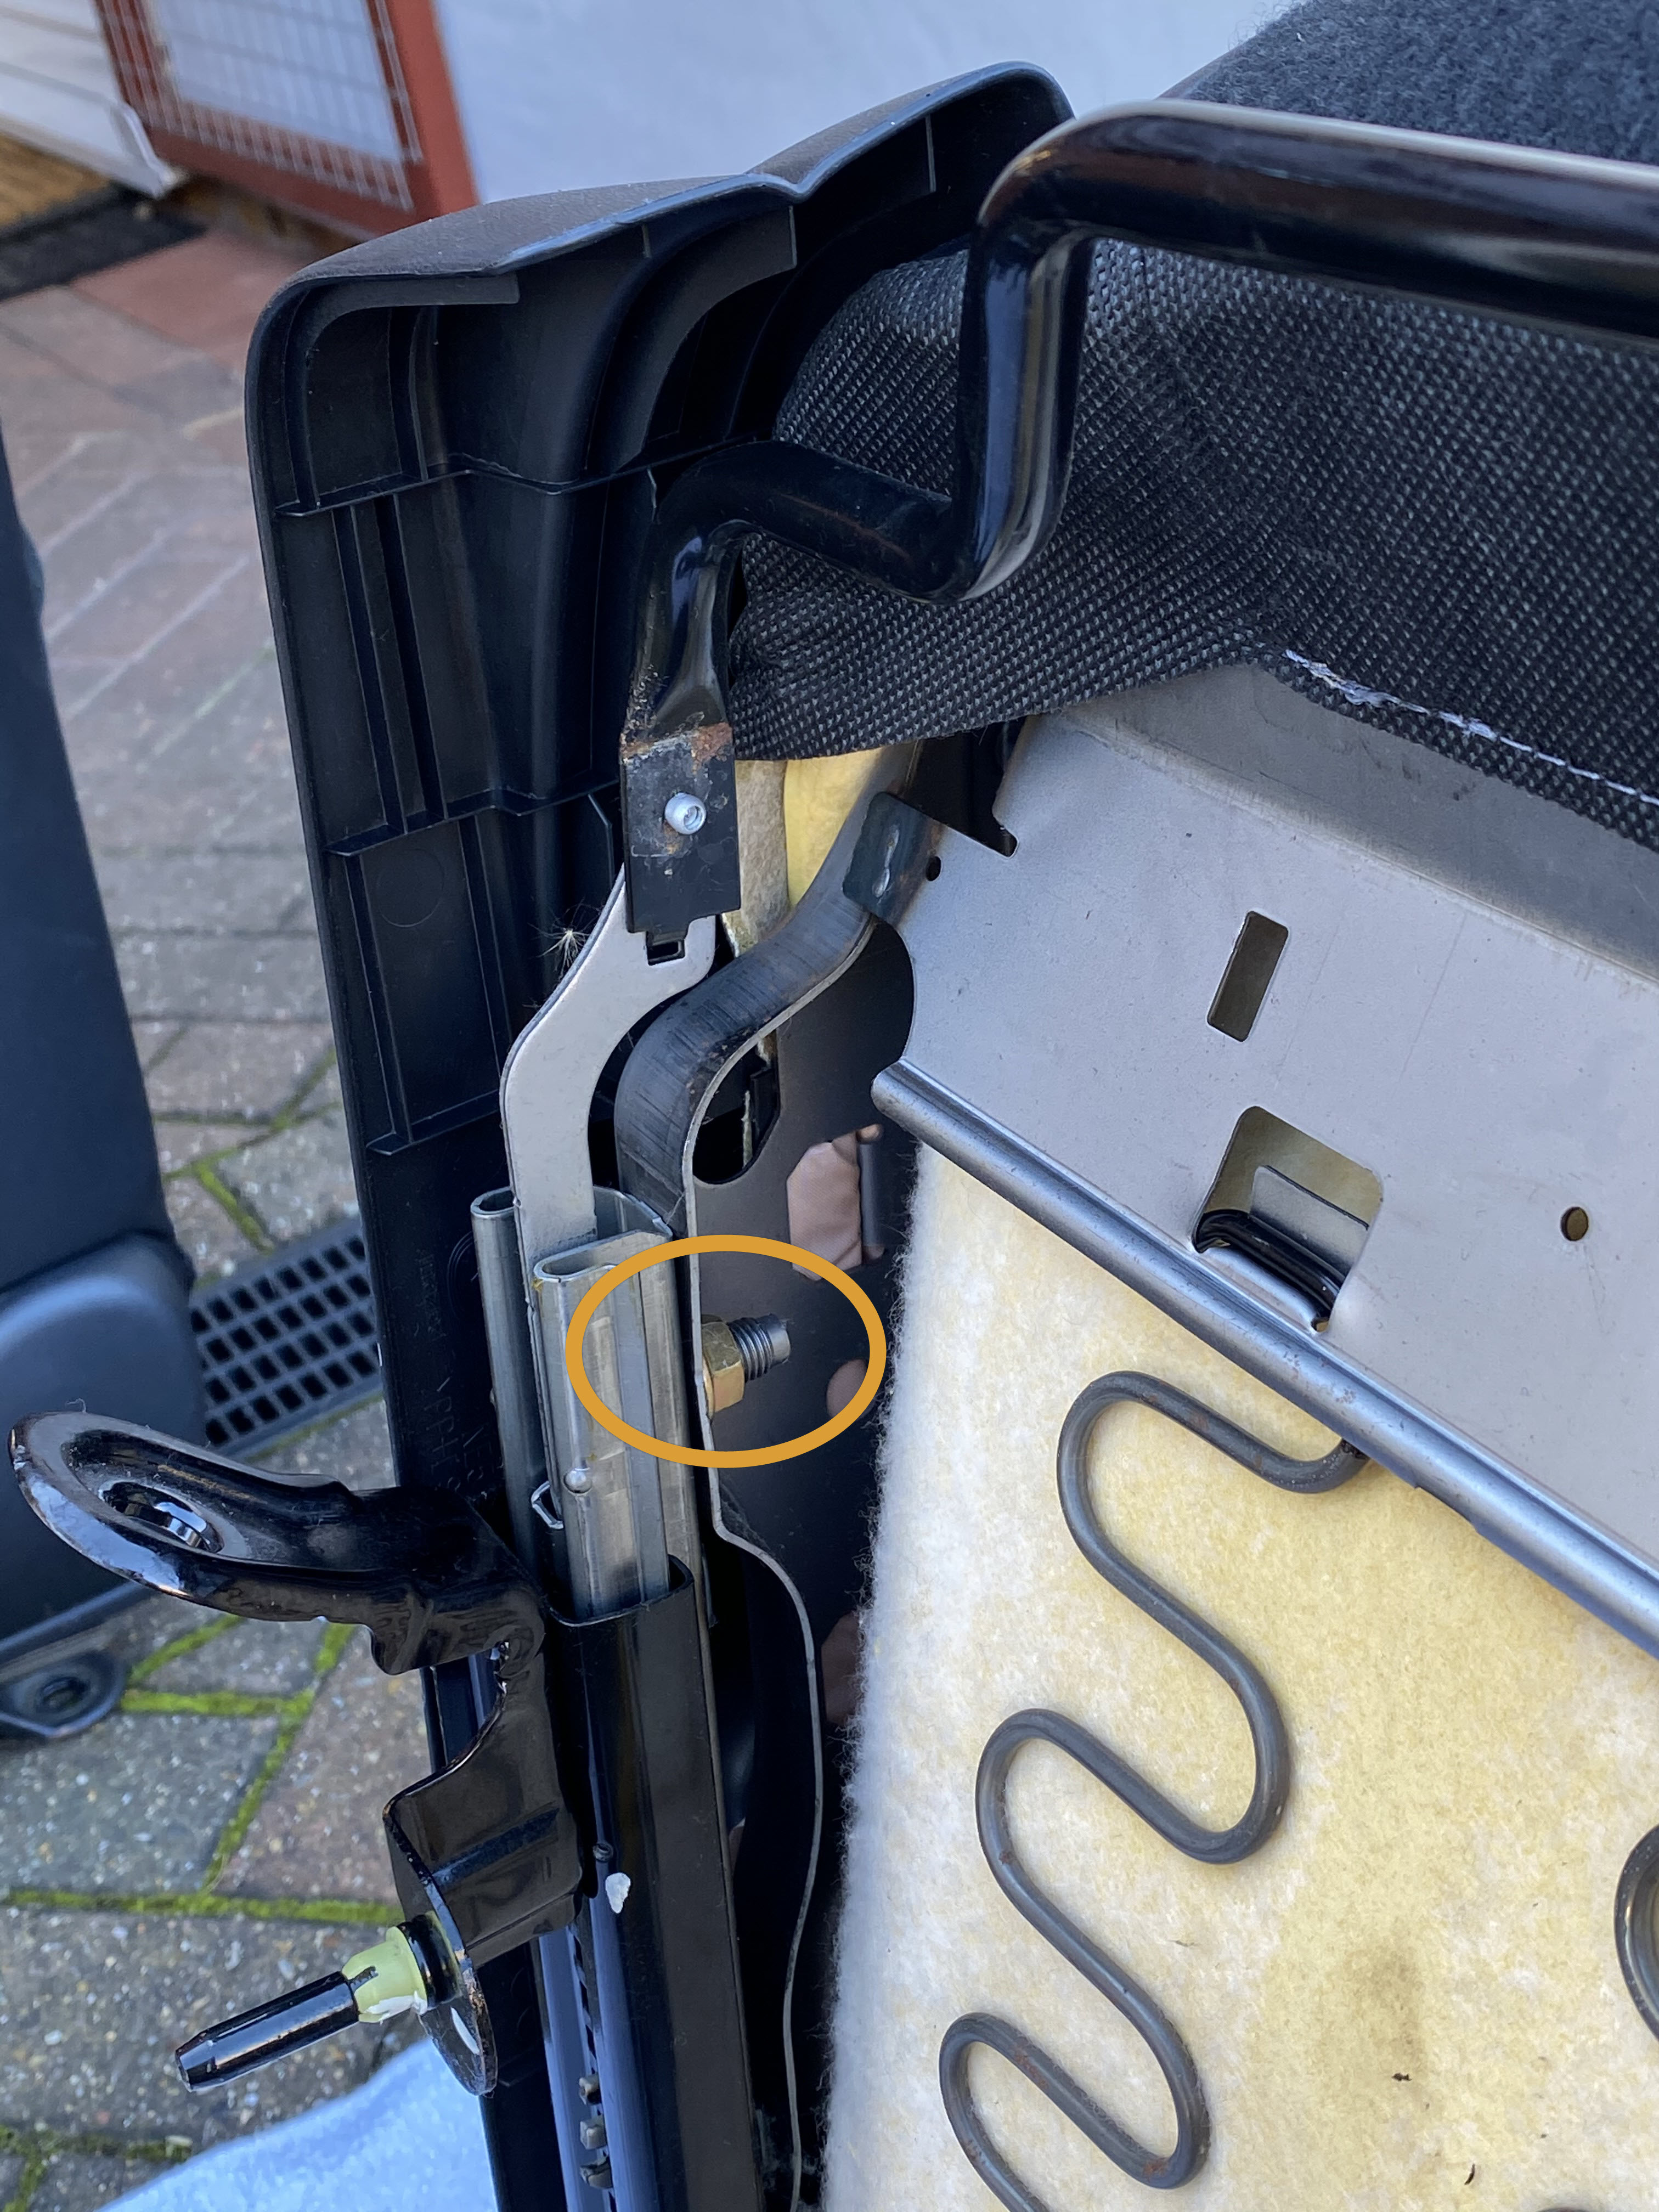
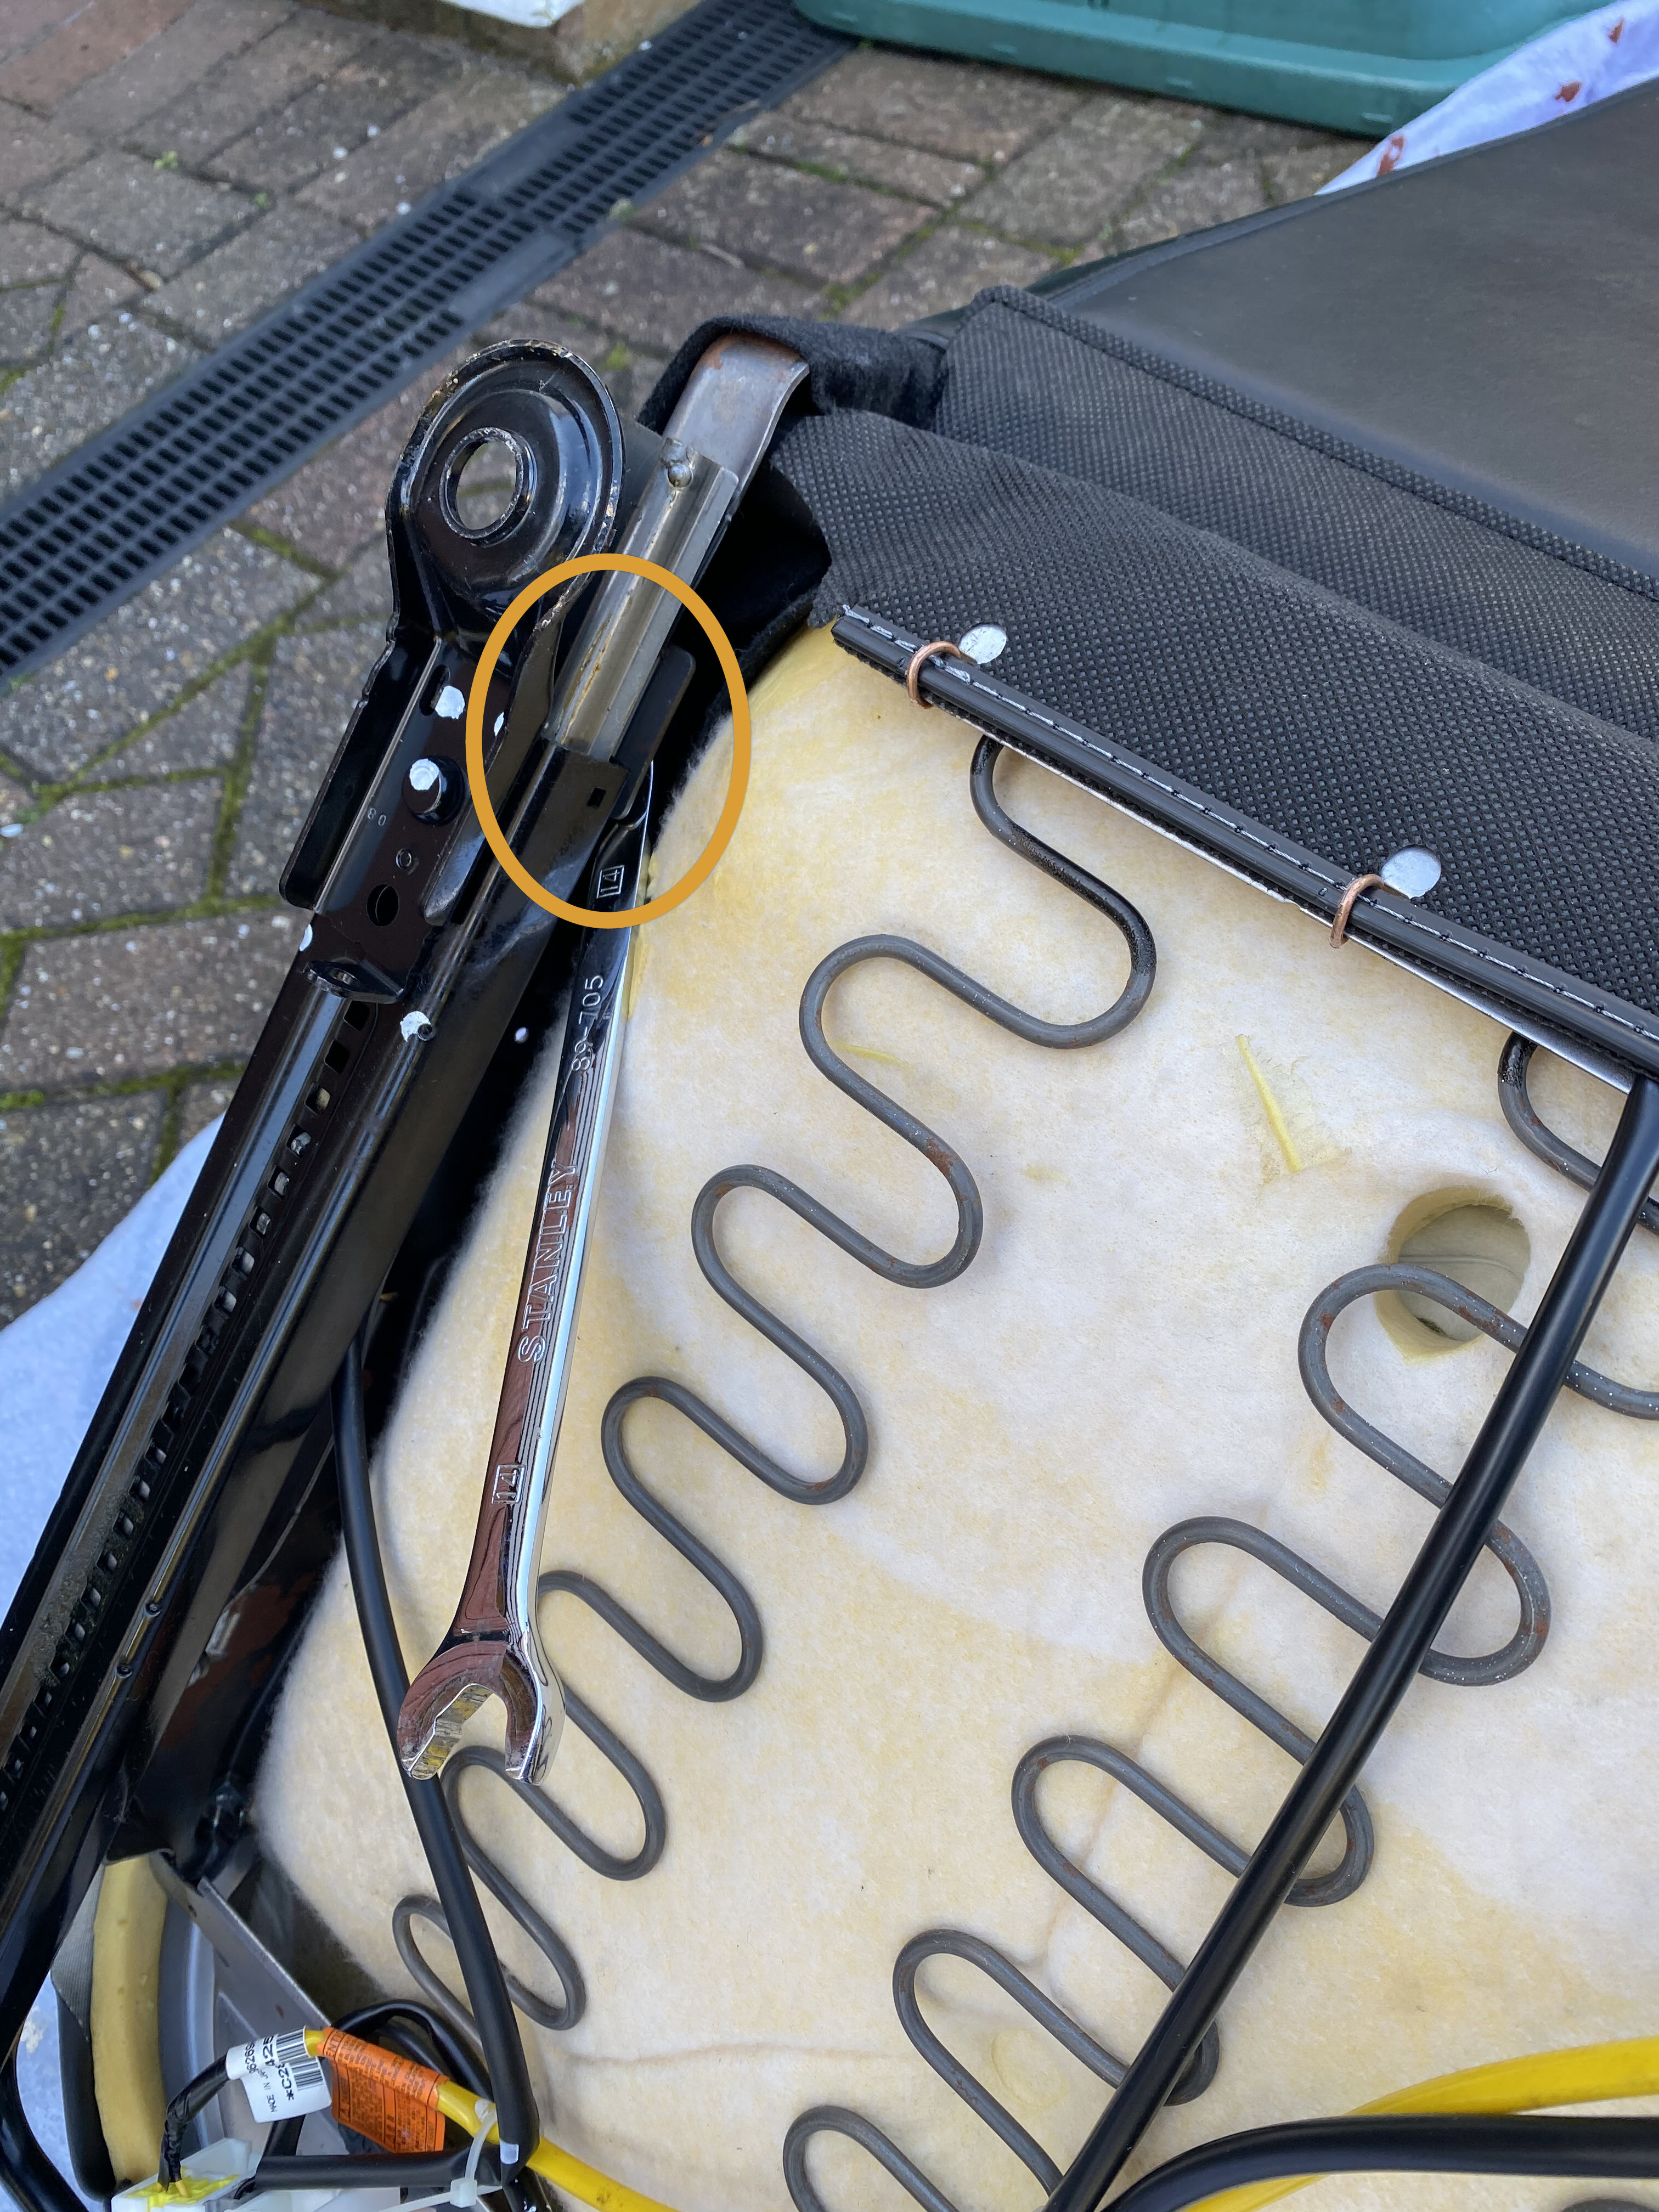
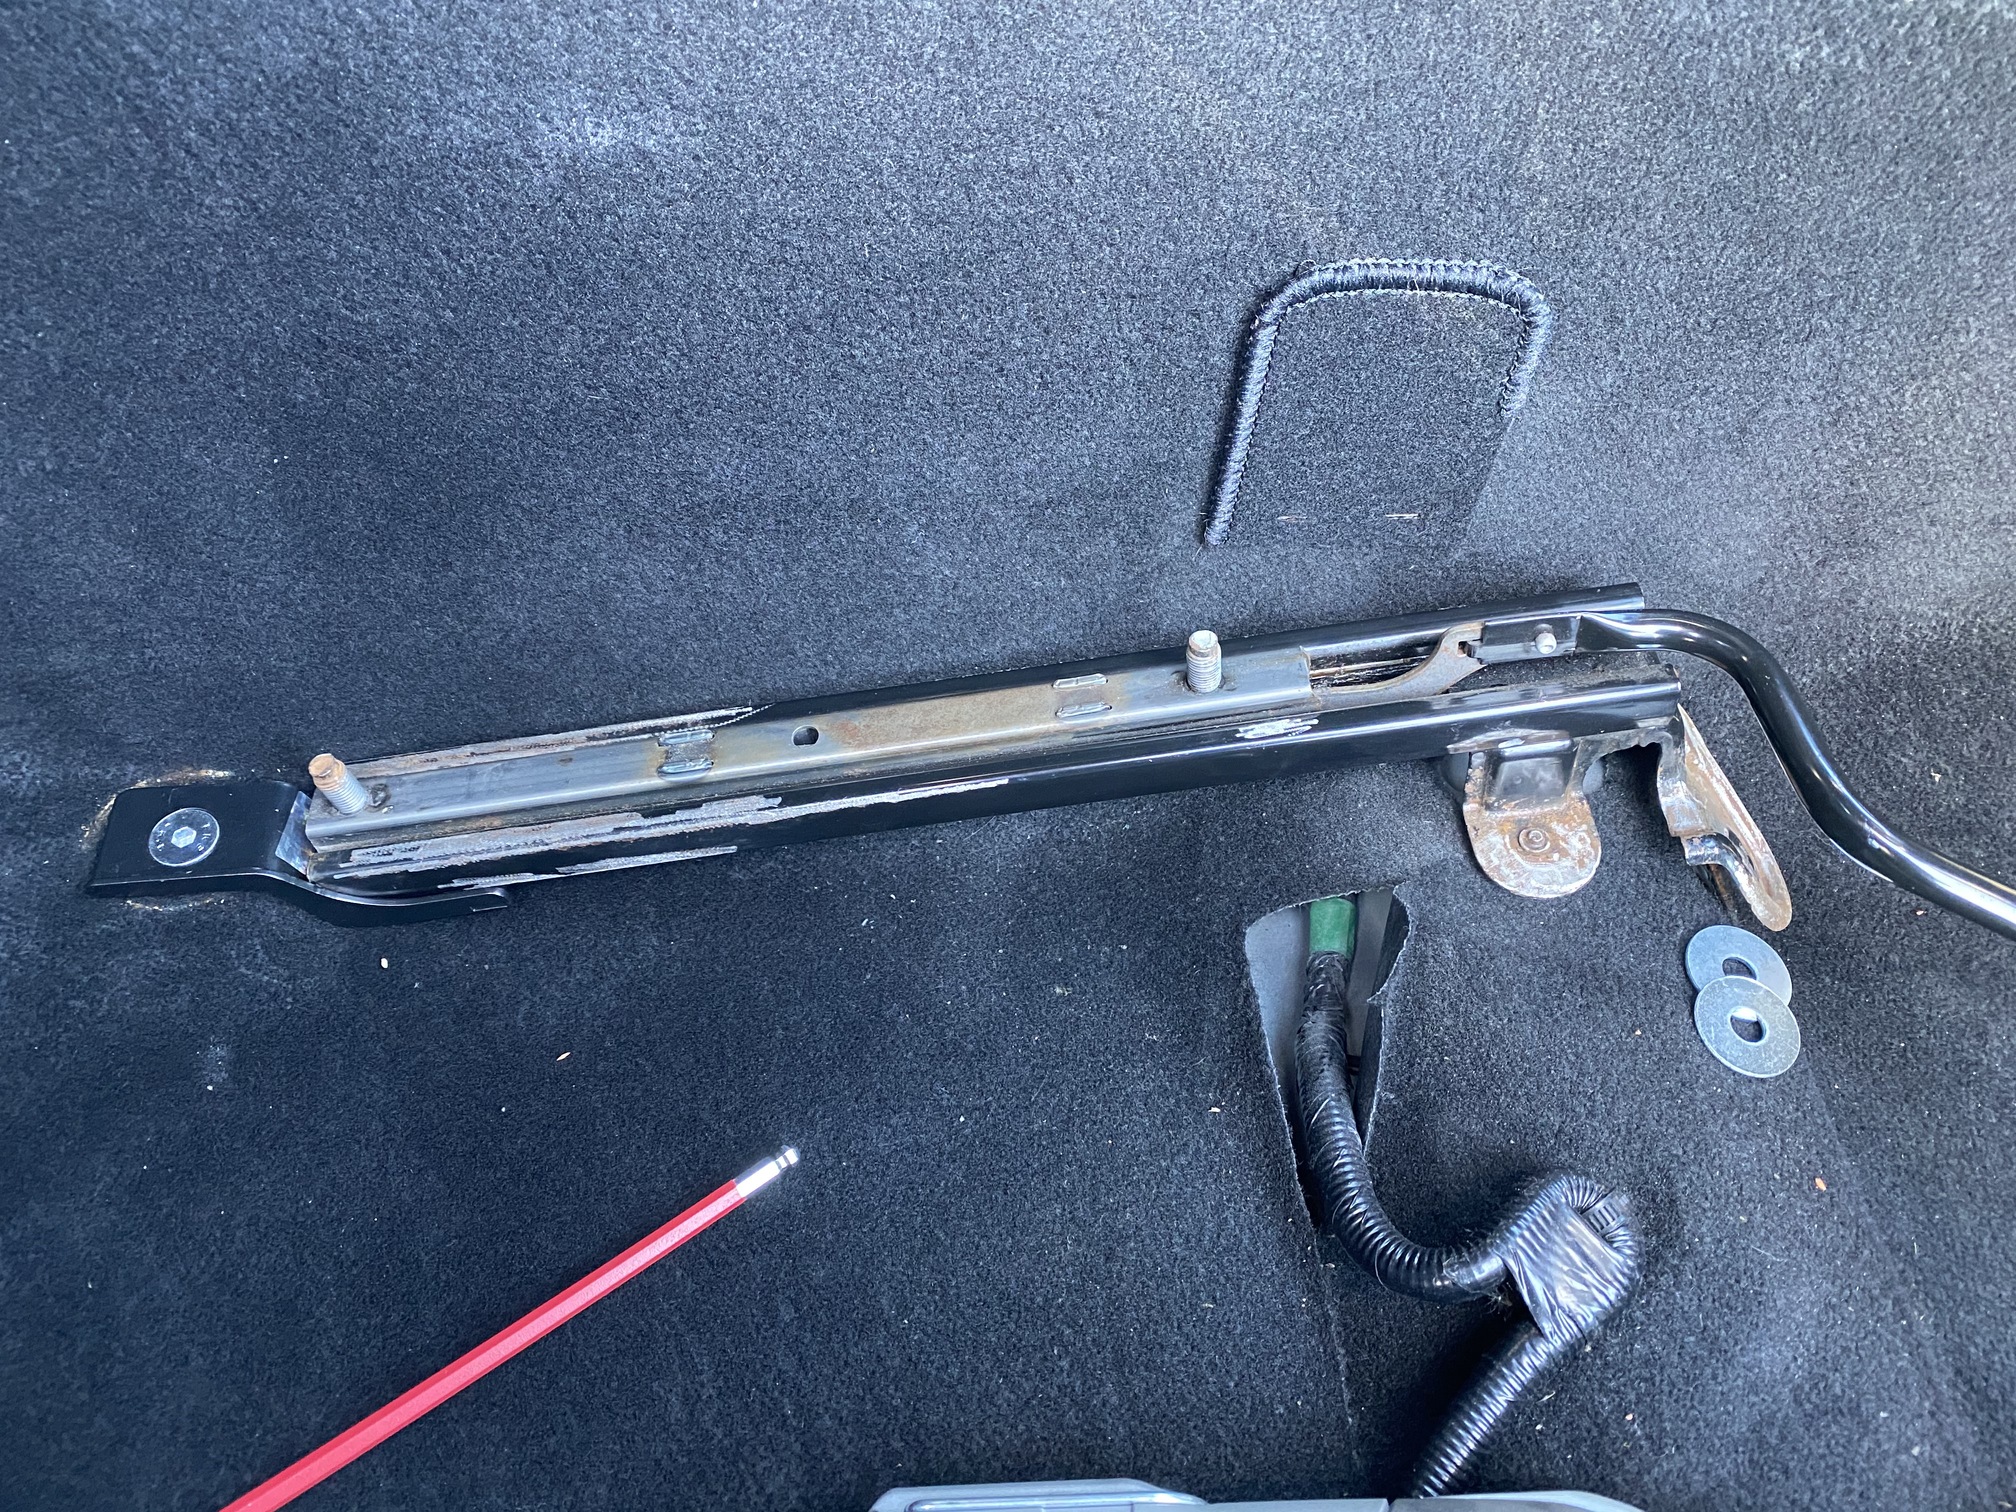
Remove the 2 off 14mm nuts holding each side of the sliders. Use a ring spanner and a hammer to persuade the nuts to come loose with a few gentle taps. Don’t try this with an open-ended spanner, as the nuts are quite soft and they are likely to deform the nuts and slip, possibly causing injury! [Don’t ask how I know] Once loose, use a ratchet spanner if you have one to unscrew them fully. Don’t let them fall into the inside of the seat, they’re a pain to recover….
-
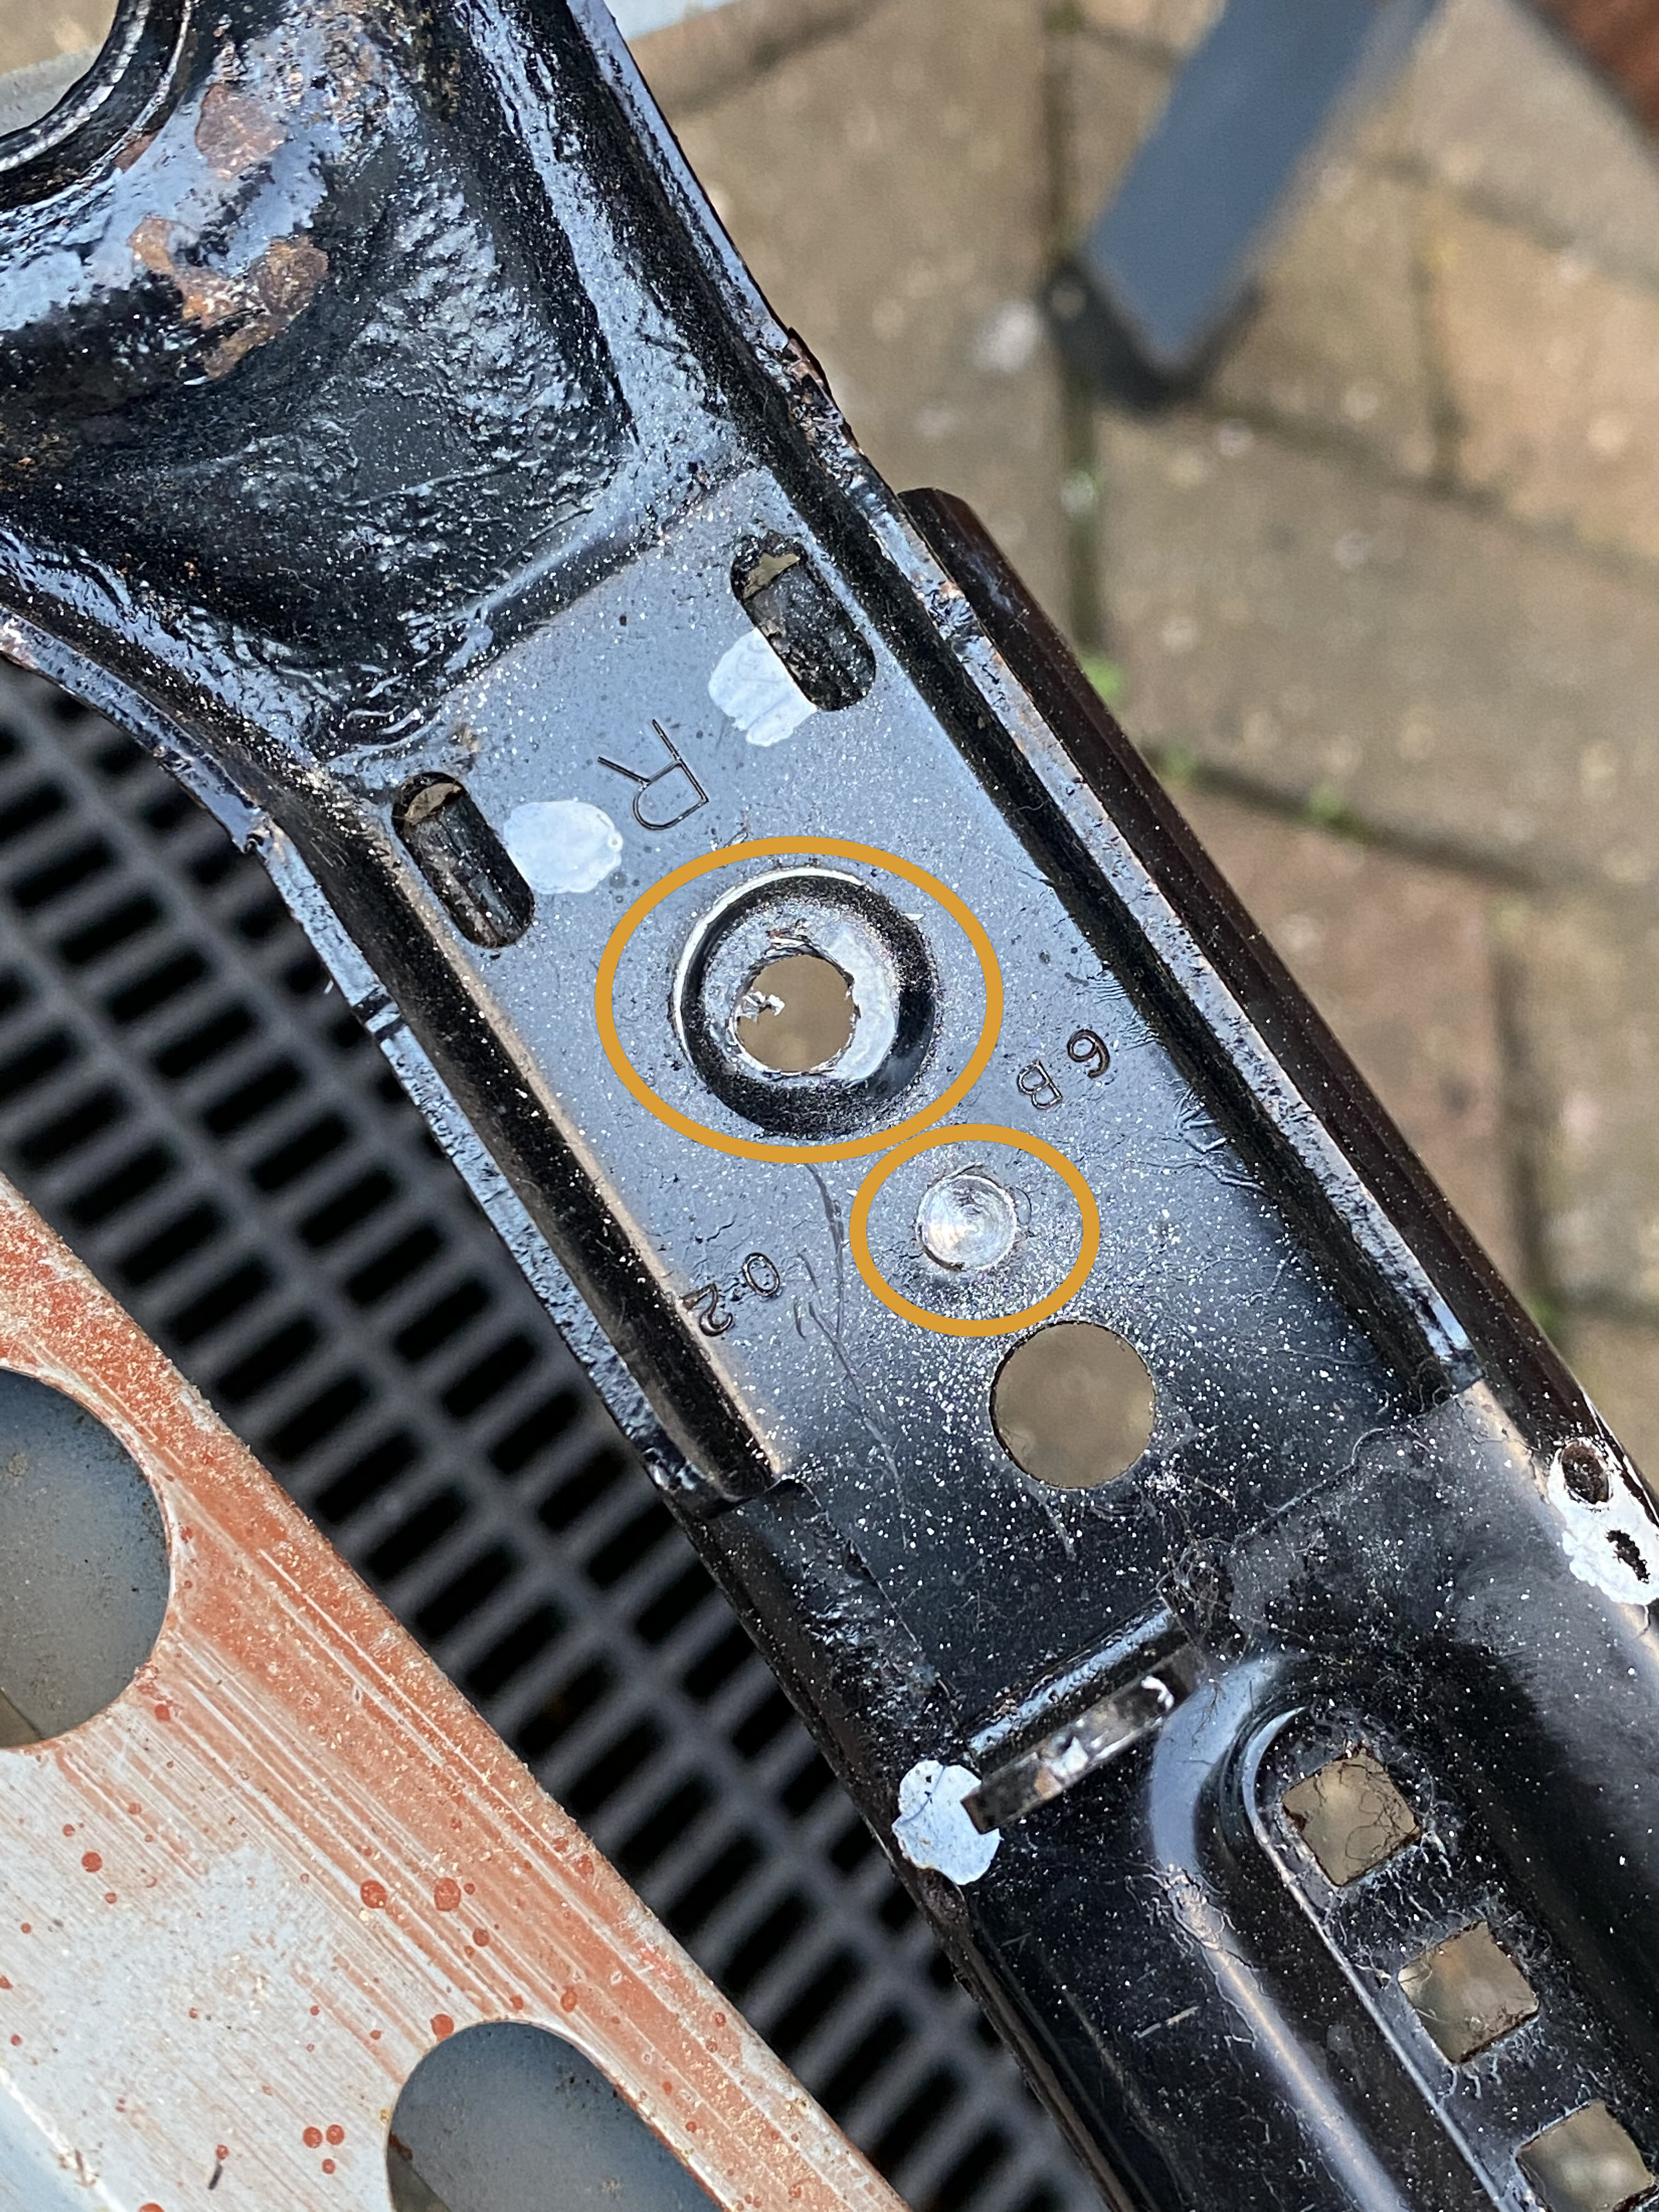
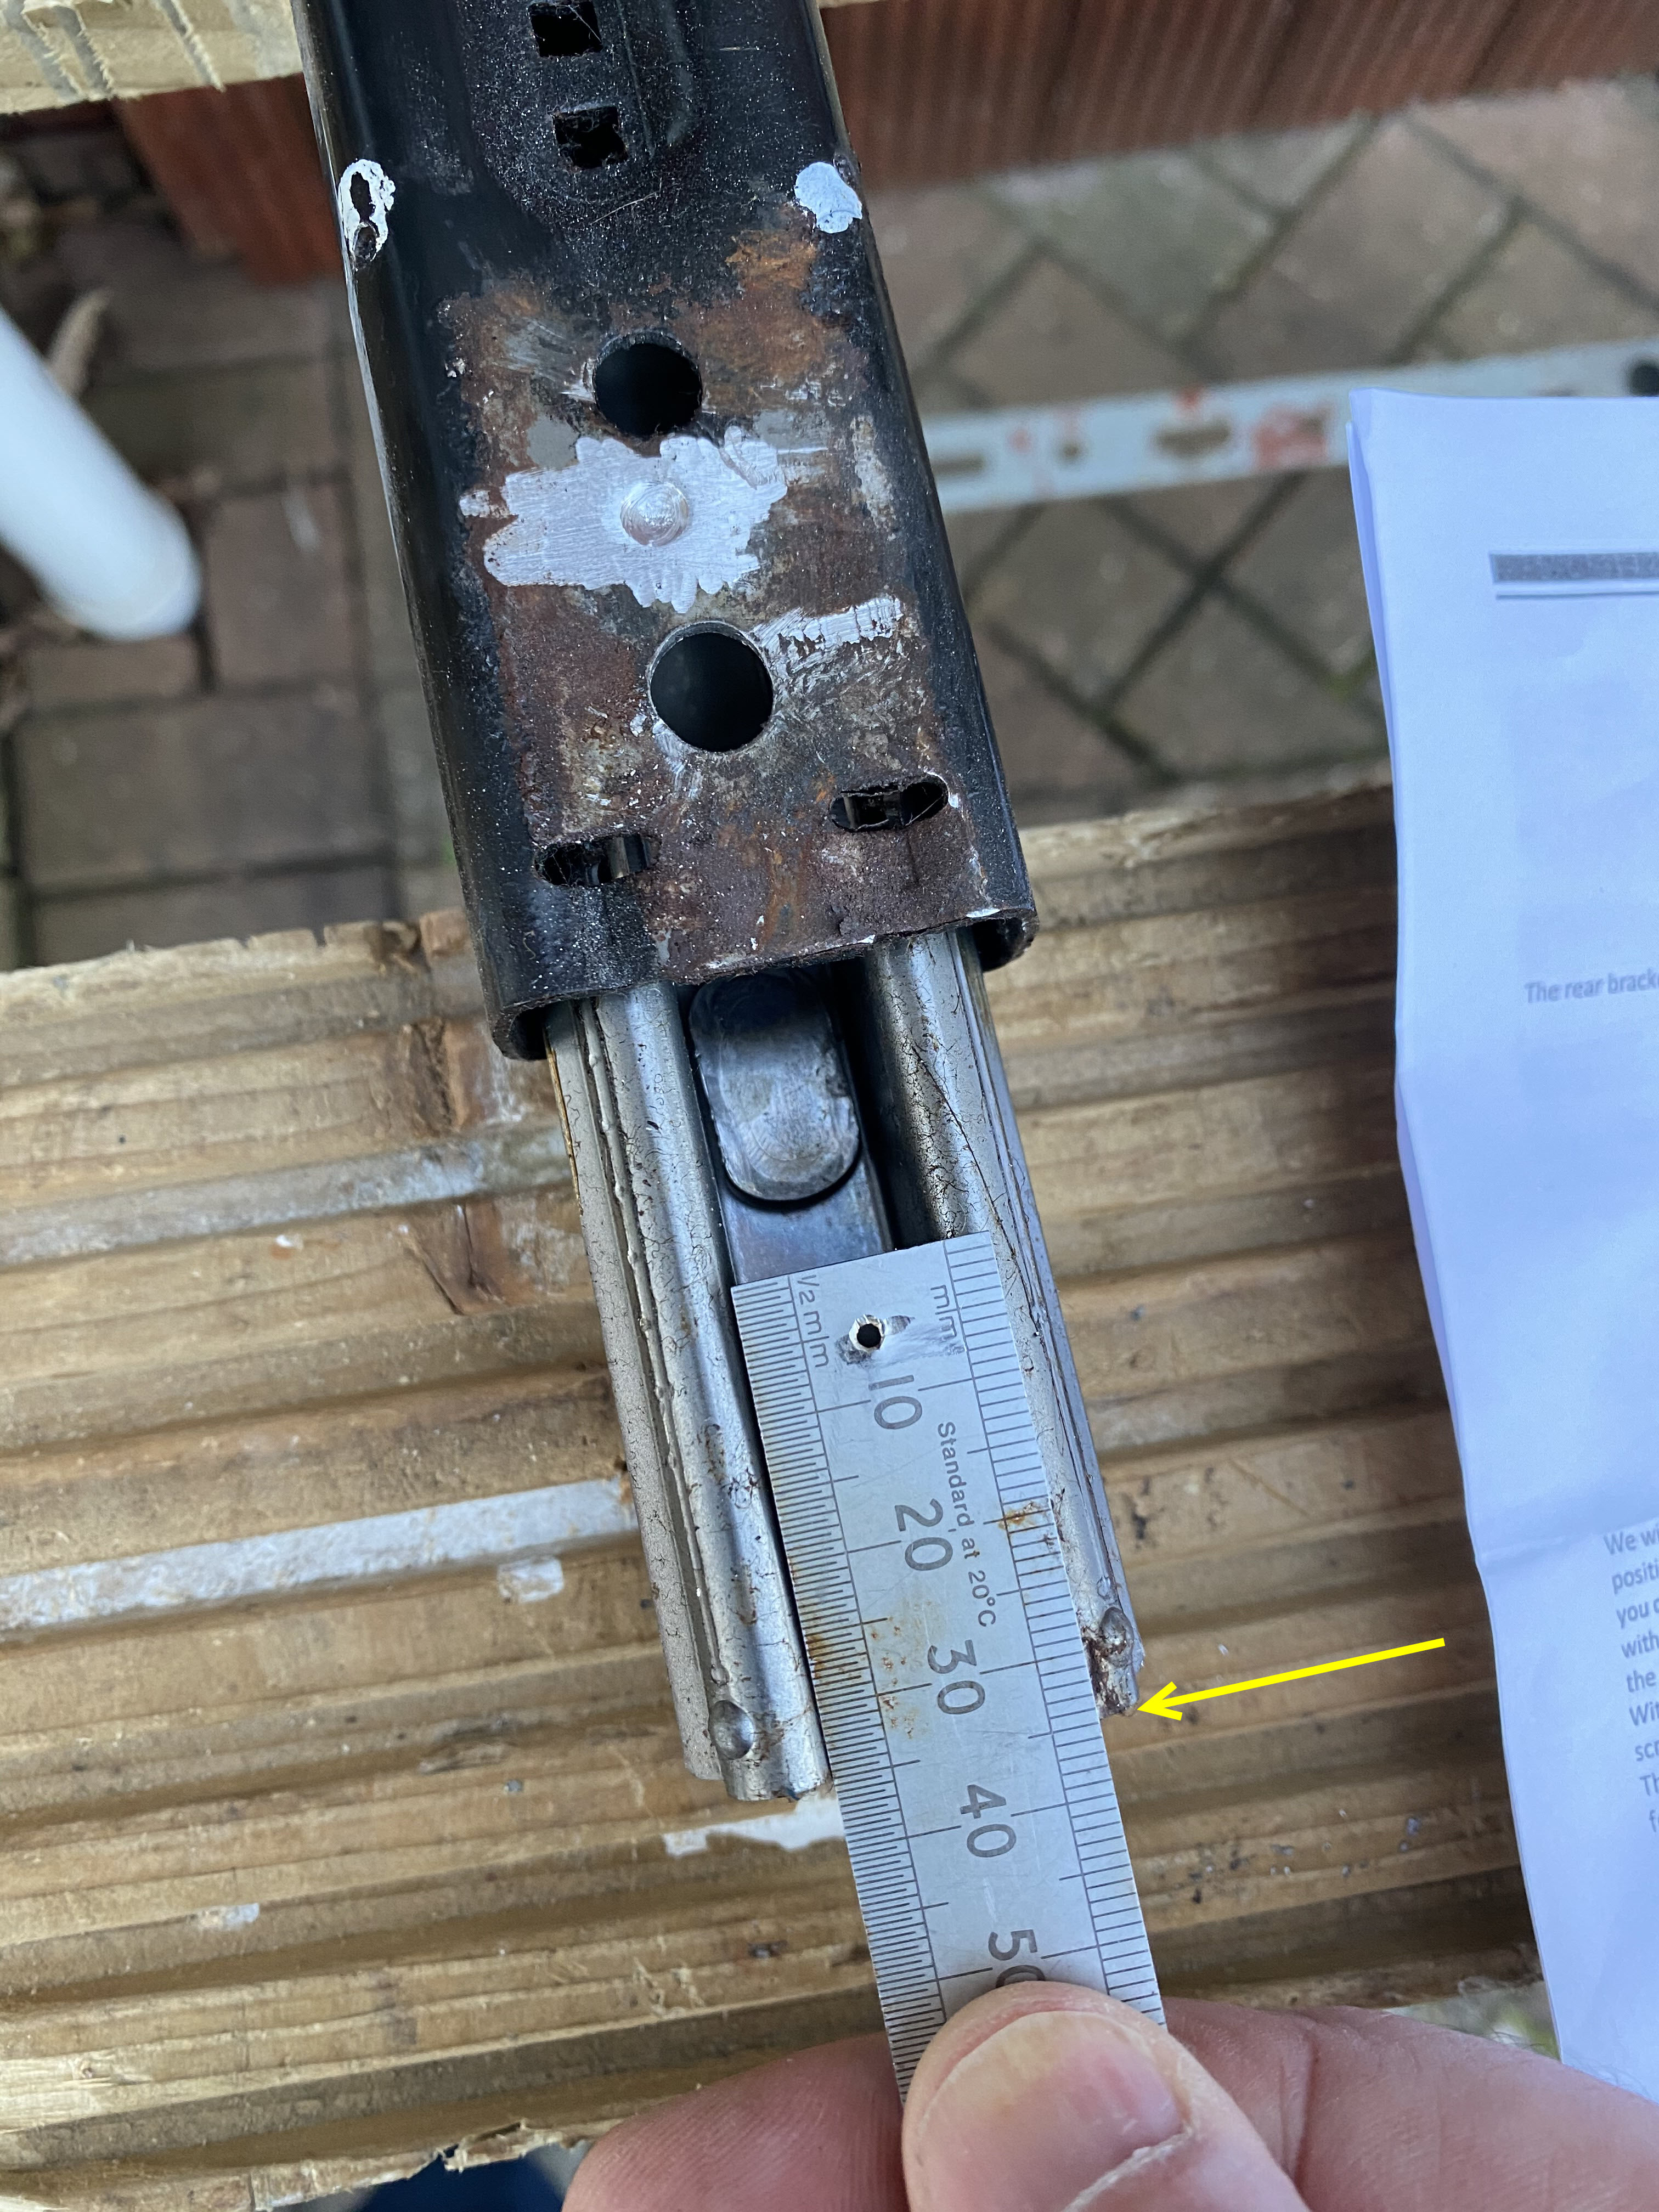
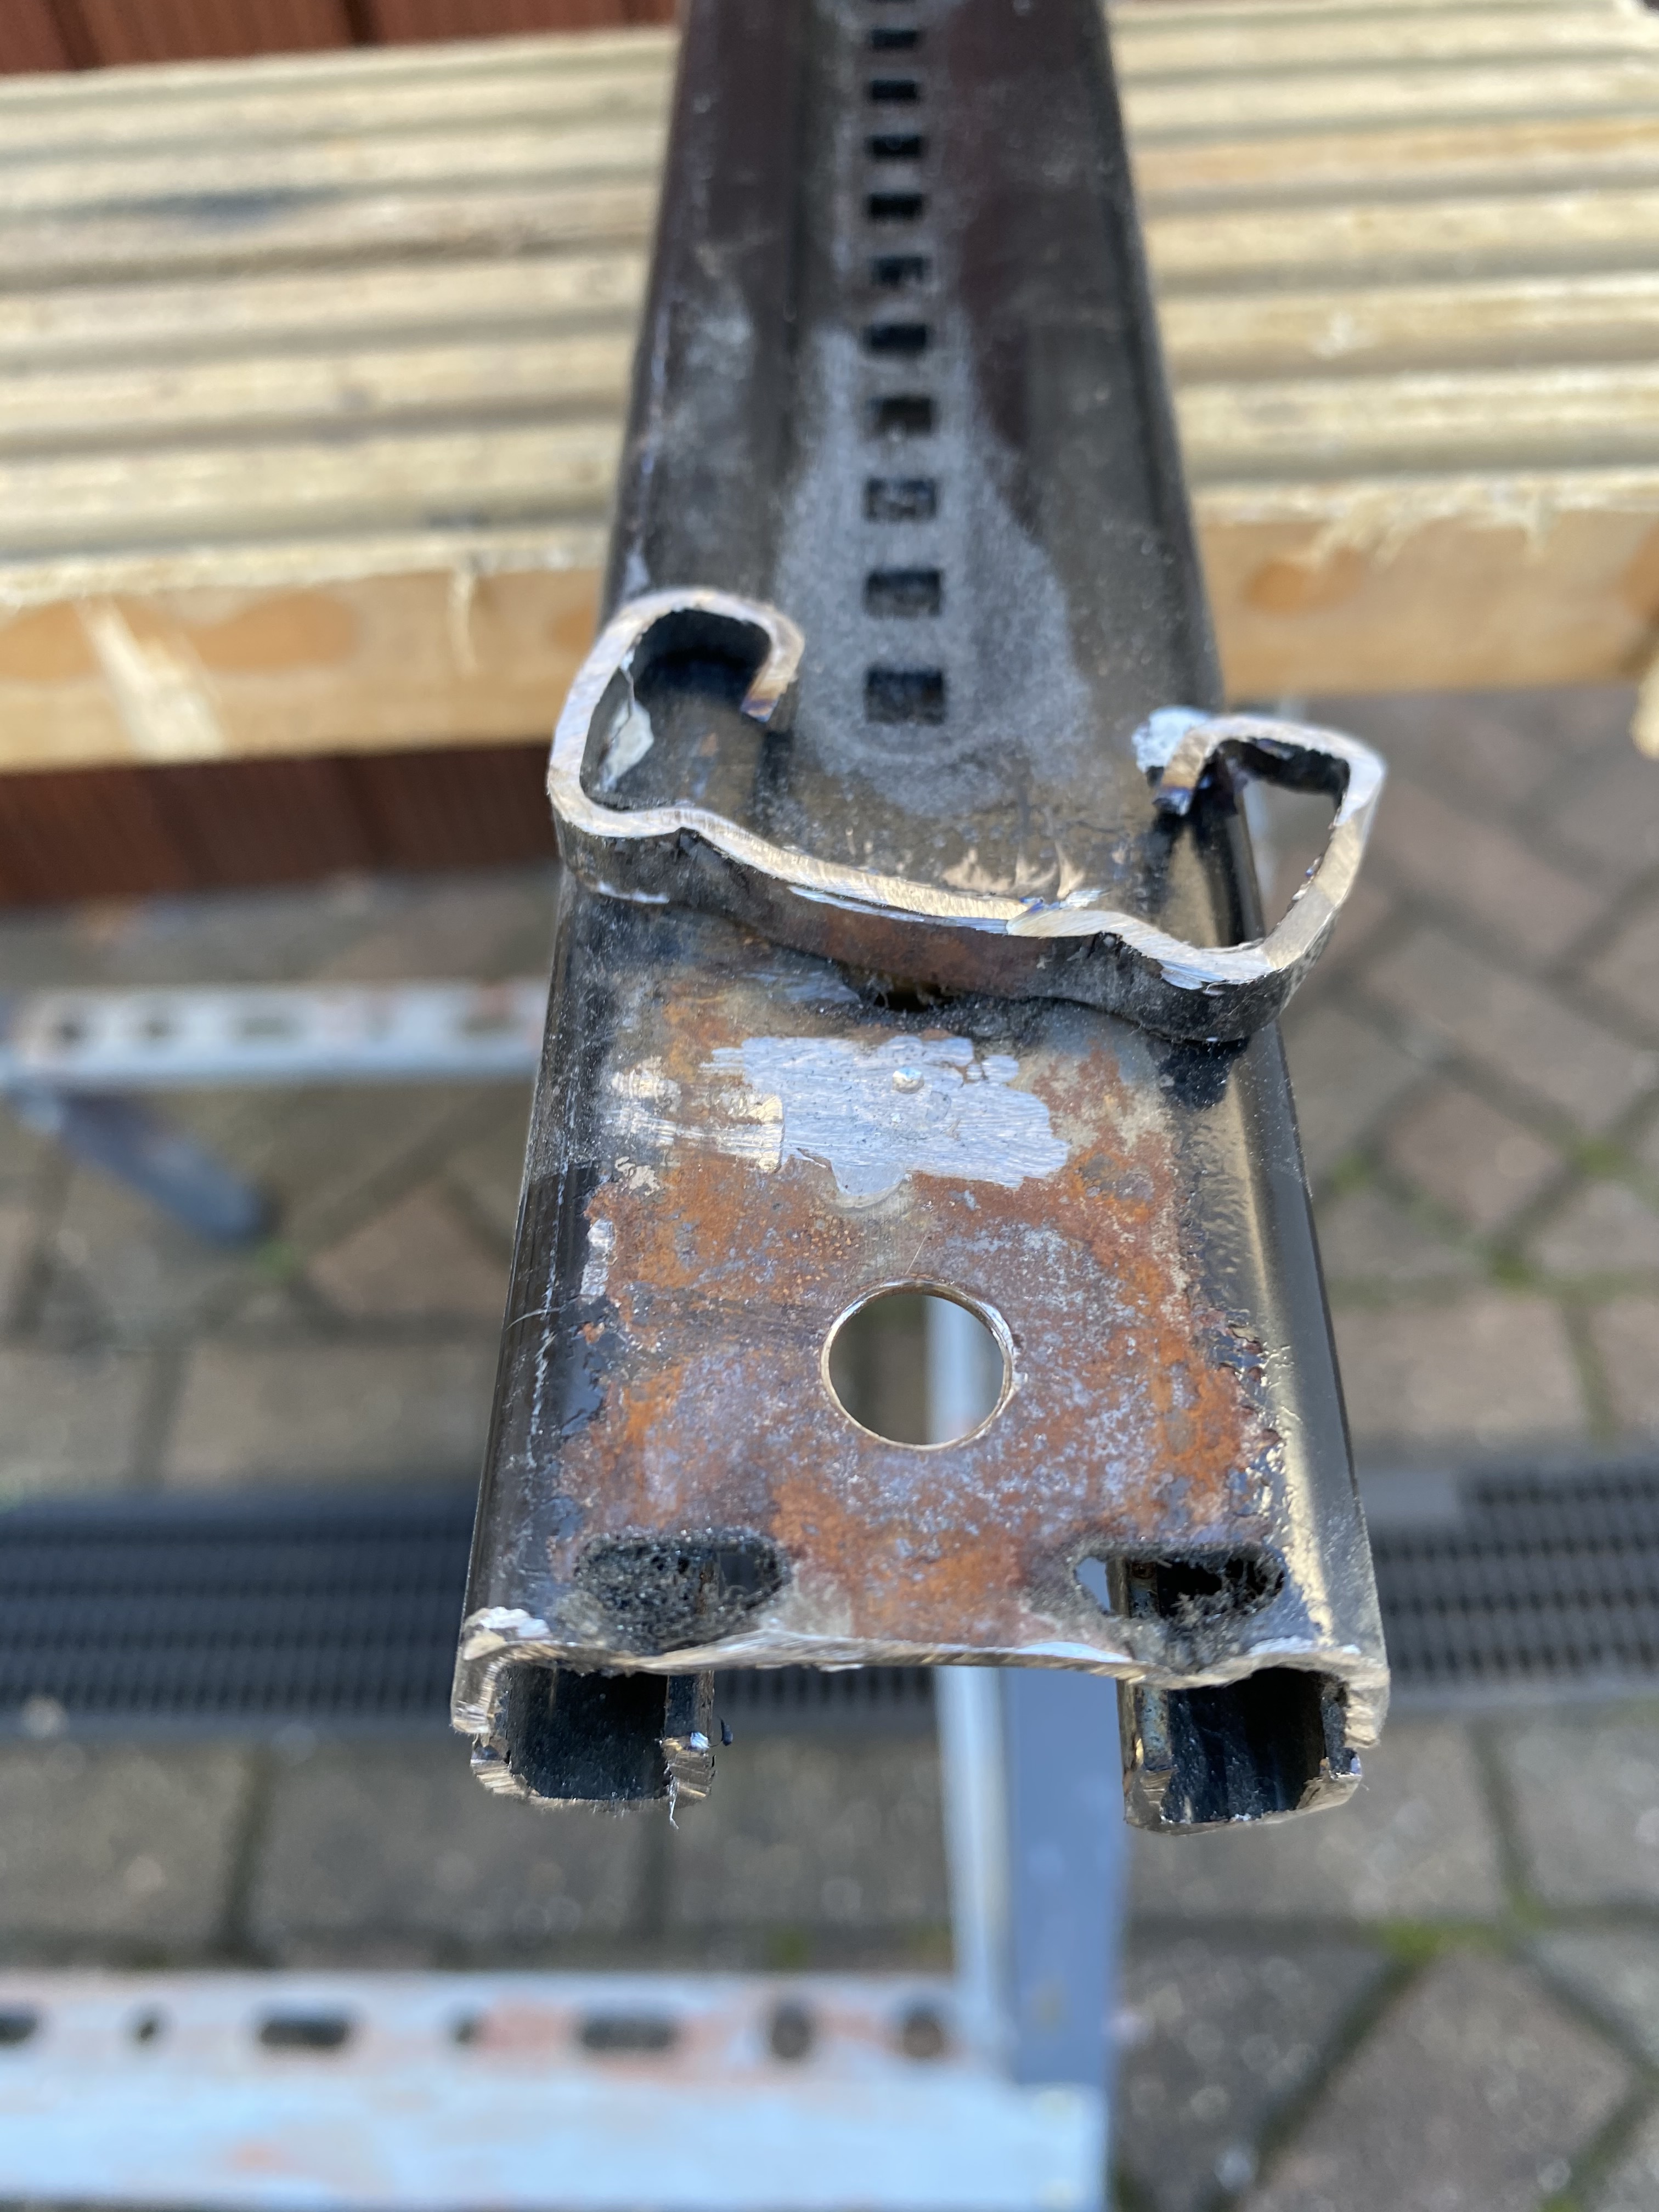
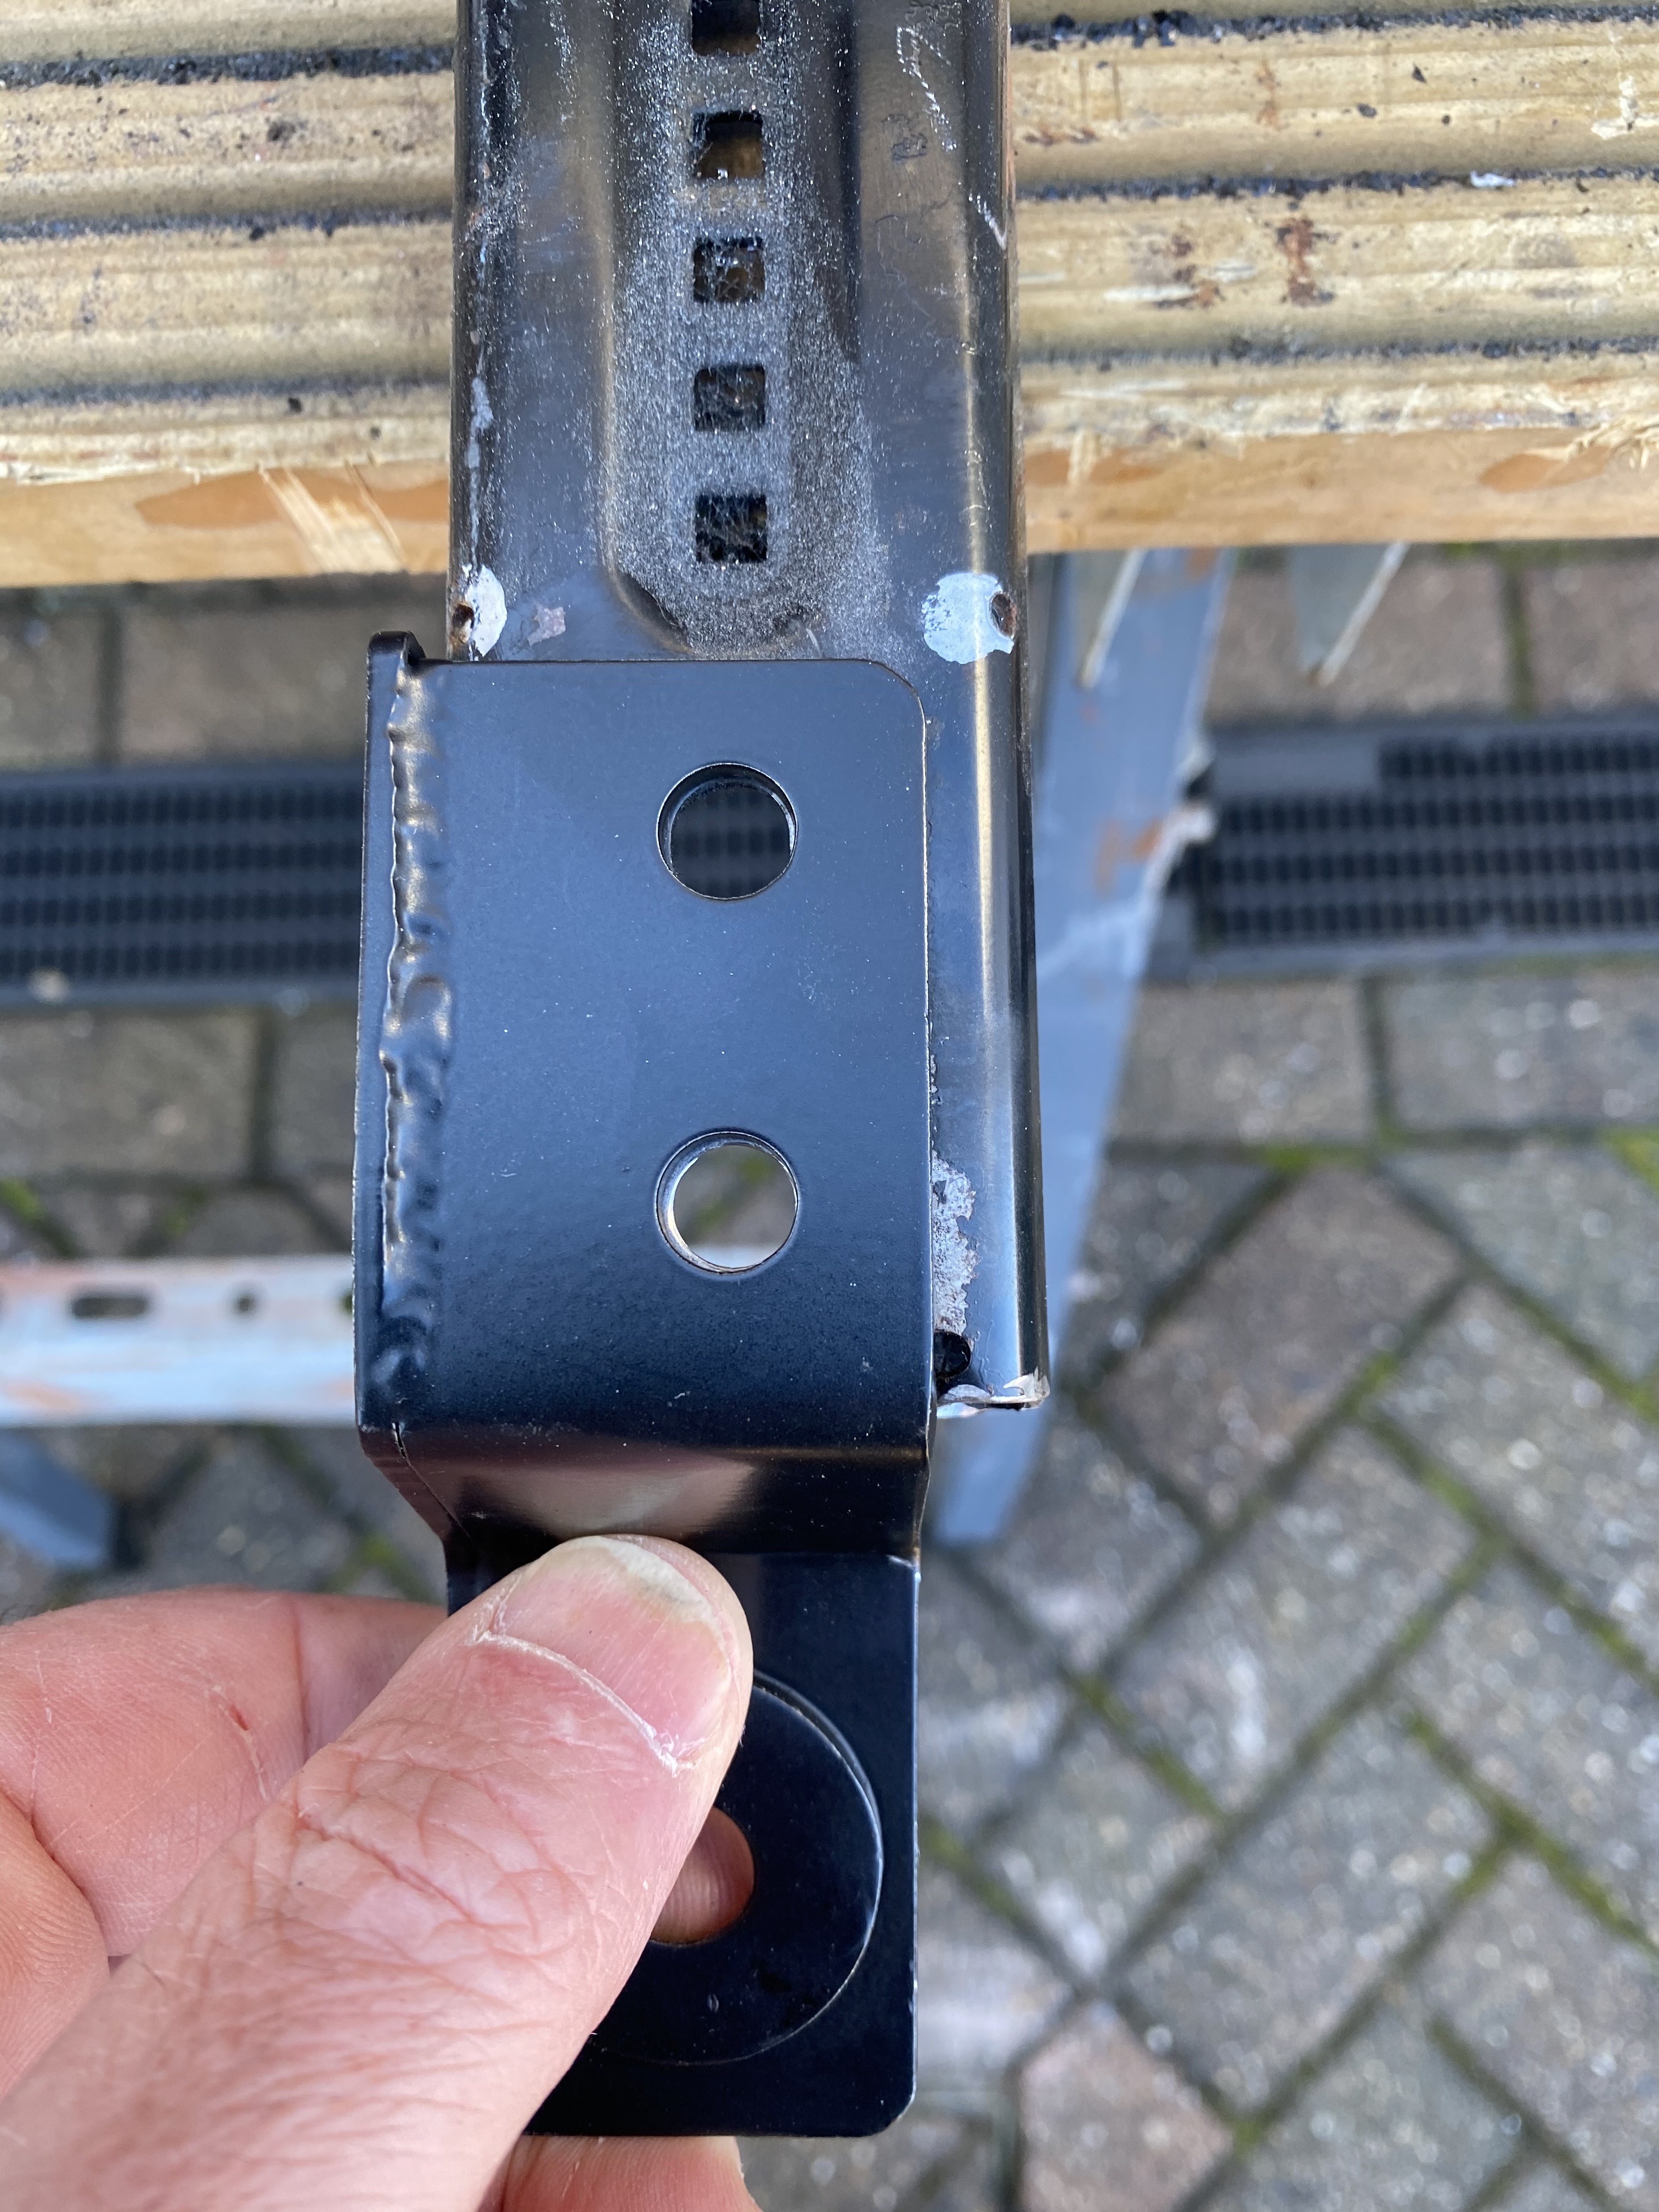
Once you have the sliding rails off the seat, get your workbench out. You now need to drill out the rivet and weld to get the end brackets off. You’ll need a hammer, centre-punch, a drill and 4mm, 6mm & 8mm drill bits. You’ll also need a chisel or an old flat-bladed screwdriver. Do yourself a favour and go out and buy some new ones if yours are quite old. You’ll save yourself a lot of grief! Start off with the 4mm drill, then the 6mm and finish off with the 8mm. You’ll need to use the chisel/screwdriver with a hammer to separate the end brackets after drilling. Mind your fingers! You can throw these away once off. You don’t need them again.
-
You’ll need a Dremel or an angle grinder to flatten out the surface after removing the end bracket. If you’ve been really lucky and the surface is flat, then you can skip this.
-
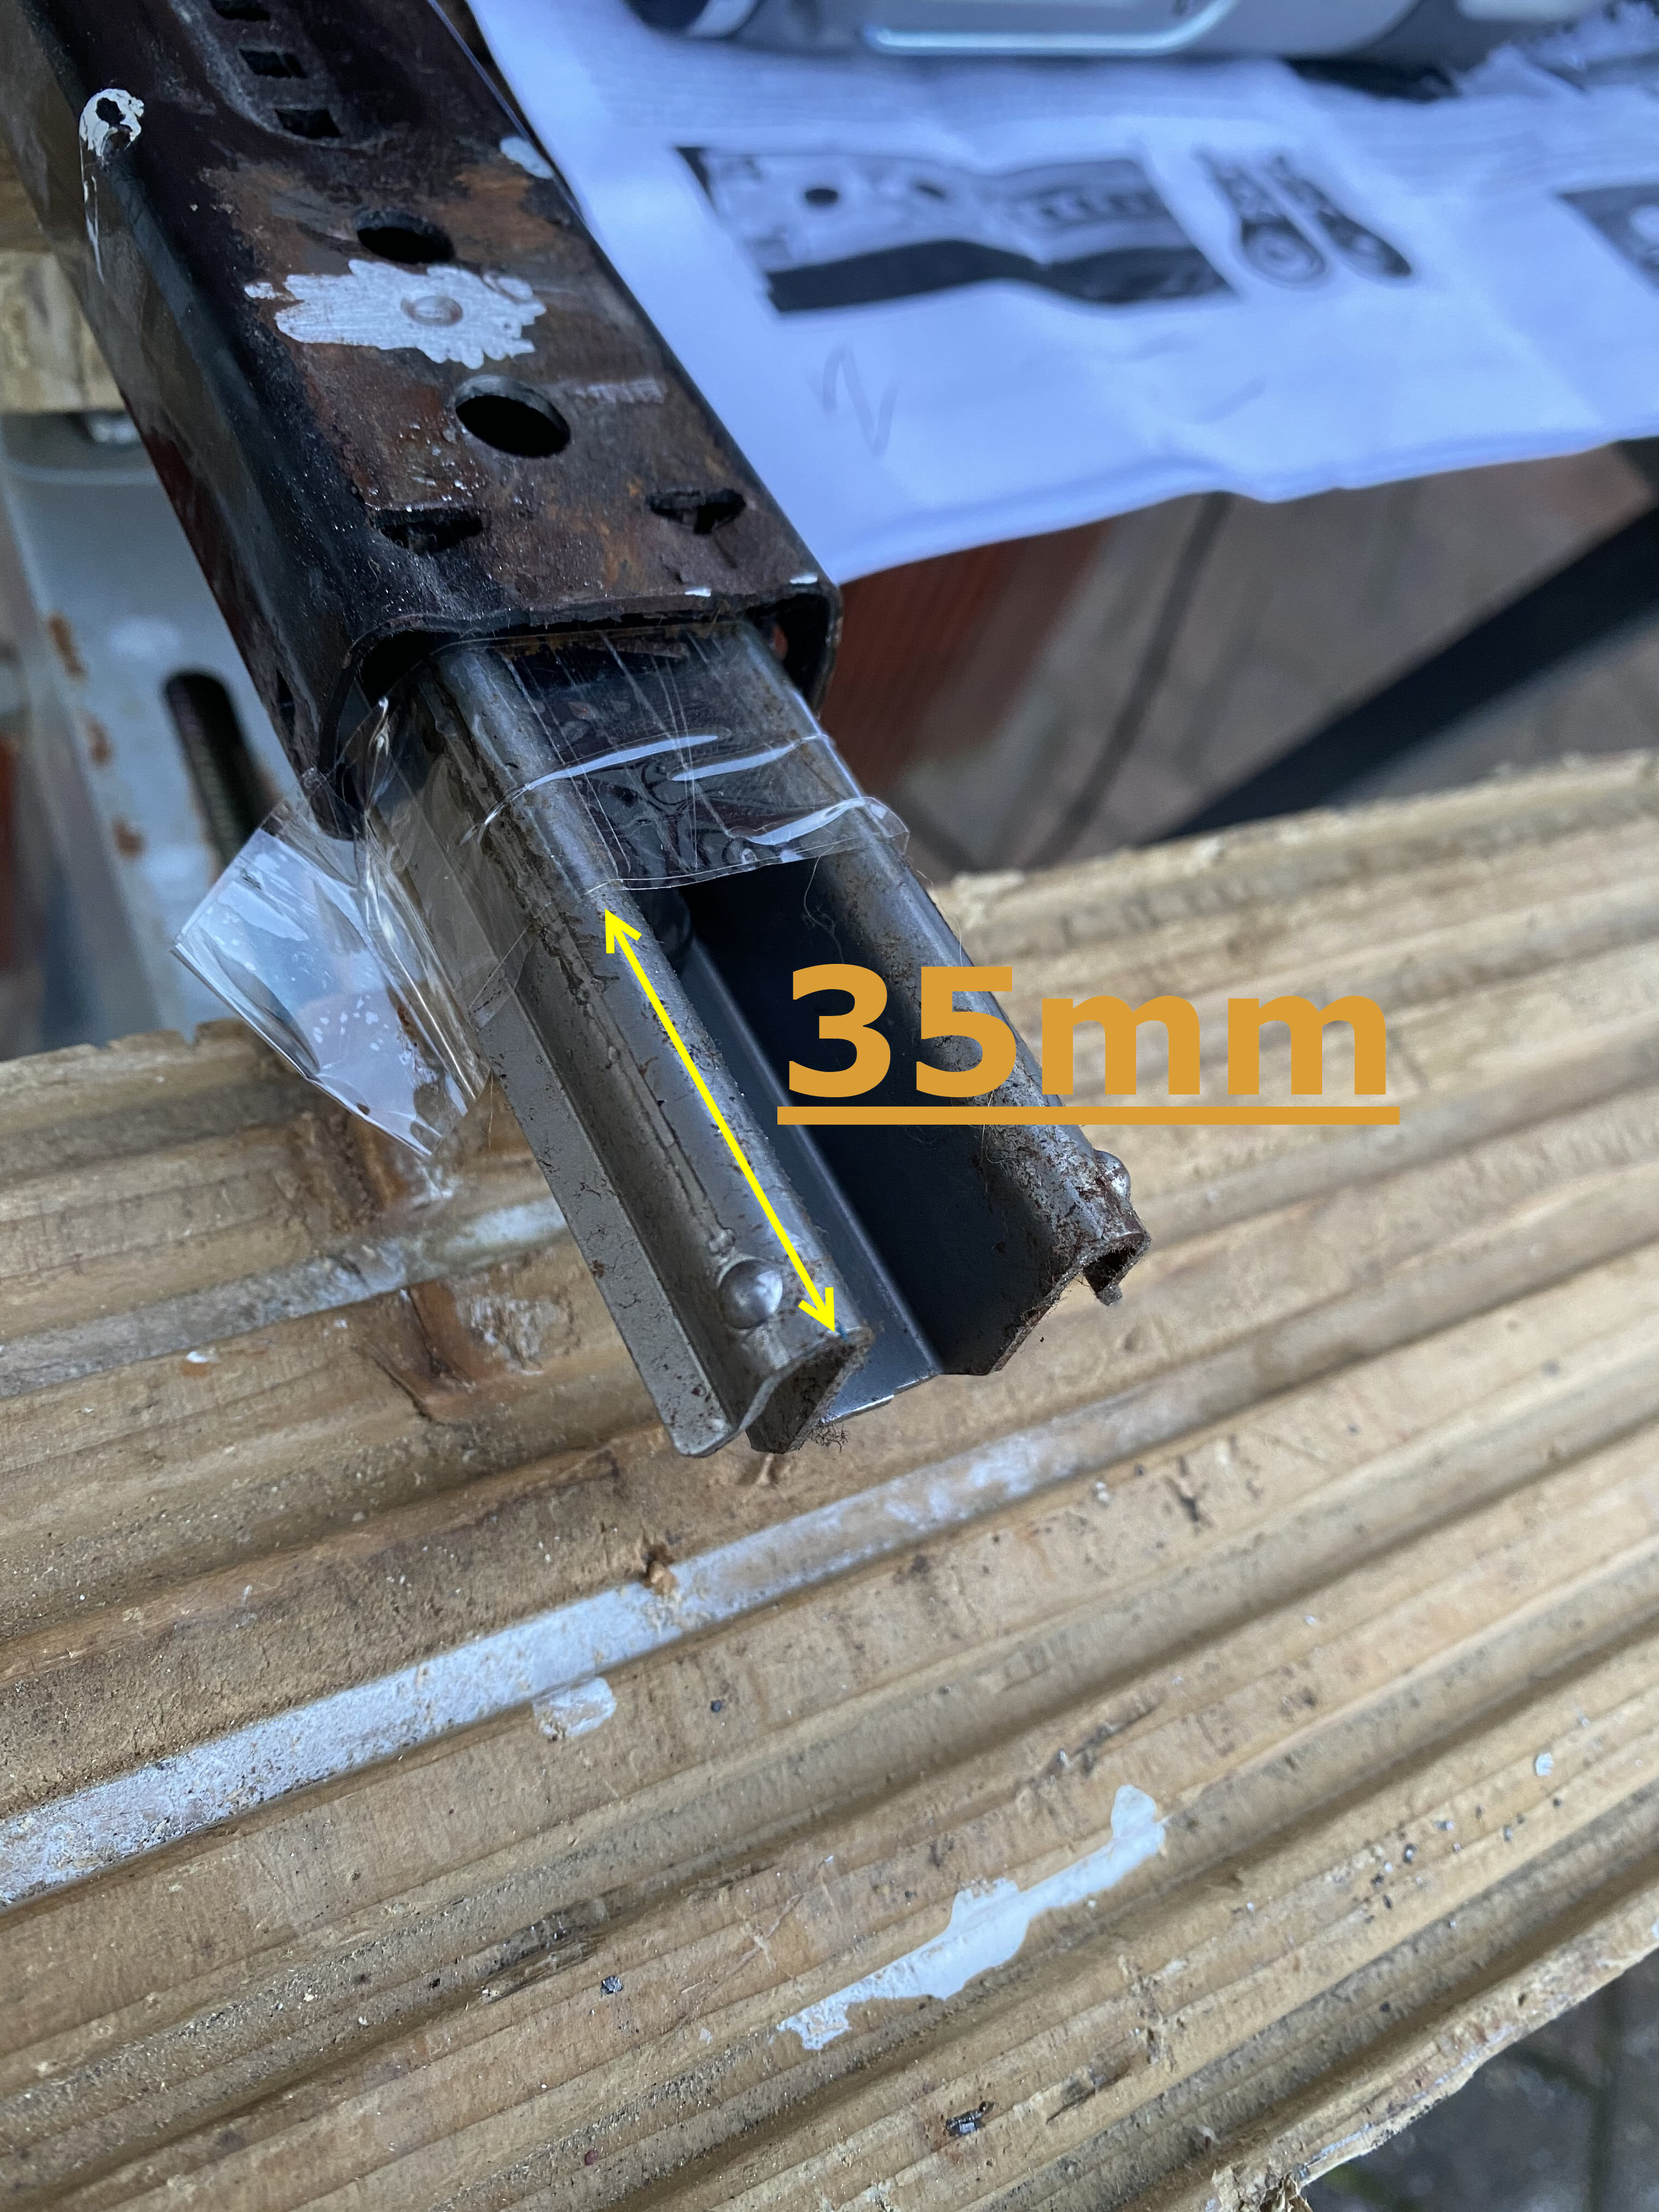
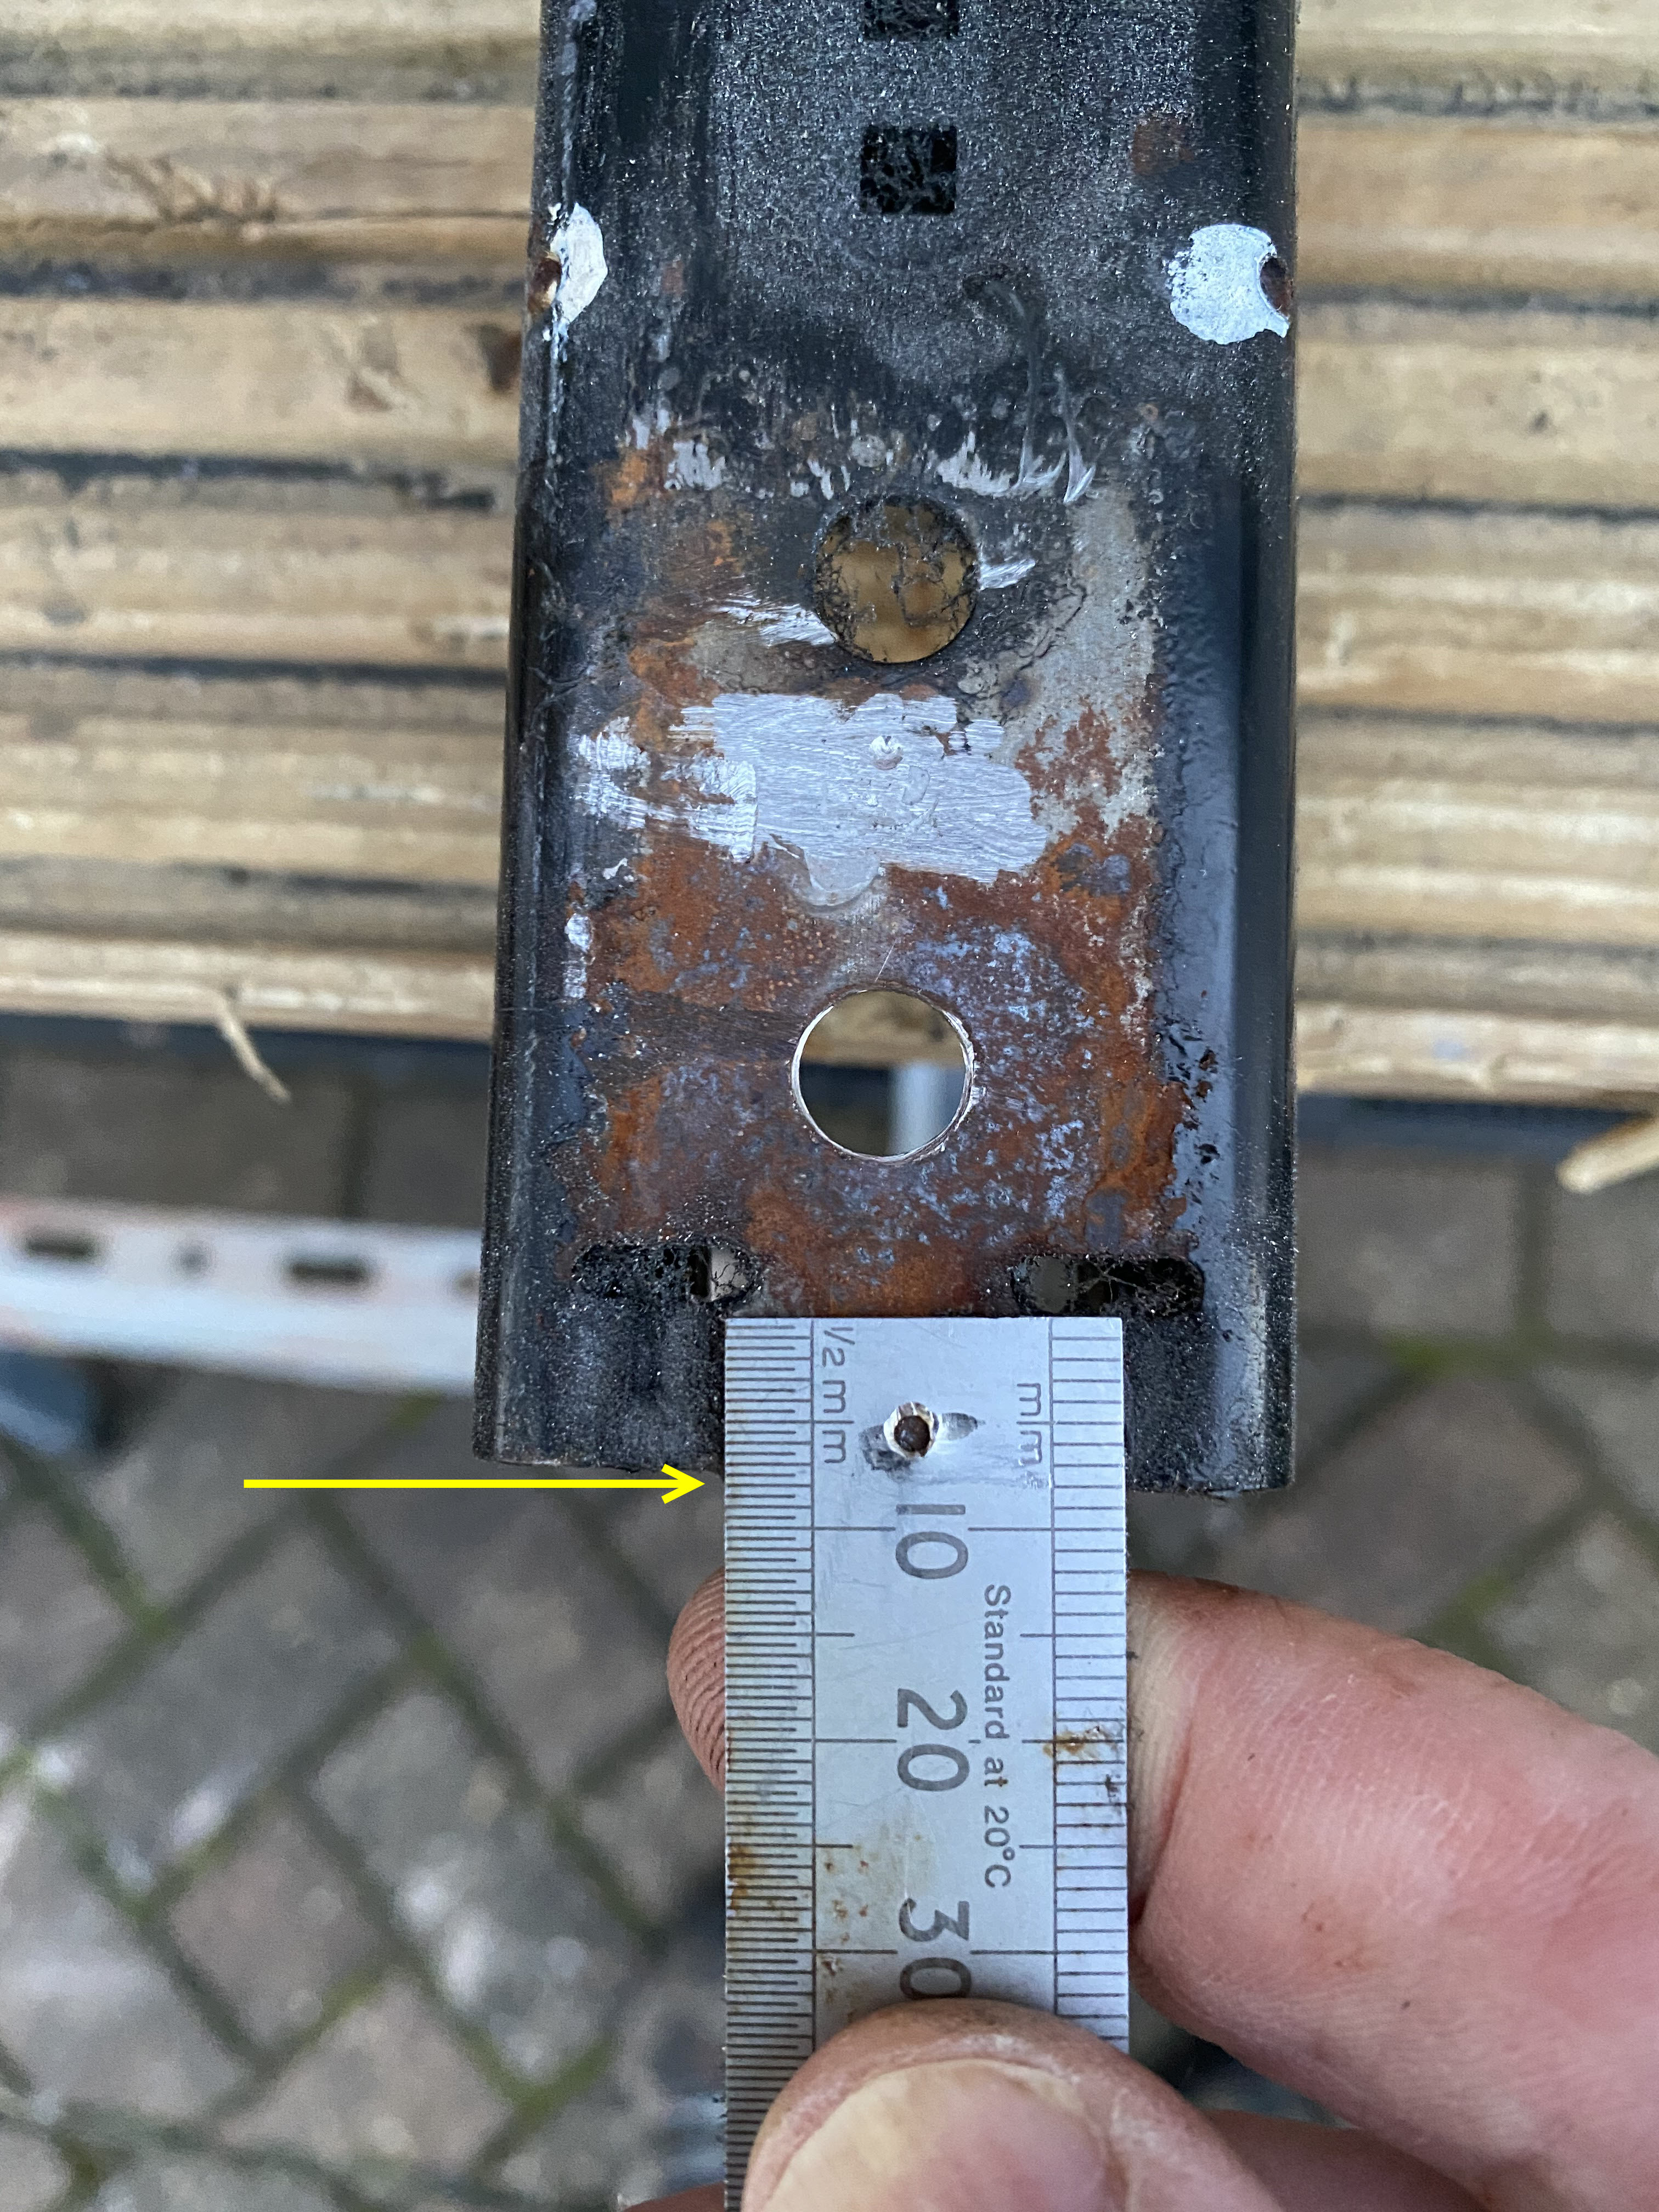
The next job is to trim down the inner slider. This is required to ensure that the seat will go back far enough after the new lowering bracket is fitted. We need to remove about 35mm off the end of the inner slider. Release the brake, and slide the inner slider out as far as it will go (out the end you’ve just removed the bracket from). Measure up and either mark or tape off where you need to cut. I used tape as I couldn’t get a marker pen to work on the greasy surface.
-
Choose your method of hacking, and take off the excess on the inner.
-
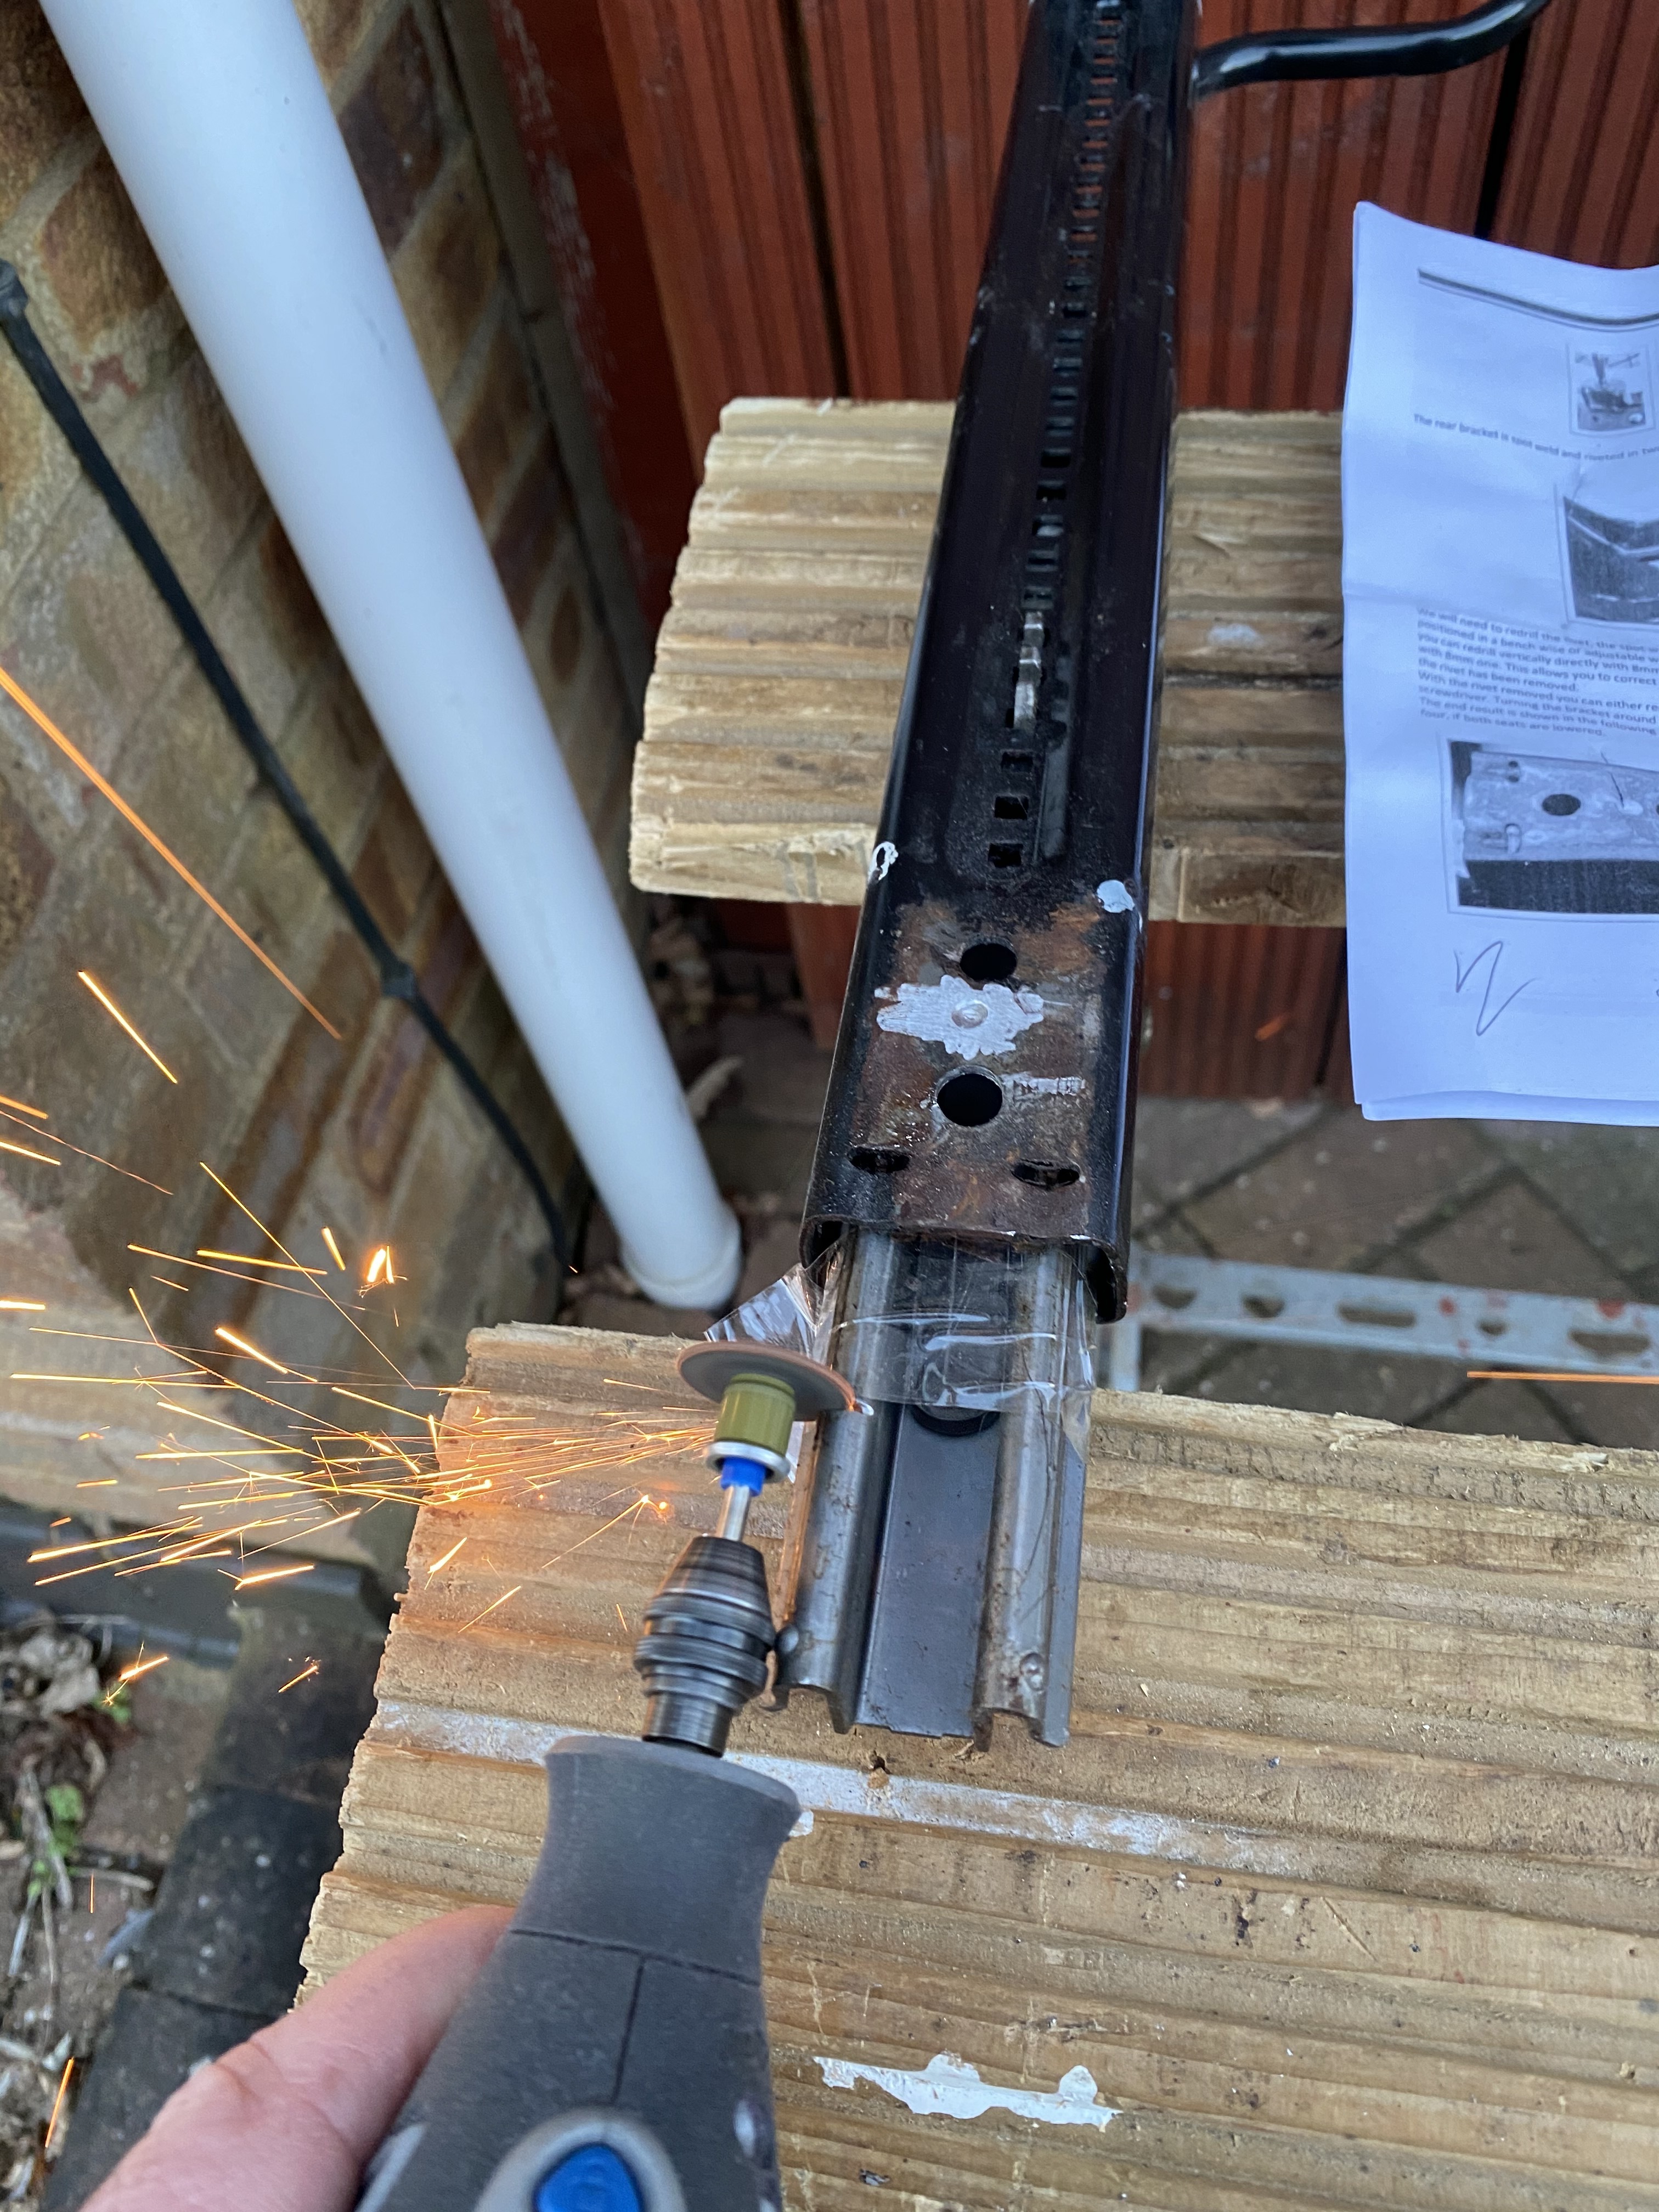
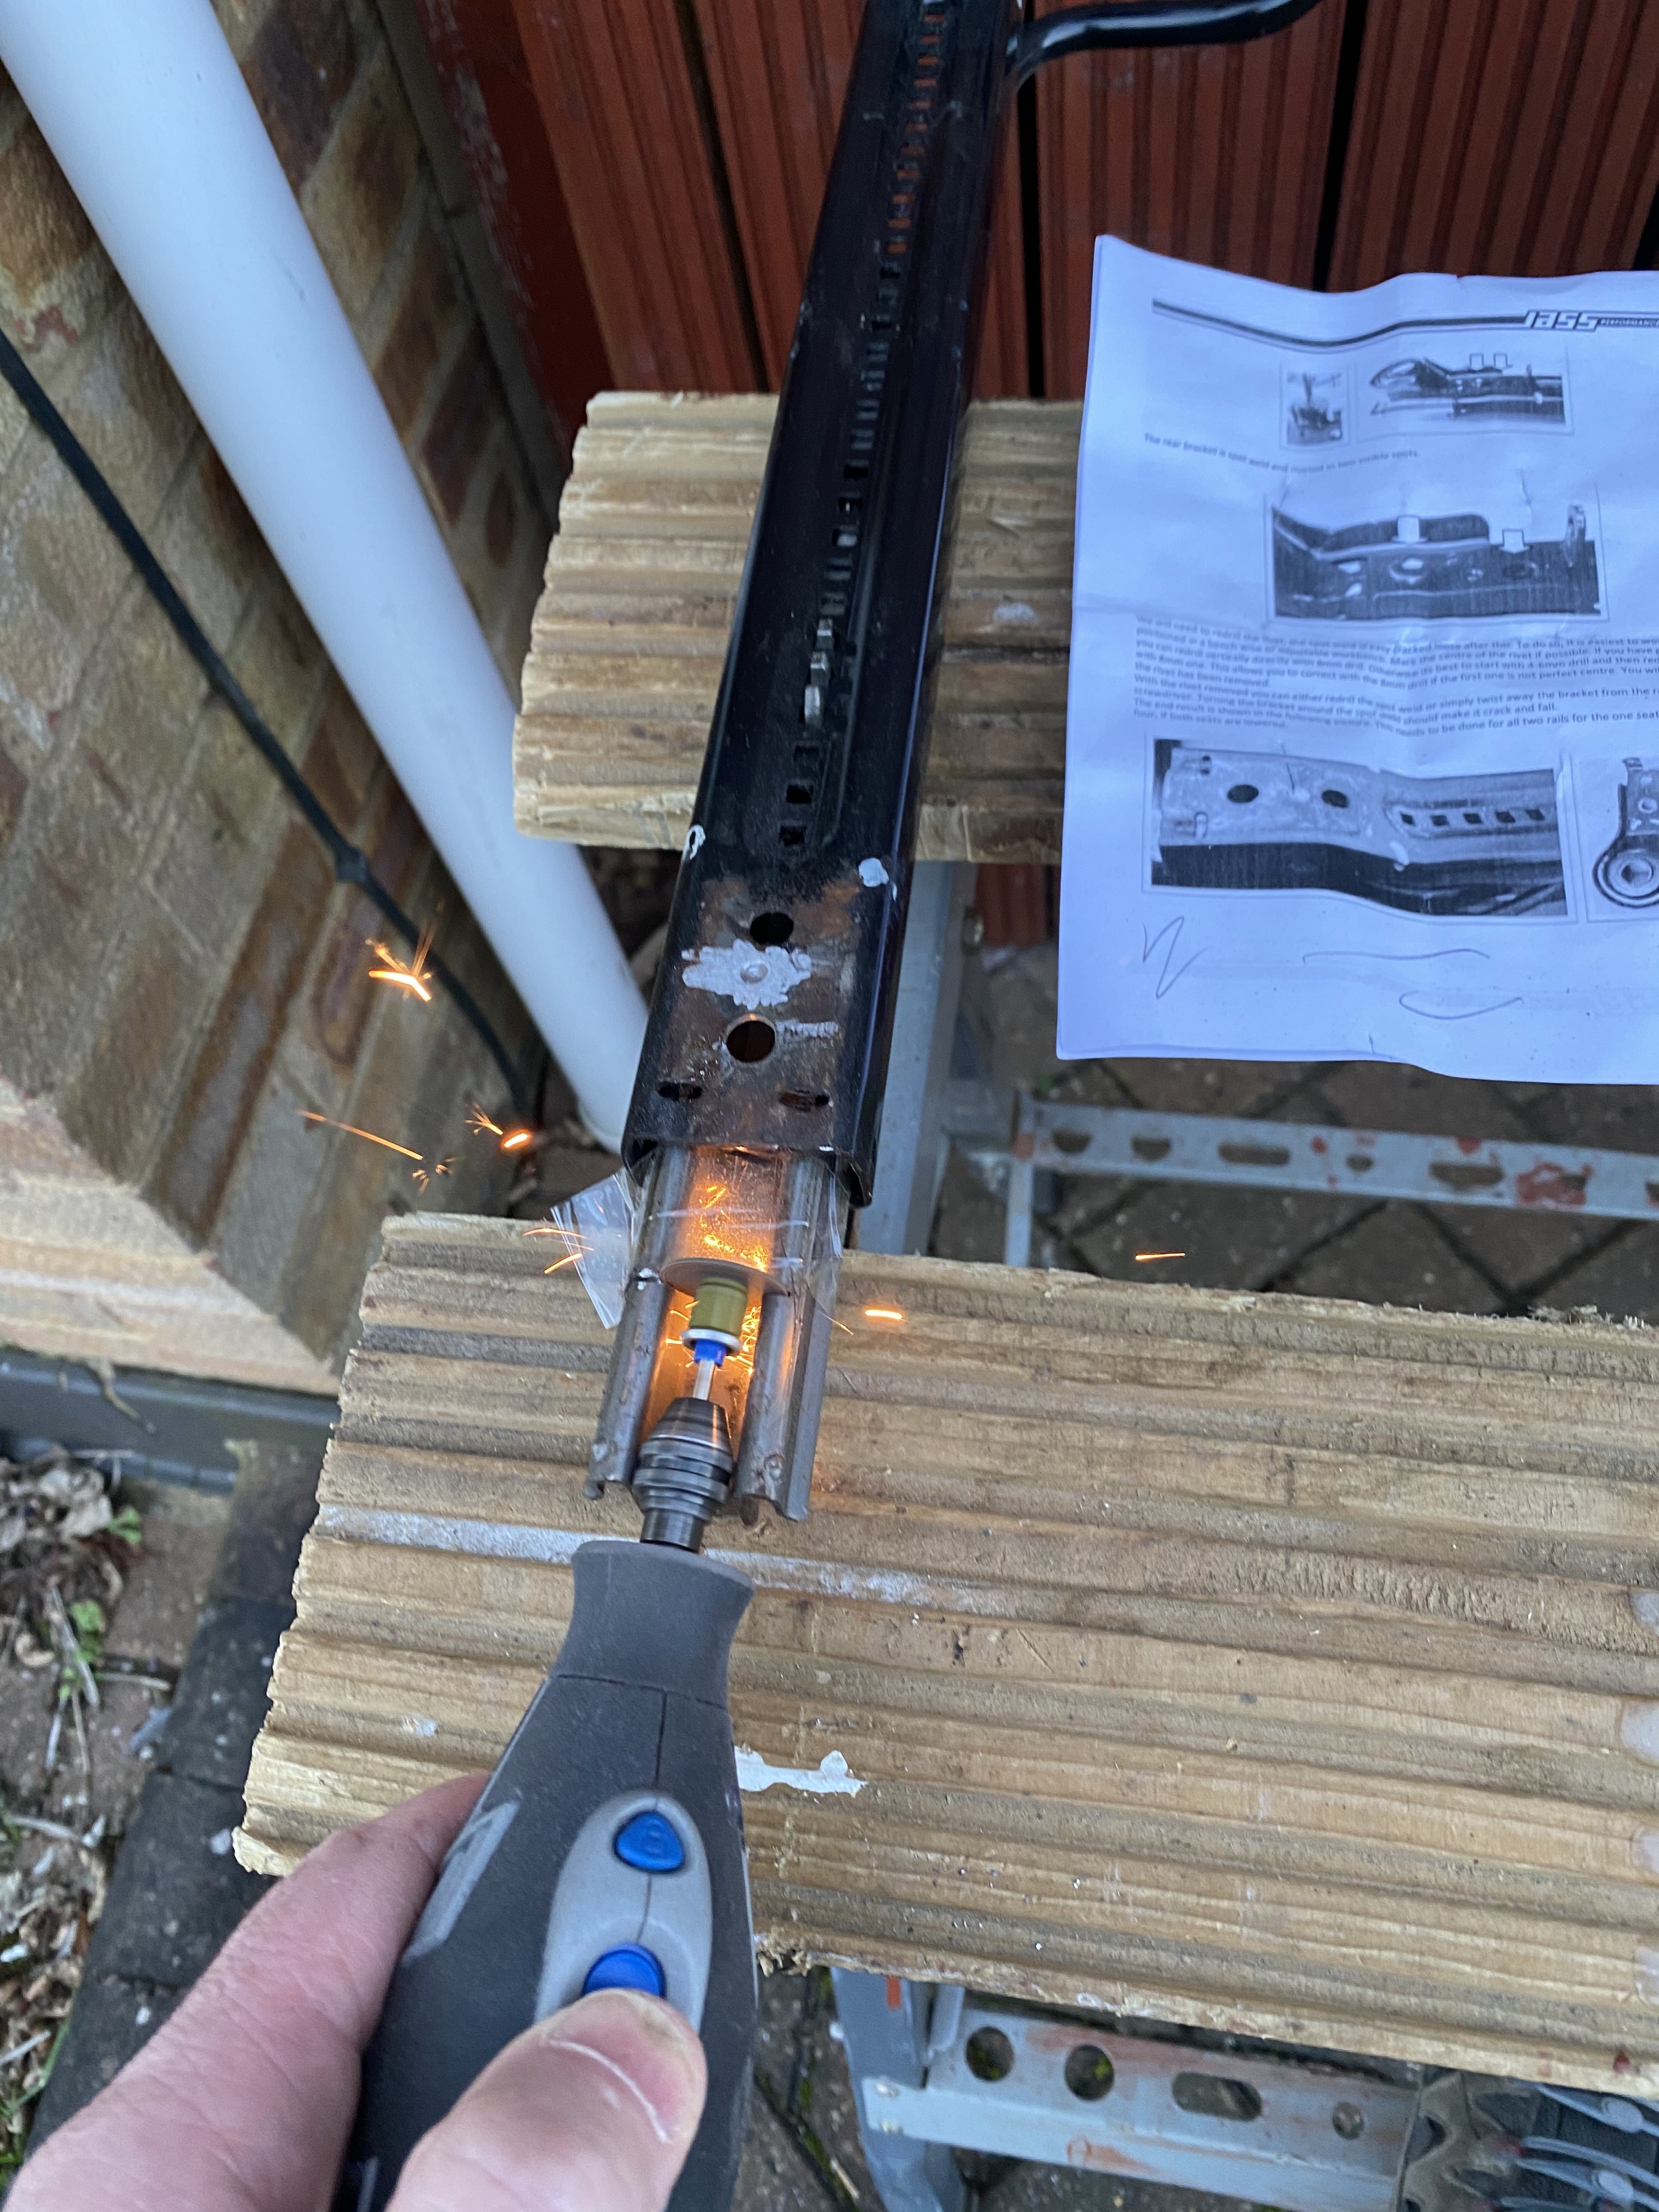
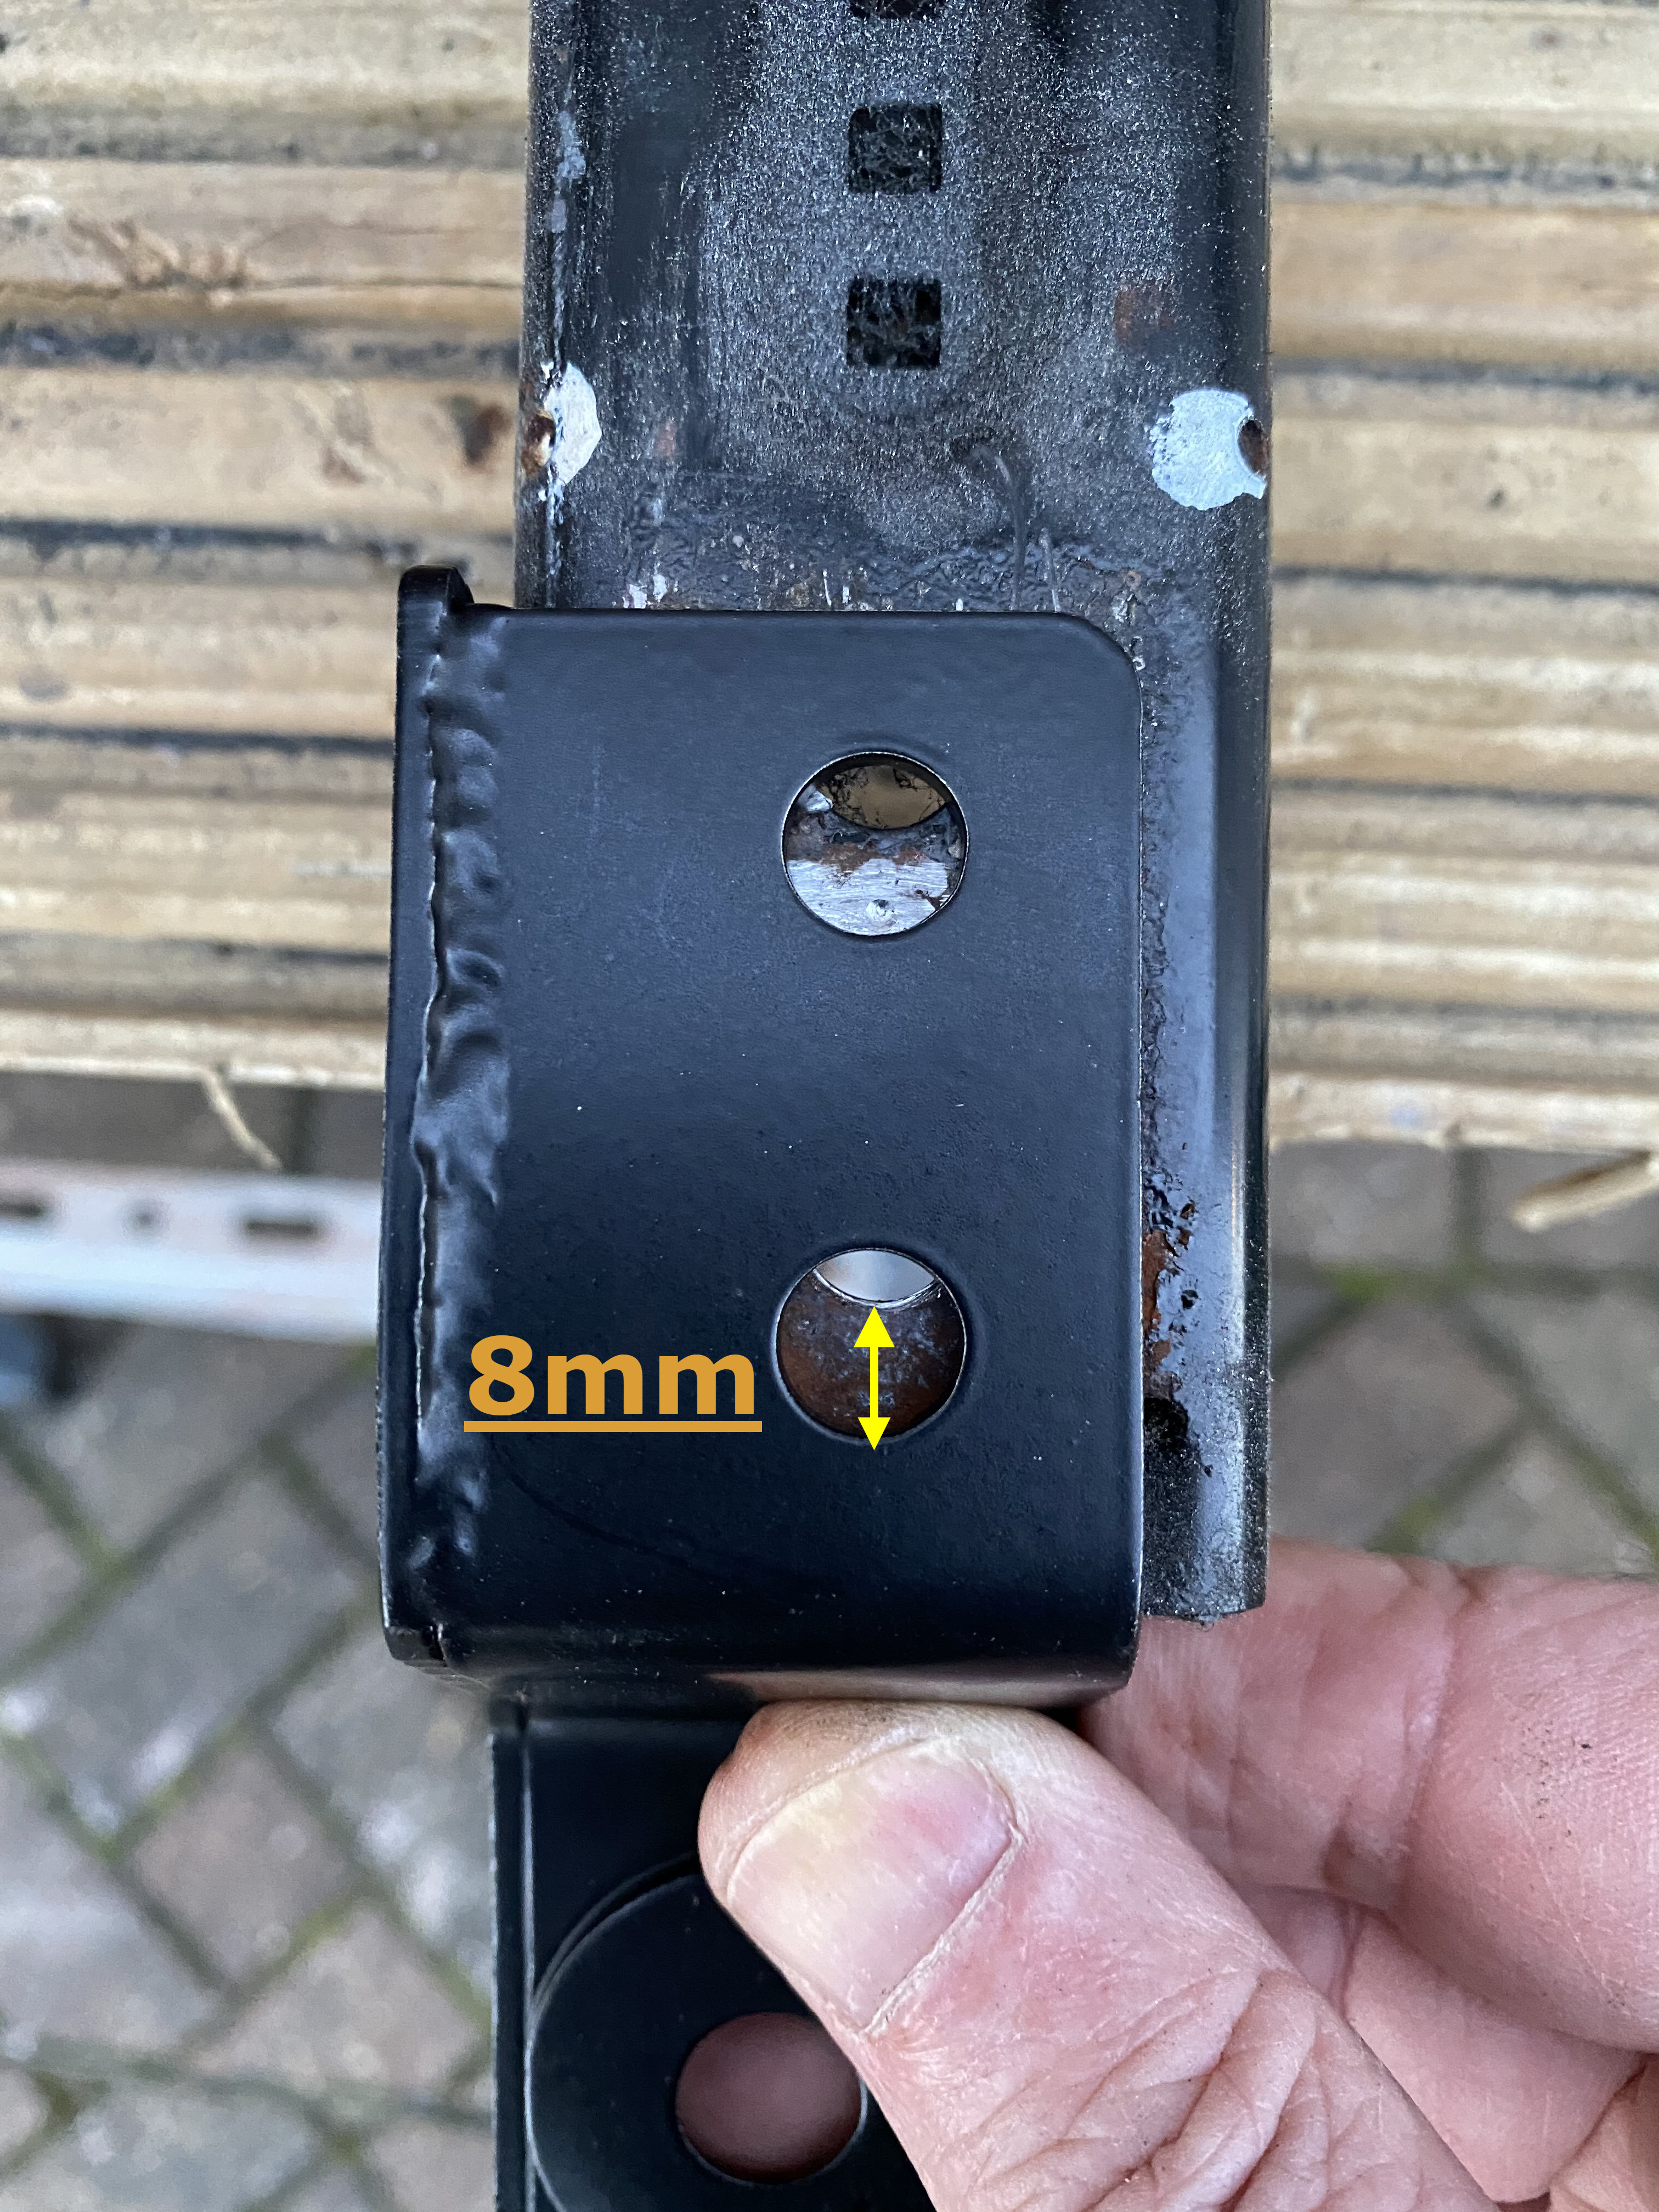
Next, the outer slider needs to be adjusted. The lowering brackets can’t be bolted on just yet, as the holes don’t line up. We need to trim 8mm off the end. Release the brake and slide the inner slider in so it’s well past the end of the outer, then mark up an 8mm section off the end. This should be just short of the 2 dimples that were part of the old end-bracket locators.
-
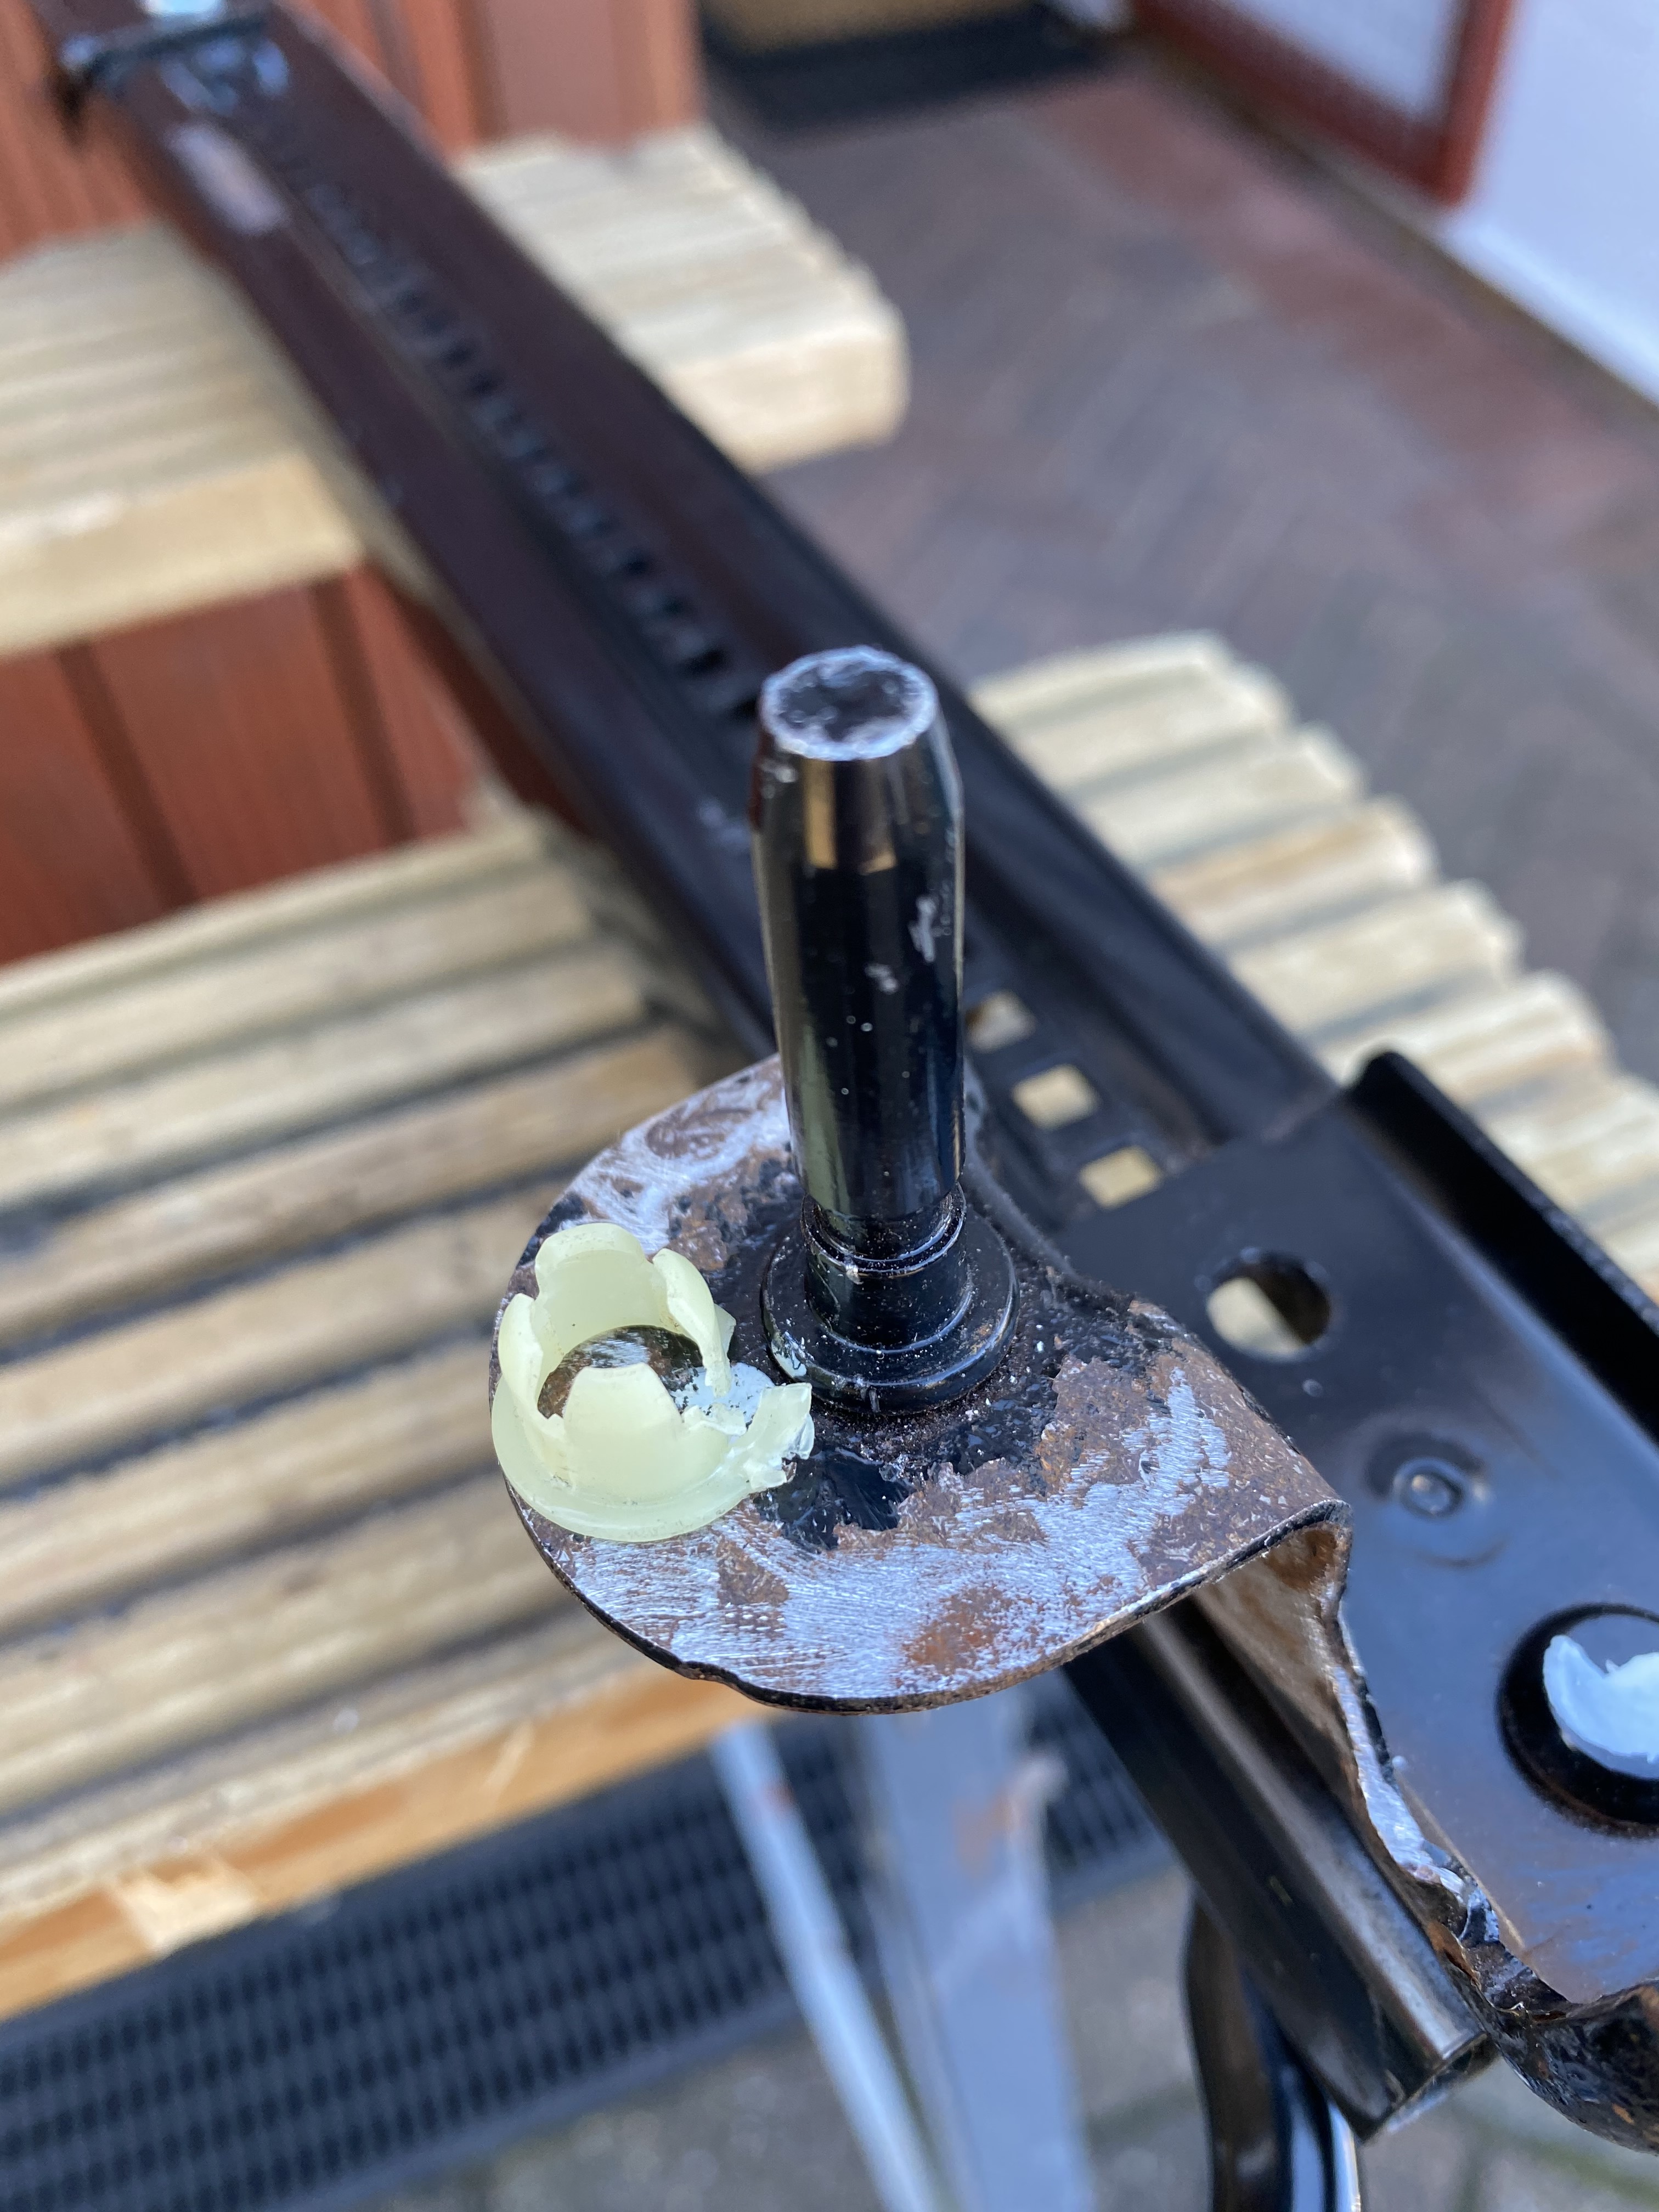
Hack off the end. If you have a grinding tool, ensure you clean up any sharp edges on both parts of the slider. Remove the plastic bush. The front won’t sit low enough to get the bolts in if you don’t remove this.
-
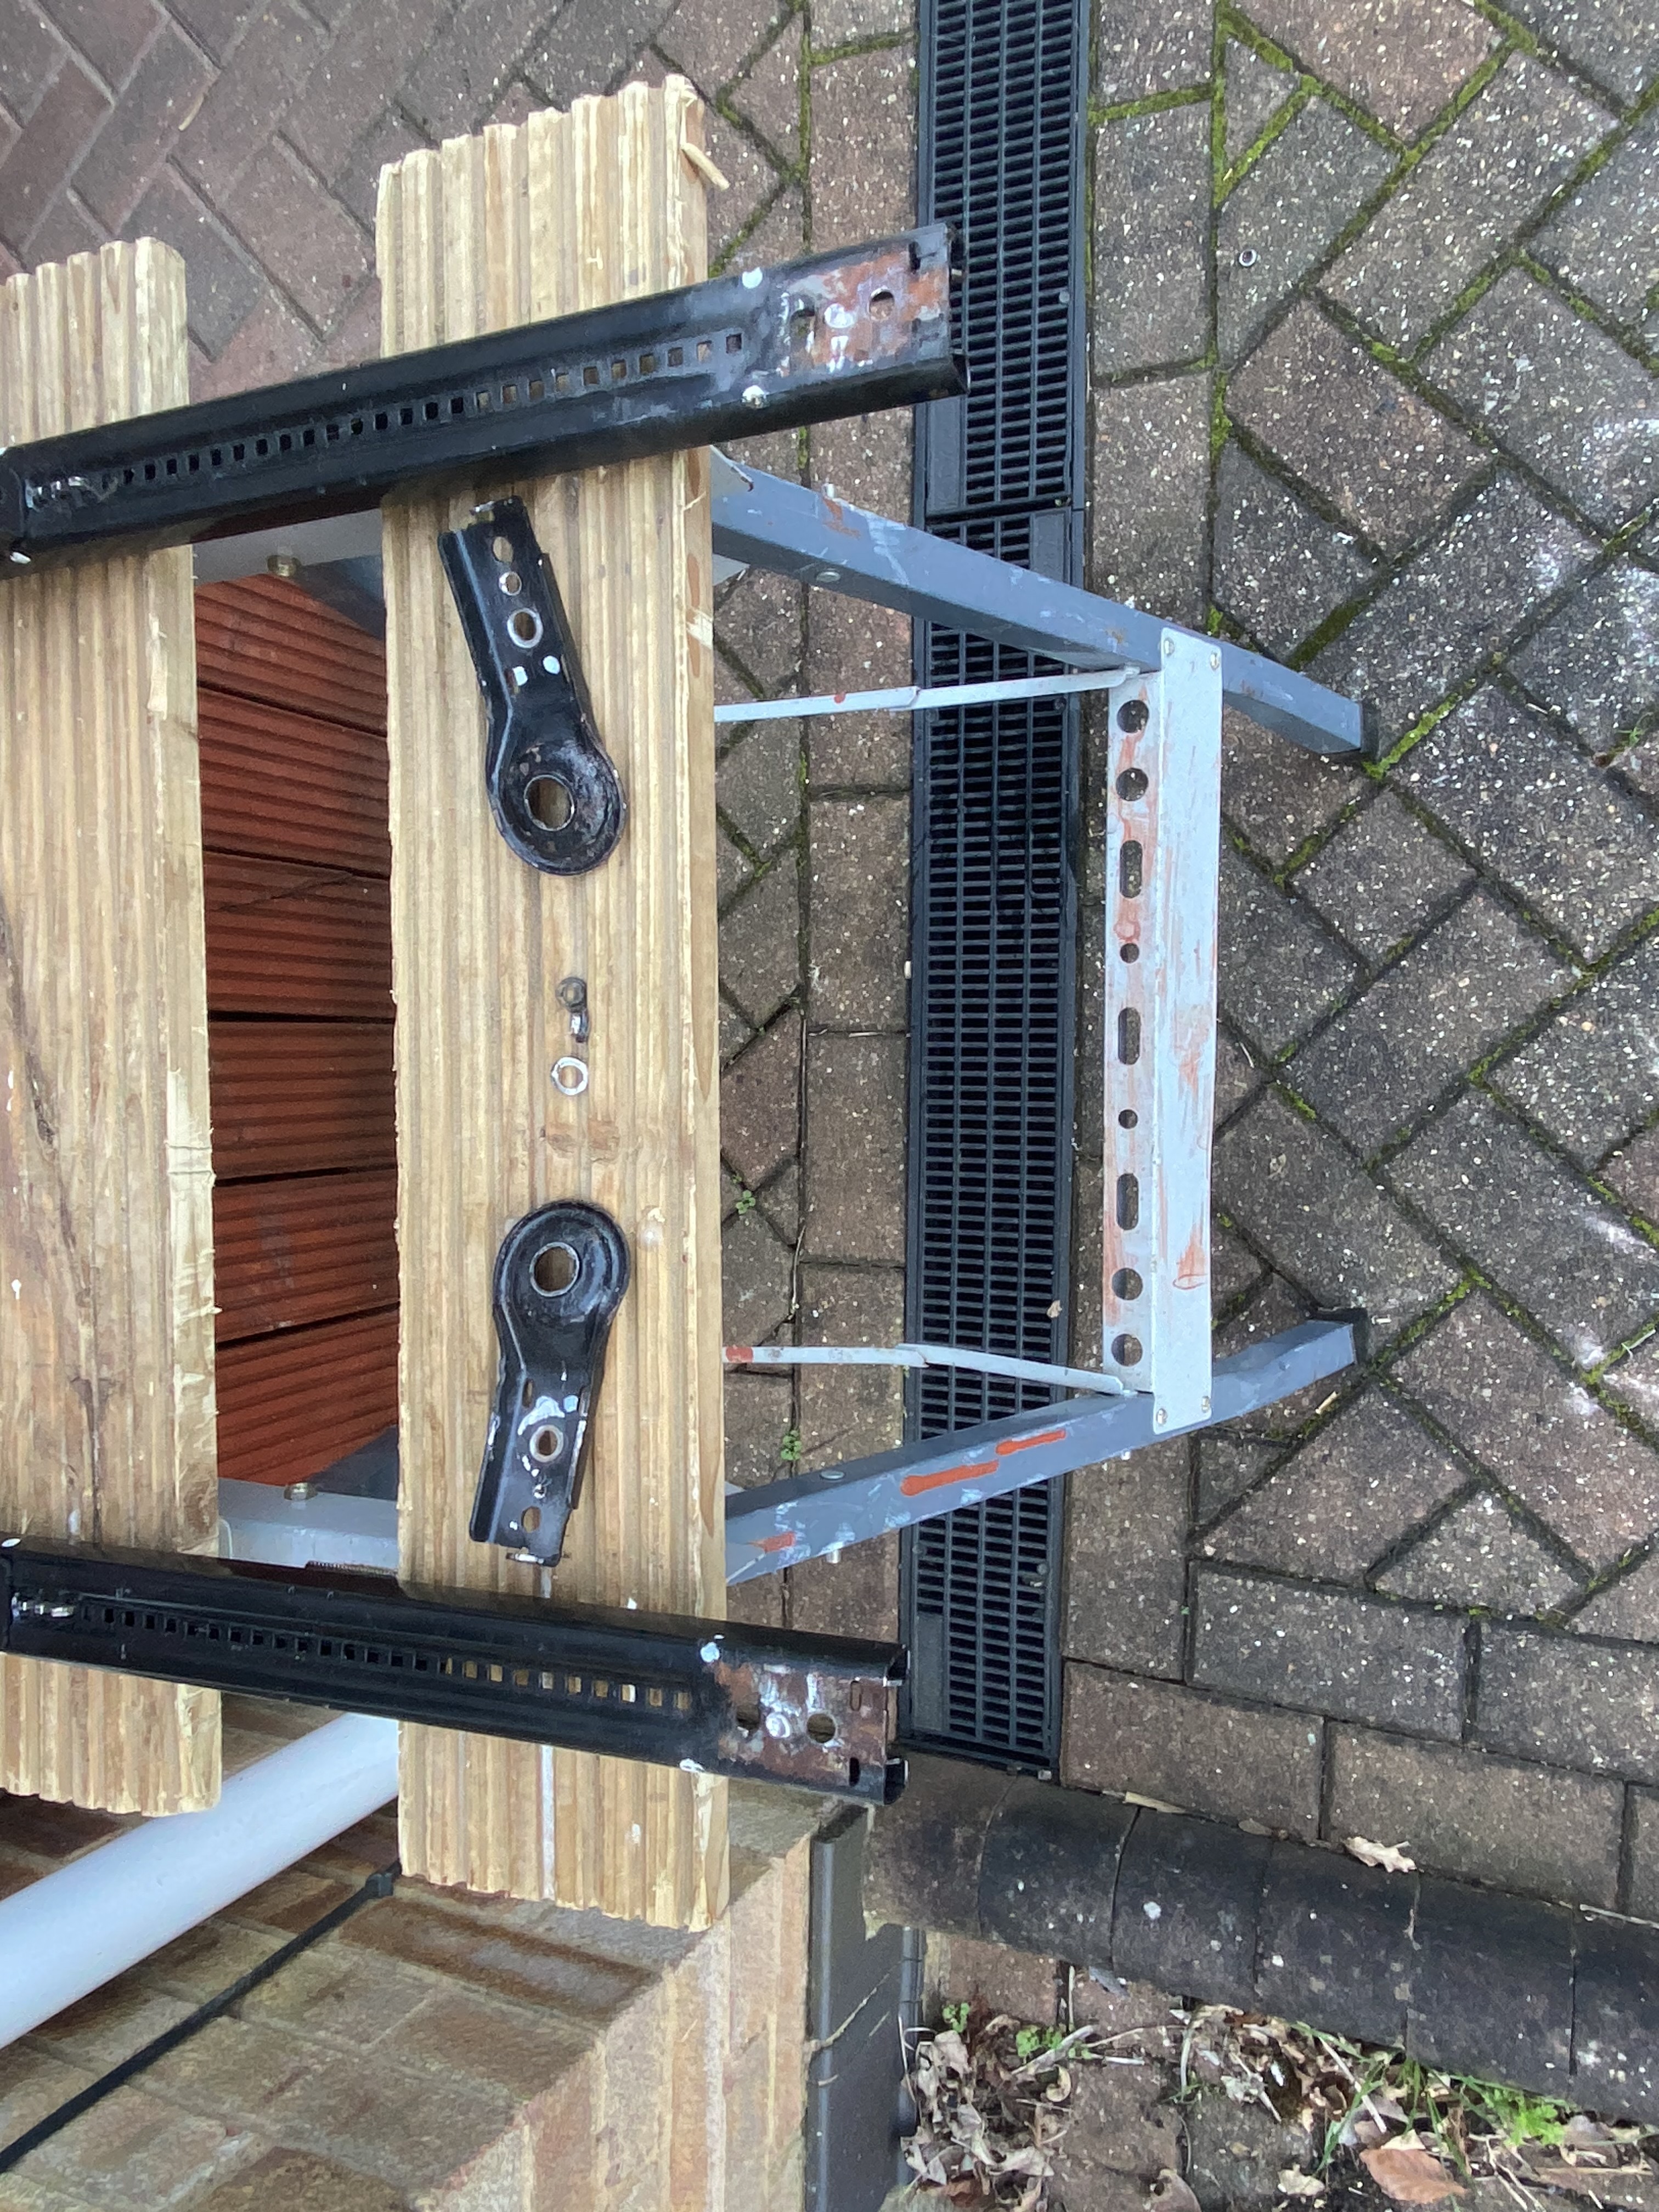
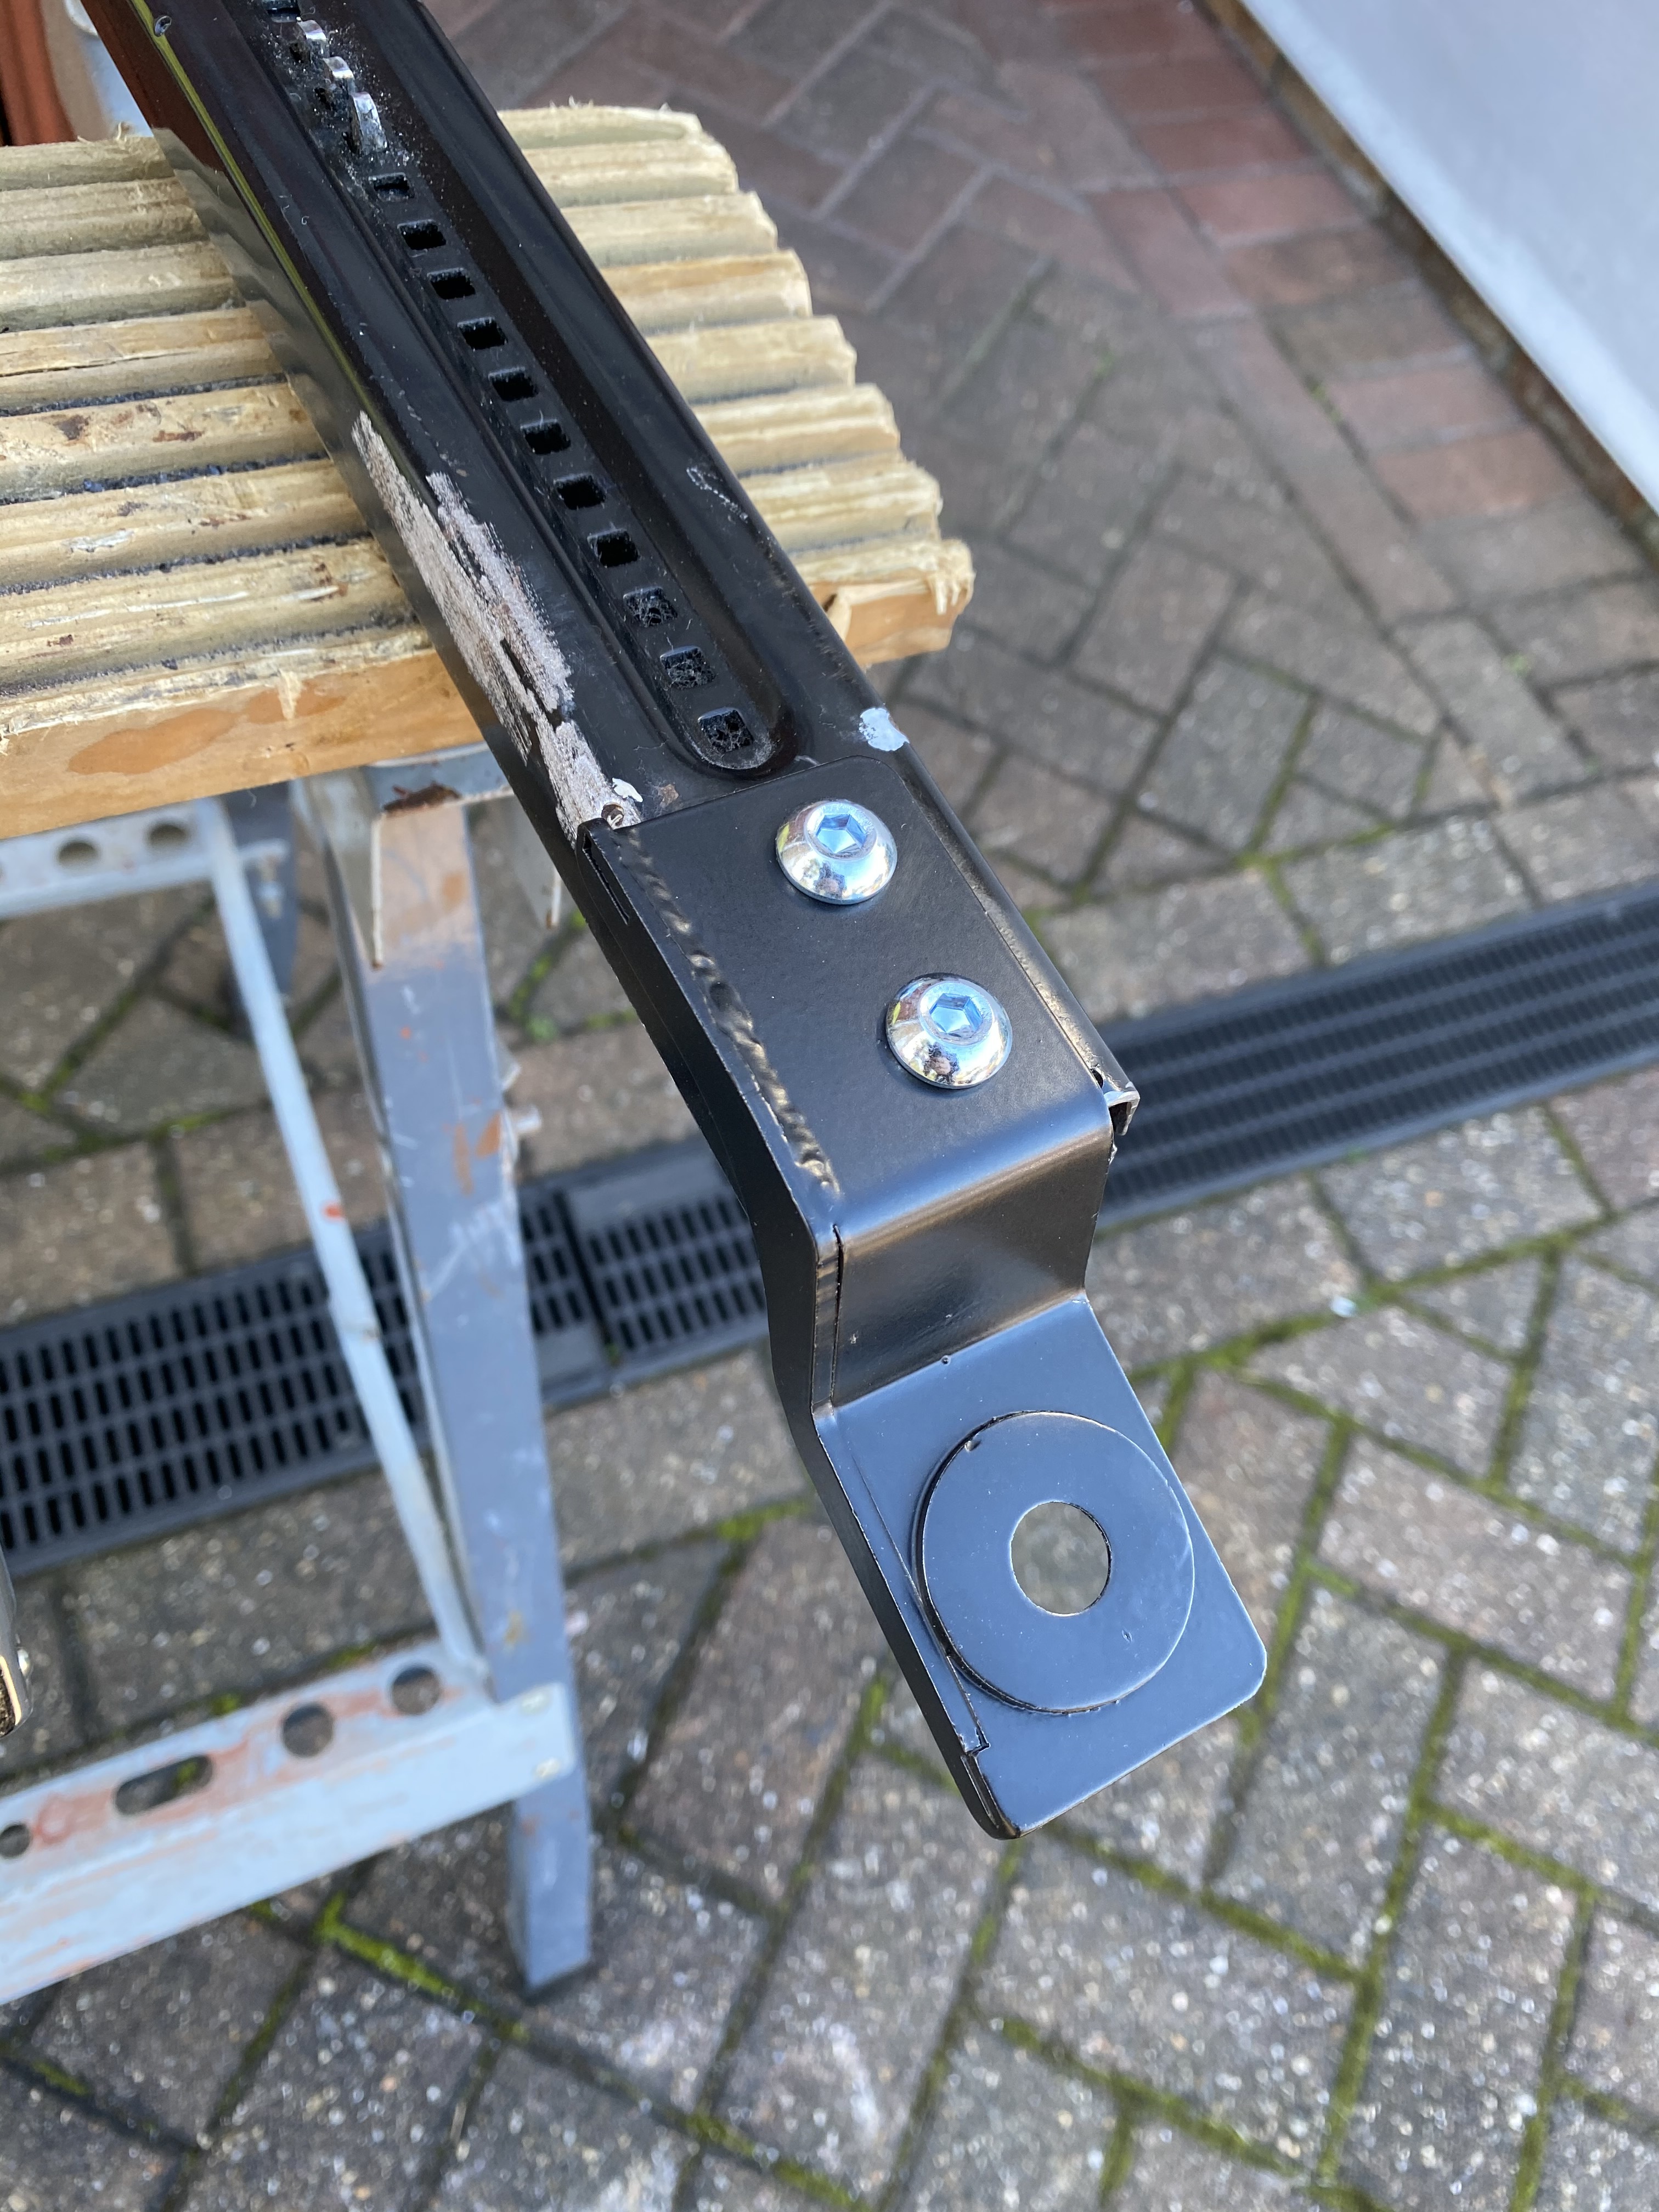
Now we need to temporarily assemble the runners, so we can present it to the car and make some modifications to the locating holes for the pins. Attach the new end brackets loosely.
The strengthening web goes on the inside of the rails, so they face each other.
Use the nuts and bolts provided to attach the brackets to the outer sliders. The bolt goes in from the bottom, so the nuts are encapsulated inside the rails. 5mm Allen key & 13mm socket required here.
-
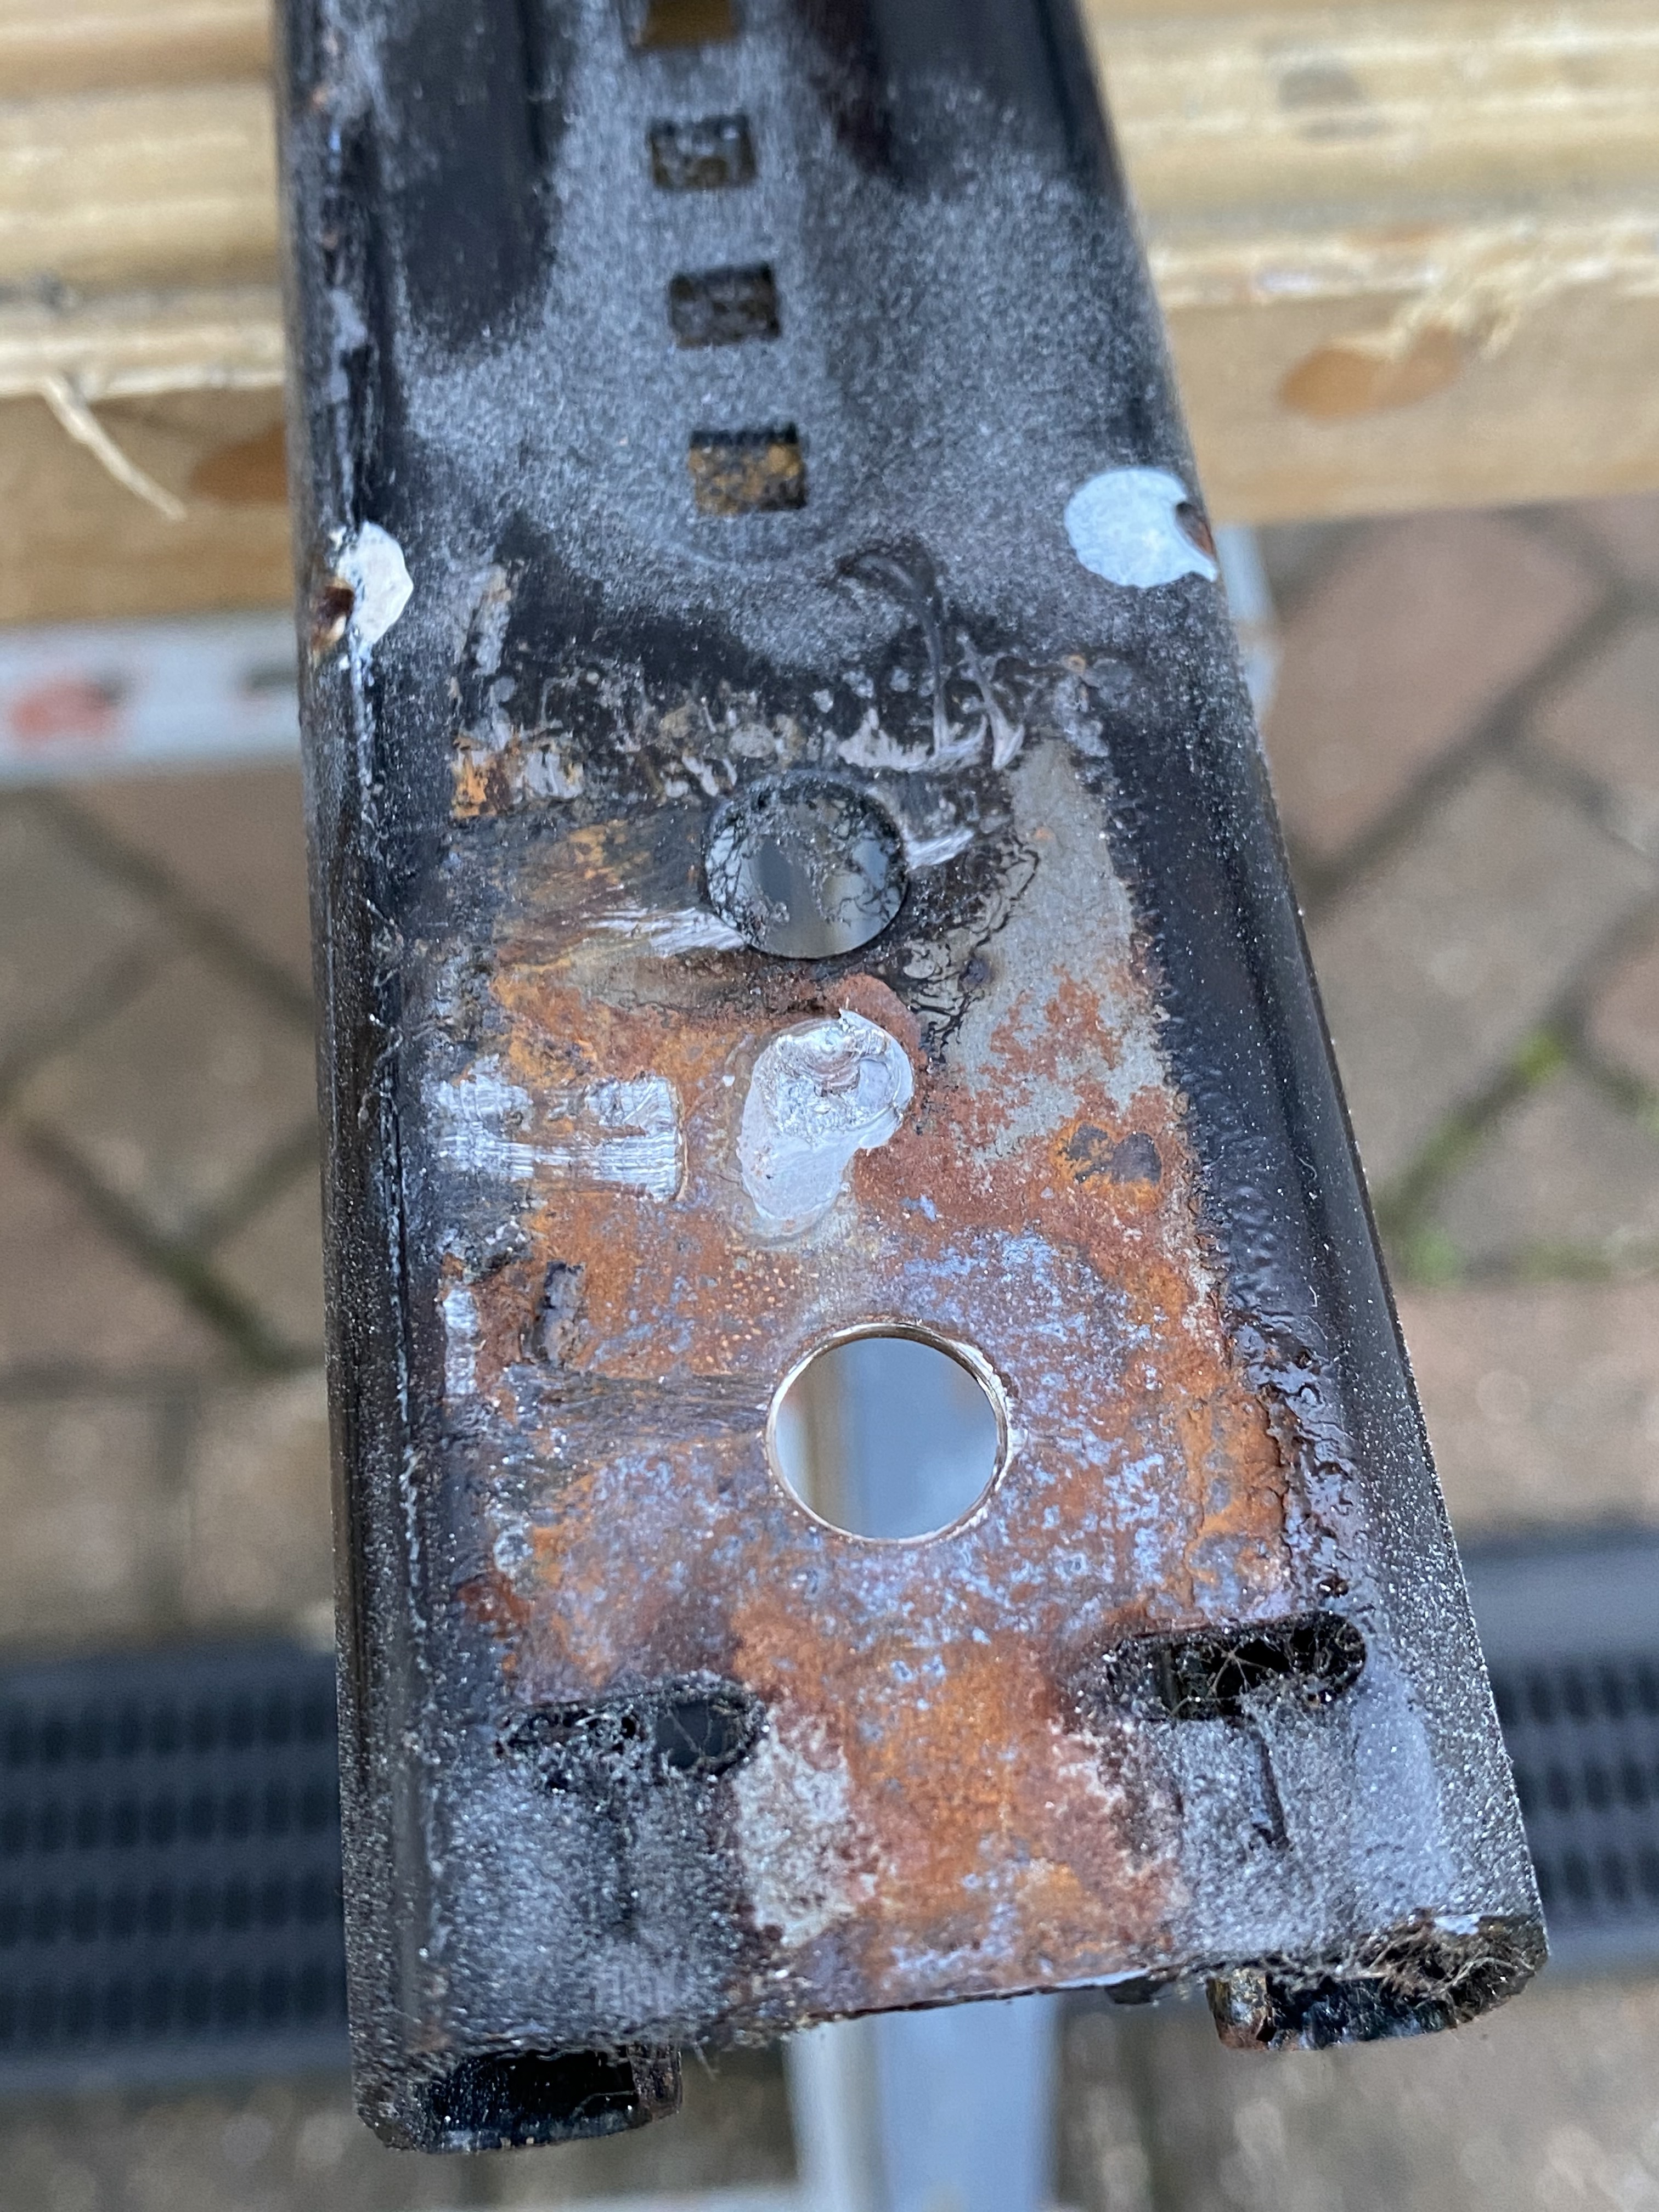
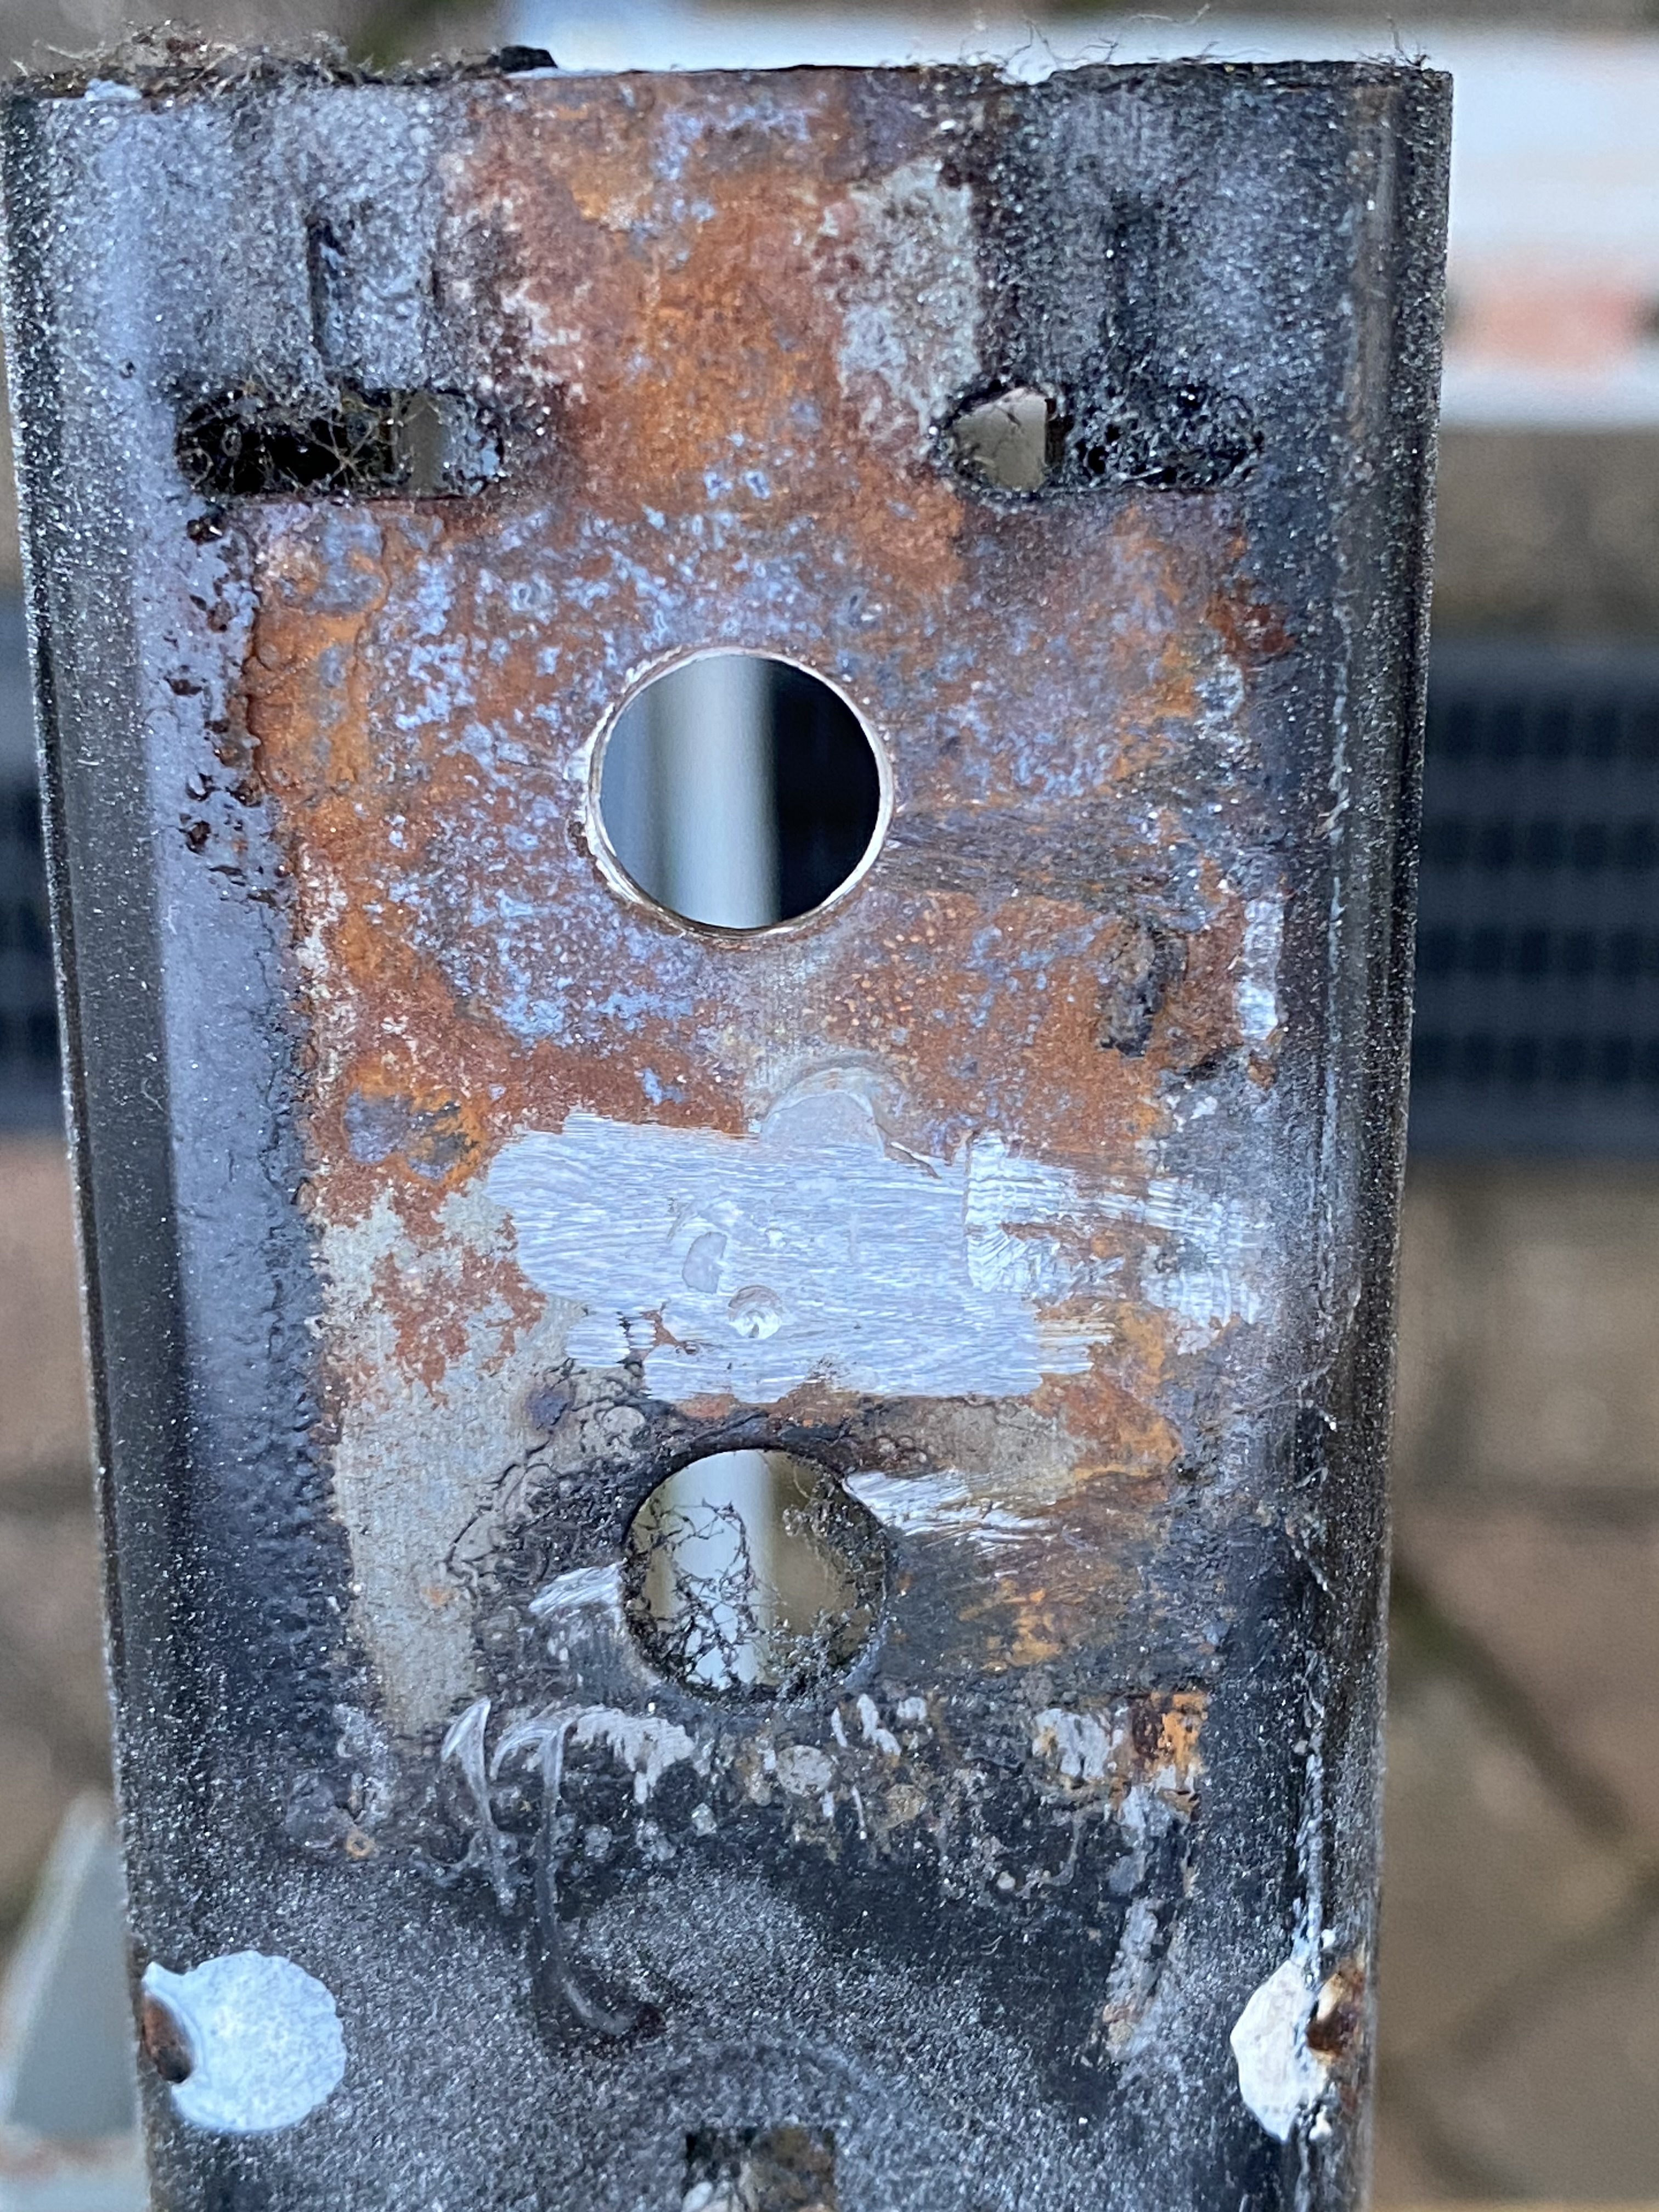
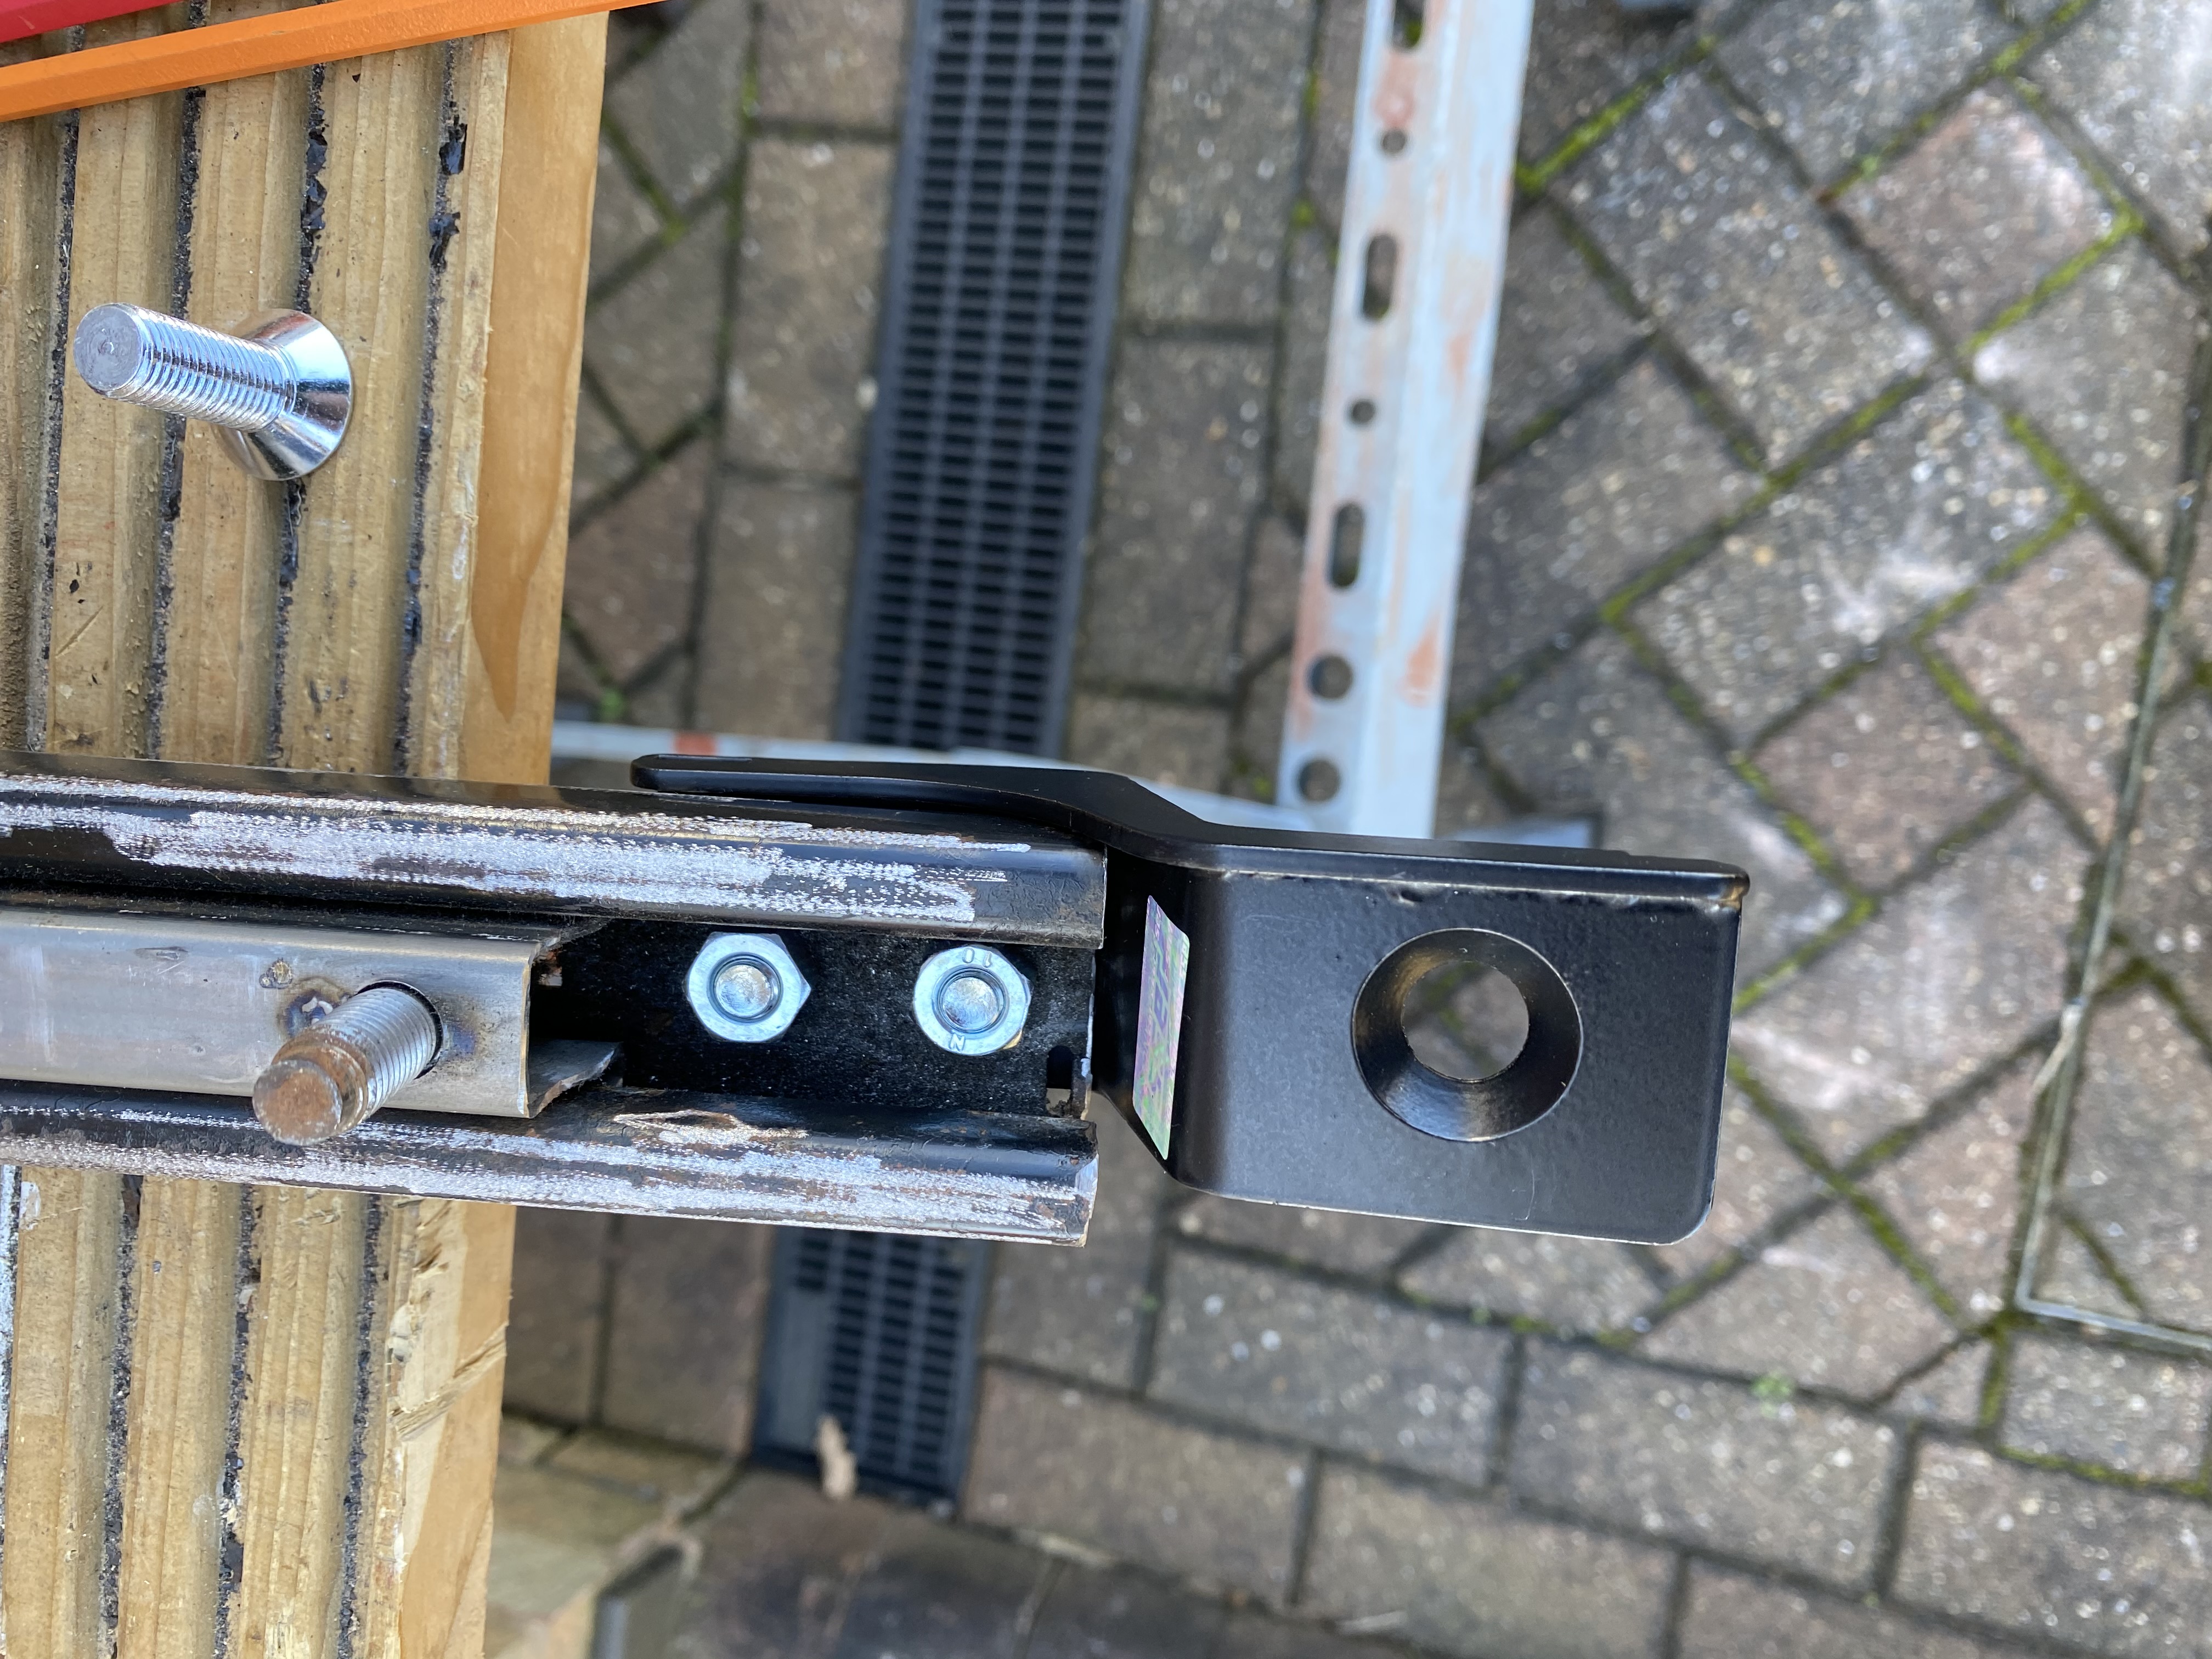
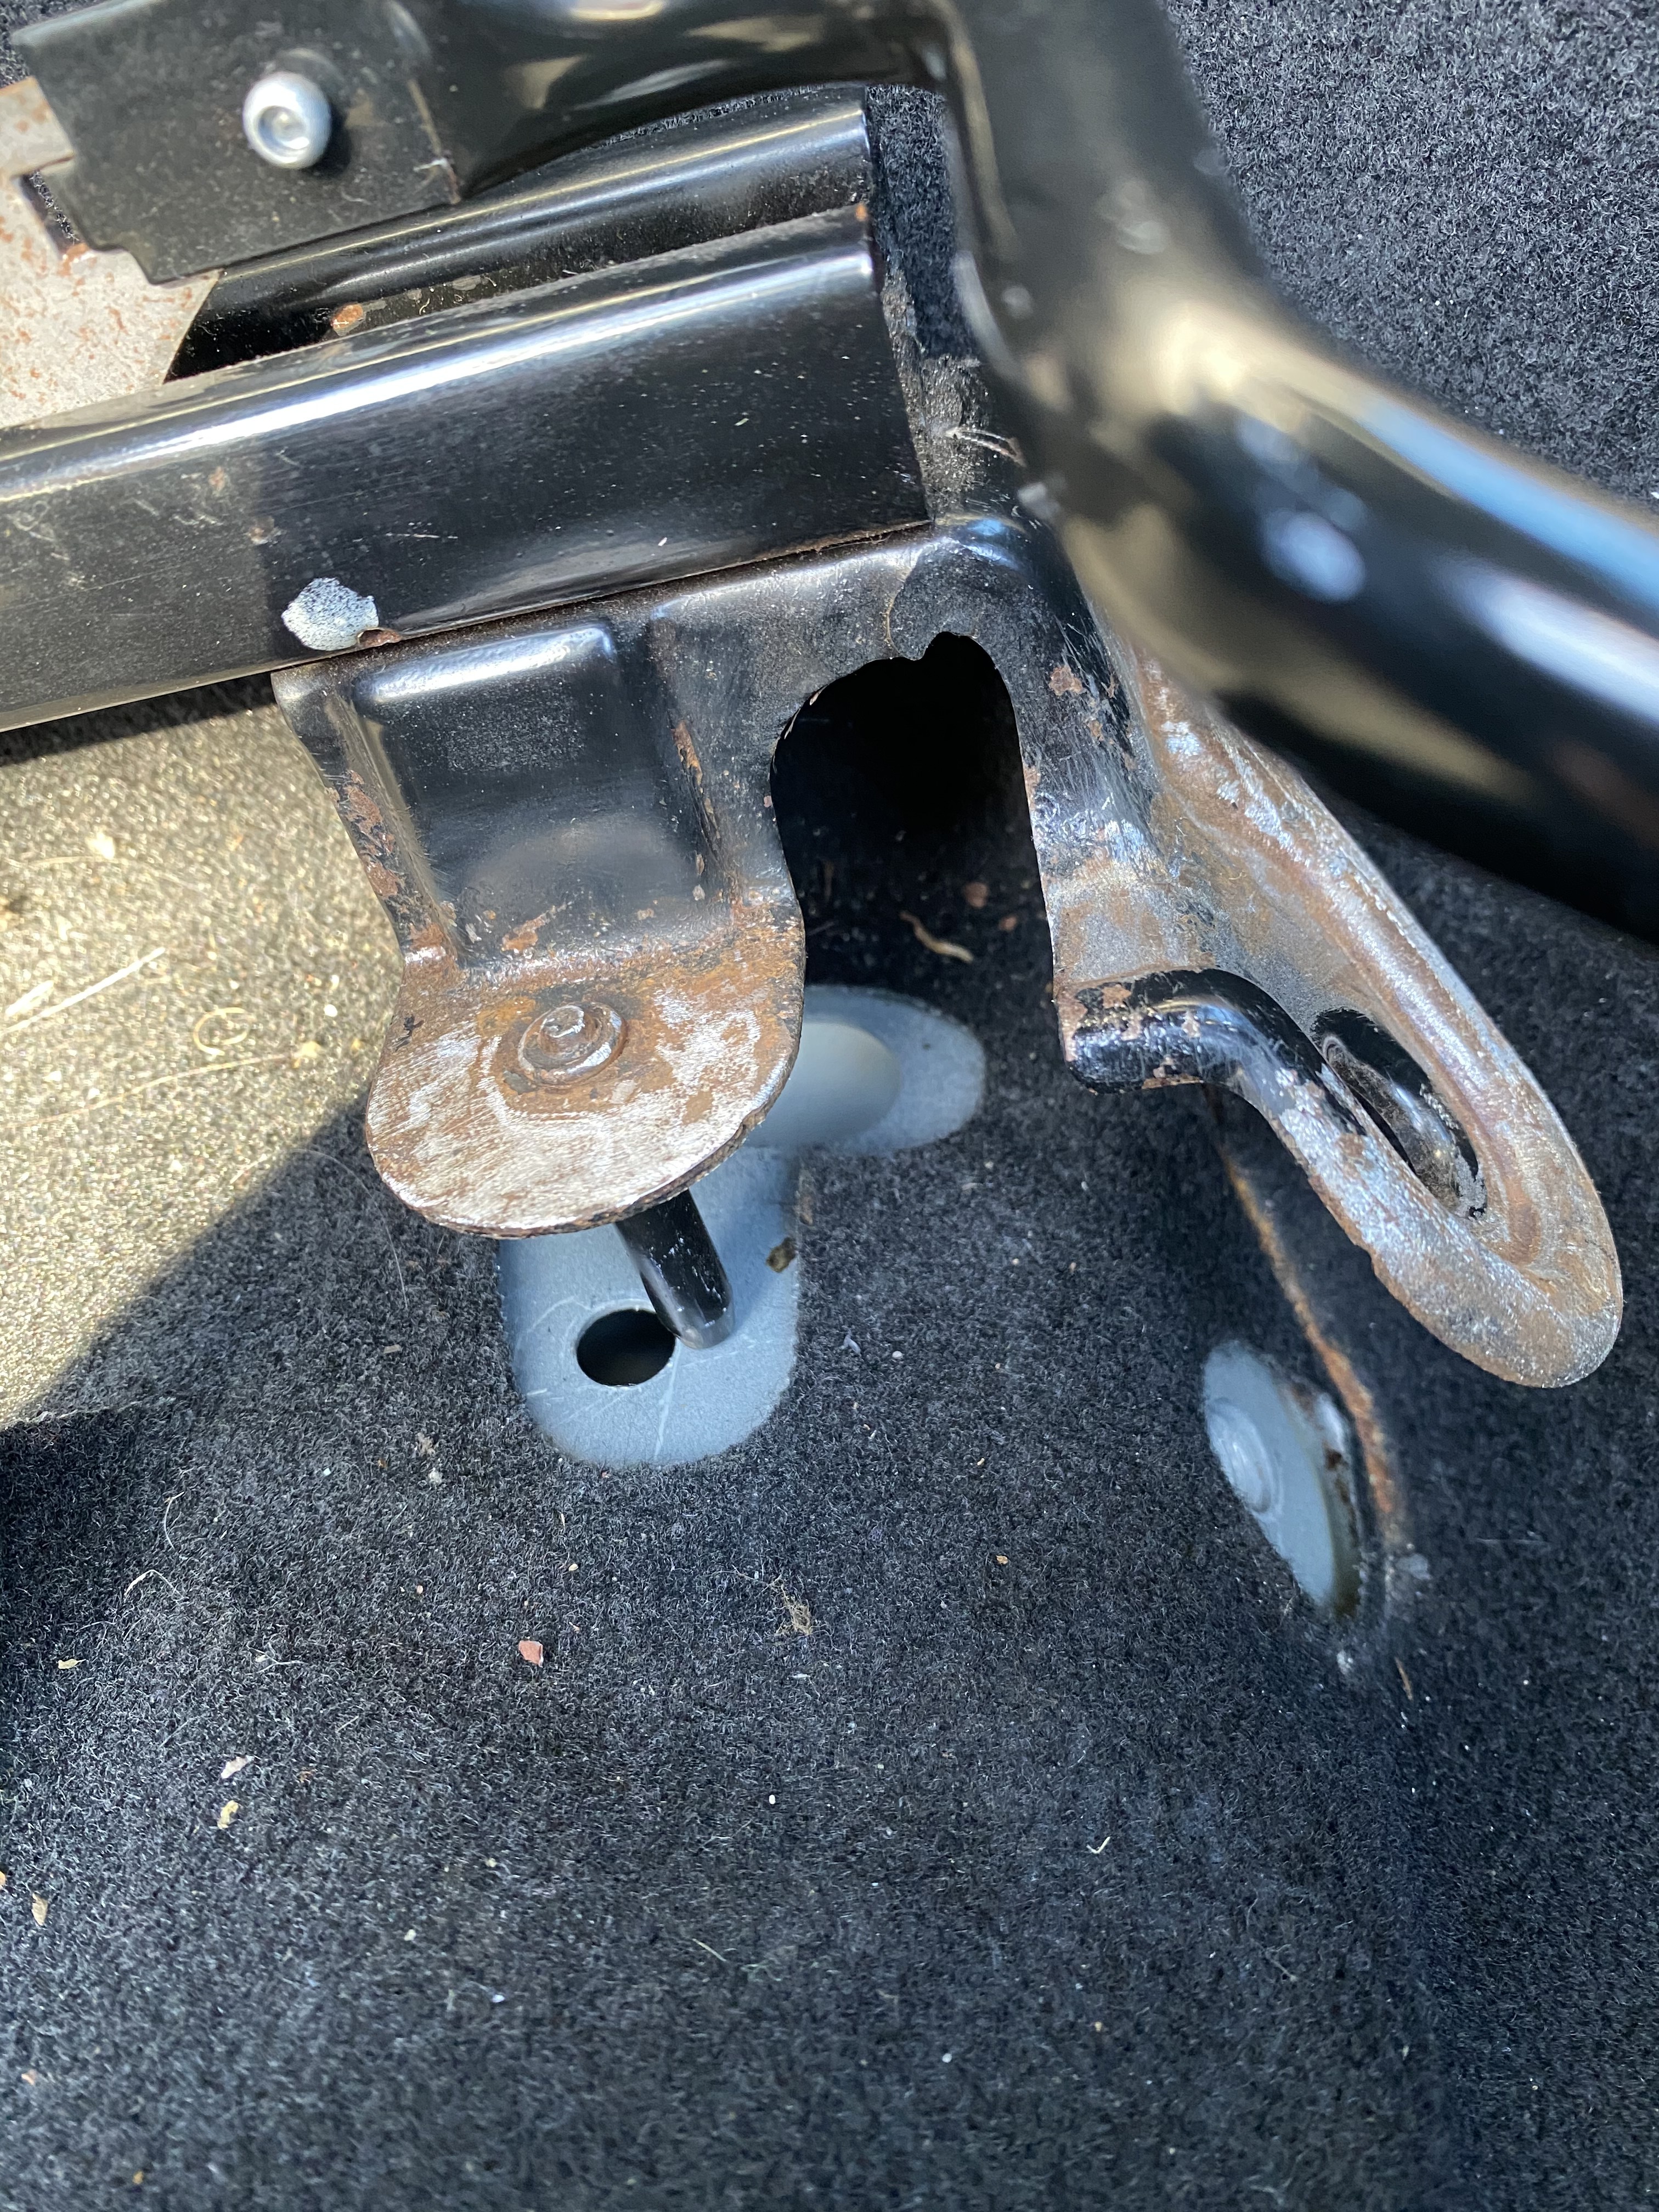
Put the rail assembly back in the car. Loosely screw in the new rear Allen bolts (6mm), just enough to bottom out the bracket at the back. You’ll then see how much you need to alter the locator holes. On mine, I only need to lengthen the one on the inside. About 3mm to grind off/file off.
-
Grind/File off the excess to extend the locator hole. You need to extend the hole towards the front of the car. Then represent the rails and ensure that you can reach all the bolt holes and firmly attach the rails to the chassis. Attach the front brackets first, so you can get the washers underneath easier, but only loosely. Then put the rear Allen bolts in.
Make sure the rails can still slide.
Assuming it all fits nicely, take it all out again, and you’re done with the destruction.
The 2 large washers will go underneath the front bracket to provide padding to fill the spacing and allow proper contact, as the front bracket is now a couple of mm further forwards.
The rails fitted!
-
This is a perfect time to do a bit of restoration if your rails need it. Get the wire brush on it and clear off any loose paint or rust. Clean it with isopropyl alcohol (or your own preferred cleaner), and apply rust converter and/or primer where needed.
Leave this to cure as required, then repaint with black Hammerite (or whatever brand you prefer).
Do the same to the chassis modification while restoring the rails, so you can repaint both parts at the same time. This is also a perfect time to apply some more grease to the rails if needed, before assembling everything back together again. -
Bolt the rails back onto the seat. I suspect that you should probably replace the nuts. The ones taken off are quite soft, and the gripping teeth on the contact surfaces look quite flattened. Apply thread lock before fitting. Once the rails are attached, we are ready to put the seat back in the car.
-
As before, fit the 2 front brackets first, using 2 of the large washers between the chassis and the bracket. Apply thread lock at this point. Get the bolts into the threads, and in a few turns. Slide the seat forwards to get access to the rear brackets.
Use the supplied tapered Allen bolts to attach the read of the seat, to allow the seat to slide over the top of the bolt. Apply thread lock and screw them all the way down. Don’t tighten them fully. Slide the seat back again, and now fully tighten the front bolts. Then fully tighten the rear bolts. Ensure that the seat continues to slide smoothly while doing this.
I had to get my Dremel out and slightly enlarge the hole on the inside Jass Performance bracket, as I couldn’t get the thing to align properly once the seat was attached to the rails and I was doing the final installation.
Also, take care not to let the ballbearing races come out of the sliders when you are moving them backwards and forwards. There’s a bit of a design issue with the Jass Performance brackets IMO. They should be a bit wider to completely cover the ends of the rails to stop this from happening! -
Reconnect the electrical connector under the seat, and finally the battery.


High-resolution images available here:
https://drive.google.com/drive/folders/1x3VKV50lqayNPvHPaJnlummWEPdHtXwT?usp=sharing