Hi,
My Merlot was in a similar condition, its taken about 5 years to get it sorted, and just a few final jobs to be done.
If you can afford to take your time, learn and do whatever you can, you will be rewarded with a fantastic little sportscar! Bear in mind you will have ups and downs along the way, and as has already been pointed out, you will probably never get your money back in the overall value of the car!
One thing i have learned, Mazda dealer original parts arnt that pricey, and will fit, so for anything original i would go that route. There is ample and almost unlimited choice for upgrade/custom parts, shop around though!
Good luck, and keep another 5 on the road if you can!
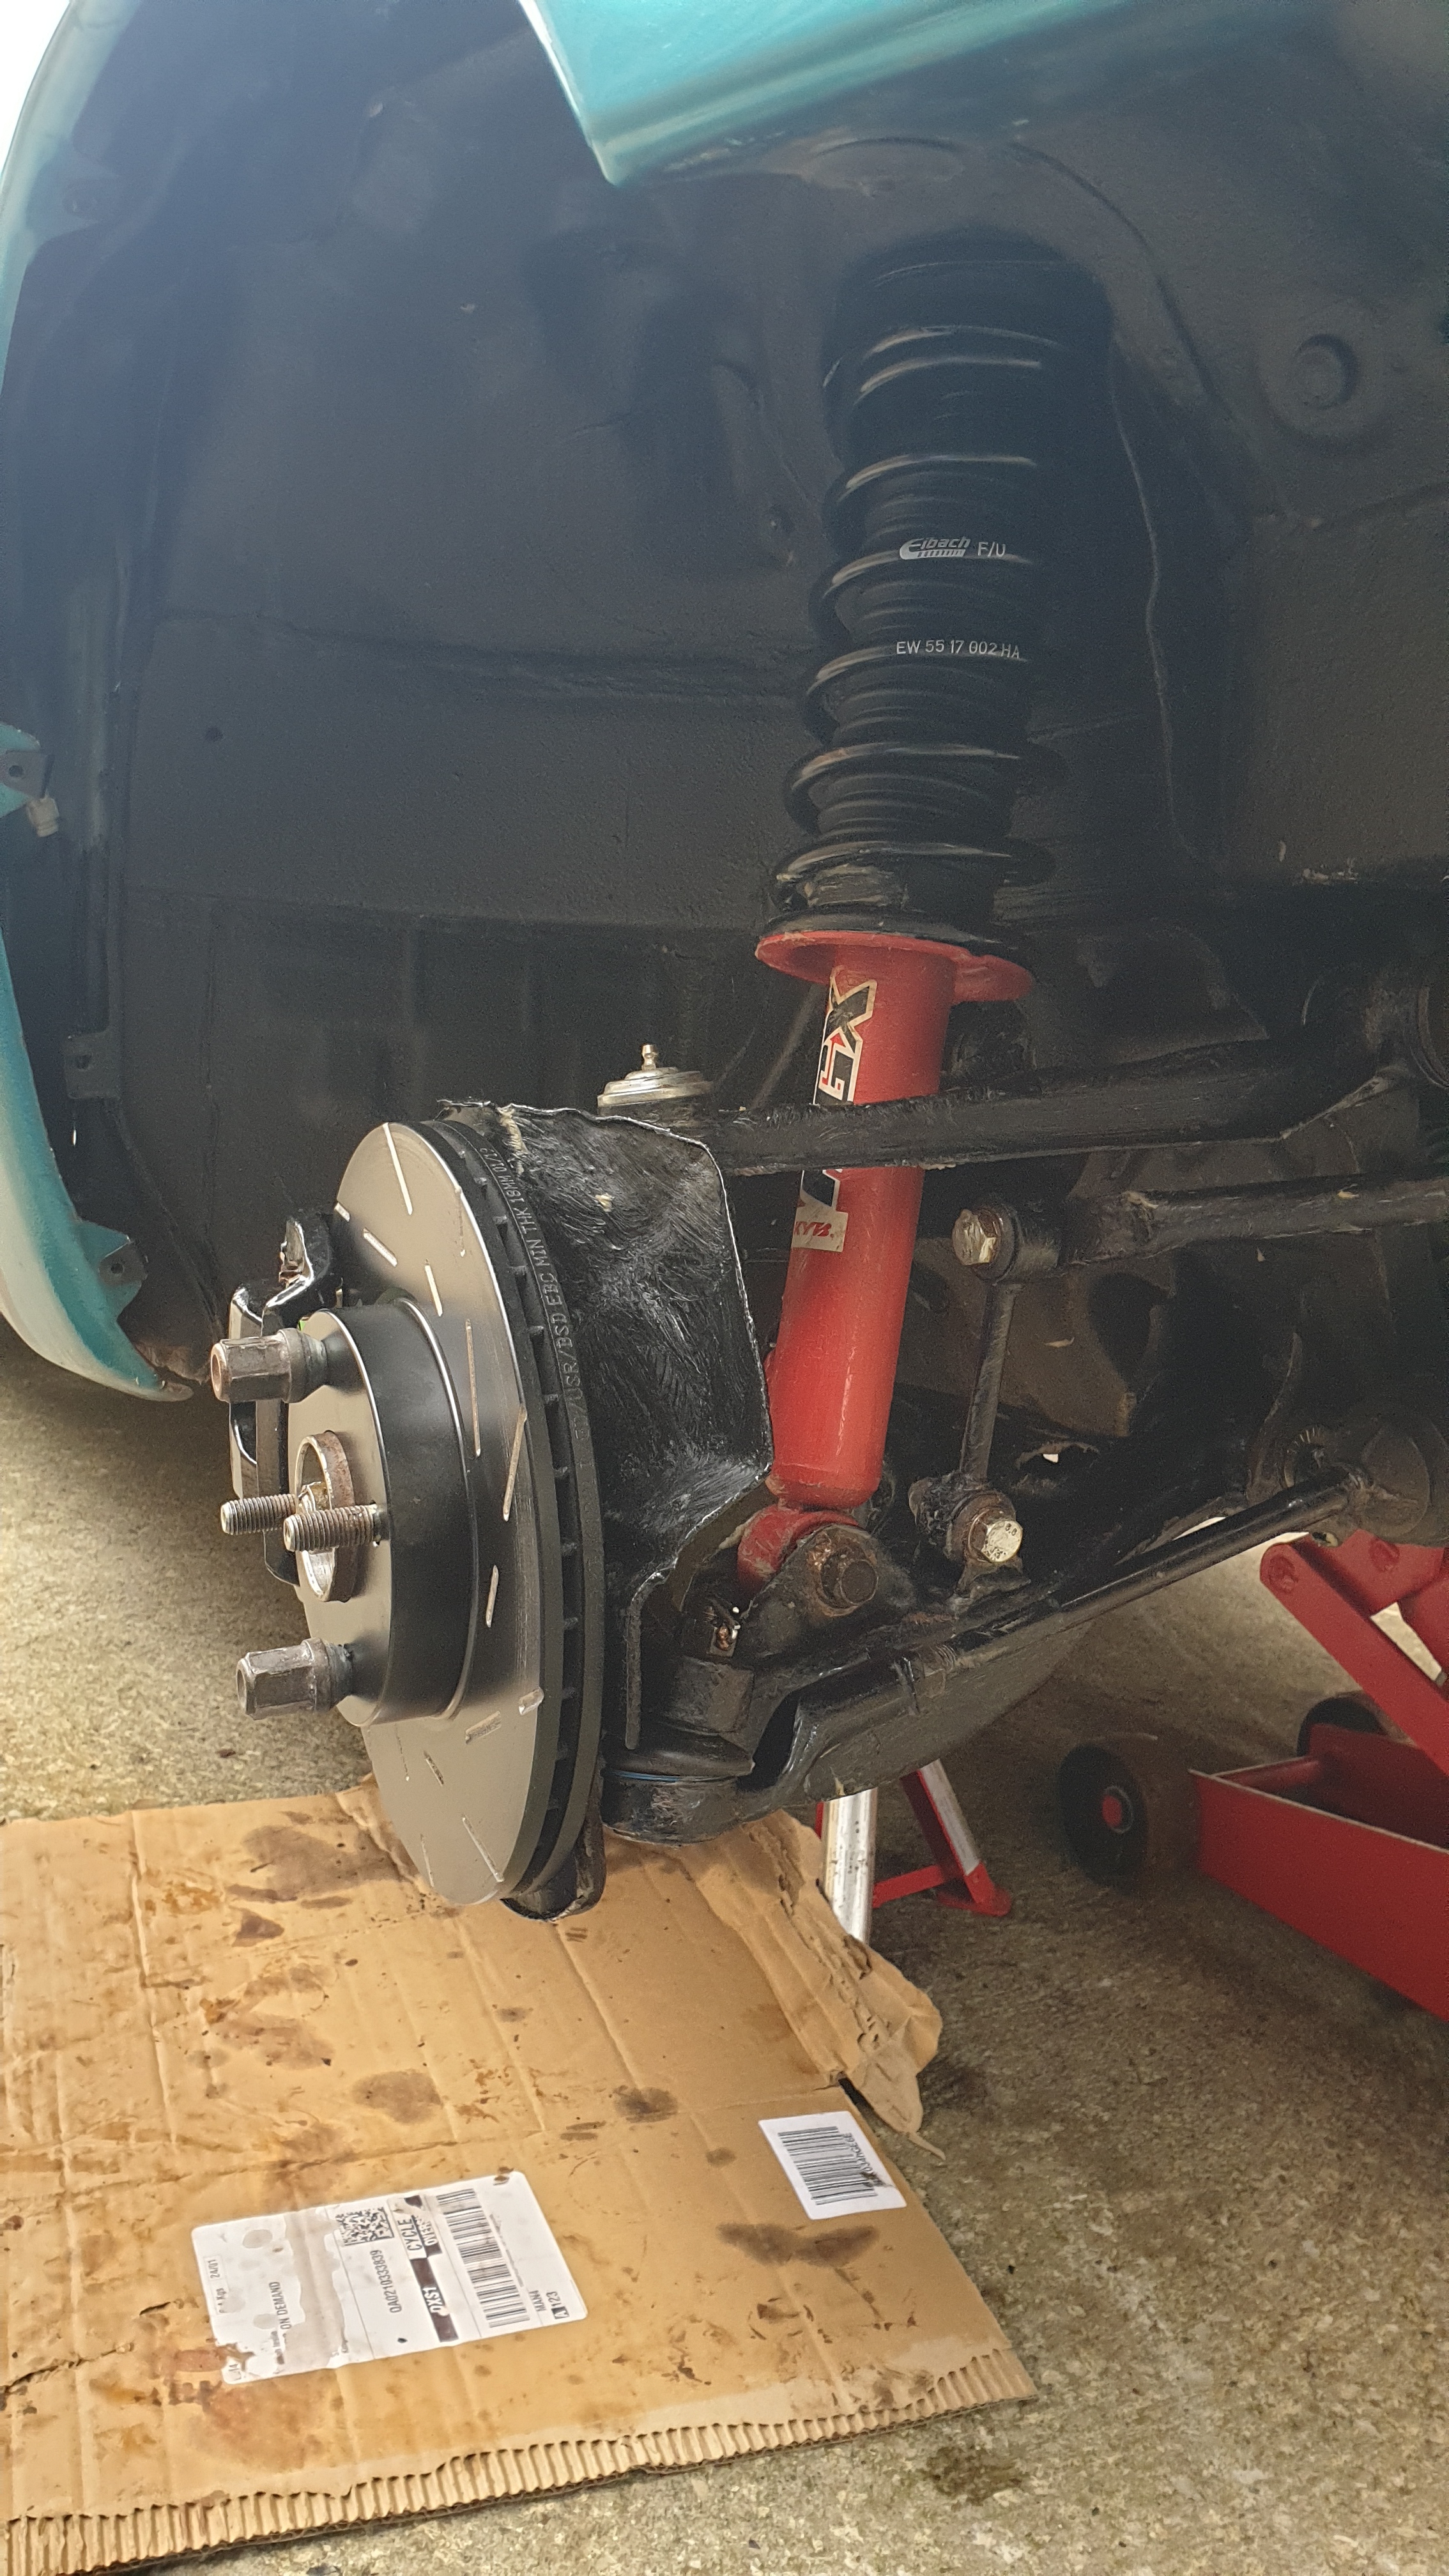
Thanks for the advice. I may replace the bushes with new standard ones. I have found that the suspension was on KYB adjustable shocks with the eibach ground control system fitted. I am trying to remove it so that I can fit it onto some new shocks, but no info yet. Don’t want to damage it as it costs $499!! Got one side all off and painted with POR15. Started on the other side. Just had a quote for welding work from MX5 city. Almost £3500. I may have a go at the work myself as the car isn’t worth that much. The labour was almost £2000. Whilst it is in bits I am going to replace the cam belt and cam and crank bearings as don’t think they have been done for over 7 yrs and it has an oil leak.
1 Like
Hi there, just reading your topic and i have just started to do the same as you although i,m fairly lucky in that i did the sill repairs a few years ago and waxoiled the life out of it back then. I have opted for MX5 parts IL bushings as i,m not convinced with the polyurethane ones having used them before in different cars. I,ve decided ( rightly or wrongly ) to do the car in 3 stages. Strip the rear suspension out first, do all the rebuilding, sort out any rust issues, rust proof, underseal and paint underside and refit the suspension. Then move on to the front and finally, the bodywork and respray. Good luck with the job, they really are one of the best handling cars about.
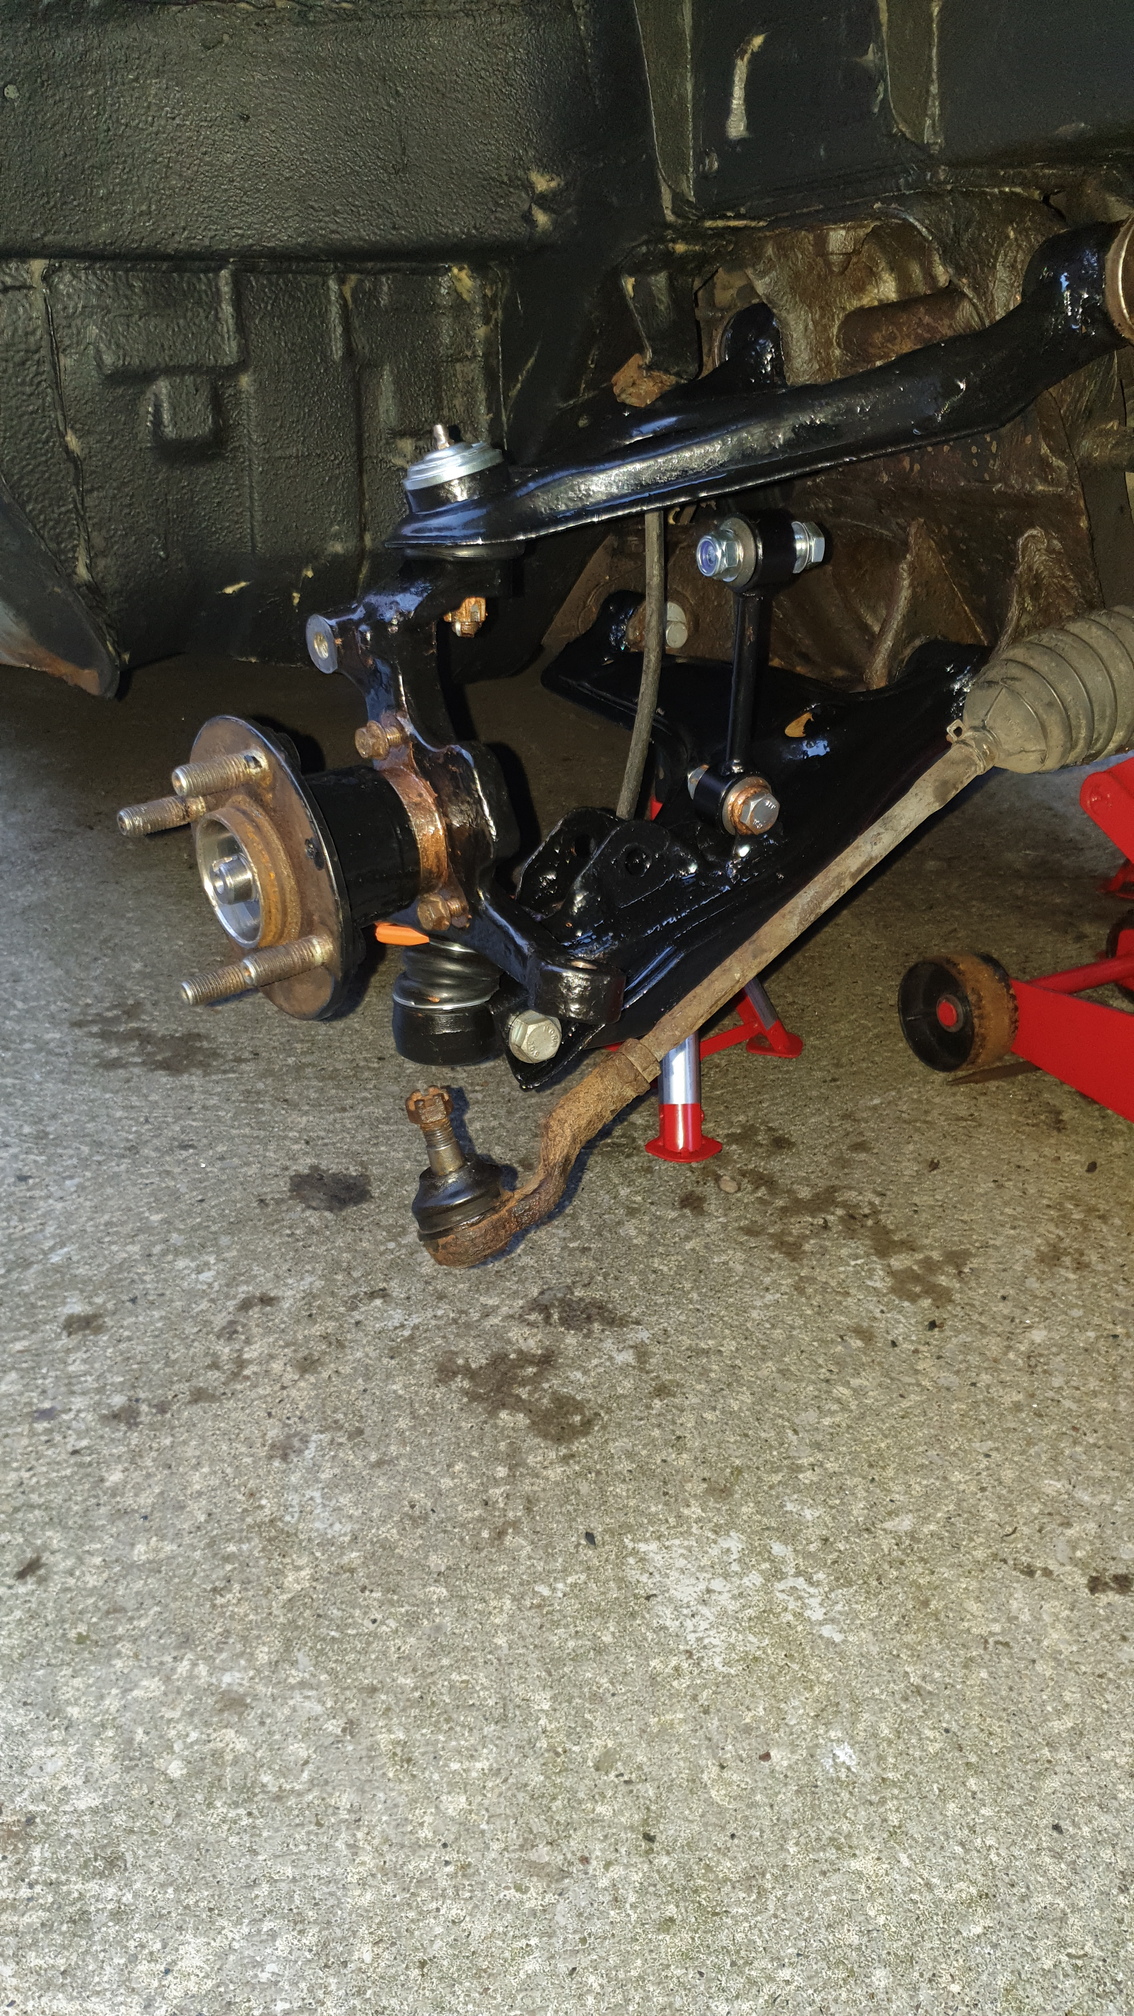
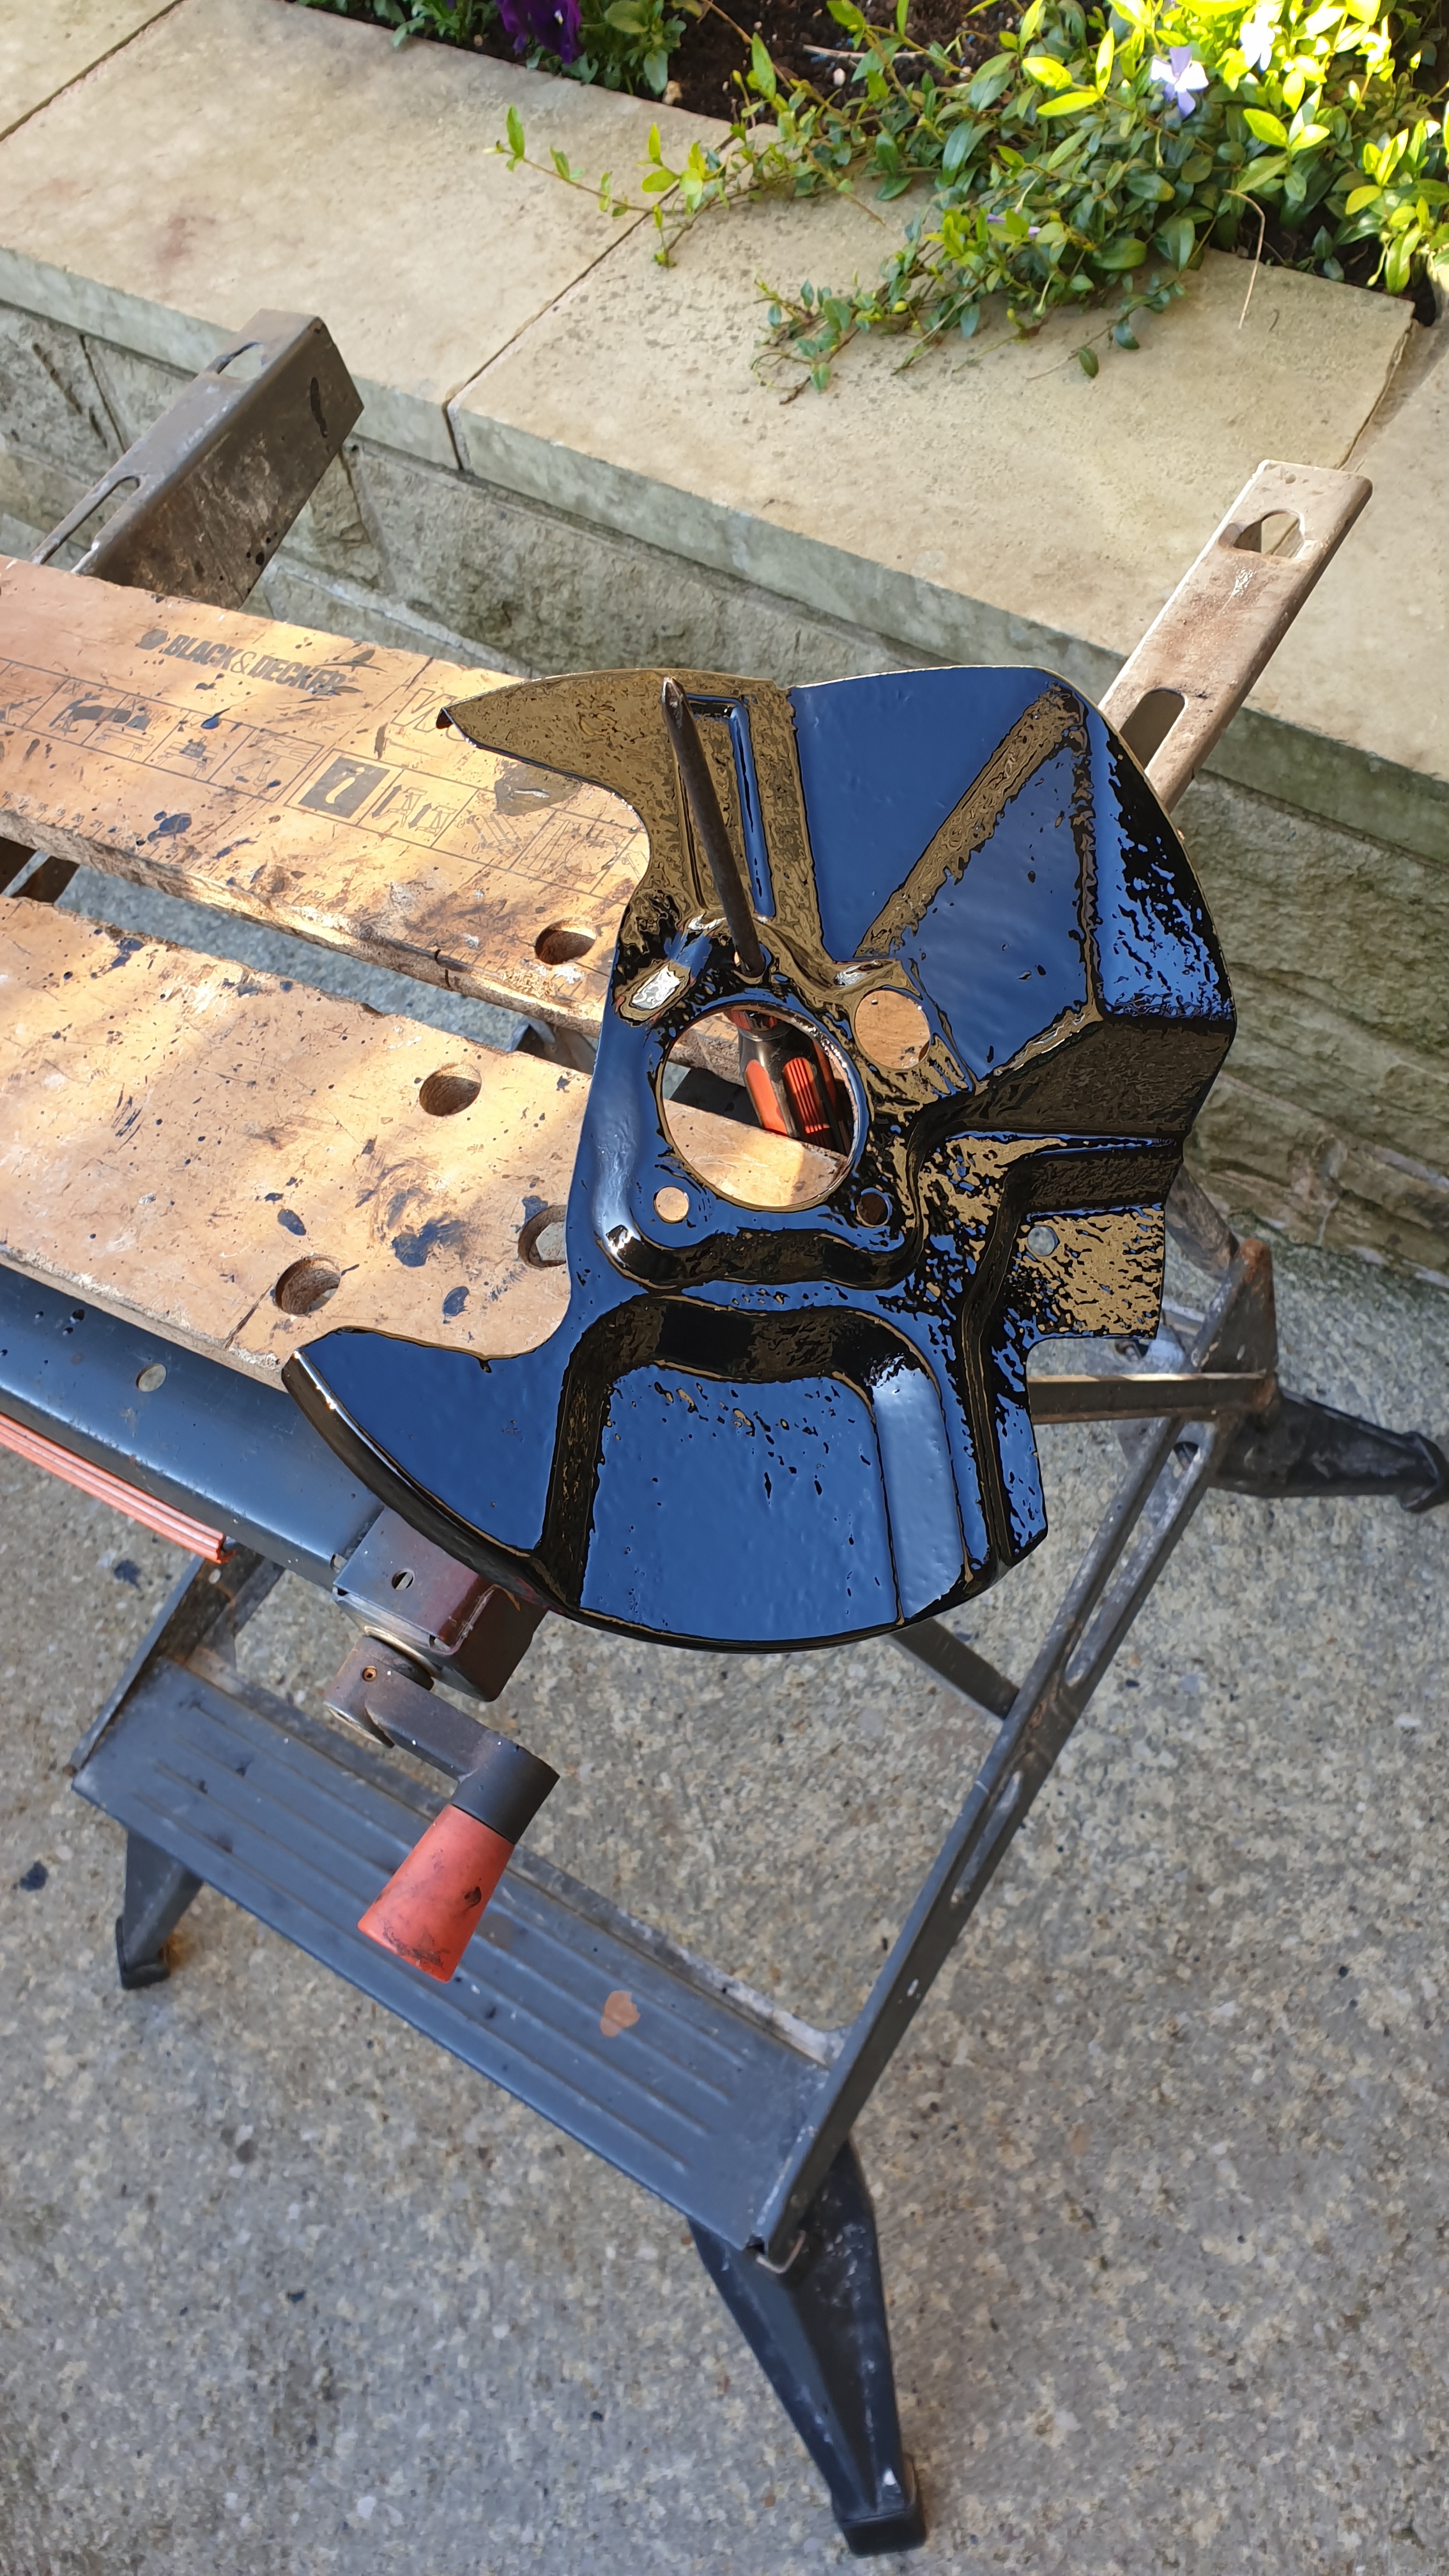
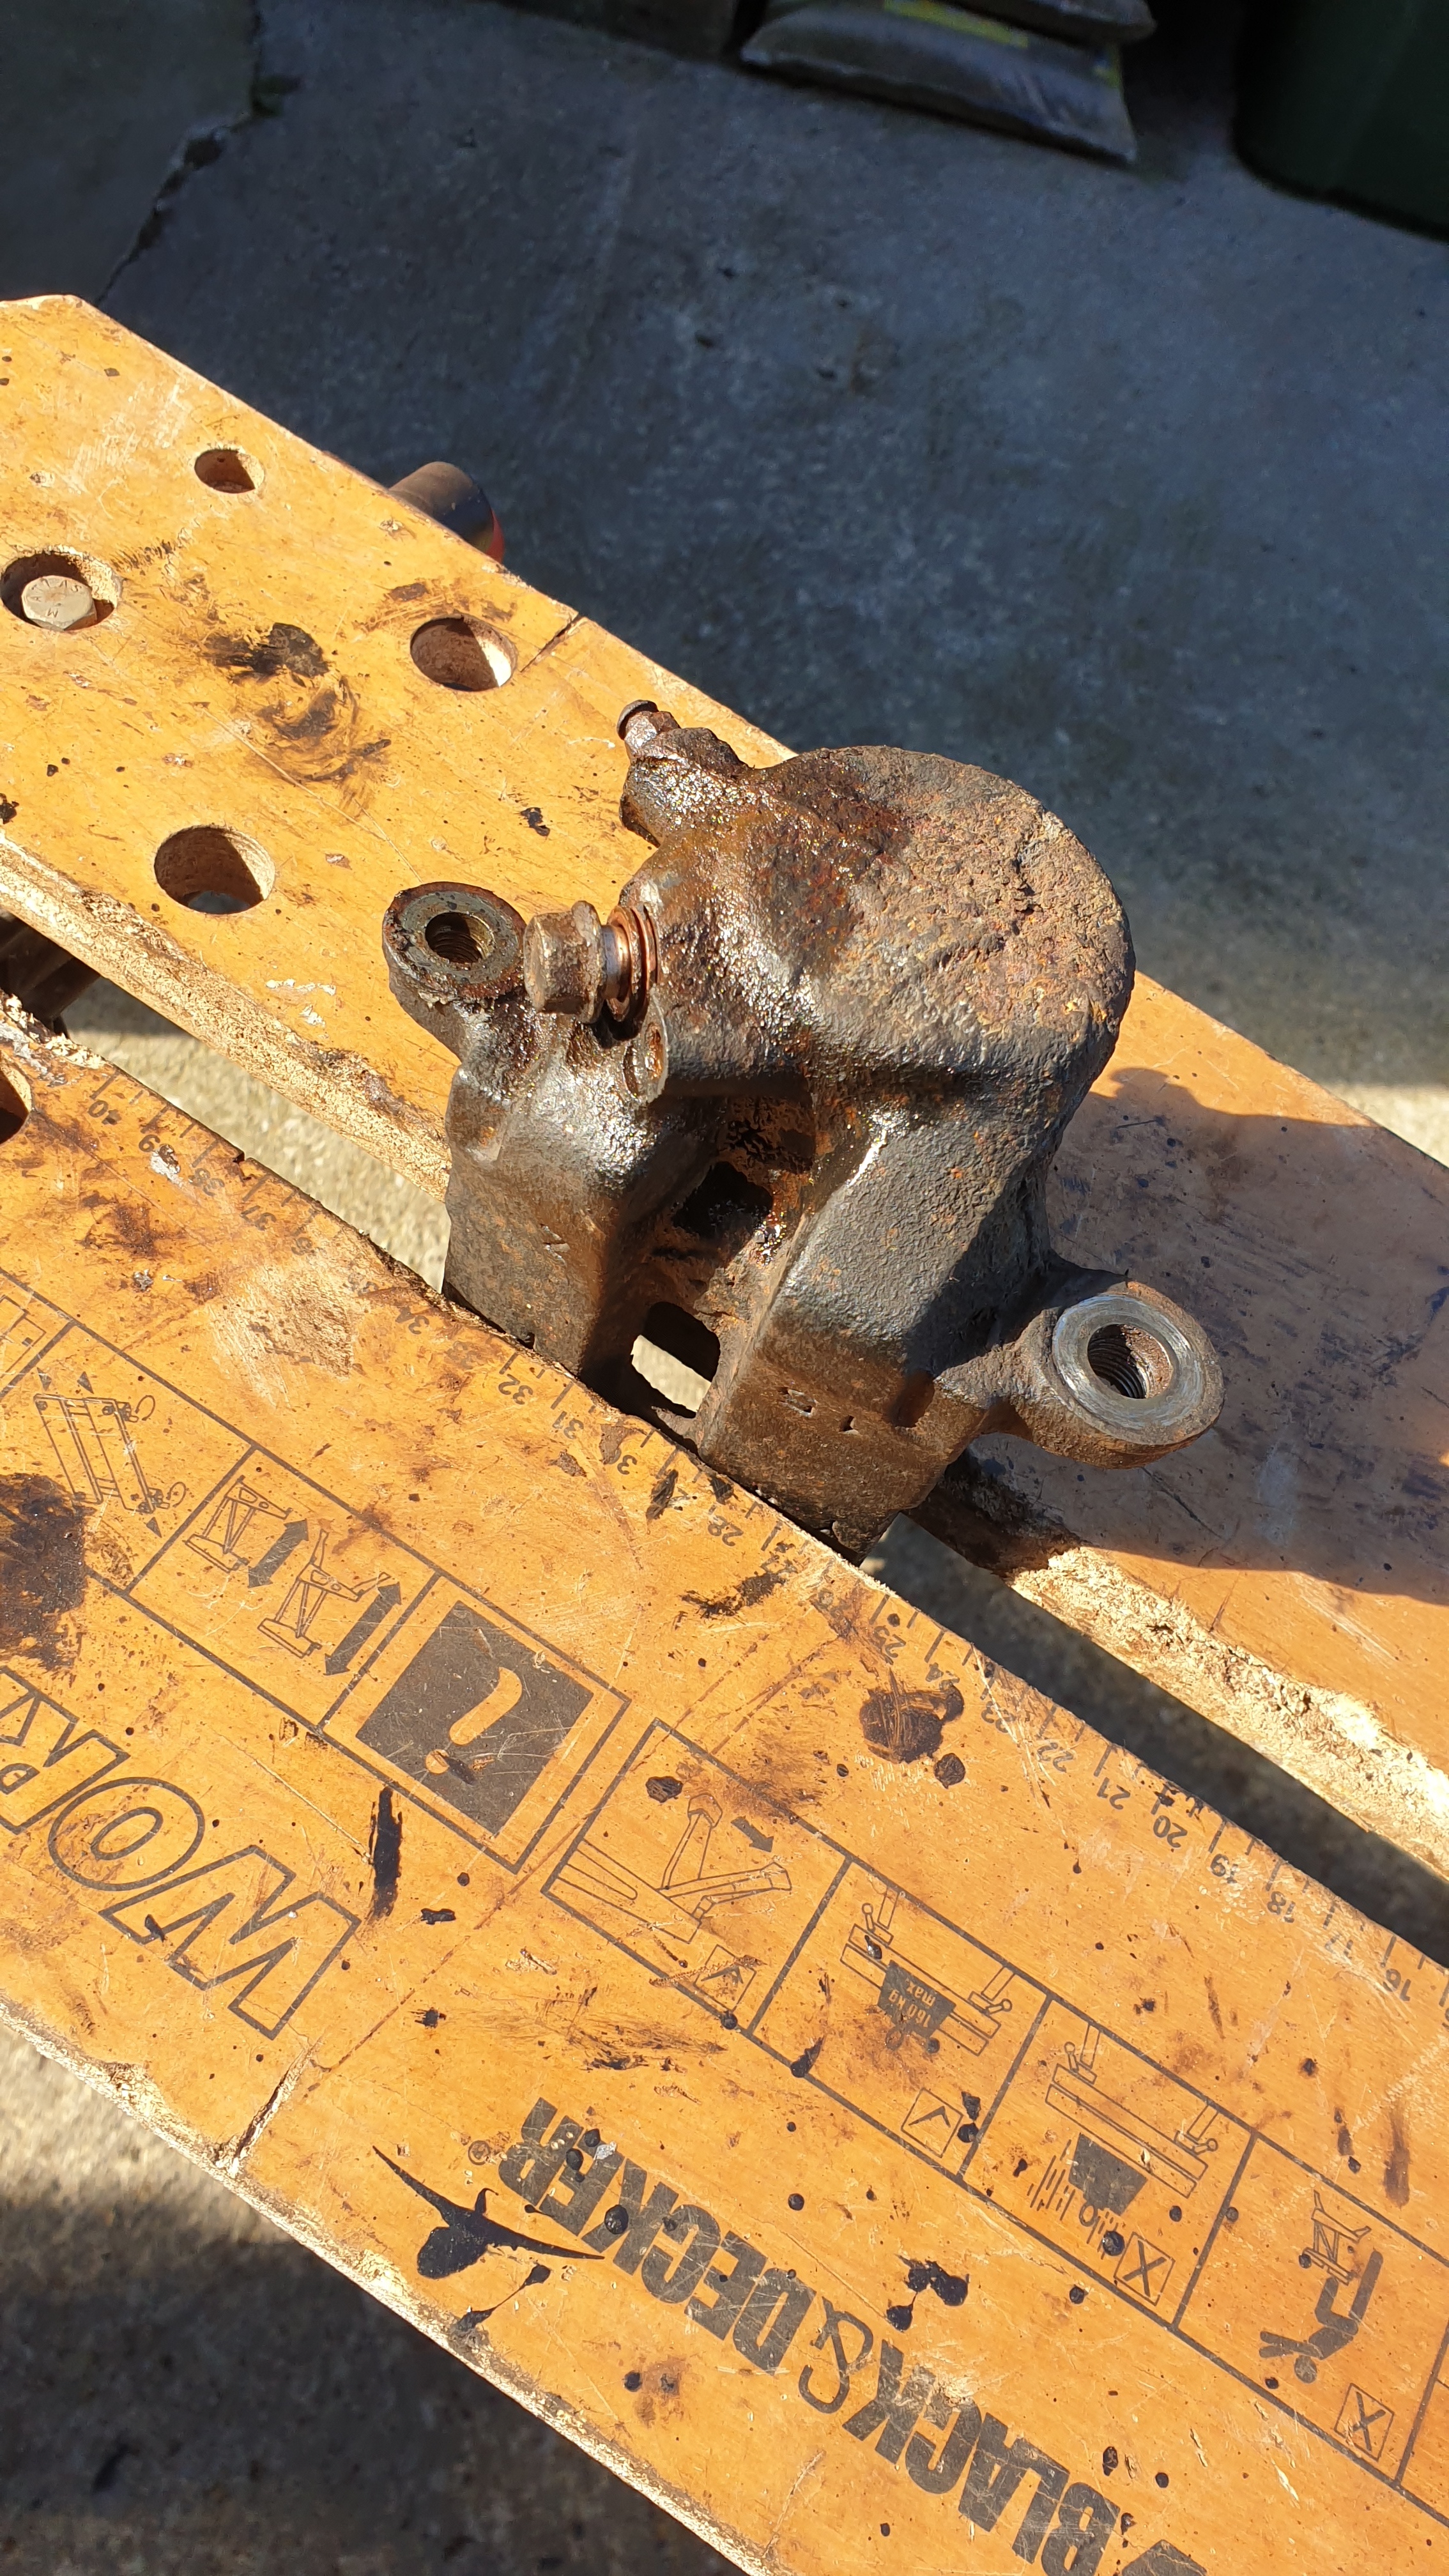
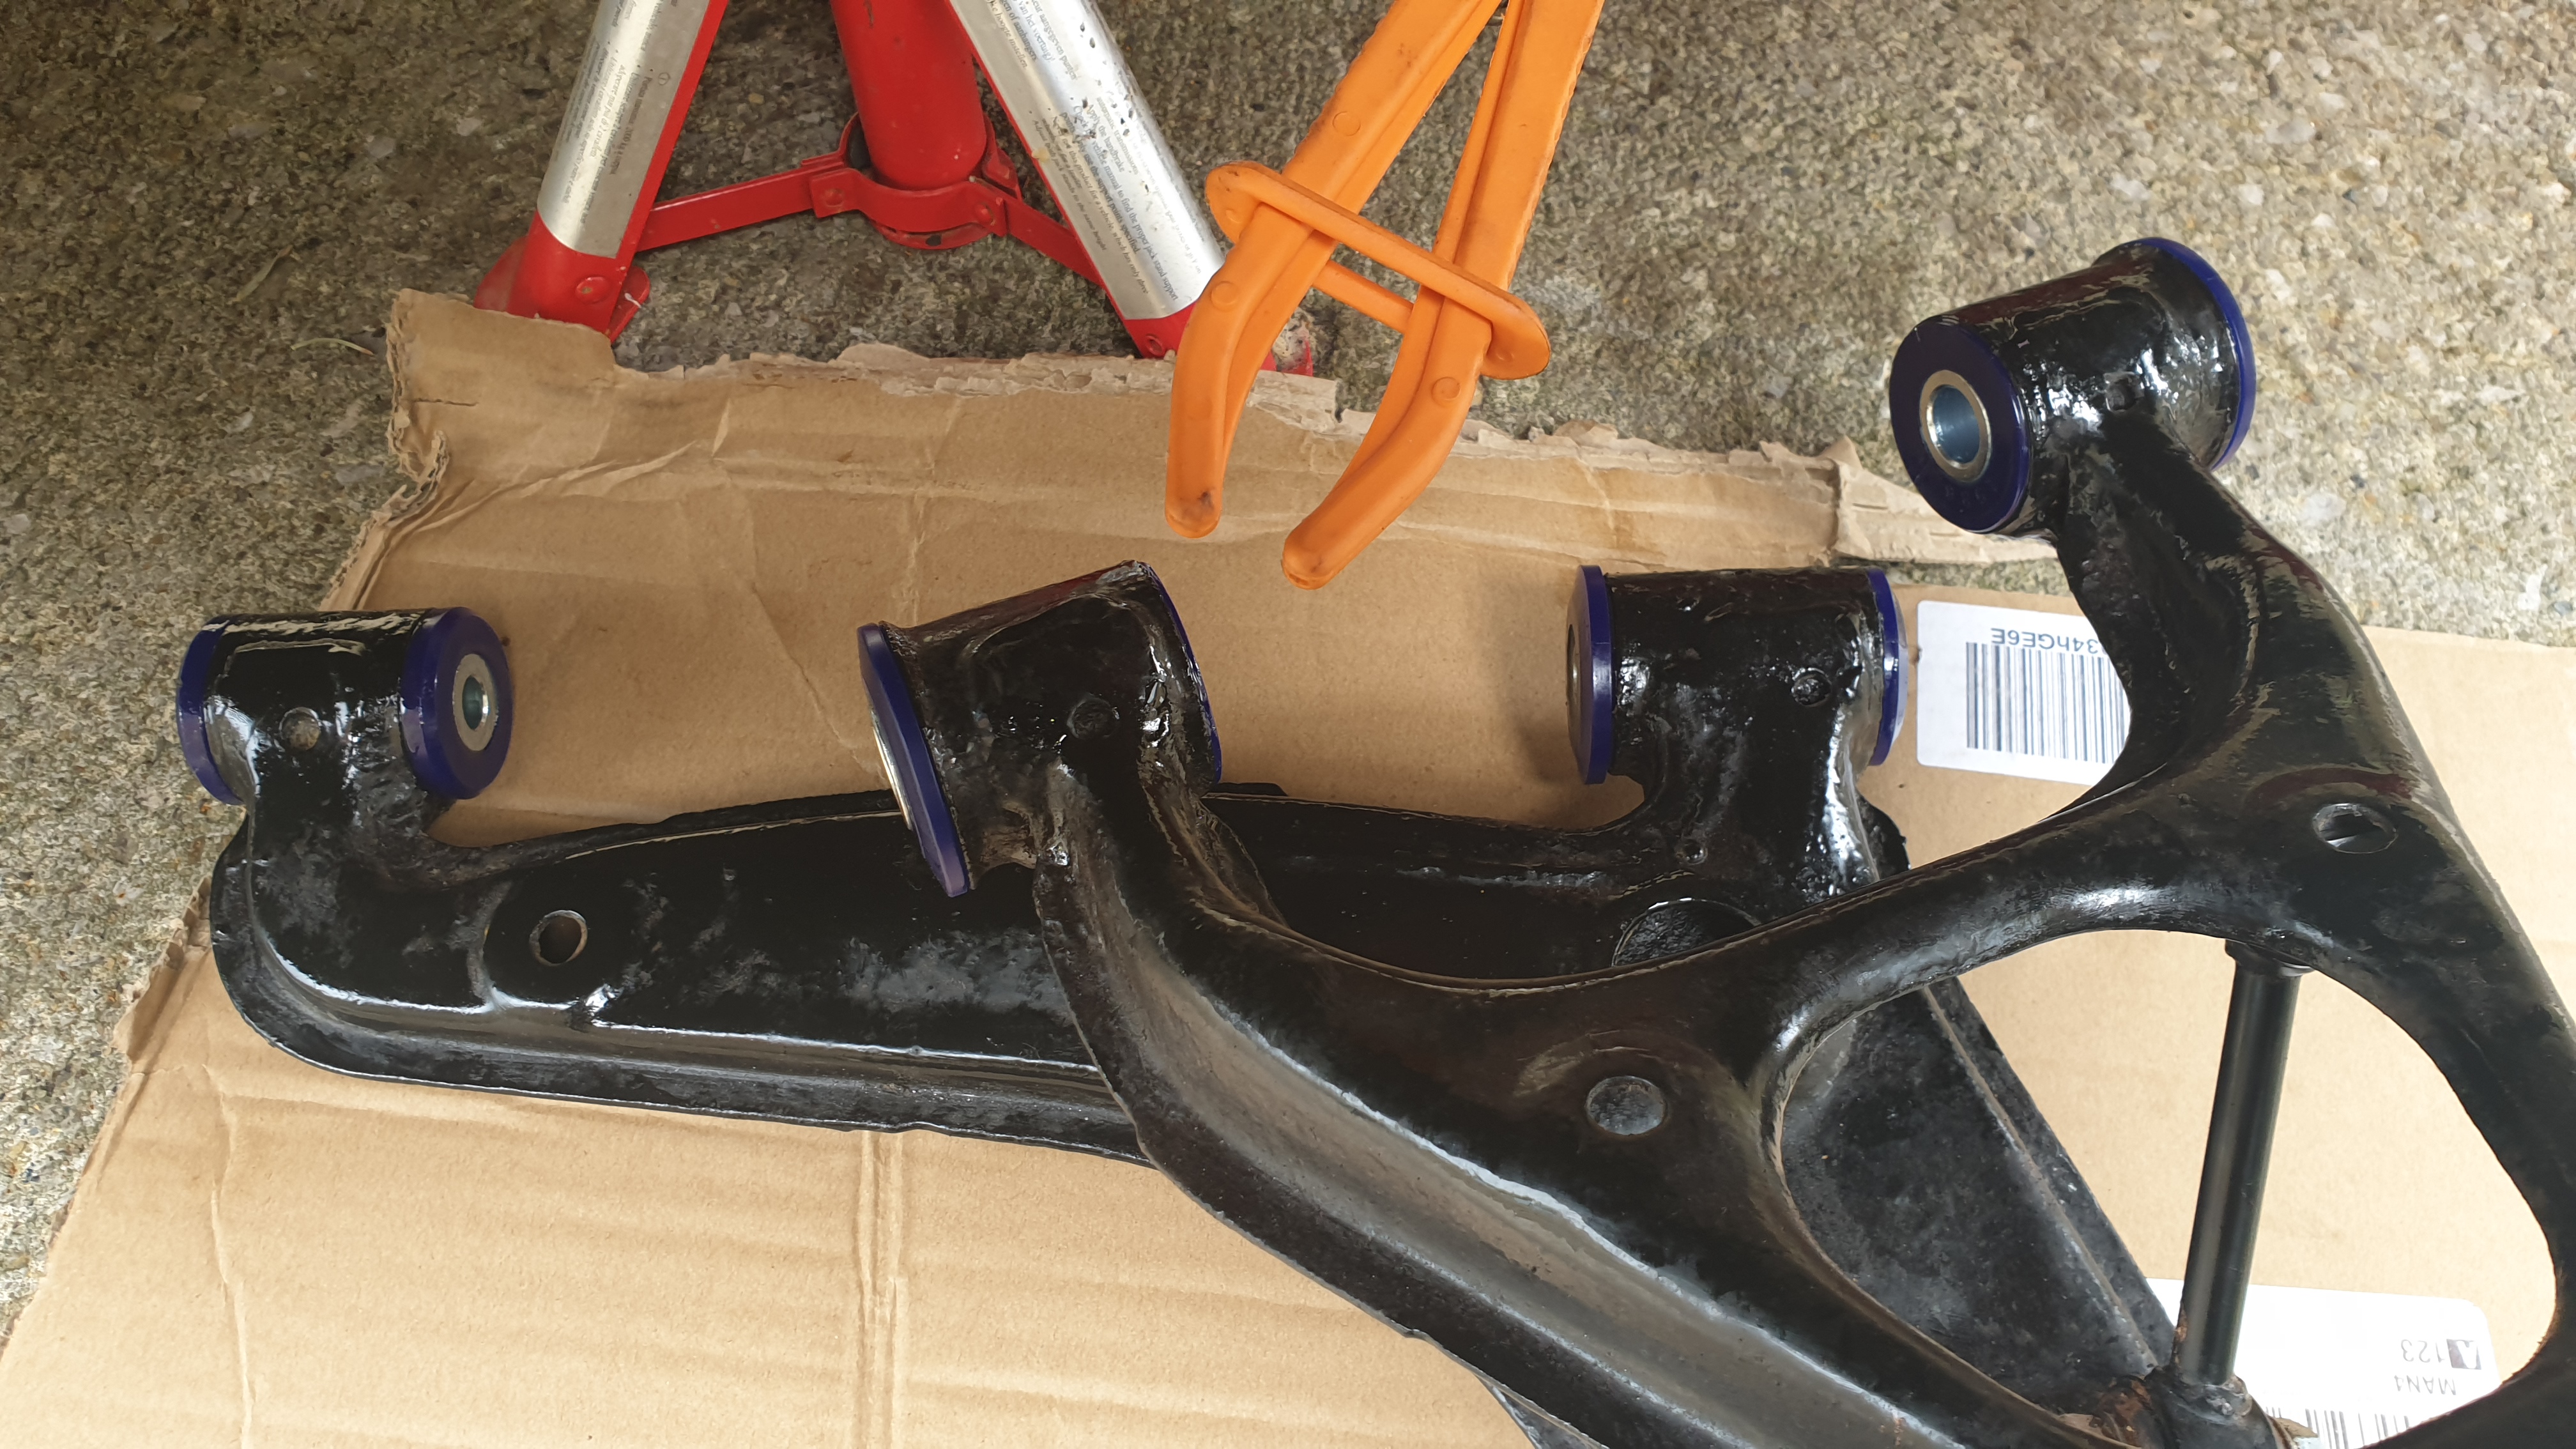
Well I started the job and once the front suspension was all off and cleaned and painted, I decided to replace the ball joints and track rod ends and am still waiting for some SuperPro bushes so that I can put it all back together. Refurbished the front callipers with new seals and pistons and painted with POR 15 calliper paint. Done the dust shields and have new EBC discs and green stuff pads and Goodridge hoses too. Suspension wise, I opted for KYB AGX shocks and Eibach pro springs. The wheel arches were also treated with POR 15, followed by stone chip and finally loads of waxoyl.
I fitted the new cam belt and replaced the cam seals and crank seal and cam sensor O ring and new rocker gasket.
Whilst waiting for the bushes and a new upper arm I have removed the rear bumper and anti roll bar and towing brackets and cleaned them ready for painting.
4 Likes

Good solid & progressive work Pete.
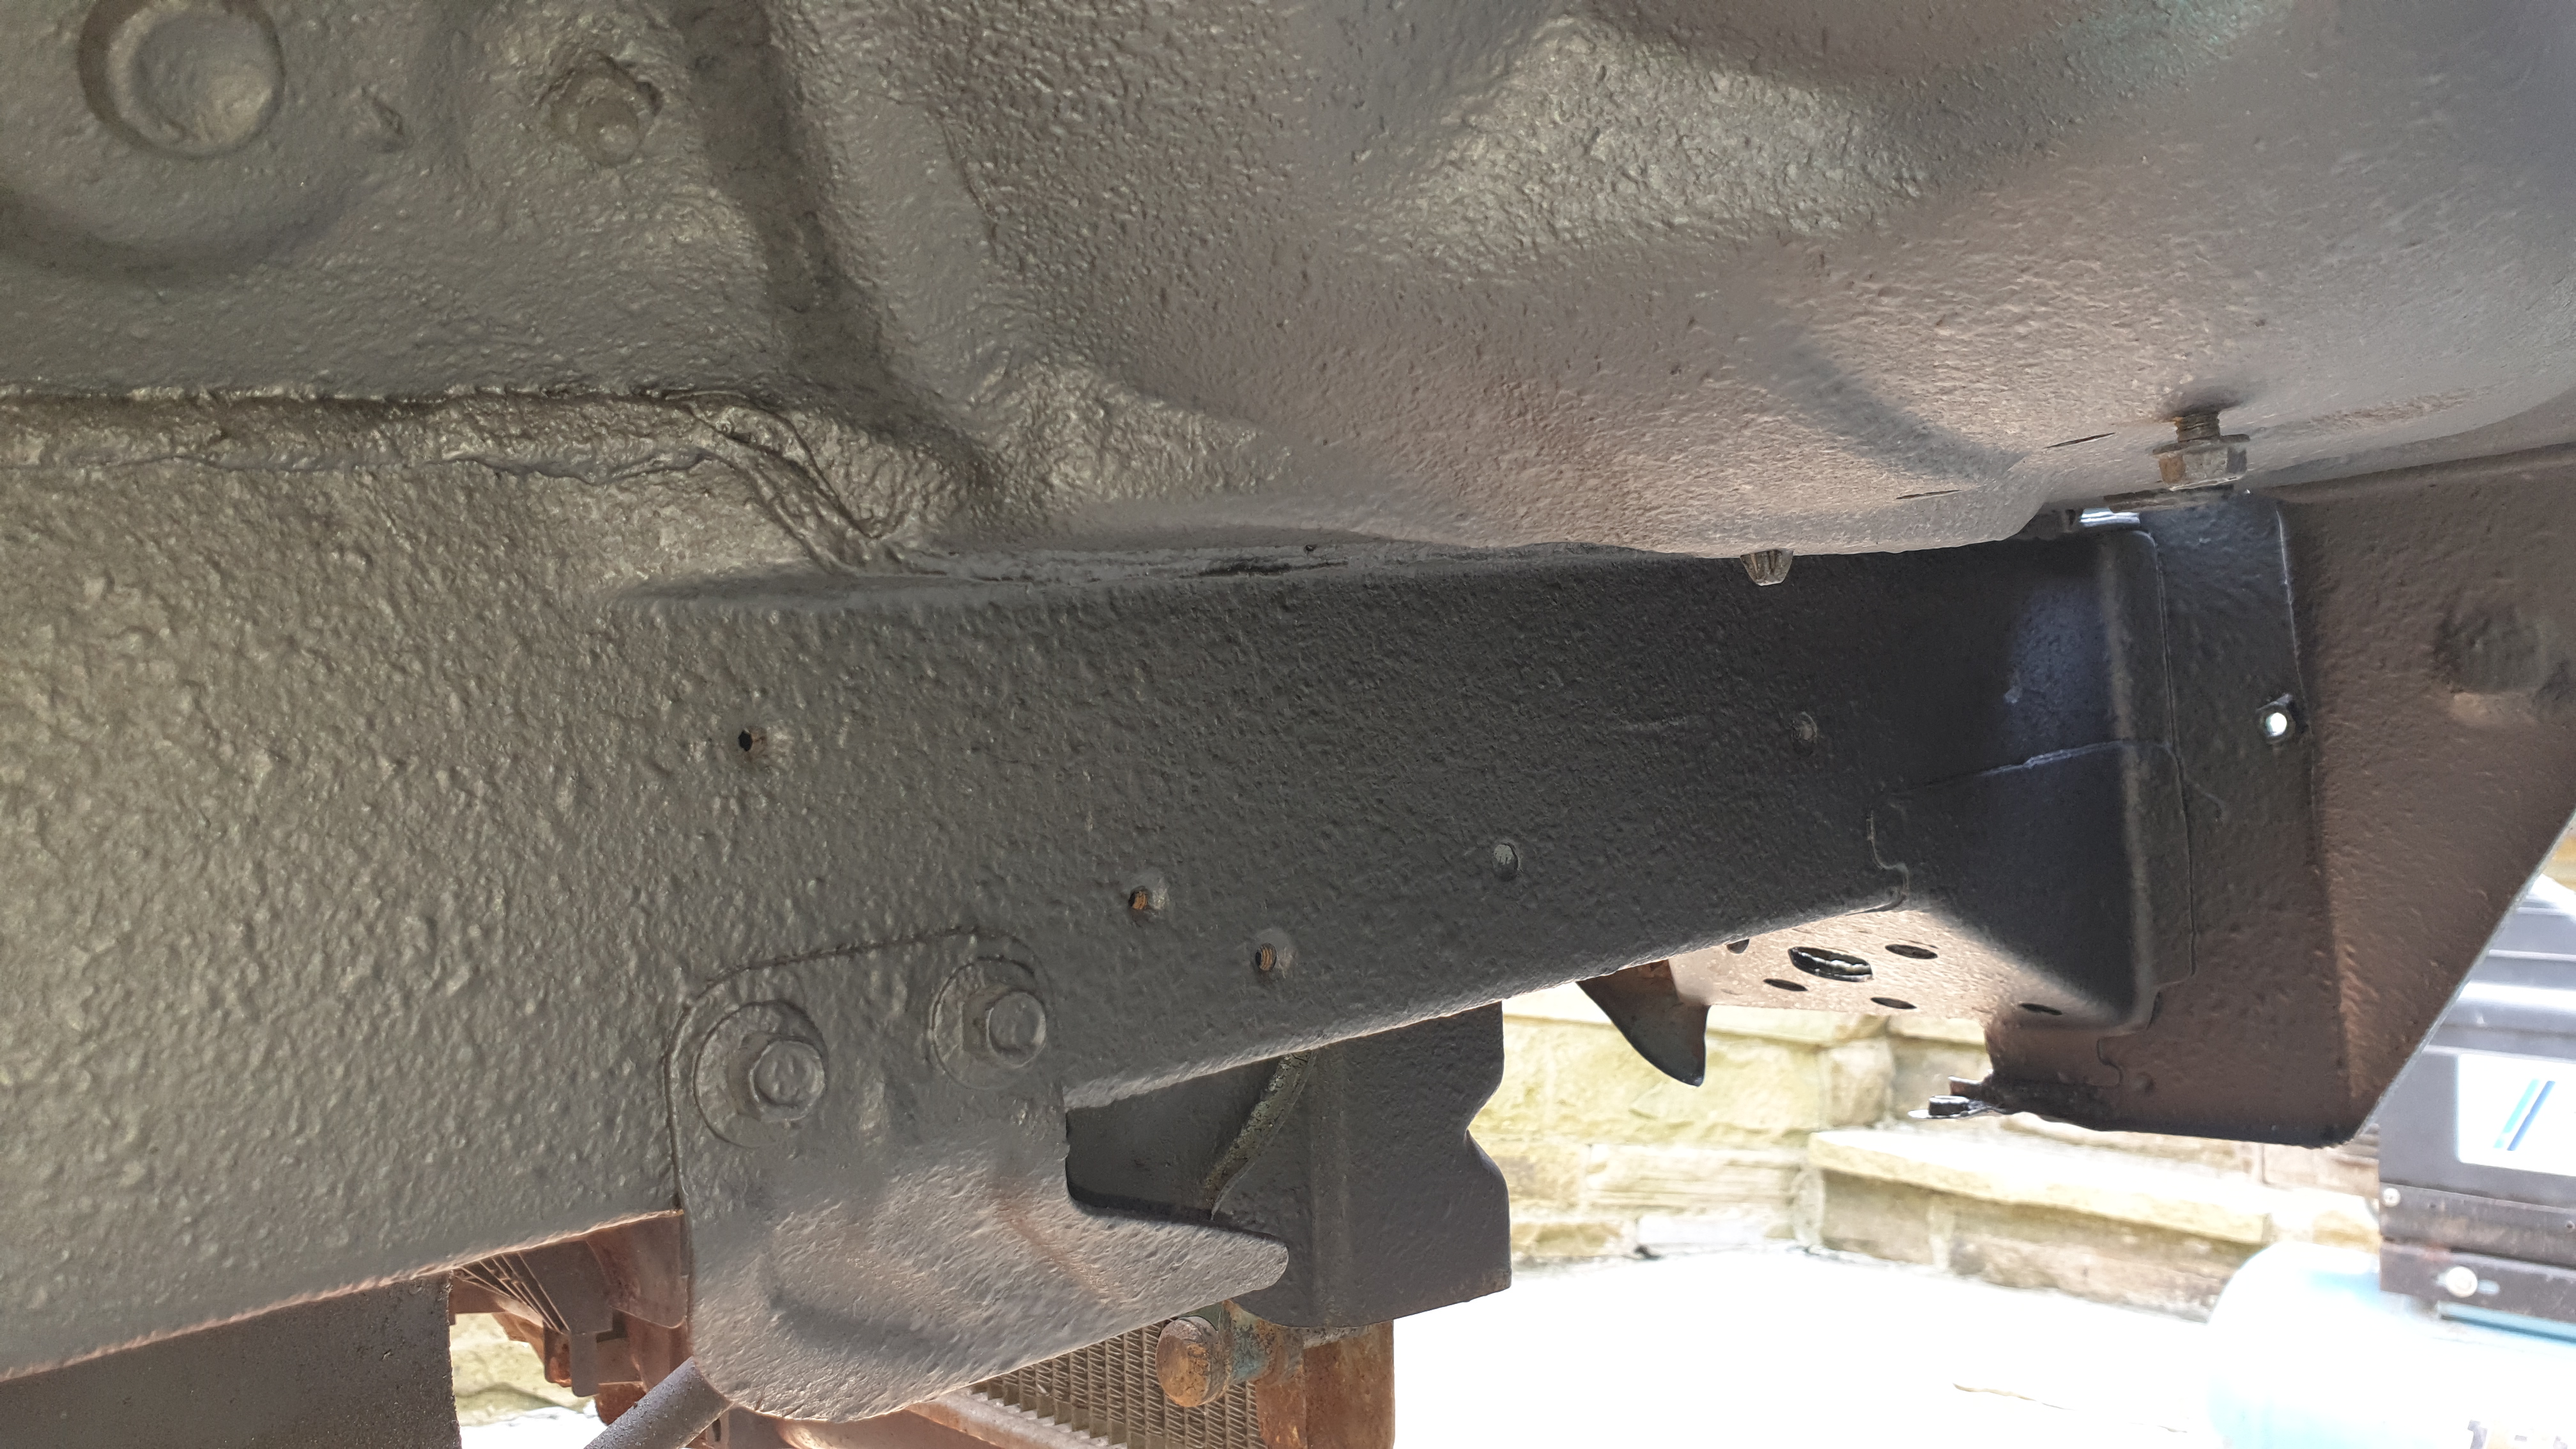
Typical Mk1 chassis rails, just as my own are. Solid.
It’ll be an utter revelation taking it out for a damned good Italian Tune Up once it’s been on it’s shake-down, 4 wheel lasered. I had fast road settings done when I replaced my suspension last year. Cannot really say how much that contributes as it now sits on Koni-SRT kit and rebushed everything. But it now means the chassis is a lot “quicker than the engine”. Extremely pointy, stable, and plenty mechanical grip.
Just by the by, I’d recommend a bottle of Forte fuel/injector cleaner come the day.
It’s expensive, but excellent stuff.
Thanks for that. I’ll give it a try once I’ve done all the dirty bits. I should have gone for the Konis but I was going to refit the Ground Control set up and it only fitted the KYB shocks.
Had a delay for almost 2 weeks as the superpro bushes disappeared in the post. Mx5 Heaven did a Stirling job of replacing them and couldn’t do enough.
Started the assembly this afternoon and managed to get the offside front finished apart from bleeding the brakes

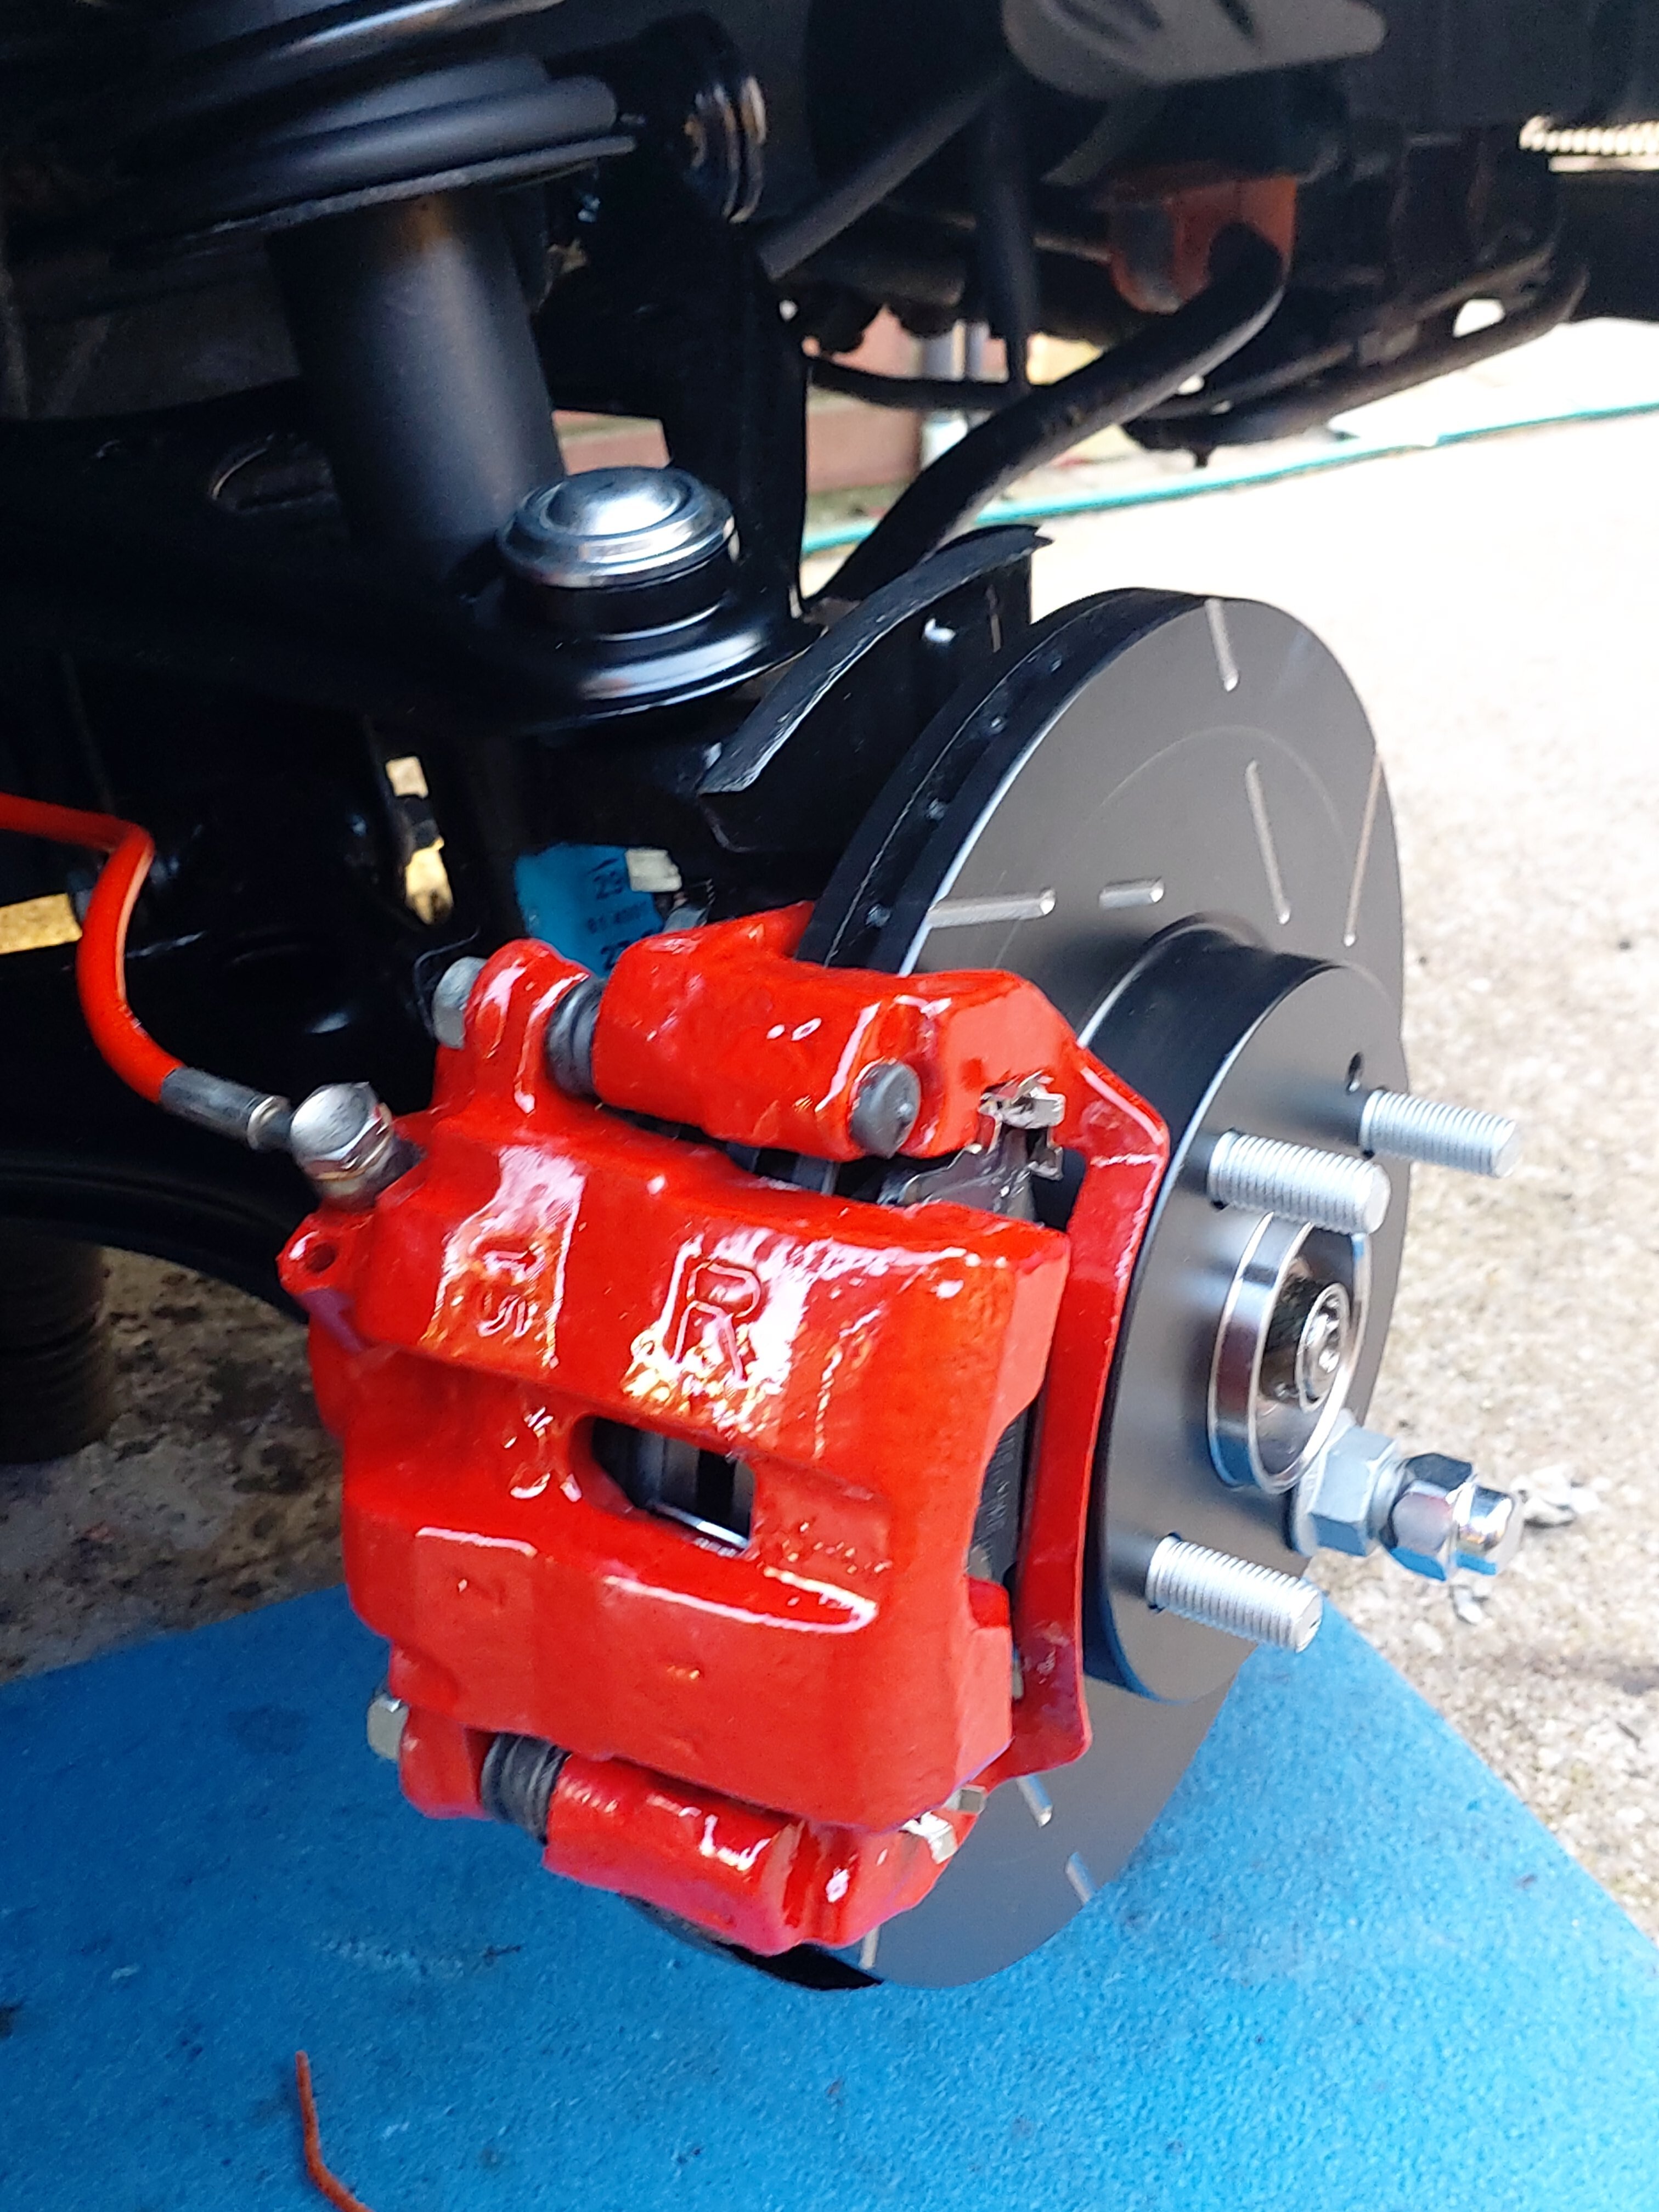
That looks a substantial coating on the Caliper, how did you achieve it? Brush, spray?
If you mean mine, I used POR15 caliper paint from Frost. Caliper back to bare metal, then de greased and metal prep. 1st coat with POR15 and leave until just drags then the caliper paint. You can use either a brush or the sponge on a stick which is supplied in the kit. Did all the suspension with the POR15. It’s very strong and sticks to the rust to protect it. Used it on an etype restoration and still looks good.
Thanks Pete, but meant Dave’s bright red ones. I’ve done mine with high temp red and the blacken up really quickly, Dave’s look very smooth
Thanks, they were taken back to bare metal with a power wire brush, chemically treated to remove rust then primed in red oxide. Then over a period of several days, three coats of red brake caliper paint applied with a brush. All part of my front suspension replacement.
Dave
1 Like
Removed all the rear suspension, the diff and the sub frame. All blasted and the subframe powder coated. Painting and then the new bushes and refitting.