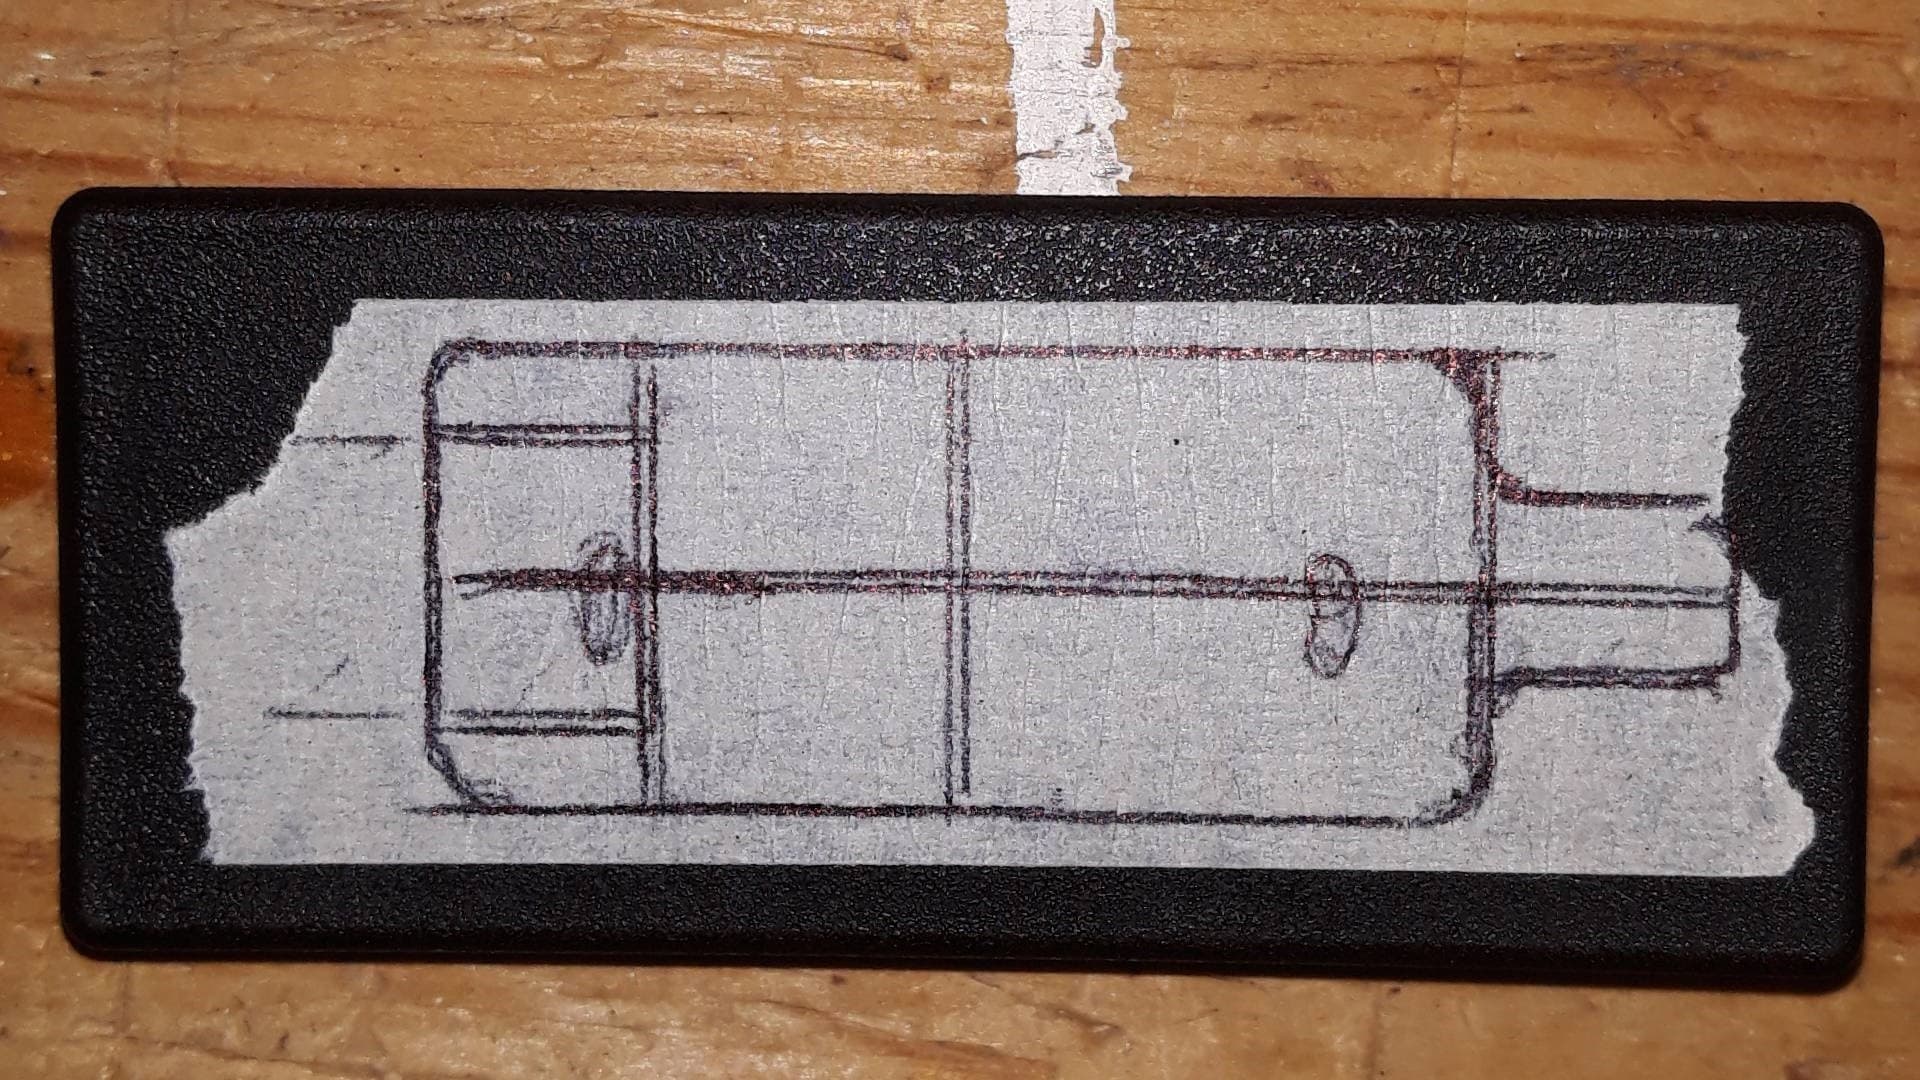
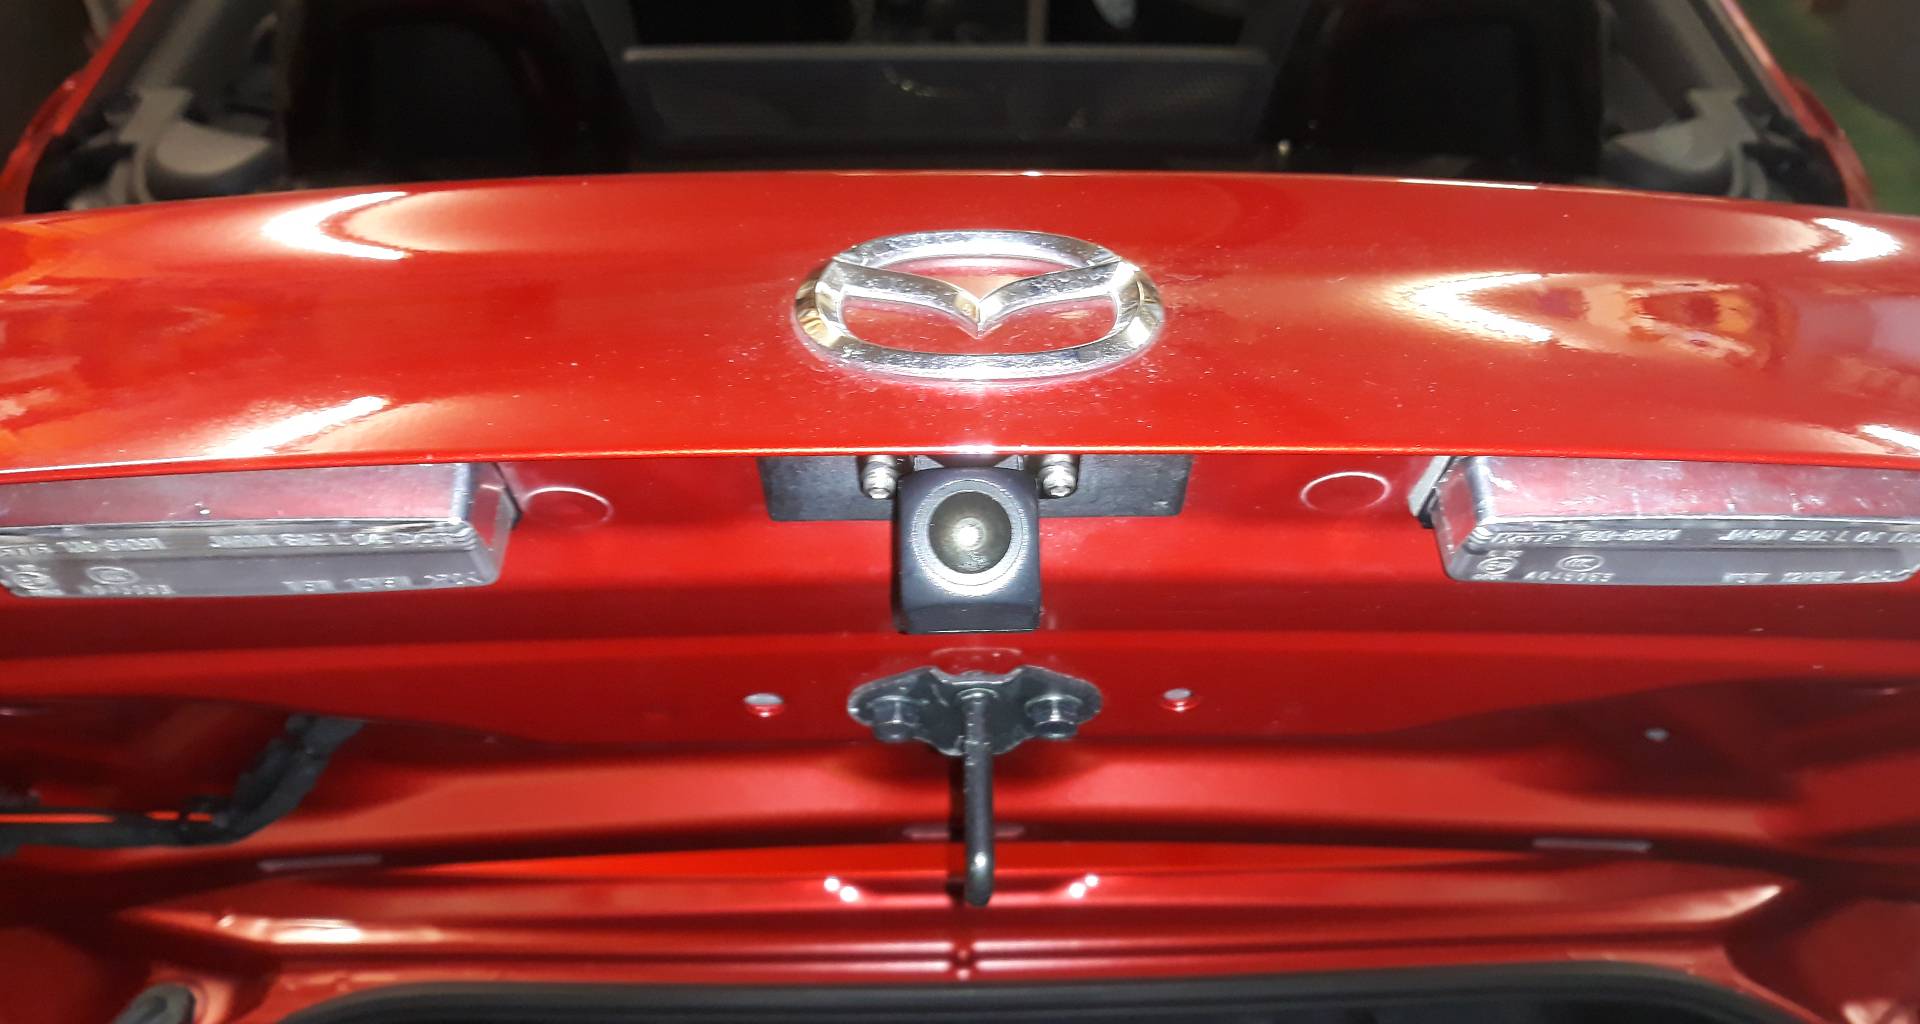
This morning I fitted the camera to the central blanking plug in the boot lid. I spent a couple of hours re-measuring and offering up before committing myself and drilling the holes. Fortunately, last year I marked the outside of the plug with where the webs were inside.
Today I decided on the best positions, so the stainless M3 nuts, washers and 8mm long screws, AND the camera lead (6mm hole) miss the webs without stress, and the camera points in the right direction. Here the superb sealant/glue is curing for a few more hours before the final installation tomorrow. That little 5gm tube has lasted really well, and done four other minor jobs in the last month. It may say “Fast!” but it’s actually 24-48hours depending on humidity and temperature…
A dry day, no wind, and I thought not too cold to be messing around outside, so I finally adjusted the parking markers on the Alpine for the new camera.
After taking ages fiddling about swapping menu views between a) reverse selected for a pic, and b) marker guess-adjust without pic, by using the tiny tap-tap-tap steps on screen I took the snap.
Alpine screen is only 625 line PAL standard definition, so the aliasing makes it looks quite pixelated on the “hi-res” phone camera, but by then with cold hands I didn’t care, they were near enough, and the new-camera’s image (full 1080p HD sensor and thus nicely oversampled for miserly SD) is so very much better than that from the 525line NTSC radio-linked Garmin.
Having tidied up, and now with a coffee warming my cold hands, only then did I dig around in my memory and dimly recall from months ago seeing new-camera pic and adjusting the markers simultaneously, BUT only if the Alpine thought it was an Aux camera and not a Direct camera. And yes it does work nicely then, but I’m not starting all over again today.
Oh Well.
Next time, it will be in a nice big car park with proper road markings on another empty bay behind the car.
I’ve been playing with different reversing lamp bulbs because the incandescent one the car came with was pants.
I had a couple left over from Niseko experiments (two in each pack but only one used), and the best one of those went in a month ago. A few days ago it failed while I was playing with reversing camera markers. I think it overheated from being on for too long, and shut down permanently. But its brother in the Niseko lasted a couple of years.
So I bought another pair of LEDs, slightly smaller too. The new LED in the car is much brighter! And hotter, given enough time. Even though the same make (Aglint) as the failed one, the only real worry I have (given its light intermittent usage) is it might drop out of the socket!
LEDS are just the job for reversing lamps. Best for reversing rather than blinding me with those bloody headlamps!
I’ve used them in my TT and failure rate is high. I think the style of bulb doesn’t suite the format. This will be sorted and a decent illumination whilst reversing is a good thing just around the corner I’m hoping.
That bulb runs at 7 watts for a claimed 1100 lumen (157 lumen per watt, really?) when cool, and drops to 4.5W when hot, at 110C!
The Osram LED T15 only runs at 2.9W for 280 lumen but they reckon about 4000 hours life. It is reasonably efficient at a much more typical 100 lumen per Watt.
An Osram incandescent T15 runs at 16Watt for 190 lumen and 1000 hours life.
When I was designing LED illumination schemes all the major chip manufacturers quoted ~30,000 hours life to half brightness at a mounting temperature of 50C. They varied at 100C but by then expected life was closer to tens of hours.
I found this holds true with domestic lighting; this house has been almost completely LED lit since 2009. But while lifespan can be longer than incandescent or fluorescent they definitely don’t last forever. Very few elements here are the original LED bulbs or LED strips now.
I too replaced all our domestic bulbs with LED long ago and no, they definitely don’t last for ever.
I also replaced reversing lamp bulbs with LEDs in both my Miyako and my 3 series.
The Miyako was really successful with much brighter light. However, the 3 series twin LEDs have been disappointing with much less improvement.
I suspect the bulbs I used just don’t suit the small apertures in the light clusters.
Ever since I bought the 25AE I kept making notes to myself to buy some more of the internal trim clips, but I also kept on forgetting to do so; something always seemed to come up and distract me . The car was missing three.
Finally, at long last, I remembered to buy some a few days ago!
These VVO 6mm fasteners are a perfect fit in the trims lining the boot, and work just as well as the originals for removal. Not the cheapest, but I don’t need hundreds.
Always an excellent selection of clips below, never failed me when needing anything.
I’ve just received a pack of under tray clips for my Skoda, I had to butcher one when removing to do an oil change. Speedy delivery always.
Mazda clips…
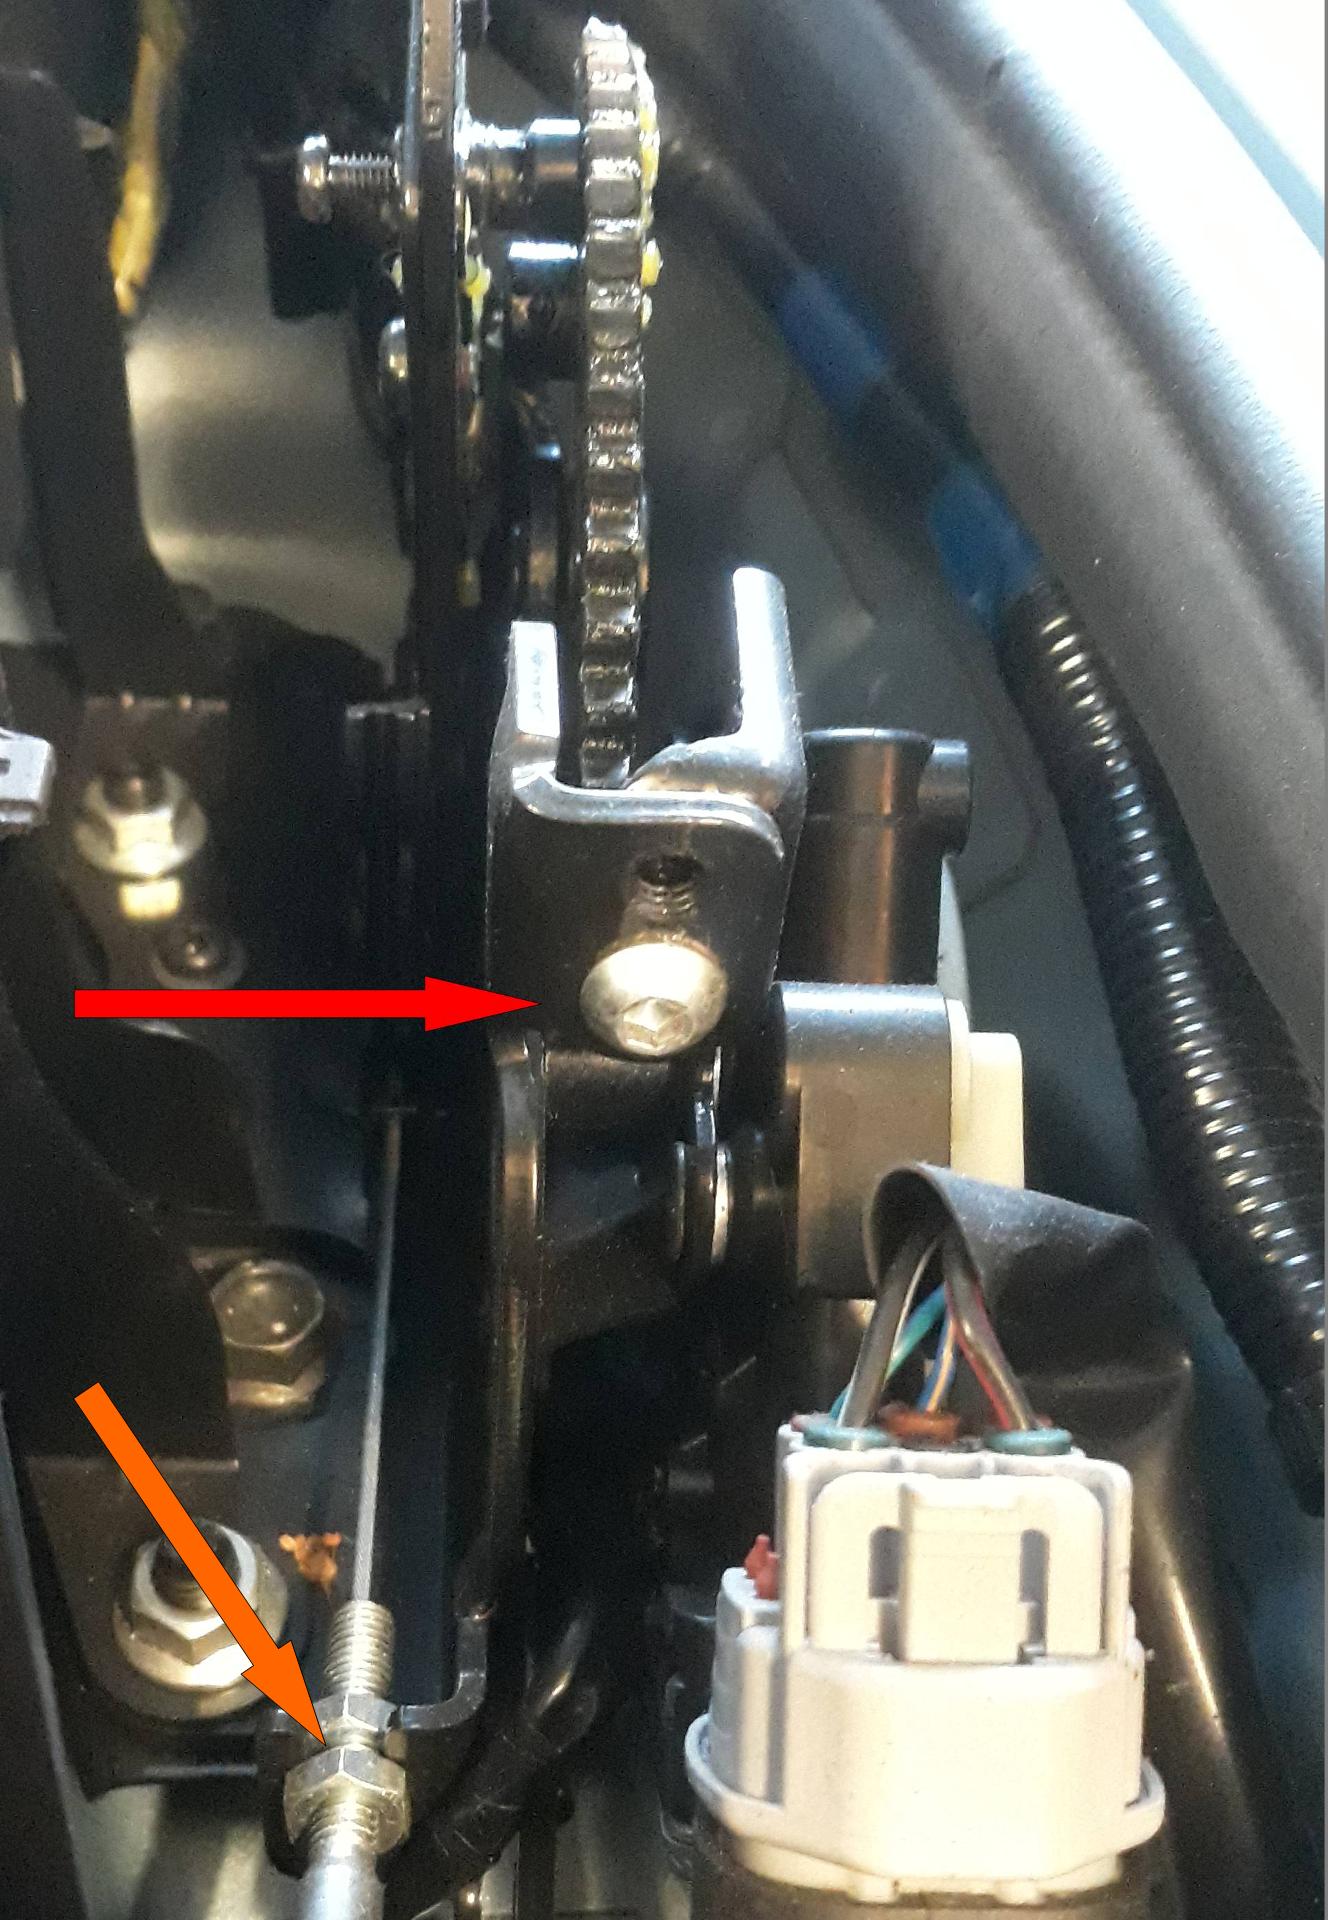
Thinking about Locktite 248 just now, it occurred to me I don’t recall checking the Chrome-dome bolts holding the PRHT gears together.
Driver’s side was tight tight tight. If I tried any harder to undo it something was going to break, so no point in worrying about that one.
Passenger side was another matter; the Chrome-dome bolt was barely finger tight. Suitable dose of the Loctite on its thread and now I can forget that one.
Here’s an old pic from the Niseko. Red arrow for Chrome-dome I’ve just secured, Orange arrow for roof lock cable adjustment (untouched).
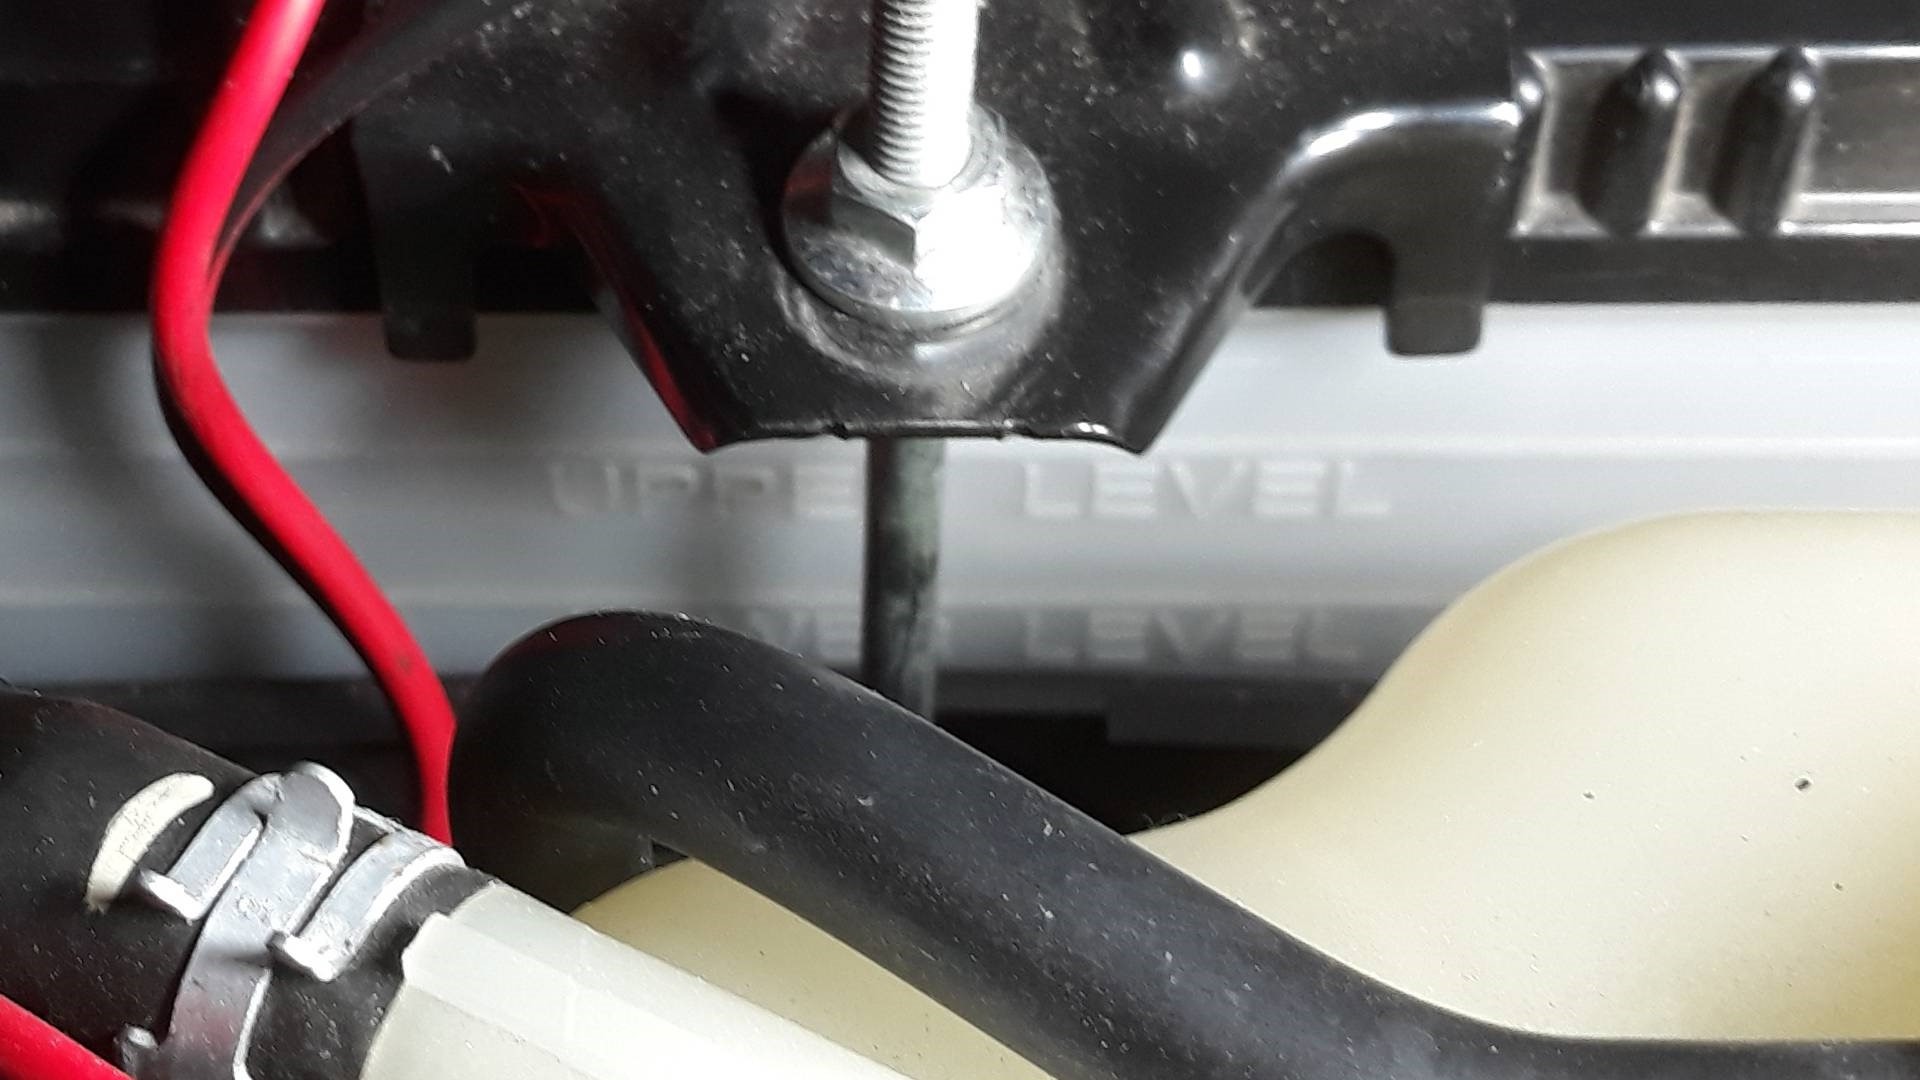
Checked the battery fluid levels in the 25AE, it has filler plugs so why not.
Some cells were showing the plates by a millimetre or so I’m considering topping up with distilled water to just cover the plates. Shining a light into the filler holes shows some levels on or just below minimum marked on the outside of the case.
But I’ve not done it yet because my still-sealed pint of genuine distilled water (not “de-ionised”) is getting on for thirty years old!
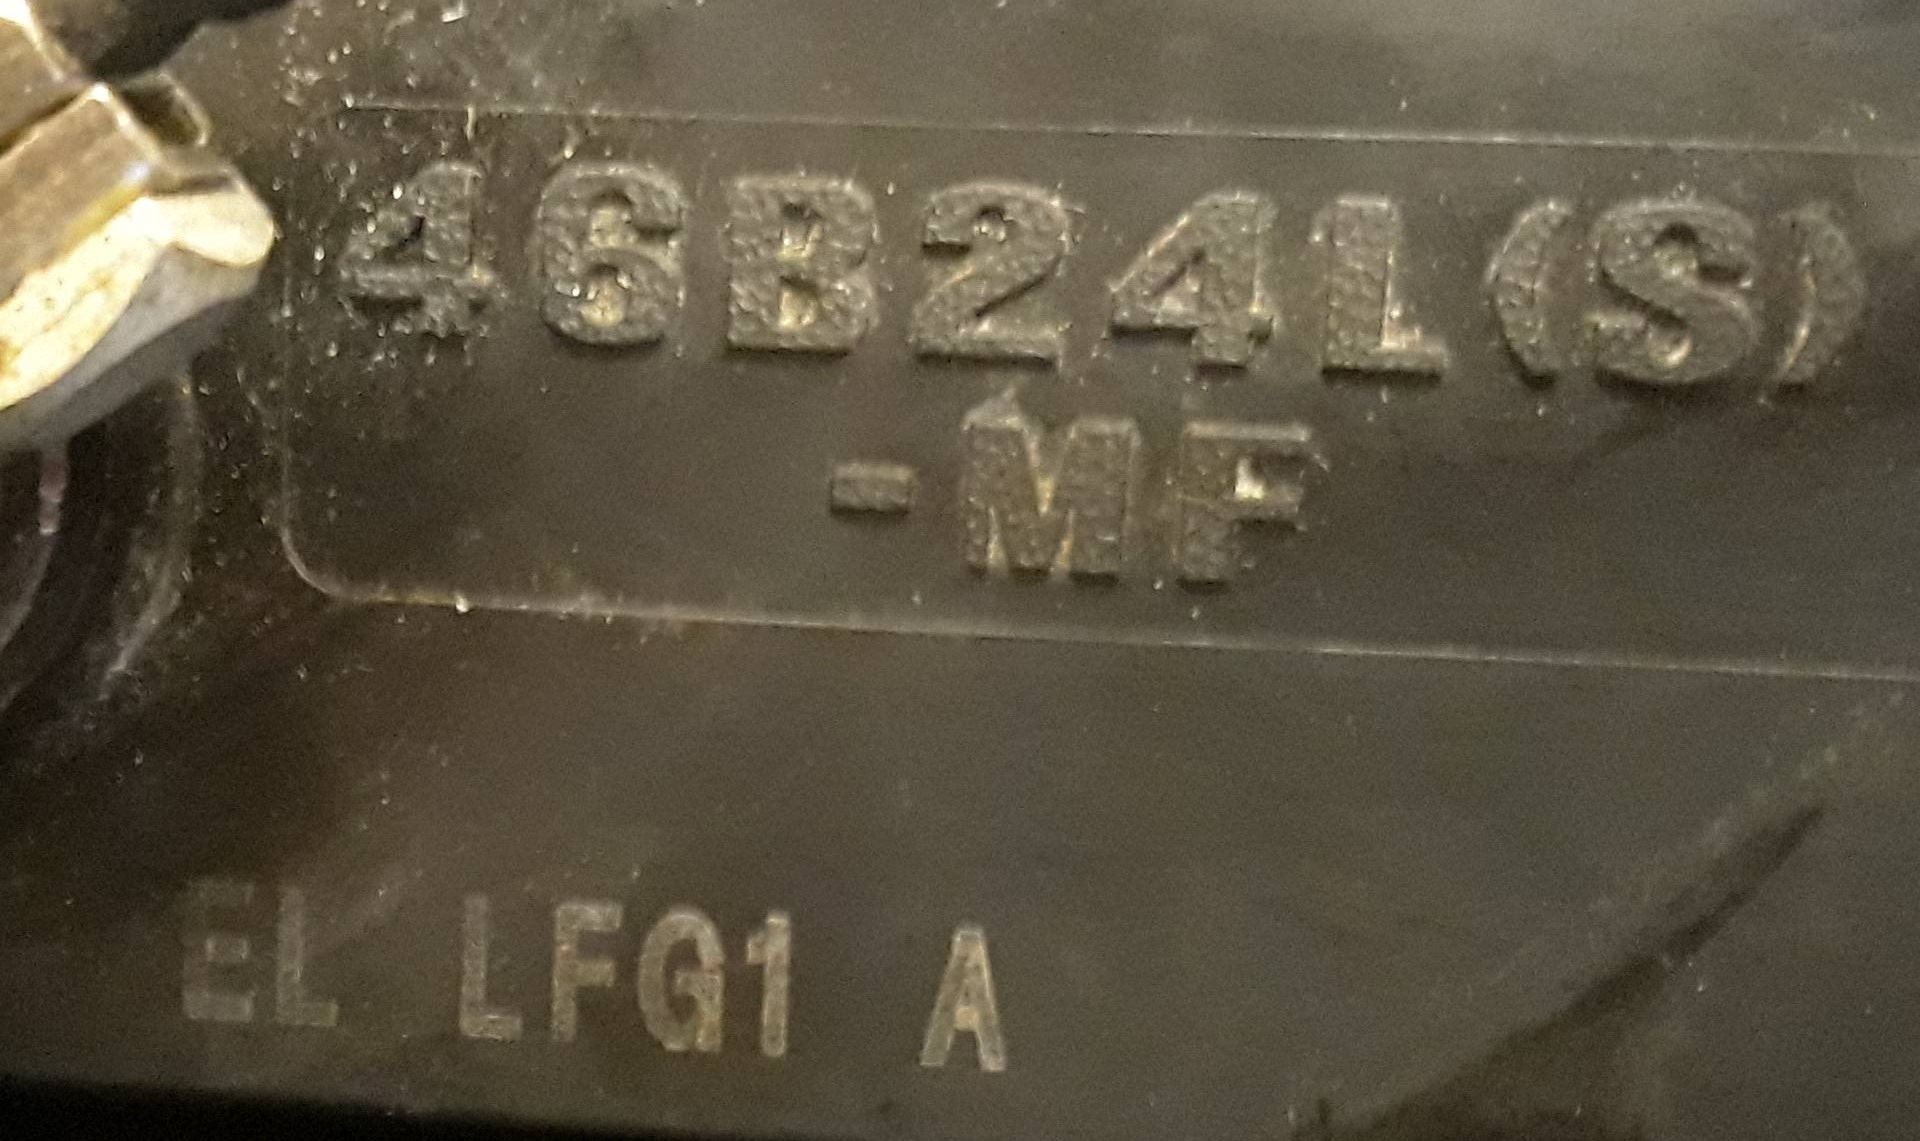
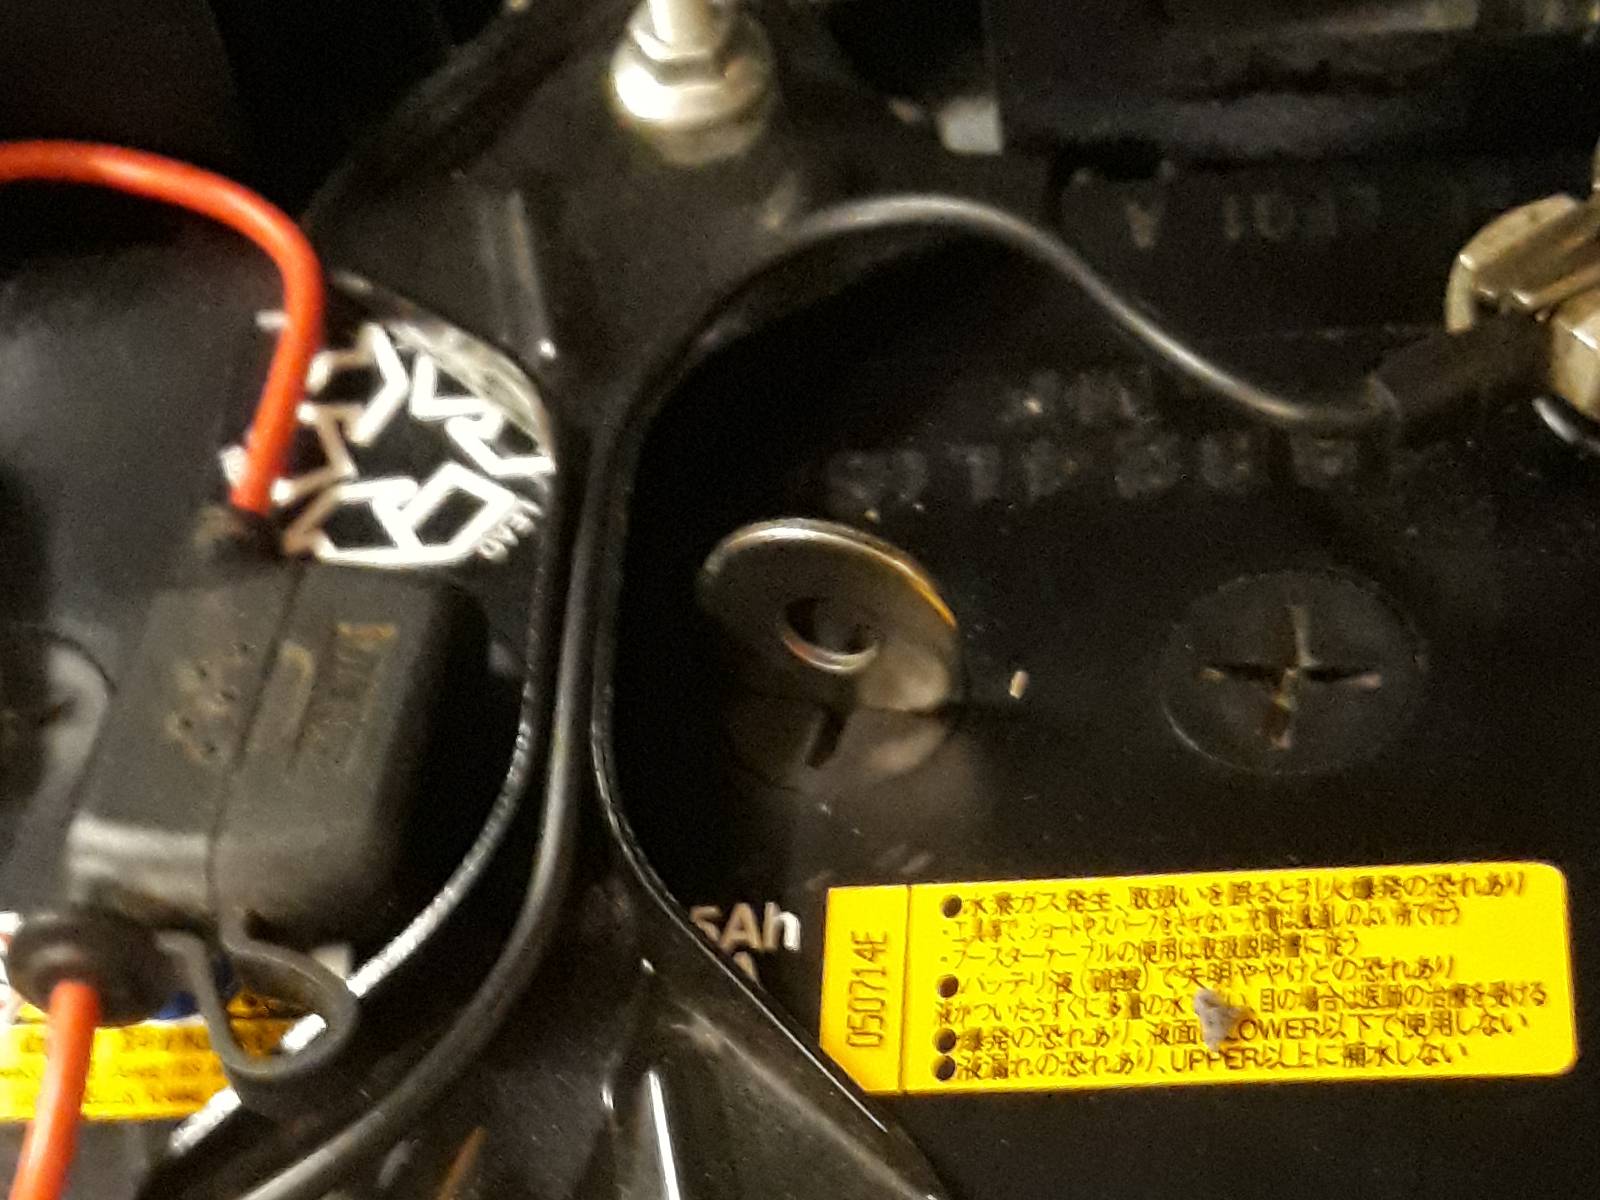
I assume this is the original battery that was supplied with the car, and now ten years old. There’s no mention of a replacement on the various docs that came with it.
I can’t identify any date codes on it, unless its the 050714E, the car was first registered in 20.09.14 so this might be the clue. These pics show all the useful details on the top.
It seems OK and my battery test meter suggests it is too, but it’s probably well worth keeping an eye on any battery this old. I doubt it has anything like its original 45Ah capacity.
Ah, good. It’s not a “sealed for life” so I’ll go ahead and do it.
It’s a small job for this evening.
I cleaned it and the battery housing soon after I bought the car. The uniform thick layer of dust removed from the top of the battery suggested it had never been topped up, ever.
I’d top it up a little bit at a time to bring it up the the maximum level. If topped up each year during service the effect is negligible, adding a load of distilled water all in one go could kill the battery.
Oh yes, I agree absolutely. I did that on my bike battery when still a wet-behind-the-ears student. Lesson learned.
Second lesson was never to buy a cheap, flimsy Blue Star battery. Dead in two months of daily use.
At four times the price, Fowlers had the proper battery for my 650 which could withstand being cooked by the non-regulated 6V direct from the alternator and selenium rectifier, but only provided it was frequently topped up with teaspoon amounts. Still good three years later when I sold the bike.
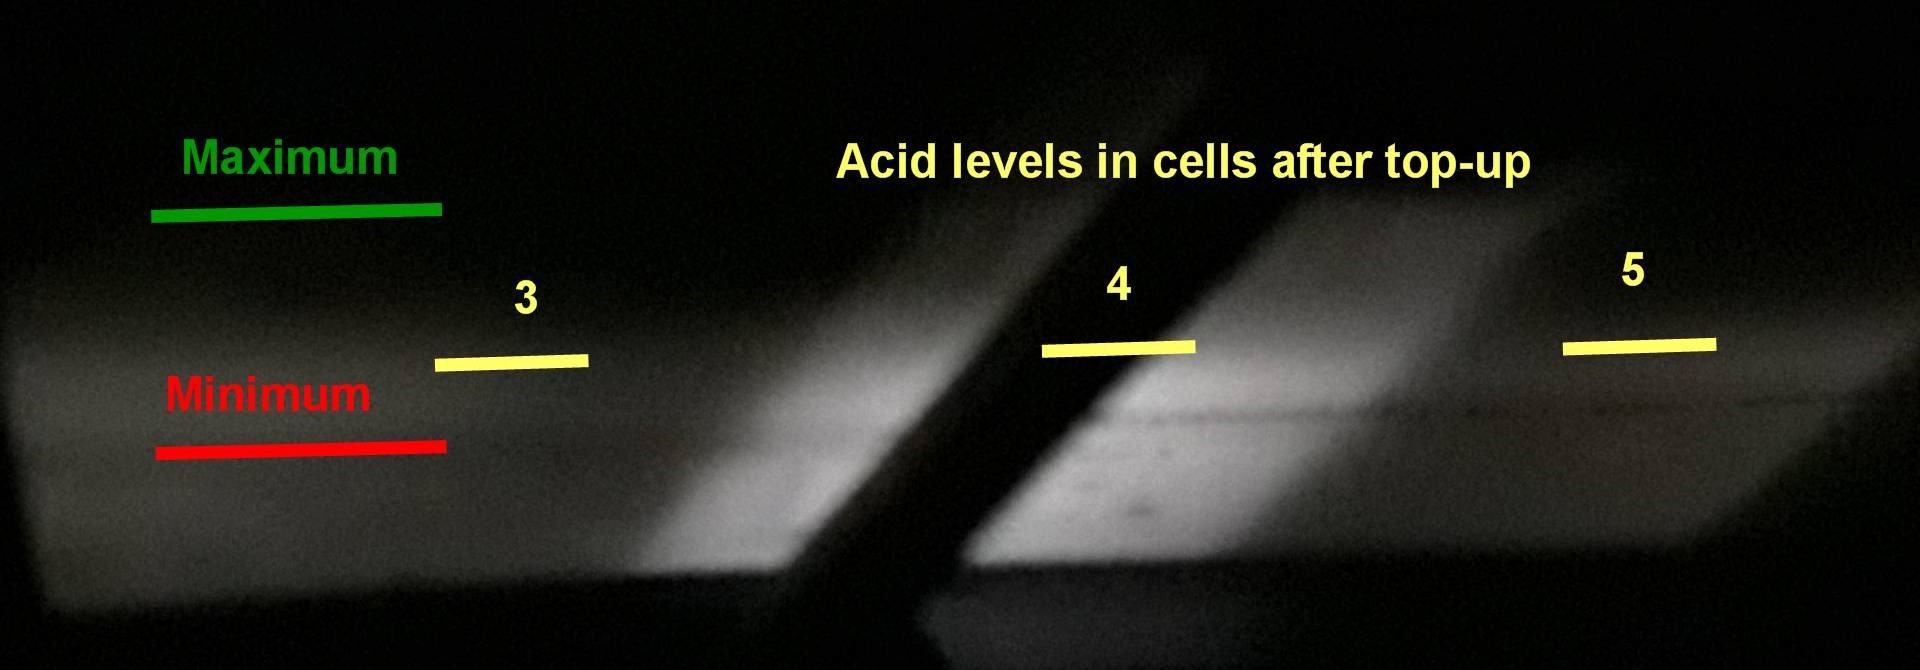
I’ve added about 2mm (1-3mm) of distilled water to each cell. In two the plates edges were just beginning to show above the acid when looking into the plug holes, the others were covered. Levels are clearly marked on the outside of the battery, but how to tell where the acid is?
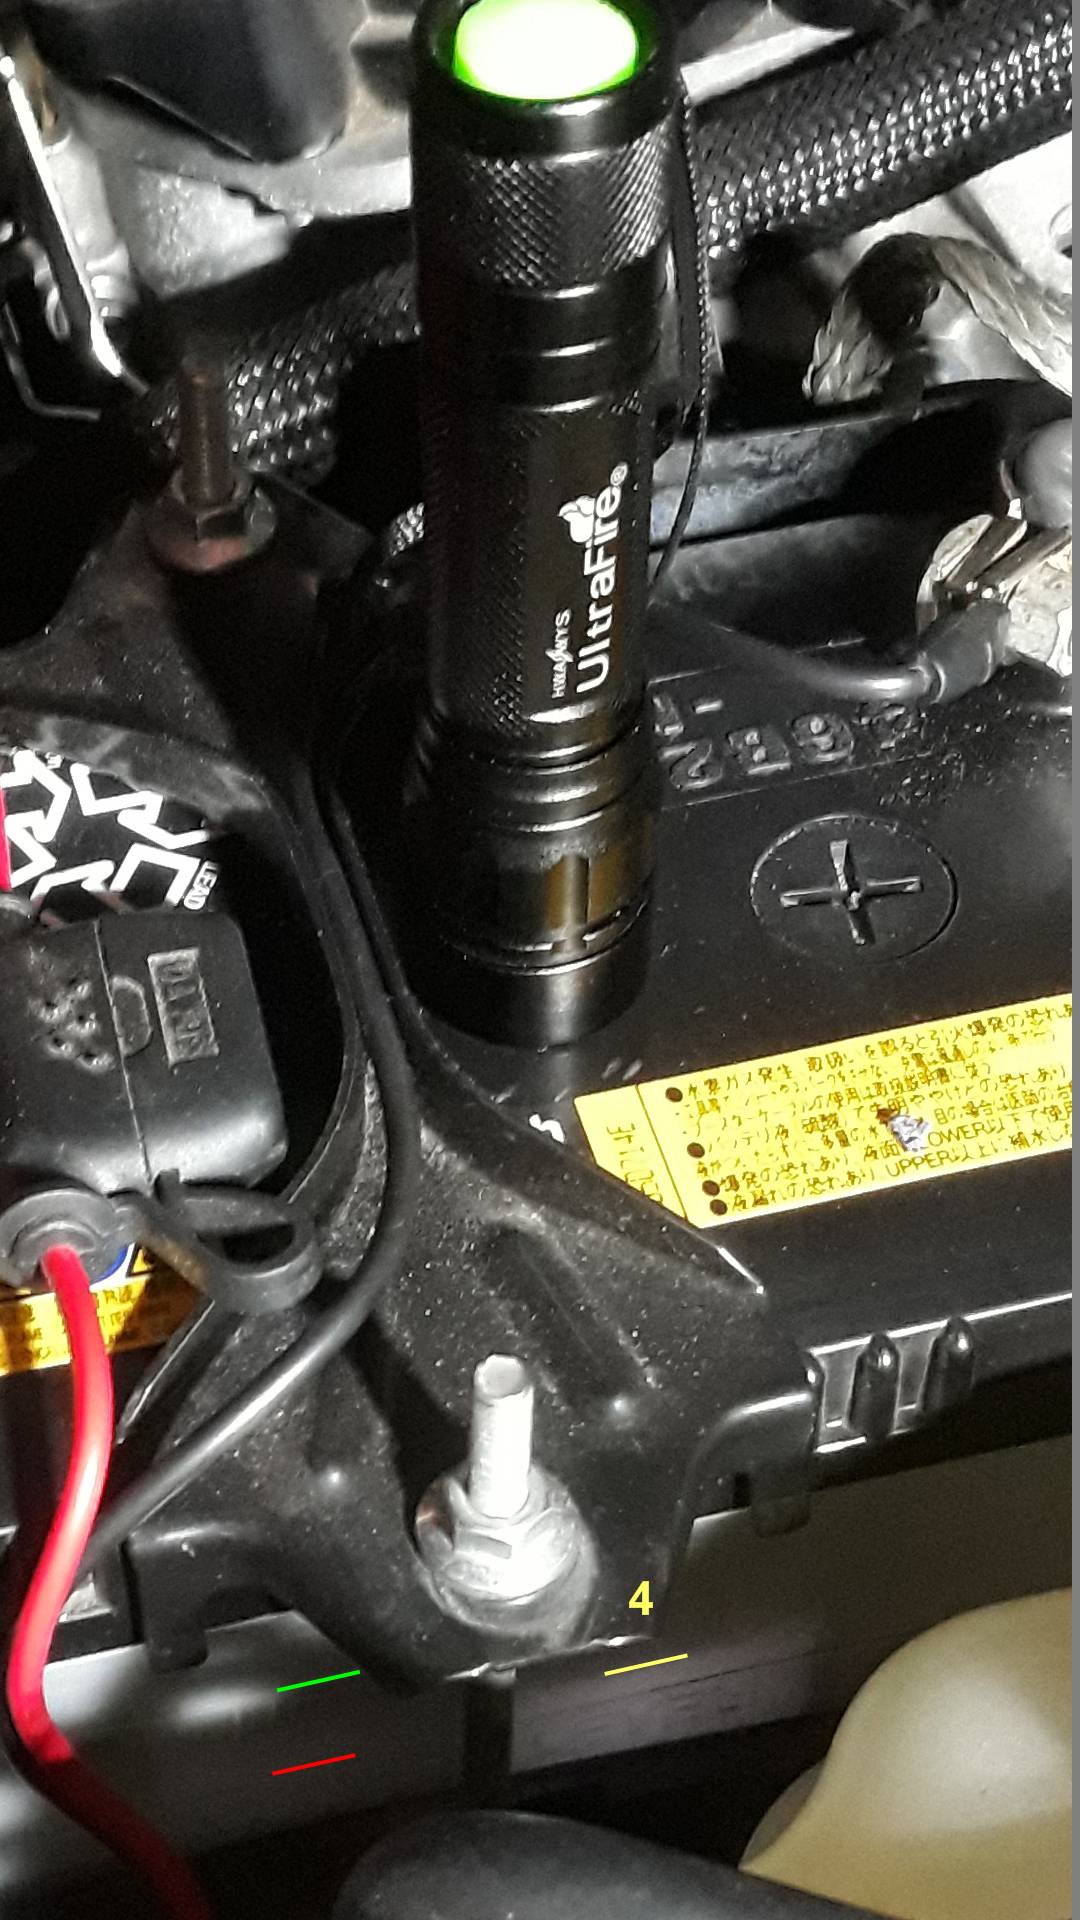
It’s a little bit fiddly with battery terminal lugs getting in the way, but easily do-able. Pics taken after topping up.
I used a 1" penny washer to unscrew each filler plug, one at a time, and lots of clean tissues because the plugs are long with a tube reaching down to the acid.
The torch is bright enough to light the acid in the cell; it is just visible for cell 4 now topped up a couple of mm above the lower level from being a mm below. See the yellow line I added to make it clearer.
Turn the garage lights out and the scattered light from the torch shows adjacent cells are similar, but the camera is struggling to make sense. The good-old Mk1 Human Eyeball is much more effective.
The Precious was awarded a new MOT today, having sailed through its annual service with all boxes ticked in the green.
The lad on the desk said “Look after it, that’s a good one” and told me his mechanic said “It looks like a new car.”
Thank you Milcars for the kind words.