Chap a few doors away from me pays £450 on his ‘02. My ‘06 is £325. Not a game changer but worth knowing.
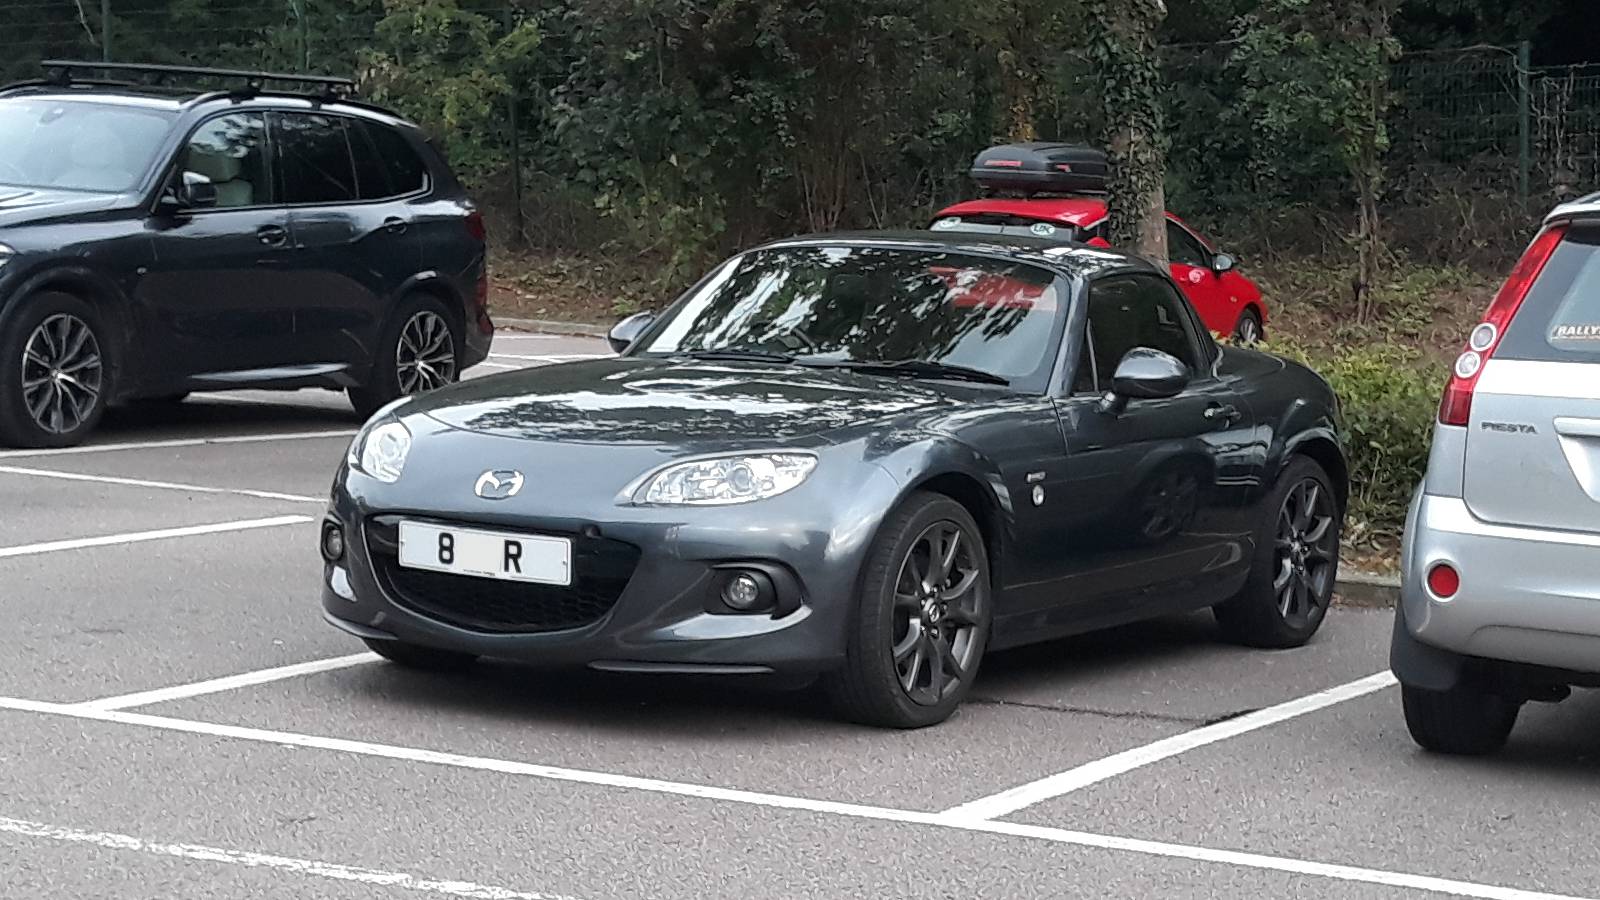
The Precious took me to Hemel Snowdome again for 15th Sept Drive your Five day, and only one Dolphin Grey (?) MX5 still parked at 18.30, a 2013 PRHT. I forgot to have a look at the badge on the wings to find out which edition it was. I’ve blanked two letters on the number plate.
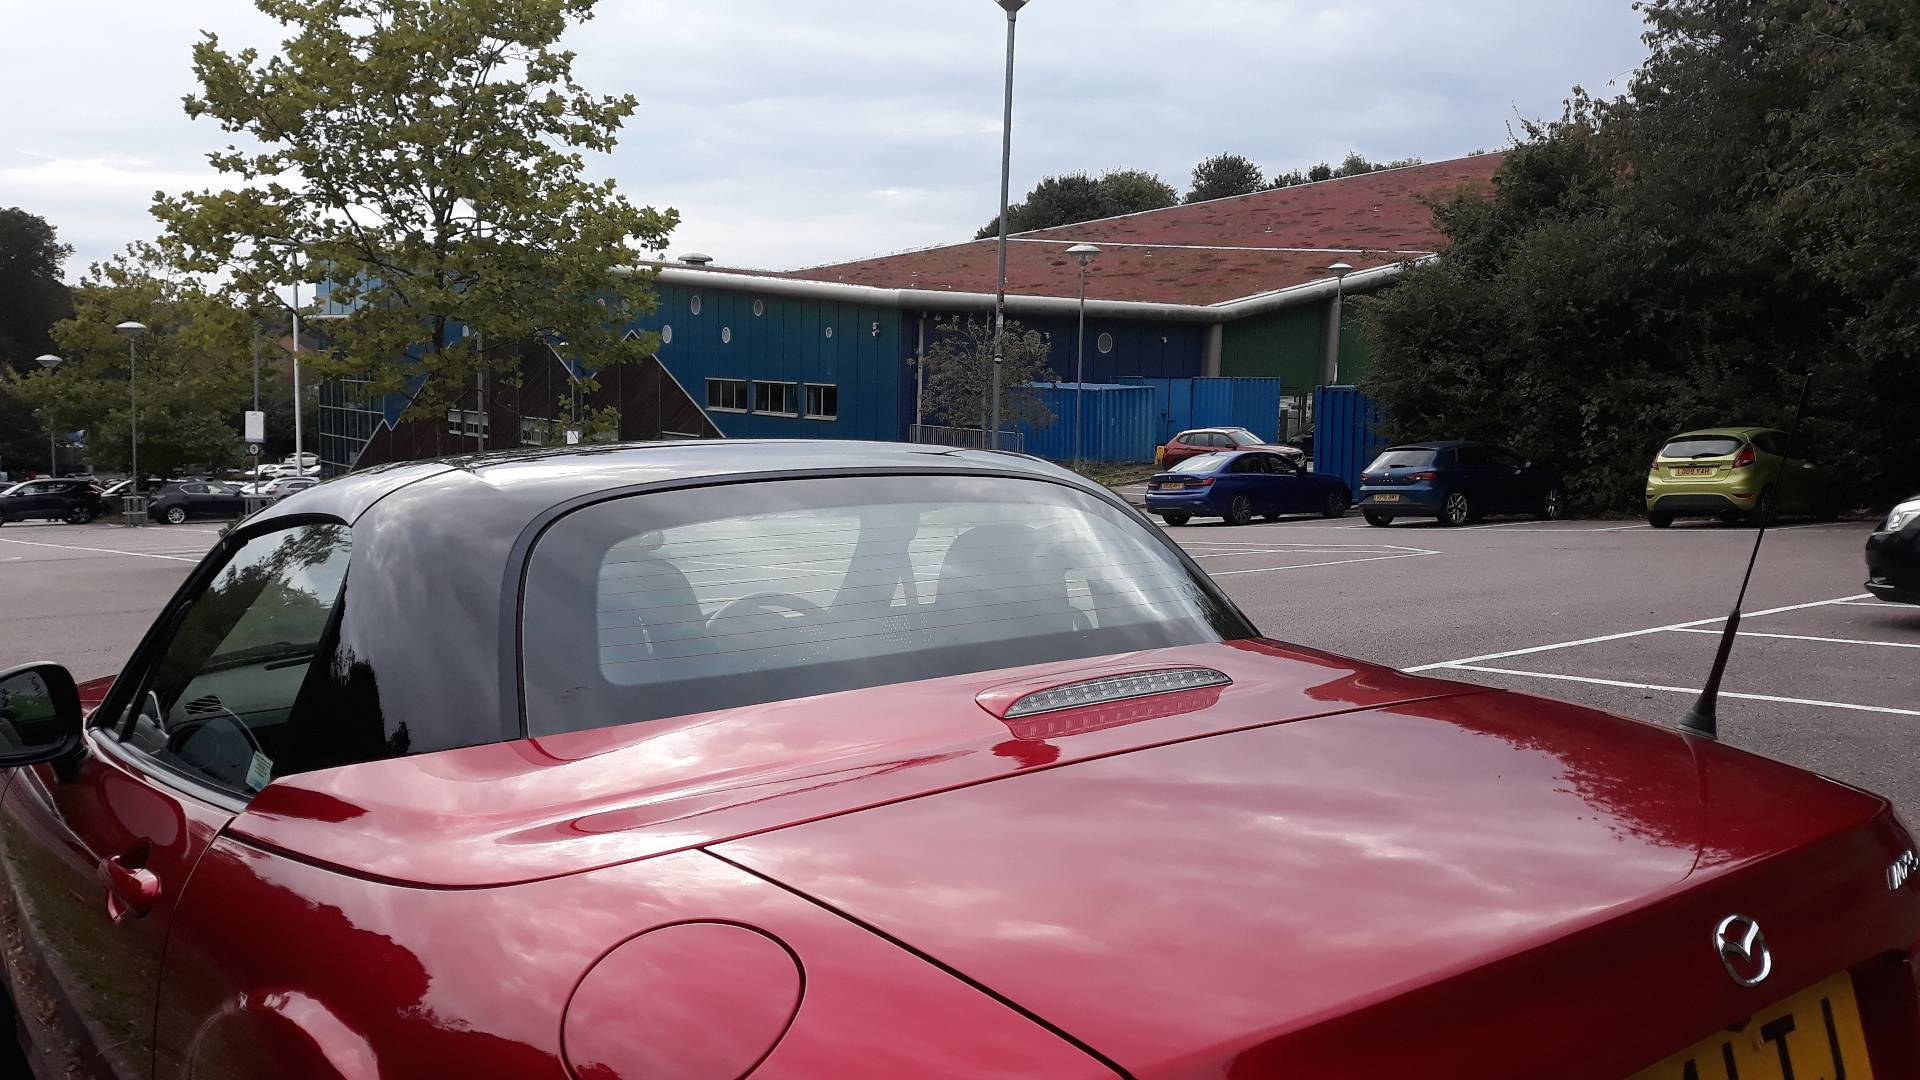
And a shot of the Precious with the ski slope sedum roof behind it.
The BBC weather forecast was amazingly accurate, rain from about 19:00 to 21:00 while we had a meal nearby, and I was driving back in it from about 21:00, but Precious was blow-dried again when I reached home 21.30.
3 Likes
I finally found time to restore coolness in my Precious today, by taking it to my local Kwik-Fit to re-gas the air-con. 69.95 poorer and one hour later it was the chilliest I’ve ever known it.
Curiously I missed having air-con most when the windscreen was misting a bit on a long drive home in some rain a month ago. Usually the air-con dries the air, so no misting.
Looking at service history this is the first re-gas in ten years of low mileage.
My Niseko was re-gassed at thirteen years, but with triple the mileage, so the air-con had been used more frequently, and therefore the seals were better lubricated.
Moral: use it or lose it. ![]()
2 Likes
I need to do that with mine. Think kwikfit have a no charge policy if the regas doesn’t hold…
I sold my 14 plate daily driver this year, the auto climate had never been turned off even in winter. It finally needed a regas at 9 years old, worked fine until then. Took the 14 plate NC last year to get regassed and the daily drivers replacement only 3 years old but the aircon didn’t seem to operate too good in summer. That was only down a little on gas but much better when topped up.
1 Like
It may be an ‘old wives tale’ but l understood using the AC took 10% of your fuel. Since becoming familiar with it cost/benefits I use it at least once a week. That seems to be a reasonable compromise to keep it in good fettle?
As said above, its very handy in the MX as it does seem to fog quickly under some conditions.
1 Like
The A/C in my old 1996/7 Vextra-B worked fine for all its 20 years on the road, no re-gas needed . We might still be using it if the cam-belt tensioner spring had not broken, expensively… ![]()
1 Like
My Brother-in-law had a Mercury Comet convertible. Switch on the air-con and a solenoid opened the throttle to prevent the 170cu-in straight six from stalling. MPG was appalling regardless of how it was used.
This pic from Wikipedia shows one looking exactly like it.

1 Like
Haha!! American cars are ridiculous in so many ways. Still, they know how to fill the arches….
Adjusted the headlight aims for exactly correct dip-beam specification when set on the middle click (1) of the in-cockpit level adjuster by my right knee. (Lower cut off line is 30mm down from centre of bulb at a distance of 3metres.)
This pic is from the Mellens Lighting.pdf, and for USA, so for UK swap the beam shape L ↔ R.
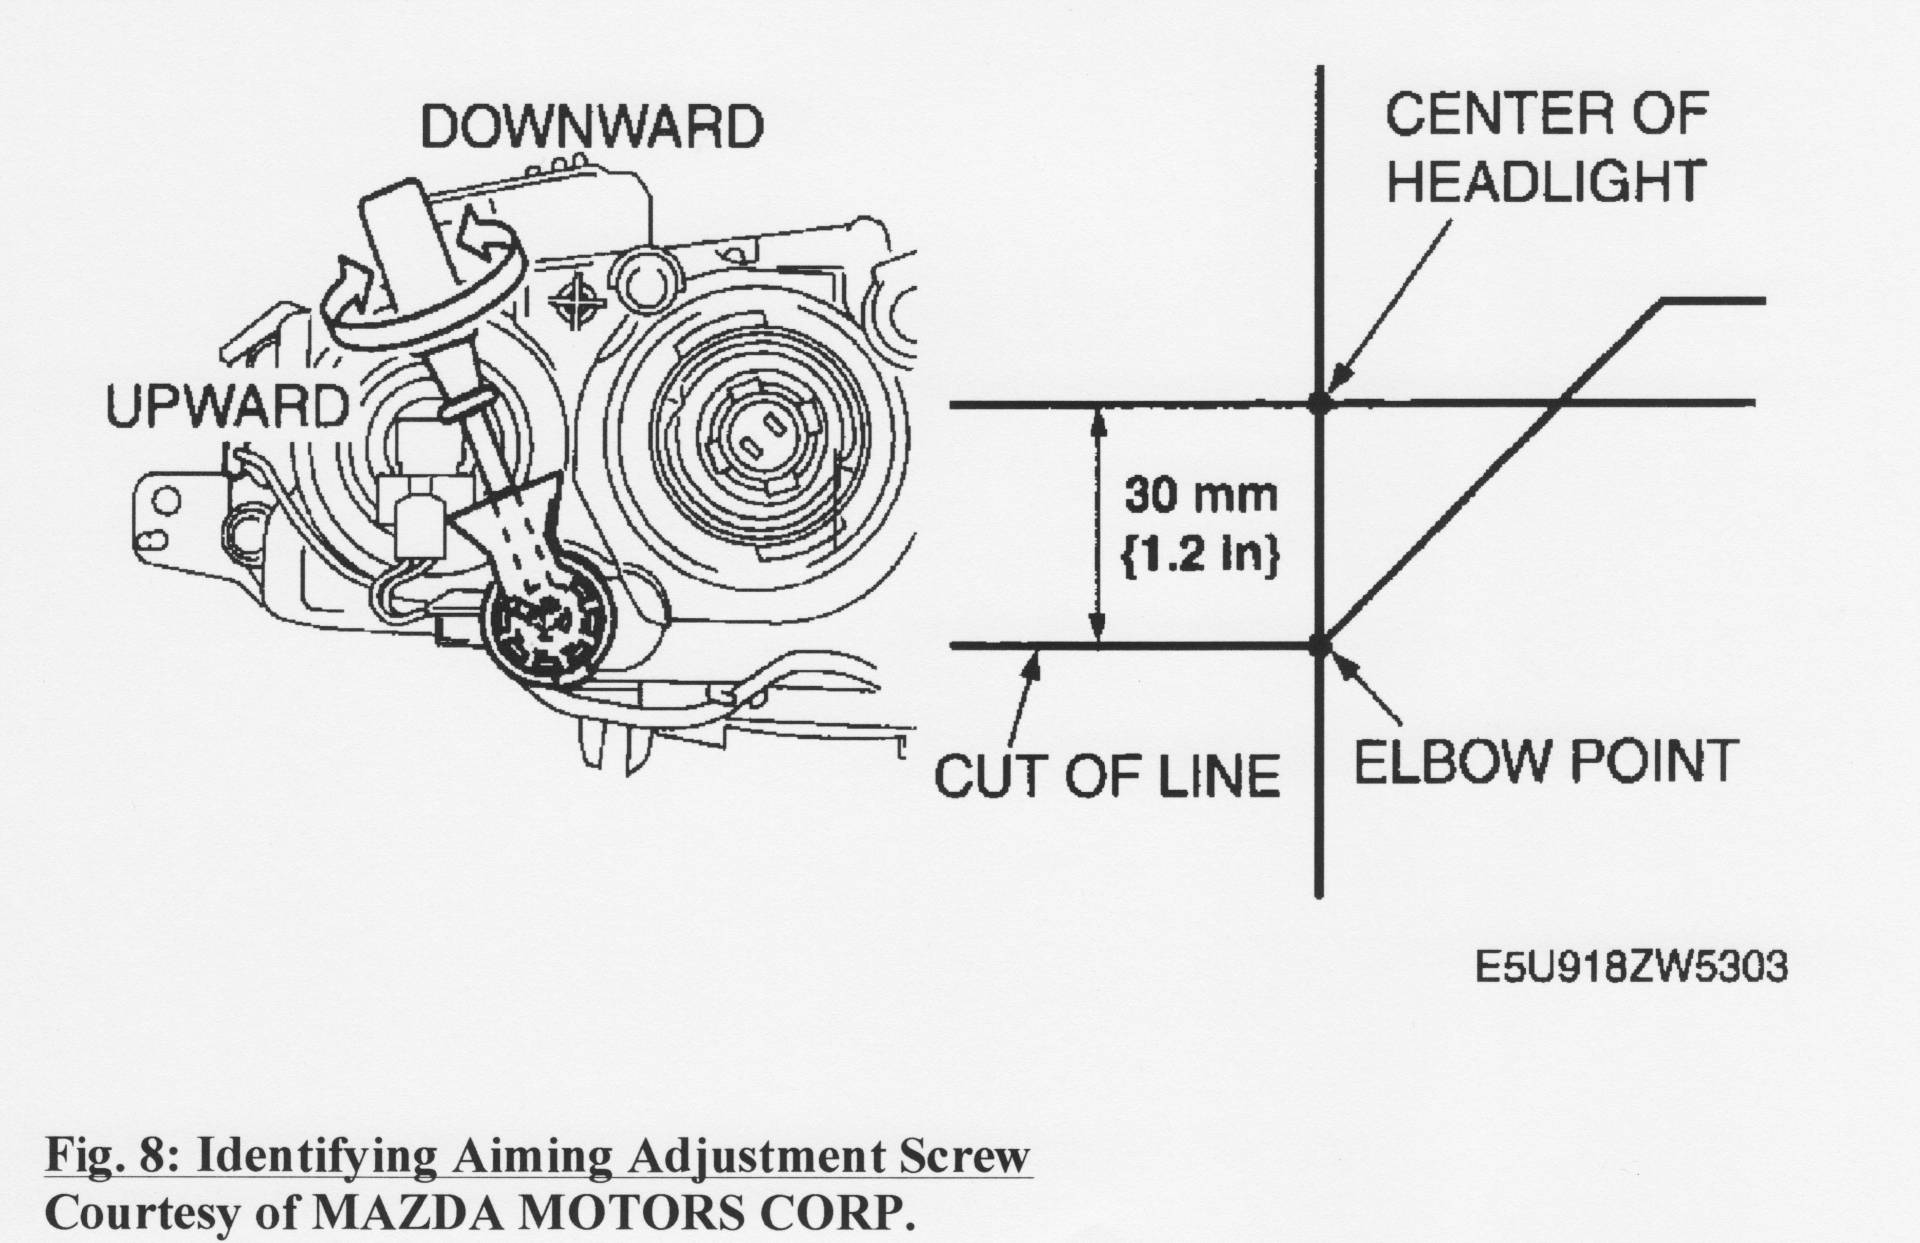
It was originally aimed too low even on the highest click, and obviously the beam aim was not checked at the MOT not so long ago.
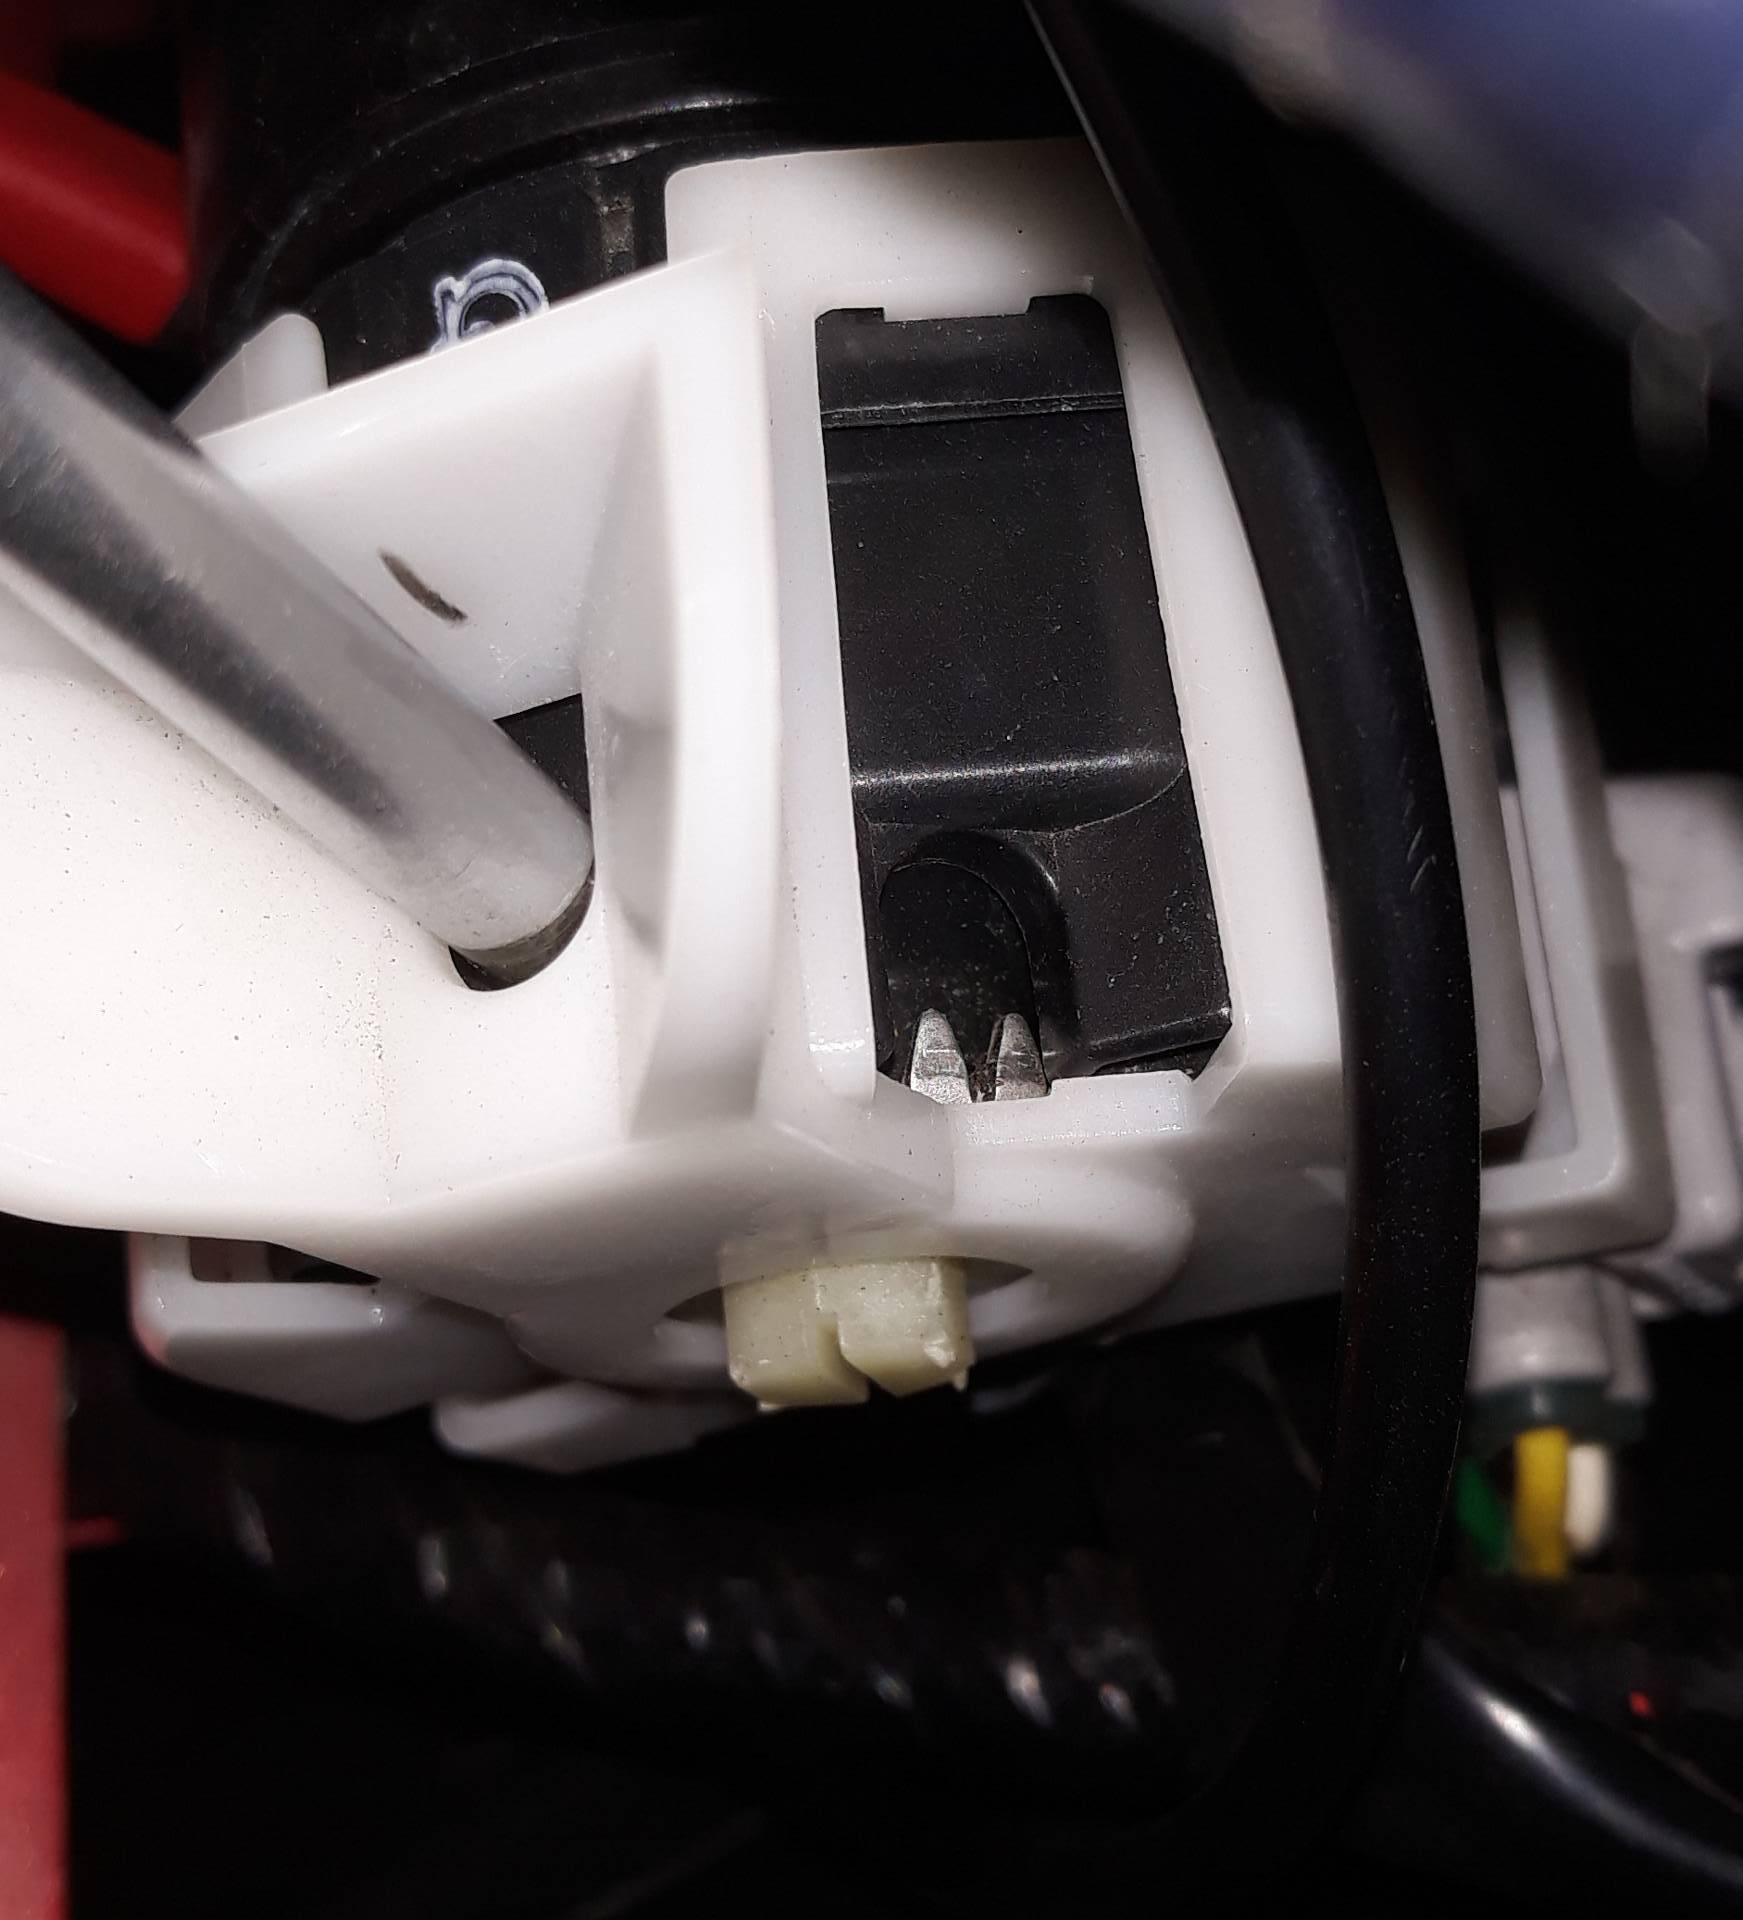
The housing allows three ways of accessing the backstop adjuster: a guided slot, here with a no2 cross-head screwdriver in place (or a slim no3); unguided slot for a key or screwdriver here with the teeth visible; and its nylon hex head with screwdriver slot.
I used the screwdriver as it was much easier on both sides. Pic is of driver’s side adjuster.
Tested today on another run to Hemel Snowdome, this time in the dry with a clear night, so much better.
1 Like
Took the Precious to meet some more MX-5s at the Cricketers in Sarrat on Wednesday, but in going there I made the mistake of using the scenic route, and discovered too late that the road was covered in mud left for more than a mile by HS2 trucks and then Thames Water’s roadworks.
So today the Precious was thoroughly rinsed down underneath to remove the yellow clay and given a good wash and final rinse with stored rain water, followed by a half-hour blow-dry on clean, dry, local roads.
Now gleaming again, but the light was gone by the time we returned home so a shiny picture will have to wait for the next sunny day.
1 Like
Now that’s dedication ![]()
1 Like
Never heard half hour of pleasure called a blow-dry…
1 Like
The wired “Remote Control” for the Sub was rattling around a bit too much under my seat, annoying, but I’m still experimenting with settings so it remains connected.
But this morning I had a rare brainwave; stick it in place with some self-adhesive Velcro.
Soon the loops were on the back of the Remote and the hooks on top of the Sub.
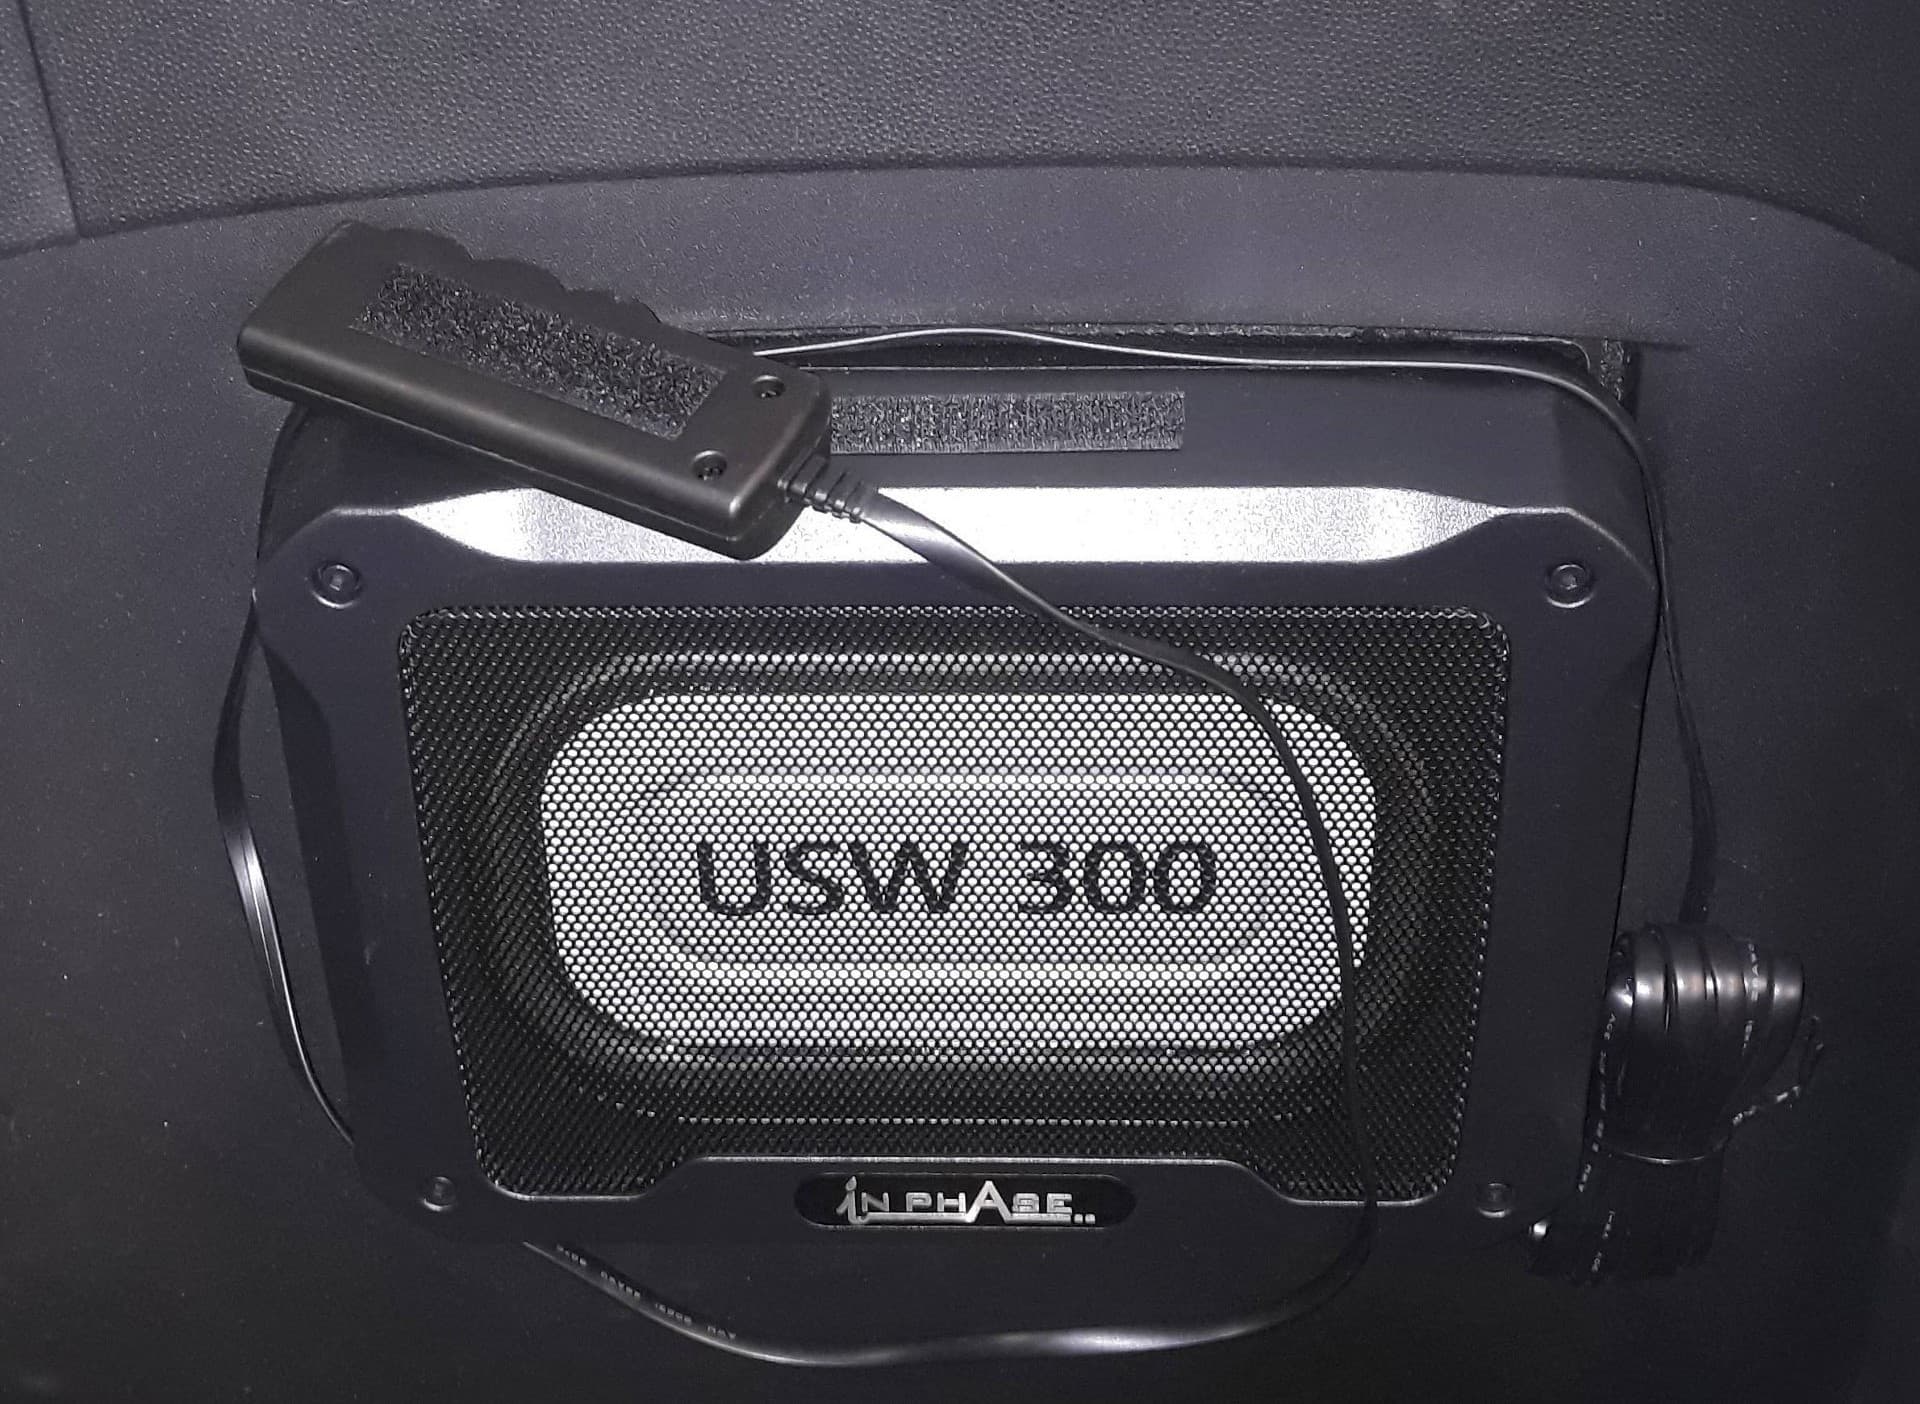
and it looks like this when parked.
3 Likes
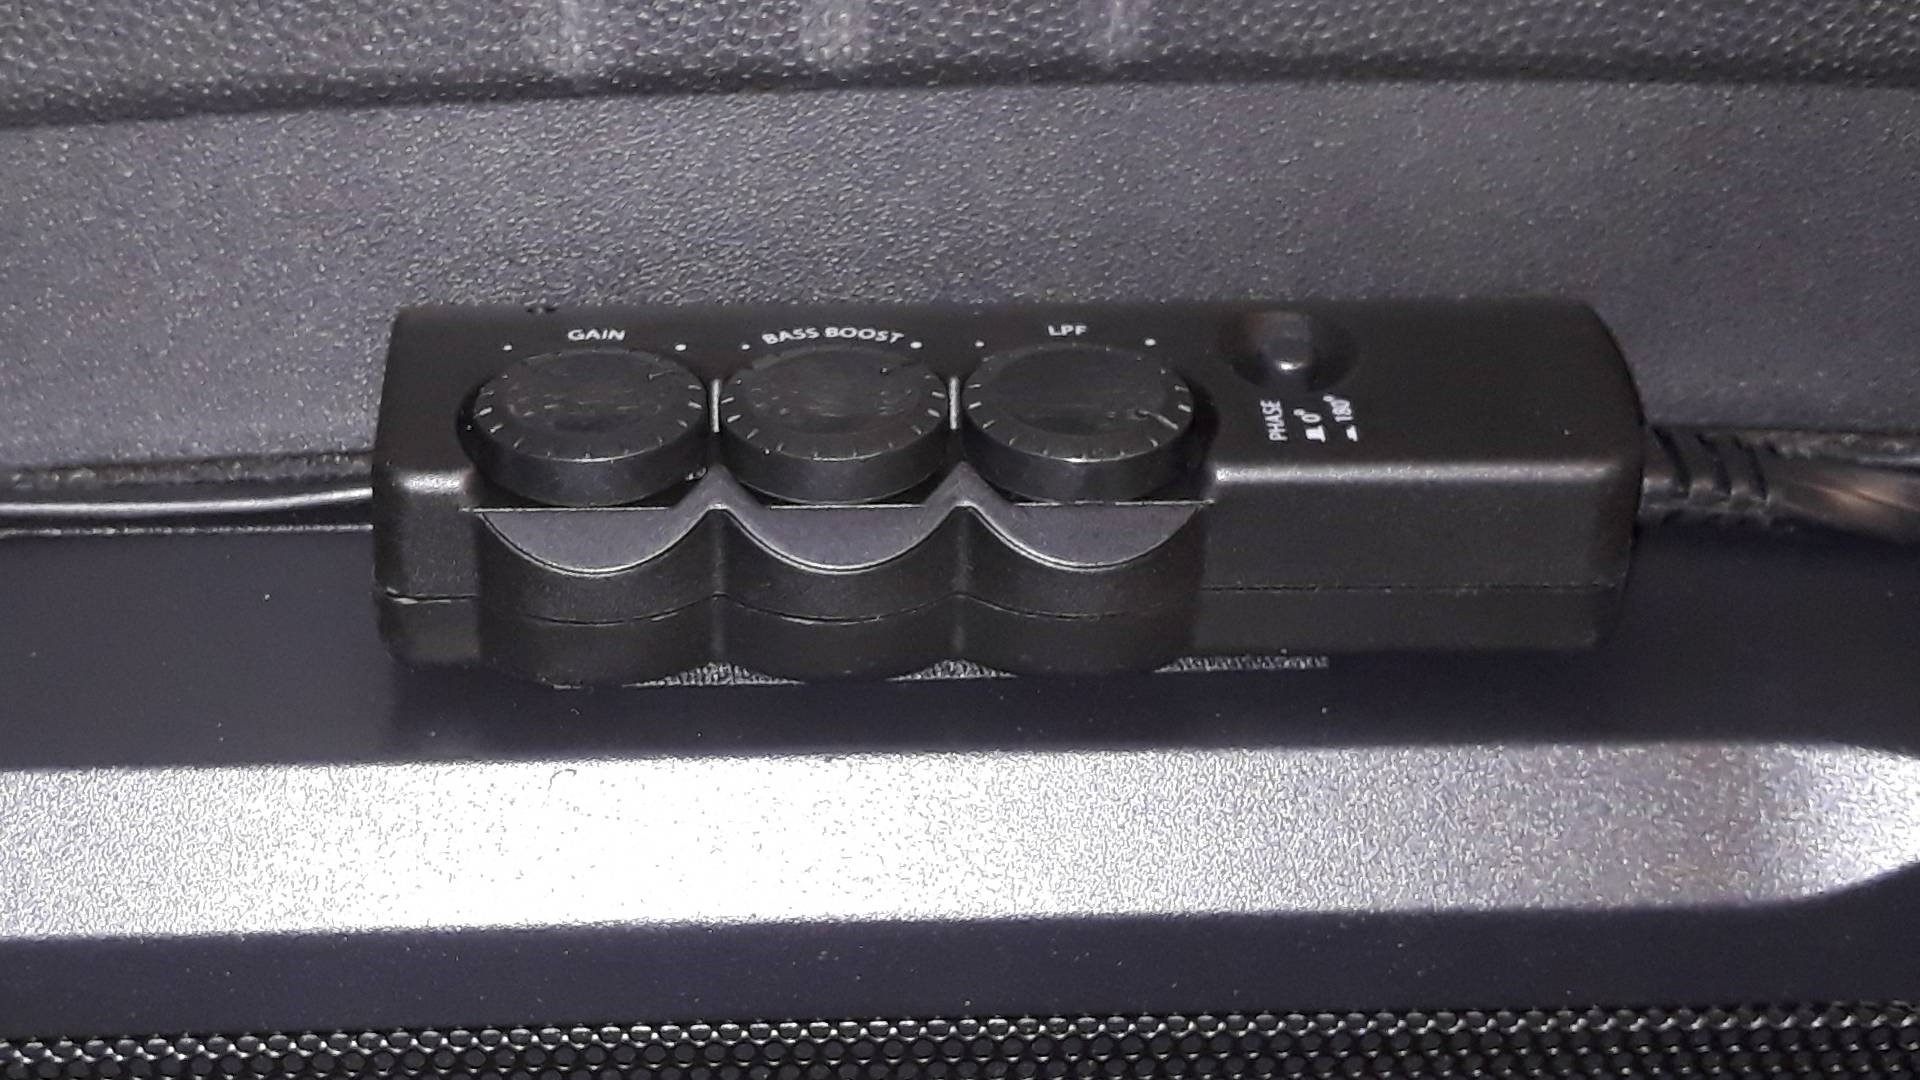
Nice job , just out of curiosity what’s the hz cut off set at on amp ?
At the moment Alpine is set at 125Hz high pass filter on fronts with a 12dB slope, ie 12dB down at 62.5Hz., so the door speakers are still doing something, including their resonances.
The low pass out to the sub is also set quite high in the Alpine but down a bit from the 125Hz for a flatter sum total. Level out to Sub is on maximum!
Knob twiddling on the Remote has been tried by me and a couple of passengers on various favourite bits of music, so I’ve no idea where it is now!
Graphic EQ is set flat.
So it’s a bit smoother than the doors alone did. Measurements are better.
But it’s still not good enough, I’m hoping to find something with a lower fundamental and no resonances around 100Hz!
I may revisit the doors as I’ve some ideas to try out, but I’ll hold on to them until proved or disproved.
But I’m not looking too hard for a better Sub at the moment; other non MX-5 things on my mind, alas.
It’s the little things that count the most.
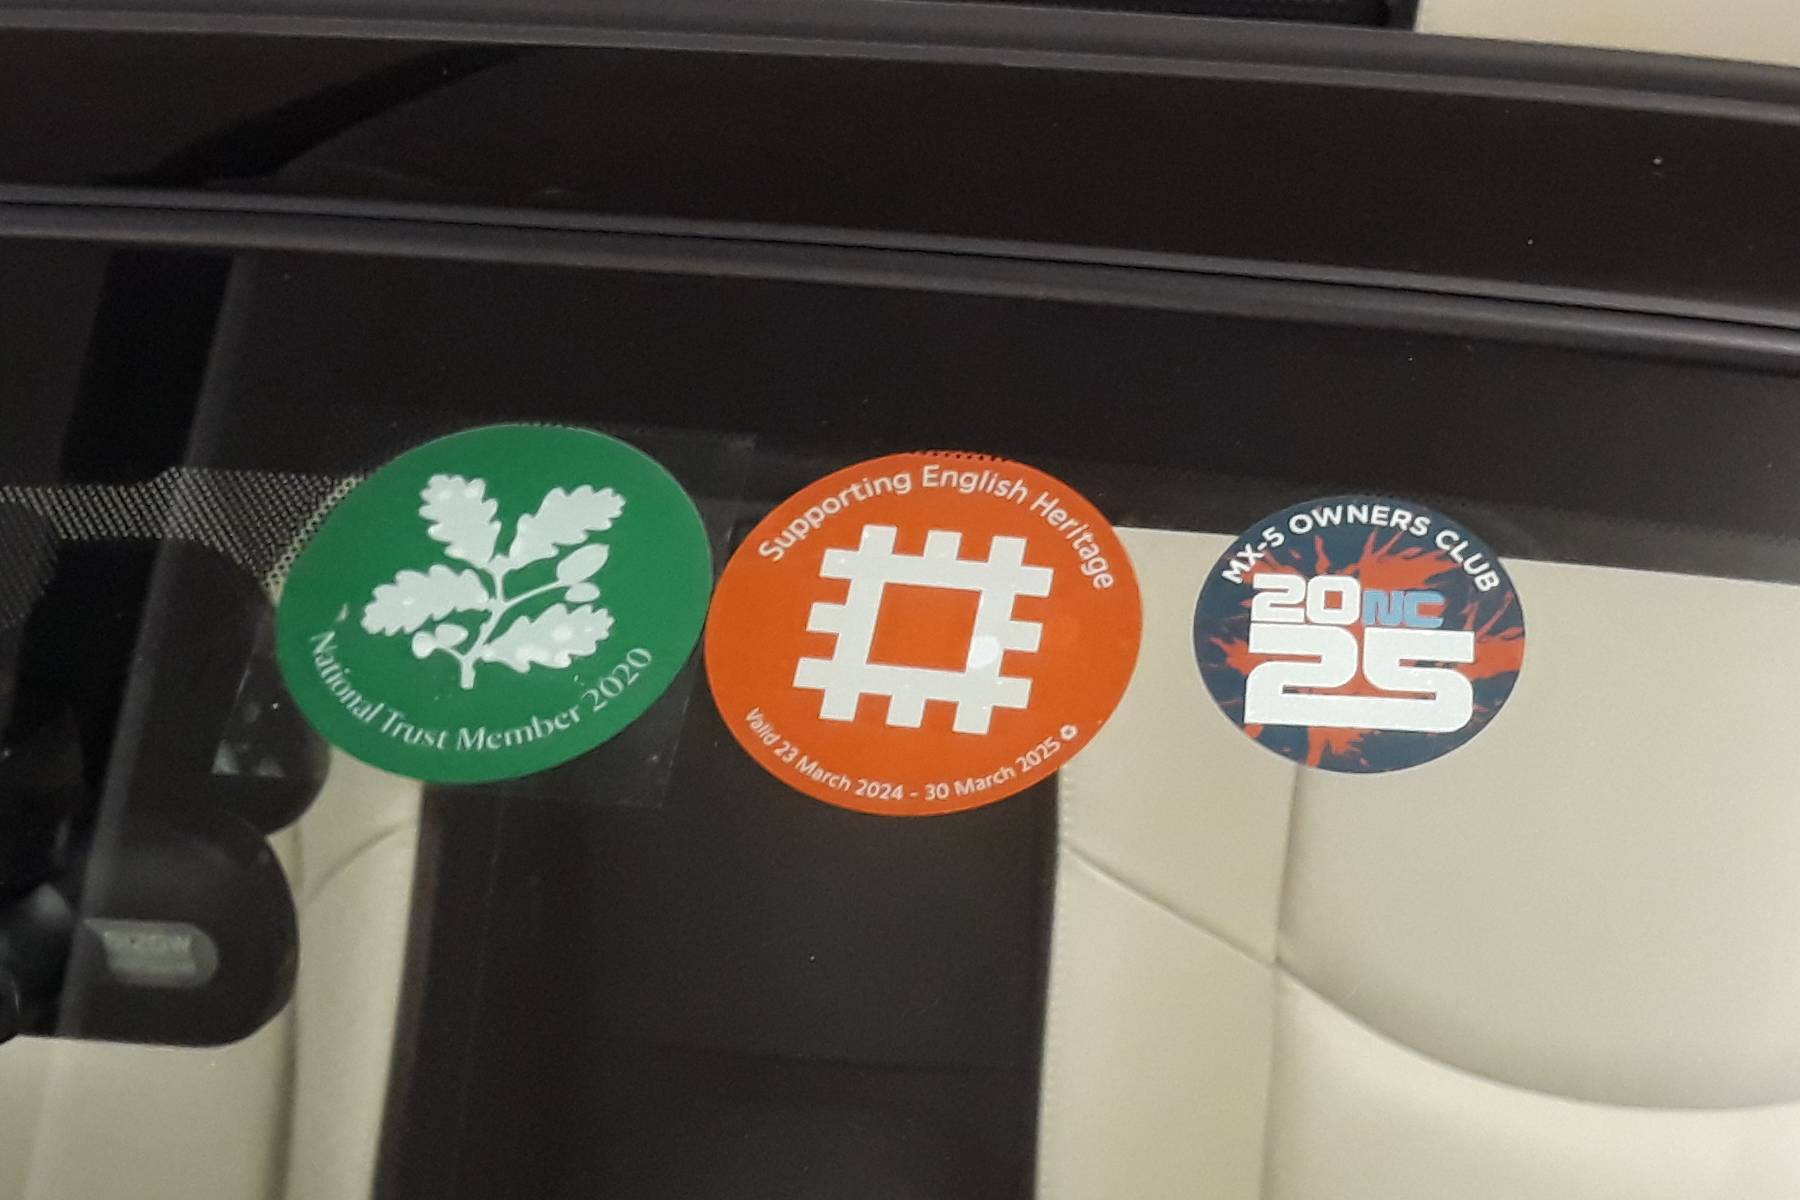
Today I changed the club sticker for the 2025 version. I notice next to the 20 and above the big 25 is what looks like NC. This is appropriate for my NC 25AE.
1 Like
20 years of the NC Richard…
1 Like
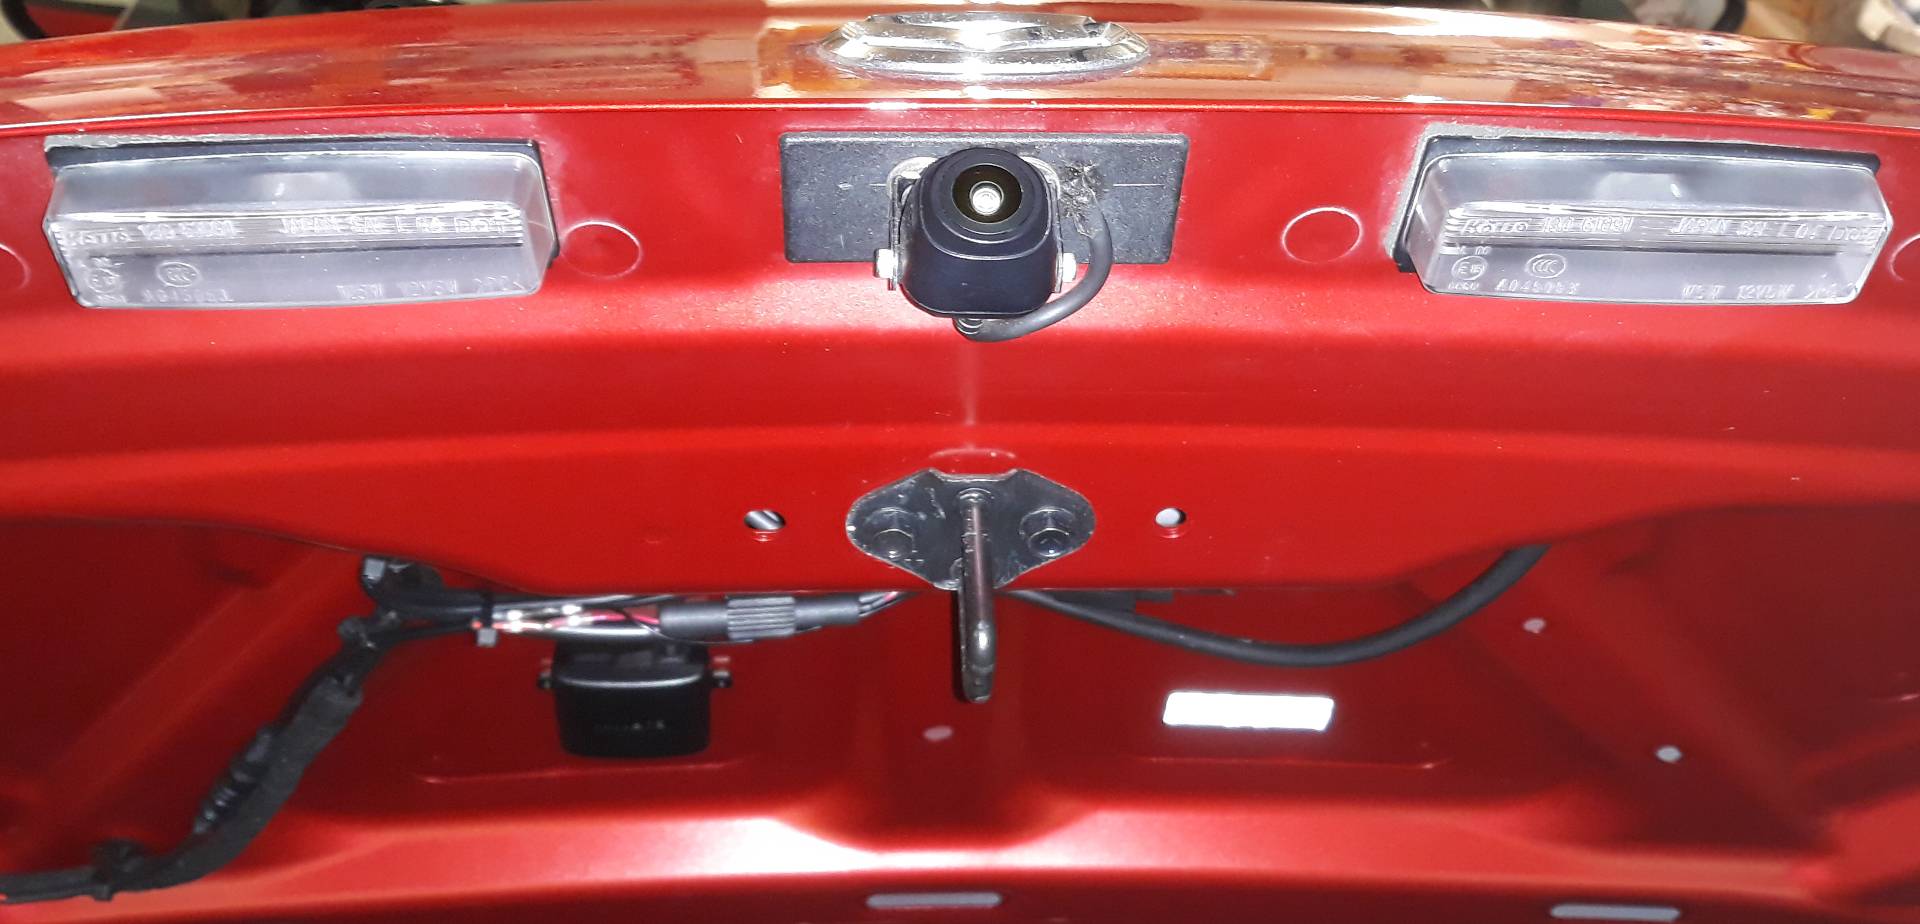
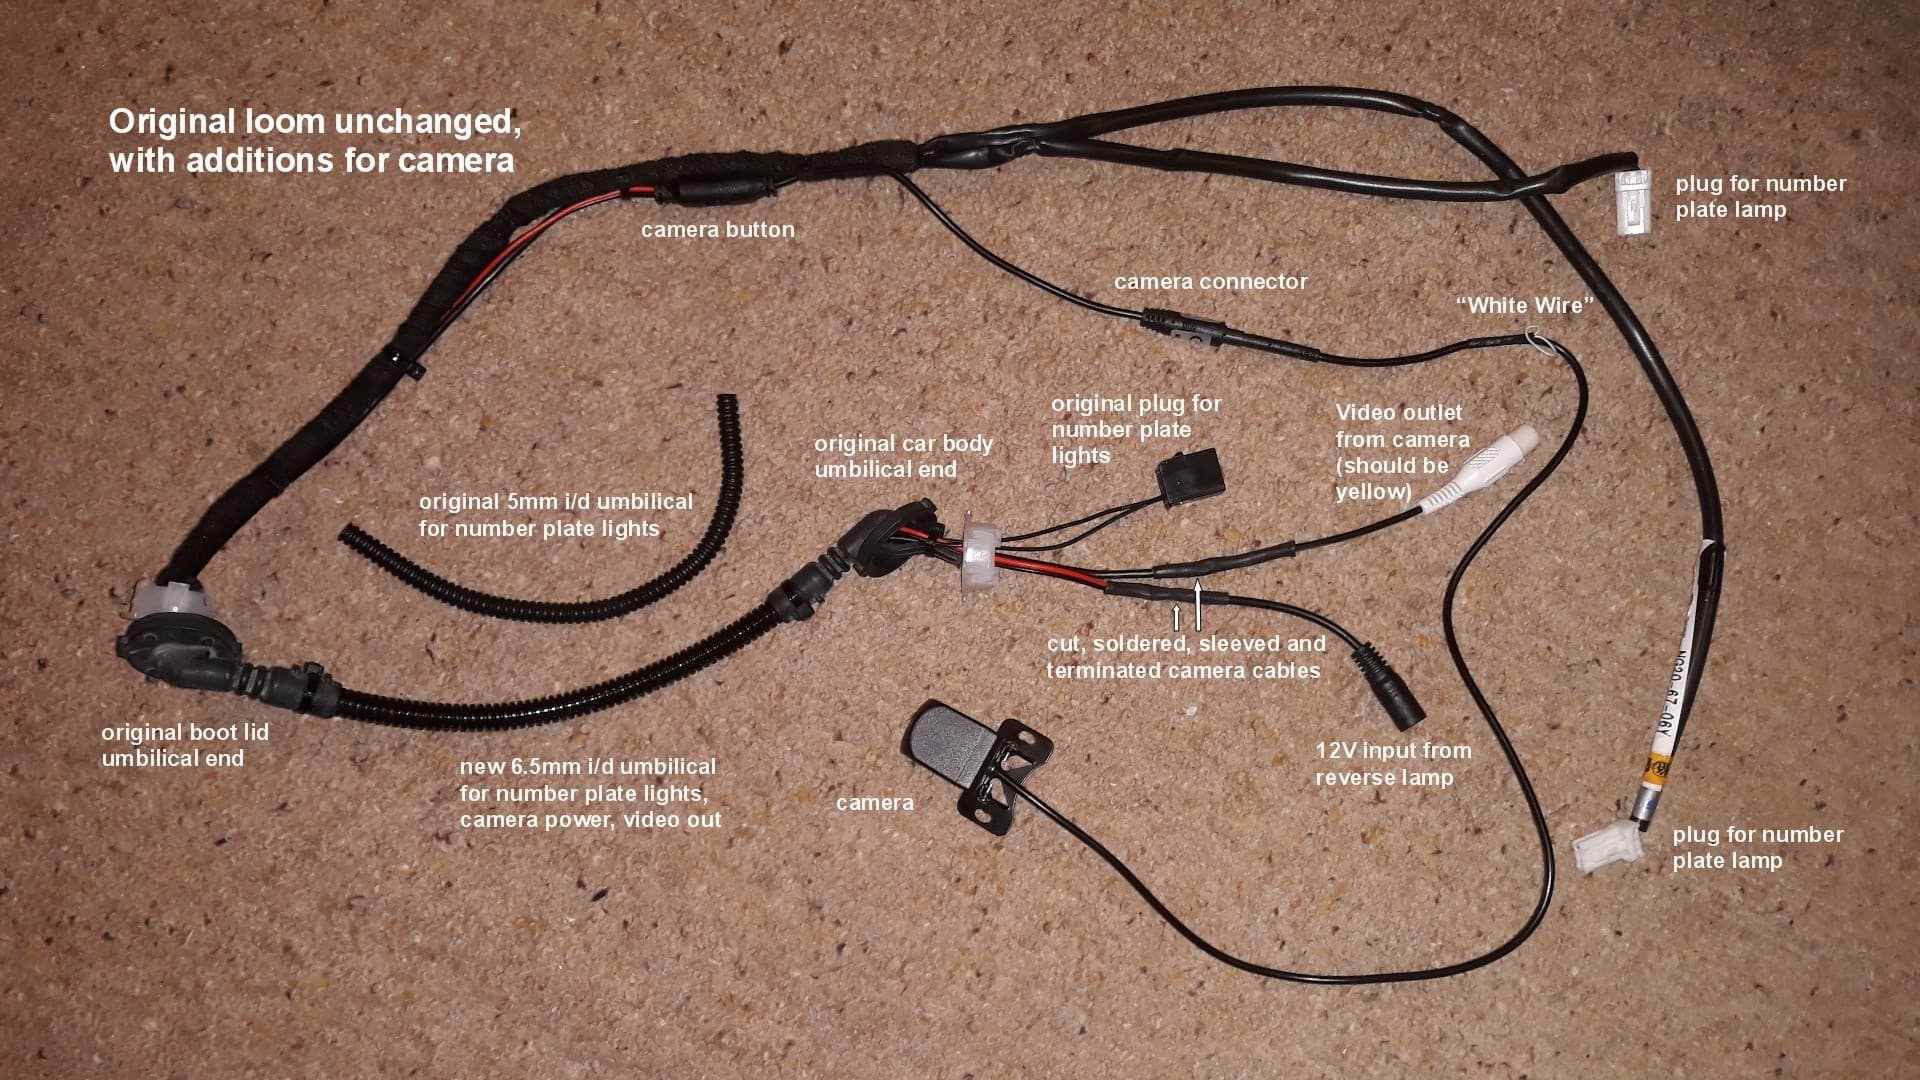
The bits arrived today to allow me to upgrade the reversing camera, key to the operation is a new bit of umbilical flexi, 6.5mm internal diameter allows enough room for video cable, camera power cable and number plate lamp wires.
With the aid of an antique specialist tool I was able to expand the rubber sleeves at the ends of the umbilical to fit over the slightly bigger flexi.
This is what I fitted when I bought the car, Garmin camera using an rf link to my Garmin Satnav.
with extra wires added to the umbilical
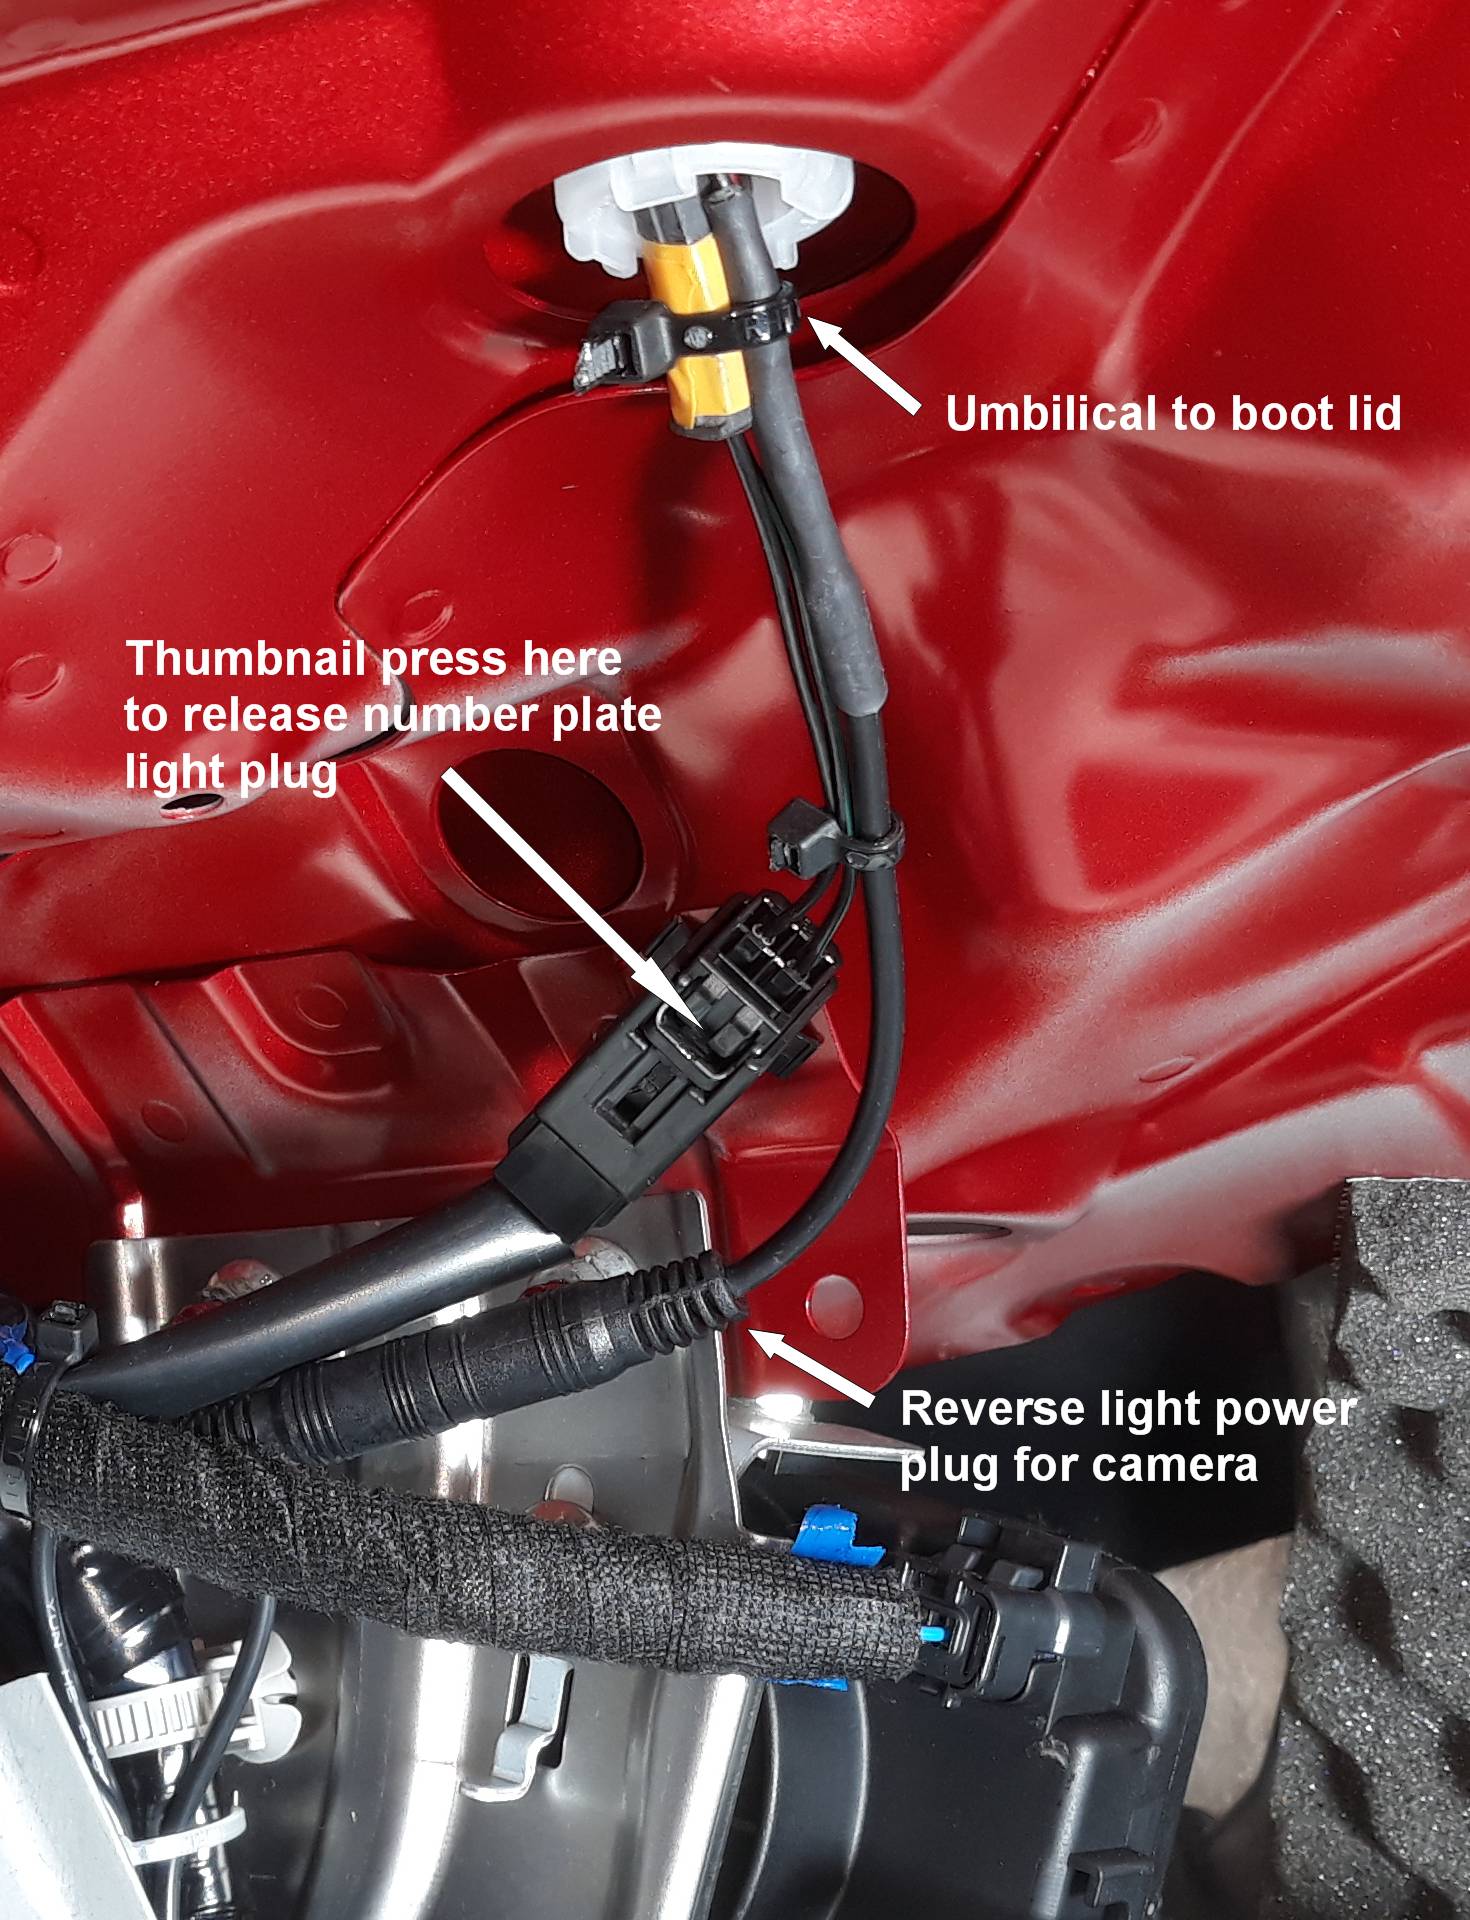
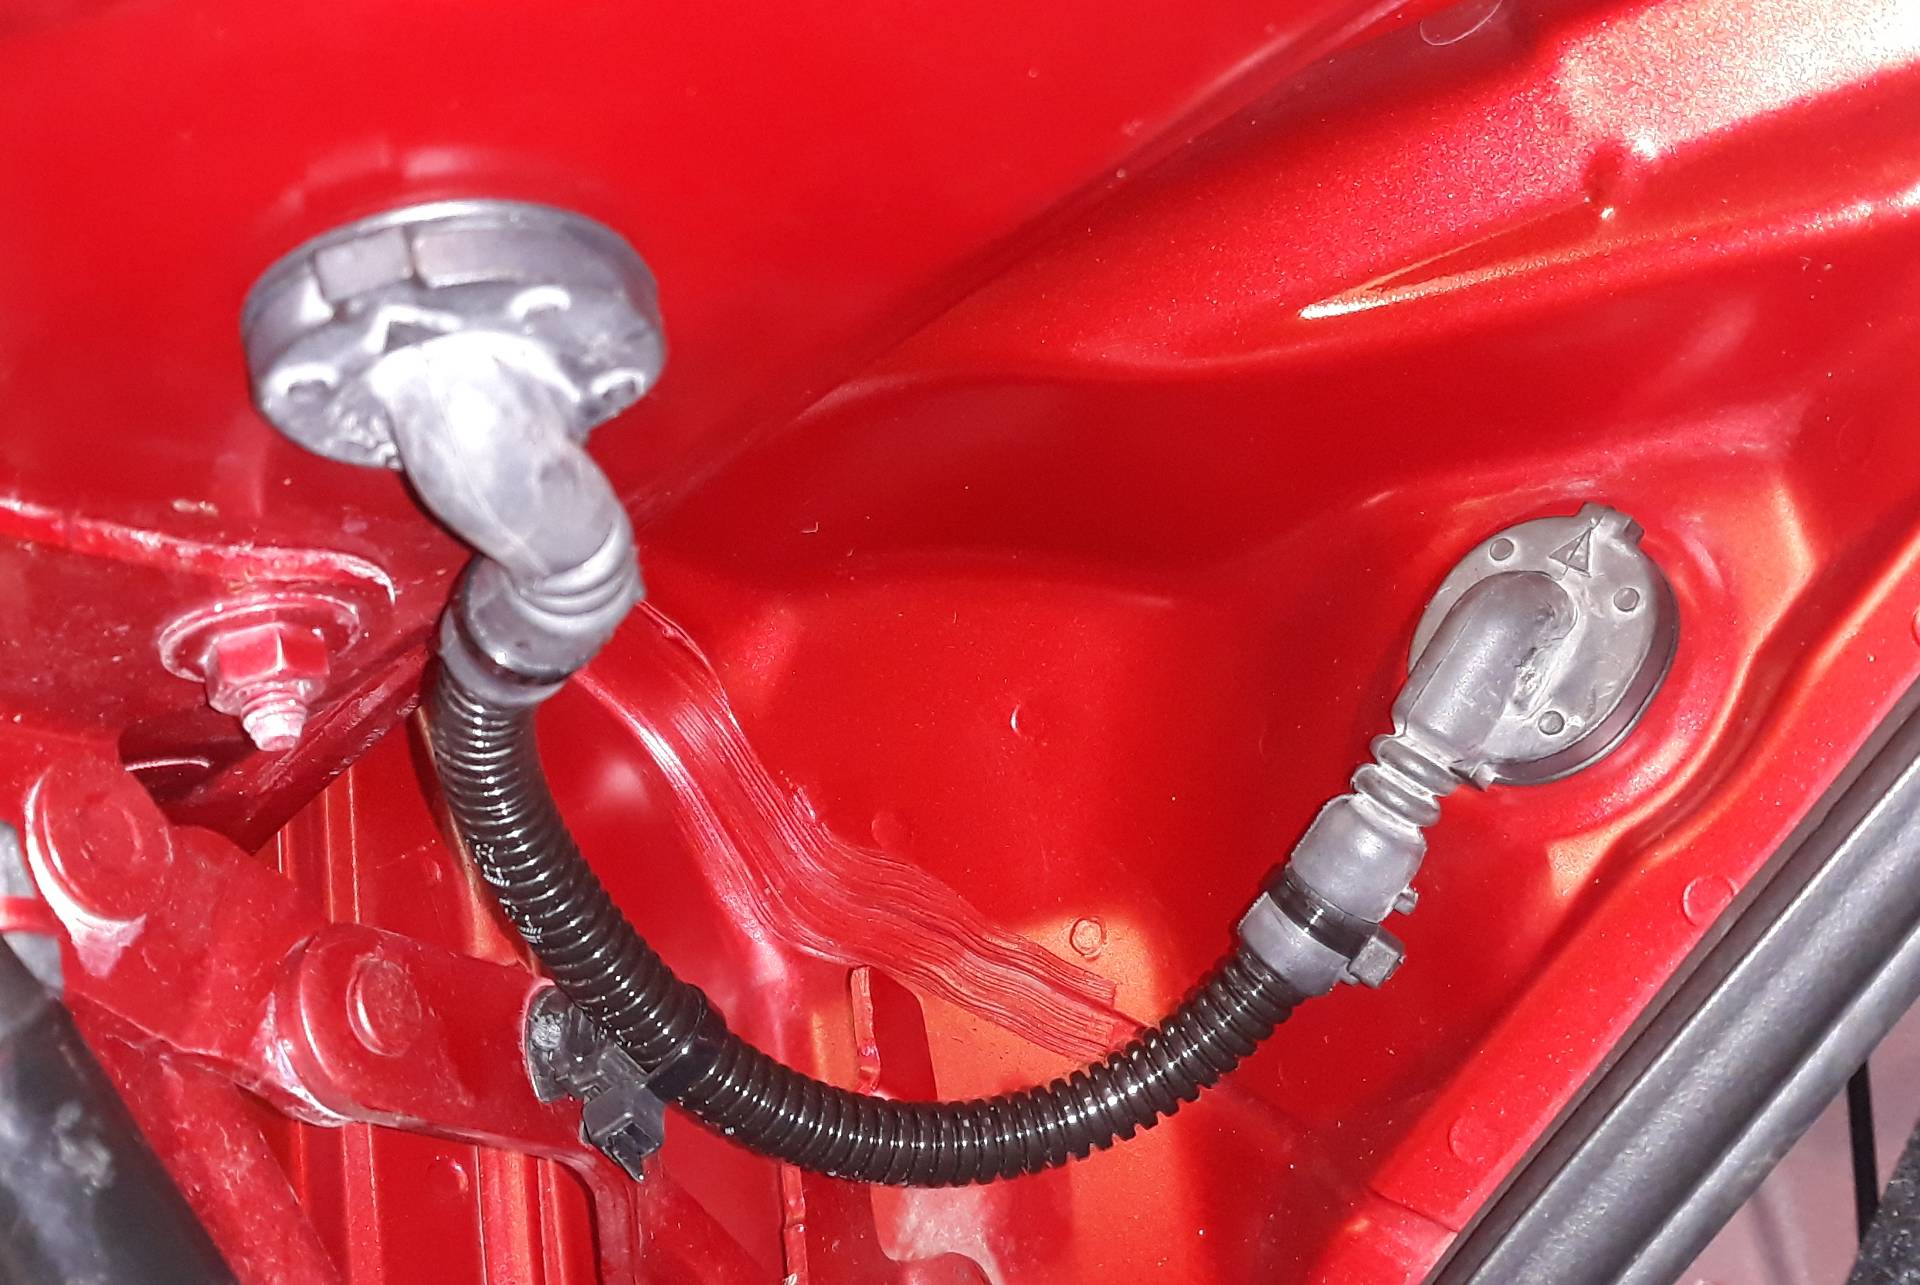
Tease off the rubber cover and then it’s easy to release the four tangs on the plastic clip to withdraw the end of the umbilical
Snip a few cable ties and the whole boot loom can be removed for easy work on a table.
The complete loom as I’d modded it for the first camera.
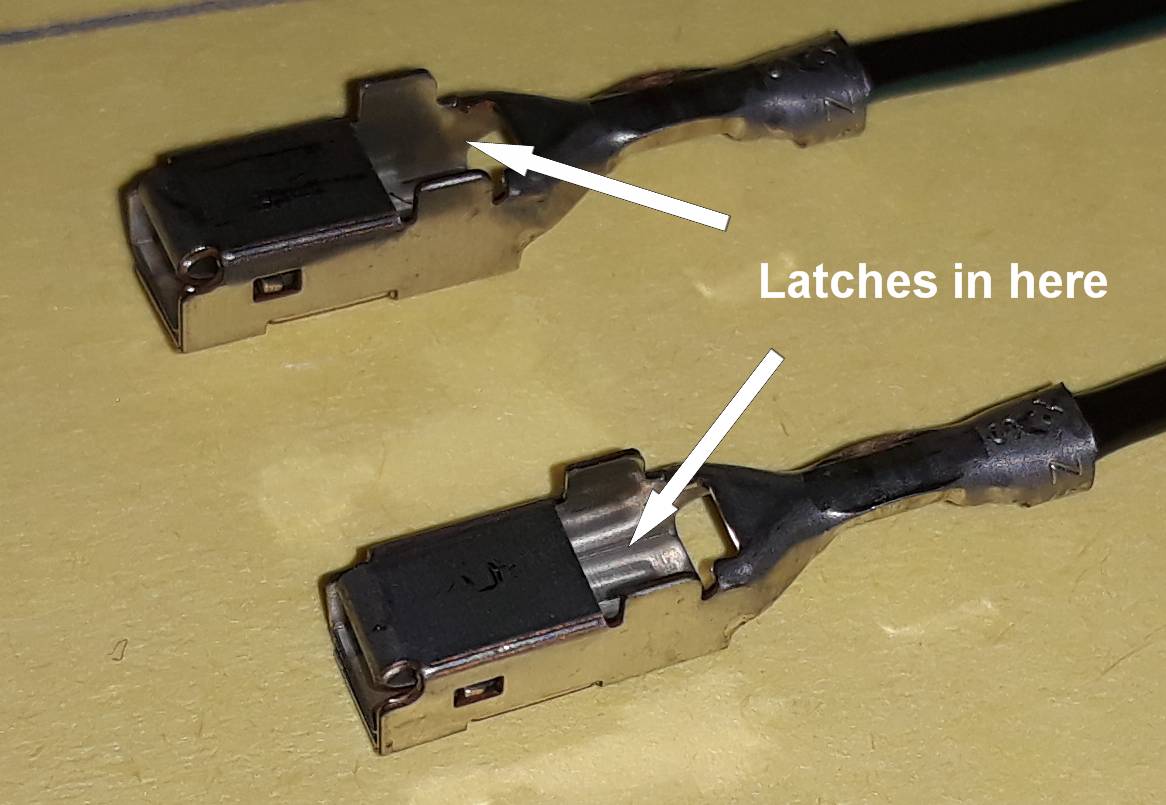
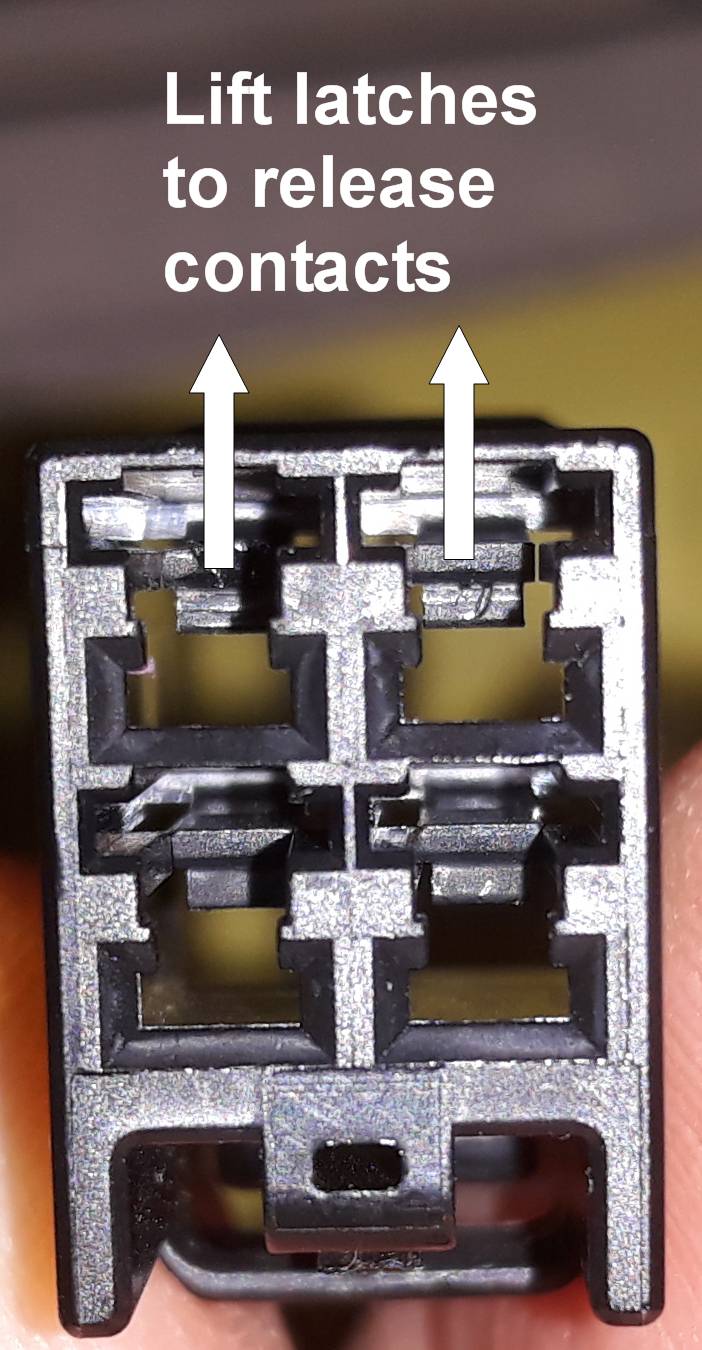
I wanted to use as much untouched original Mazda wiring as possible. This is easy, but only if the two contacts are removed from the number-plate light plug to allow those two wires to be extracted from the old umbilical, after I had first drawn out the cut-off camera power wires. I put some tape around the contacts to prevent the tangs snagging on the corrugations and staggered them by a couple of inches to minimise the cross-section, both when removing and when reinserting them as first-in later.
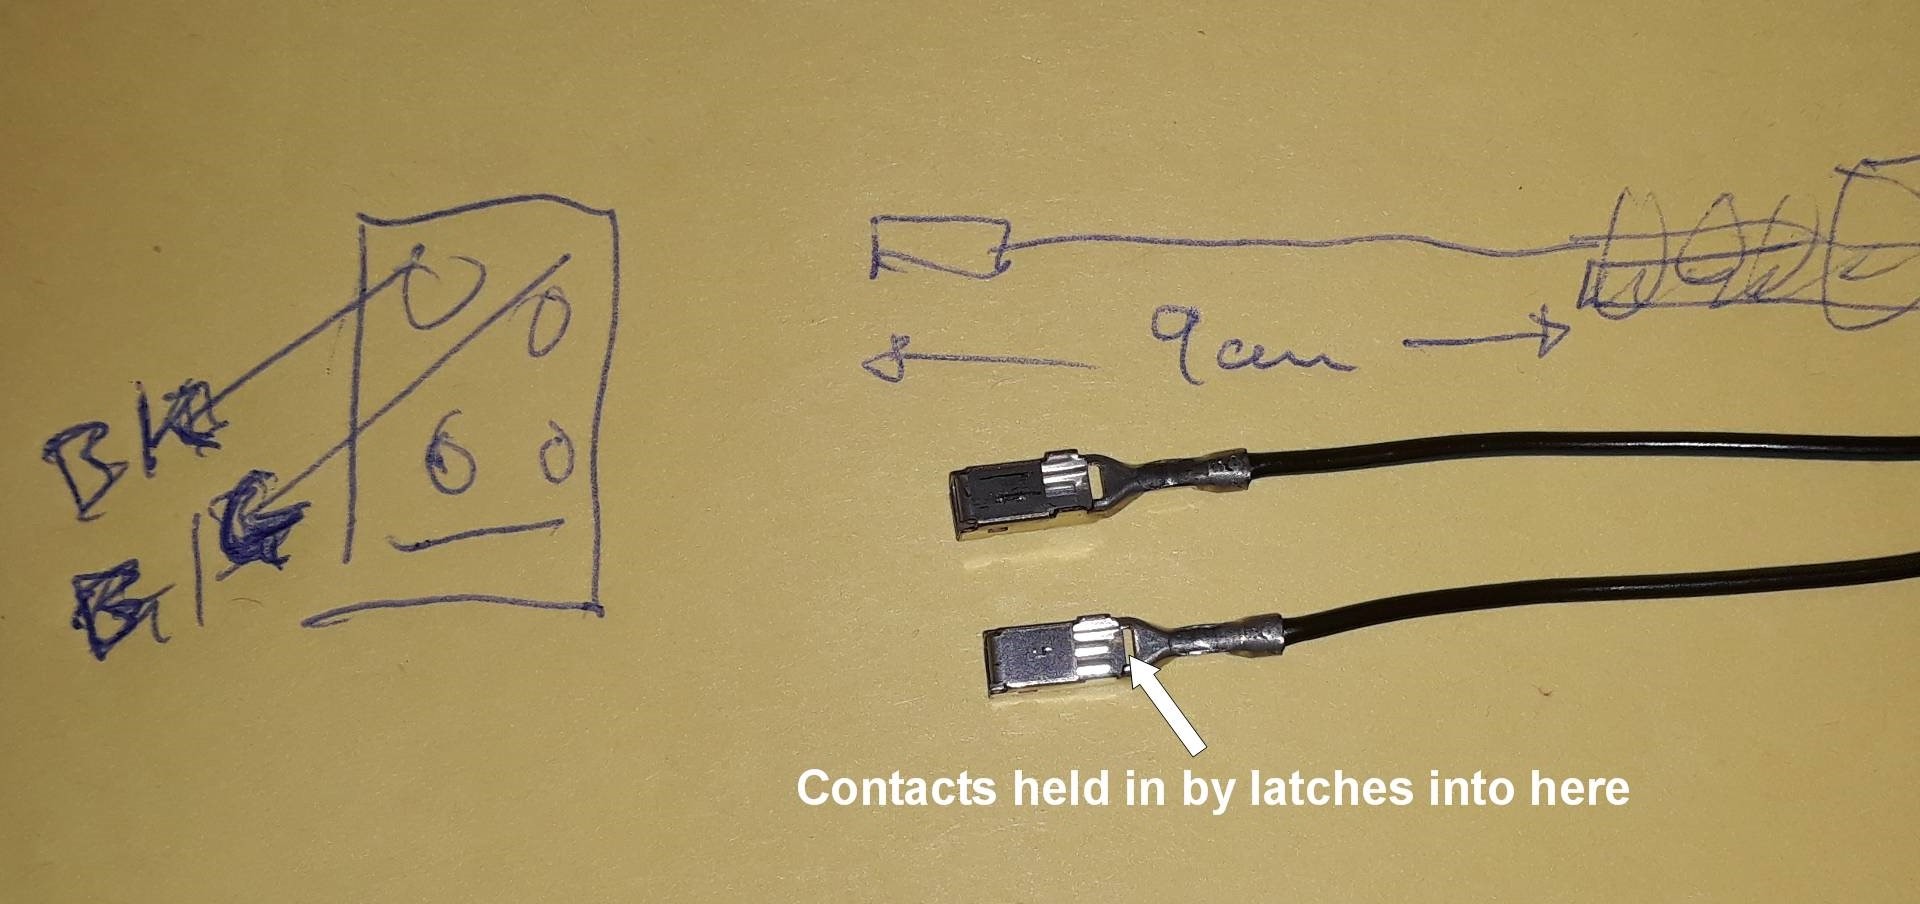
Extracting the contacts is tricky because a slim jewellers screwdriver is needed into the front of the plug to lever/lift the latch out of the recess in the contact to allow it to be extracted.
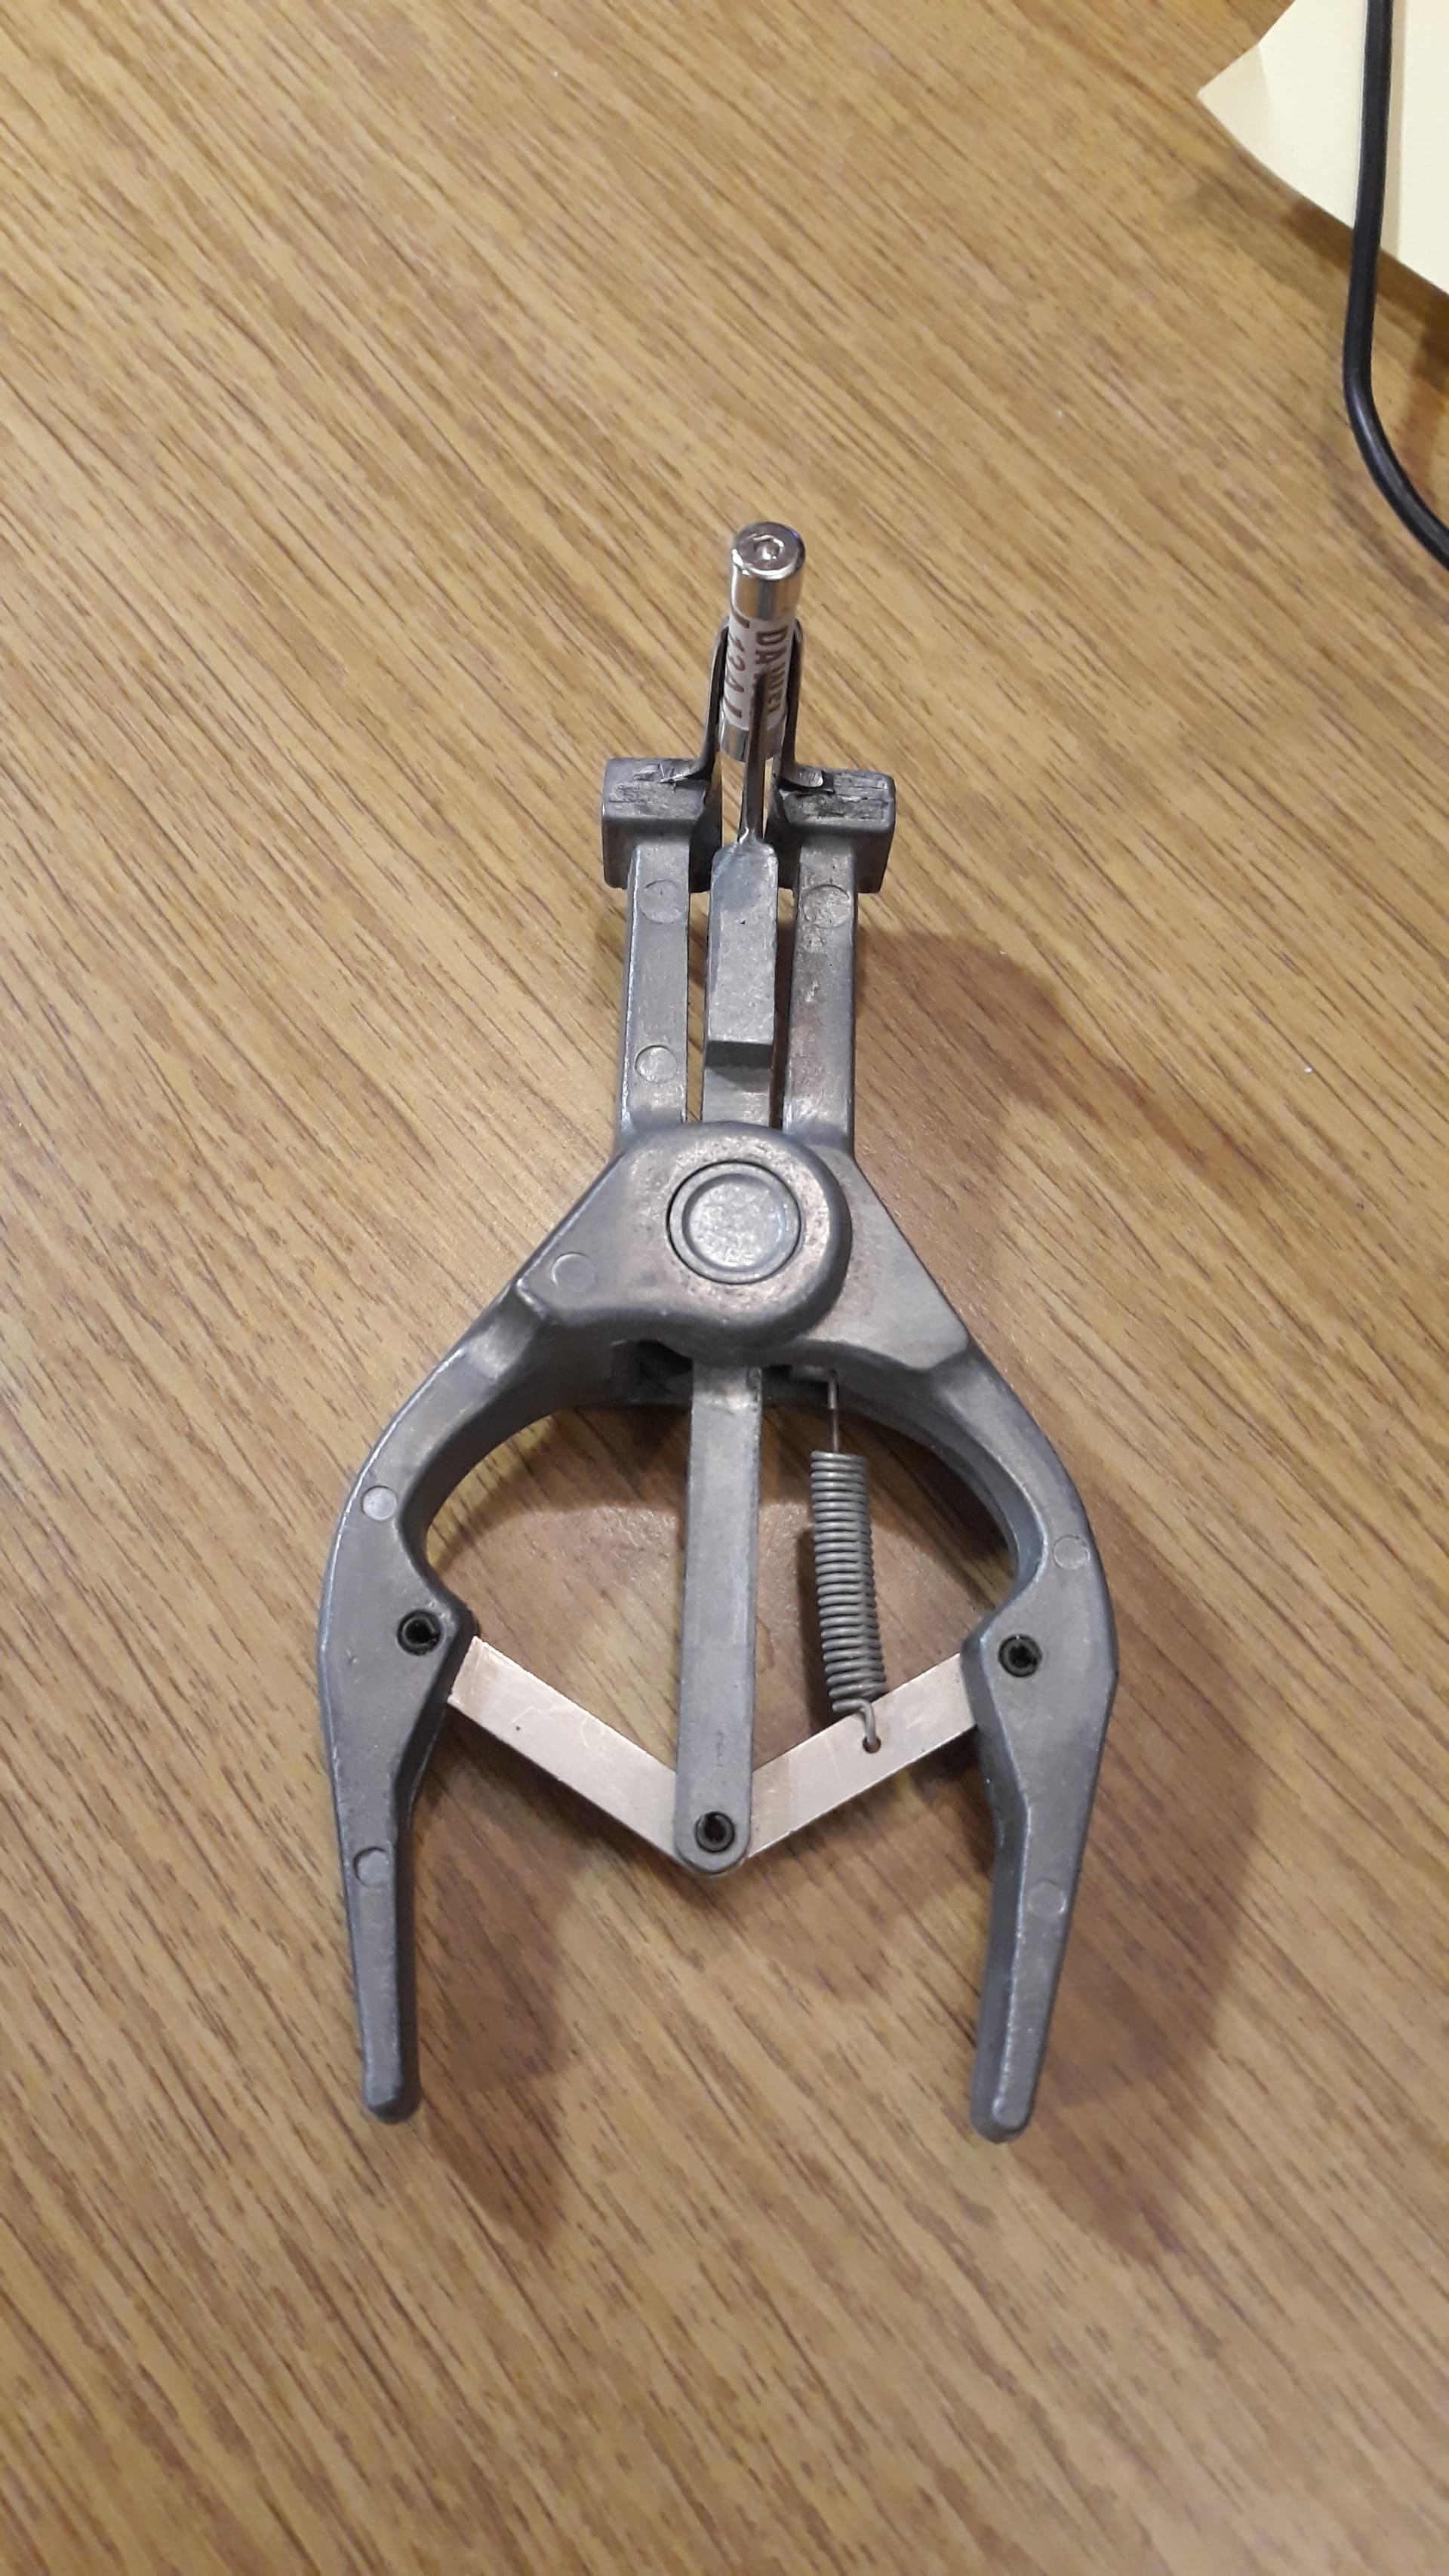
The new fatter umbilical can be fitted into the rubber end seal with the help of an insulating sleeve stretcher, at work they were always known by a rude name instead of the correct one, Hellerman Pliers, here shown with a fuse clipped between the three expanding prongs.
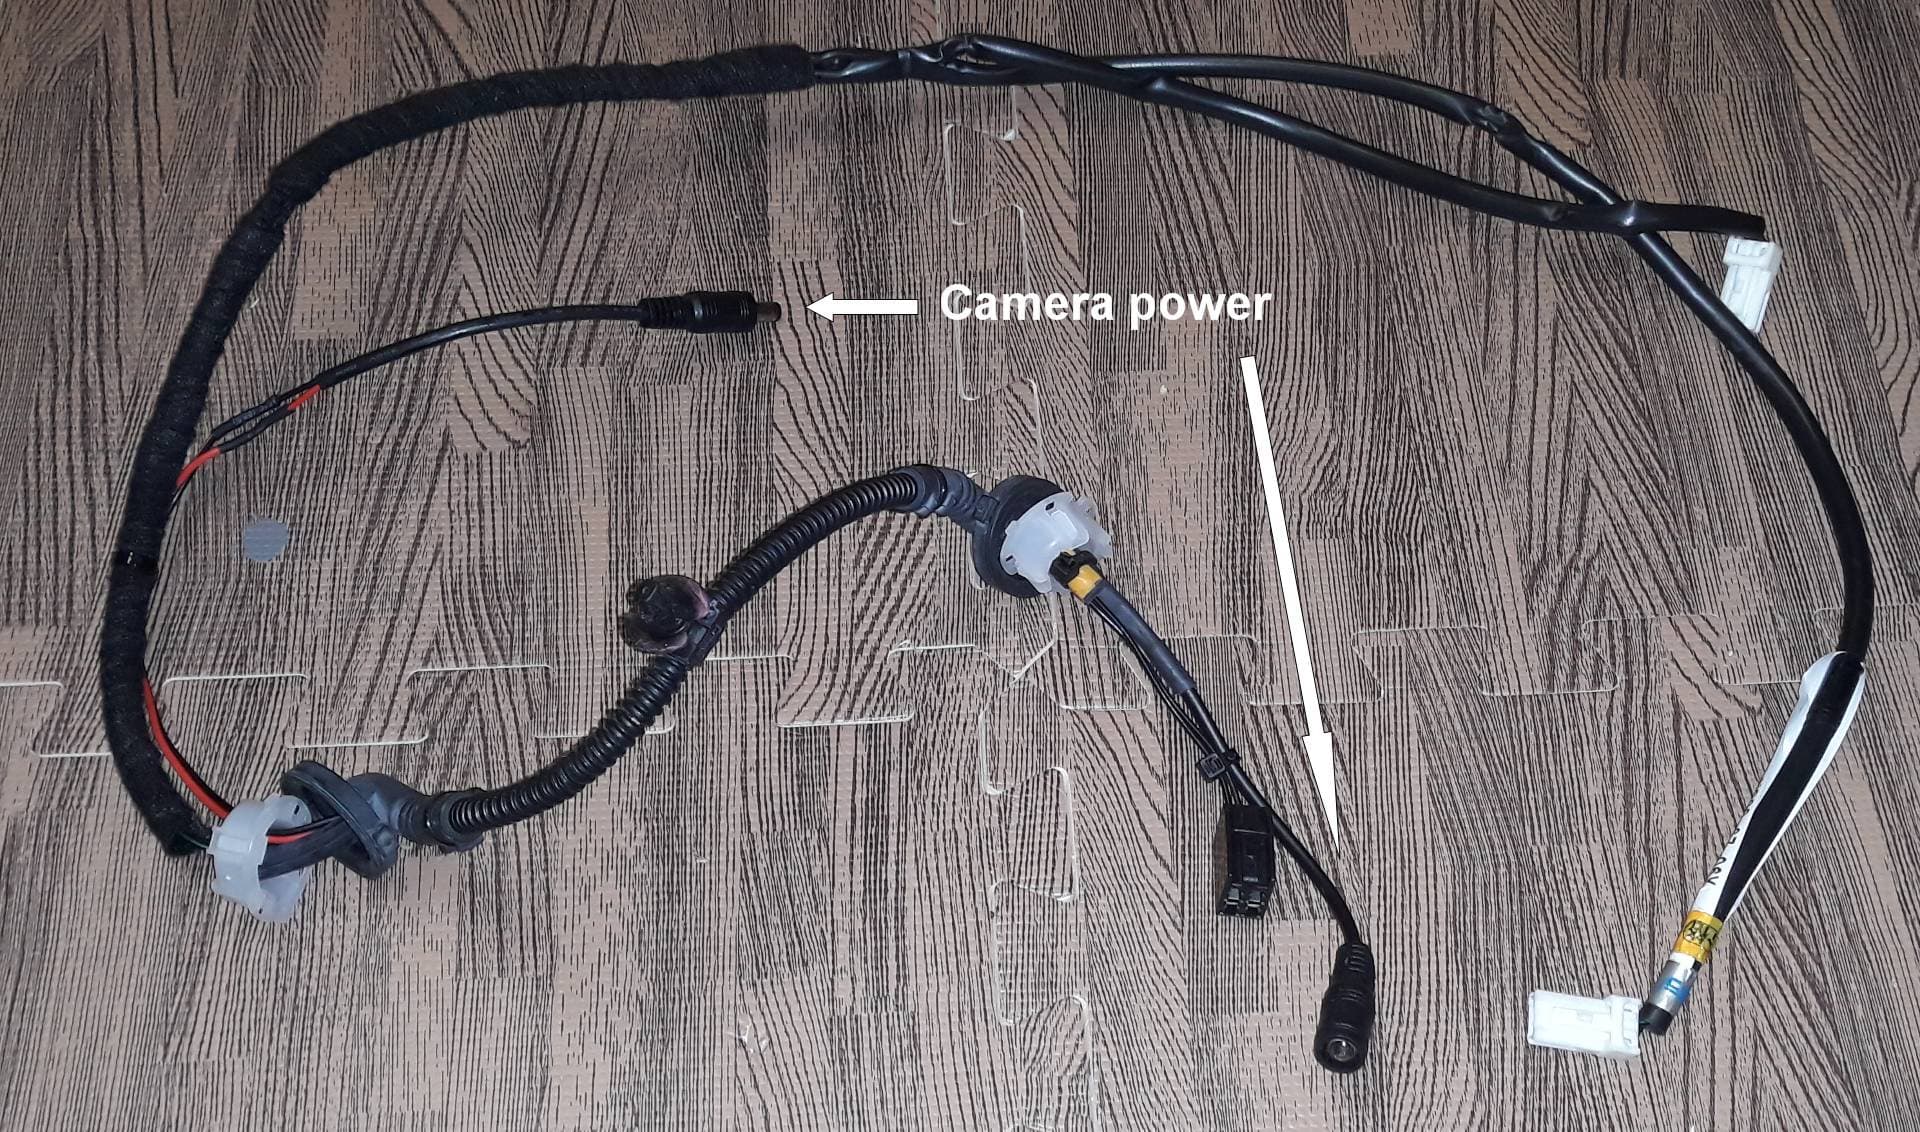
Then pulling the wires back through the new slightly fatter umbilical was trivial, as was the soldering and sleeving of the wires on some pre-made connectors I had in stock. This is now the complete boot loom including camera and its two controls, one a button to choose video format and one a loop to cut when happy with the format. I show the old flexi to compare, it’s only a tiny bit smaller at 5mm internal diameter.
It tested OK out of the car. Tomorrow I’ll install it.
3 Likes
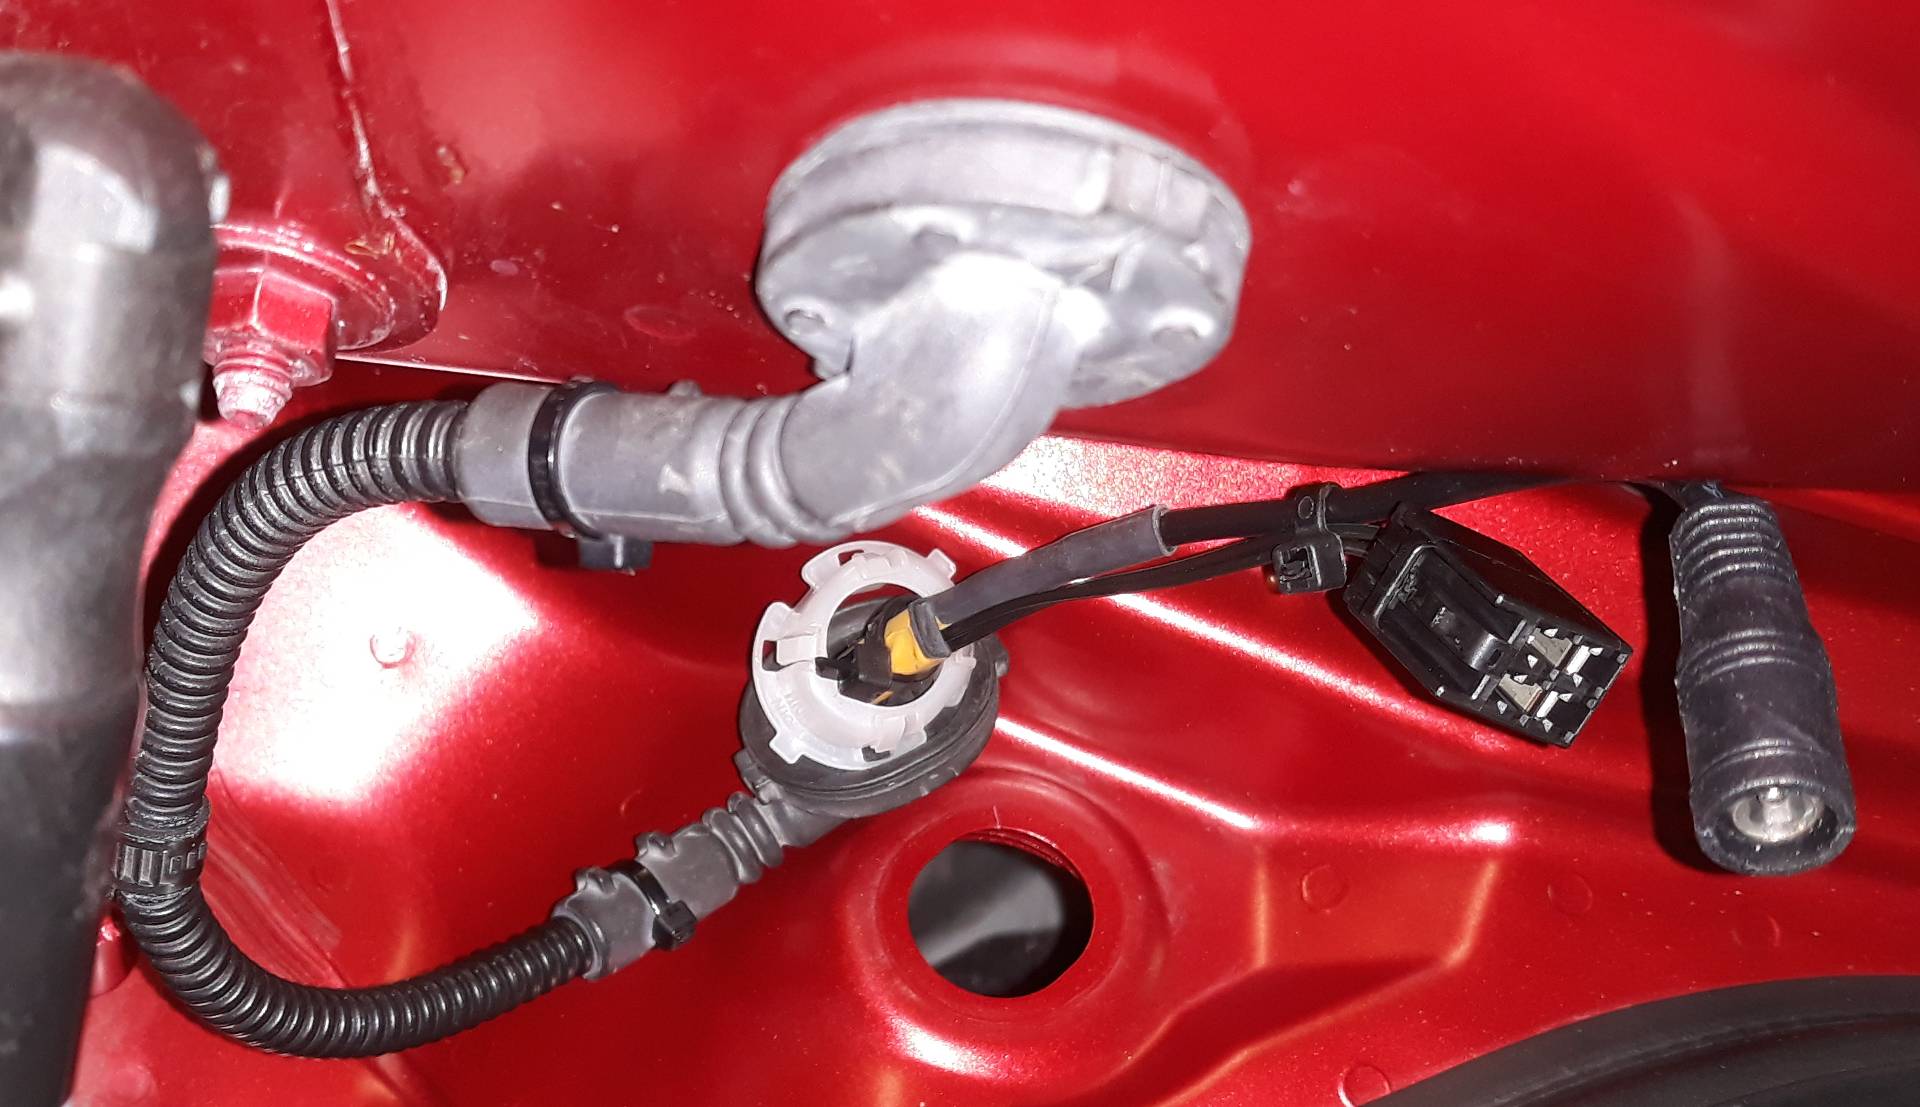
Loom is now installed and it works as hoped!
First steps included liberal doses of Gummi Pflege on the two rubber ends for the umbilical where they seal to the paintwork on body and boot lid.
Inside the car it is reasonably tidy where the umbilical plugs meet the rest of the car. I only had white RCA sockets for the video lead (not the usual yellow), but the inner is a white wire, so it’s easy to remember when assembling, and not to use the red wire which could carry 12V telling the head unit to show the reverse camera (but I didn’t use that). I cut the video lead (yellow RCA plug to white RCA socket) with a couple of feet to spare, just in case I needed to re-route it differently, so there’s a loop of it tied in just above a wide band of blue tape. Mid right, there’s also a convenient tie-down hole to stop the umbilical plugs flapping around.

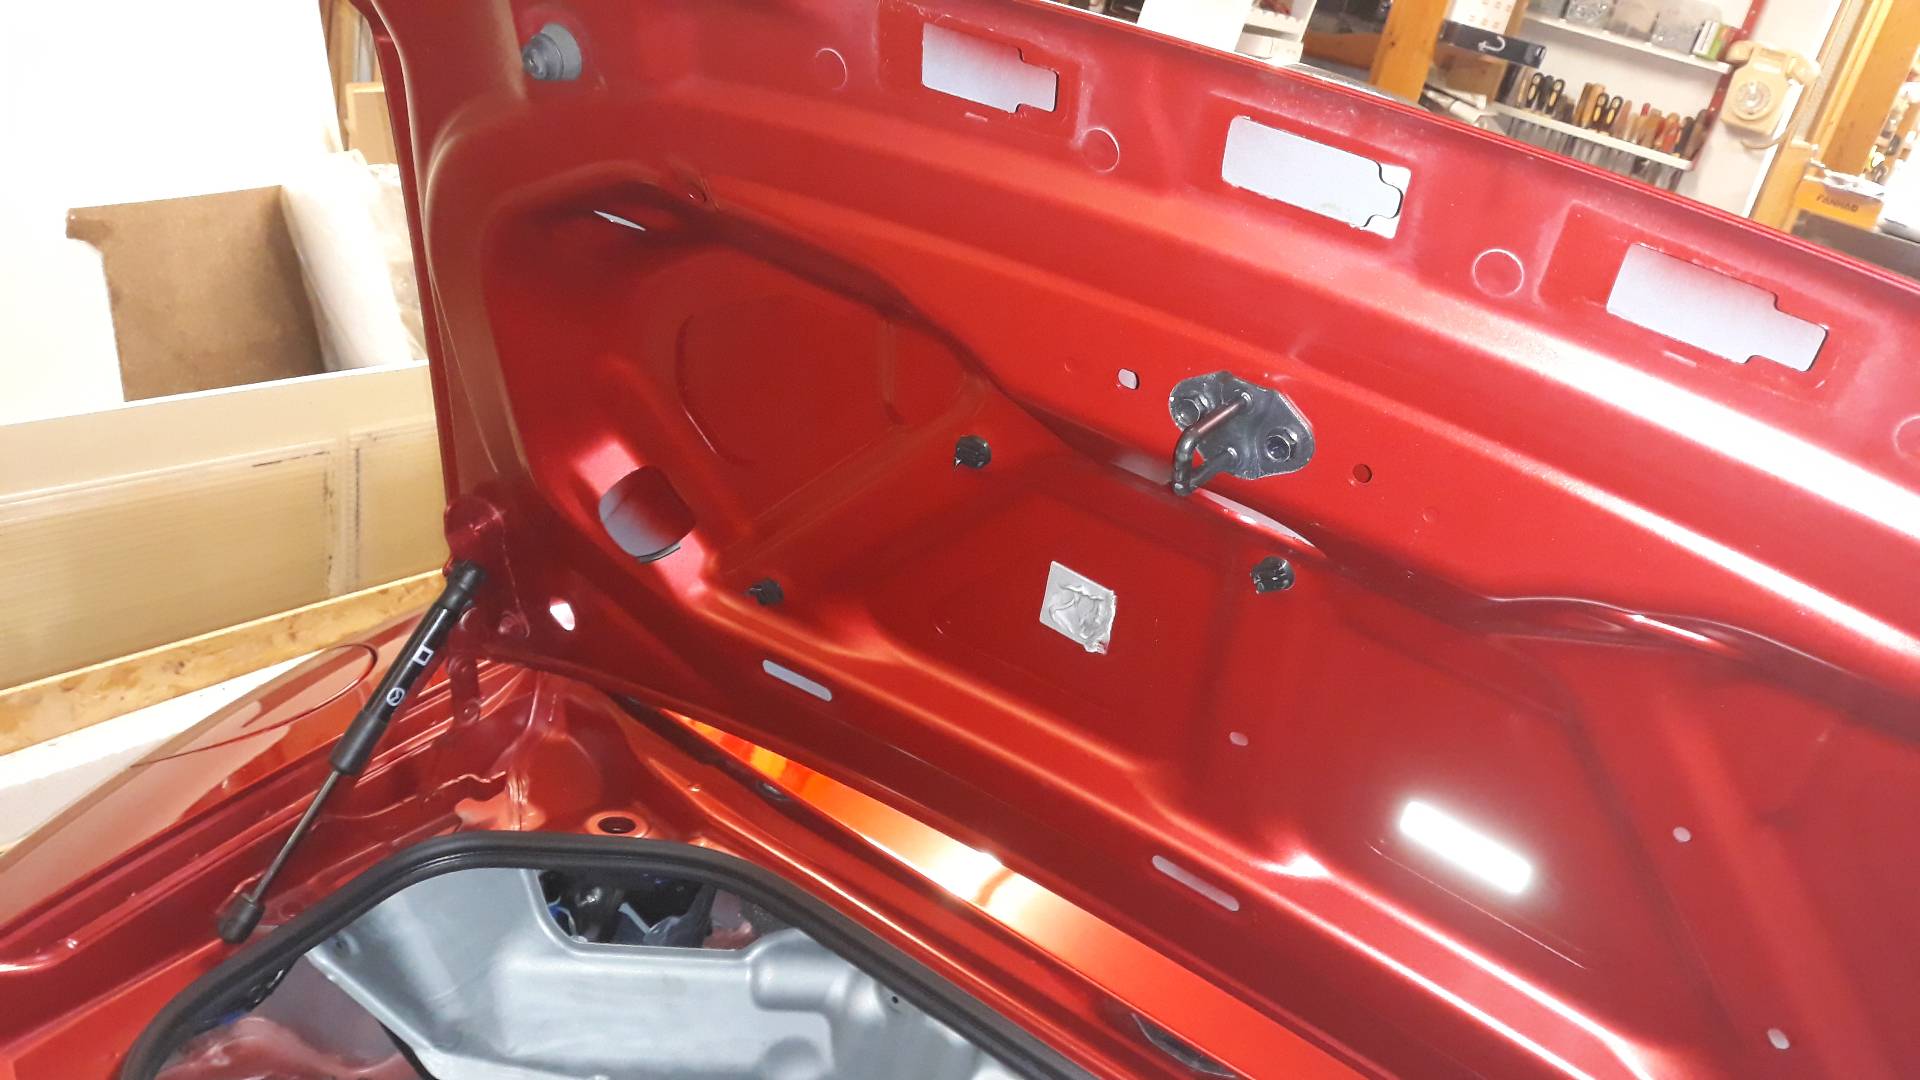
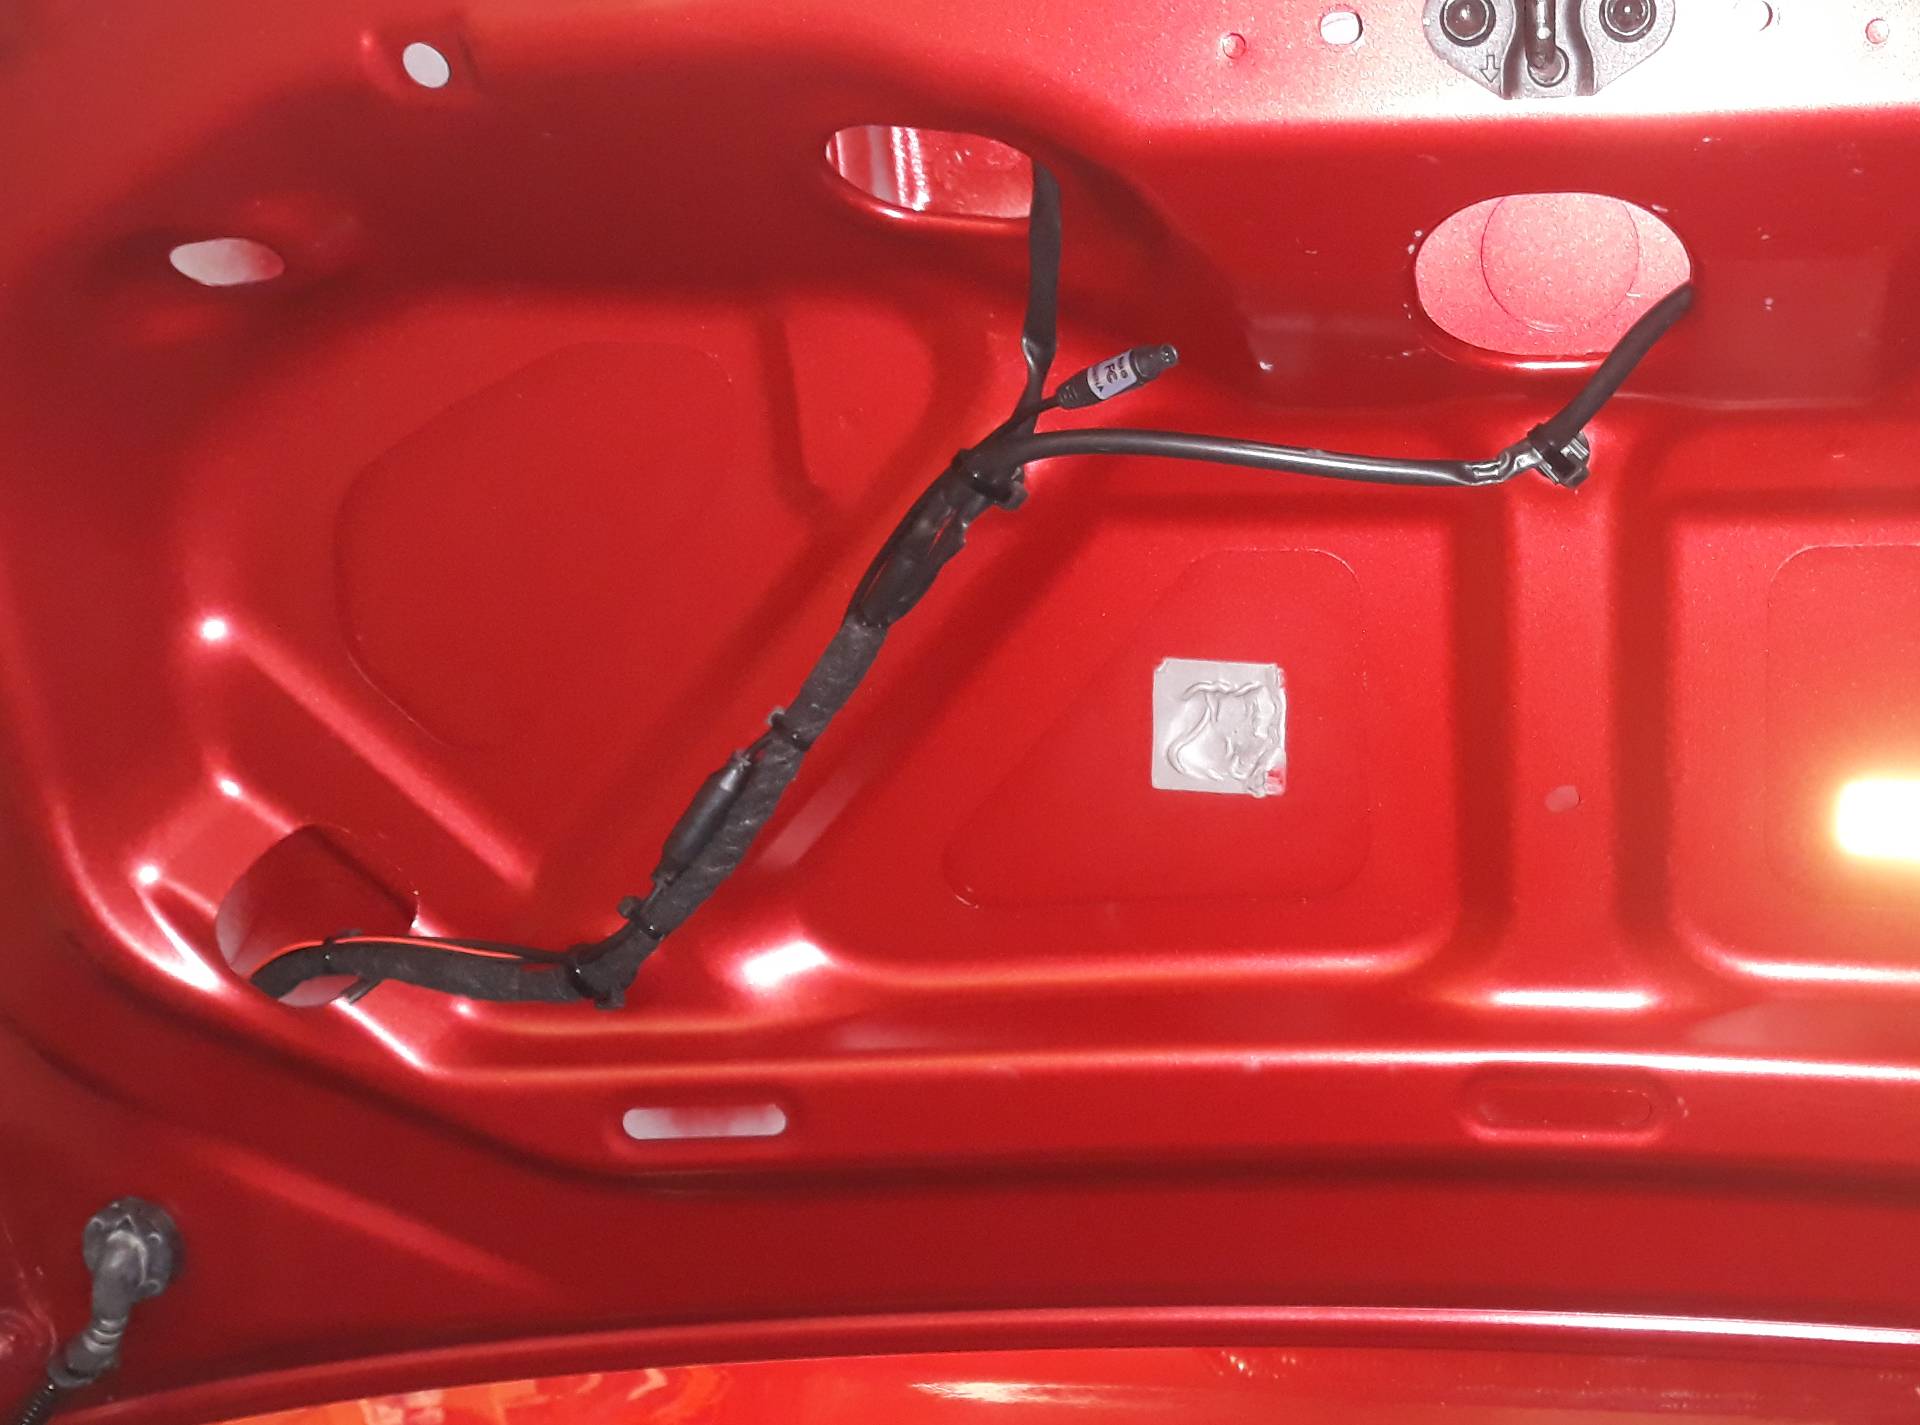
Loom is neatly secured in the boot lid, and I’ve put protective edging (slit off-cuts of outer jacket from thin twin cable) on a couple of sharp edges where the cables press on them. The pic is only missing the lead to the camera because I’m still fettling the mounting. And I still need to remove the ugly sticky pad that held the transmitter.
A final touch is to fettle the numberplate lamps a bit. They used to bounce too much light off the inside of the boot lid and flare into the camera. Now some foil tape, only on the rear (outside) face, redirects this wasted light back inside the lamp and so down towards the number plate below.
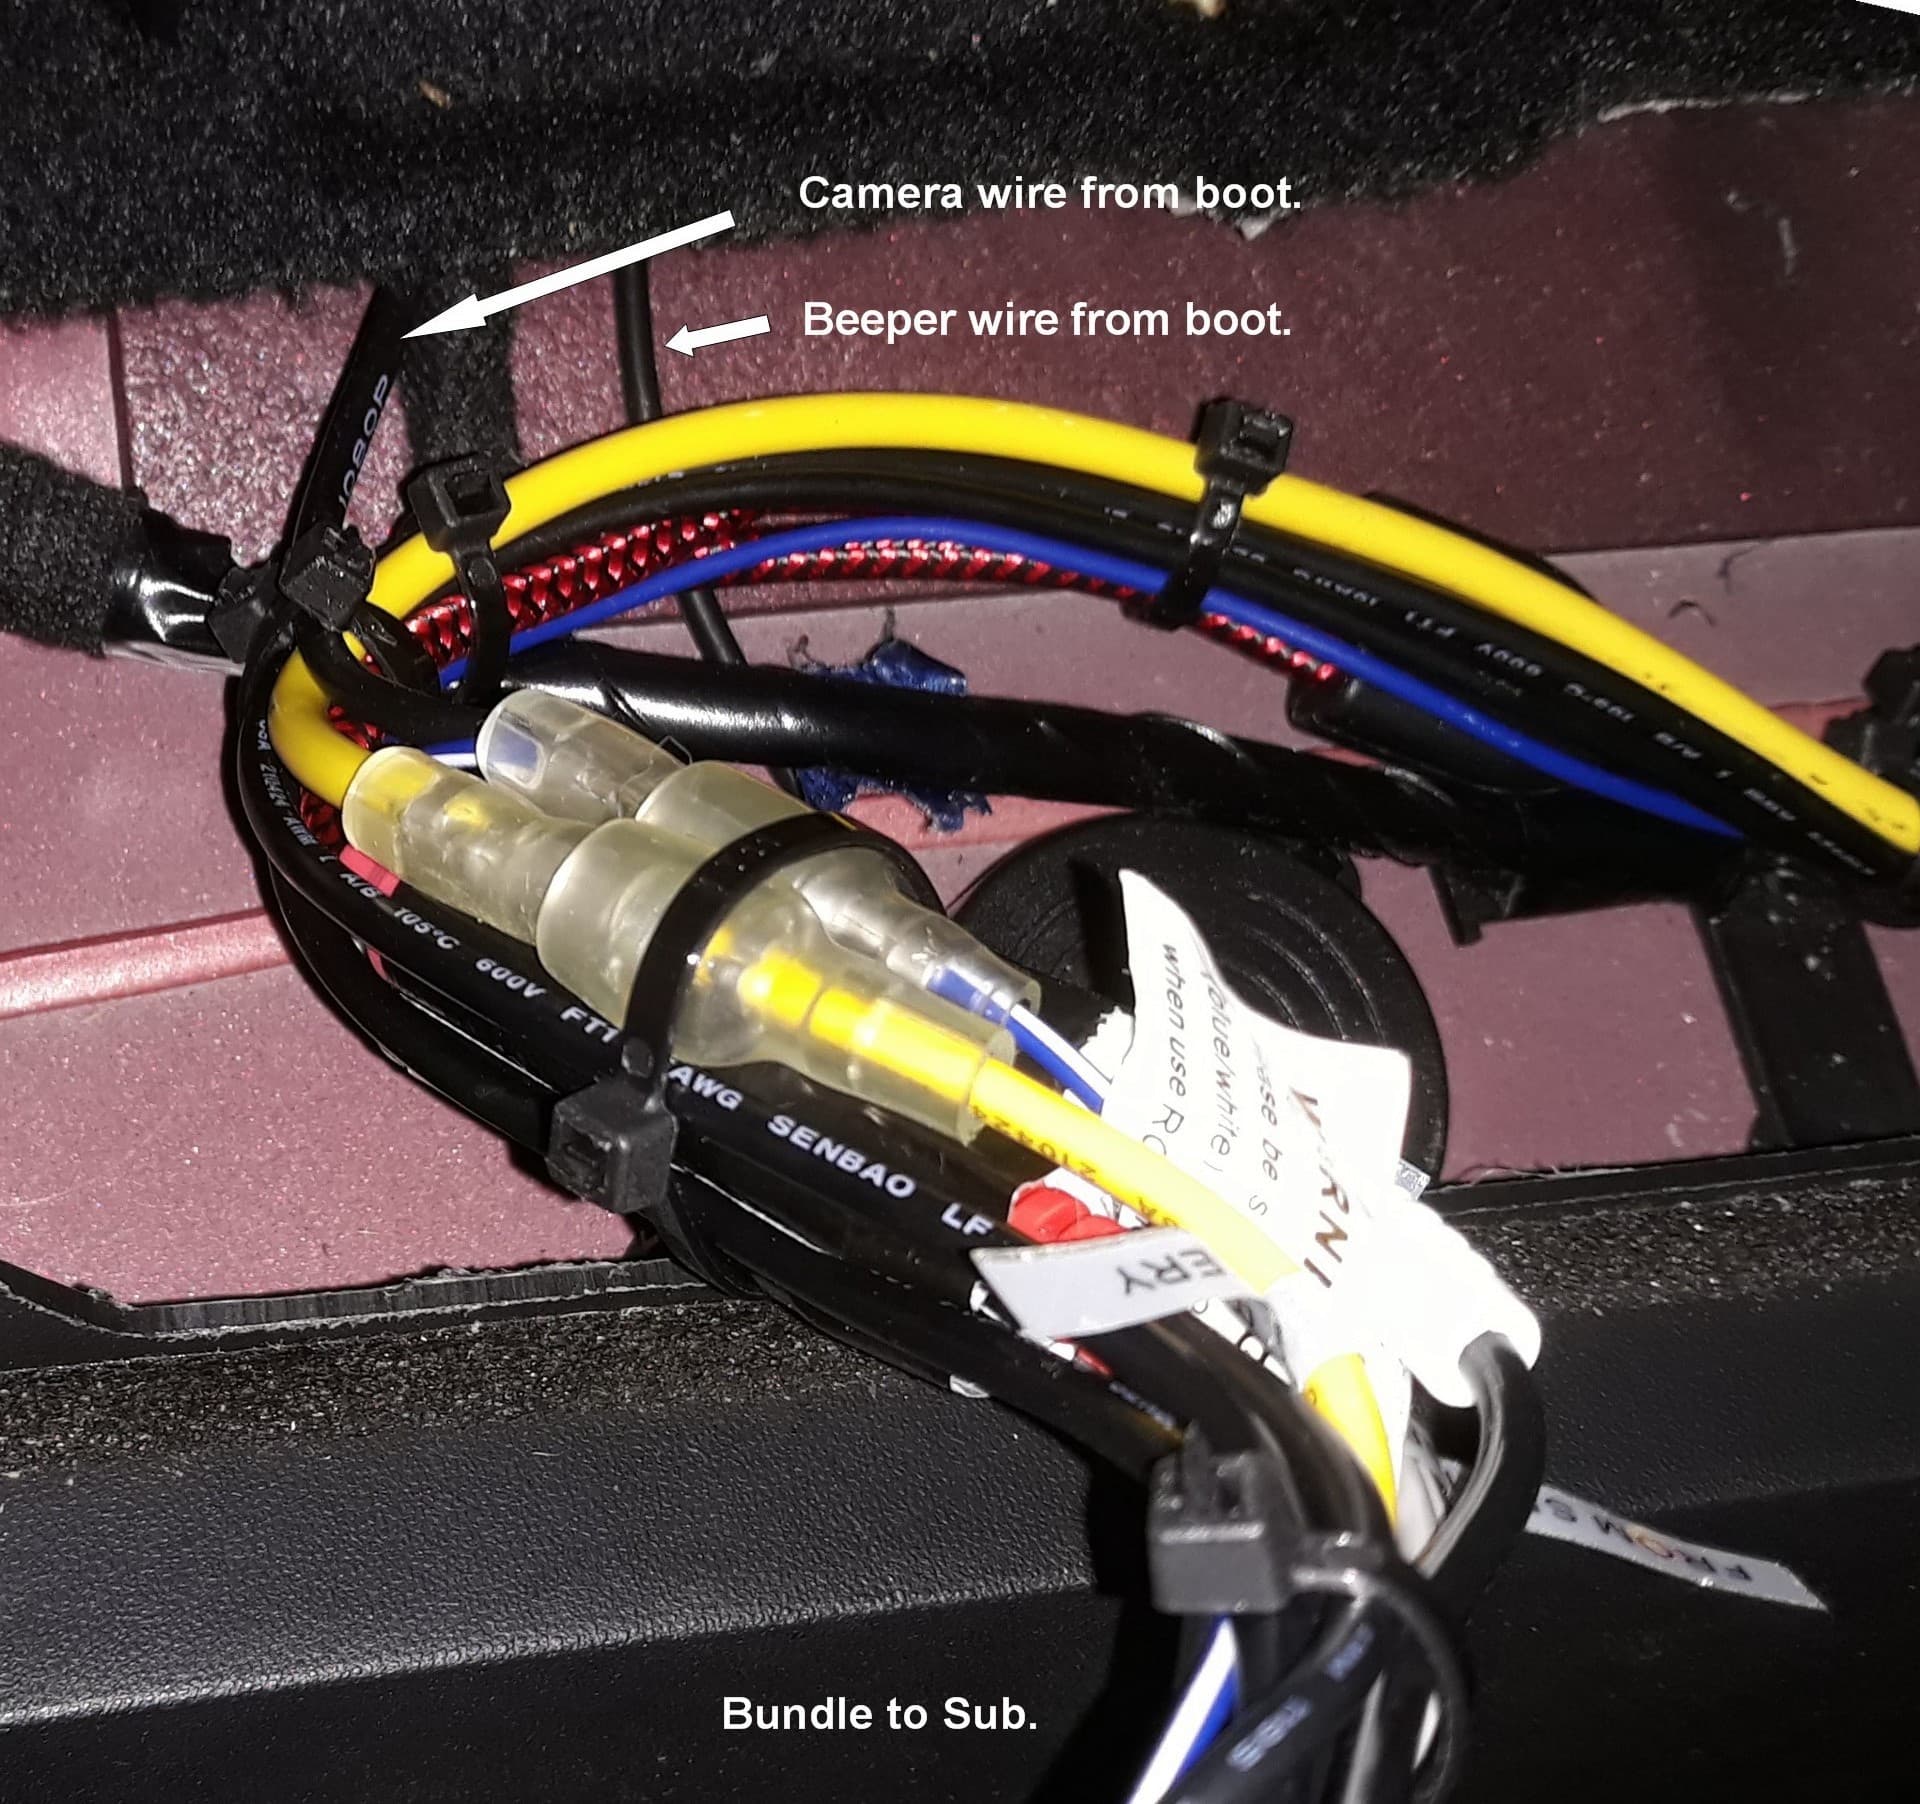
Lead towards the front of the car follows the beeper lead’s route, and the all weather tape holding it down is still nicely sticky, so I simply re-used it.
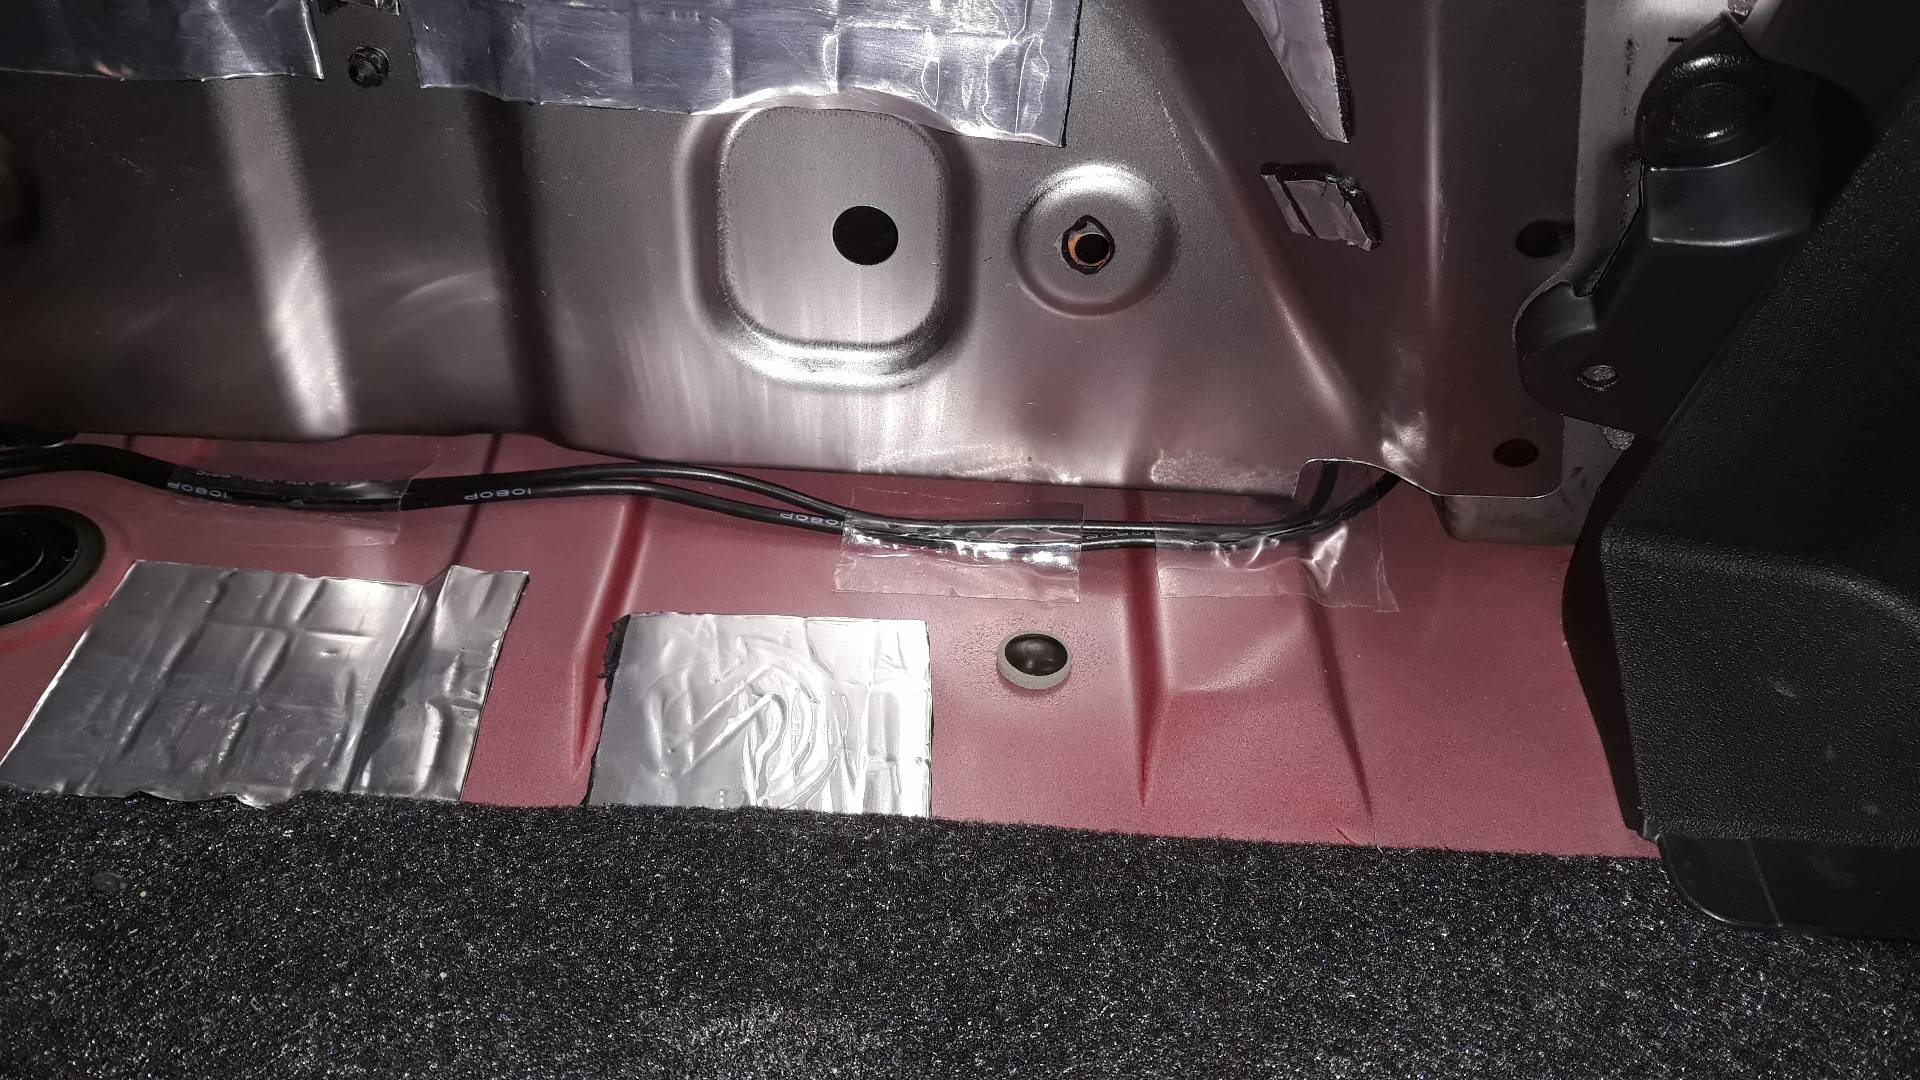
Final picture show the reversing-too-close beeper and camera wires coming through under the PRHT cavity’s carpet. Here the white RCA socket on the camera lead meets the yellow RCA plug on the loom to the head unit. Fat yellow wire is 12V to the Sub, fused at 20Amps.
For a quick test I dangled the camera out of the central hole where it will live and the Alpine showed a satisfactory picture of the garage floor, but that’s not worth repeating here.
3 Likes