Today I learnt how to adjust the push-rod that operates the NC clutch master cylinder.
-
Check the clutch pedal travel is 130mm. Bare foot on the pedal with end of tape measure held between the toes, note the difference in readings against the stitching on the steering wheel while operating the clutch. In specification, so the top adjustment is not needed.
-
Recharge the inspection lamp. (And have lunch.)
-
Adjust the seat base so far back it jams on the runners.
-
Place the Bathroom Stool beside the car (door already open), and almost next to the seat.
-
Find both the 10mm and 12mm spanners, and the inspection lamp, place them in the foot well up against against the bulkhead, anywhere else will be out of reach.
-
Carefully lie on your back, shoulders in the foot well, hips on the bathroom stool, and head under the steering wheel and dash and both arms forward. It is just about possible for a six foot contortionist. Call for the reading glasses to see this view with head on the floor under the pedal (much easier with the camera).
-
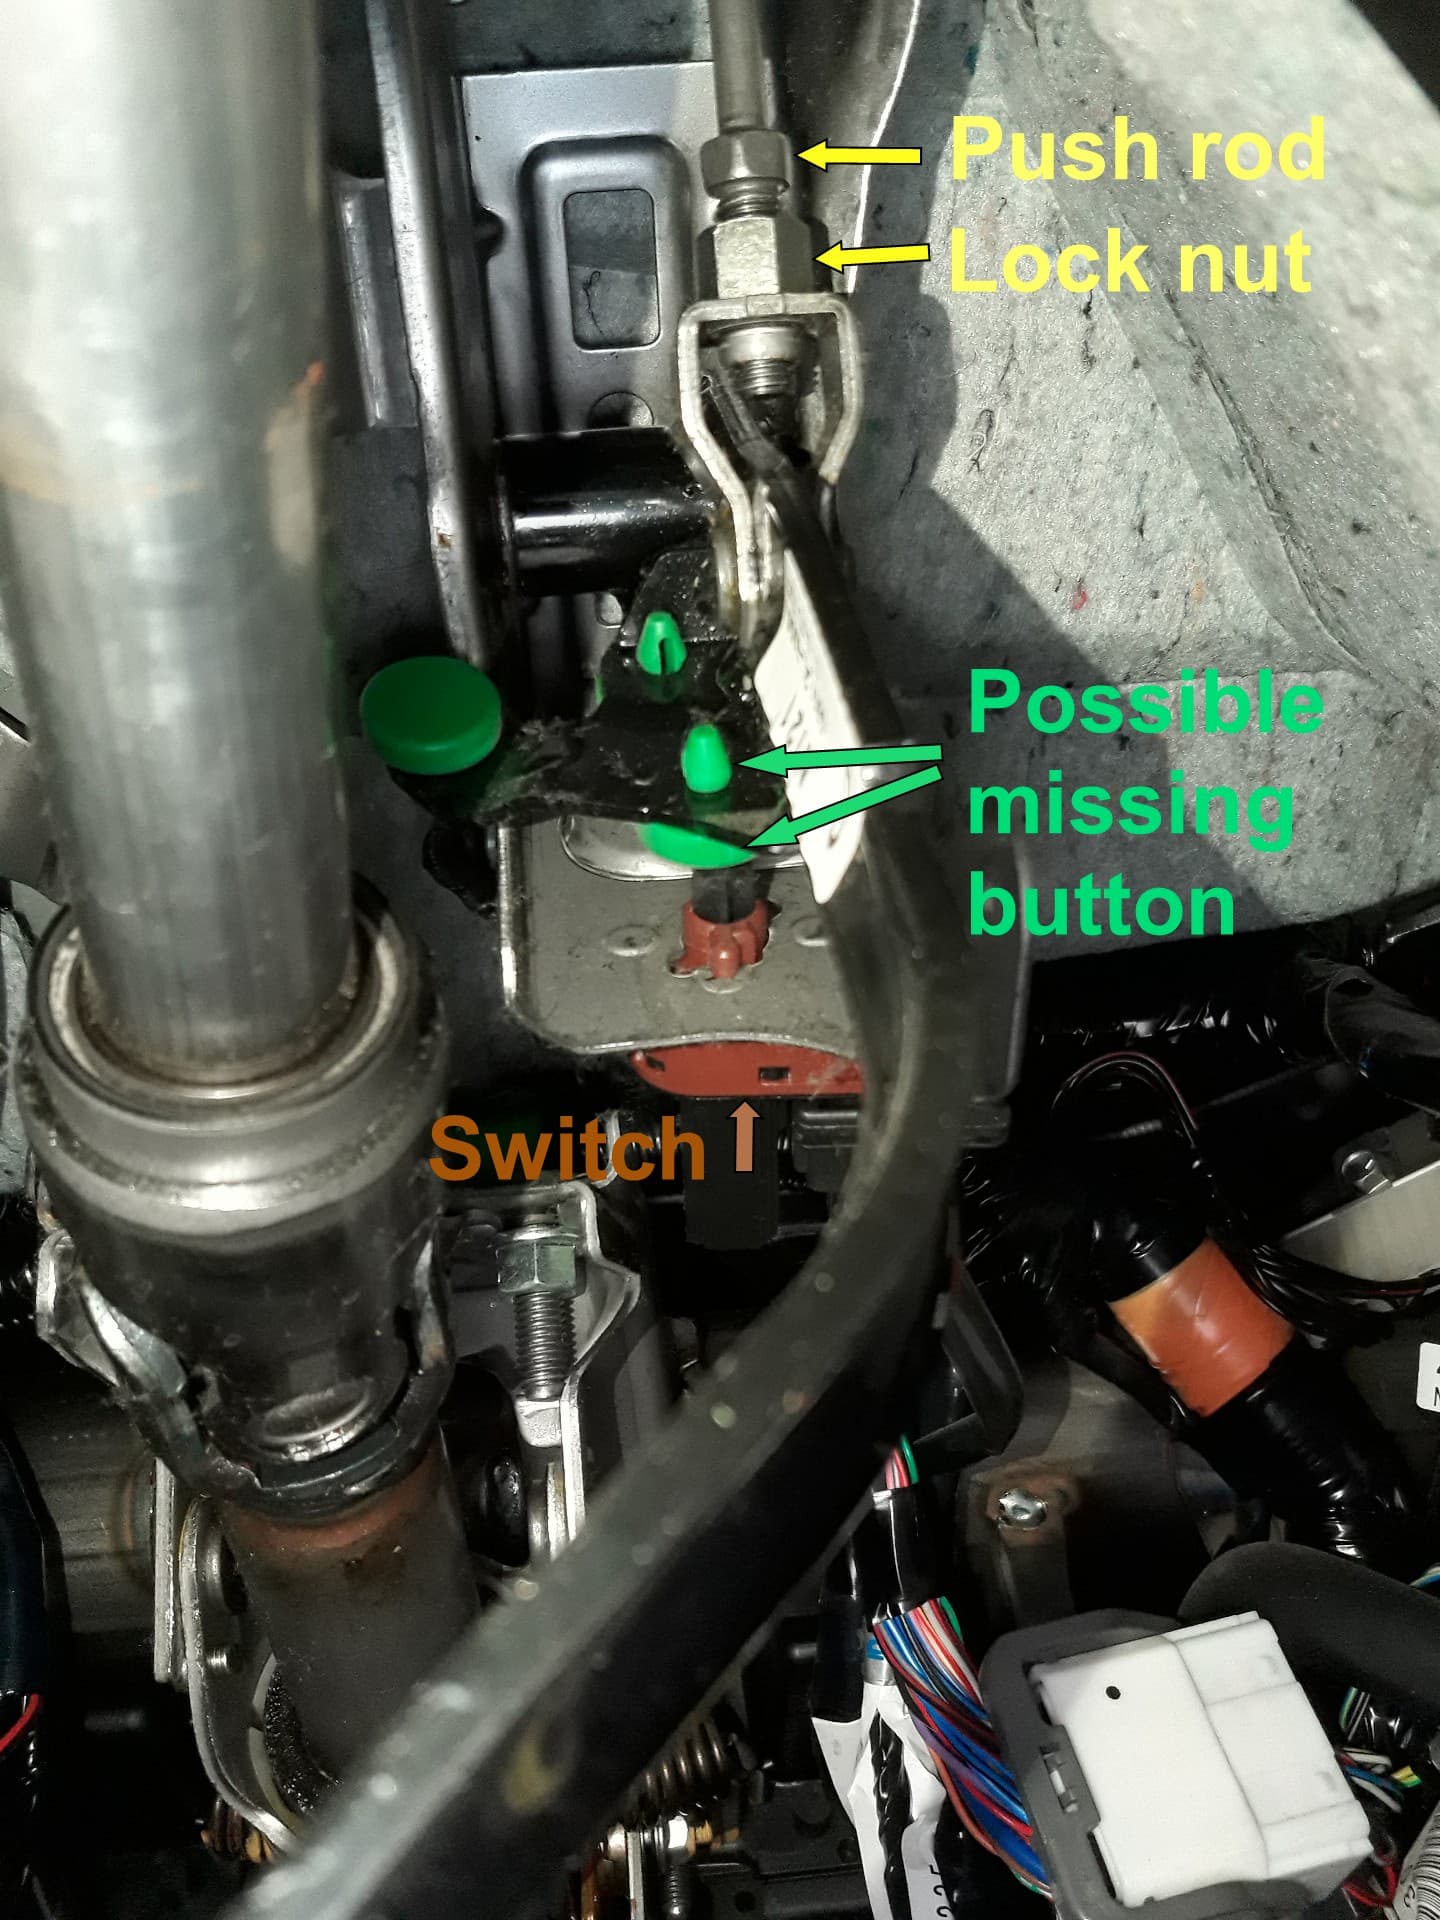
Find the 12mm lock nut, and loosen it. It is usually done up far in excess of the specified torque setting. Easiest if you also have the 10mm spanner on the push rod.
BUT, if it is too tight this way, such as when loosening off the locknut for the very first time, put a big spanner across the flats of the bracket it locks against (so as not to bend the assembly elsewhere or break off a green button or the switch) and just use a ‘closing the scissors’ action on the big spanner and the 12mm for easiest leverage. Big spanner size varies on where it fits the bracket, 20-22mm might be OK. -
Wind out the push rod a whole turn, awkward at only about 1/6th of a turn at a time.
-
Extricate stiff body from foot well, and check “free play” against specification. Hmm, it seems to have made no difference… Never mind, remembering other posts on the forum, one turn might be enough to be going on with.
-
Repeat from stage 6 if necessary.
-
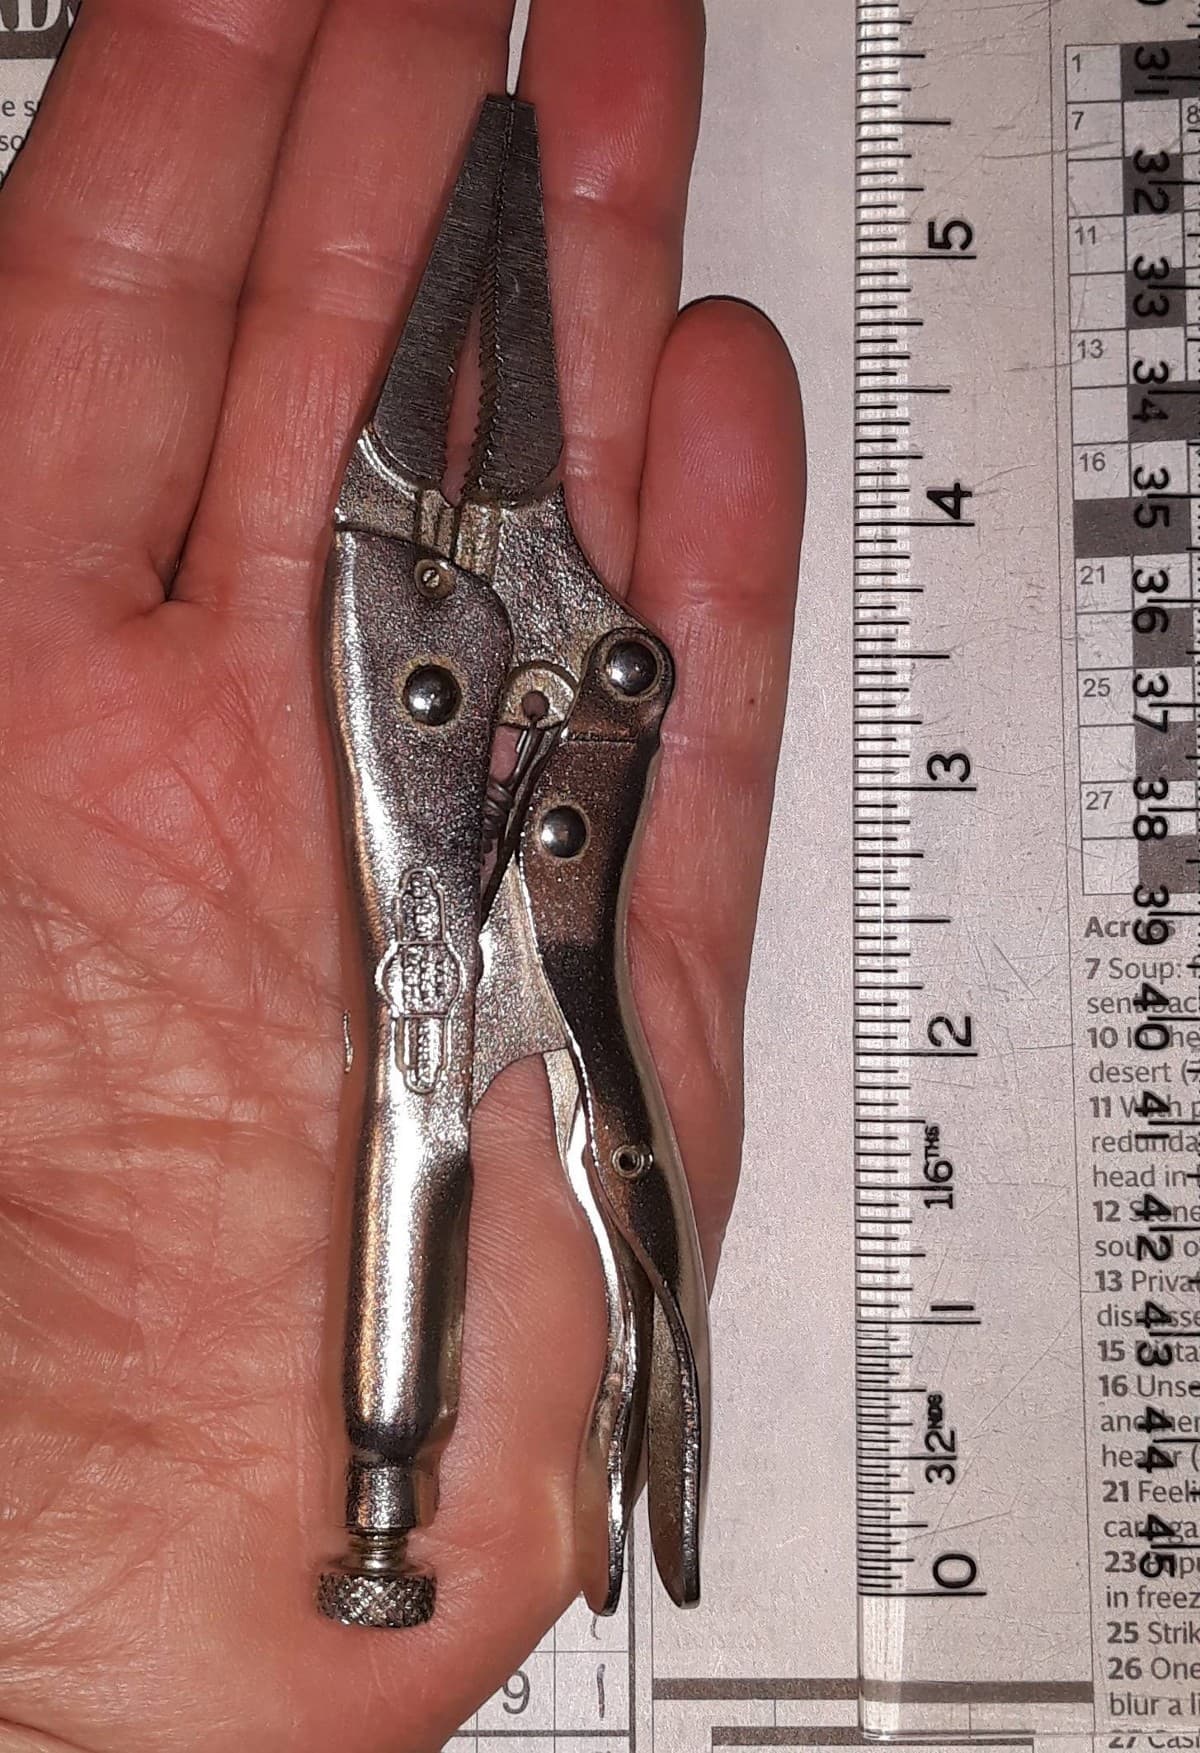
Tighten the 12mm lock nut while holding the rod in place with the 10mm and using a small visegrip dangler as a pointer for reminding one where the adjustment point was.
-
Repeat stage 9 as a final check.
-
Reposition seat, only possible without any weight on it.
-
Remove spanners and bath stool.
-
Start the engine and listen carefully for the bite point, easy with such a noisy box.
-
Drive round the block in the sun. Yes there is a difference, it is slightly better, at 105mm disengaged it is now just within the Mazda spec (80-110mm) .
-
Ask SWMBO to try finding a gear - no luck. (RESULT, it is still mine to drive).
-
Go for a much longer drive in the sun.
This exercise took me the best part of three hours the first time, what with checking the manual and trying to find a position from which I could actually bring both spanners to bear. The Bathroom Stool made all the difference, suddenly it was easy.
EDIT. The second time a few months later it took about ten minutes, and maybe one more turn of the push rod took it to 95mm (mid-spec) which is ideal for me, although SWMBO still hates it.
Scroll down through the Mellens clutch.pdf figs 4,5,6 for more detail info and diagrams
(Edited to make the clutch.pdf link still work)