Perfecting the ND1 - Currently 225bhp Naturally Aspirated
I wanted an ND. I knew I was going to modify it anyway. I bought one.
As soon as I found some corners - I hated it! Then the more I pushed and pushed it, the more I found it unpredictable, inconsistent, and frankly dangerous (before ‘the limit’).
My first week with the car wasn’t a good relationship!
Welcome, to my ND ‘Sprint Build’
2016, ND1 2.0L. Bought in October '24 at 40k miles. Not much of the car has been left untouched. Here is some of my key points and journey which has led me from Hate to Love.
CONTENTS
| Post # | Topic |
|---|---|
| #1 | Build Overview & Full Mod List — Introduction, philosophy, and complete list of modifications |
| #1 | Engine & Power — First remap (175 map), manifold install, second remap (190 map), 68mm throttle body |
| #1 | Dyno Results — 200bhp result with above mods |
| #1 | Intake Testing — Skuzzle intake trial, ECU data analysis & removal |
| #1 | Suspension & Handling — Coilovers, sway bars, strut braces, geometry, downforce |
| #1 | Verus Aero / Downforce — Undertray & diffuser install, rear lift issue resolved |
| #1 | Wheels & Tyres — Advanti Blizzard wheels, Goodyear F1 tyres |
| #1 | Quality of Life Mods — Infotainment, audio, boot lighting, cargo nets |
| #1 | MPG Testing — Documented test loop results across all stages |
| #25 | Rear Wing / Spoiler Research — Options considered, shortlist with images |
| #33 | De-Cat Manifold — BBR de-catted manifold acquired (winter upgrade) |
| #34 | Component Weight Tracking — Weight table across all major parts |
| #39 | Hardrace Chassis Kit — Arrival and overview of full chassis brace kit |
| #42 | Sneaky Peaky 1 of 4 — First teaser of upcoming power mods |
| #43 | Sneaky Peaky 2 of 4 — ND2 head teaser |
| #47 | Sneaky Peaky 3 of 4 — Marino intake kit teaser |
| #48 | ND2 Head Swap — Full writeup: ND1 vs ND2 differences, research, plan, parts list & predictions |
| #53 | ND2 Cams Arrived — BBR ND2 camshafts delivery |
| #58 | Car in at Performance Link — Before dyno result (188bhp), work underway |
| #59 | Mazda ND1 vs ND2 Official Tech Data — Mazda engineering docs on spec differences |
| #64 | ND2 Head Port Cleanup — Photos of port work by Performance Link |
| #65 | GoodwinRacing Exhaust — Acquired second-hand, sent direct to Performance Link |
| #70 | Bottom End Part Numbers — ND1 vs ND2 crankshaft, pistons reference list |
| #71 | Gearbox Ratios & Options — Analysis of gear ratios with revised redline, options A/B/C |
| #73 | Head Progress Update — Photos of cleaned exhaust ports from Performance Link |
| #74 | AI-assisted Engine Analysis — Theoretical max HP modelling using ND2 head specs |
| #75 | ND1 Head Off — Photos & findings from Performance Link; carbon buildup, oil leak discovery |
| #92 | ND1 vs ND2 Port & Valve Size Data — Measured comparison table of actual head dimensions |
| #93 | Head Flow Analysis — Virtual bench flow numbers based on measured port/valve data |
Most of the below work I have carried out myself so if anyone has questions / needs hints tips etc please ask away.
List of Mods
ECUTek BluTooth (175 map, then 190 Map, now custom approx 225bhp)
BBR decat Manifold
BBR Center + Sports cat
GoowinRacing backbox
Fab9 68mm Throttle Body
Race Oil - 0-20w
Dmarino custom intake
ND2 Head, Intake manifold
BBR ND2 camshafts
Custom flat underfloor
Hardrace Chassis Bracing
Verus Engineering - rear suspension covers
Verus Engineering - 1x Rear Diffuser
Verus Engineering - Front splitter
Verus Engineering - side skirts
Side Marker LED Lights orange (front)
Side Marker LED Lights red (rear)
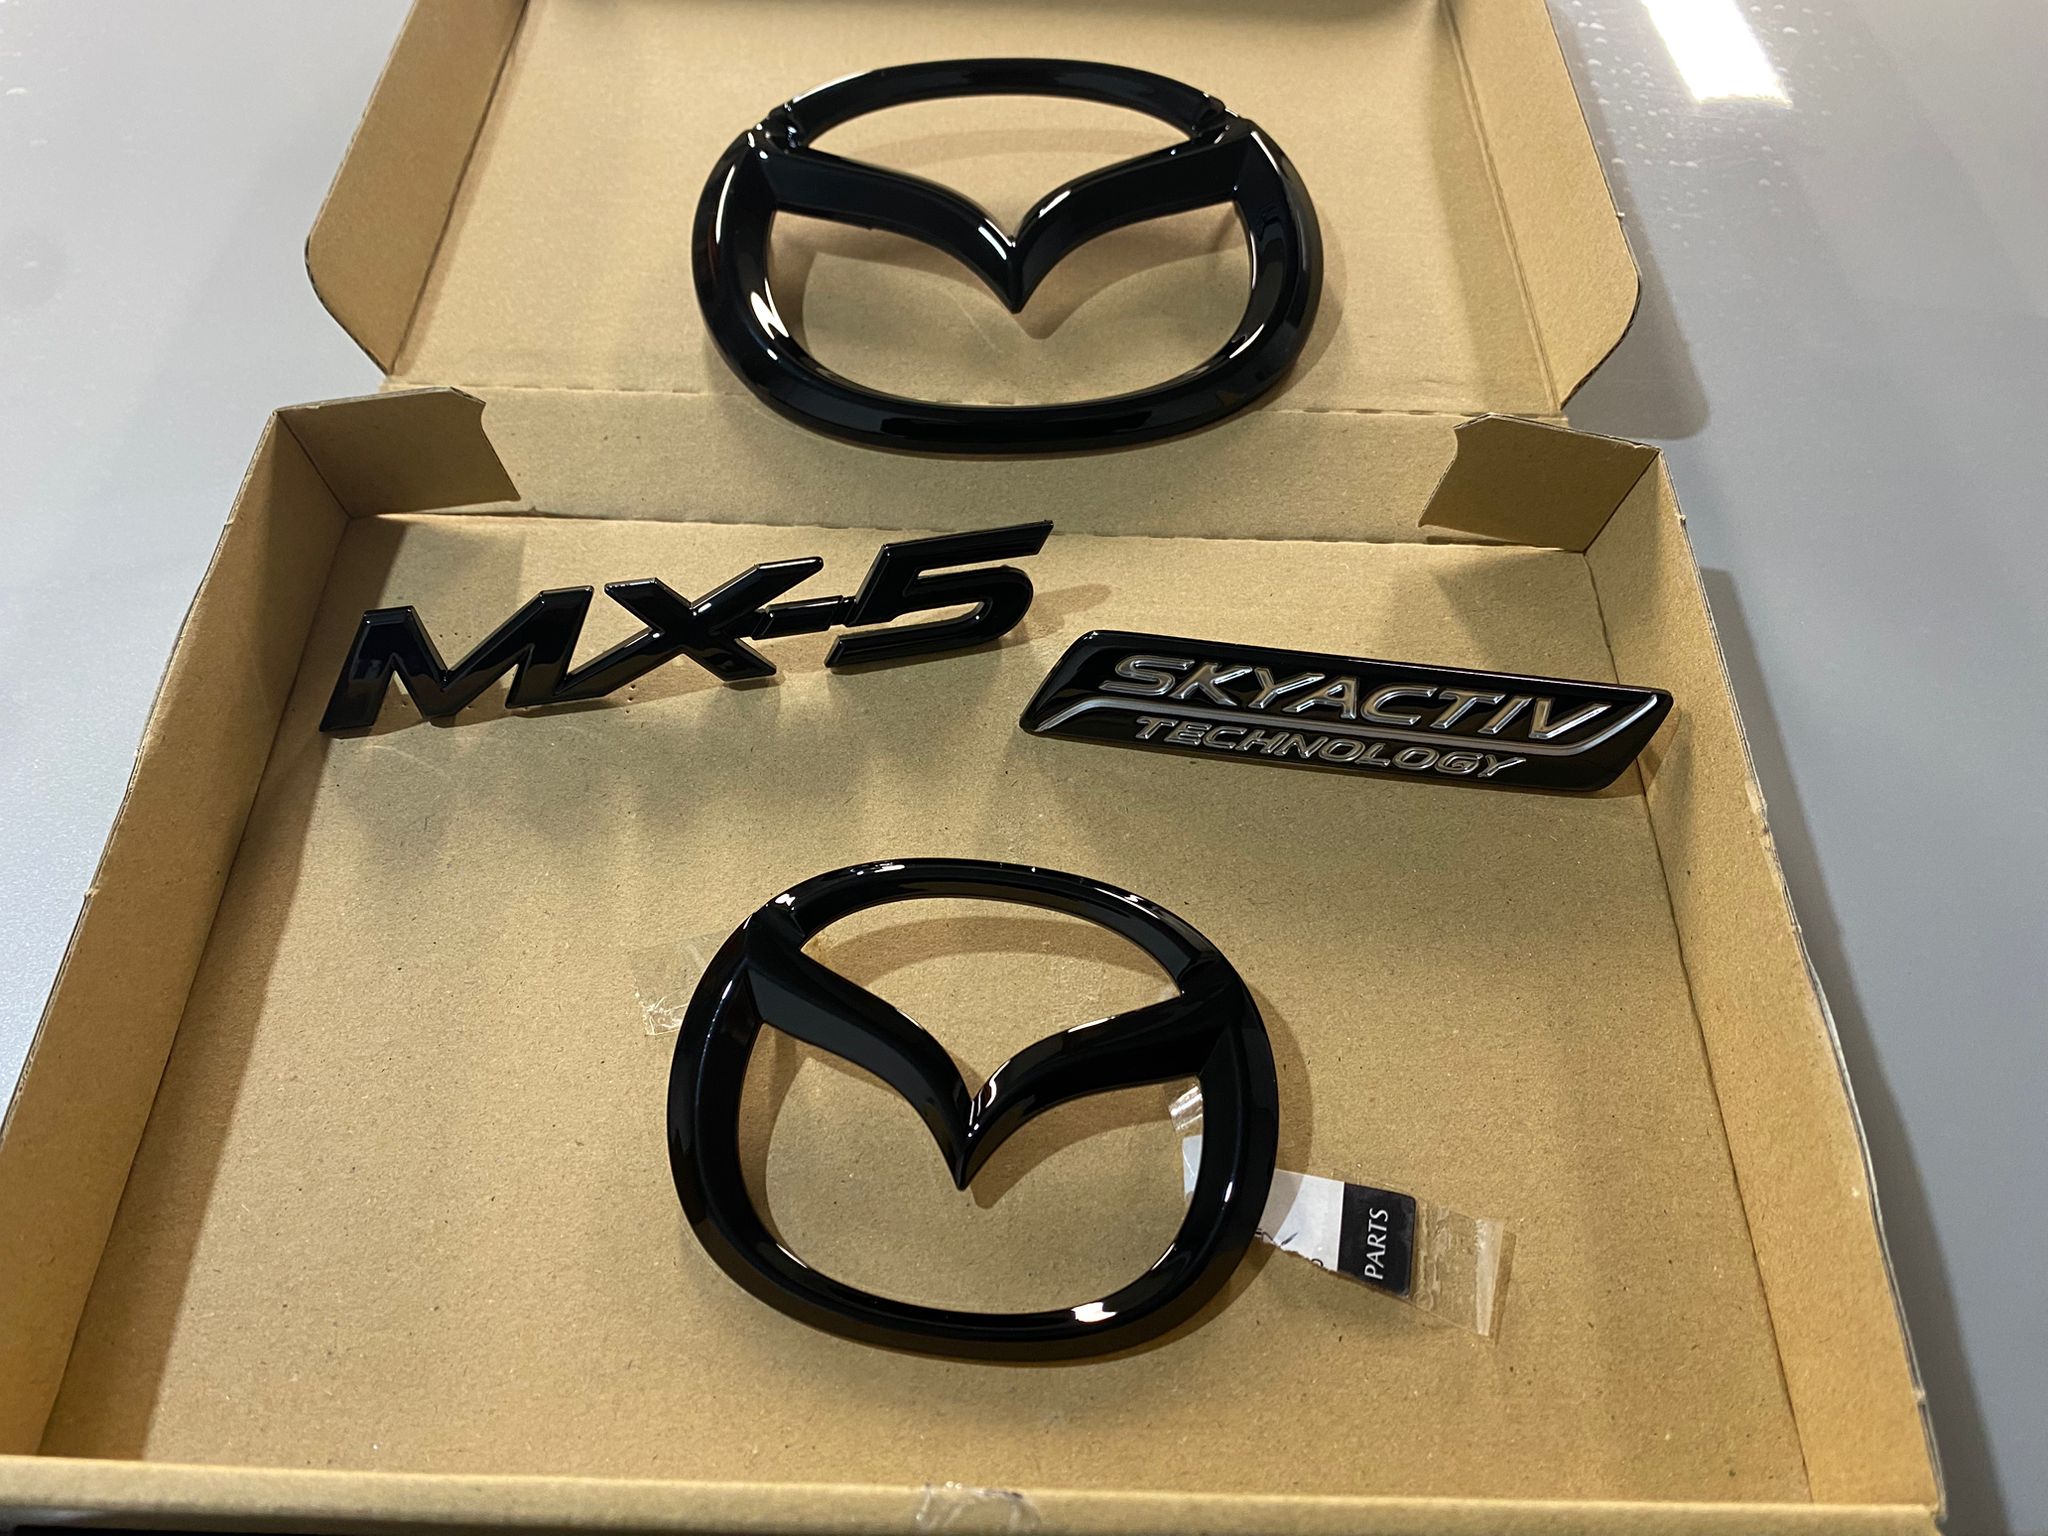
Black emblem badges (front and rear)
Stubby aerial
GravityPerformance Front Strut Bar
GravityPerformance Rear Strut Bar
Eibach Front and Rear Sway Bars
Yellow Speed Racing Coilovers
Dual track/road alignment specs
CleaR Motosport Front Chassis Brace
Advanti Blizzard 17x7 Hyper Dark silver.
Goodyear F1 Eagle Asymmetric 6 215/45/17
McGuard lightweight spline nuts
McGuard lightweight locking nuts
6-pot Wilwood front Calipers
Grooved front Discs
CleaR Motosport Clutch Stopper plate
Rear Transparent Wind Blocker
AppleCar play upgraded Infotainment
Applecarplay USB Module
DRL Harness for ‘always on’
Paco motosports Complete Audio Kit (tweeters, door speakers, sound deadening)
Interior cargo nets, driver & passenger
Dashcam with Mirror power feed
Boot LED illumination kit
Derin door bushings
(Authors Note - this is the first time I have listed or even thought about the mods ive done… having now done so, this is longer than I was expecting!)
Engine/Power
For quick context, I havent had a sub 300 bhp 2-seater as my ‘toy’ in about 12 years, as my various wife-upsetting fancies over the years have been a bit potent. ![]() so for any comments made I am making them in the full understanding that I have come down some power levels to this car. Every effort has been made in my own mind to be neutral and realistic.
so for any comments made I am making them in the full understanding that I have come down some power levels to this car. Every effort has been made in my own mind to be neutral and realistic.
Stock
160bhp. For the weight of the car, does absolutely fine! Right out of the box I was happy with the power available. My big issue was its ability to handle the speed through corners without killing me (see Suspension section later).
However, there was a big fault > 6,000rpm. Having done some driving trips through Scotland where overtaking is much easier to do (safely), I would often hold the gear for the fun. What I was feeling was hesitation and a ‘cushioning’ feel as it reached its 6800rpm peak.
What I have learnt since - and have the ECU log data now to show it - is that from around 6,000rpm the Mazda ECU is programmed to limit power and so begins closing the throttle. Cor!
This is what gives the ‘odd’ rev limiter feeling, and also quite literally chokes the engine for the upper several-hundred RPM.
Although I had future plans for modifying the power output, I went straight in for a remap. And went for BBR’s 175.
First Remap
I will make a bold statement here > If you do nothing else to your MX-5 ND (power wise), get a remap! *this doesn’t have to be BBR.
I documented performance improvements before and after on power pulls (insert link here). The map made next to no difference under the 6000rpm mark. BUT, and the big but, is that rev limiter gets a bump to around 7,200 and the power delivery difference from 6000rpm+ is huge. The throttle no longer closes, and in the opposite it continues to make power for longer.
I made commentary at the time that it felt on-par with dropping in new cams. The engine pulls and pulls to redline.
Added bonus - if you are into numbers the EcuTek can link to your phone for on-board dashboards. I now run a screen with various intake temps, oil temp, knock sensor output, Shift Light, etc. a great tool.
Manifold + Center section install
As a DIY job at home - this turned into being a right pig of a job. There wasn’t anything inherently difficult, only basic tools needed. But working under axle stands just didn’t give much flexibility to move freely. Plus I had issues with tools going missing (wife!) when I started. The engine needing jacking higher than I expected/wanted and this cost me time while I came to this realisation. Then to top it all off, I had 2 failures: a stripped 02 sensor, and incorrect replacement, and a snaped bolt when mating up the Cobalt to the BBR flange.
In short - should have been 2-3 hours total. It actually took me about 4 evenings and 7 hours.
The big questions from anyone reading this will no doubt be - how does it sound? - did it add power?
Sound - so I already had the Cobalt backbox fitted. Which vid clips can be found online for this. With the new manifold and center section, the sound pitch, tone, volume - near enough identical. Couldn’t notice any real difference. This is most likely due to their still being a cat in te manifold which is usually the item that adds big decibel numbers when removed.
No difference to cold starts. No difference to motoway driving. No difference to foot to floor.
The only change I think happened, was very low RPM driving there was more bass tones, such as driving under 2000rpm gently through town.
Power - on initial ‘feel’, no difference. Had it have been a blind test I wouldn’t have known the new exhaust was fitted. EXCEPT > remember the engine choking/throttle closing on the OEM map I spoke about? I could now feel this again.
Luckily, I have an ECUTek and am able to analyse the data.
What was happening, is that from around the 6000rpm mark the ECU was closing the throttle again because the Desired Torque numbers on the 175 map were being exceeded. That’s awesome!
We know how to fix that…
Second Remap
And so after doing power runs and plotting the data, I remaped with the supplied 190 map. Repeated the test.
Power was up! With the throttle hesitation/choking now gone from the upper rpm this did now feel to the driver that there was more power post exhaust. Not huge, but enough to be felt (subjectively). Power numbers supported this.
However… there is a but here.
After extensive driving the maps performance has not been great. I can feel hesitation at odd places in the throttle maps, the KCS often drops to -5 for long periods of time despite no data recorded for knock, and I have data outputs where flat-footed the throttle is seen to close where there are no obvious reasons or causes for it, and different places in the rpm.
I was happy for the first couple of days, but its not been great since. I wonder if this map is/was more suited to a catless manifold and its not been attuned to the catted version.
unfortunately BBR havent been great at getting back to me with other queries so this never went anywhere. (side note, but I think I’ll be going elsewhere for future engine and ecu work. Too many poor experiences vs good in my various orders with them)
Link to thread for the 190 bits: ND - Before, During, After Results 175map to 190map (plus exhaust) - Technical Area / Engine, Transmission, Exhaust etc - MX-5 Owners Club Forum
68mm Throttle Body
Purchased from Fab9, this is a direct plug and play replacement. The ND1 has a 55mm butterfly plate, the fab9 bosch unit is 68mm. Quite a jump.
Love this little mod!
The throttle body is about a 30min install. (fab9 have a great how-to on it).
no remap has been done post TB install. it runs inside the bbr parameters. (ive got the data to prove).
best way to describe it in a sentence - you know when you drive a modern vehicle with a ‘Sport and Normal’ mode, and you can feel the throttle difference and ‘sense of urgency’? well, this TB feels like a ‘Sport button’.
pleased i did it.
Dyno Results
Car, with the above, has a Dyno printout for 200bhp. A little higher than would be expected, however there are a couple of extra mods done which may add a horse or two, plus reduced transmission losses due to much lighter wheels.
ND1 on the Dyno Today - Results. BBR Super190 - Technical Area / Engine, Transmission, Exhaust etc - MX-5 Owners Club Forum
Skuzzle Intake
With the data I pull from the ECU, I can see every parameter you can think of (except tyre pressures. Shame that. My only ND1 peeve). Data such as airflow seen through the MAF, intake temps, and resulting torque generated.
With this in mind I thought I might have a try looking into the Intake kit options. With the MX-5 ND, it ‘widely known’ that the OEM airbox is really good, and that some aftrmarket kits have lost power.
I am a person who likes to find out for himself. Especially when the online evidence seemed to only point to 1 test which could be seen as valid (2 others were not fair tests).
So I went shopping. There are various options, with most asking for the region of £500!!
I came across Skuzzle, which has good rep (from what I could find) on the NC. On the ND they designed an intake which made power everywhere on the 1.5. they then tweaked it for the 2.0L and it make power on the top end. Had a dyno output.
Now I know this is not a great design for air temps - no heat shield. Next to exhaust manifold. But I was happy with this to test and try, as with my live Ecu feeds I can run road tests to see how the temps change (and can lower prior to power pulls). As long as it flowed better, the heat I could handle after.
Well in short, I did 3x power pulls. Fitted the Skuzzle and did 3x more. (20min apart!)
felt the power lost! I didn’t even need to see the data, the power was noticeably down.
All 3 power runs for each set was almost identical (supporting the repeatability). The second set with the skuzzle was down about 15bhp! Ouch.
Looking through the logs, there was too key indicators - one, the air intake temps were huge. Even with ‘flushing’ the air with some wide open throttle prior to a power run, the intake temp at the MAF (the closest temp to ambient across all the intake temp measuring points) was 25C+ over ambient. It was 6C ambient! (OEM airbox was seeing approx 9C at the MAF on the same set of tests).
The second tell tale, was the airflow. The g/s, raw and corrected, were down about 10% in airflow from what was seen just 20min earlier. Had this have been higher, then the intake temps could have been addressed with some relatively simple DIY work.
Logs available if anyone is interested.
I did get a refund for it. The reseller saw my data and didn’t raise any objections.
This is only 1 intake of a dozen available, but I think this will prevent me trying any others, at least until I get bored doing other things to fund another design.
Important info - MAF internal Diamater was the same on OEM and Skuzzle. Approx 65mm/2.6inch
Side note - the induction noise - no change! I was expecting to see the typical intake sound. However it was not ‘throaty’ like my meories of 4 cylinder intake systems. Bear in mind this is an open filter system, so not hidden inside an airbox. Surprised me, this lack of noise…
Future Power Changes
See contents, and see whats going on!
Handling
This is my favourite area to work on…
My ethos for a fast car is not one which can reach silly speeds, sprint to 100, or have the biggest BHP number… a fast car is one which can maintain high speeds through bends. So this focuses on areas of tyres, suspension, chassis stiffness, downforce, weight.
Where to start on this controversial topic?
Well, I test drove 3 standard MX-5 NDs within a couple of days of each other. They all mooch around town just fine, like a toy boat on a pond. Start asking it to lean into a corner and it felt like that toy boat was out at sea!
Its something I wont go into (again) too deeply here. But in short in its OEM form, I found the following issues / that these issues were very pronounced in cornering:
- Excessive body roll
- Limited lateral low speed grip
- Very limit high speed lateral grip
- Too sensitive to mid-corner steering or throttle corrections, leading to more corrections
- A rear end which was working against what the front end was doing
- Rear end lift from 60mph, dangerous at 80mph (anyone remember the original Audi TT?)
Quite a lift of problems to fix. Now its controversial because, a some owners have agreed with me (almost fully) or disagreed (almost fully) There didn’t seem to be much in the way of agreeing with ‘bits’. For the sake of this thread - these are ‘my problems which only my car had’ that I wanted to fix
My handling has had various updates and imputs. I think all have their own thread somewhere… so I will just summarise a timeline here. But the improvements when listed are real improvements, meaning that I recorded the MPH at which the car was at this grip limit and logged an improvement or not.
OEM:
Bridgestone Potenza on all corners. Lots of tread. Cobalt exhaust fitted (important to note due to Lift issues later…)
First Update:
Yellow Speed Racing Coilovers + Eibach Rollbars.
Theres a review thread I did . Yellow Speed Racing (YSR) coilover review- MX5 ND - Technical Area / Steering & Suspension - MX-5 Owners Club Forum In short, this made bounds of difference at low to medium speeds. Grip in general was still lower than I wanted. Traction control was still coming on when flooring it in 4th on a slightly bumpy road. But, body roll greatly reduced. Cornering upto around 60mph felt much better.
Once the suspension settled, I re-adjusted the ride height (again) and then got dual-spec geo setup. (see 949 Racing). This made the turn-in feel sharper and gave a more ‘familiar’ feel to me having had similar setups on previous cars.
In short - this first phase still left two big unresolved issue, despite the very high monetary outlay: A back end disconnected from the front, and high speed instability at the rear. Ive got to be honest, I thought Coilovers and Sways would be the start and finish of my handling venture!
Nope!
Second ‘Tweaks’
Next up was new rubber. I first replaced the 205 Oem bridgestones with 215 Nexen nfera. These are on the cheaper end of the tyre market, but are a very soft compound (both in terms of grip, and sidewall). This made for better grip levels at low speed. Such as throwing into roundabounts. Definitely provided more grip over the 205 bridgestones, which are rock solid (and as wide as a 195!.. Seriously, go measure them).
This lack of overall improvement though ruled out rubber/tyres being the issue as far as I was concerned.
Also during this phase I had the OEM front strut tower off, as I was making frequent adjustments to the shock bound/rebound settings during drives and test-loops.
I need to take a moment to appreciate how good the YSR coilover are, and how versitile the shock adjustments are. Because, everytime I think I have found the ‘best’ setting, I have to re-learn and change it up with every suspension update, as there will be a new ‘best’ to be found.
For example:
The front strut tower was off during initial shock tuning (because its not possible to make tuning changes with it fitted). Onething I immediately noticed while driving (in a straight line) was the ‘wobble’ seen when looking down the nose of the bonnet with the front strut missing. The left and right side of the front of the car were very out of sync / independent of each other.
so I bought the Gravity performance front strut, and ‘while I was there’ I bought the rear. These are copies of the Goodwinracing items, but sold in the UK, and lightweight.
Well as soon as the front strut went on my MPH numbers changed on the Test Loop. And the bump behaviour changed. Good. BUT, this also meant I had to re-tweak the shocks, they now performed better at a softer setting.
The next item was a big shock, and is an item I cannot overstate enough - the Rear Tower Brace.
so if you watch a particular flyin’ miata video they will say ‘don’t bother with the rear, its so close to the firewall anyway’. For this reason, I wasn’t going to get one. Its only because it was cheap (£80?) so thought I may as well get one on.
Well, same day as re-fitting the front strut, I did the rear. (separately). I went back onto the test loop and was met with an out loud comment from my own mouth - ‘‘hang on, was that right’’?
What I had stumbled upon, by complete mistake, is I completely nullified the ‘disconnected rear end’ symptom I was talking about. This was fixed to such as extend that I had to go home, calm down, and go back out after a tea to redo the Test Loops to confirm it.
Fixed!
After then doing some research, I found 2-3 other instances across reviews and Miata forums of others reporting similar issues to me and noting this rear bar fixed it. It doesn’t seem like a very well conversed topic. But theres other owners with similar reported issues, that they feel this has also fixed.
£ for value, this single item for me is my best buy on the car!
Unfortunately I could not find a good way to record or demonstrate this. i.e, I needed a way really to video inside the boot to show strut tower movement. So as it stands, this is just my subjective view. (well, plus the extra couple of MPH I now got out of the corner, with less steering wheel fight)
Winter Phase
Living in Scotland, we have snow! And I am far enough north my winter doesn’t see positive figures much for a couple of months. So fitted now tyres (skipped all-season altogether).
again, the YSRs needed readjustment. The super squishy tyres didn’t feel right on rock solid suspension. So adjusted down to very soft levels. Giving a good compliant ride for winter.
Downforce / Lift Issues
All my corning and stability issues, including traction control light at high speed - all fixed with the Verus rear diffuser and undertray set. Immense, measurable difference.
So I havent yet fitted the side skirts or the front lip. Only the under panels (2 central, 2 rear suspension, 1 rear diffuser).
Absolutely wow! There was definitely a rear-lift issue. My theory / root cause is as follows (but I cant prove this. Its just a thought process):
- I think the aftermarket backbox has created a large void/air gap at the back of the car which wasn’t there from factory. As you look under the car in the direction of airflow travel the rear bumper is giant scoop / parachute. I think it was catching air and making a very large high pressure area. And therfore, lift. I did manage to go some way to prove rear lift was an issue by adding ballast and re-testing corning at high speeds.
- I doubt the verus kit adds that much positive downforce by itself, but I suspect compounding the results I am getting are the undoning the lift added by the new exhaust. ‘Doubling’ the effect.
My wife comes out with me often on our drives. Shes is quite well tuned to a car herself even in the passenger seat. A quote from the her during first outing as a passenger on the test loop after these were fitted: ‘‘wow, that felt like the lotus’’! Heck of a compliment. This was primarily due to the fact we just took high speed corners on the test loop which the mazda has not been able to even get close to speed wise. I wont say what speeds we were doing… but the difference she felt (finally) was lateral g-force pulling her from the seat.
MPG has gone up. Road noise has gone down. Cornering speeds are up. Predictability at speed has gone up.
Its not a cheap kit, and you could home-make one if you are handy for very low cost. But what a transformation.
One comment: the rear suspension covers will get in the way of 4-wheel alignments. Get that done first. (just adds some additional labour time to remove and refit otherwise)
New Wheels and Summer tyres fitted.
After much, much debating and discussions around tyre choices (and therfore, which wheel width do I get), I went for the lightest wheel I could find. The newly released Advanti Blizzard. The metal alone I have had weighted and compared - is 3kg lighter PER WHEEL than the oem Recaro Alloy wheel weight (see thread link).
The tyres are a little heavier than the OEM bridgestones (ignore the winter tyres, don’t muddy the water with those). In total a saving of 2.5kg per corner.
In terms of acceleration and steering feel - I cant say I can notice a difference. Even with the fact ive had the snow tyres come off.
What has changed massively is the steering accuracy and response time (vs the snow tyres). I nearly binned the car a few times on its first outing due to me tuning too soon. There was no longer that latency between sterring wheel > tyre > direction change. Muscle memory issue ![]() no fault of the tyres.
no fault of the tyres.
And… guess what. YSRs needed re-tuning to find a new ‘best’ ![]()
In short - Wow!
The MPH I am now getting on the Test Loop vs when it was stock - HUGE. Numbers I wont quote here… Of course this is now a result of all work done, not just the new tyres.
Corning/Suspension summary
To help condense the above - if I was to do this again on a budget what would I do, if I wanted maximum cornering ability?
- Get rear strut brace
- Get verus underbody trays (or, make your own. Can be done cheaply)
Looking back, I bet if these were done first, then the hunt for better rubber, better wheels, stiffer rollbars, top quality coilovers, might not have been needed / would have dropped far down the priority list.
Notable mention:
Wilwood 6-pot calipers.
These came as an impulse buy as I had a seized front calliper. And the 4-pots werent in stock. If you are thinking of getting these I would recommend. Superior stopping power over the oem. And, drives like OEM. You only know they are there when you start braking from high speed, like 70mph, where a light touch on the pedal gives some very reassuring bite! Also - lighter than OEM! Weight saving.
Still reading?
Go get a coffee, this thread isnt going anywhere.
Quality of Life
This is a car. Its to be driven.
But there are things which make that experience more fun, or a nightmare. For example, imagine having to switch off Lane Assist everytime you start the car if it doesn’t save our settings (a very real issue now, for those who have a newer car) . Or ,perhaps your coffee cup didn’t fit into a cup holder, that would be a pain.
To that end, there are some key mentions for Quality of Life on the MX-5 which I have ‘improved’ (my opinion).
Interior - cargo nets
My last car was the Lotus Evora, and despite coming with 2 rear seats (shelves with seatbelts), it had no cup holders, no door pockets, and the glove box was only big enough for gloves ![]() so I found a solution which ive transferred over to the MX-5: velcro cargo nets.
so I found a solution which ive transferred over to the MX-5: velcro cargo nets.
These are really cheap, easy to remove options from Amazon. I have one each side of the transmission tunnel so the passenger and drive has one each. For the drivers side, I use mine on every journy. Its very easy to reach and open, putting in keys + wallet at the start of every journey. Rather than having to twist around for the rear glove box. Or have the jingling of keys in the armrest hard plastic over bumps. They are big and hold some weight. On a long multi-hour journey I use the passenger side one for thing I might need when I pull over, such as glasses case, sweets, and other nik naks. When not in use, they are barely visible and take up just a couple mm of room.
I also use a smaller one in the boot to keep smaller items of flying around in corners, like the locking wheel nut and emergency pump.
Audio Upgrade
Cannot write this thread without talking about the audio upgrade! Specifically the mazda infotainment upgrade to allow for applecarplay. This also needs a new USB dongle box thingy, but bring the 2016 car nearer to 2020 :D.
Being able to have a decent live satnav on the main screen is a quality of life well-needed. As well as Spotify ![]()
The Paco kit - Installed this in 2 phases due to time. But in short - I wouldn’t buy just door speakers alone (same logic would apply to any brand), mainly due to the inability to filter out unwanted frequencies. And the fact that the tweaters will be ripping your ears apart when the door speakers get upto volume.
But the whole kit - awesome! There are a few frequencies ‘flat spots’, where sometimes the bass doesn’t feel… bassy. (cant tell if that’s the bose sub, or not). But the quality is great. And on motoway drives with the roof down it can play loud, clear, punchy tunes!
Boot Illumination Kit
Buy it. Do it! Its a 15min DIY at home jobby, and really works. You can see every single inch of your boot and helps a ton. Also work very well when (like me) you are pssn around in the boot doing work to the rear lights, adjusting your shocks for example. As it’s a great substitute headlamp. Its that bright that it still lights up the boot in sunshine, unlight the oem yellow bulb that barely gave a glow in the dark.
Front Shock Brace
I have to add this in here, as I have adjustable shocks. Would not be possible without this
ECUTek ECU
For me, this is my primary driving companion. (see pic). Tell me all the data I could ever want while driving. One great feature is the Alarm on it, which I use as a shift light. So in the heat of battle where my eyes are focused on forwards, my phone flashes bright red, the entire screen, signalling redline is a couple of hundred rpm away. Far better than any dashboard based shift light ive ever used.
Quality of life NOT to do
These will be circumstantial / my opinion. But some mentions
Devlin Door bushings - cor these are bloody crap. Everyone was raving about these things. They made the door sound cheap and hollow, and not the firm ‘thud’ I heard people describe. They probably could have done being a few thou thicker to give a tighter fit as I don’t think they are as good as the OEM ones (for sound, and quality feel).
Wind Breaker
So I got a new perspex on from ebay. Its a shade higher in the middle than the oem. It looks great, helps with rear visibility. All good. But this is quality of life section…
Its new height makes getting the roof up and down a shade harder (more arching of the arm/hand). So the advice here is not to get anything bigger! I know mx5stuff (I think?) sells a few variations and they are huge. But they would require you to get out of the car to operate the softtop. A big con, when the softtop currently is up and down in 3 seconds flat. Don’t compromise that.
What someone should design… is a wind breaker like the MG F/TF used to have. Which was a tall glass plate on hinges. So you can lay it flat with a push. That way you get full heigh and wind breaking capability, with fast roof operation. (not sure if the MX-5 has space for it. Might have to hinge inwards, but an idea to explore…)
Same would likely apply to rollcage. Get one if you need one. If its for show, be aware of roof operation.
Finally, some MPG numbers.
Its not all about speed. I also enjoy having a fight with my cluster gauge to get max numbers ![]()
I have a test loop which is solely for MPG runs. Its a 15mile journey with no roundabouts, traffic lights, or junctions. Its a route to a local town that I do often so is always my test bed for mpg.
Once its gets past about 6pm I can do this test without see any other vehicles! (I am very, very north in Scotland lol).
The test is always from a specific set of signs, to a specific set of signs, and the whole trip is done on cruise control. There are 2 blips each for half mile - a 30mph, and a 40mph section. Both of these I cancel cruise and let it coast before new speed limit. And then when back at National sign I hit ‘resume’ on cruise so the acceleration effort is always equal.
Each of the following had minimum of 4 runs to get the average. (listed in order of parts fitted when tested)
Stock form - 51mpg
175 map - negligible change
Winter tyres - negligible change
190 map and full exhaust - 48mpg (best result seen was lower than previous average)
Verus 5x undertrays/diffuser - 52.5mpg (worst result seen was better than Stock form average)
Lighter wheels + Goodyear Tyres - negligible change
for the above results the roof is always up, as are windows. However Interestingly I often have the roof down when im not officially recording but doing the test anyway. At these speeds the roof down only seems to cost 1mpg. Will likely amplify as speeds increase of course.
Thanks for reading ![]()
So whats next for Dirty Habits’ Mxtress?
Probably camshafts… let see.
I will find some pics of the above bits and upload.
Hope info in here can help others in the future.


")


