You should be fine replacing the nuts with the weight of the car on the suspension, just don’t allow the damper rod to drop, can’t see it happening easily in all honesty.
4 Likes
Yeah I can’t see any issues, be just like fitting a strut brace (removing nuts) not needing to remove struts.
1 Like
With the car on its wheels it won’t be an issue, but for peace of mind you can always loosen but not remove fully. If the nut can then be turned easily by hand with a socket then there is not tension against it from the spring assembly ![]()
1 Like
Thanks guys ![]()
1 Like
Great work man, makes good reading
It’s gunna feel excellent when it’s all done
2 Likes
Day 12
Hours spent today: 4
I built a simple frame to keep the hub carrier in position when the link arms are removed. It’s a bit of angle iron bolted to the two brake caliper bracket bolt holes.
I ran out of old bits of metal, so had to use some baton for the bottom section.
It looks like something from Scrapheap Challenge, but it’s very sturdy at least that those ABS wires won’t get yanked and the driveshafts are horizontal.

All the link arms for the rear suspension are now removed, so there’s plenty to do at the bench cleaning them up and replacing the bushes.

As the rear suspension consists of link arms rather than wishbone type control arms, its only one bush per component. This should make each link easier to work on because I won’t have to keep working out which way round to put it in the vice, I’ll just stick it in and do it up.
Rear bush removal here we come!
3 Likes
Did you use a ball joint separator or just give them a smack with a hammer to crack the taper loose ?
Just a sharp tap with a hammer did the trick.
2 Likes
For anyone considering this task - Do NOT scrimp on the correct tools.
I already had a TITAN recip saw - but if you dont - they are £40 from Screwfix.
Blades - make sure you get a blade for THICK metal with carbide tips.
I went with this one - was £20 delivered

Make sure you use some sort of cutting lubricant
DO NOT run the recip saw flat out - it just kills blades.
Here is the result of 15 mins cutting at moderate speed using the above equipment.
5 Likes
Day 13
Hours spent today: 6
While all the rear suspension parts are removed, I thought it a good time to tackle the diff bushes.
I got some great info from this thread over the pond:
Basically you slightly lower the subframe to access the mount on top of the diff by loosening the subframe nuts, but leaving them on with a bit of thread. You don’t need to disconnect anything on the PPF.
After removing the subframe braces on either side I did as per above, and was indeed able to access the four nuts on top of the diff that fasten the diff mount.
Access is very tight, and a 17mm ratchet spanner, ideally a flexi head one, is essential.
To crack the nuts, I needed to feed the open end of the ratchet spanner through a letter box shaped slit in the top of the subframe and piggy back a ring spanner onto the flexi spanner to get leverage. You’re working at arms length and nearly blind.
To crack the bolts fastening the diff bushes, I was able to get a socket and ratchet on the right hand side, but on the left I needed to use a short breaker bar and socket at a slight angle because the exhaust midpipe got in the way of a right angled ratchet and socket.
Once the nuts and bolts were cracked, I supported the diff with a jack. I did initially place the jack under the diff before starting on the nuts and bolts, but access is very tight and it got in the way of me squirming about under the car to get in effective positions for leverage at arms length.
After removing the diff mount nuts and bolts, I decided to attempt to remove it from where I was lying, which was under the rear right side of the diff. The Miata guide says to lower the diff a bit and maneuver it out from the drivers (left) side. However, with a bit of wiggling and rotating, I was able to guide it out from the right side without lowering the diff with the jack.

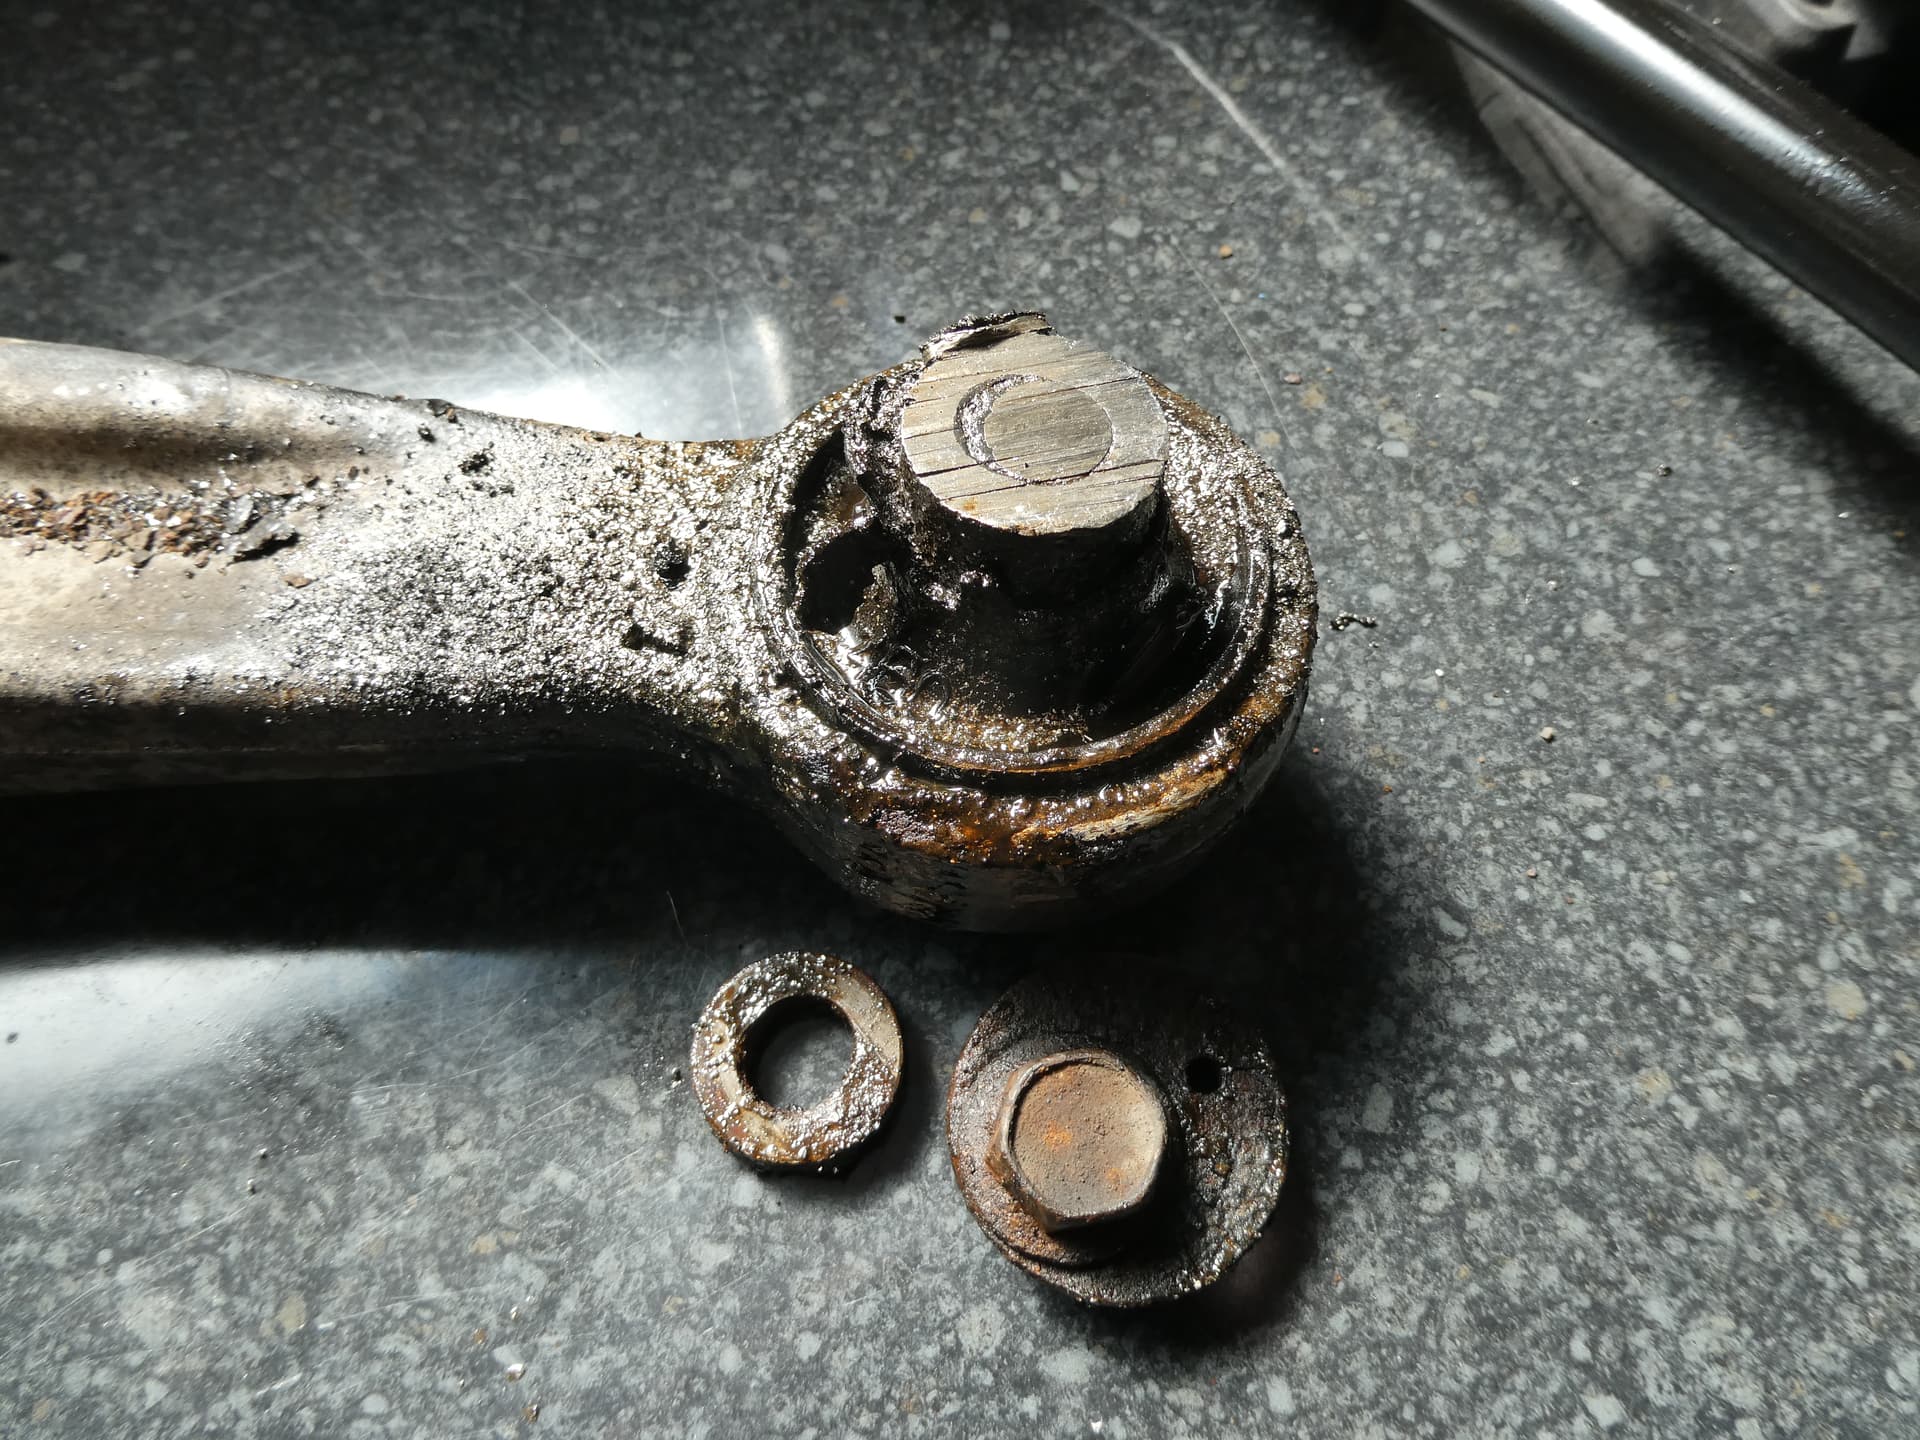
The diff bushes were in a right state, with big rips in the rubber both sides and one side had worn away nearly to the inner bush sleeve:

No need to drill holes in these bushes weaken the bush and poke a jigsaw blade through. I just shoved the blade through the biggest rip and went round in about 20 seconds.

These bushes have a steel liner and with a large flange on the outer edge. After cutting a slit in the inner liner with the reciprocating saw, and cutting an adjoining slit in the flange with a Dremel, I tried drifting out the liner but it was stuck solid.
The diff mount itself is a very light piece of alloy. I didn’t want to damage it by pounding it with a hammer, so carefully cut off the flanges with an angle grinder and thin cutting disc. Well, three thin cutting discs ![]()
Once the flanges were off, the liners drifted out with minimal resistance, which was satisfying.

Here’s a pic of a removed OEM bush and a new polybush:

After wrapping the polybushes and steel inners in PTFE tape, the polyurethane parts were pulled into position with a threaded rod and the steel inners nearly went in by hand, but needed a bit of final persuasion by a G clamp on one and the wooden end of a hammer on the other.

Refitting was a straightforward reversal of the removal, made easier because I didn’t lower the jack holding the diff earlier, so it was still in position. The polybushes were a stiff hand-fit in the subframe.

I thought this would be a quick job… It took me six hours ![]()
Glad it’s done though, looking at the state of the OEM bushes!
7 Likes
Did you have any symptoms of all that wear in the diff bushes? Looking at yours, I am regretting not doing my own when I was at it!!
I’m not sure to be honest. It’s always been a great handling car, but I’ve had it seven years and up until now the suspension and diff was untouched apart from upgraded ARBs.
I’ve certainly not noticed a rapid change in handling over the years, but there must have been deterioration as everything wore out.
1 Like
Day 14
Hours spent today: 3
A productive three hours this morning. None of the rear link arm bushes have steel liners, so it’s just the rubber bush and steel insert that needs to come out.
Thanks to @stevegilkes posting his useful thread, I knew what I was up against and prepared to melt them out with the help of a blowtorch and some threaded rod and suitably sized sockets as a puller.
Once the threaded rod and sockets were fitted and the puller was tensioned, after a few minutes with the blowtorch on the metal the rubber bush and steel insert came sliding out on its own.
I managed to get all 10 bushes removed in just over an hour and became quite good at doing them quickly.
Now I have this new skill, they’re all done and I don’t need to do any more! Always the way ![]()

A quick coat with rust converter and they’re ready for painting with some vintage epoxy mastic.

The blue ball joint in the pic above is the one I accidentally damaged the boot on. There’s a rubber glove finger protecting the exposed ball joint until the new boot is fitted.
Things left to do:
Tidy up rear subframe
Build new rear struts
Fit new ball joint boot
Wrap polybushes with PTFE tape and fit them to link arms.
Tidy up and copper brush the threads on all the bolts as they’re being refused.
Refit to car and get alignment done.
If I get a few hours spare on Saturday I might be ready to refit everything on Sunday woohoo
4 Likes
Good stuff ![]()
1 Like
Day 15
Hours spent today: 5
Gave the rear suspension arms two coats of epoxy mastic and was quite pleased with how I hung them to dry:

Admittedly the ARB didn’t get the same thoughtfulness:

Between coats I built the new struts. After removing the first spring I was surprised to see that the bump stop and top mount assembly looked brand new.

I reused the bump stops, replaced the top mounts with new top mount kits and also replaced the gaiters.
After scratching the powder coating on the front springs, I used some pieces of bike inner tube to protect the rear springs and it worked a treat:


Once the epoxy mastic was dry enough the handle the link arms, I wrapped the poly bushes in PTFE tape, then greased and inserted them into the links.

The polyurethane parts went in by hand and and the steel inserts needed the C clamp to push them home.
I also gave the bottom section of the dampers two coats of epoxy mastic because that bit got very rusty on the originals.
After this I packed away the tools feeling very pleased that I was all set for assembly tomorrow until… I spotted a remaining bag of poly bushes in the box!
At first I couldn’t work it out because all the links are now poly bushed and front end of the car is done. Then I realized… There’s a bush in the bottom of the hub carrier for the trailing arm!
This bush looked straightforward with no steel liner, but I was reluctant to use heat because the alloy carrier will act like a heat sink and the ABS sensors are nearby.
So I used the good old threaded rod again with the impact gun and brute force and got it out to just over half way, and then wiggled it out the rest of the way by sticking a screwdriver in the end.
So that’s all the bushes fitted and the rear suspension is ready for installation.
The MX5 might be back on the road tomorrow ![]()
10 Likes
Me too - haha
I even looked at the bottom of the rear strut but quickly realised it wasn’t the correct size.
1 Like
Great job and write up mate ![]()
1 Like
Day 16
Hours spent today: 7
Everything is fitted. I took some time this morning to lay out everything needed to reduce wandering in and out of the garage.

I started by installing the front lower (toe) and front upper arms, and once the trailing arm was fitted I was able to remove the DIY frame holding up the hub carrier. Then I installed the strut then the upper rear arm at the ball joint end and the lower rear arm at the bush end.
I was able to then pull the hub carrier back enough by hand to get the lower rear arm ball joint attached, and then finally nipping the jack up under the hub carrier enabled me to line up the upper rear bush with the sub frame.
By this time everything on one side was fitted hand tight except the ARB, I decided to fit that at the end to make more room to fit the link arms.
I tightened up the ball joints to torque, then jacked up the hub to ride height and torqued up the bush bolts.
The camber and toe alignment bolts were precisely set “in the middle”, as per the front ![]()
Once the other side of the car was done, I fitted the ARB and jacked up each side to ride height before the final tightening. I questioned why I was doing this because the ball joints in the ARB links would move to suit the position anyway, but this is the way I did it.
The test drive showed the car to ride very well over bumps, and even without an alignment the handling feels excellent.
The biggest difference is how quickly and positively the car changes gear. I didn’t expect any difference here, but it feels so crisp, as if a new H gate has been fitted and the gearstick just slots into gear. It must be those knackered diff bushes that were replaced with polyurethane bushes.
Anyway I’m really happy with the car and will now need to get it aligned properly before testing it properly.

Total time taken 66 hours, including some rust prevention work.
Oh, and I noticed some of the foil covering of the transmission tunnel cover has started peeling off and coming away. That will need some attention.
13 Likes
Bravo , well done , great project to take on and complete.
1 Like
As a fellow bush wacker, congratulations on completing the journey.
I had a post script today. In the second MOT since the job, it was failed on missing split pins from the front lower ball joint bolts. Halfords suggested I might like to pay 750 to replace the complete lower arm on both sides ! I hadn’t replaced the original pins as they had rusted away leaving only a remnant seized in the hole. A little light work before I return it. I wonder what they would say to wire locking and a lock nut?