Thank you, yes I have red door stripes, red stitches on beige leather and red rings on vents as standard on my Kuro edition.
2 Likes
Looks great.
1 Like
Fitted a £1.30 air filter from Euro Car Parts to my NB. Great deal from them so bought two.
Installed JL Audio amp and sub. Very pleased with improvements in sound 
Spent a day or two washing, polishing and coating my Sport Black. After washing I used a clay bar to get all the old road grime out so the paintwork was smooth, then polished the car with Britemax Black Max polish. I then removed all the excess polish off with Gtech panel wipe. Finally a coat of Gyeon Q2 Cancoat.
Certainly looks a lot better…
Many thanks to The_MXican for all the detailing information and links to the products.
5 Likes

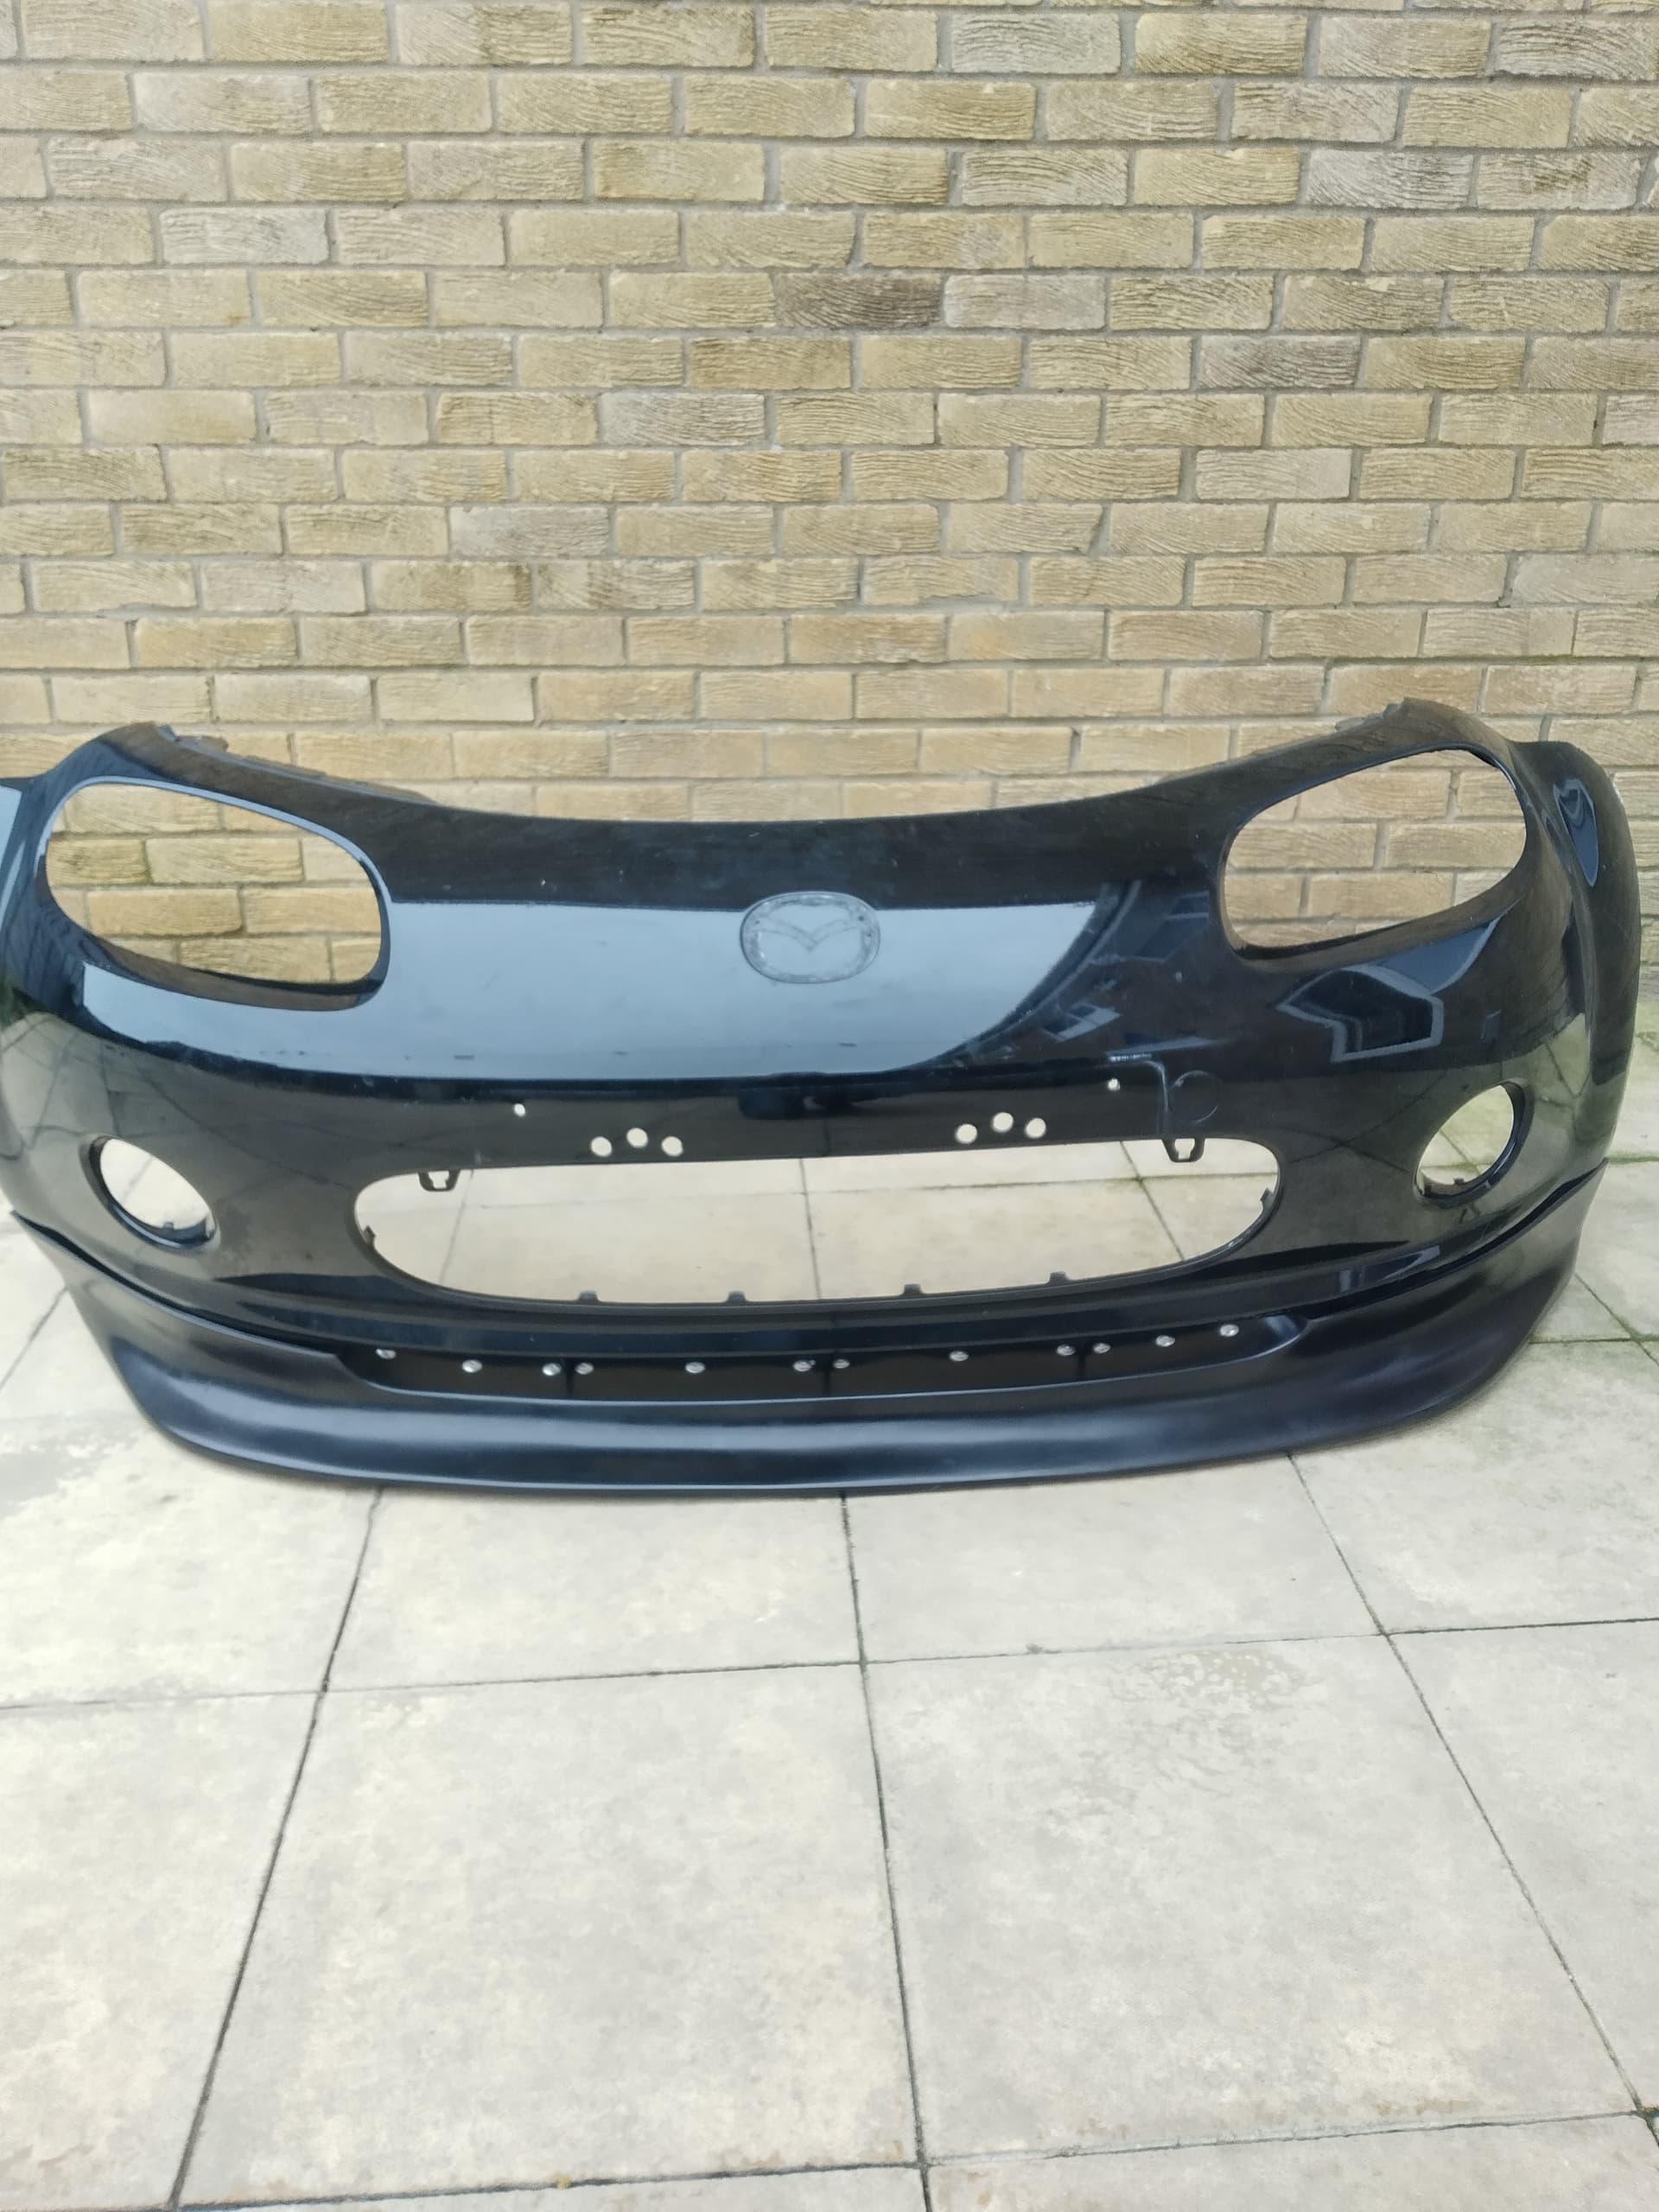
Fitted GV style front splitter, lots of heat and some manipulation required. Opted for 4.8x16mm pop rivets for attaching.
3 Likes
Looking just the job.
Obviously you’re going to colour code the pop rivets!!
1 Like
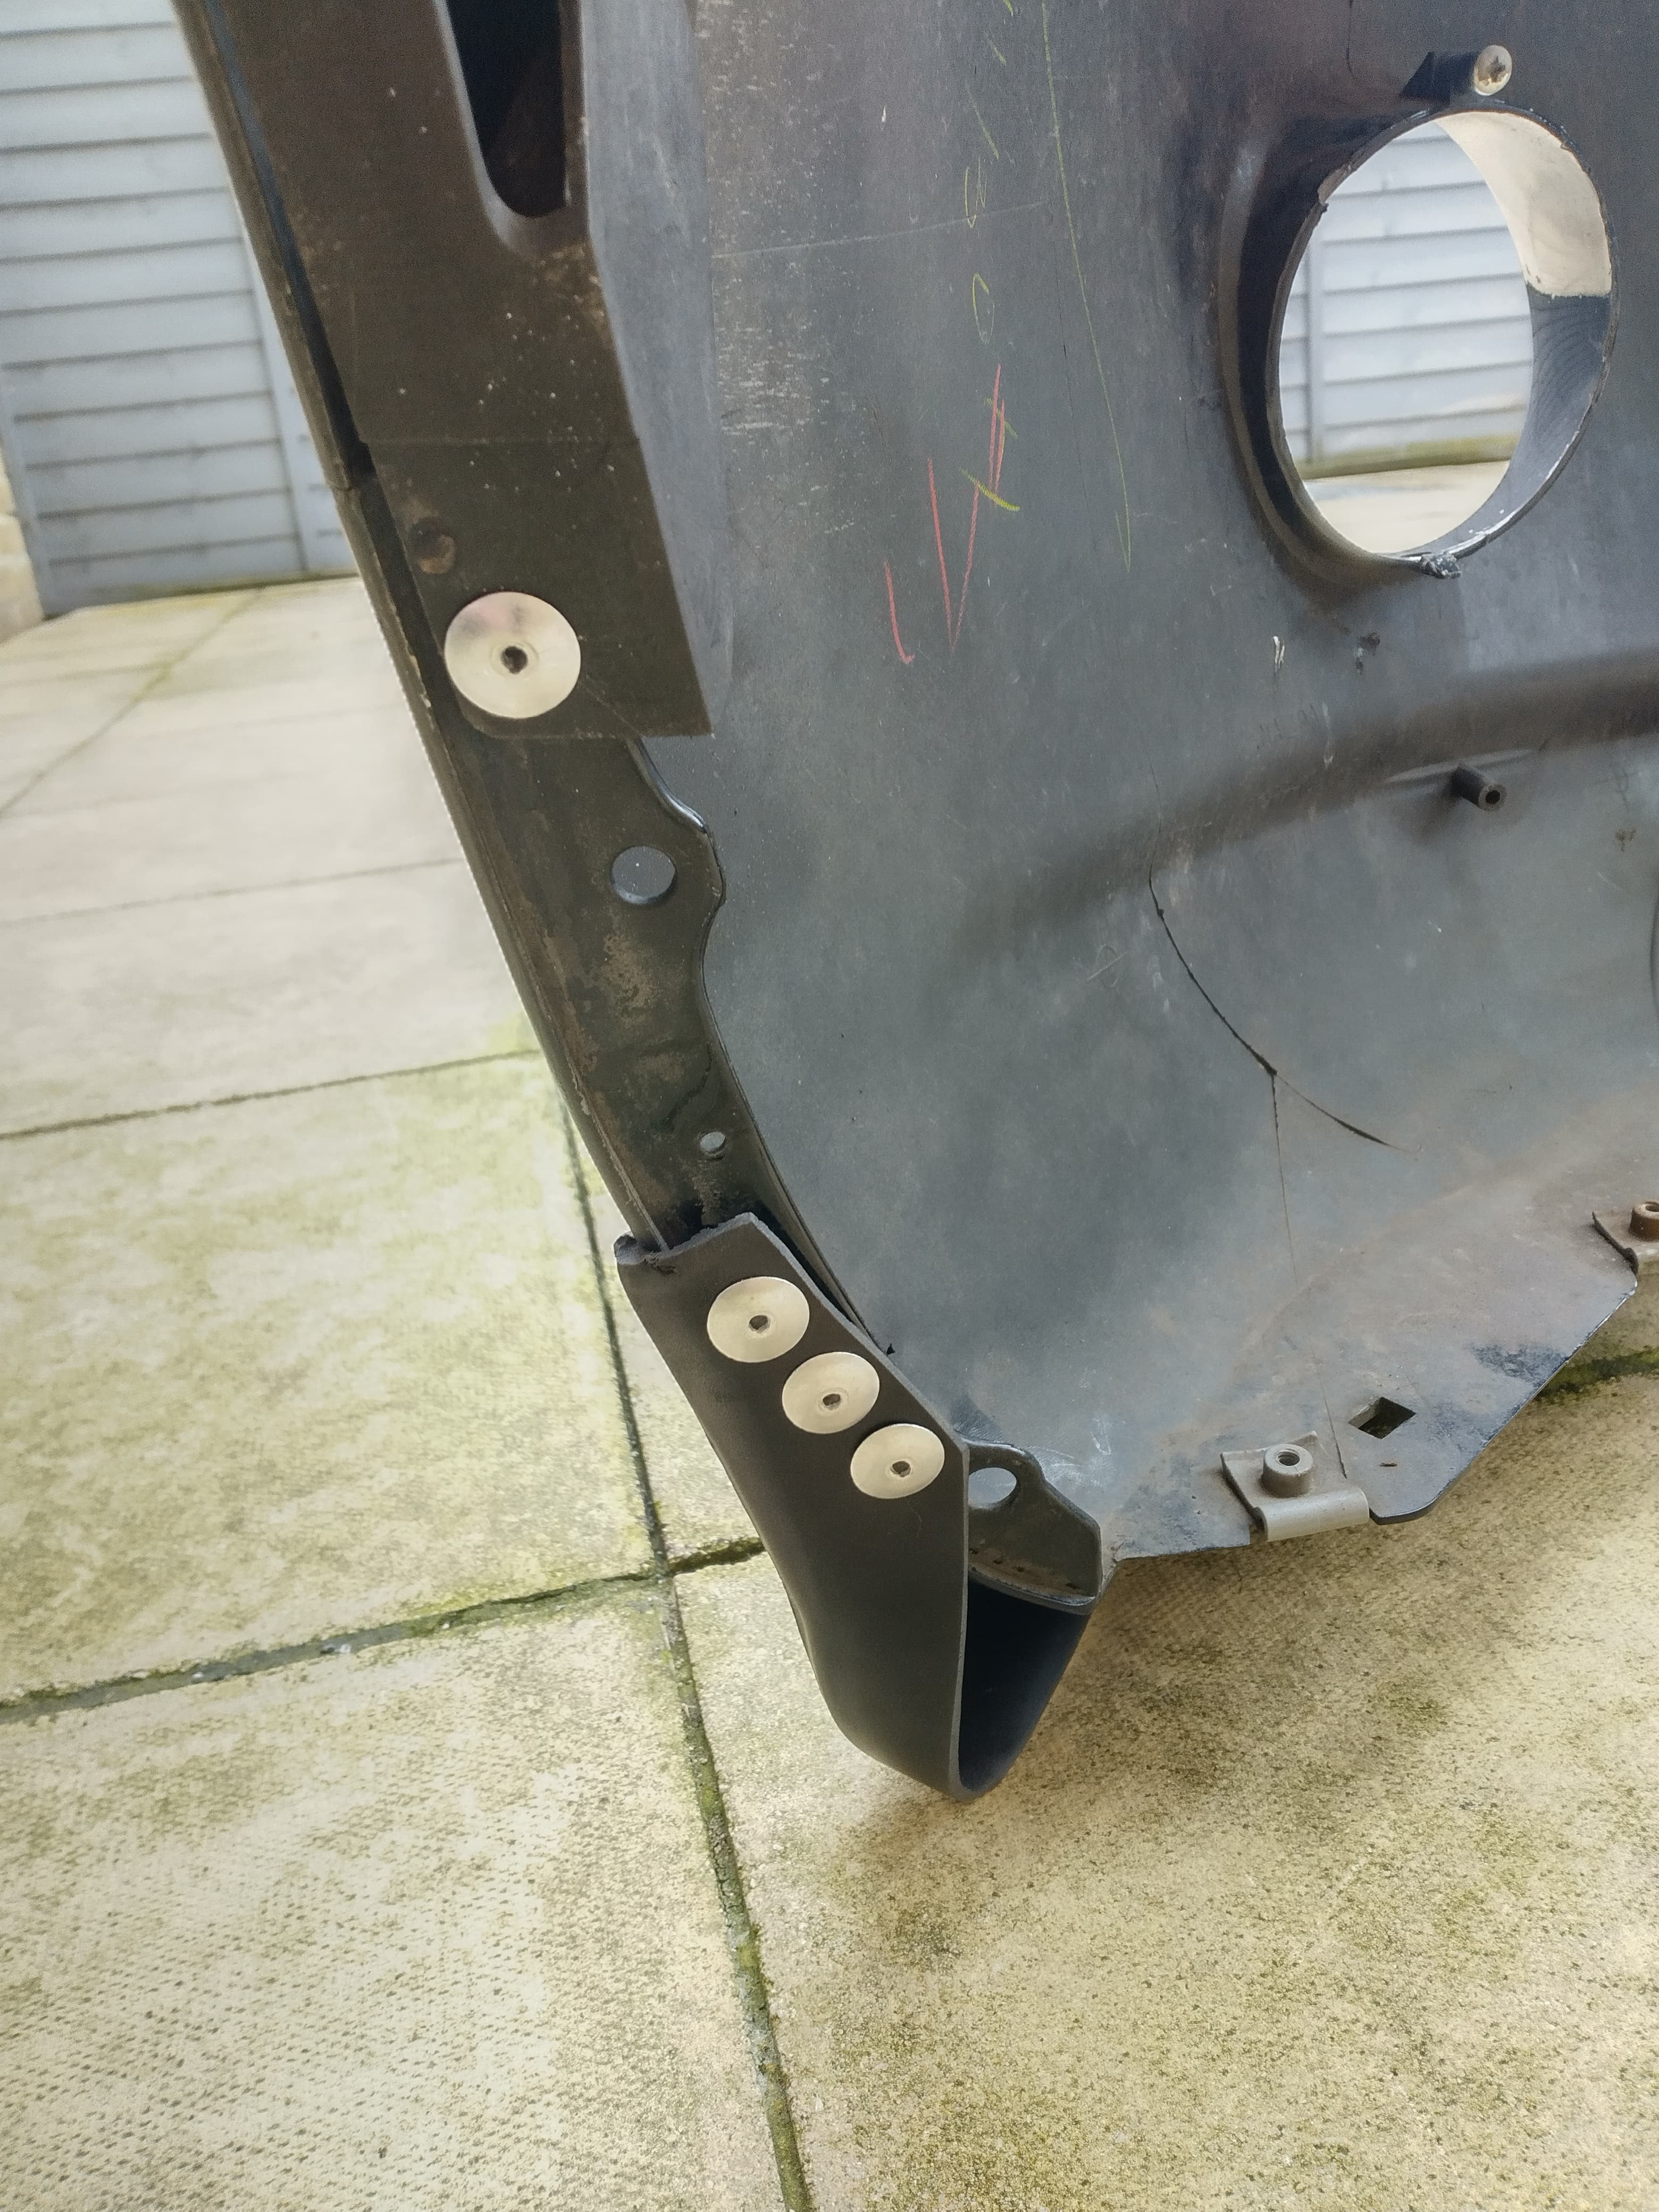
Quite possibly  having removed the badge the recess needs filling , so yeah probs a full bumper respray.
Is the front badge held on with double sided tape like the rear one?
I managed to remove the rear one using fishing line to pull/saw behind it.
Can you do this with the front one or is it a bumper off procedure?
Removed it a while back so off hand I can’t give difinitive answer, but I think the badge may of had plastic pins on that located in bumper.
I’m not home at moment but I will take a look at recess and get back to you 
In my experience when using pop rivets through plastic it’s worth putting washers on the backside of them. If you don’t they have a tendency to pull through over time if there’s the slightest load on them.
1 Like
Thanks👍🏻
My son and I decided to do some DIY wheel arch body repairs to his NB today , we haven’t done anything like this before to either of our 5’s, so we sanded back the rusted areas which didnt go too deep, treated them with rust eater , a top coat of Dolphin fine finish, and after much sanding back with ultra fine wet and dry, 2 coats of primer, a light rub with wet and dry , 2 coats of paint , and 3 of gloss lacquer.
Next week it’s a polish and real buff up with wax.
It’s never going to look like a pro paint shop finish, but its a huge improvement.
The photo shows it prior to final laqcuer finish.


11 Likes
Mazda mats, stubby aerial and Mazda locking wheel nuts fitted today - after the obligatory wash - all while we wait for the DVLA
1 Like
Painted my backbox heat shield after removing some surface rust - heat resistant paint to 600 Celcius then fitted my new back box. Being lazy and just linking to what I did in another thread - but had a bit of a job with it - all sorted now though ![]()
Took look and there’s 4 through holes in bumper so I was right in thinking the badge had plastic pins on
Same as the back one then👍
Good idea and I have decided to do that with my 07. Cant seem to get the rear vallance off though. Have removed the screws at the top, those behind the number plate and see there are three plastic plug conectors on either side into the boot. Do you just tap them back and then the vallance comes off or are there any more hidden screws/fixings?
Cheers
The bumper fastenings to the wing (near the wheel arches) called sliders just clip in. To detach just pull them away outwards the the bumper should pop off there but be careful it doesn’t drop each side doing so.
Have you found the fixing behind each rear light lense aperture?