I totalled my audi a6 avant 16 plate 80k miles, they wrote the car off when it was drivable and no air bags and no lights on dash. I got 4k more then what i thought. and i still said i wasn’t happy with the price. usually 2 declines then they re do and usually you loose.
1 Like
That’s amazing! My last service, Molly Mazda came back with scratches across the offside front wing. How do you prove it was them?!
What a nightmare. Did you tell them when you picked it up or did you get home? If the latter, you may well have a struggle on your hands. Best speak with them and try to win them over. This is one reason why some of us do our own servicing! If it were me I’d be inclined to photo/video around the car before taking it in but it’s probably always best to examine the car carefully before driving it away … ideally before paying.
That’s so annoying when that happens. Hopefully they sort it for you. Twice garages have done damage to my cars. Ford main dealer dented the door of my mustang and an independent scratched the wing on another car. Both denied it and tried to say the damage was already there.
Gladly our cars are all out of warranty now so I just do it all myself.
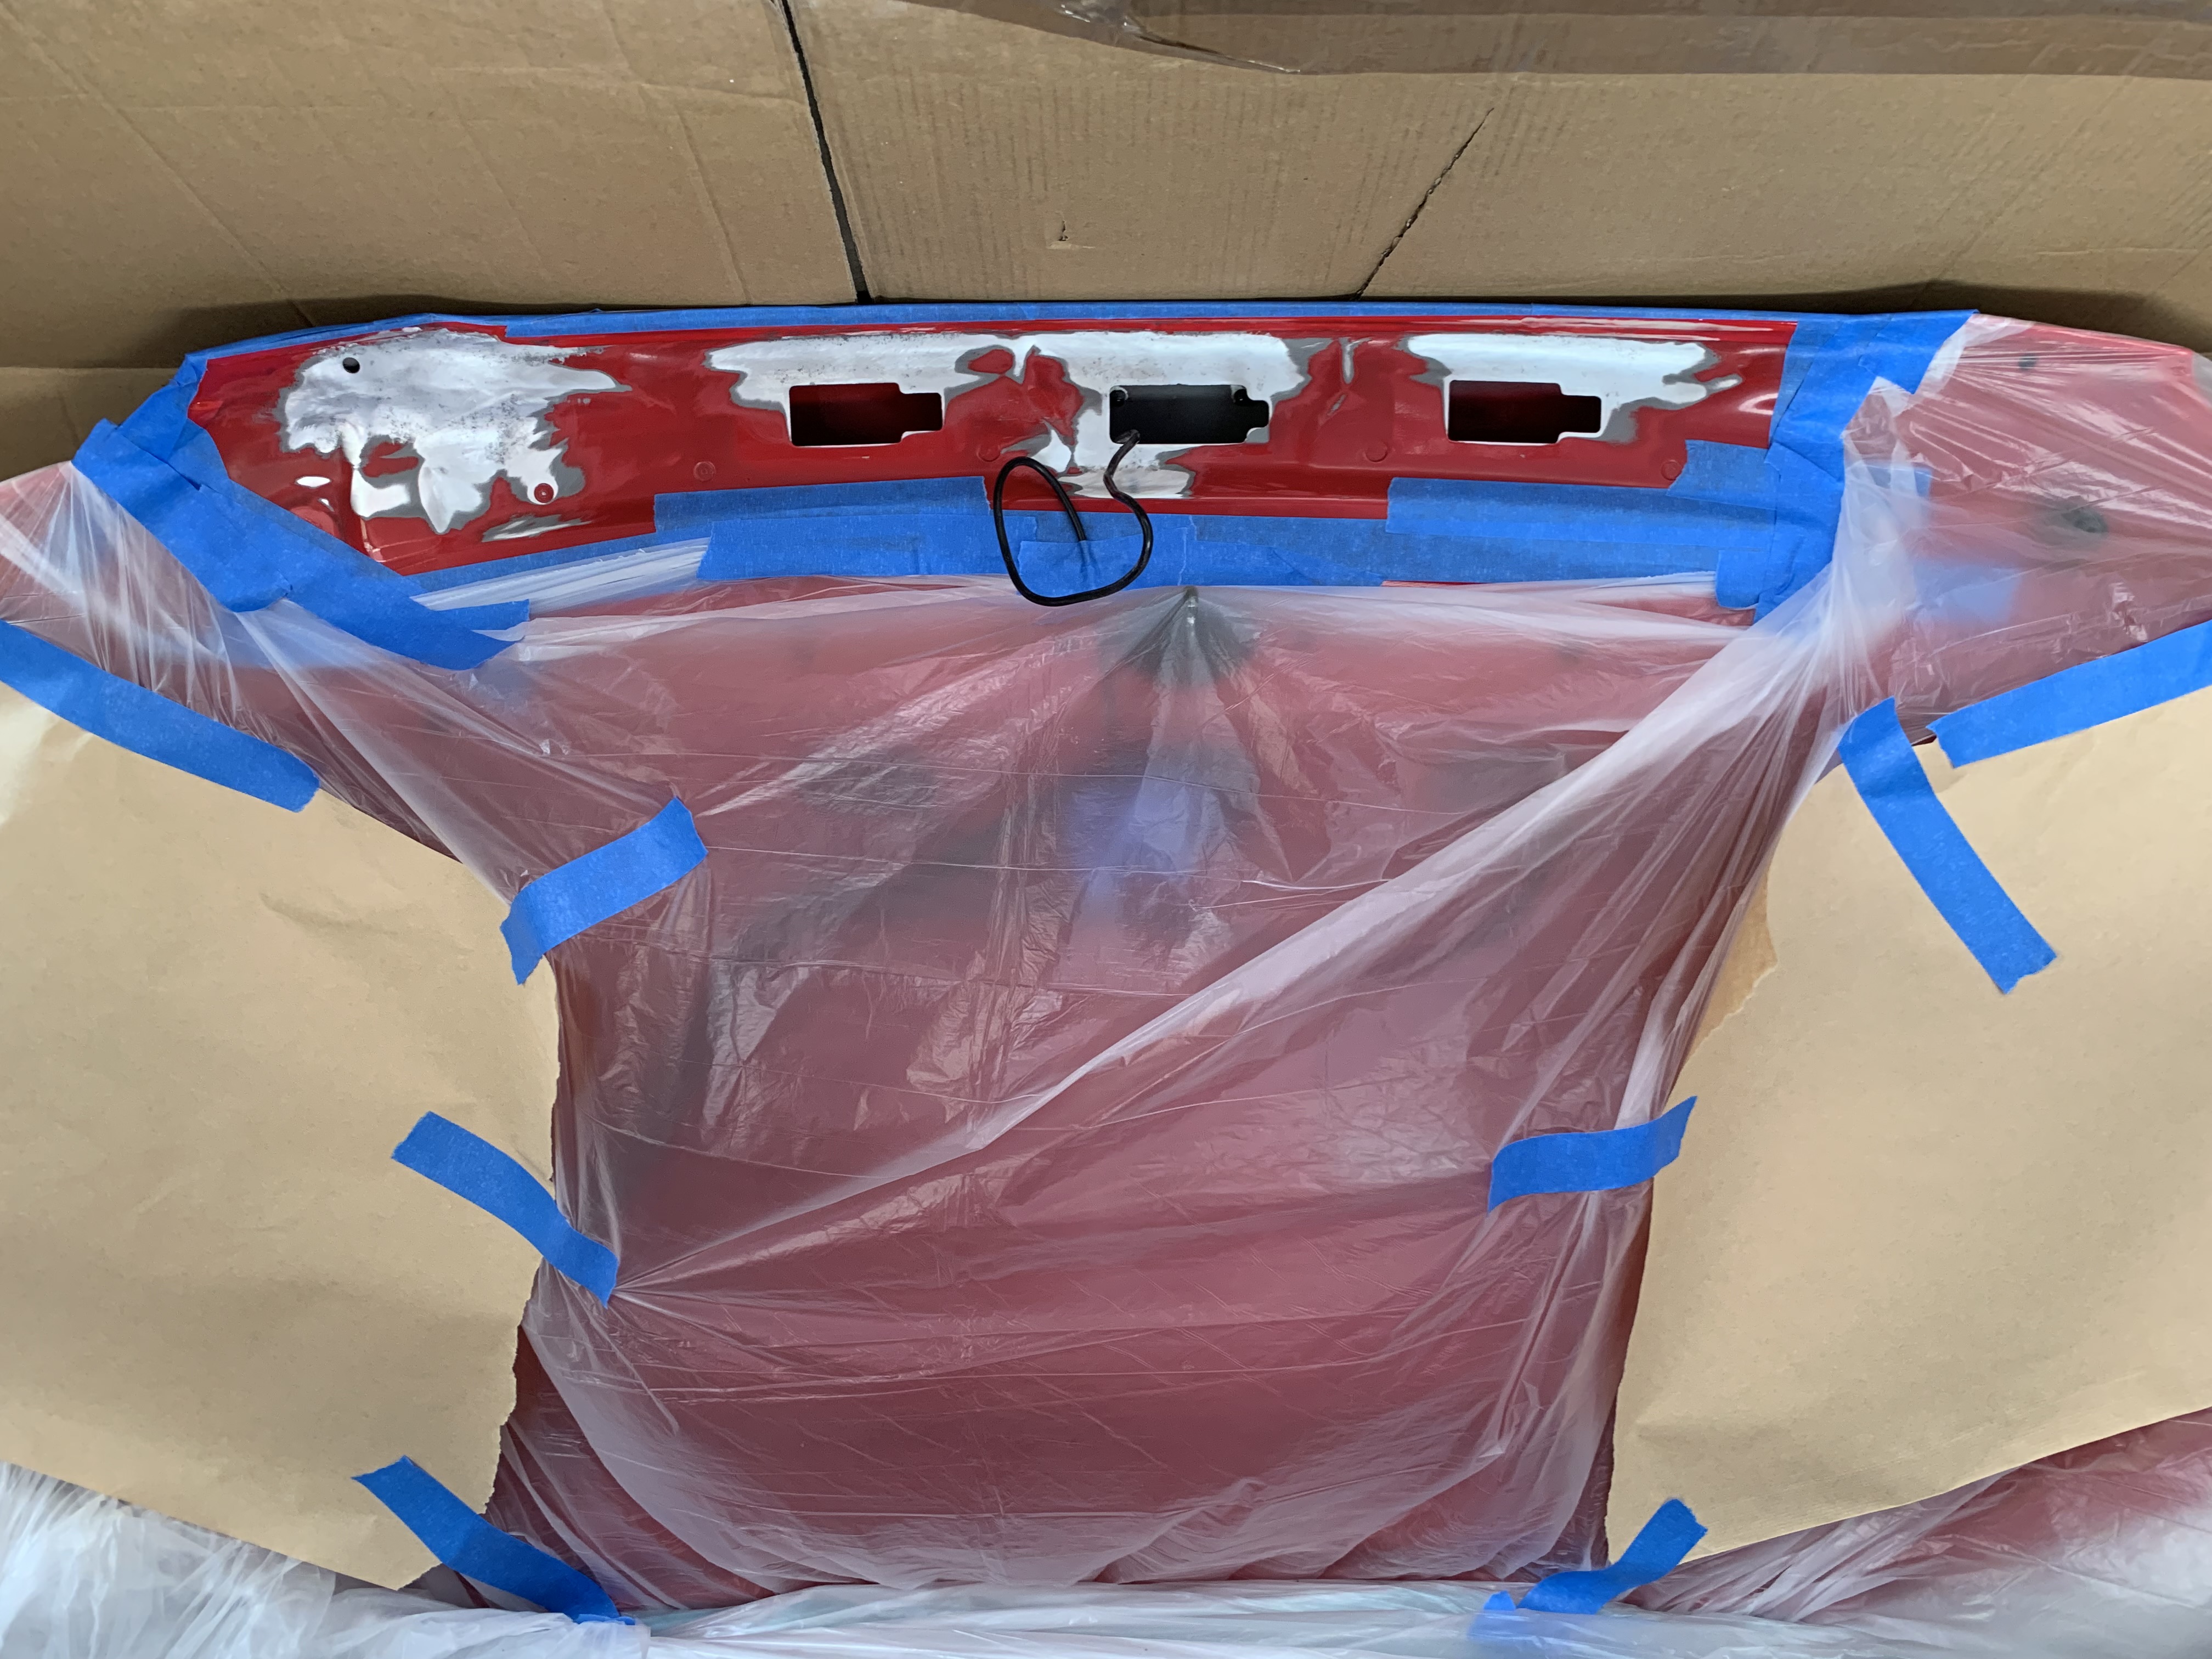
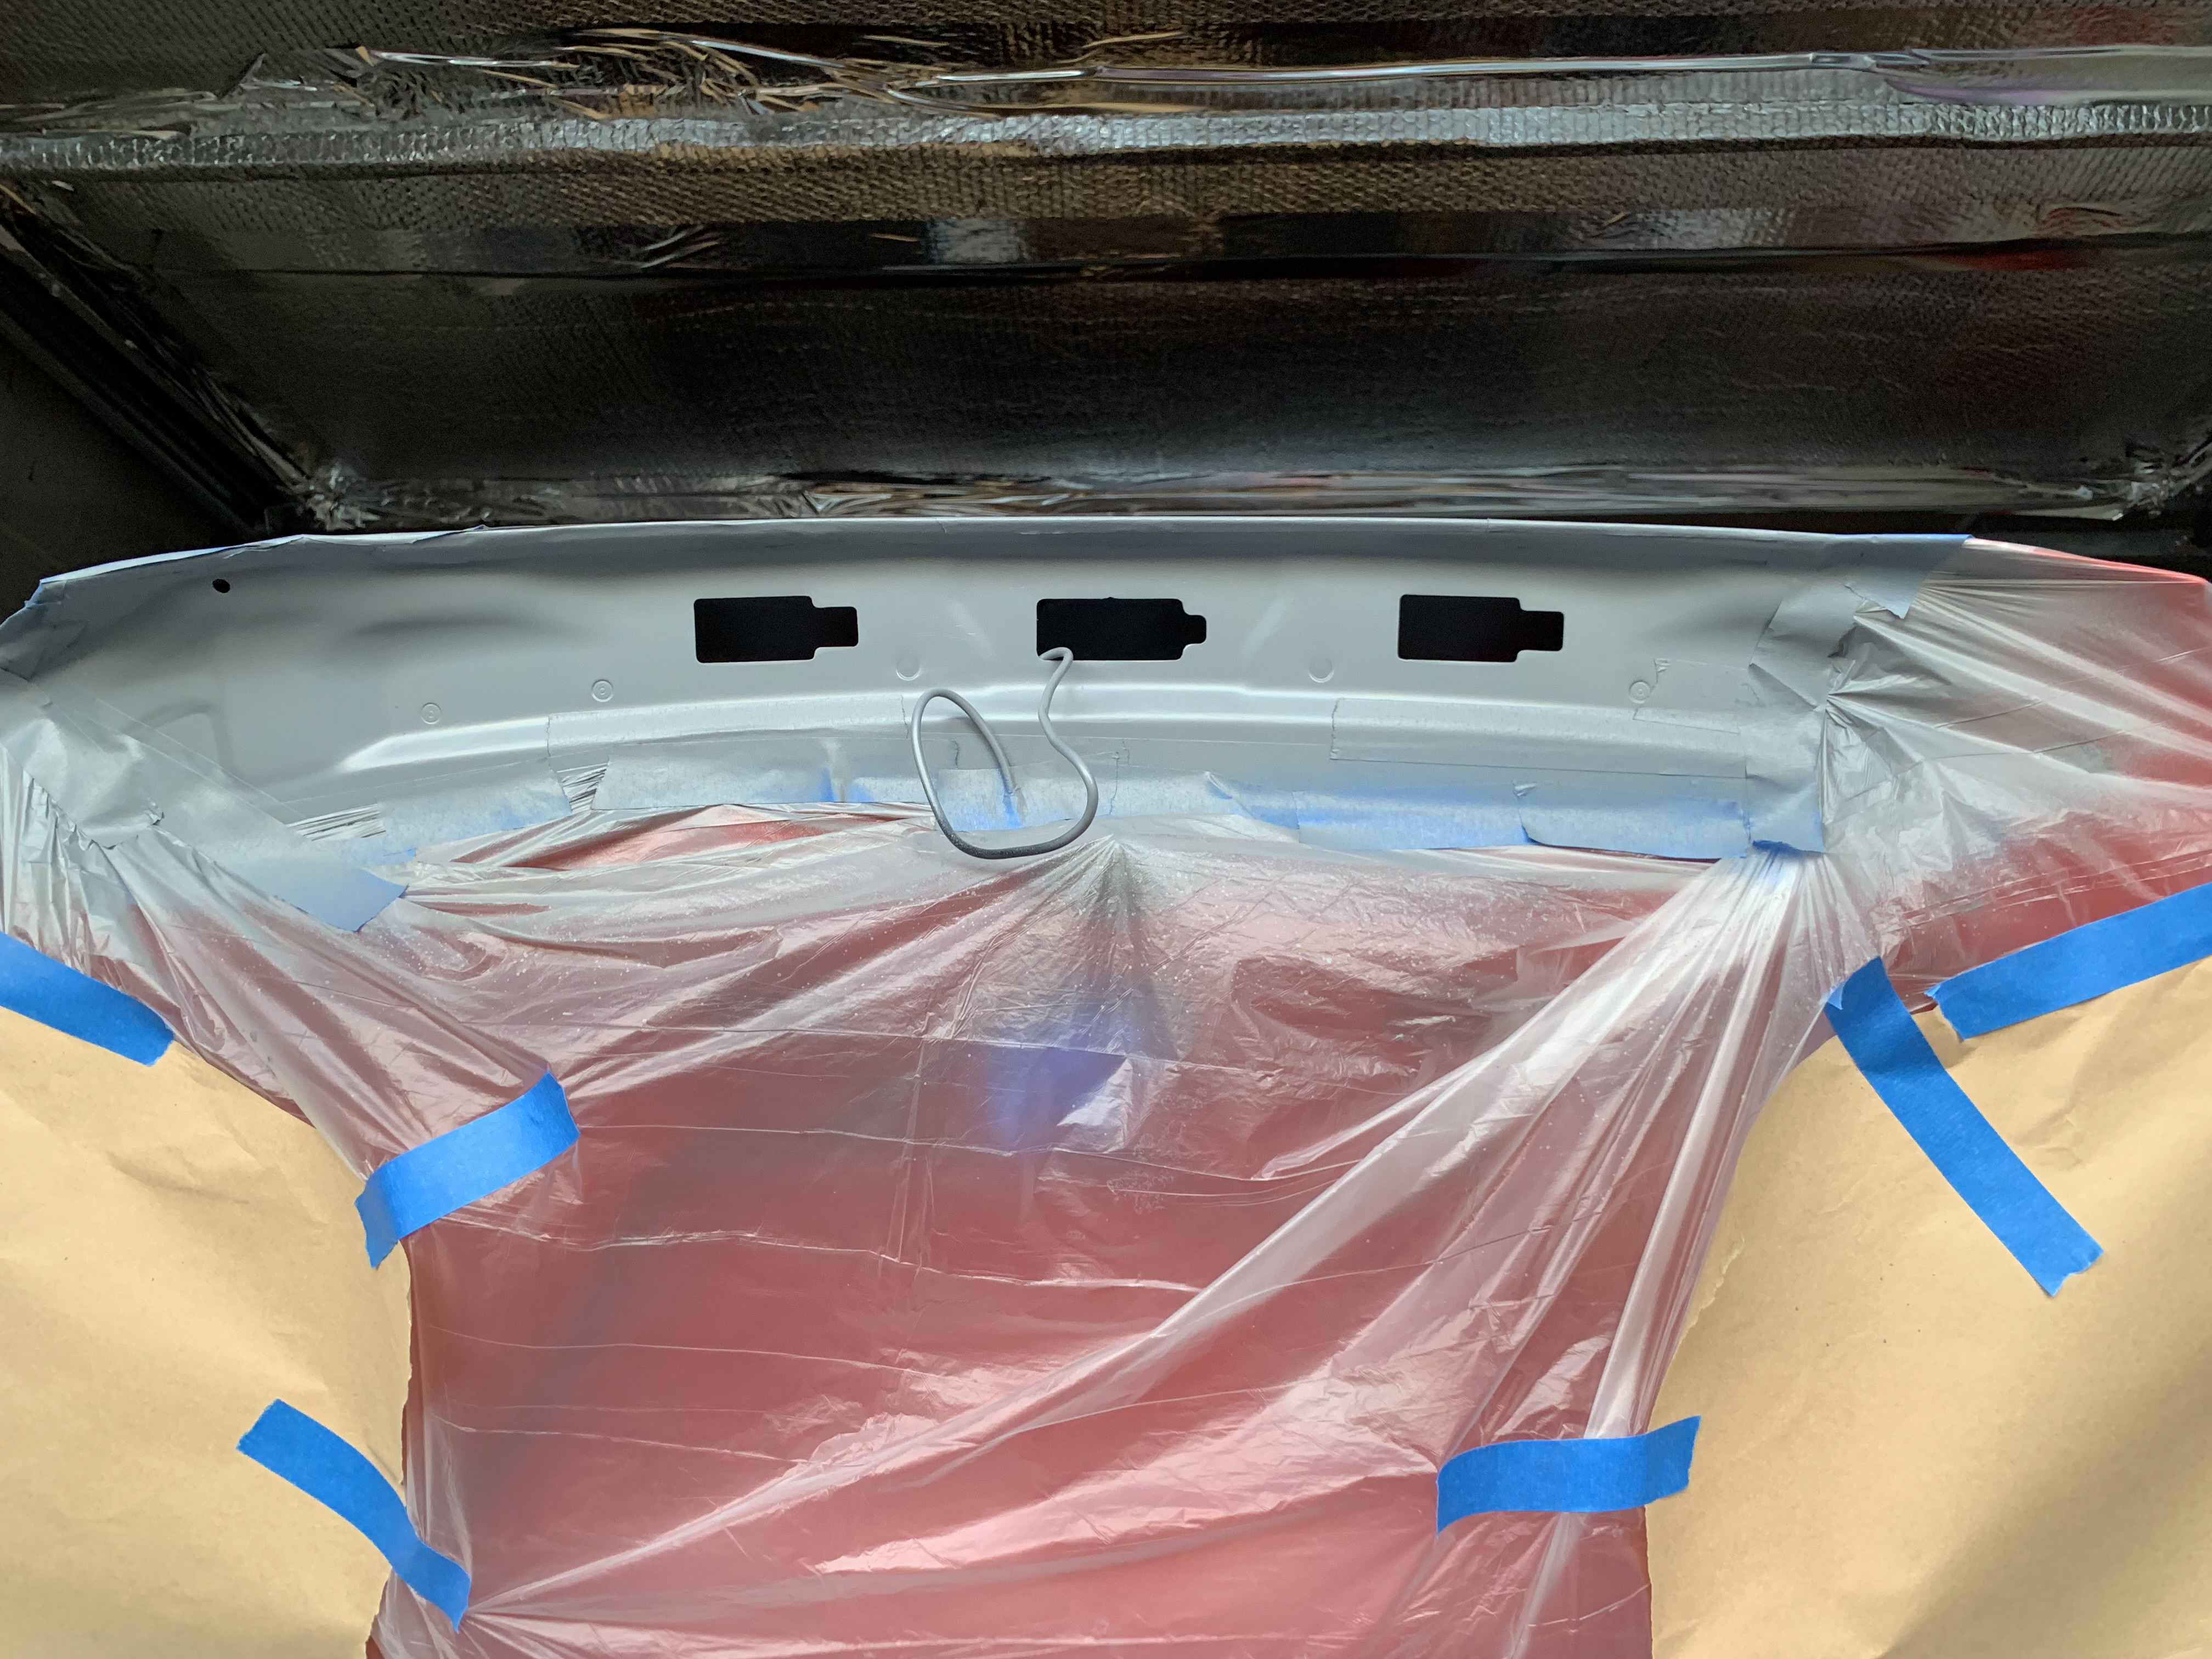
Started tackling the corrosion on the underside of the boot lid.
So far got it all sanded back and two coats of etch primer. 24 hour wait now until the next step…
First time I’ve tackled anything like this so hopefully it turns out well ![]()
2 Likes
Fitted new induction kit today…the easiest job on the car so far ![]()
I had similar, but spotted it at the garage. Seems the company they use to wash cars after the service - part of their “customer care” - leaned across the car when washing it and scraped the zip of his overalls across both front wings.
Dealer blamed the sub-contractor but admitted they should have dealt with it. I got it fixed and billed them the £550 it cost to deal with it and replace the ceramic coating.
Don’t use them anymore, local garage registered themselves with Mazda so servicing is recorded on My Mazda.
I also have a laminated A4 sign that says “DO NOT WASH” if it ever goes somewhere (MOT etc).
I never let them wash anything. Thanks but no thanks.
1 Like
I had a new car back in 2012 and took it back to the dealer for the first service.
If anyone’s seen my MX-5’s it was like I keep that, immaculately clean before it went in. Came to pick it up and it was dirtier than when it went in 3 hours earlier.
They’d washed it (why?) when it didn’t need it and left it to dry. I complained to them, washed it again properly when I got home.
Some people think it’s being fussy but even the weather conditions have to be right to wash a car. I normally wait till the evening as the sun is starting to going down. Cool enough to finish without any suds drying on and plenty of time to dry it off before it spots.
2 Likes
Checked the spare wheel fitted (somehow I’d never got around to doing that before).
Checked fluid levels and brake fluid is halfway between Max and the halfway “seam”, which is odd. It was supposedly changed in May by the stealership and it hasn’t been very far at all since then. My guess is they didn’t put enough in but I’ll have to keep an eye on it.
When using a rewind tool on the calipers it’s a good idea to remove some fluid first to avoid overflow at the reservoir when the pistons are wound back. My guess is that they (correctly) extracted some fluid, fitted the new pads but then did not top up the fluid. If you have new pads and the level is low, just top up at the reservoir until the level is at ‘Max’.
Fitted the Jass Performance seat lowering brackets’ -40mm on the RHS, -25mm on the left. Took a while (~3h all in), but fairly straightforward using the supplied instructions/how-tos on this site, and gives additional headroom/improved visibility I was looking for (I’m 6’1" / 185cm, but a little long in the body). Well worth doing.
first mod. fitted the stubby aerial as soon as i got home after picking up
2 Likes
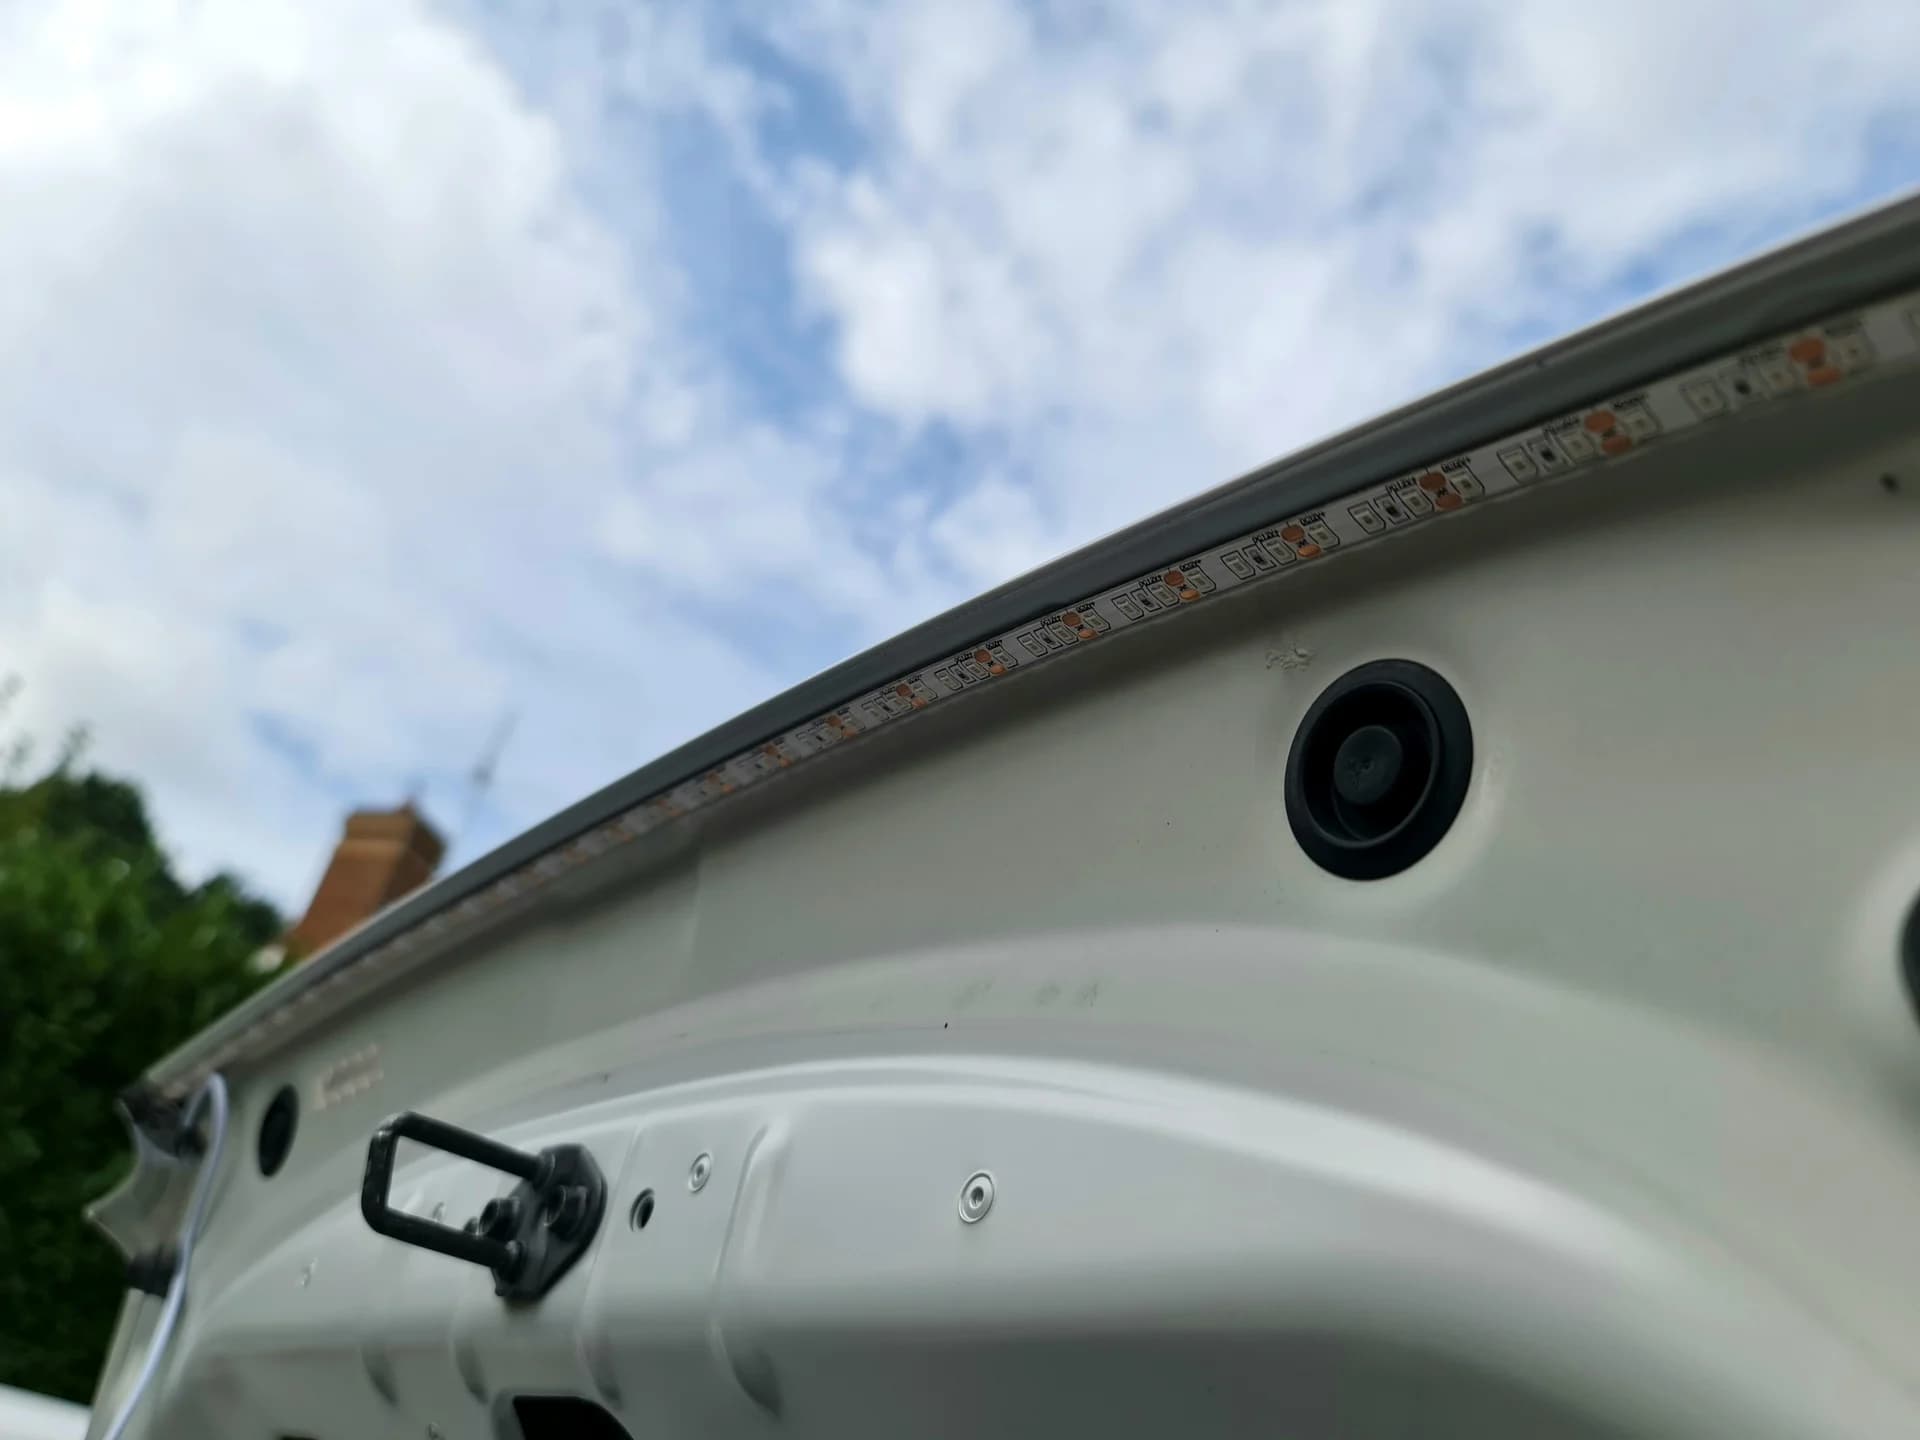
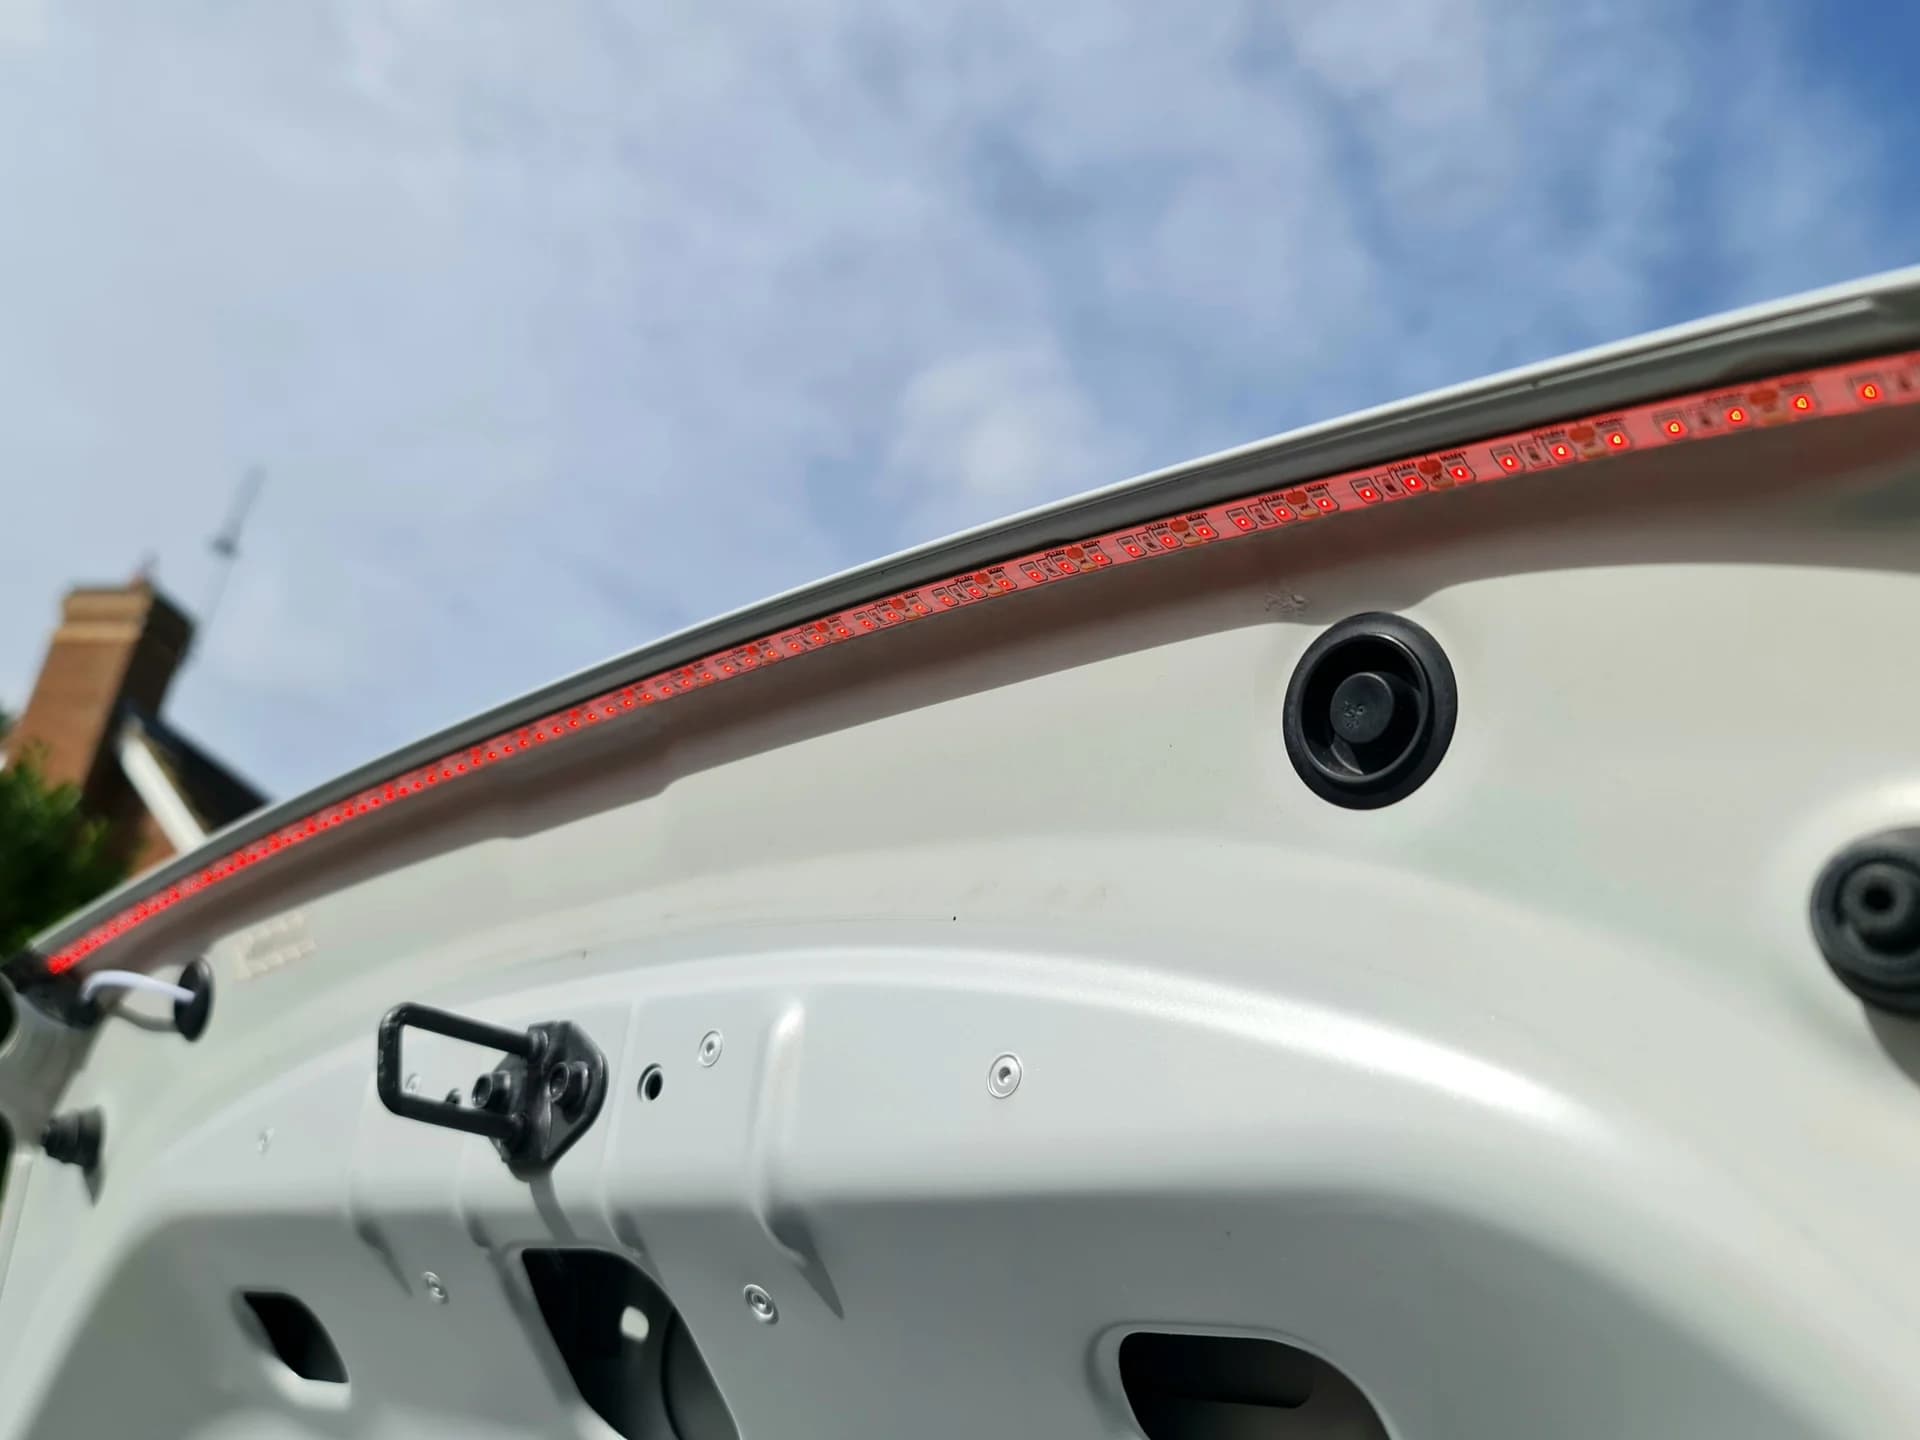
'I ordered one of Paul’s (@Roadie) Mk4 (inc. the RF) boot lid LED kits and it arrived today. Very impressed with this kit… especially as it includes 3 proper, pre-drilled soft rubber grommets to replace the hard plastic OEM ones. (Others I’ve seen, don’t) Fitting was extremely easy, taking approximately 30 minutes, although I did already have the extra clips I used in stock.
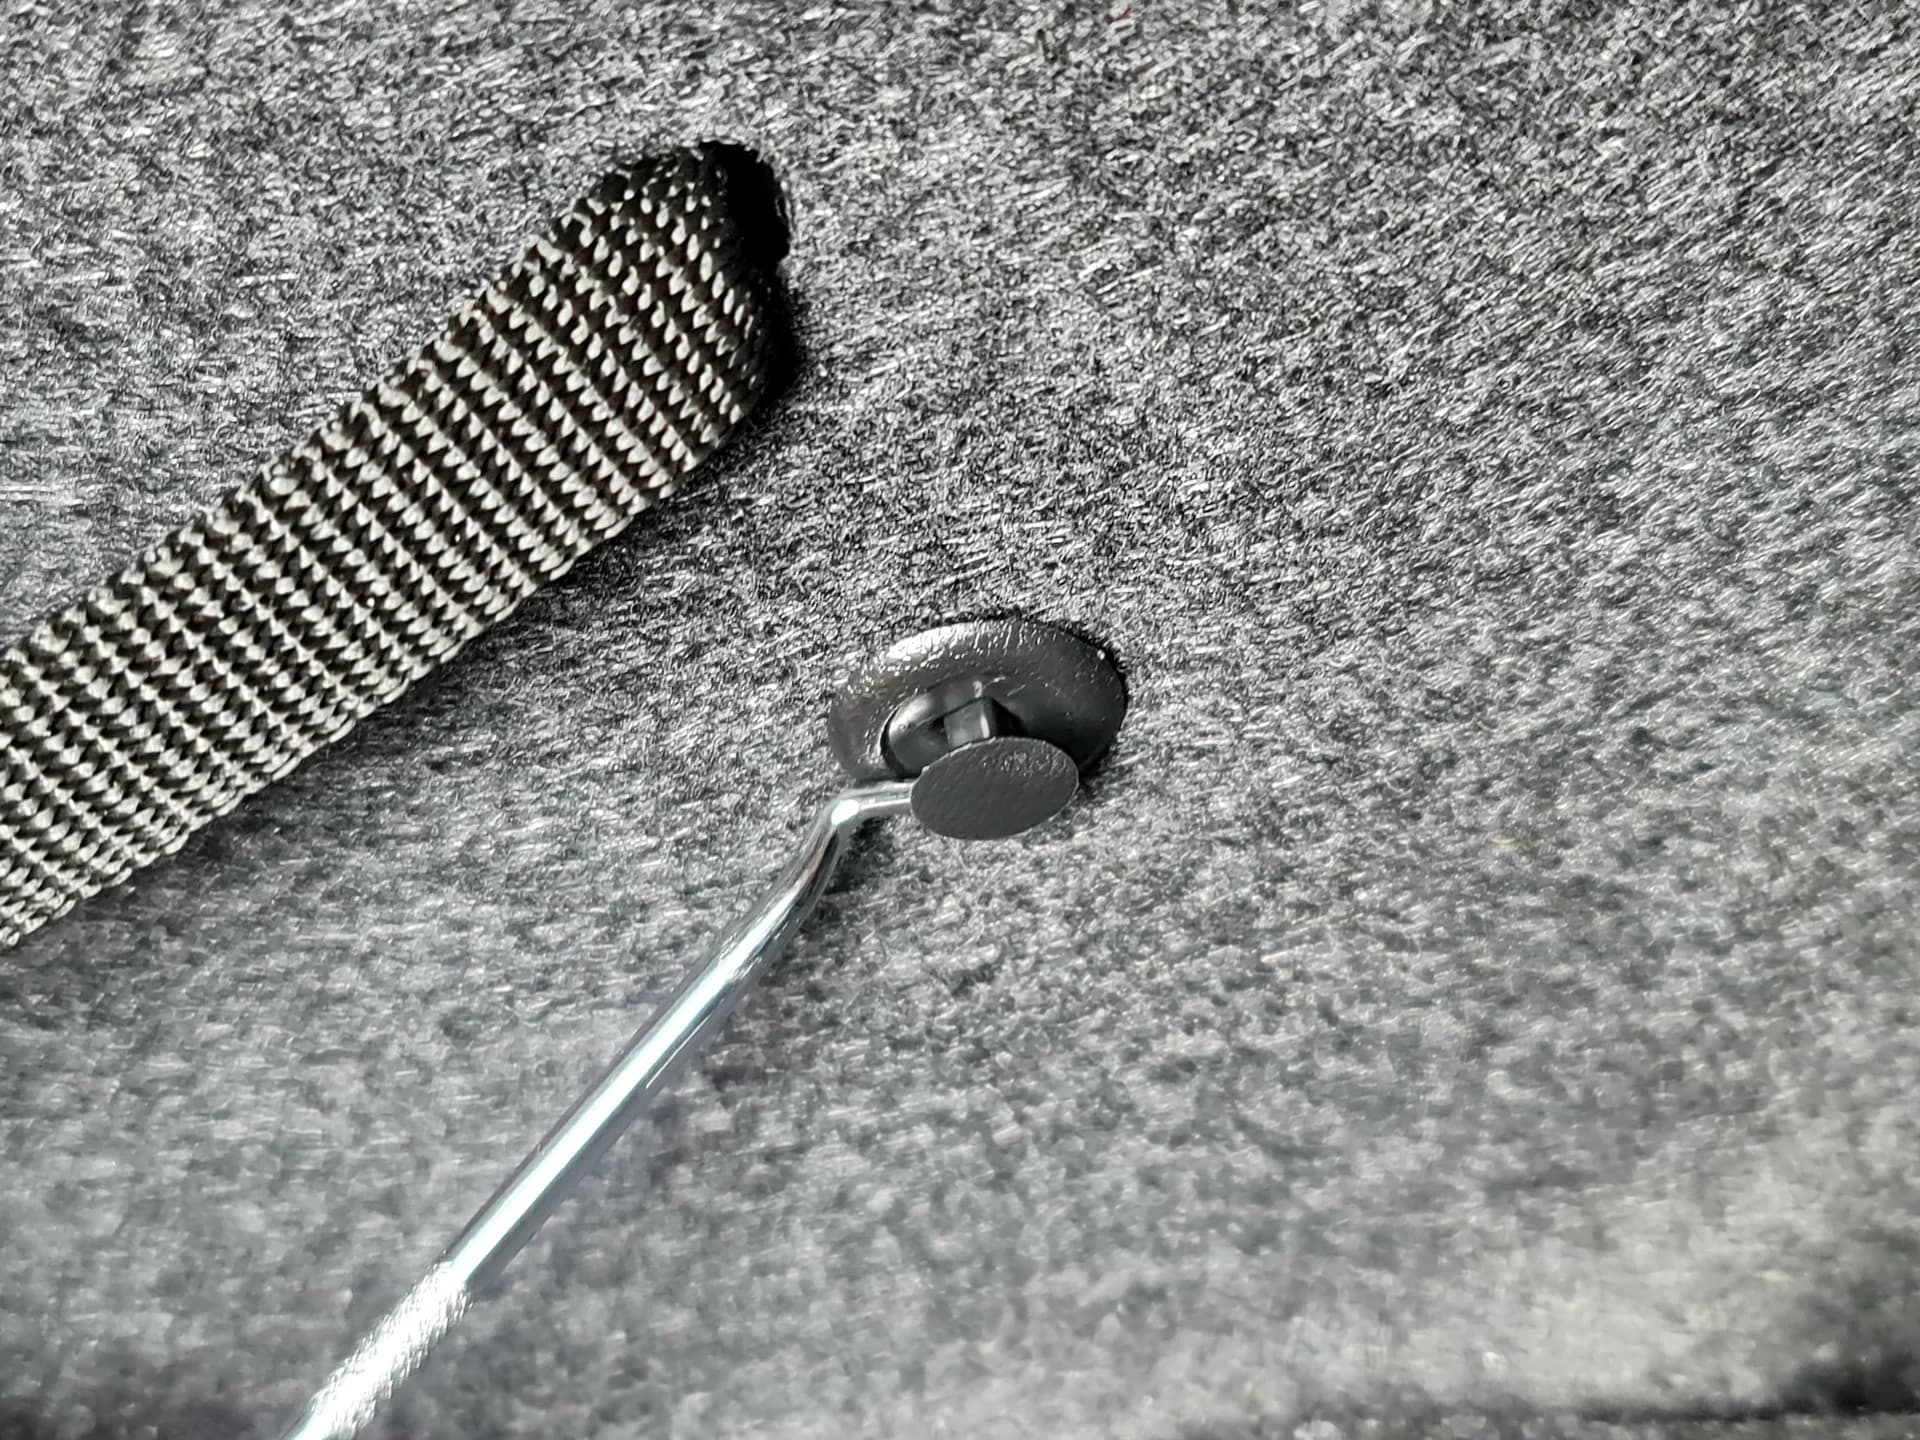
First job is to remove the boot liner on the LH side by removing the plastic retaining studs, a simple matter of lifting the centre portion a few mm with a suitable tool and then removing. You will find this easier if you take out the plastic liner at the front of the boot that contains the boot light first.
Next, thoroughly clean the underside of the boot lid with the alcohol swab provided in the kit.

After carefully offering up the LED strip to the boot lip, just behind the edge of the crease line, and assessing the length for fit, I started applying it a couple of cms at a time, making sure the edge of the strip butted up to the edge of the fold.
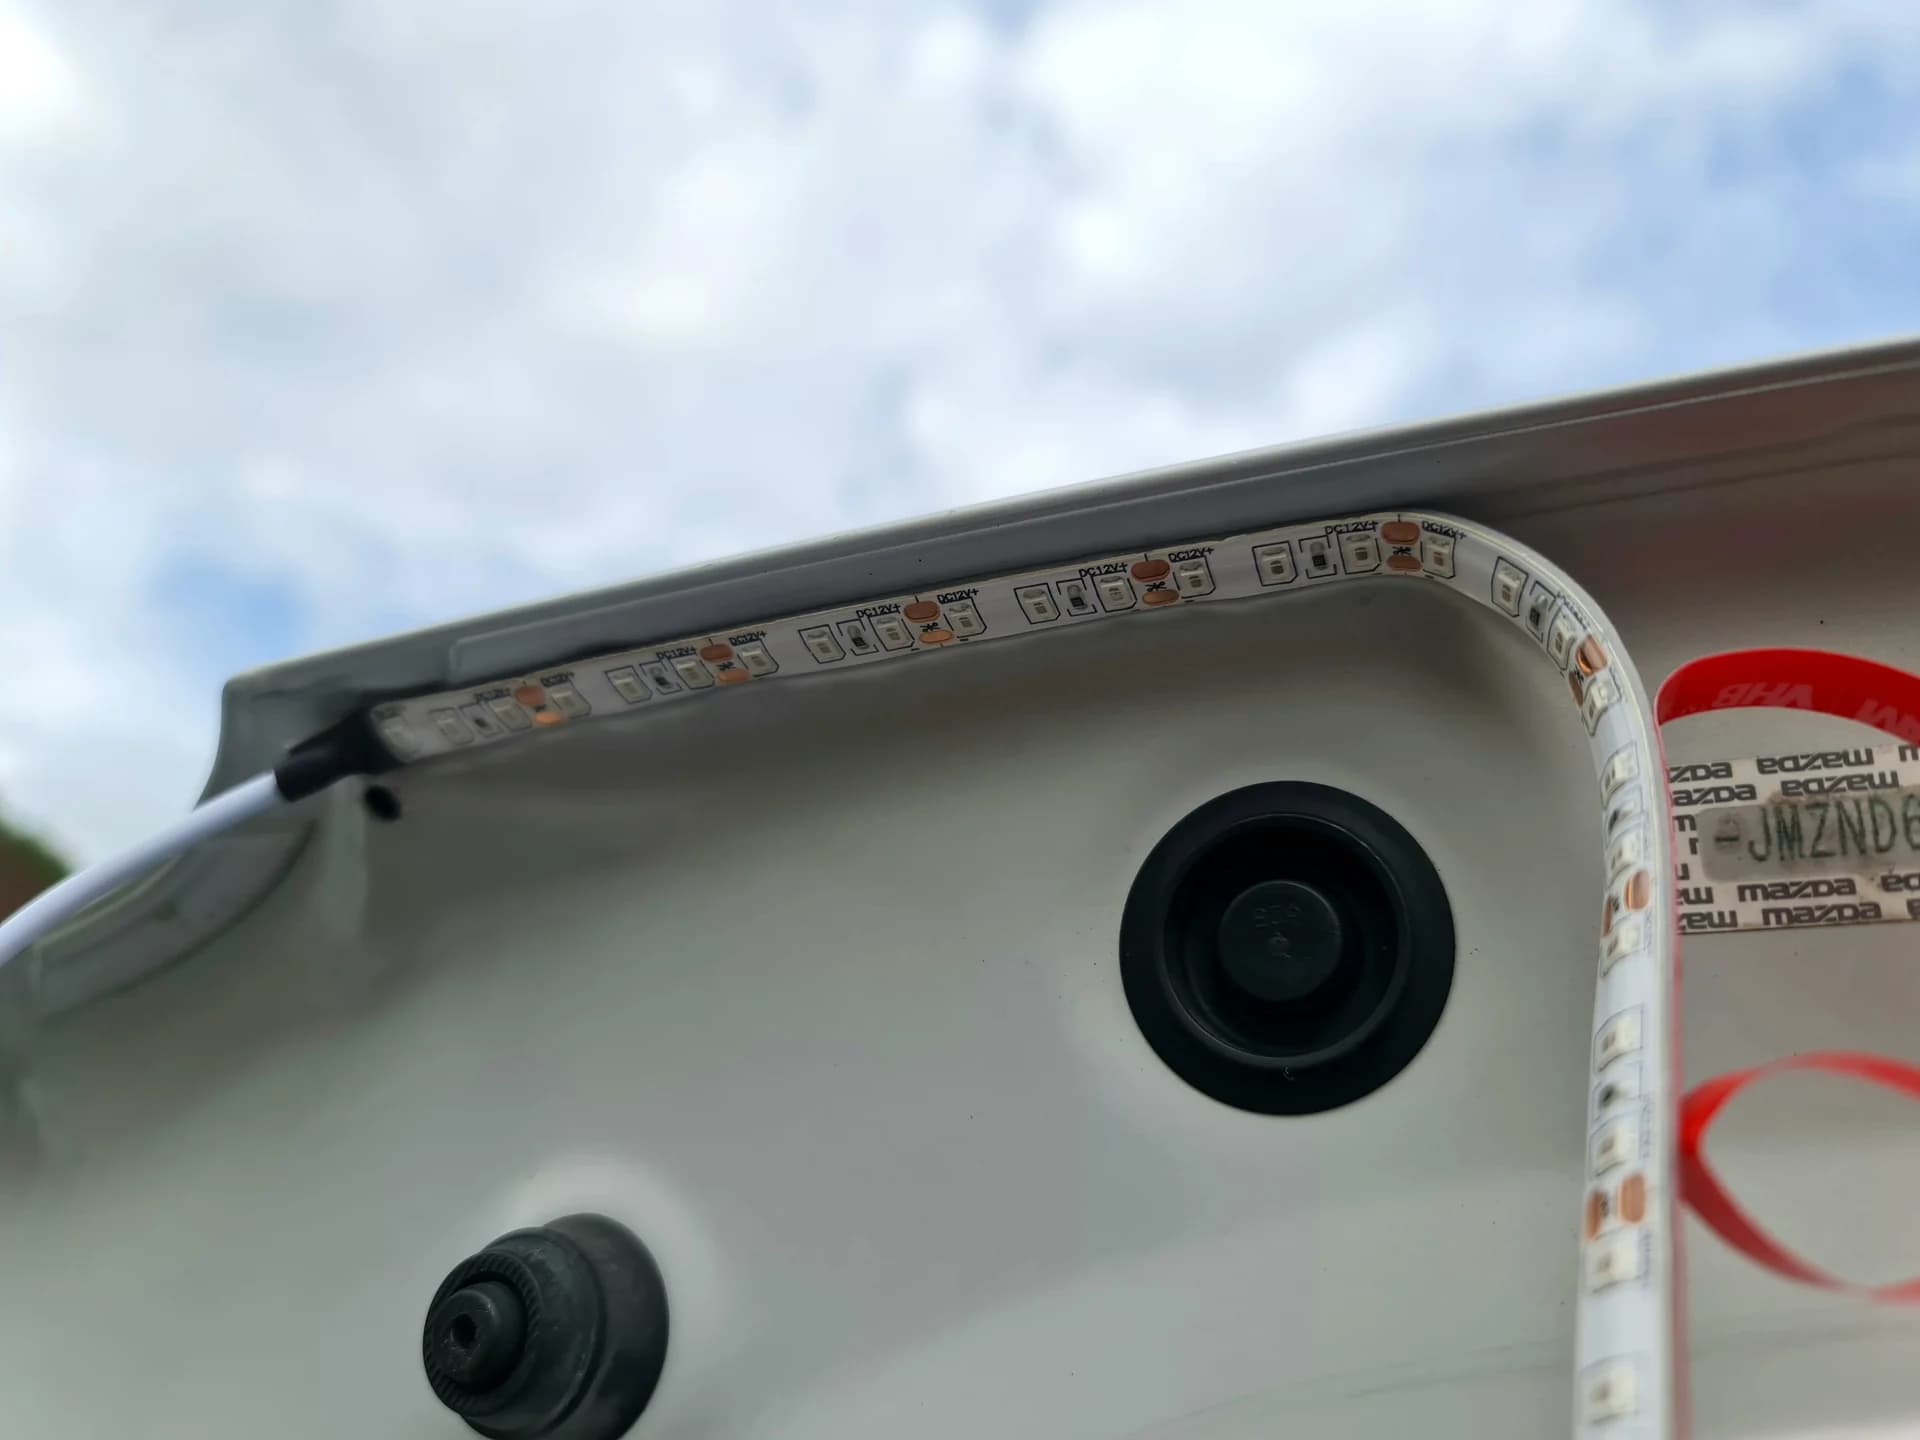
The LED strip in place. Place the supplied strips of Gaffer tape at the wire end as per the instructions to prevent the end pulling away. Once I’d threaded the cable, I removed the tape on my fit, using some cable clips instead (see further below) but normally the tape is intended to stay in place, so install it so it doesn’t show on the outside of the boot lid.
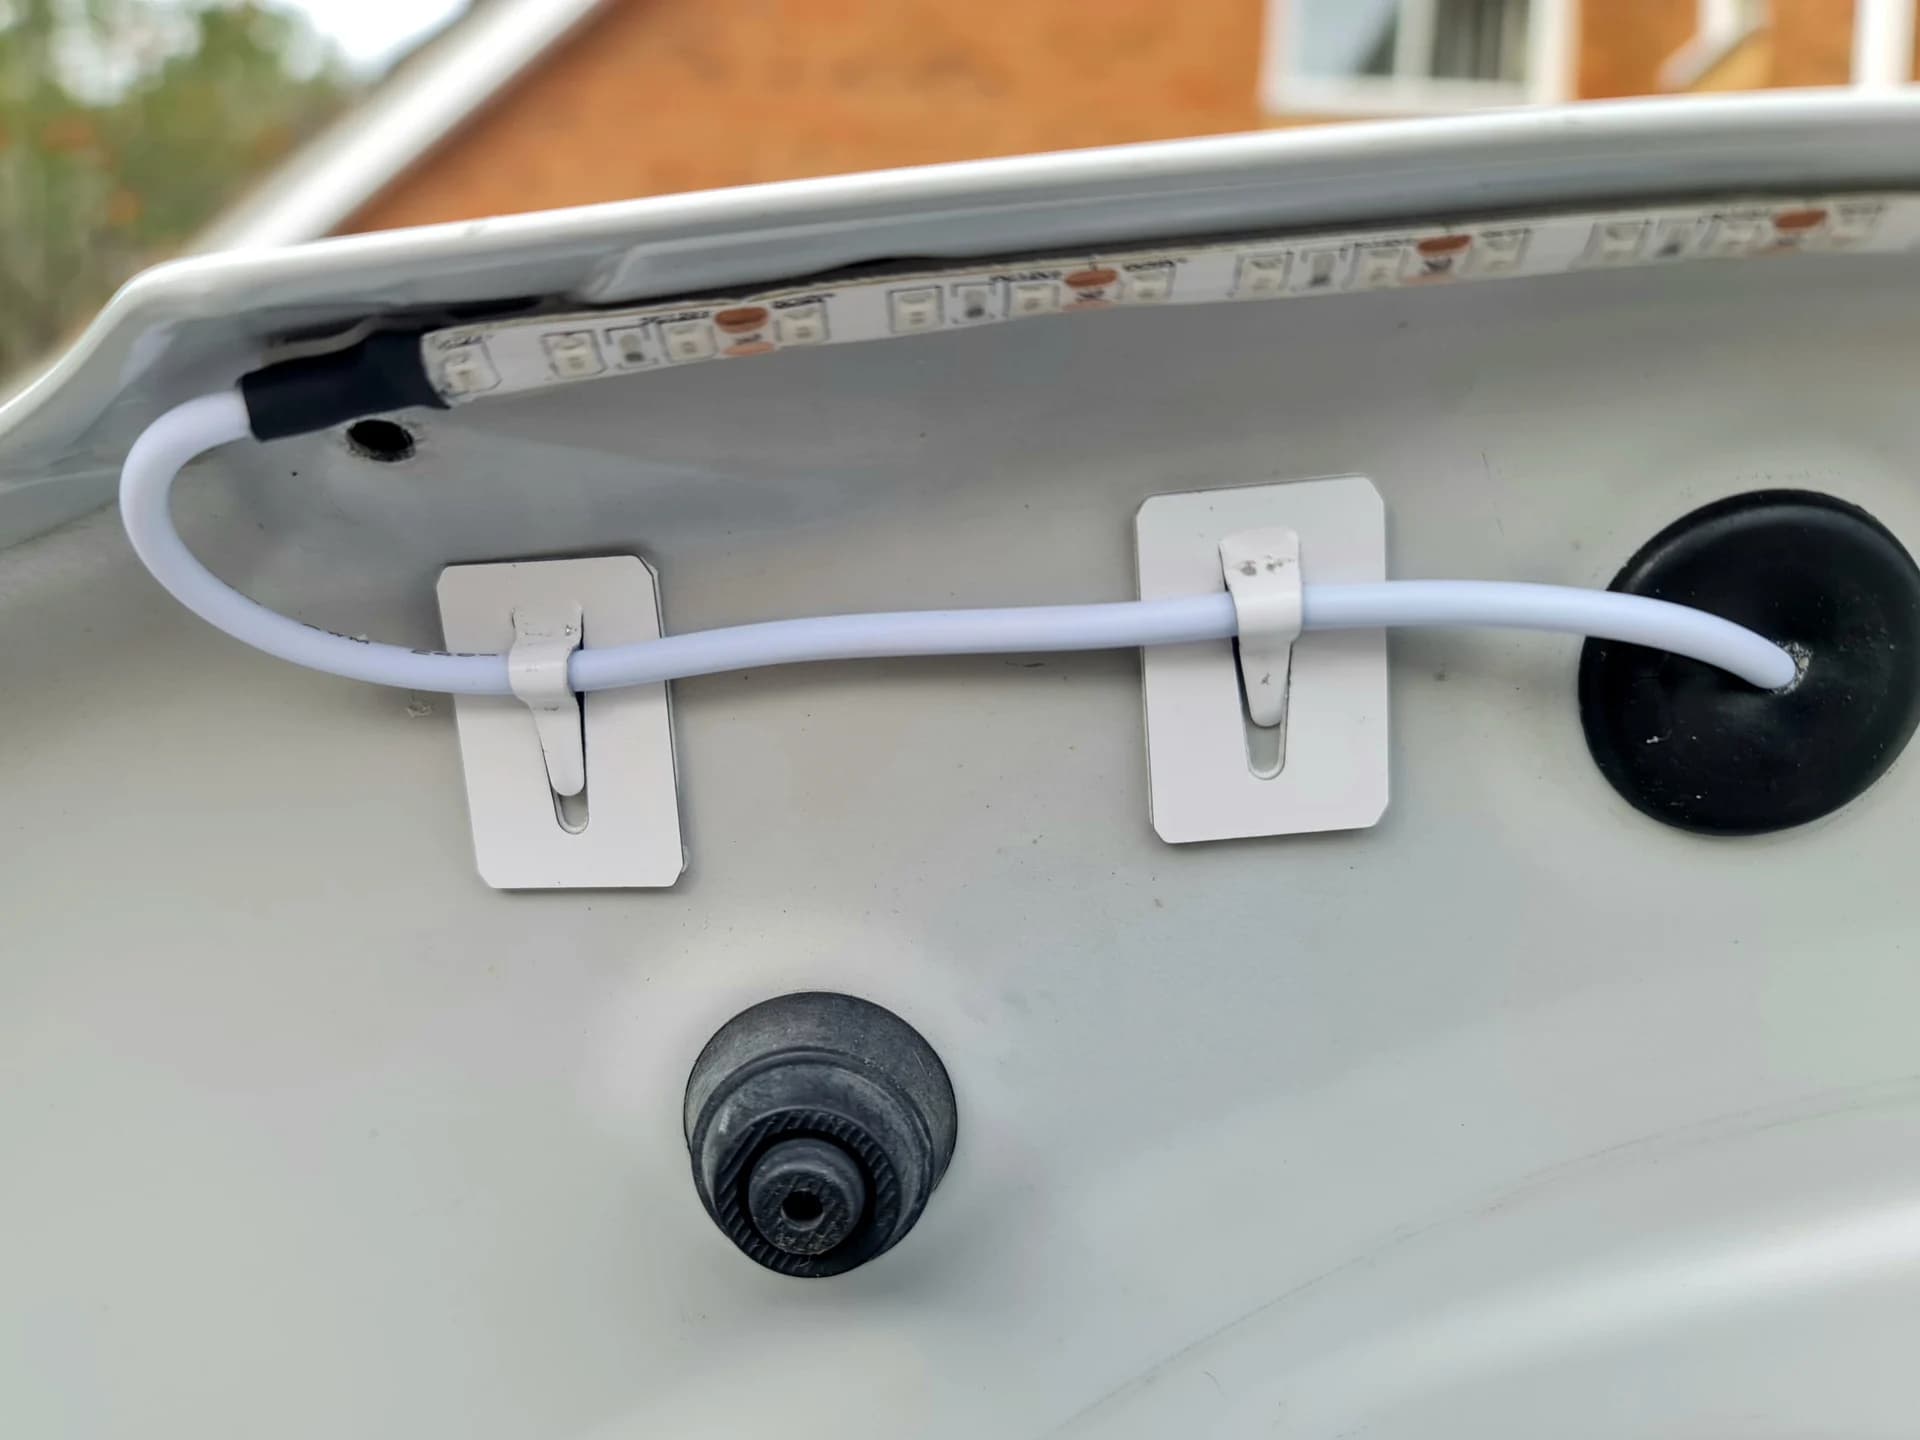
Once the LED strip is in place, start threading the 5mm, very flexible cable through the 3 supplied rubber, pre-drilled grommets. (Keep the old plastic ones in case you ever need to retro fit). The cable goes through the flat face of the grommet at the top hole.(I trapped the cable under the bump stop here to take the pic, you won’t need to do this)
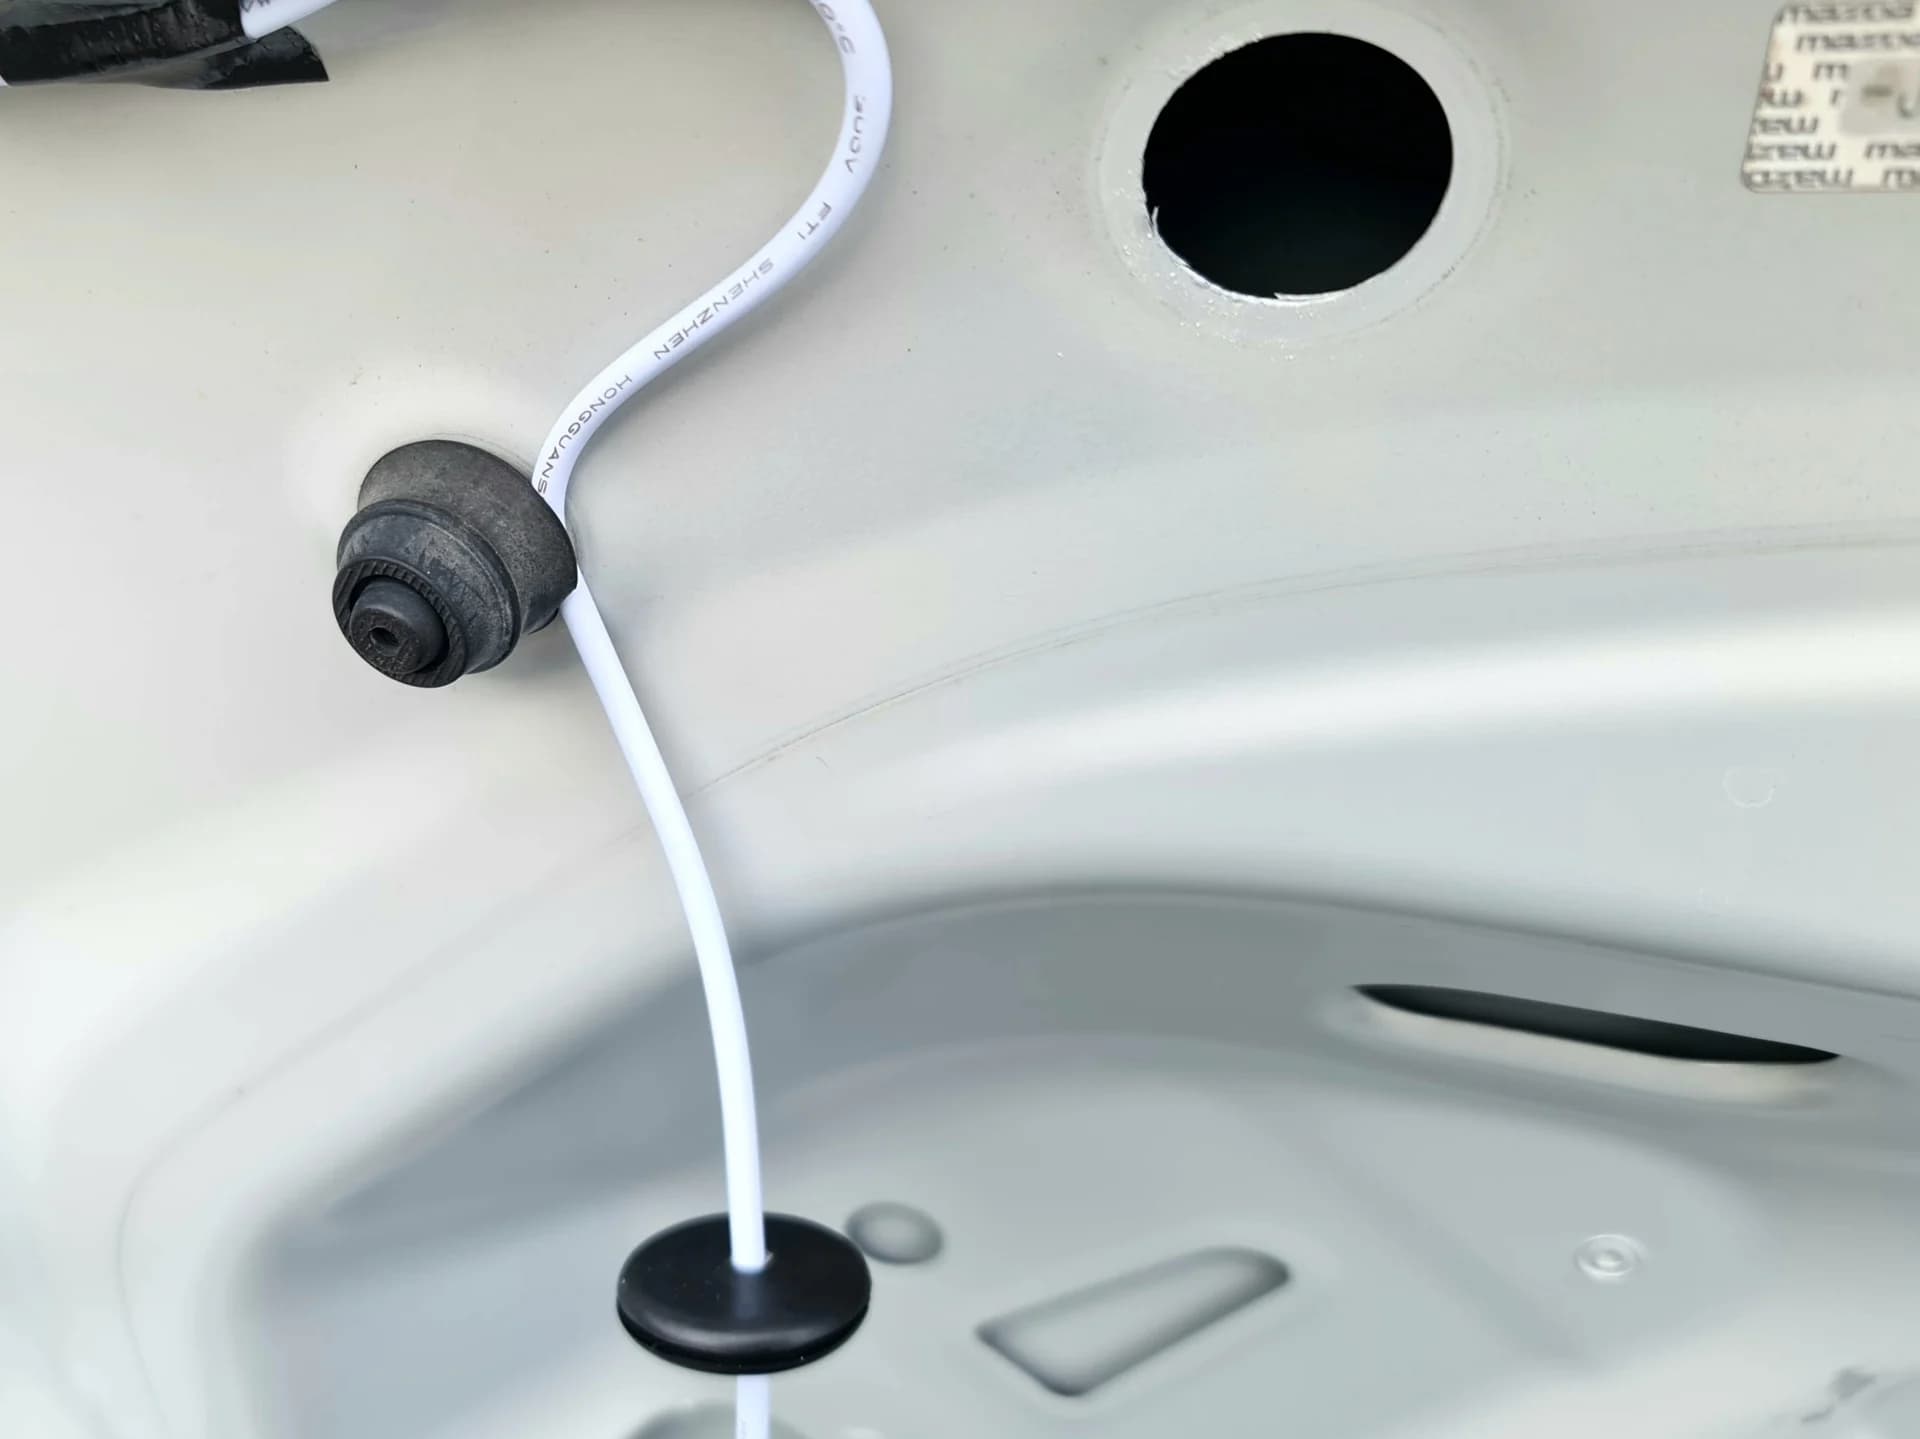
The cable then feeds down through the boot lid to emerge at the bottom grommet hole where it passes through the back (hollow side) of the next grommet. It then passes through the flat face of the third one in the boot deck.

Once the cable is routed behind the silver panel behind the carpet trim, the ends of the cable are inserted into the splice on the supplied loom, observing the pre-marked red positive position and crimped shut with pliers according to the supplied, very comprehensive instructions.
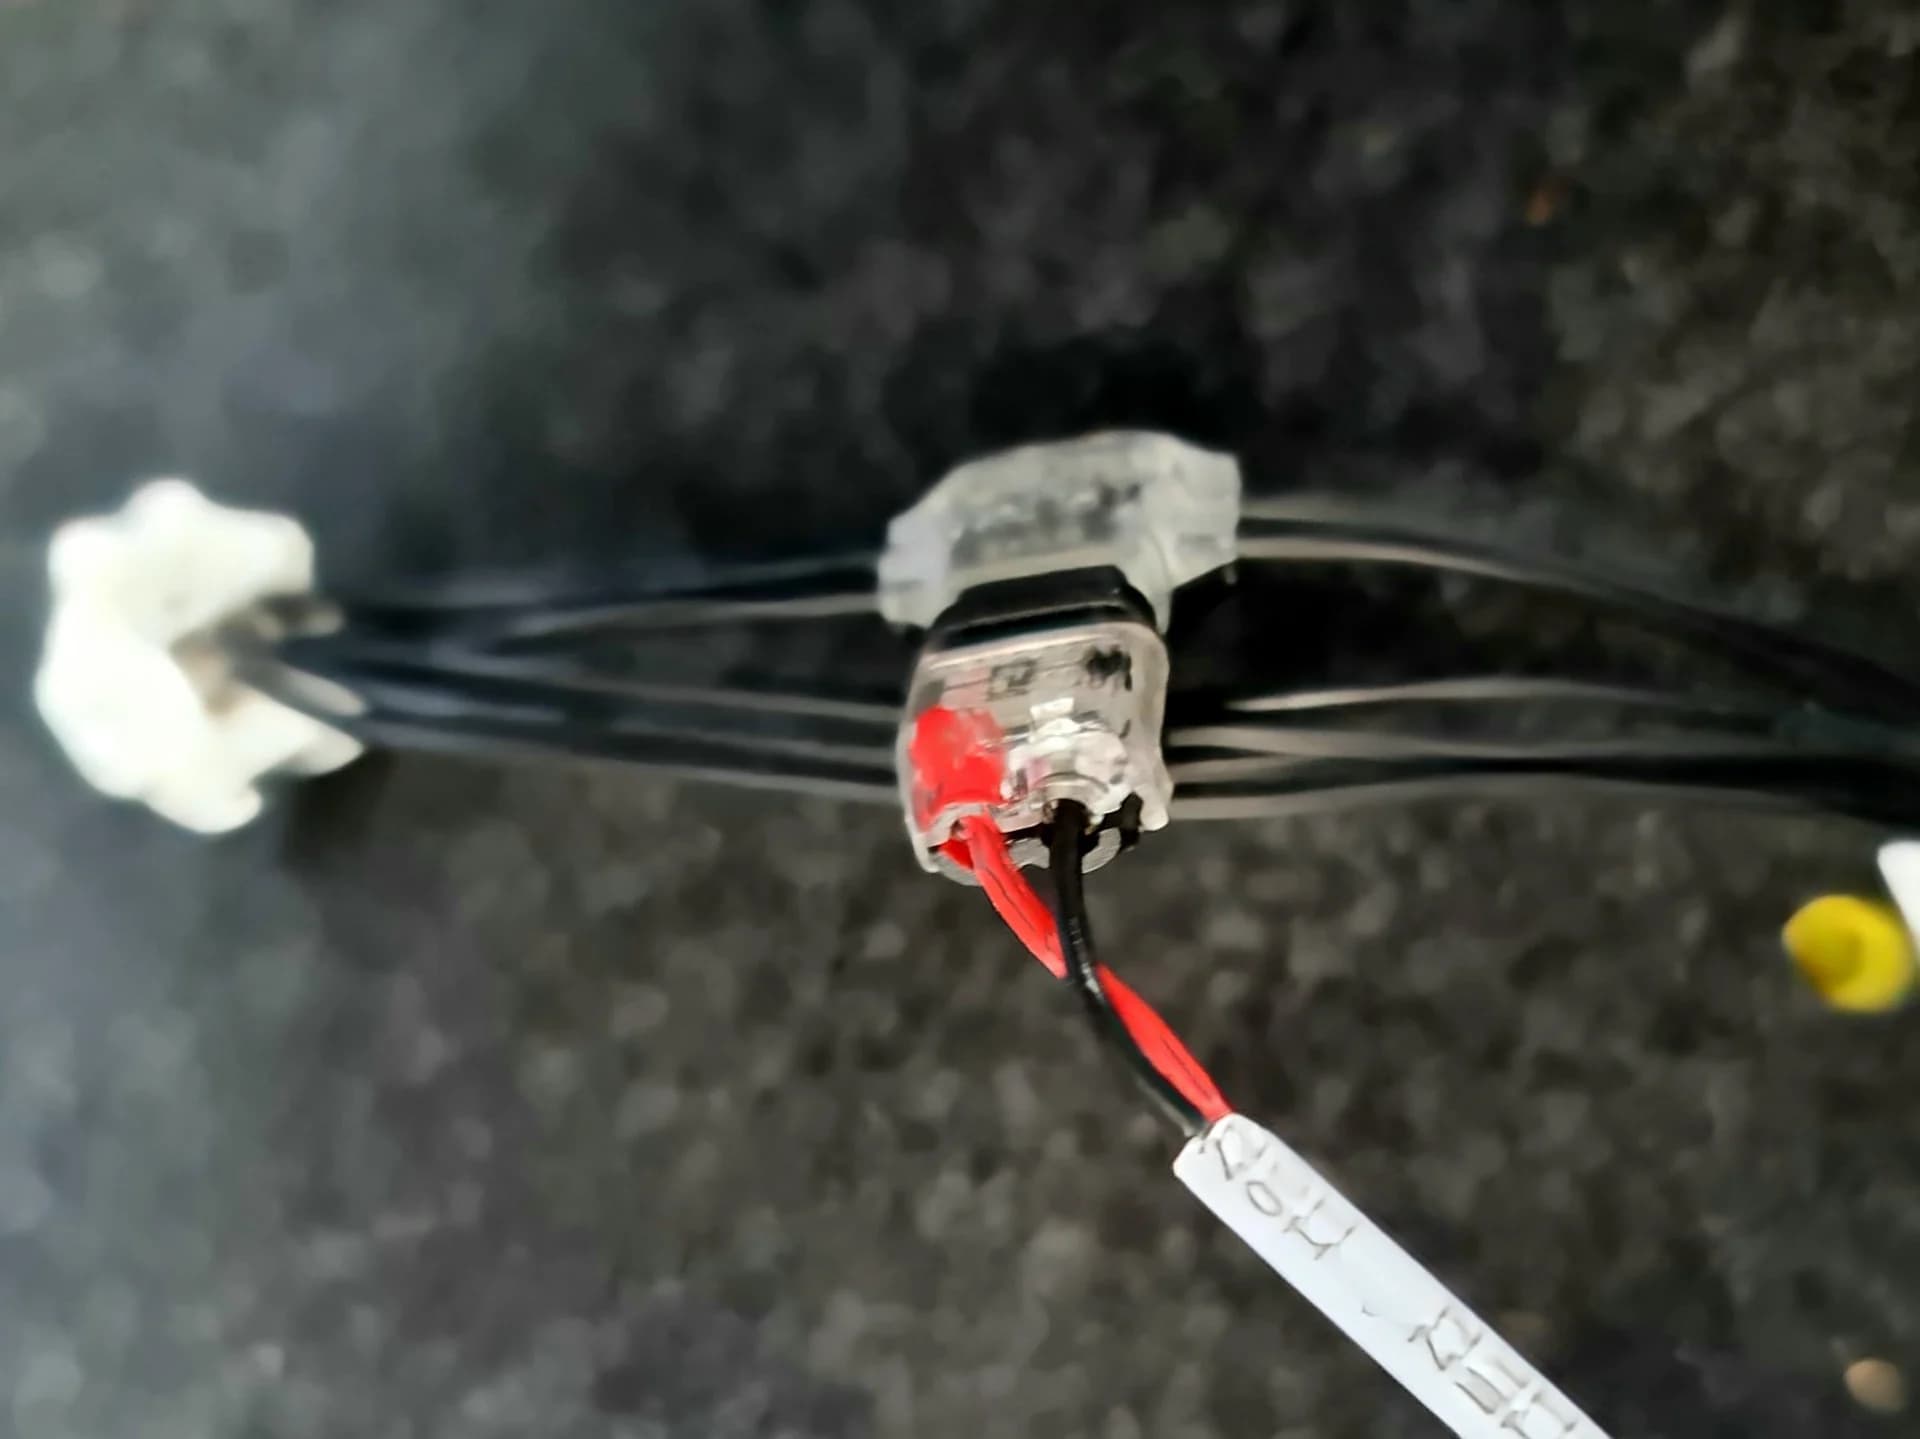
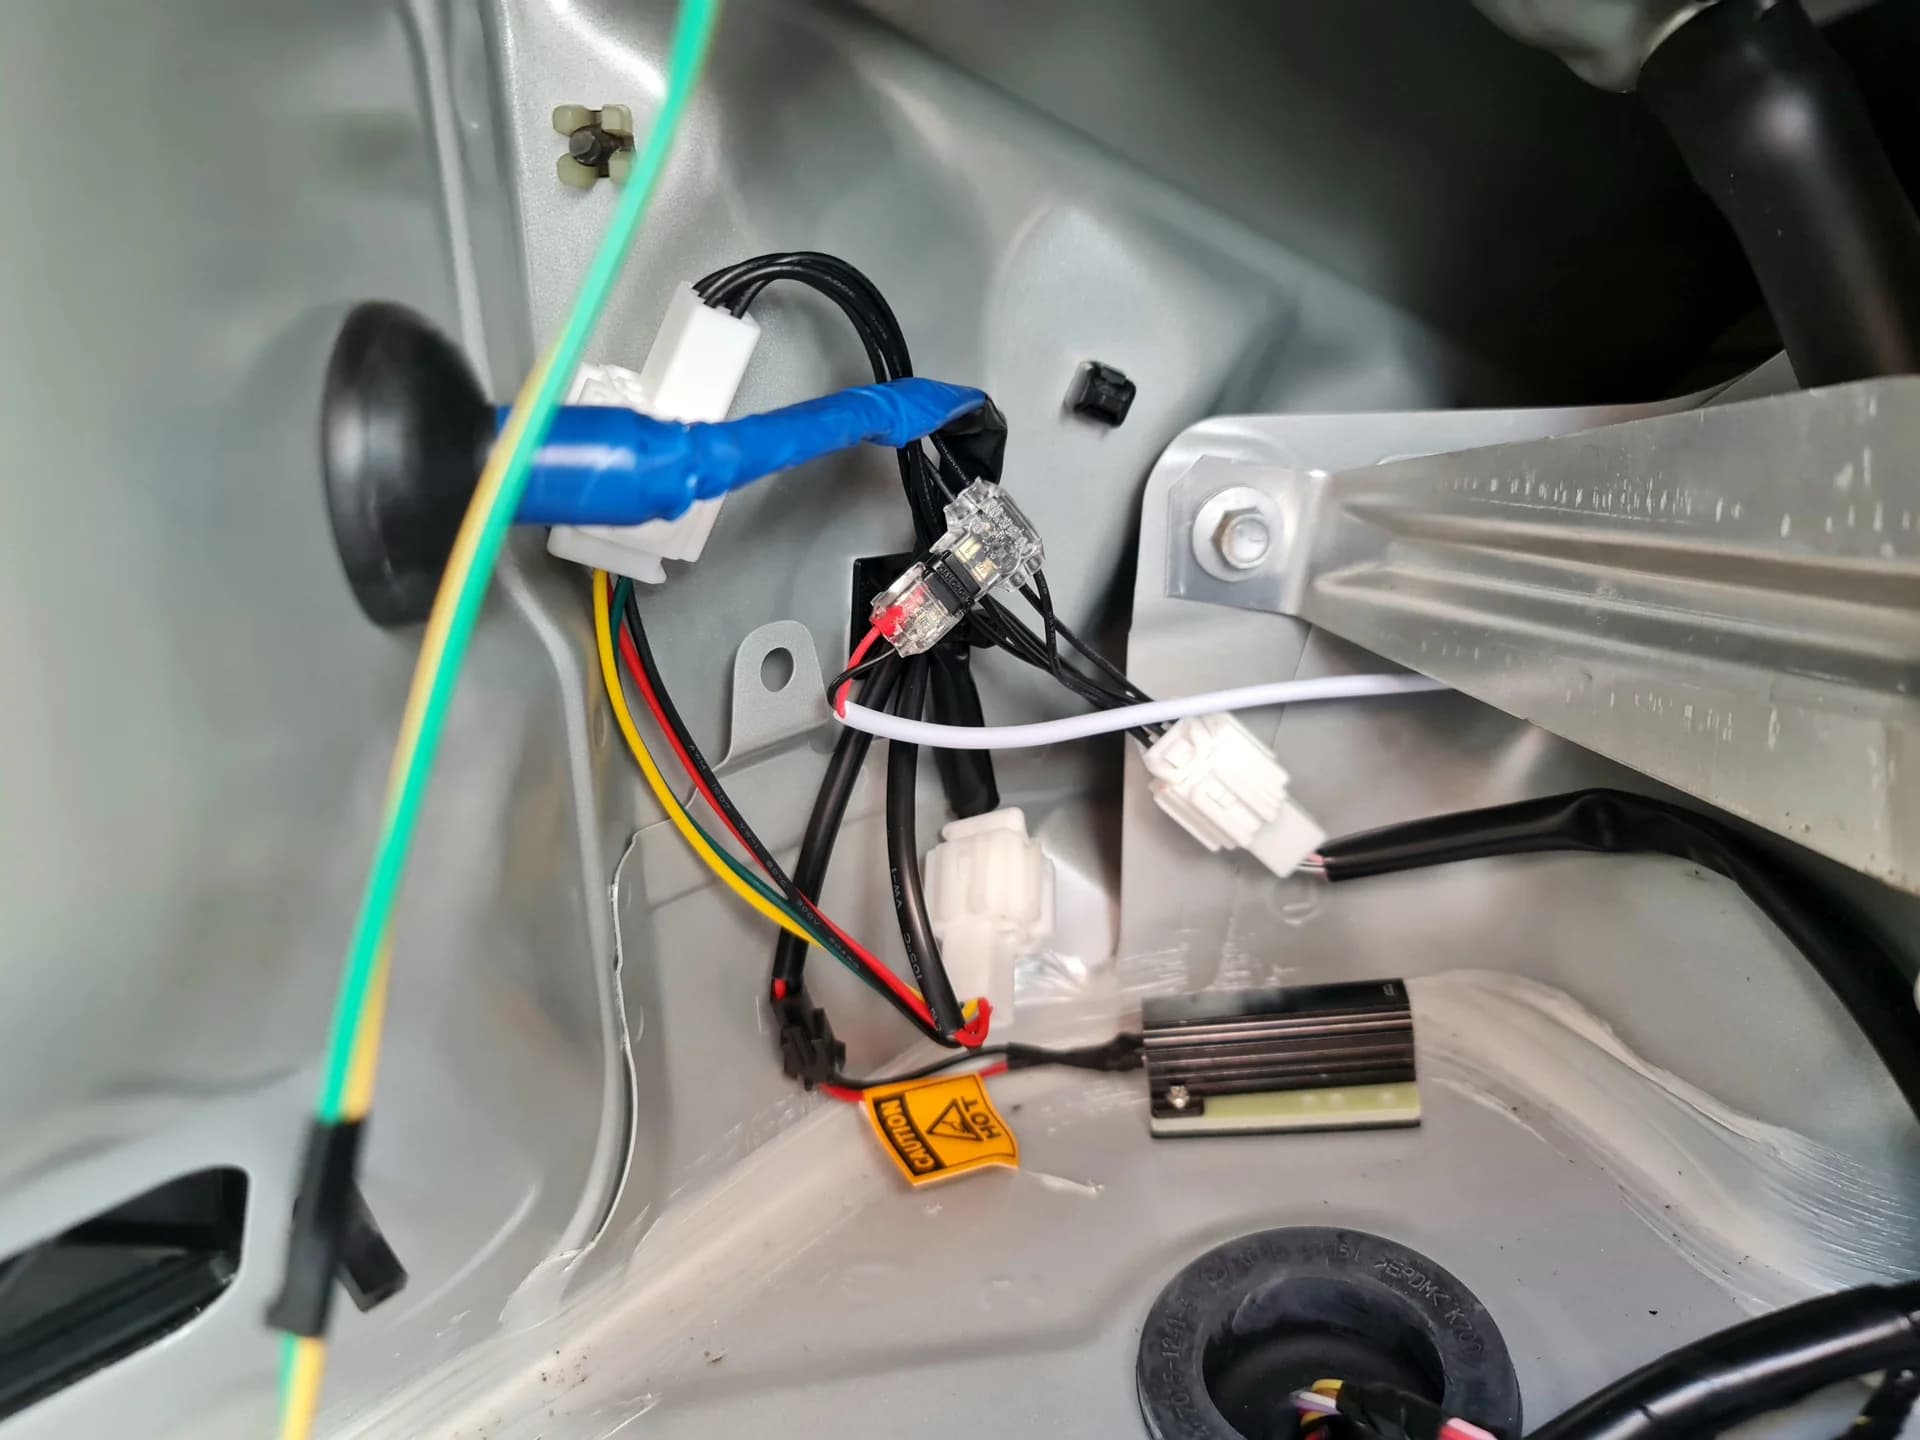
The loom piece is then inserted between the existing plugs in the lighting circuit… here I also have the sequential rear indicator loom in place… it doesn’t matter… it still goes in perfectly OK. Check all is
working correctly before replacing the carpet trim.
Lighting check… It’s alive!
The only thing extra I added were a couple of self adhesive cable clips so that I could remove the black Gaffer tape. They keep the already nicely thin cable tidy and offer the same bit of extra support to the end of the strip to prevent it peeling loose. This was just my personal preference… it’s not really needed as the wire is very light and flexible, but I just like to keep things tidy.
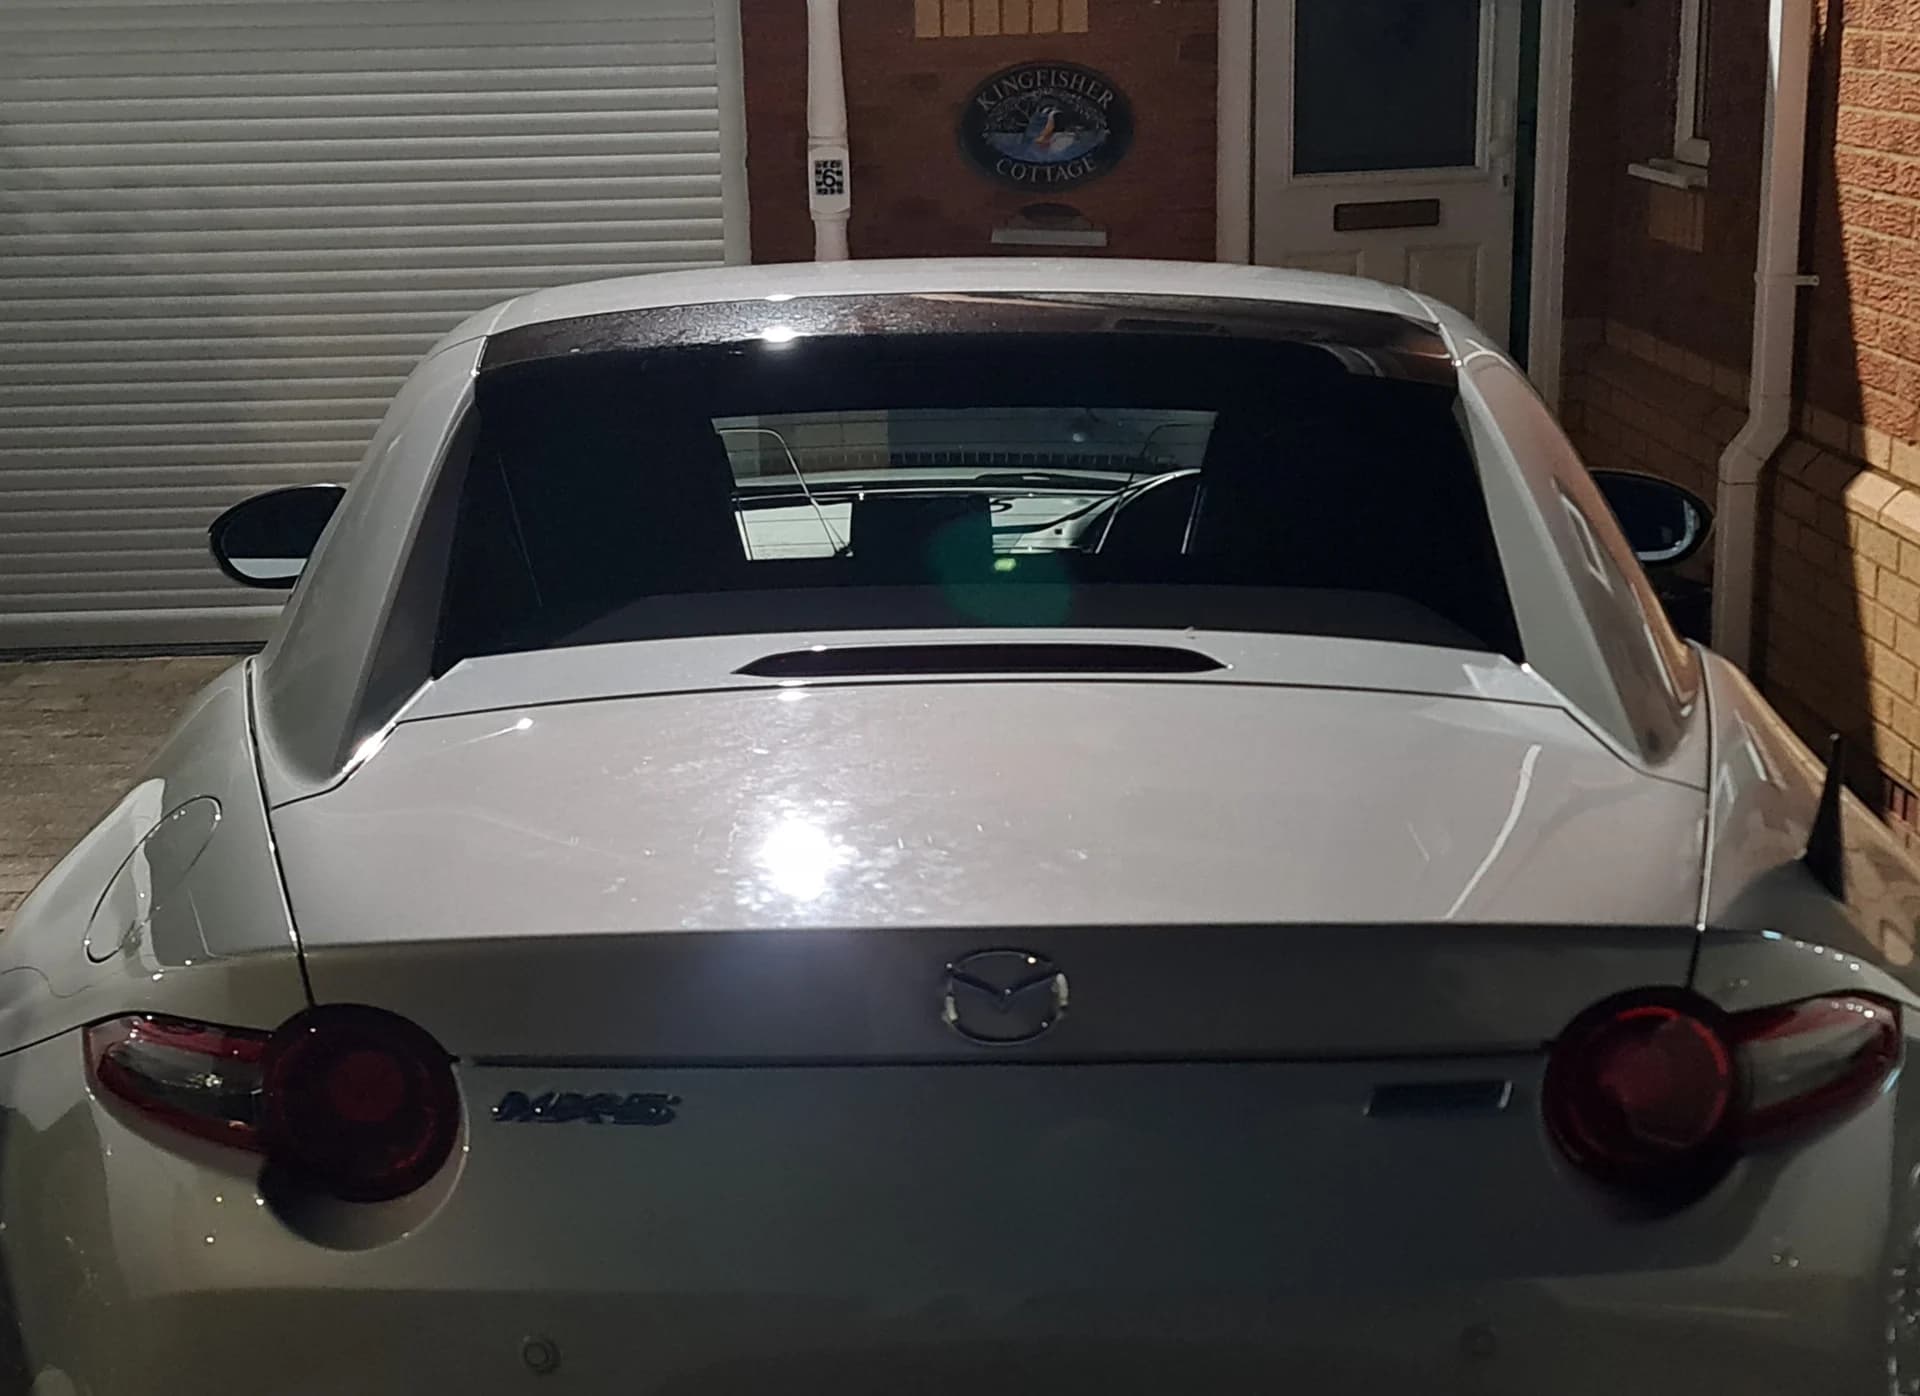
Result. No lights on. (Wish I’d wiped the finger marks from fitting off the lid before taking the pics!
Lights on! This RF is the silver ‘Ceramic’ colour, so no extra reflective strip needed. May be needed on darker colours.
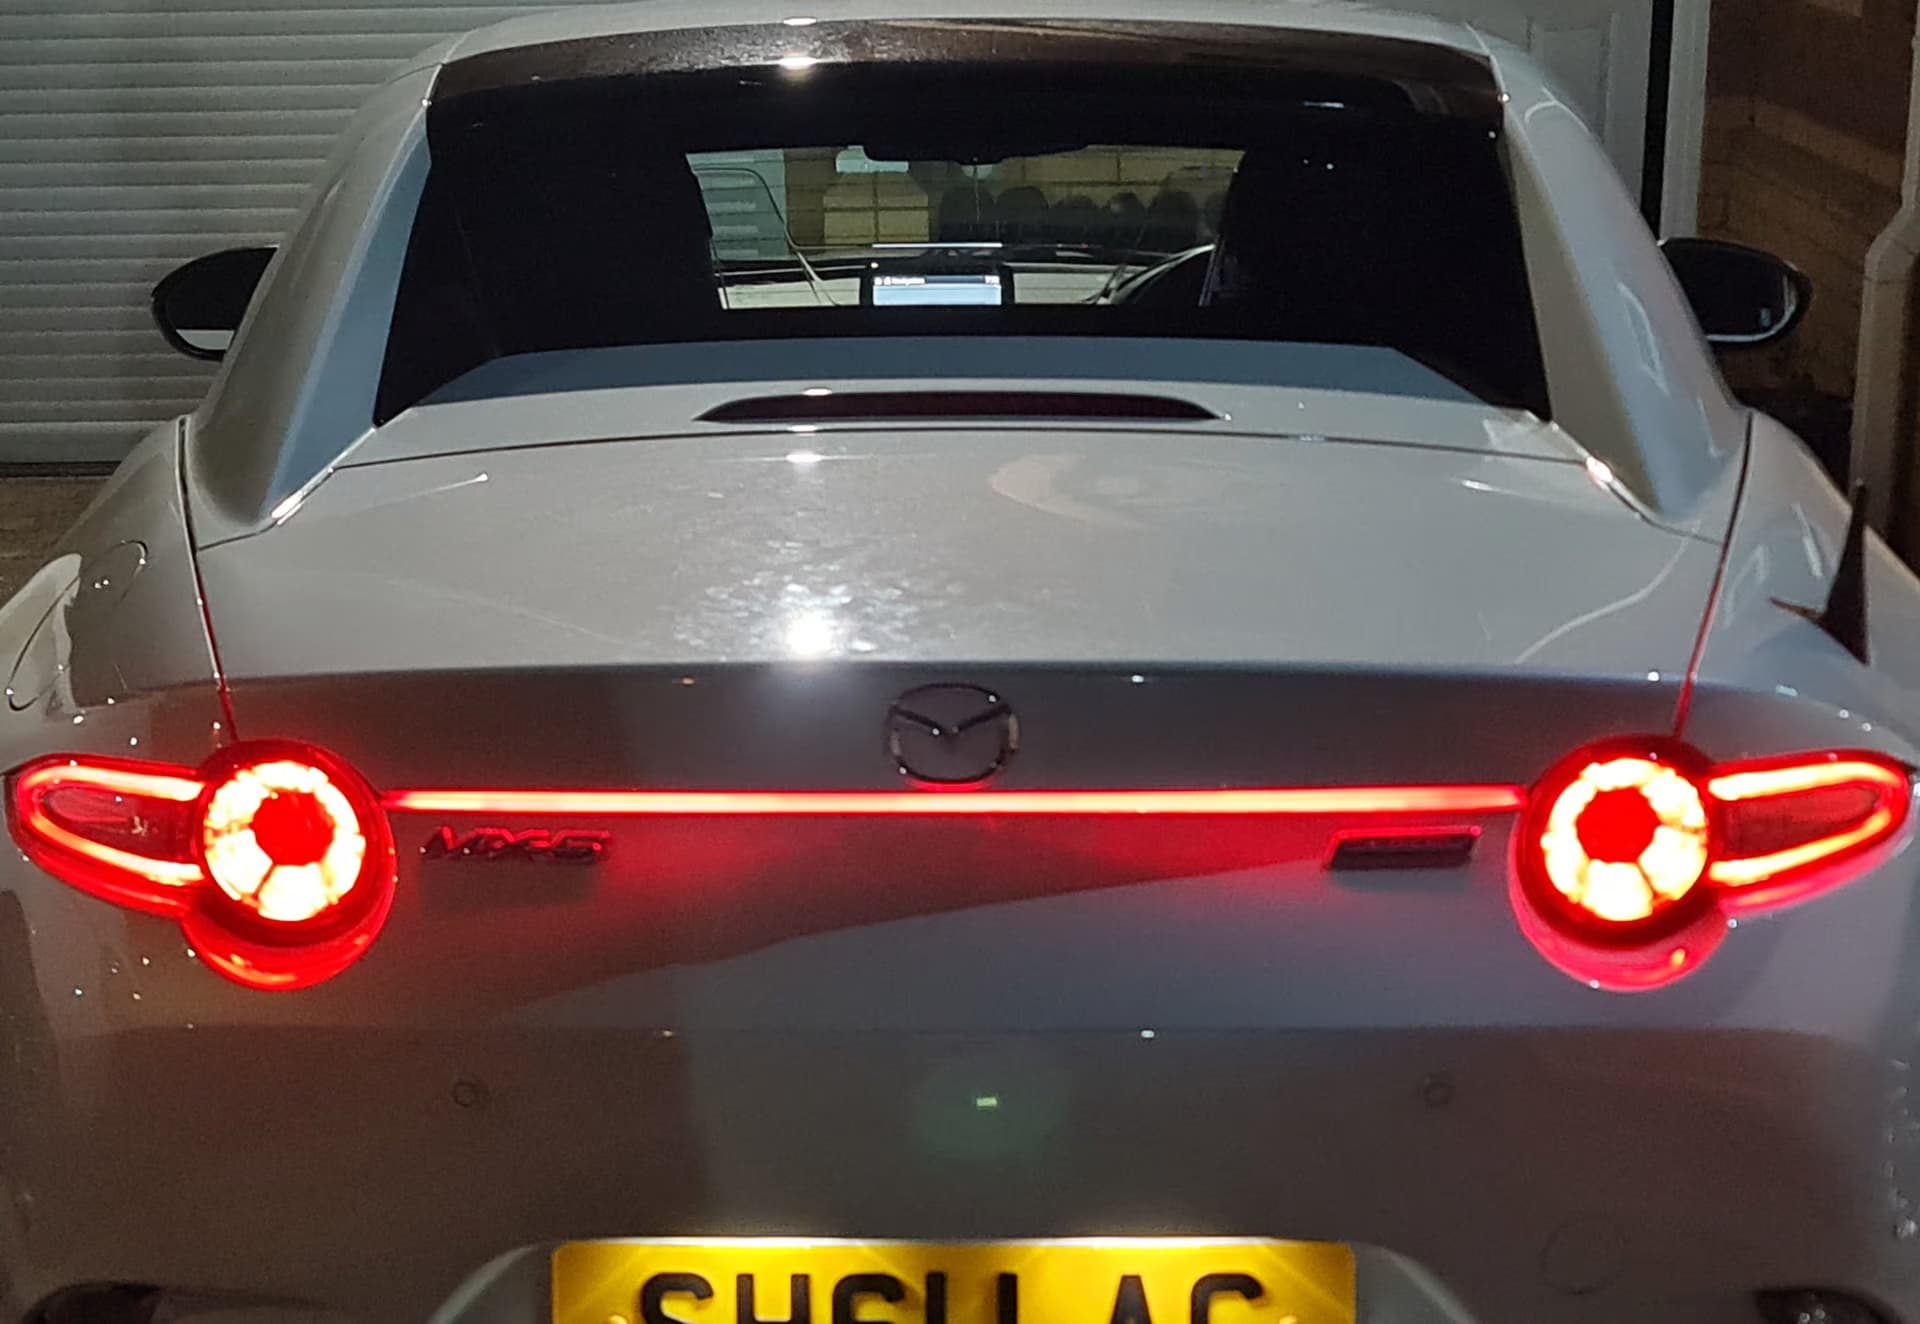
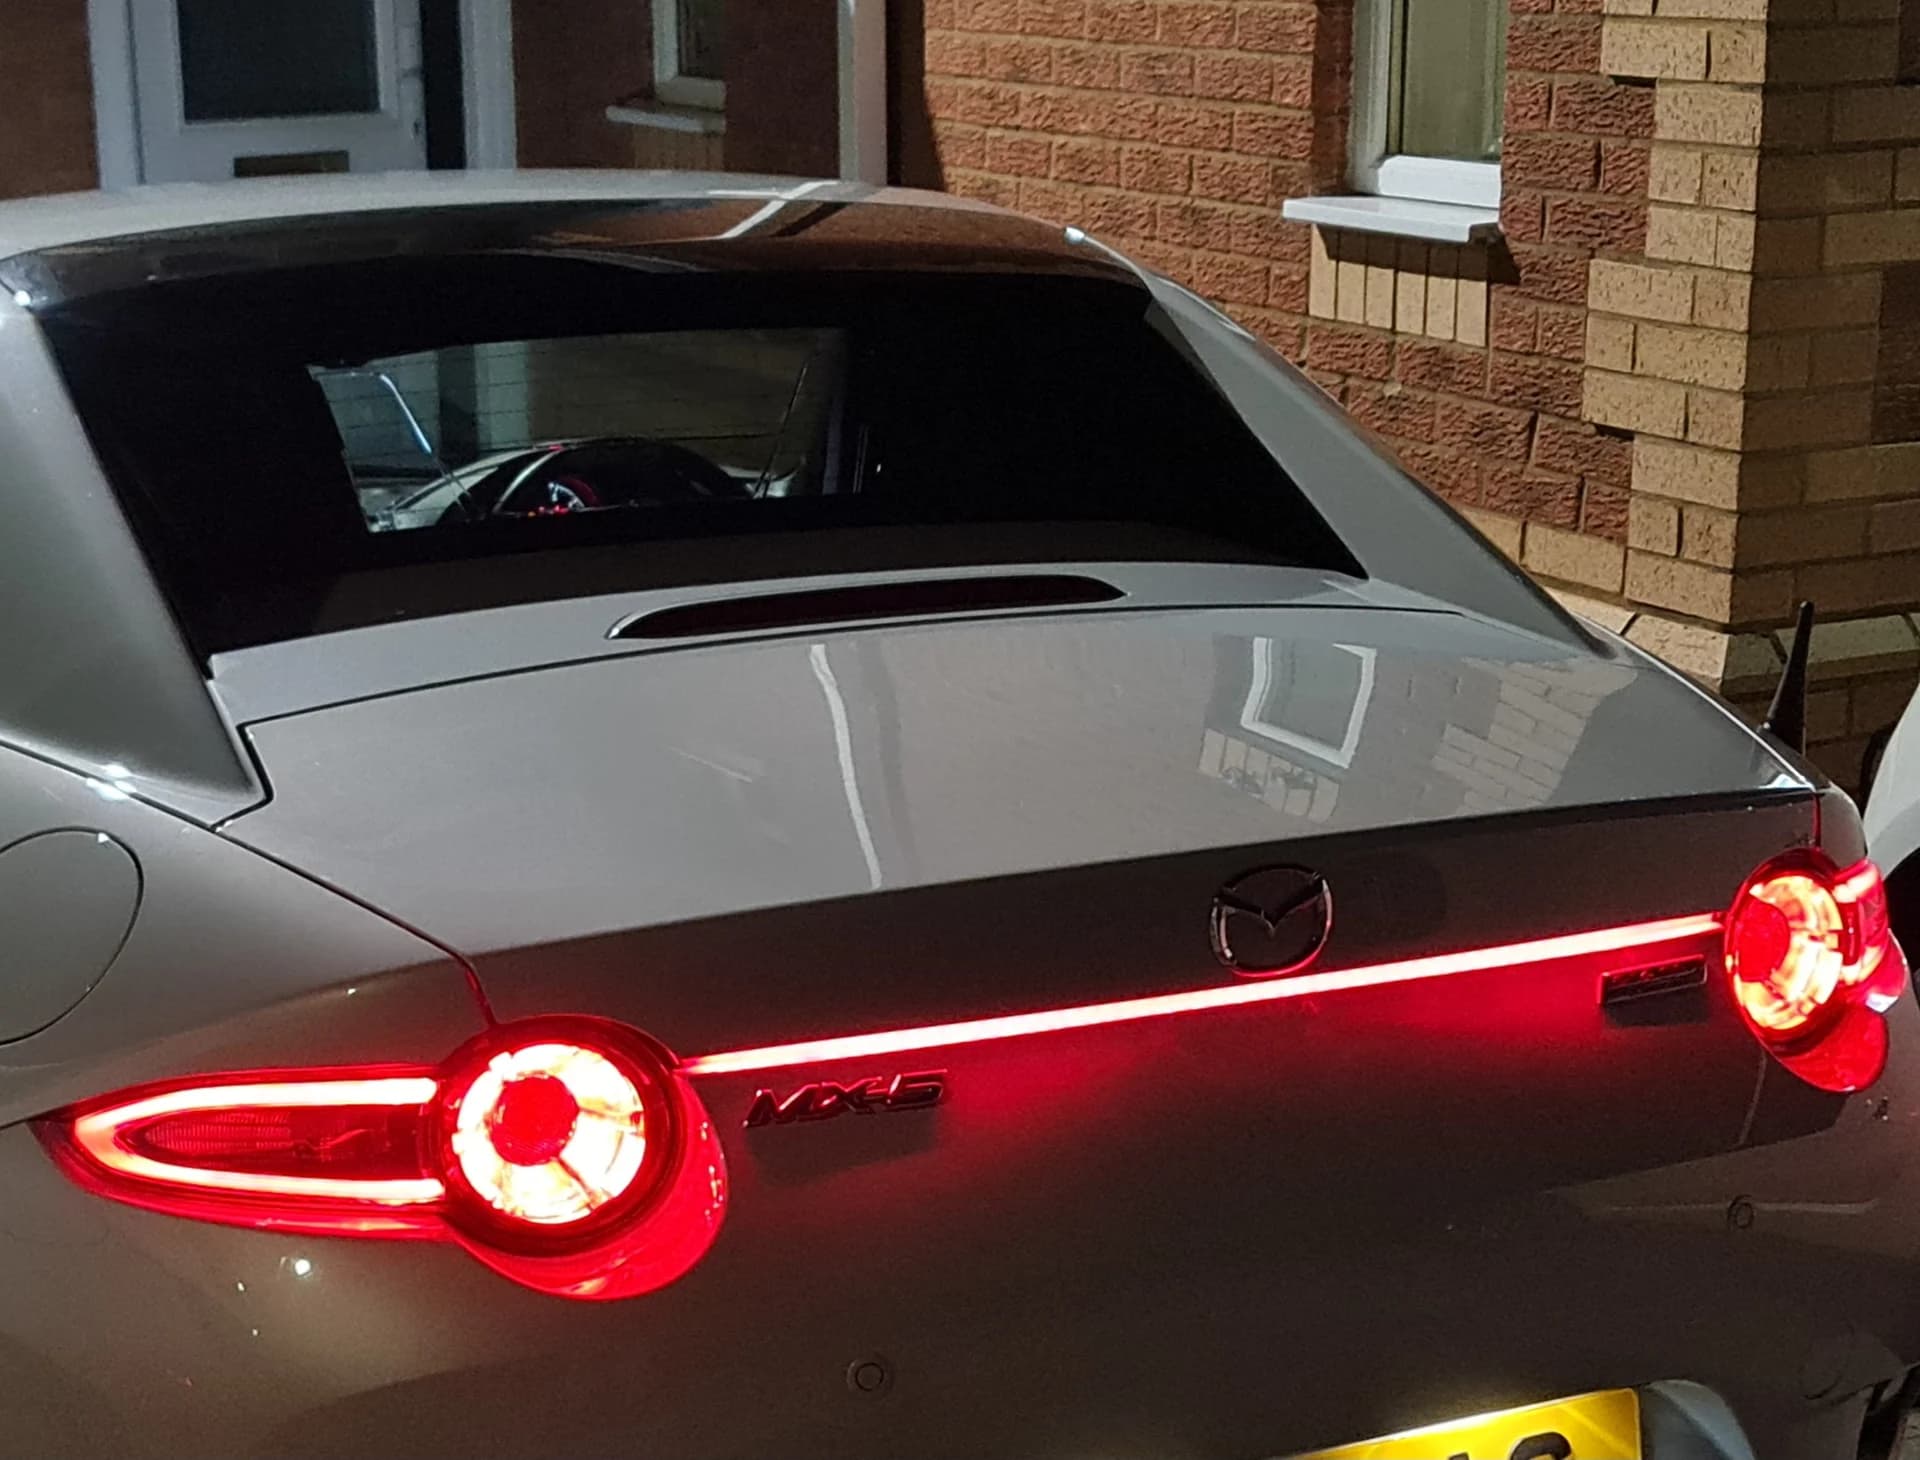
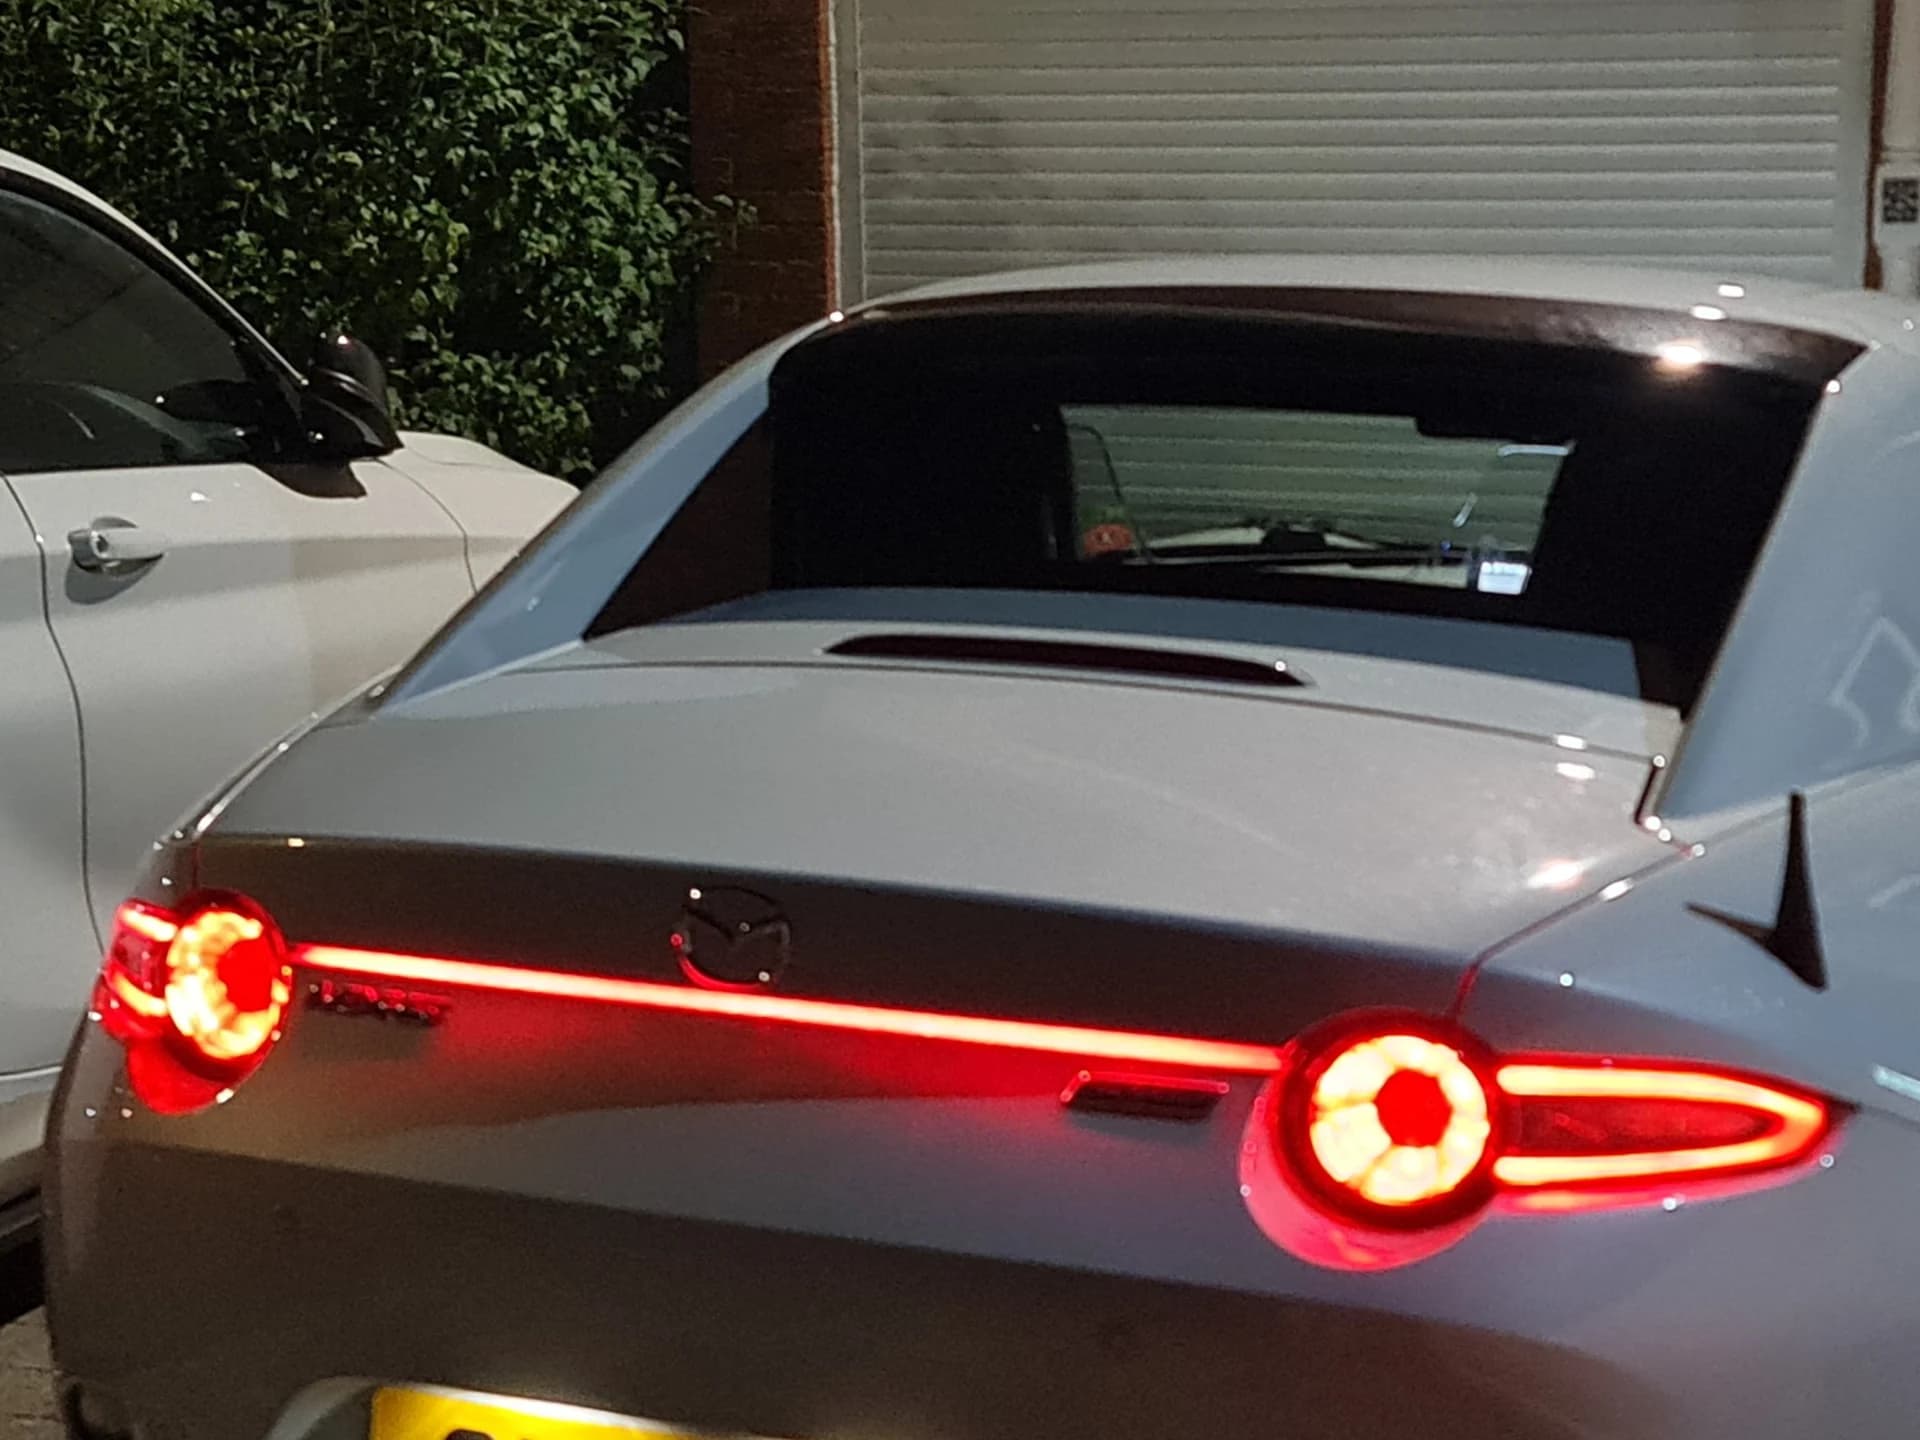
Really pleased with this kit, simple to fit, concise instructions and as mentioned, it comes with three new rubber grommets to avoid cutting the originals which can be kept for retro fitting if required. The effect is great! Nice one, Paul!
14 Likes
Nice ![]()
1 Like
OK - First reading i was thinking ■■■ noooooo, theres another owner on here i cant get on with his mods. He owns a ND. But the illuminated pics - Im a fan!!! Looks awesome. If i had a ND i would do this. Very impressed!!! Love mods like this
3 Likes