Notchy gear change - selector limit plate wear on NC 6 Speed

I appreciate there is an other thread I created where this is talked about, titled “Gear Lever Rubbing Surfaces”, but thought worth posting this as a ‘How To’ which is the conclusion of the other thread.

I am not sure if this is applicable to other models, my car is a 2008 NC 2.0 Sport. The problem was a horrible 2nd gear engagement on a cold gearbox.

The solution was a replacement of the the ‘Reverse Lock Out Plate’ which limits how far the gear lever can move left to right. This plate is made of a hard plastic, and the limit surface on the left side is thinner than on the right as it allows for the ‘lift’ to move further left to engage reverse gear. This surface wears, and then the gear lever does not line up correctly when changing to second gear.

On my car, the turret was dry of oil, so I topped that up and greased the ball - this made a big difference. A week or so later I fitted the new plate, and that then made a difference again, not as much as refilling the turret, but a definite positive improvement.

!
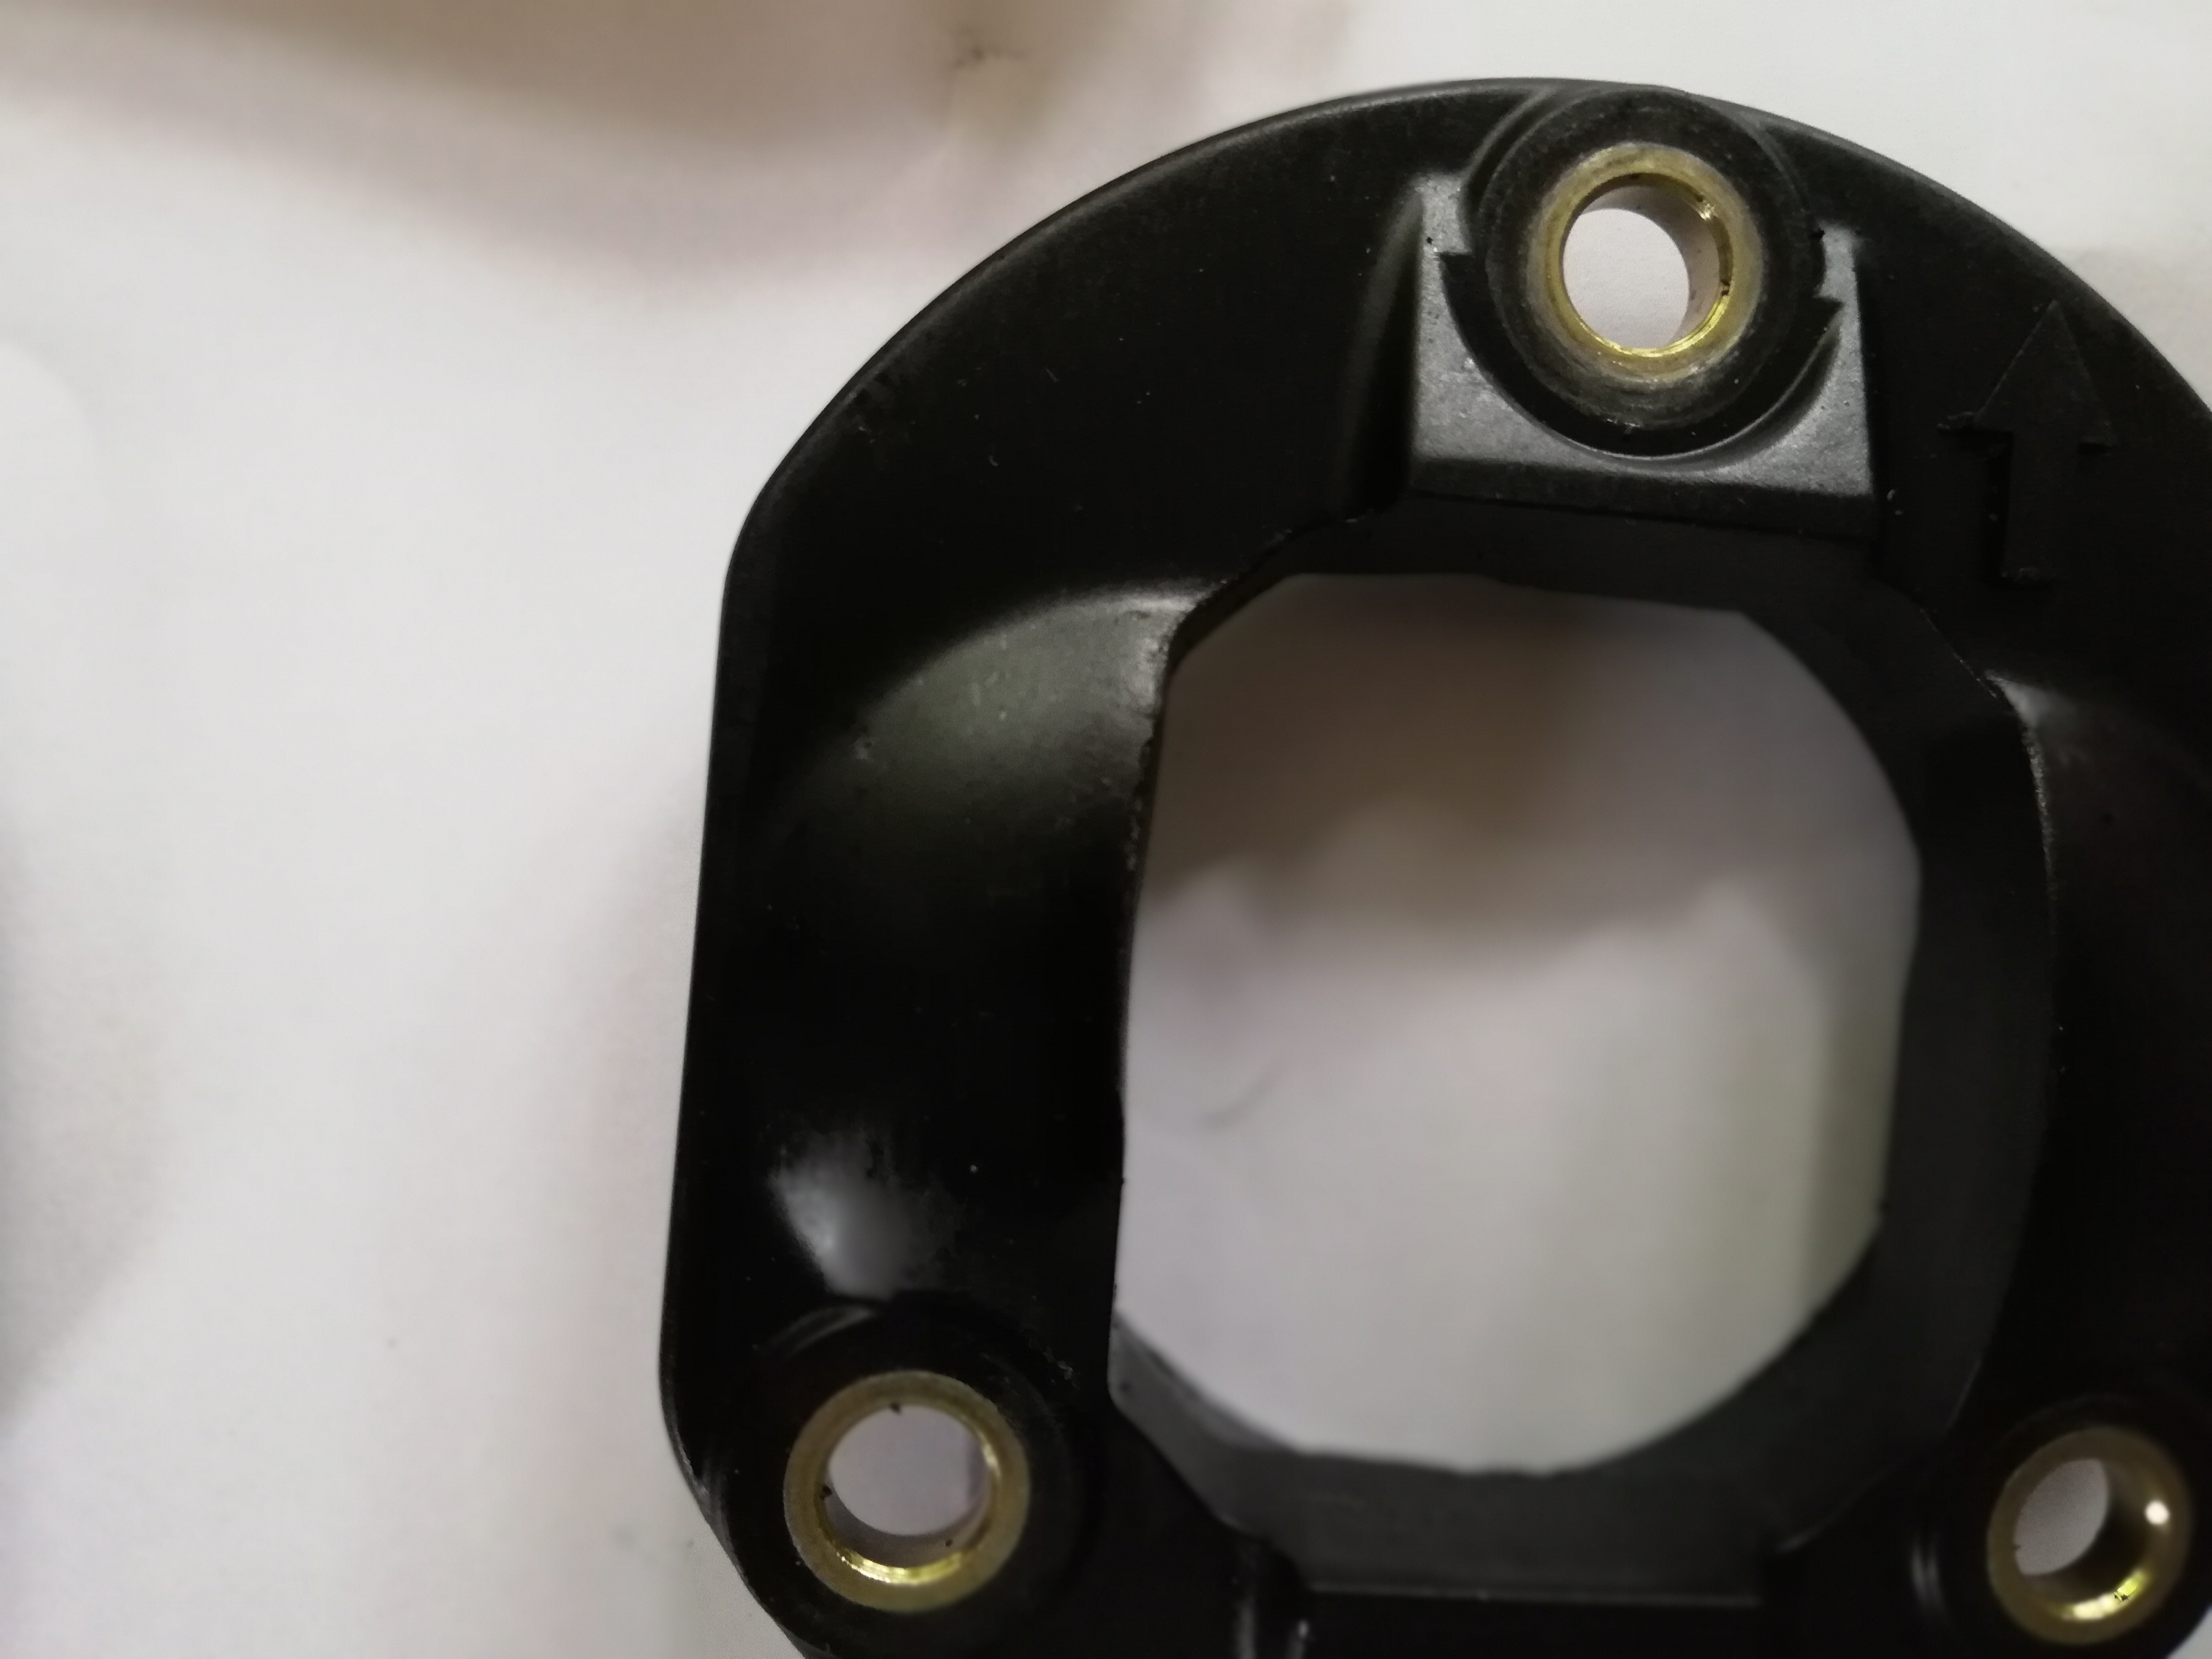
It is hard to see on the picture, but the inside left edge should be straight, the curvature you can see is wear - this car had done 73,000 miles.

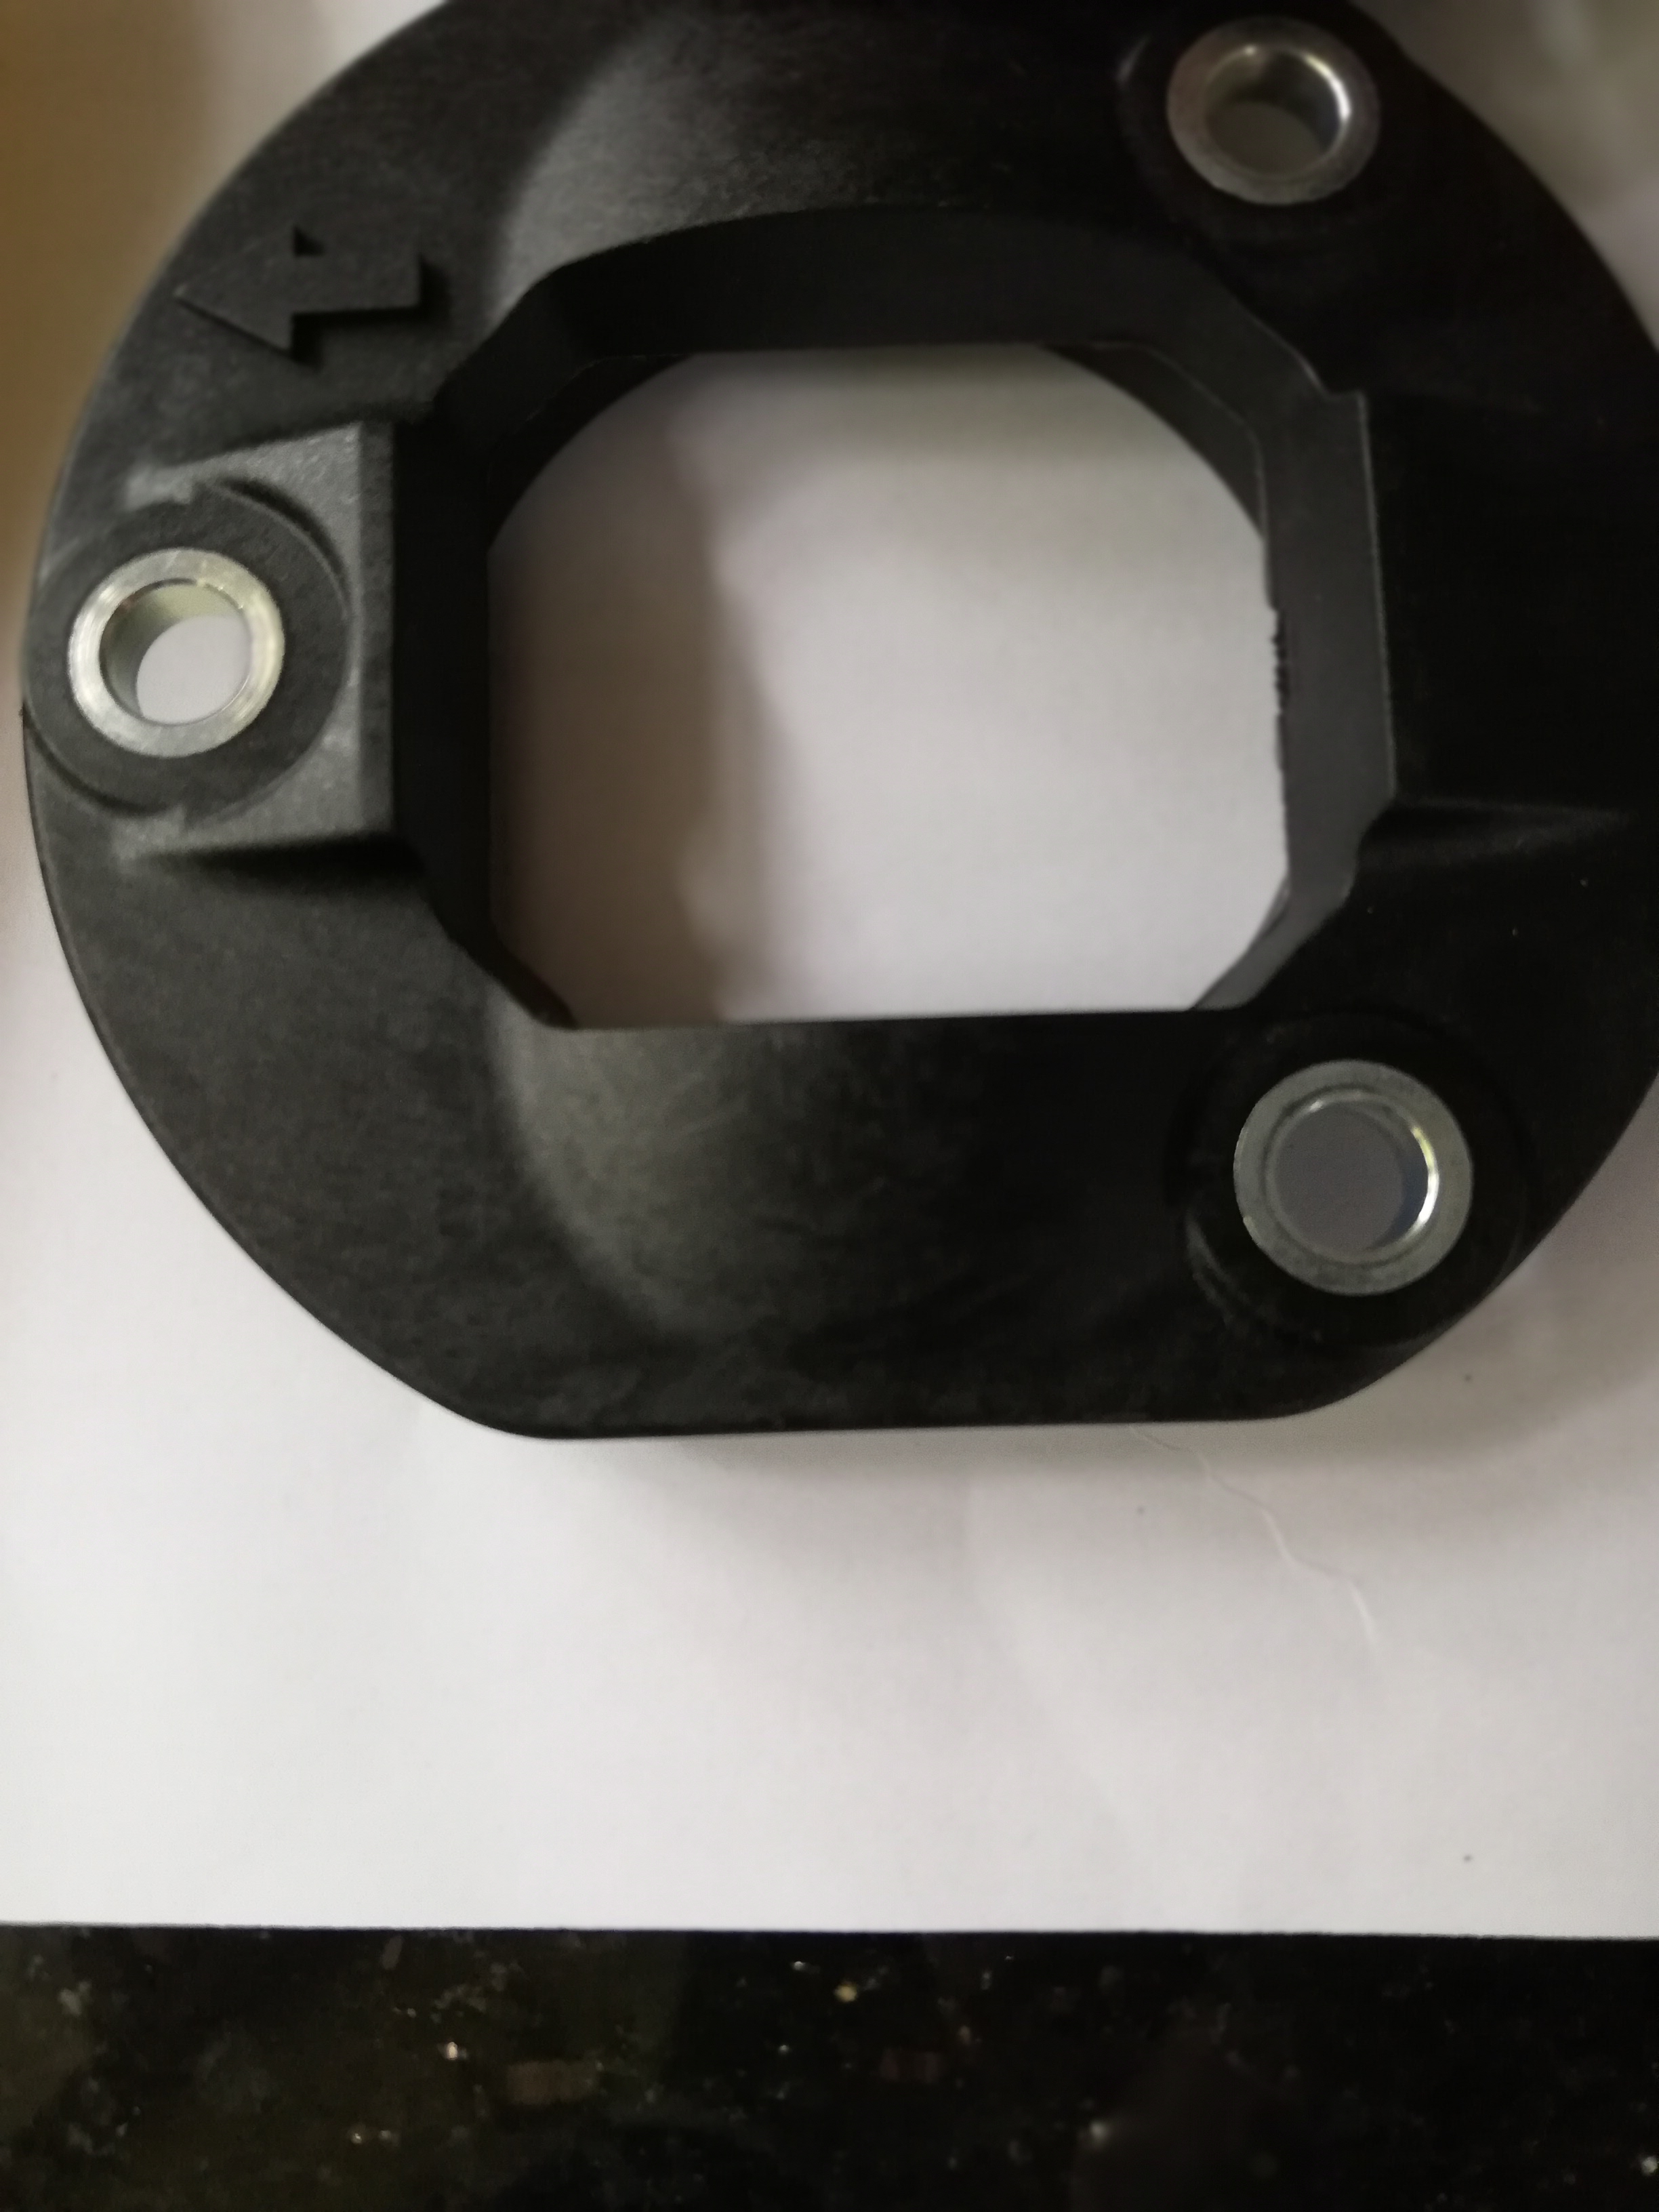
Below is the new plate for comparison

The part is available form Mazda as part number P601-17-449A; and is also available from MX5PARTS on thier part number SP3003. This is not (yet) listed on the website, so you need to call and ask for it using this part number. Cost was about £19 delivered.

How to fit:
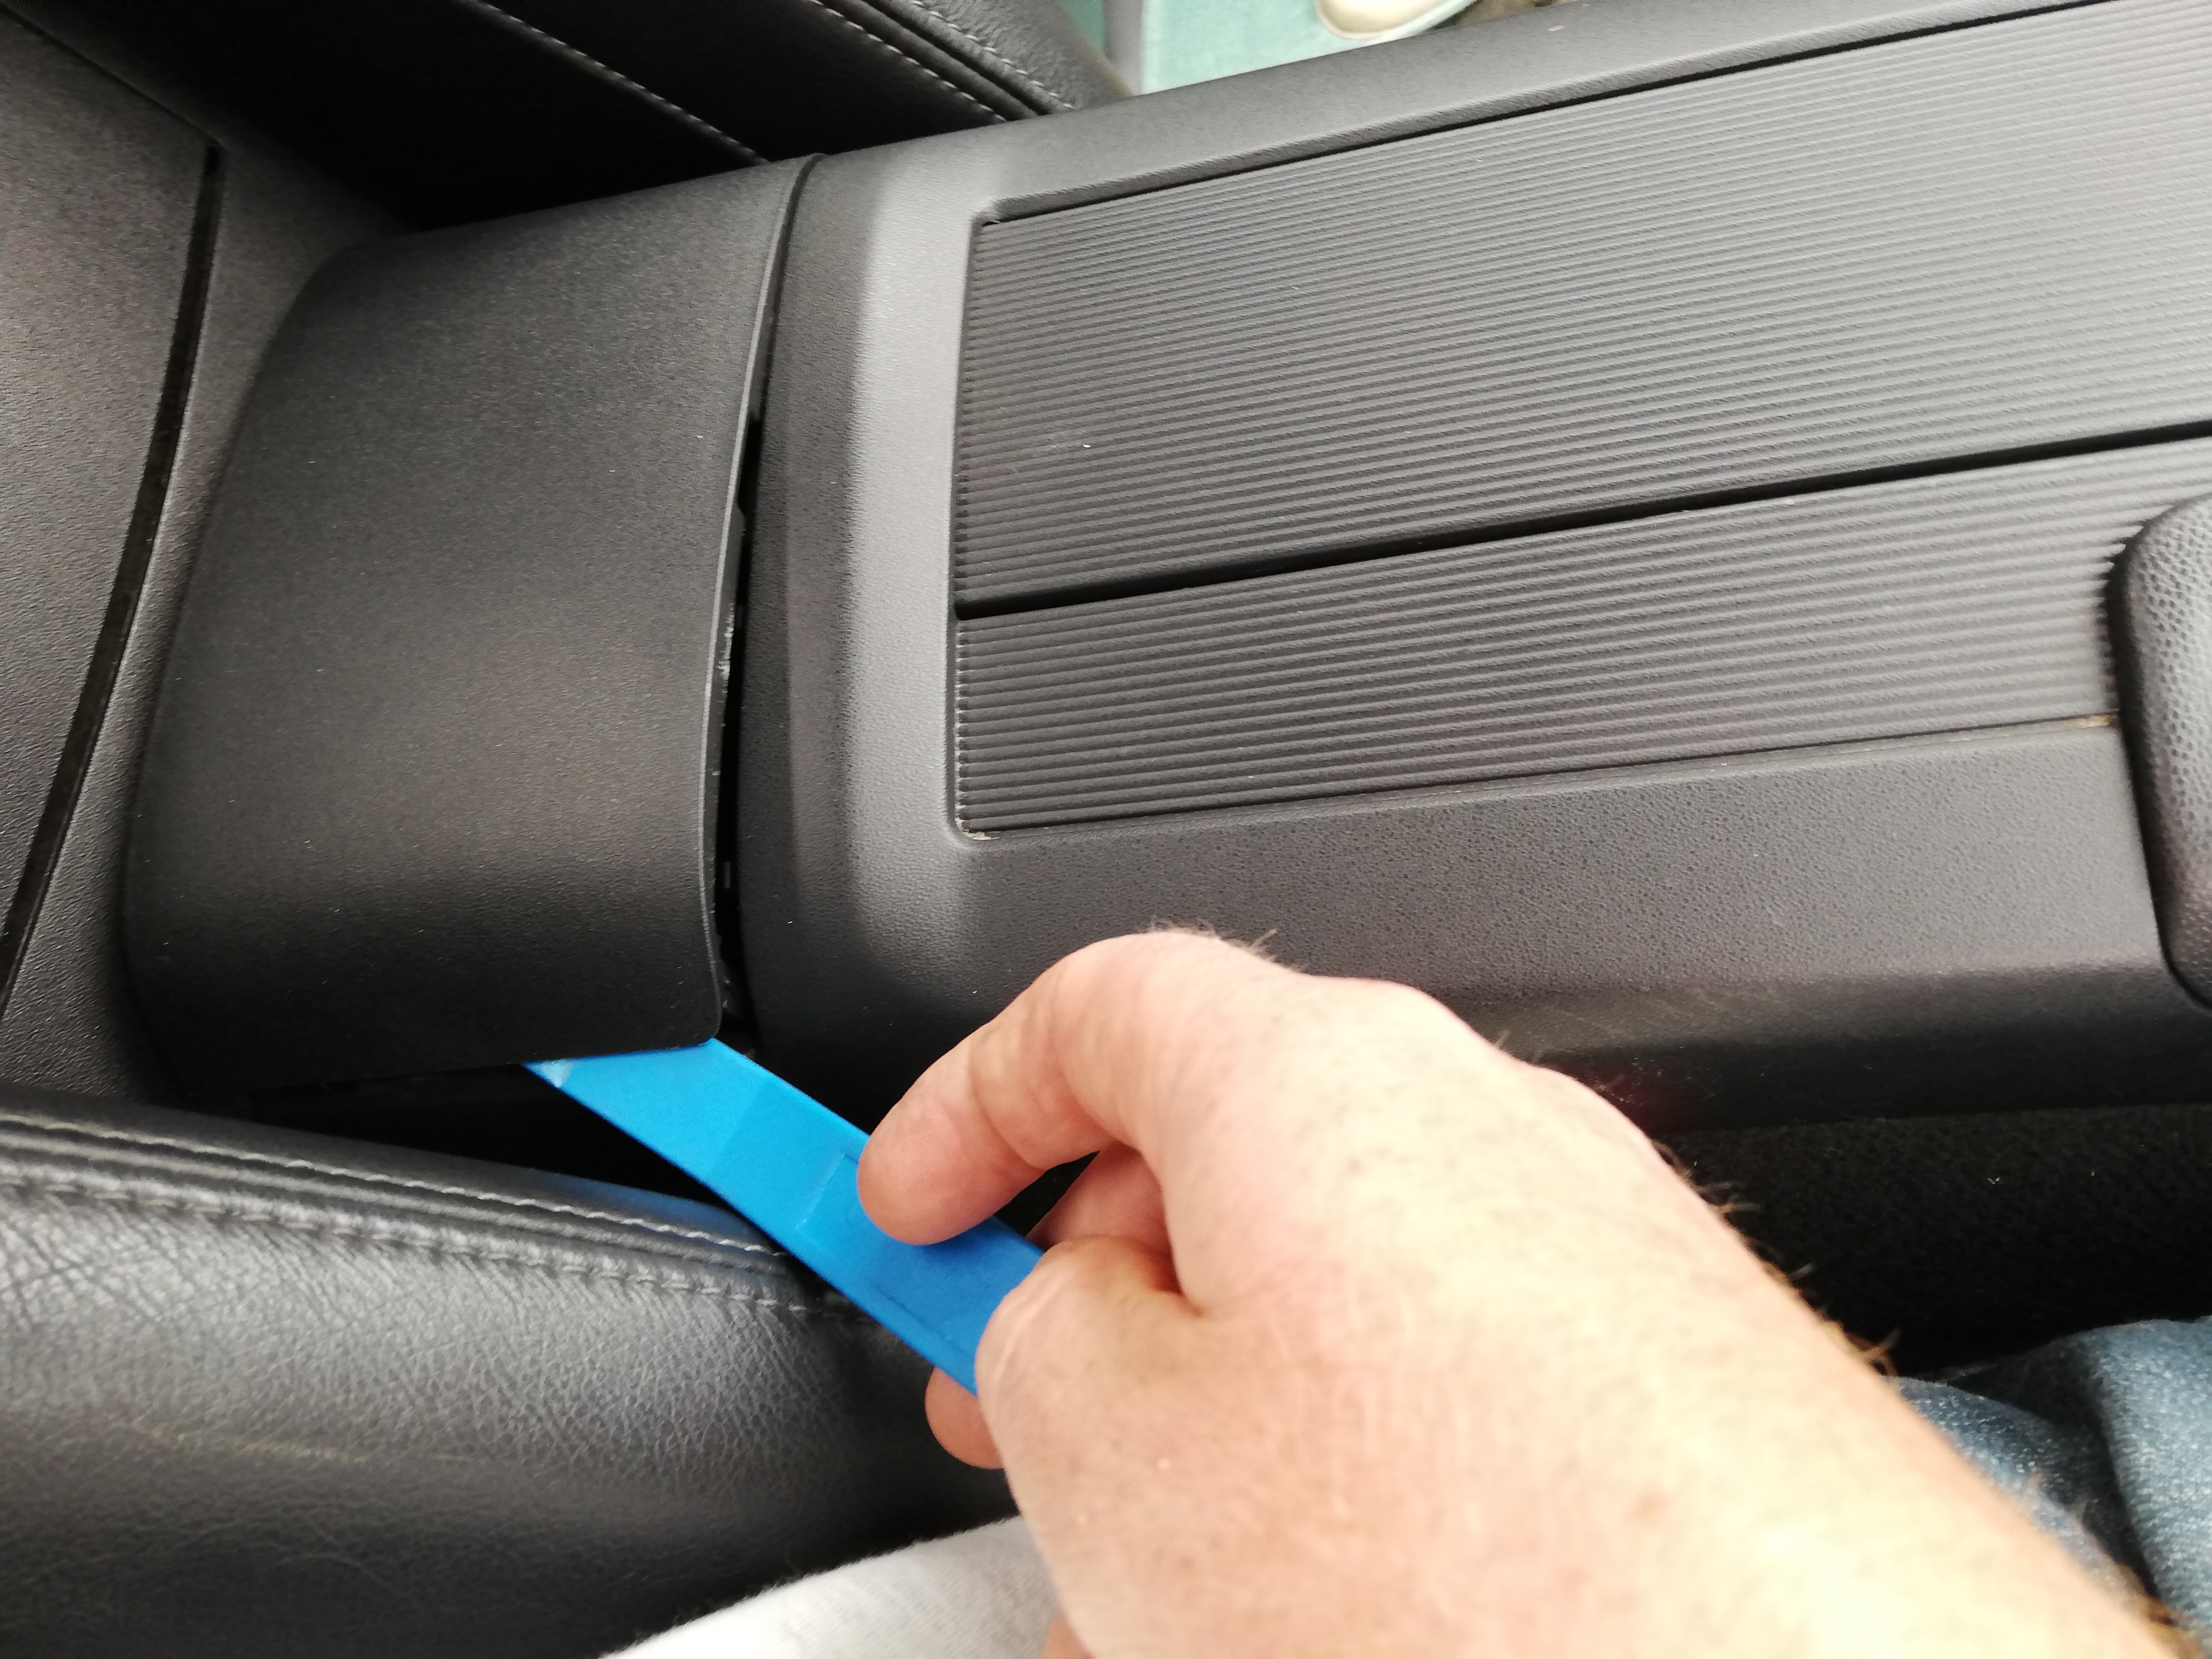
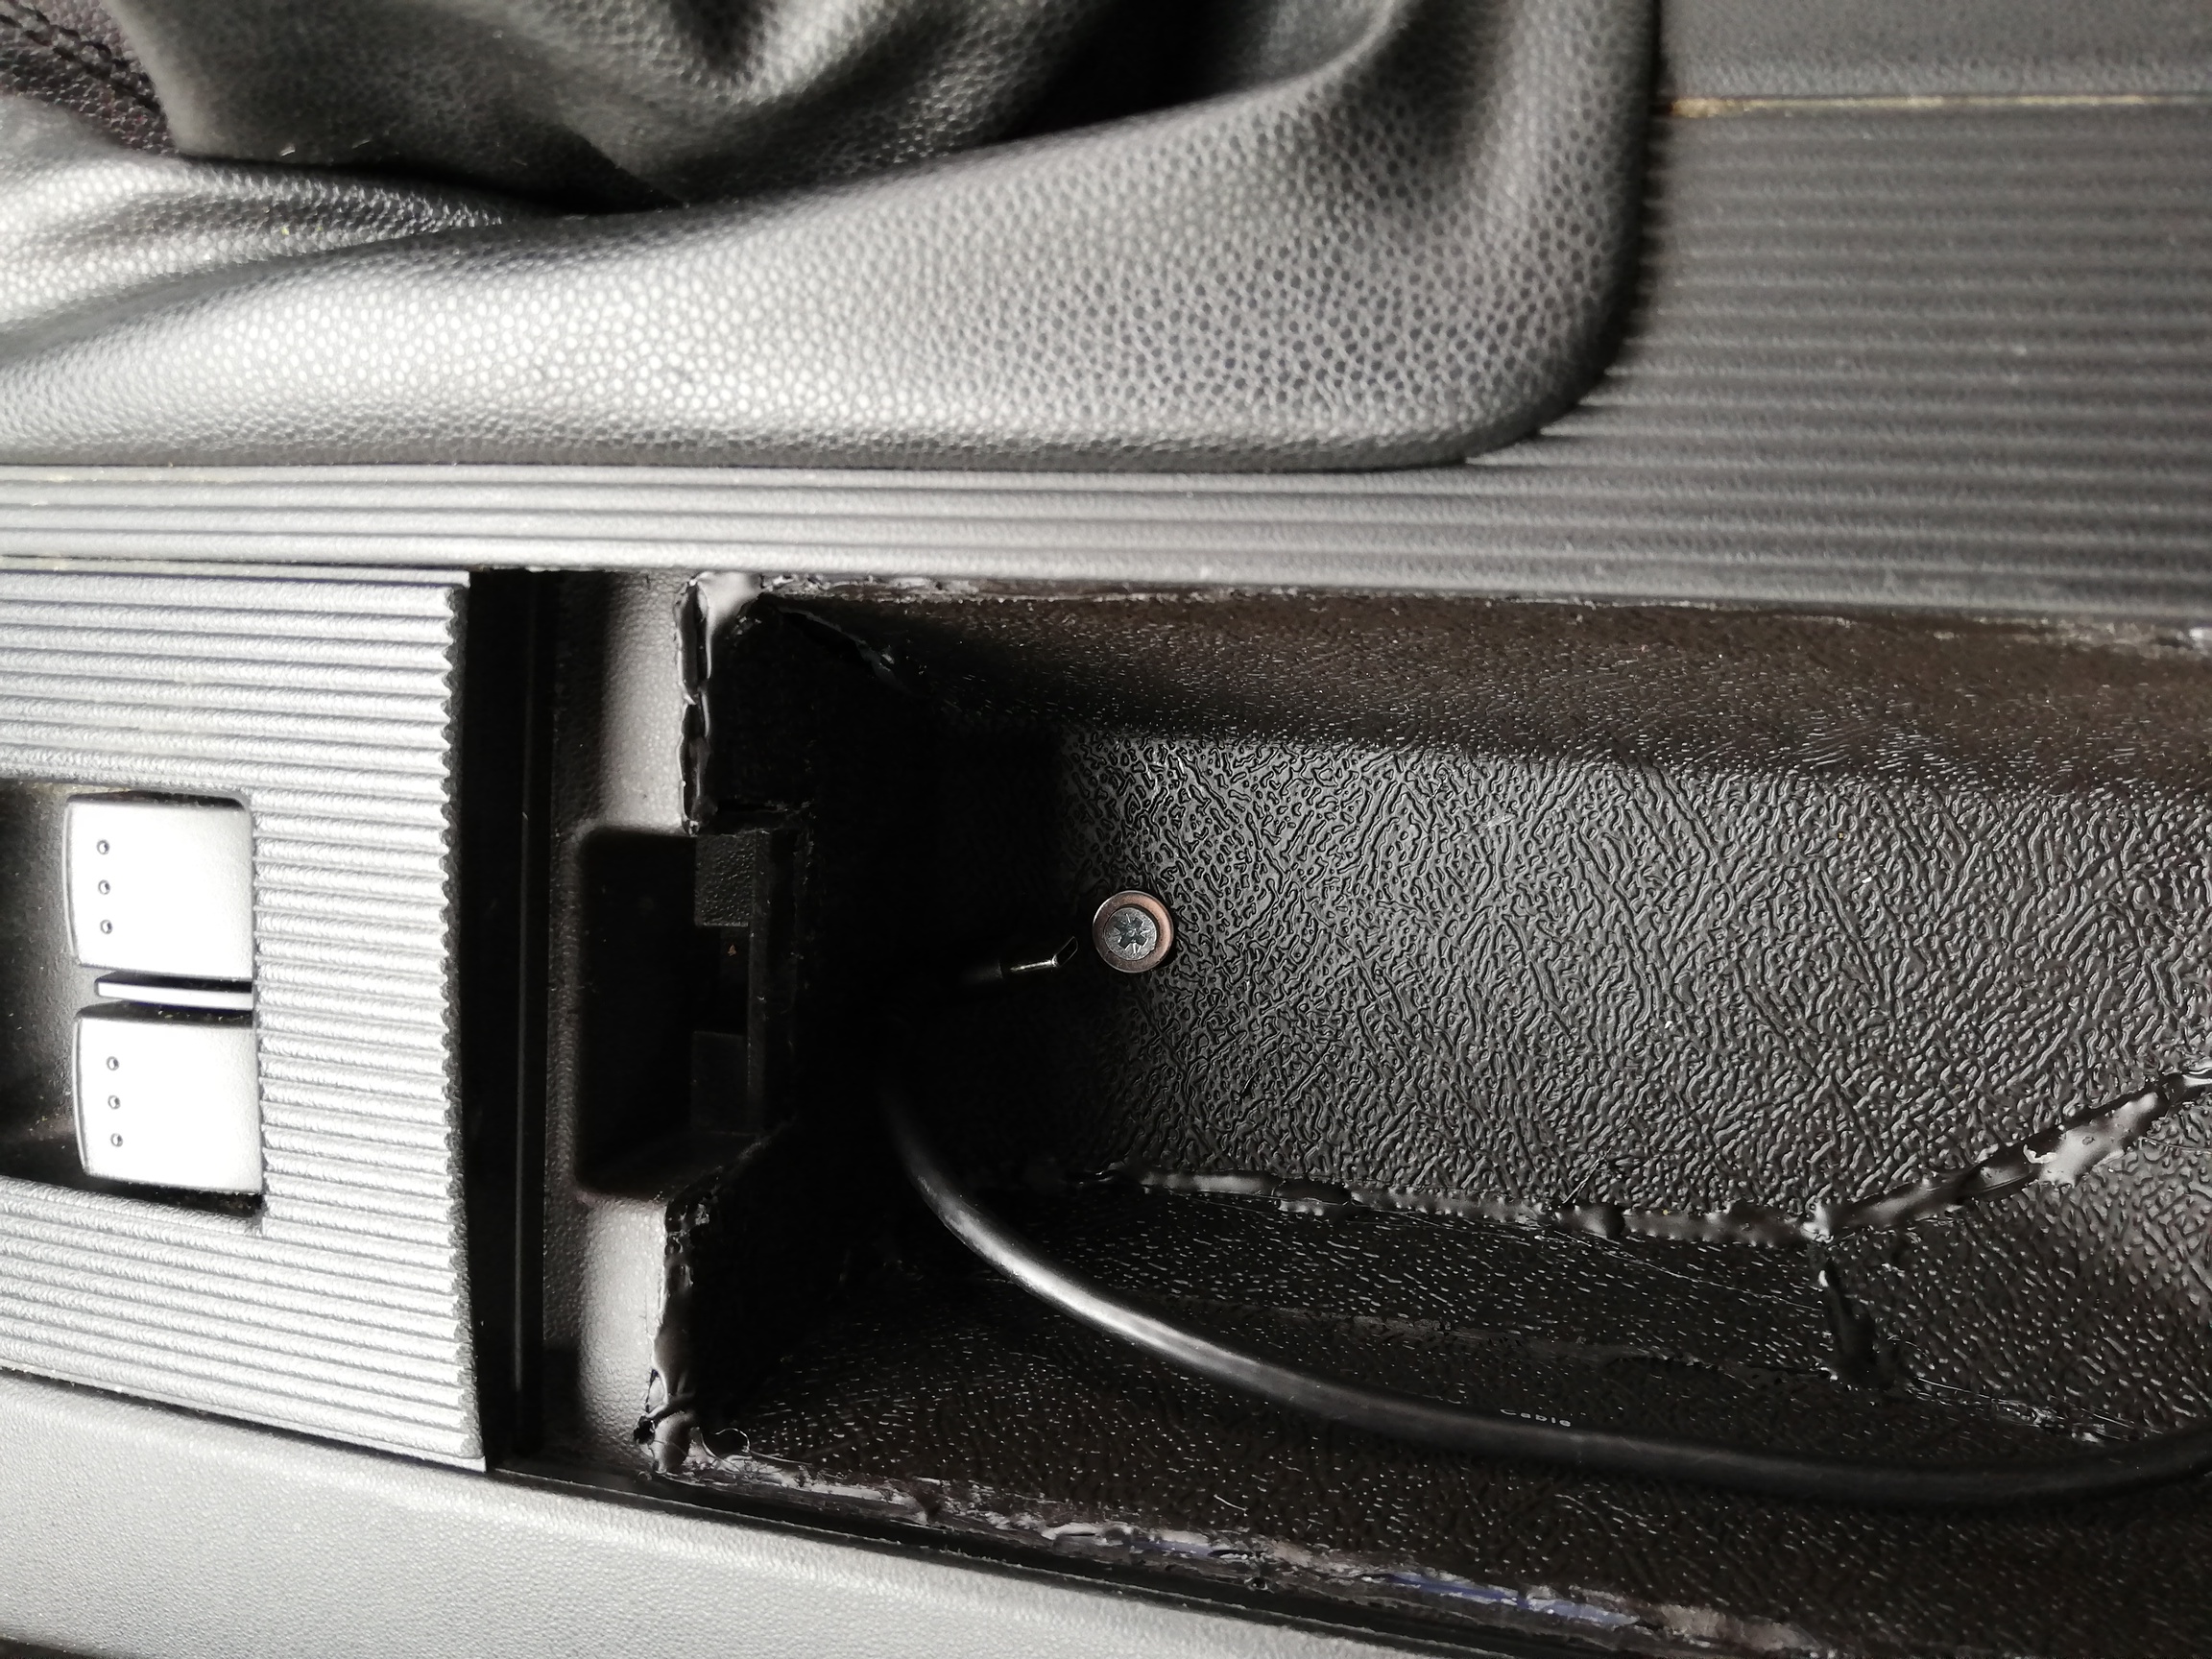
Remove the plastic coin holder, and the trim cover at the rear of the console - both prise upward and will pop out when the catches release. Use plastic trim tools to avoid any damage to the soft plastic. Also remove the cover from the bottom of the front cup-holder (on the pictures below, I have replaced the cup-holder with a rough home made cubby space, but the screw is in physically the same place.

Doing this exposes the five screws that hold the console on place. Remove all these screws, they are all the same so you wont get them mixed up.

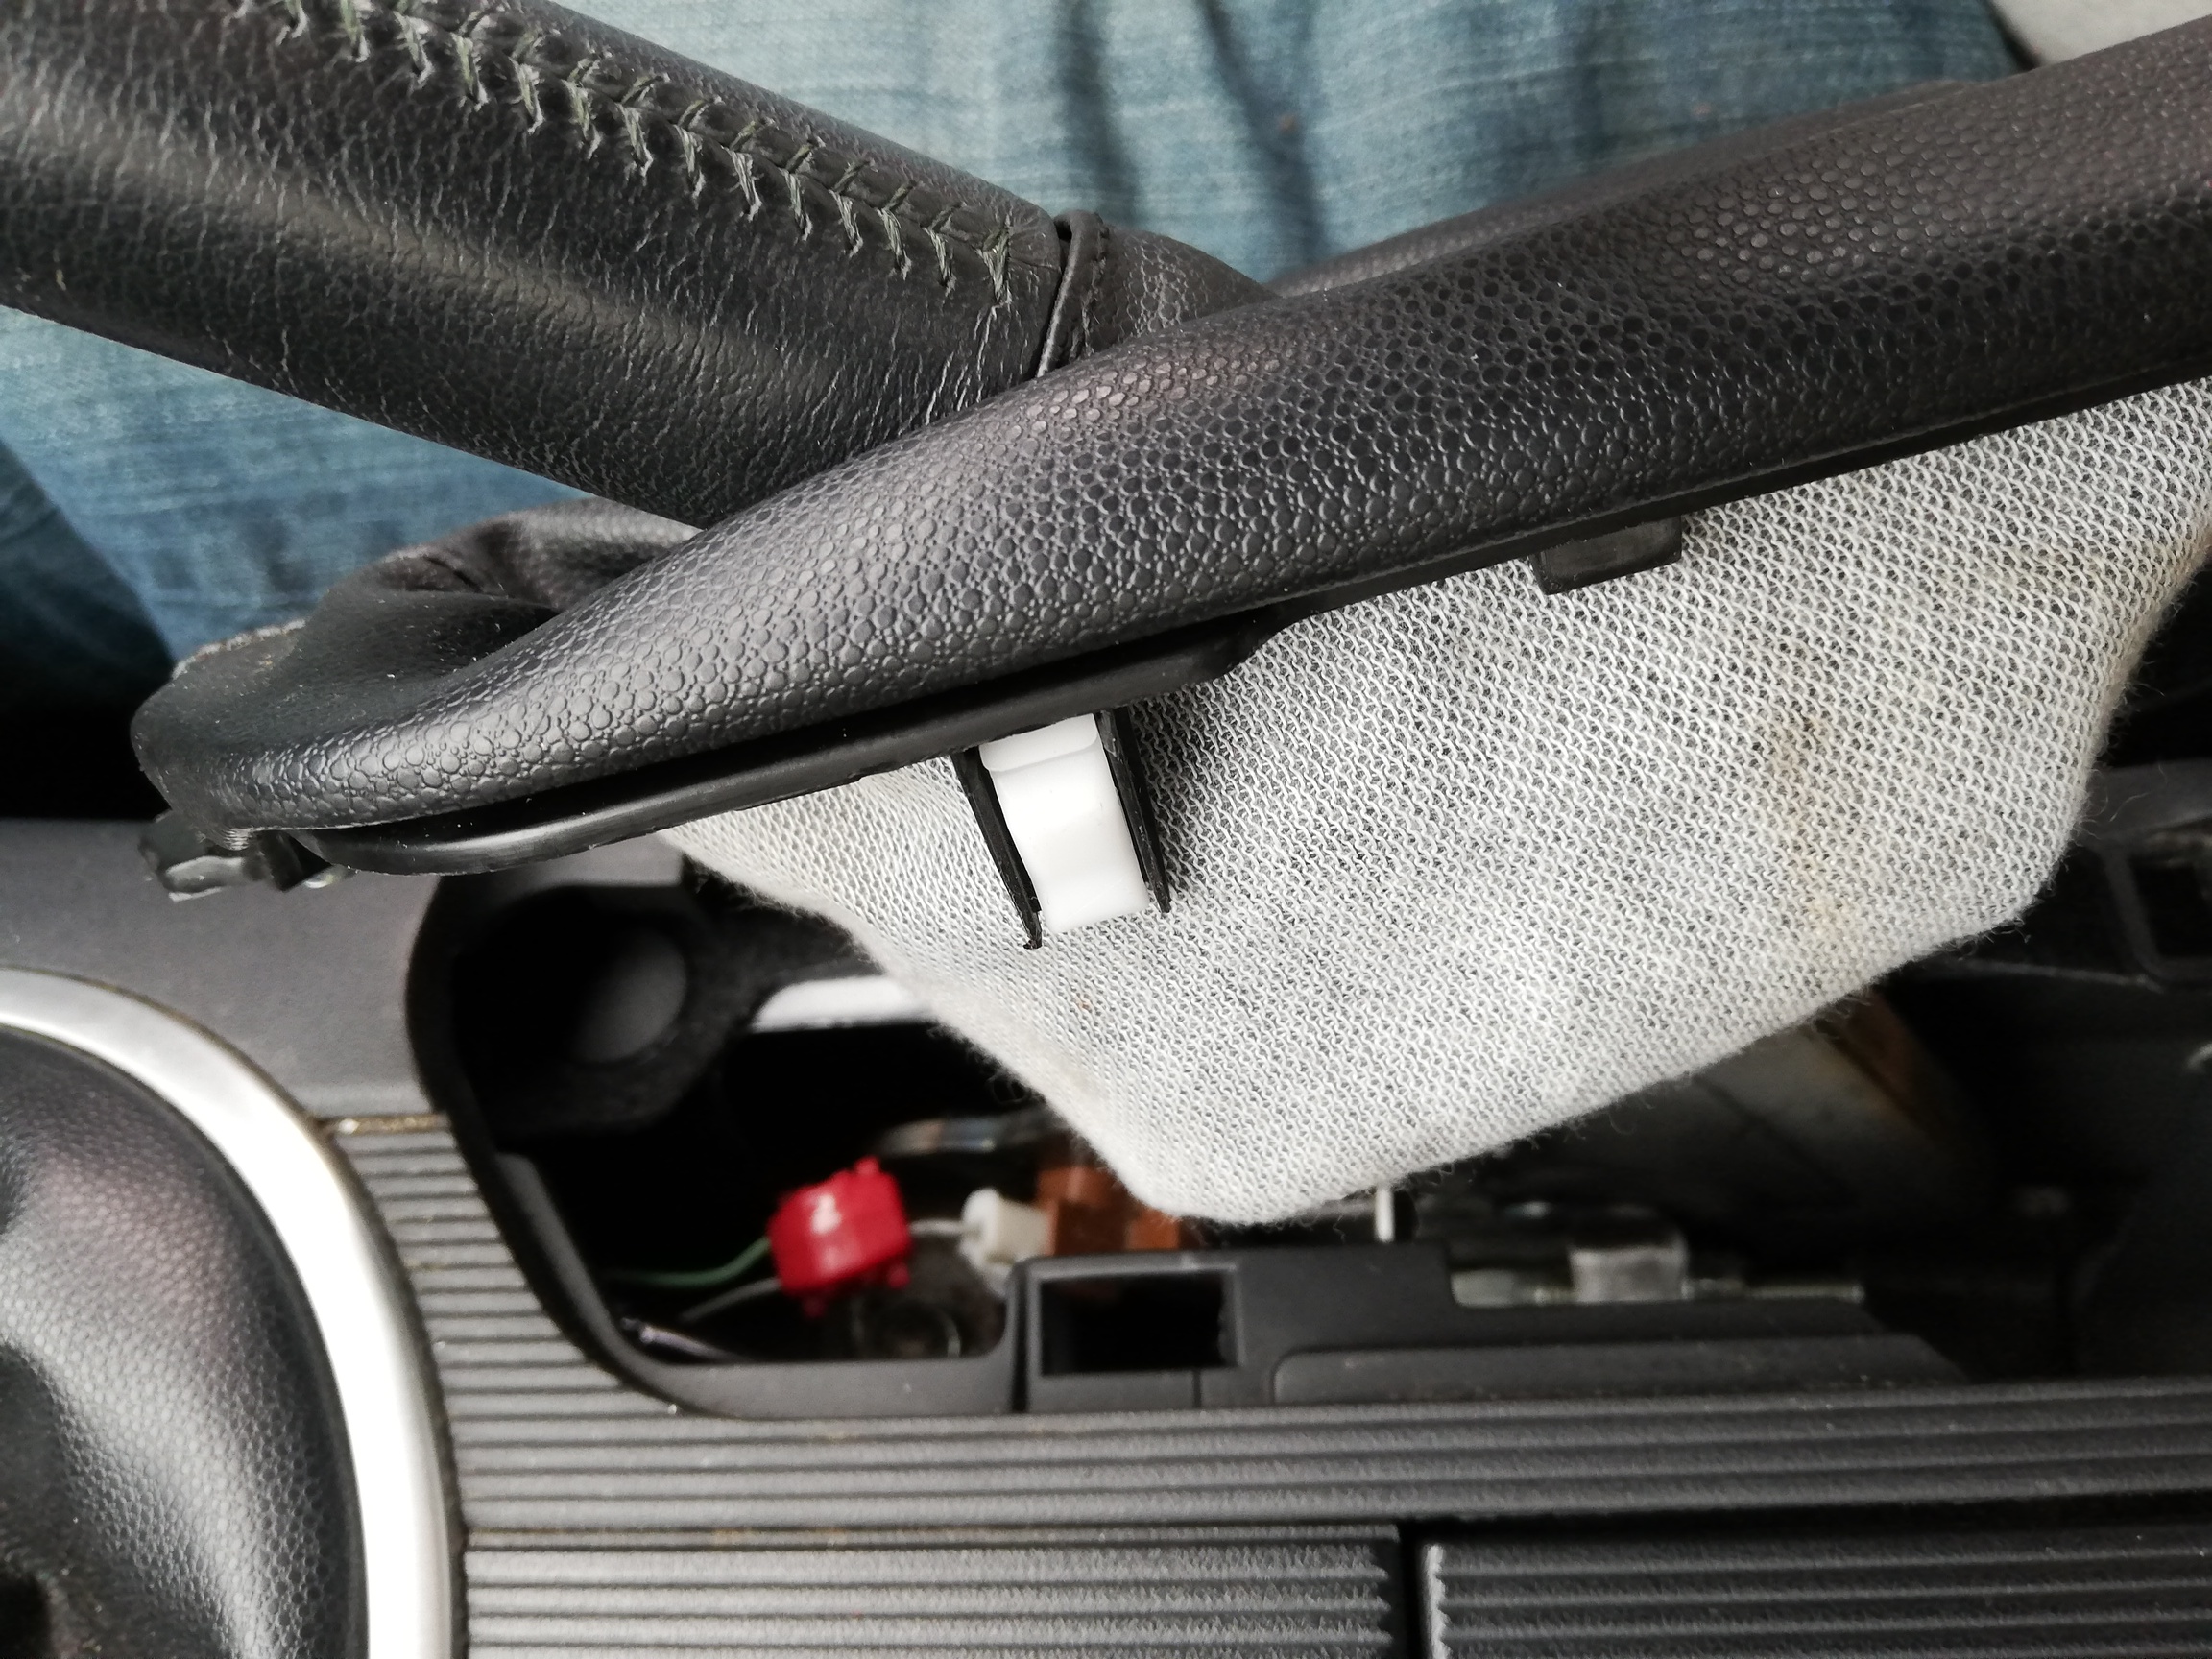
Pull the cover off the handbrake, there are clips on the inside edge, use your fingers to pull them free. Do not pull the front up as it has a locating tab that is only released by moving the whole floppy cover rearwards when the clips have been released. You can then pull the whole cover off the handbrake. The first couple of times I simply wiggled the cover though the opening in the released console, and left it in place - but it is much easier to remove it completely before removing and refitting the console.

Unscrew the gear nob and remove. Simply twist anticlockwise and it comes off.

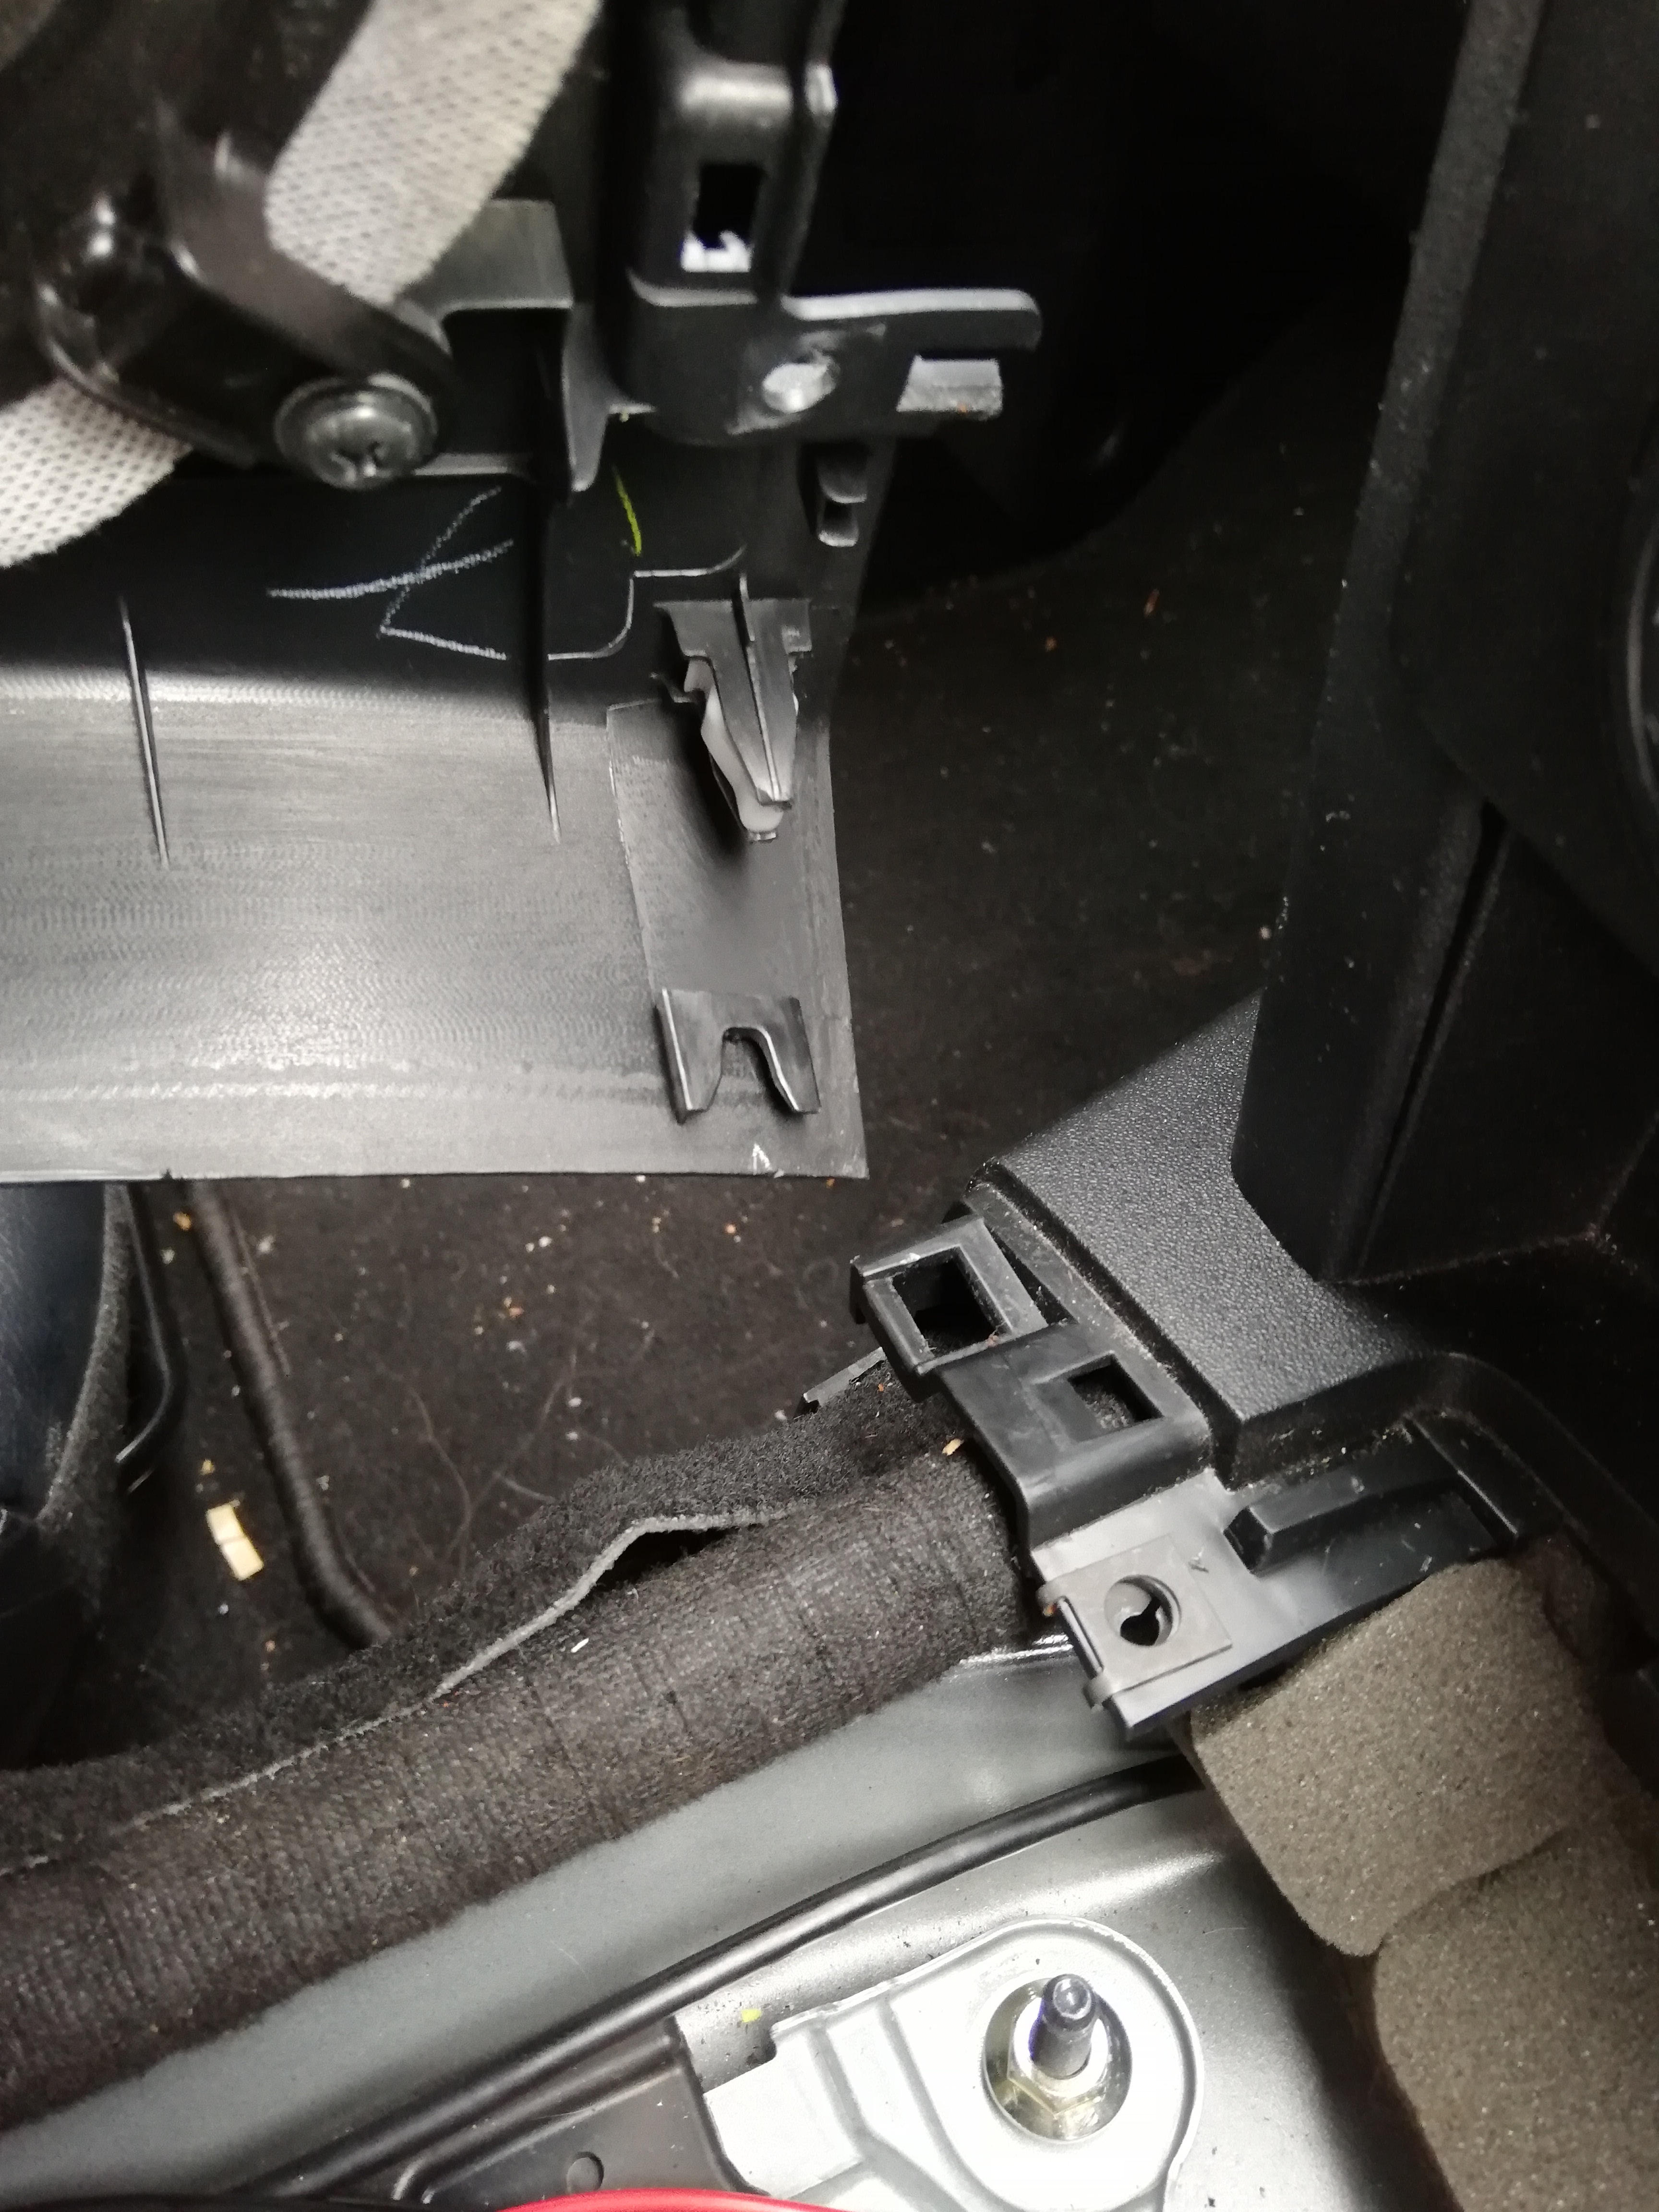
The console is now only held in place by two clips at the front, the picture below shows the open console so you can see the clips. Pull the whole of the front straight upward using your hands on each side of the transmission tunnel.

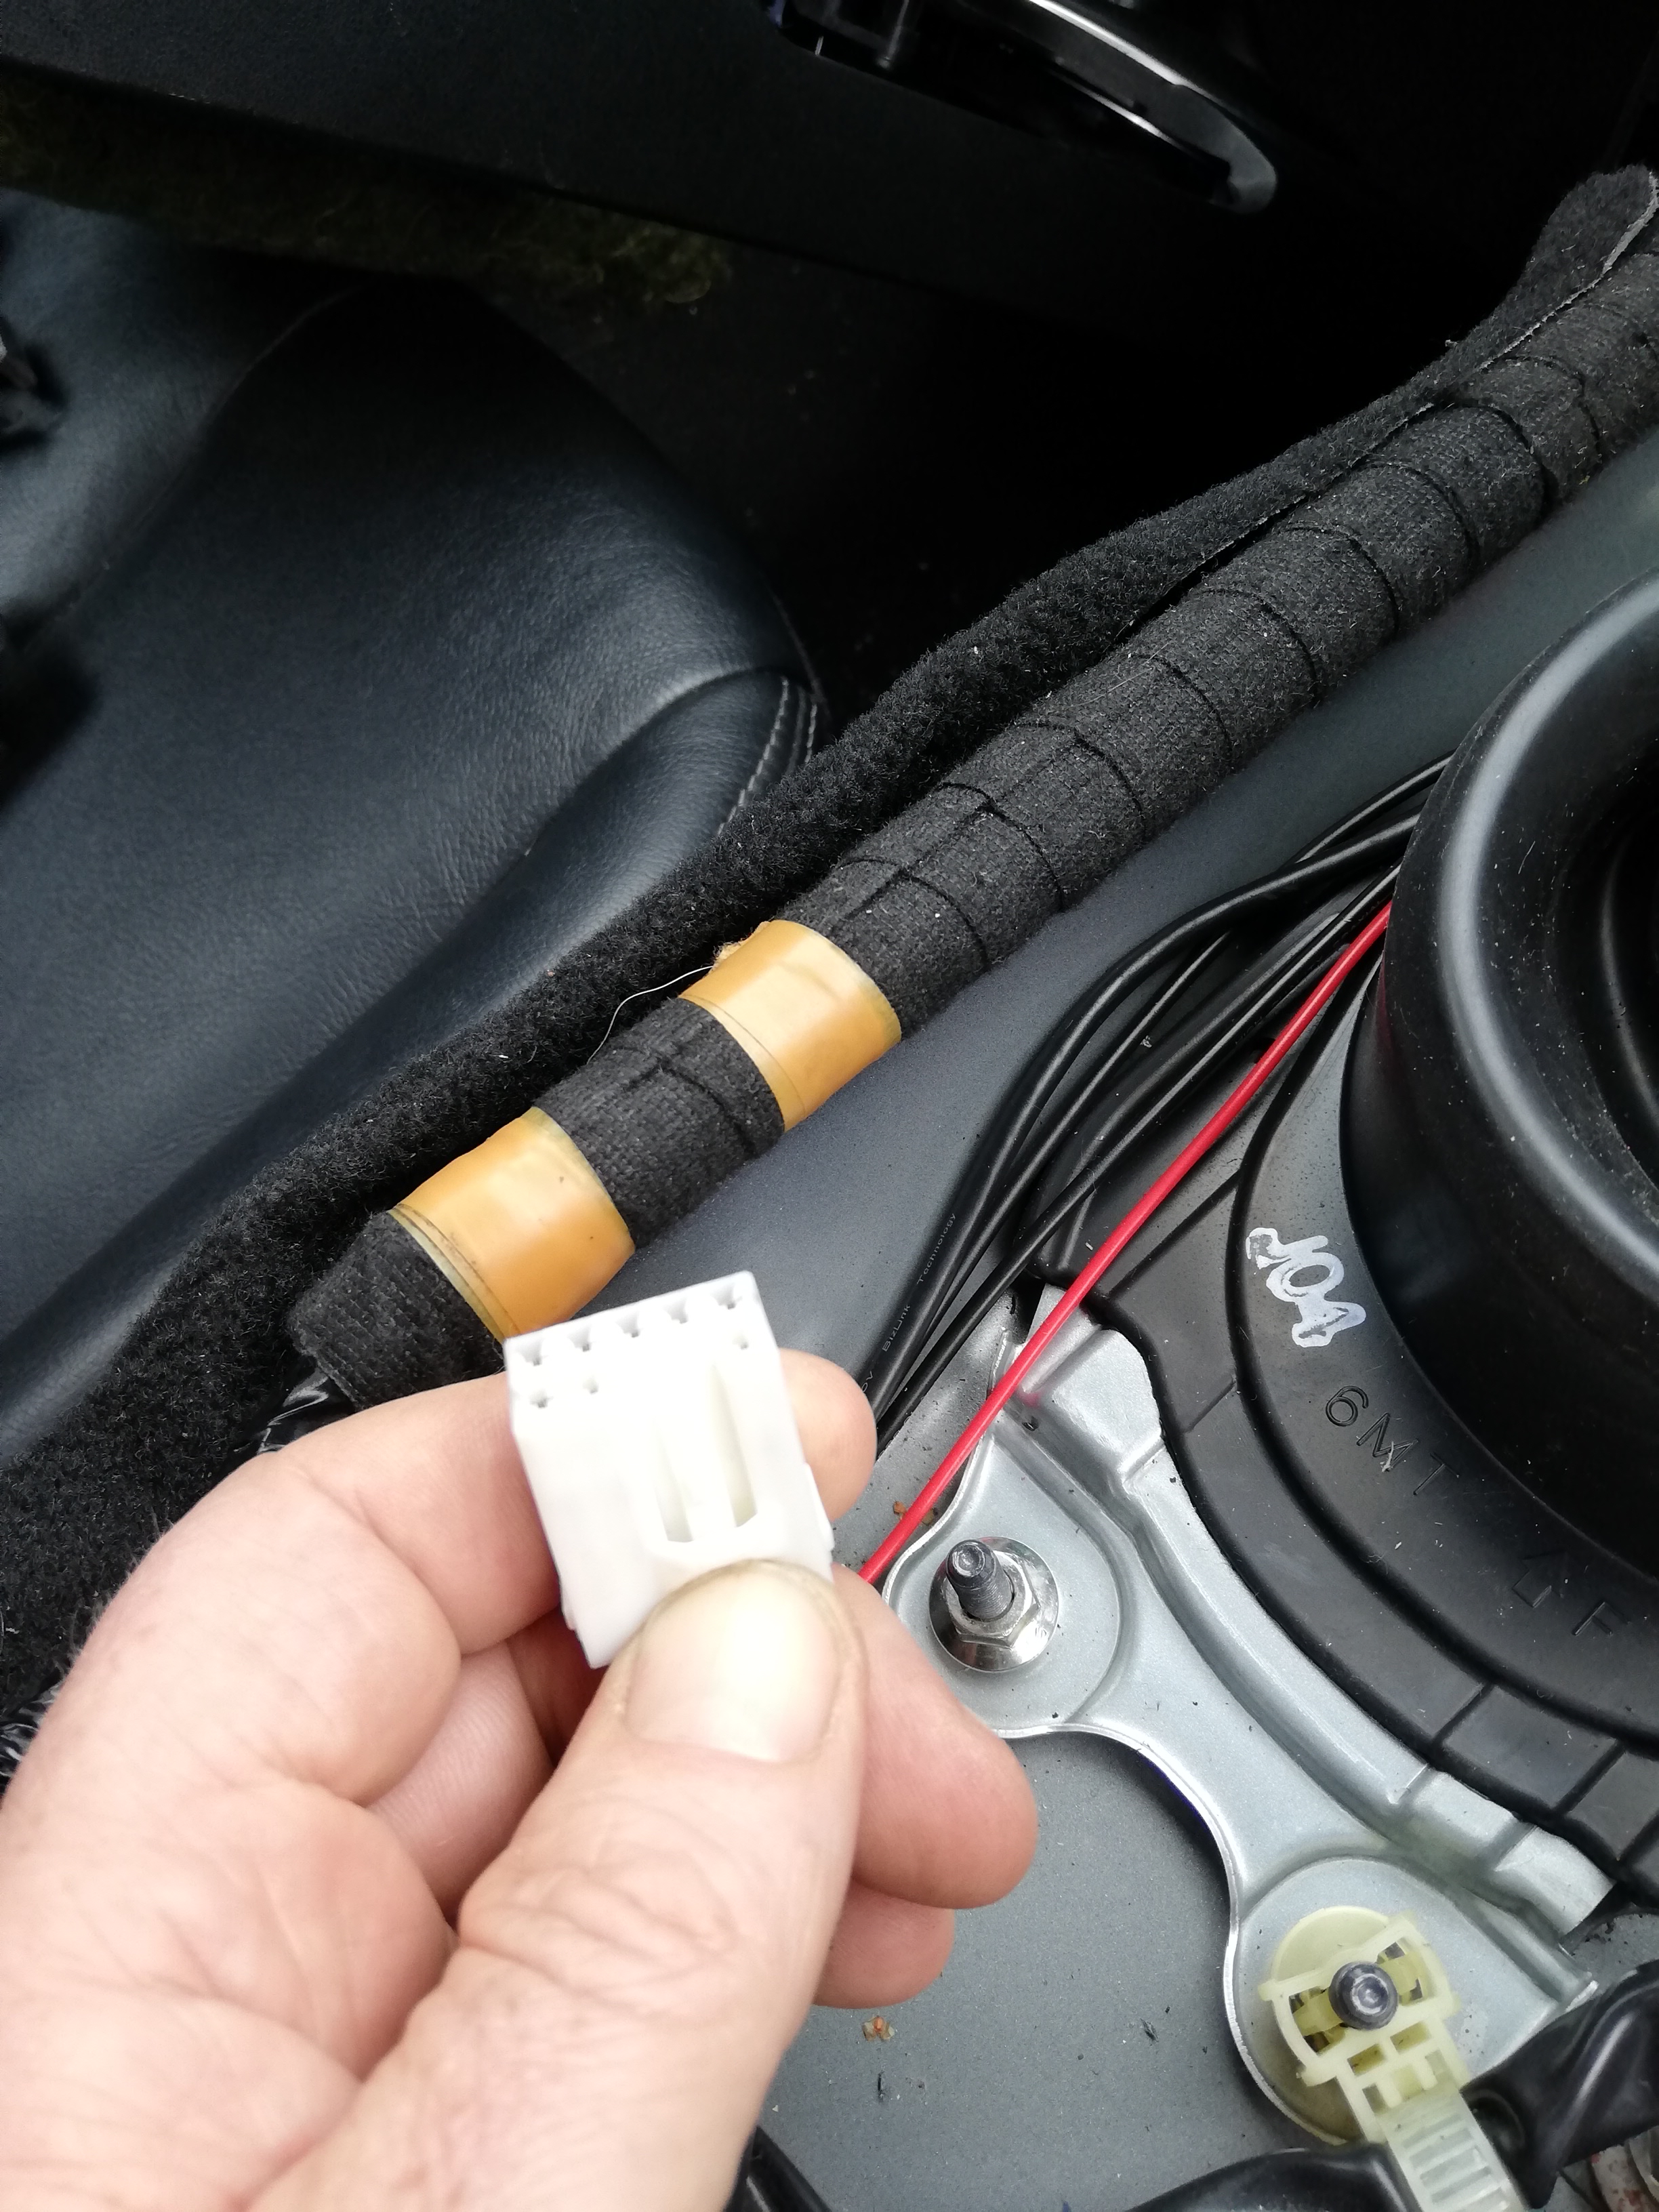
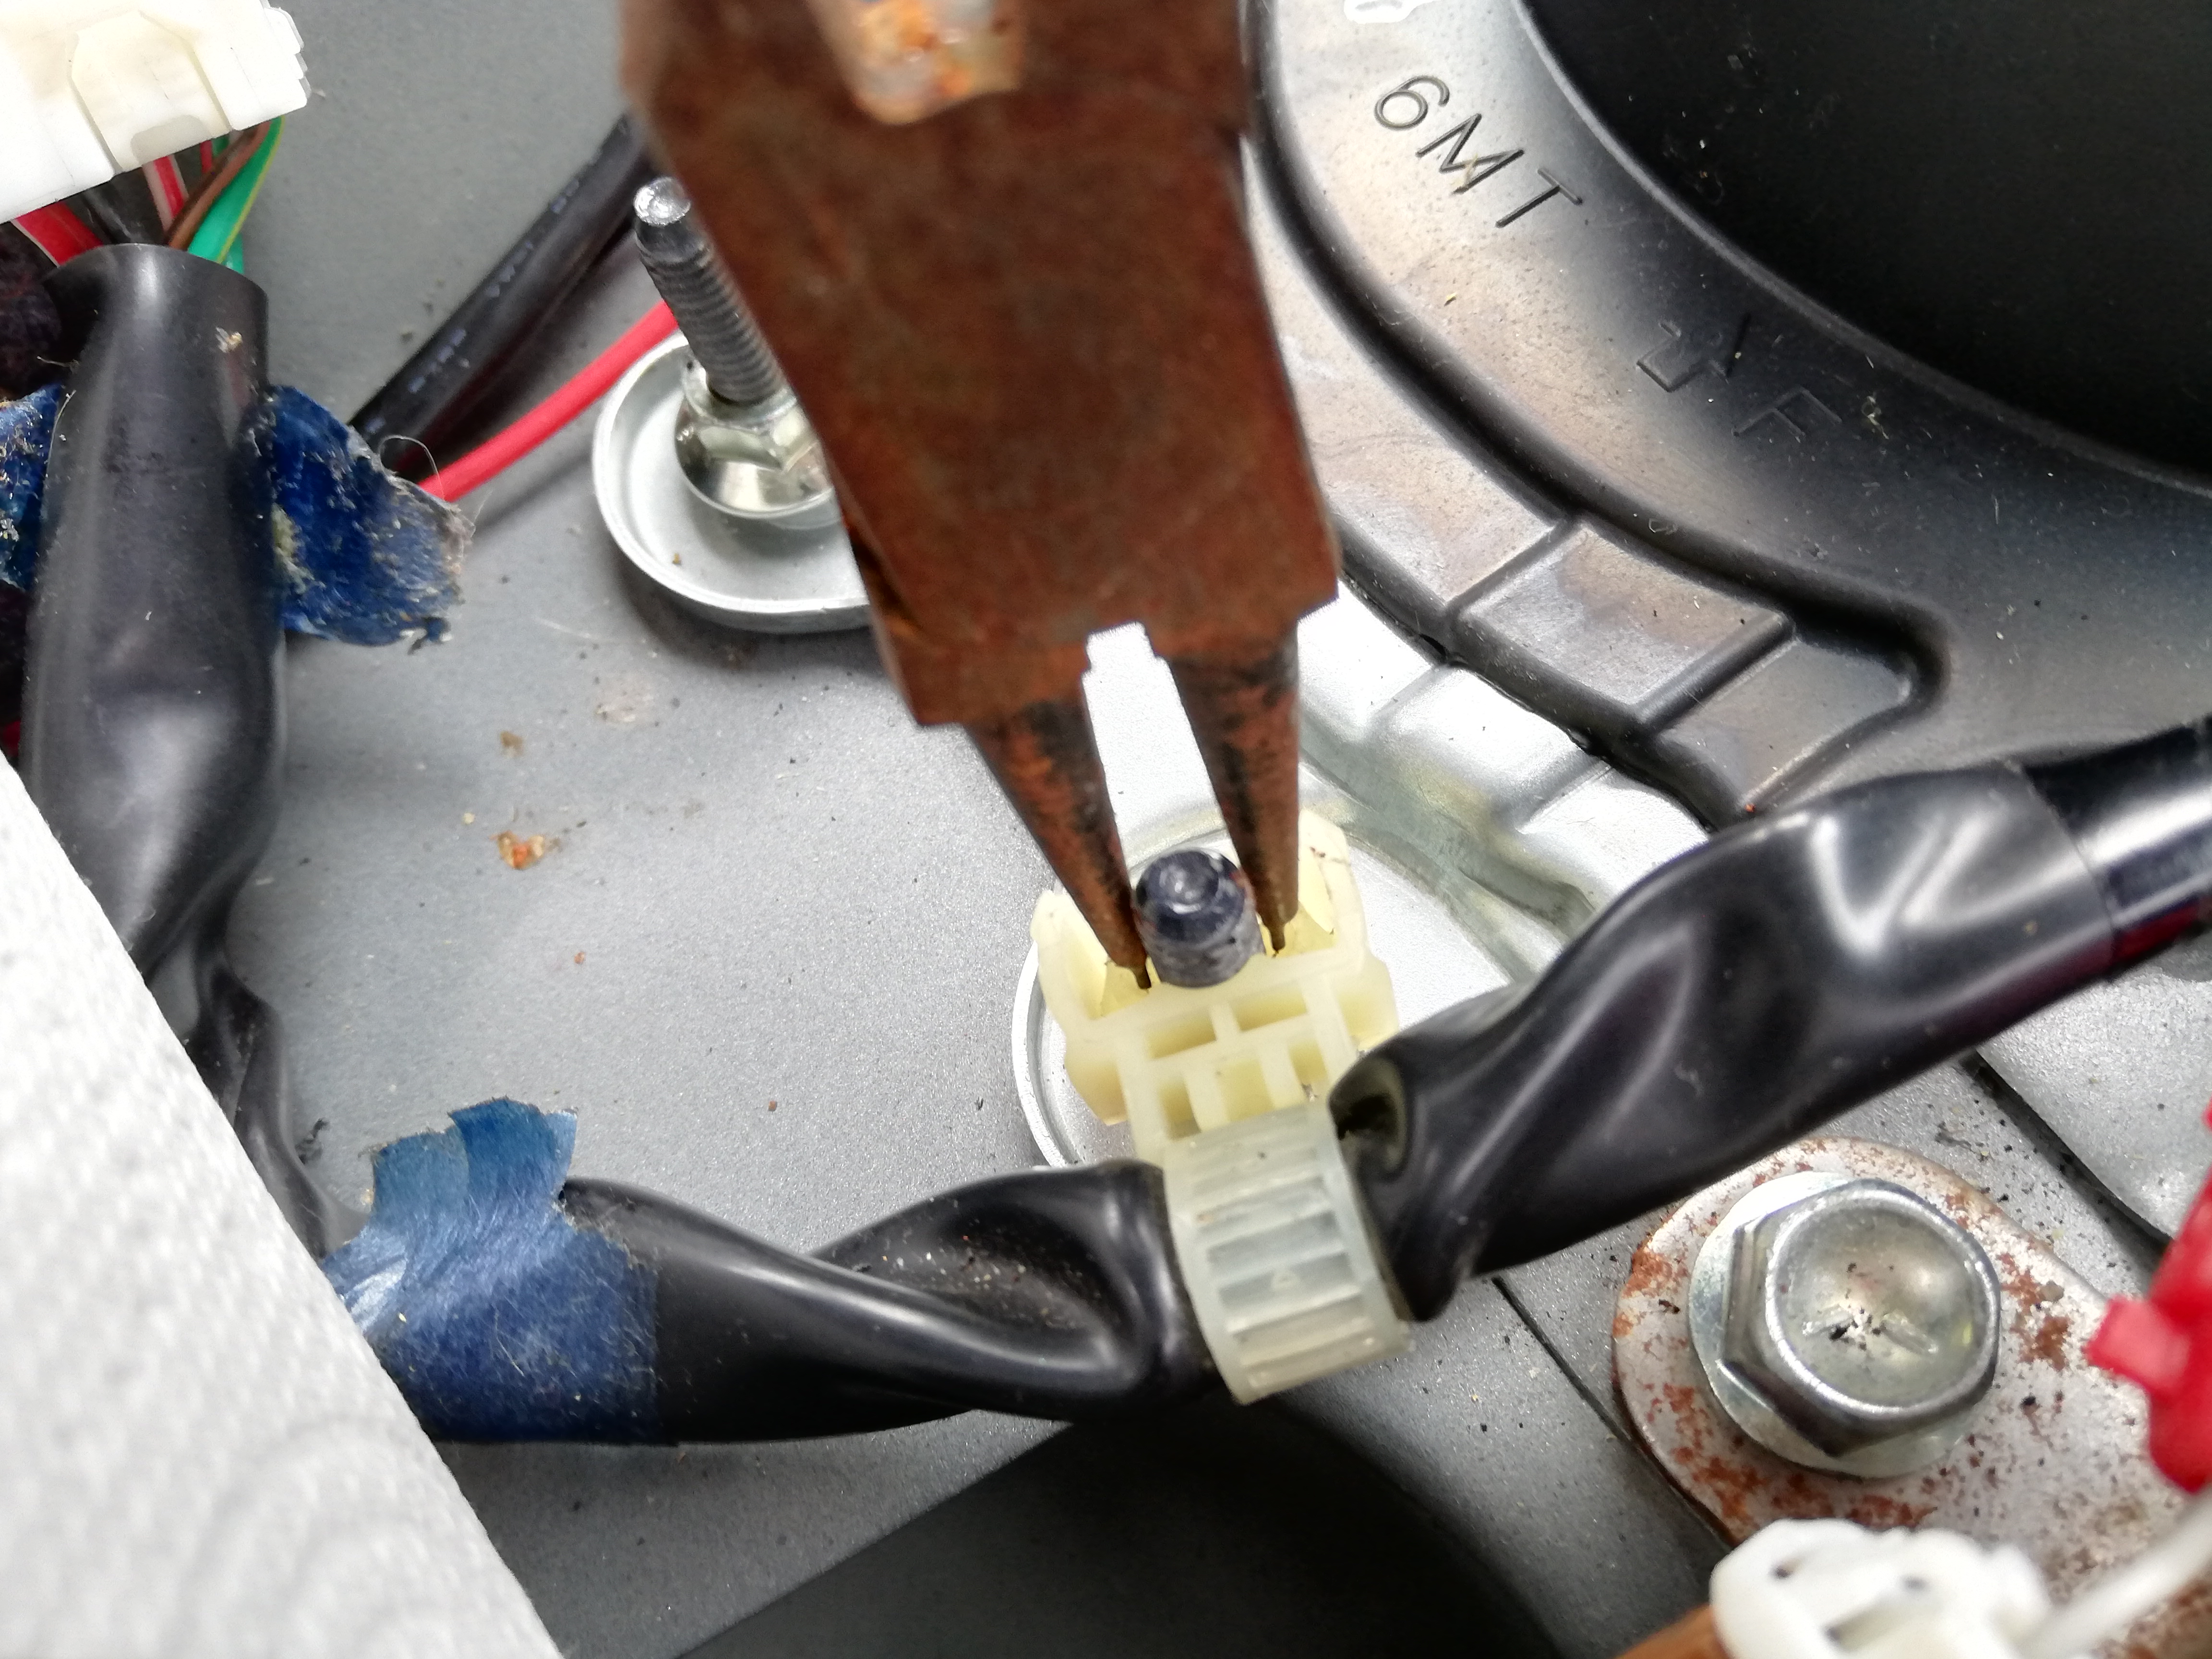
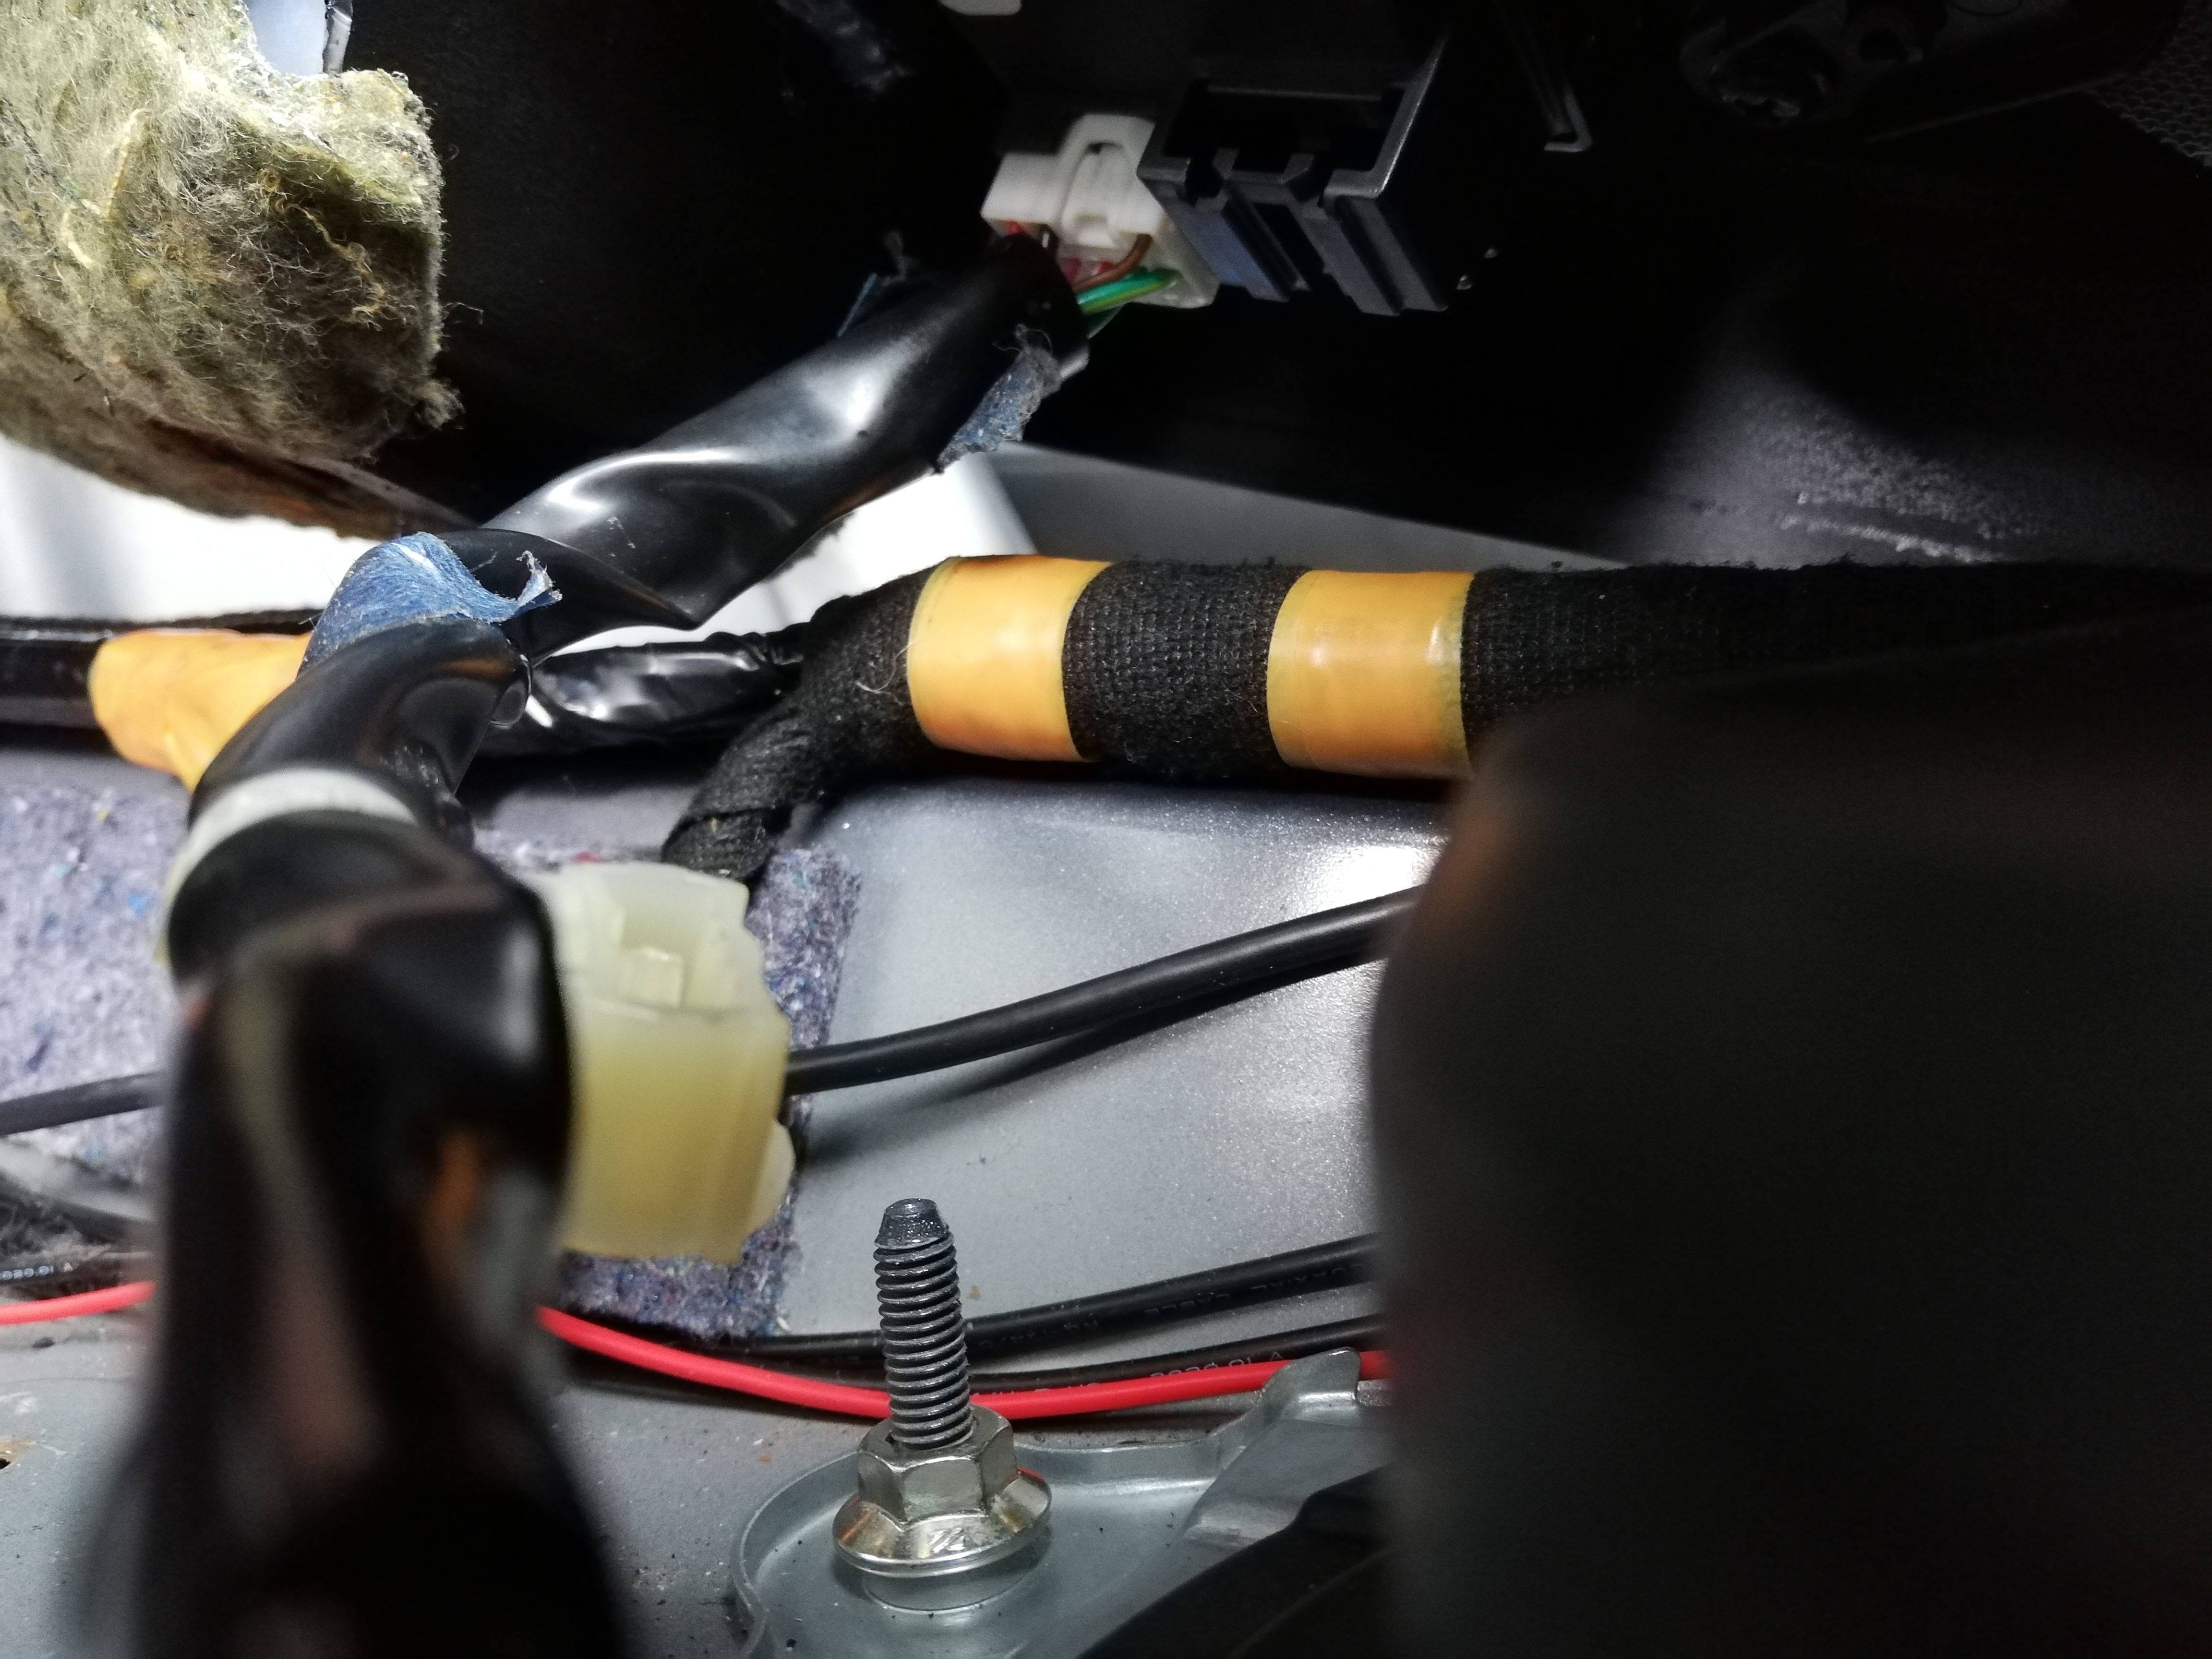
Don’t yank it off yet - the electric window switches are on an awkward little connector that you need to push the clip on in the right place to release. Squeeze the clip and pull the connector downwards and it slips off. The picture below shows the connector removed, and you can see the clip about two thirds of the way along the edge towards the front.

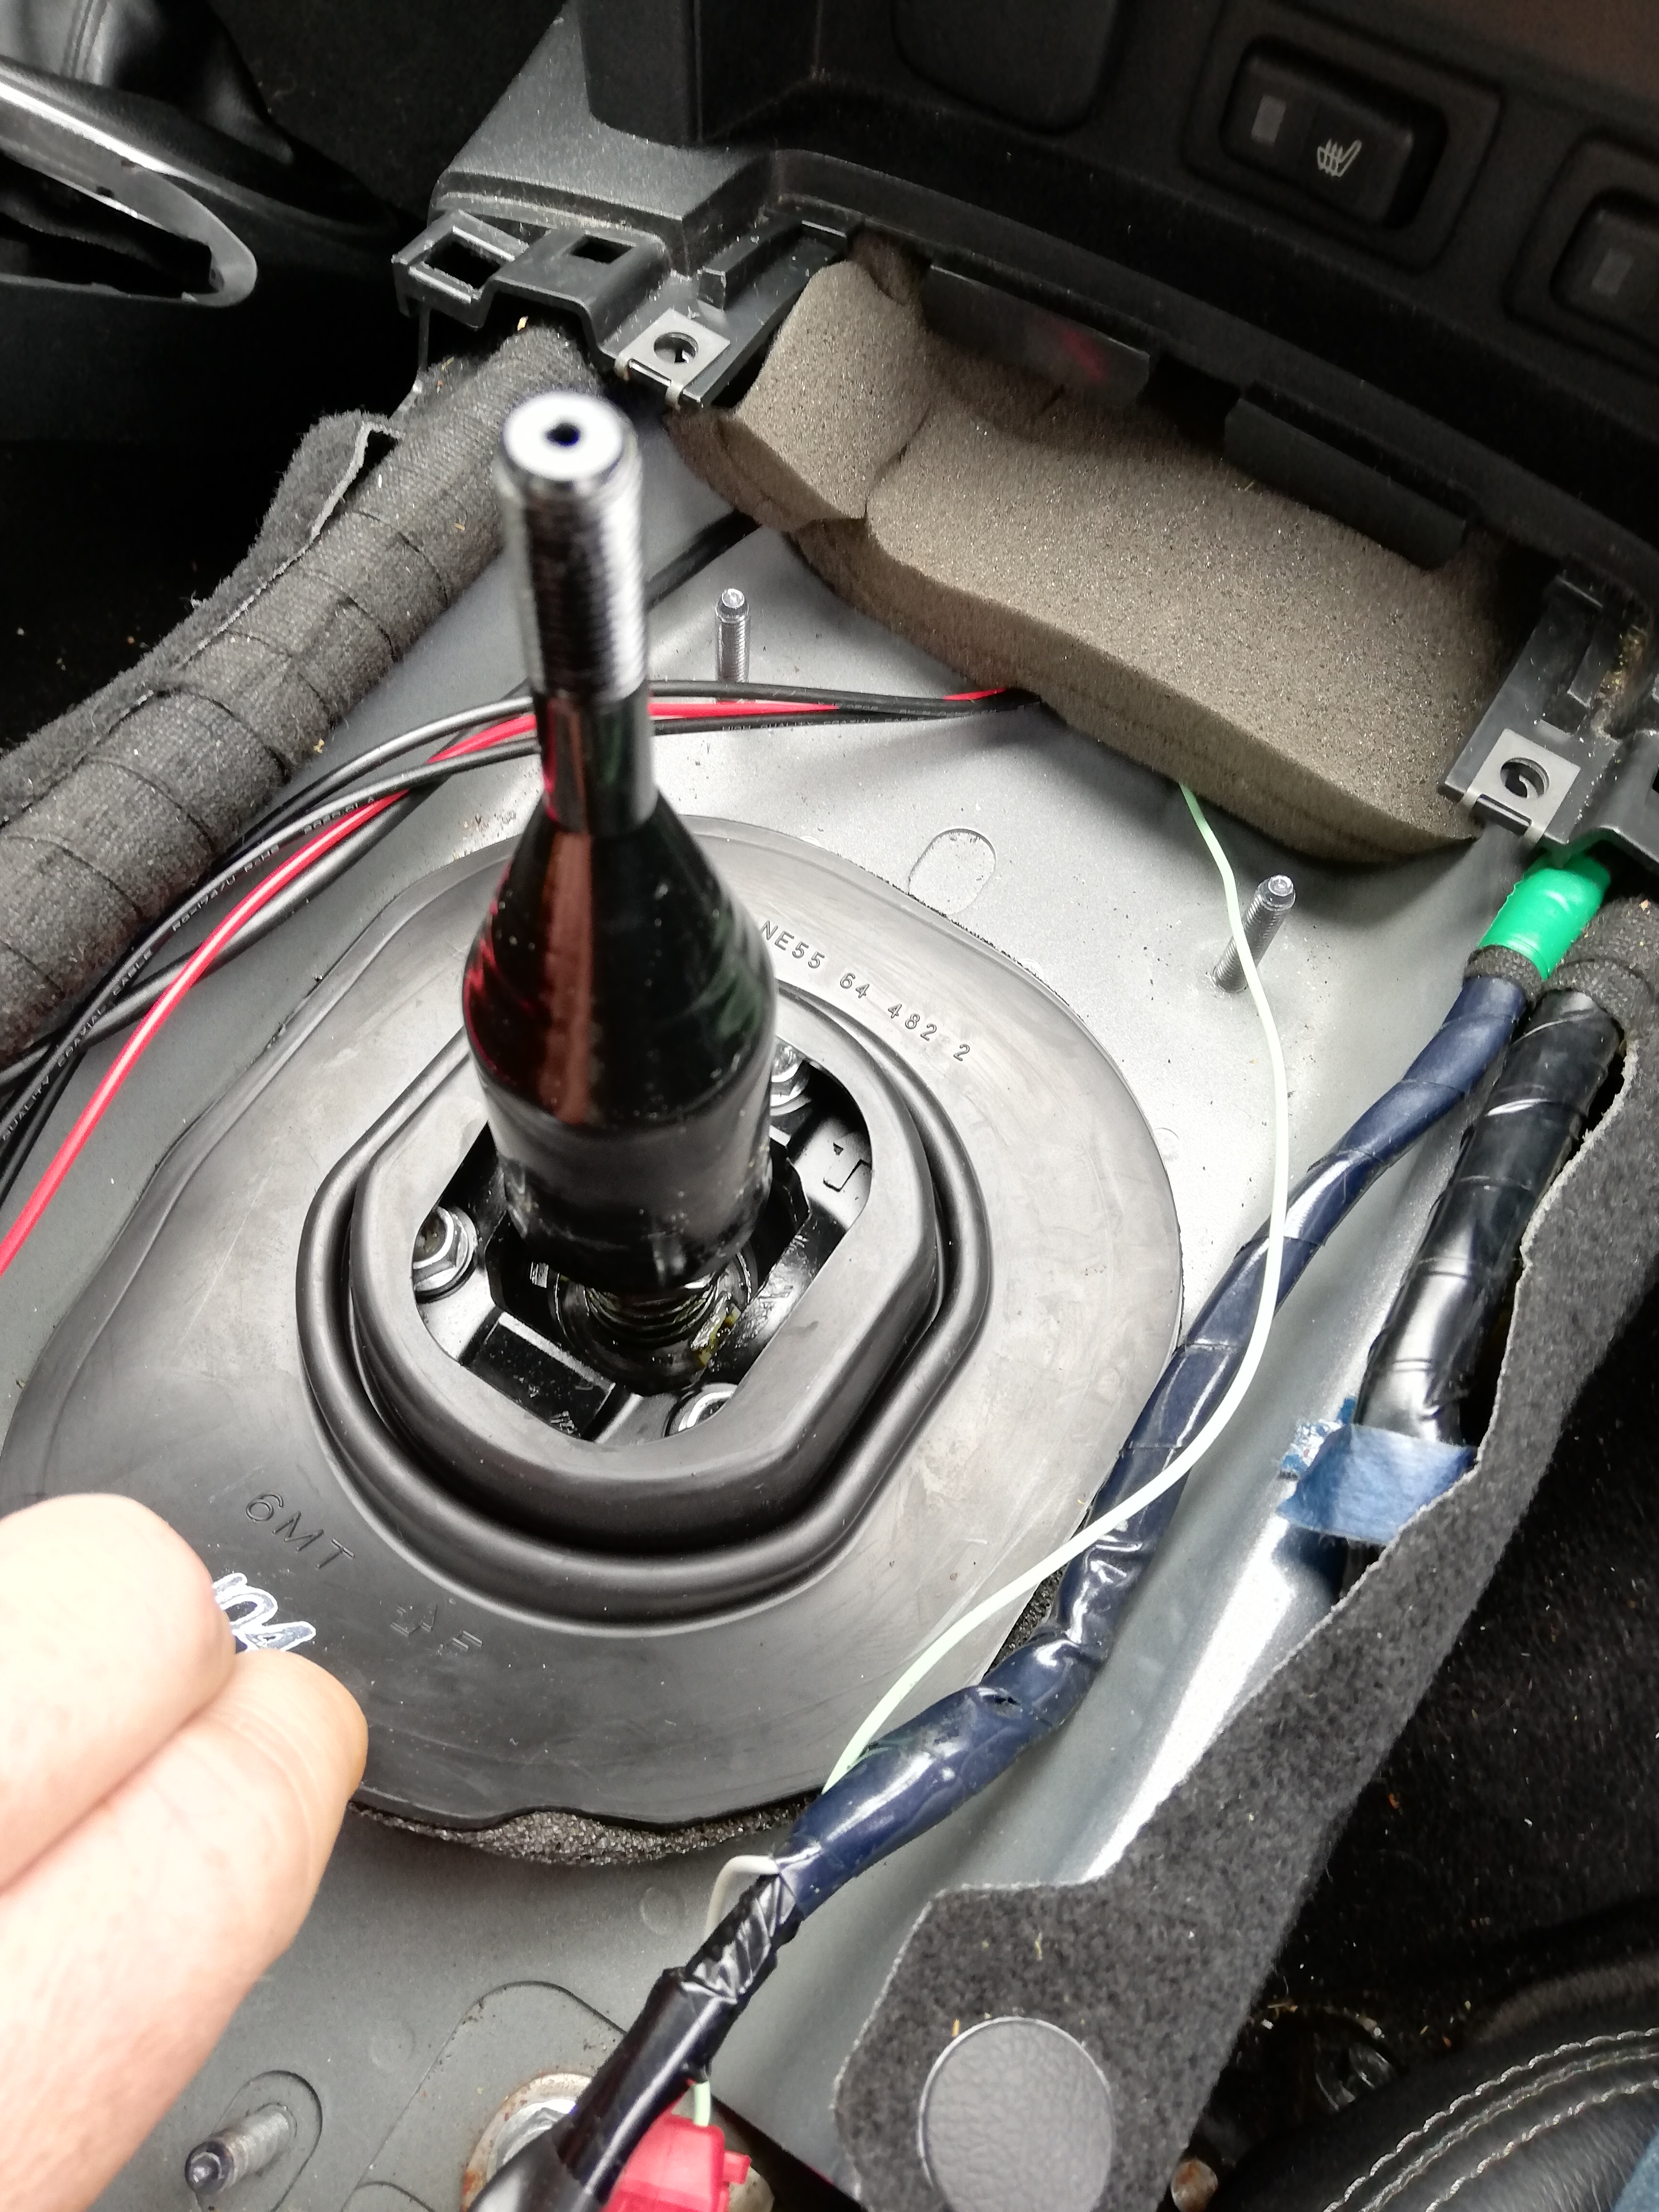
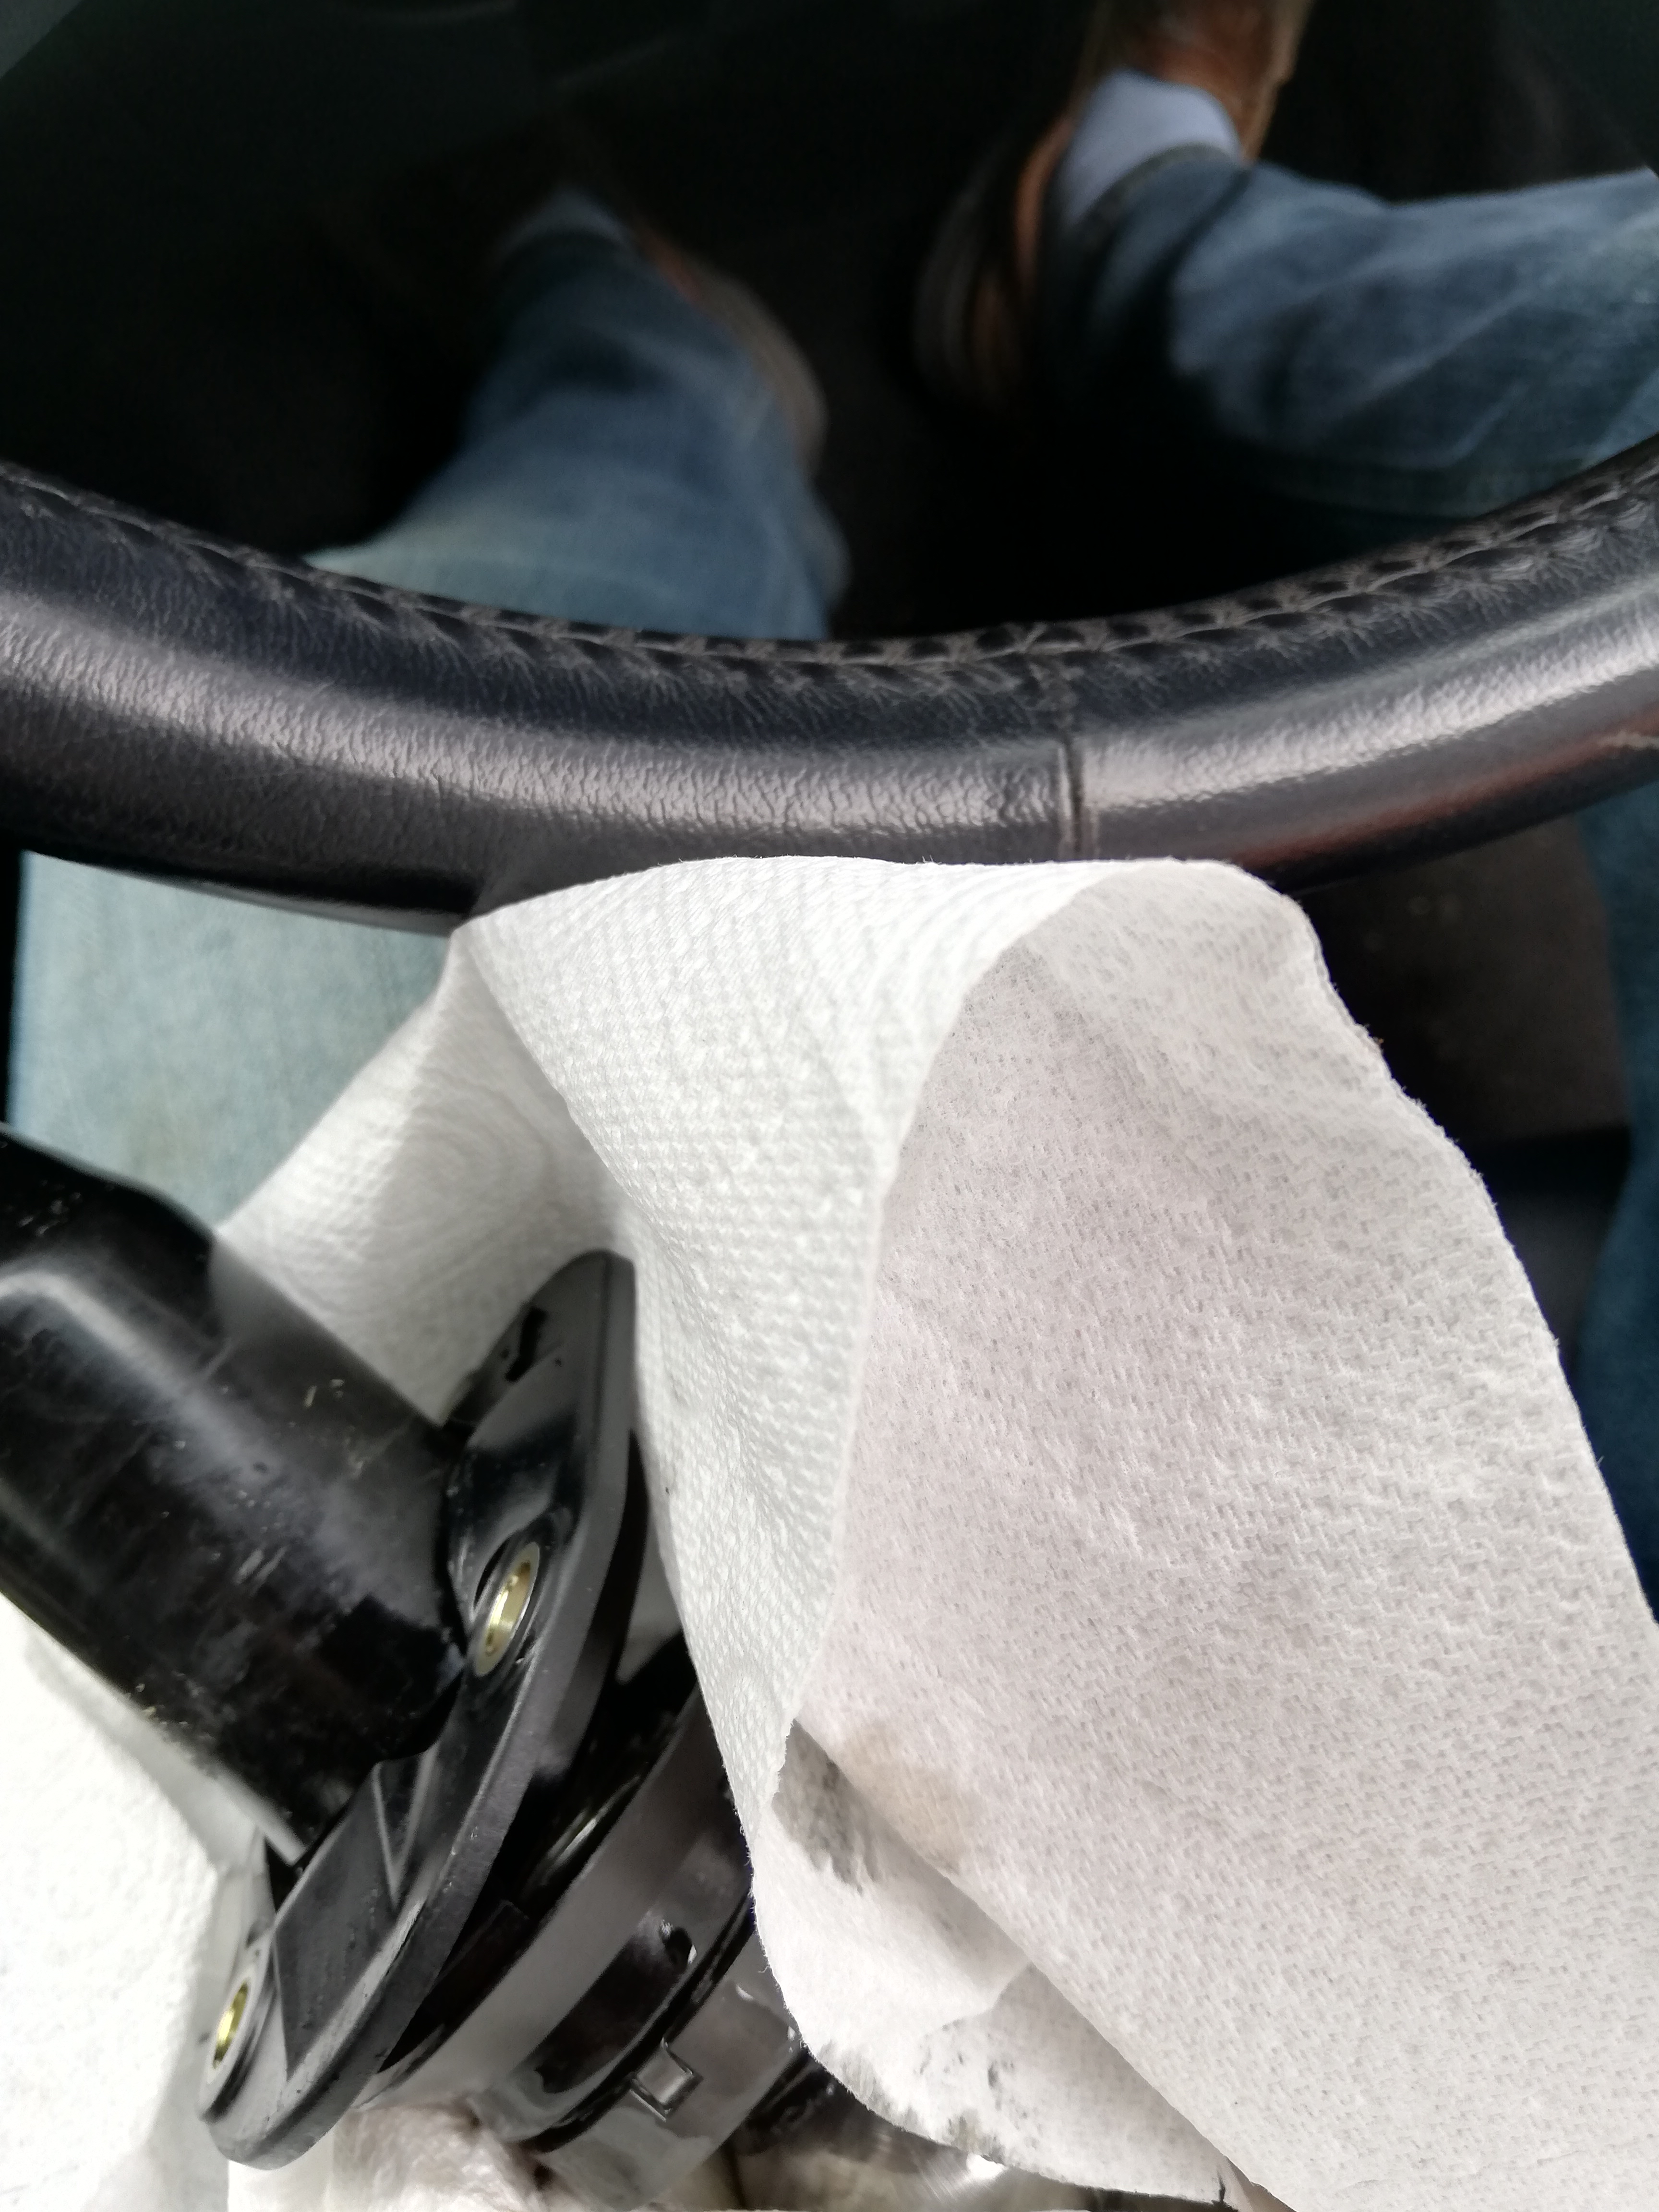
Now you can see the gear lever and its surrounding gator. Remove the small foam cylinder from the gear lever, and remove the cable tidy clip form the rear right gator bolt. I fount the best way to do this is with a pair of cir-clip pliers that can open the internal tangs that grip the threads.

Pull the centre of the gator up and off the top of the the fat bit on the gear lever, some lubricant may help this. The first time I did this, I was changing the gator as it was split, and the top was pretty much glued to the gear lever after 15 years of use. As I had a new one, I simply cut the thing off. If yours has never been touched, might be worth checking if there are splits, and if so get a new one. Cost about £35 from MX5PARTs for either a genuine Mazda or a pattern one is a couple of pounds cheaper. There are two rubbers, the large outer one you can see at this point, and a smaller internal one under the outer one. Both come together in the kit from MX5PARTs.

Undo the four nuts - easy with a 10mm deep socket, and lift the gator off to expose the inner gator - the inner one just peels off. If has a foam seal around its perimeter, and that may have glued itself down if it has never been touched before, so pull gently unless you have a new one ready to go in.

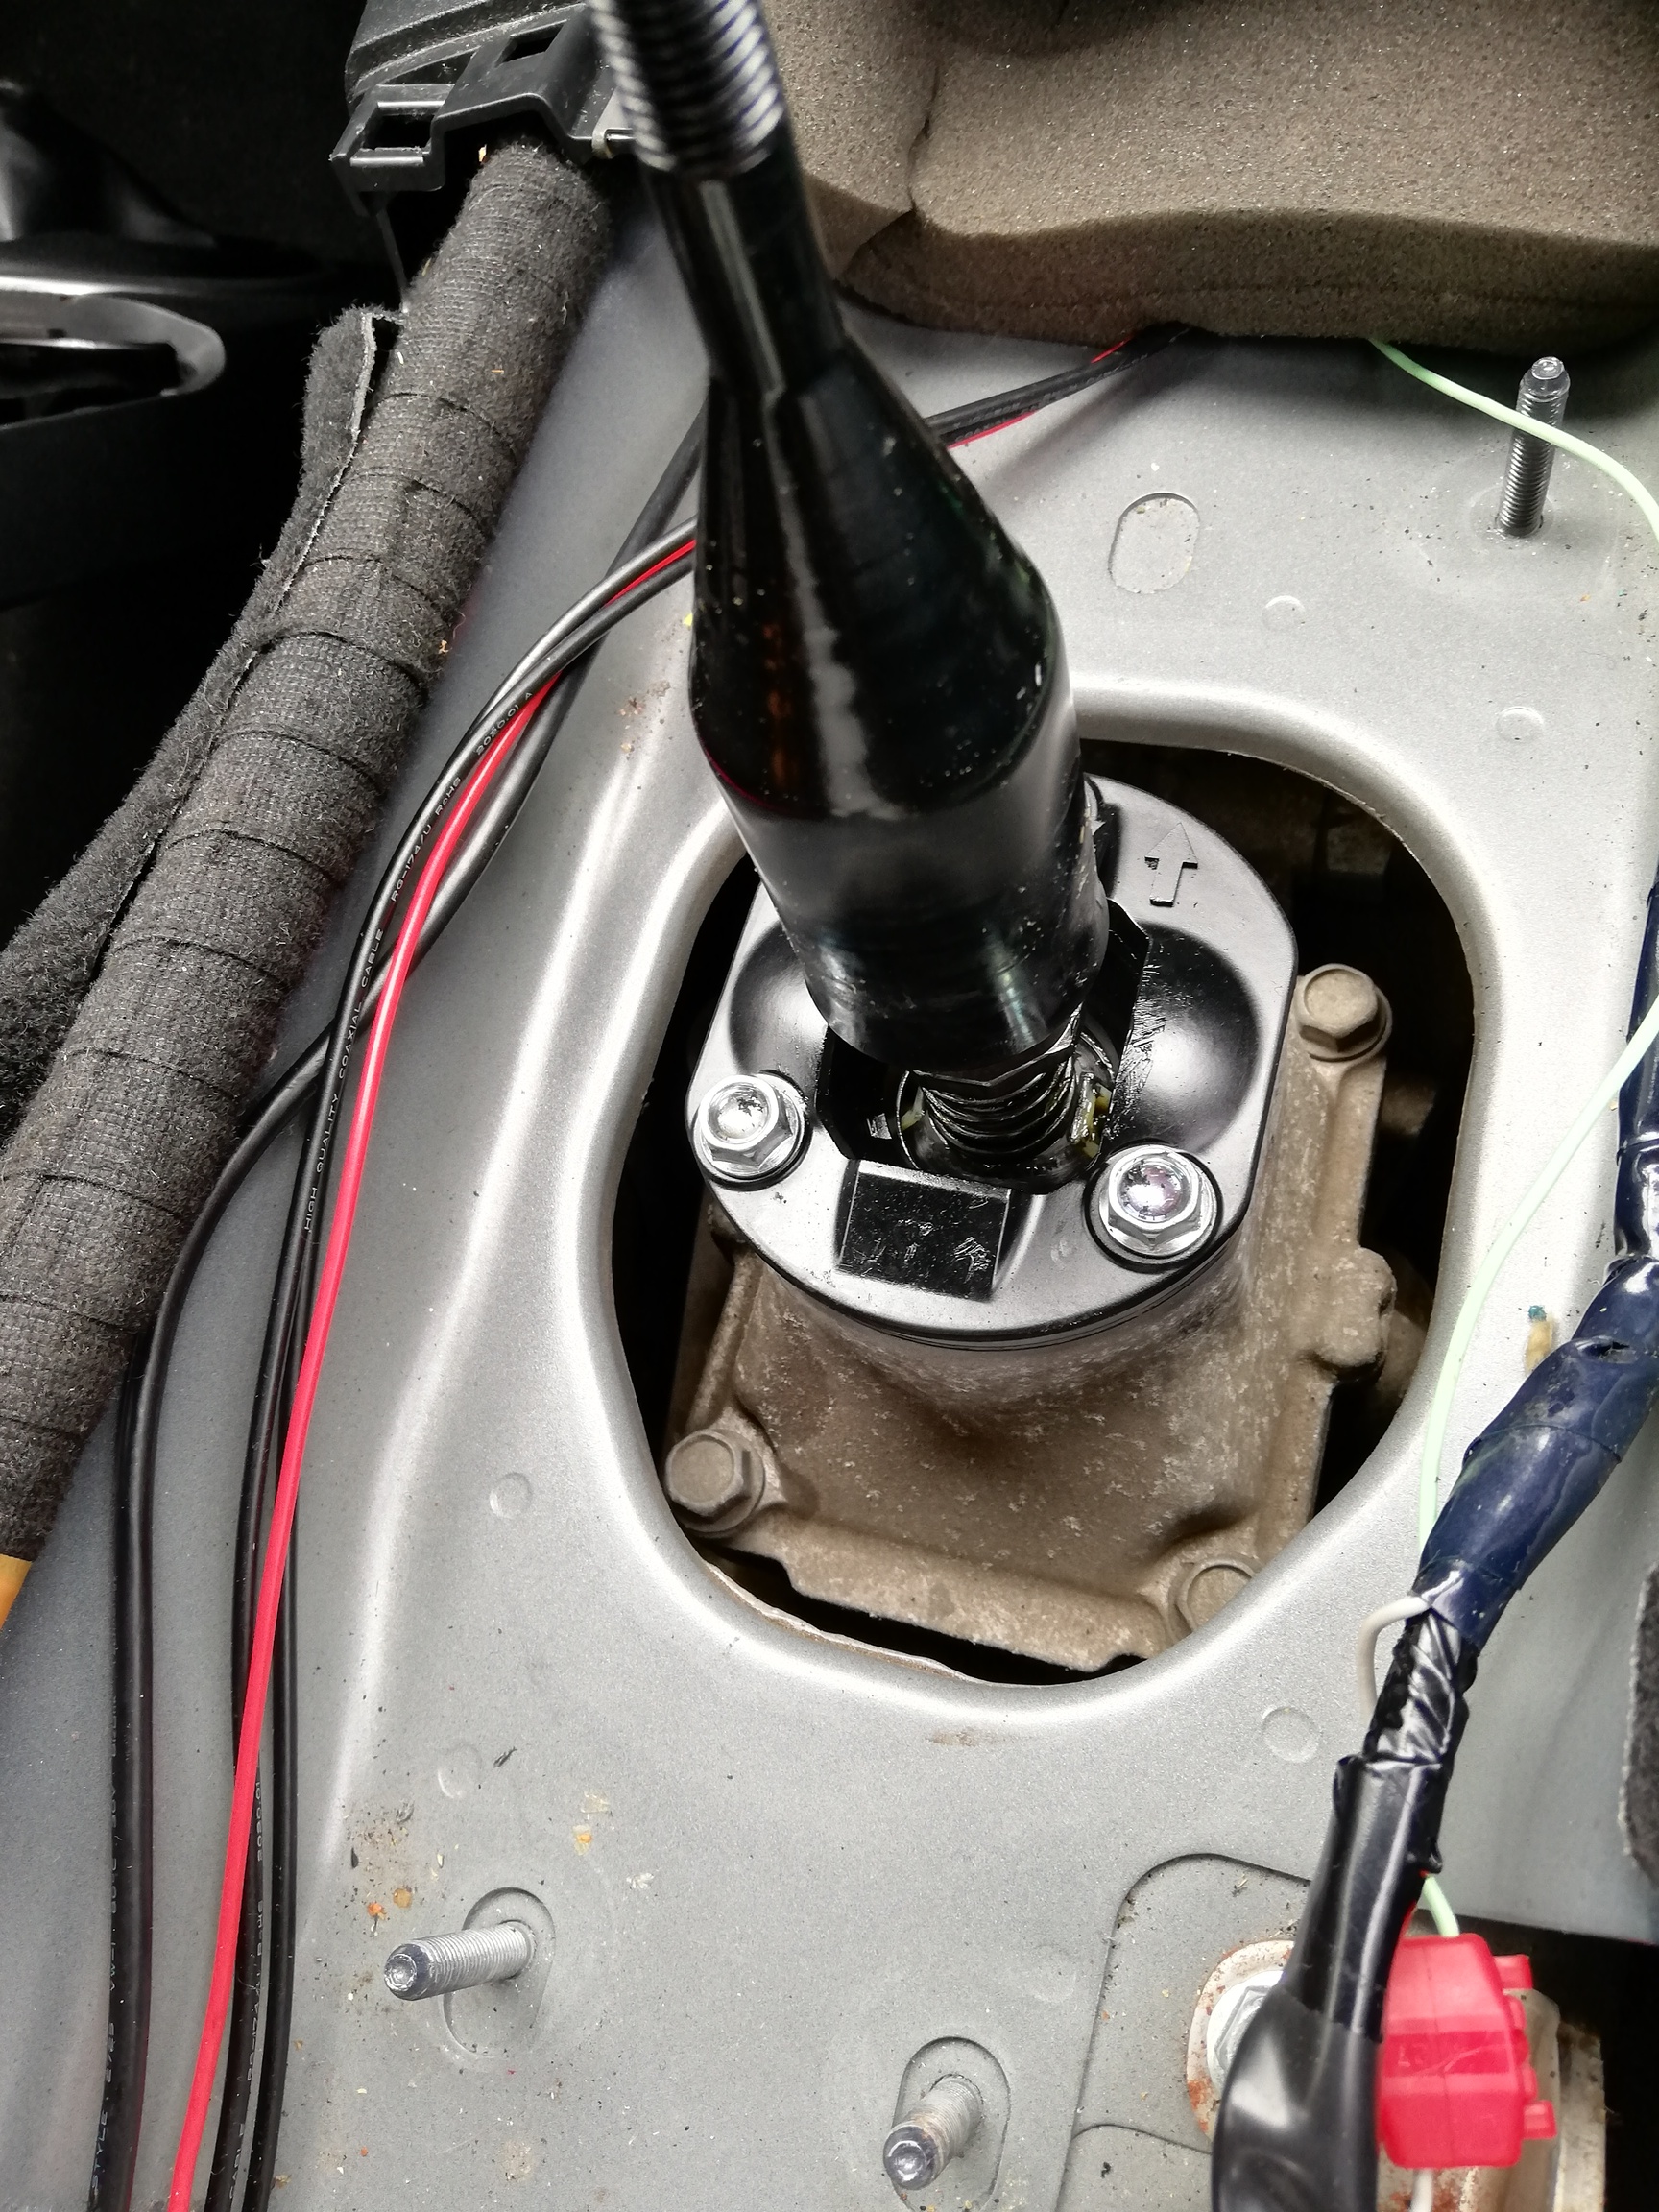
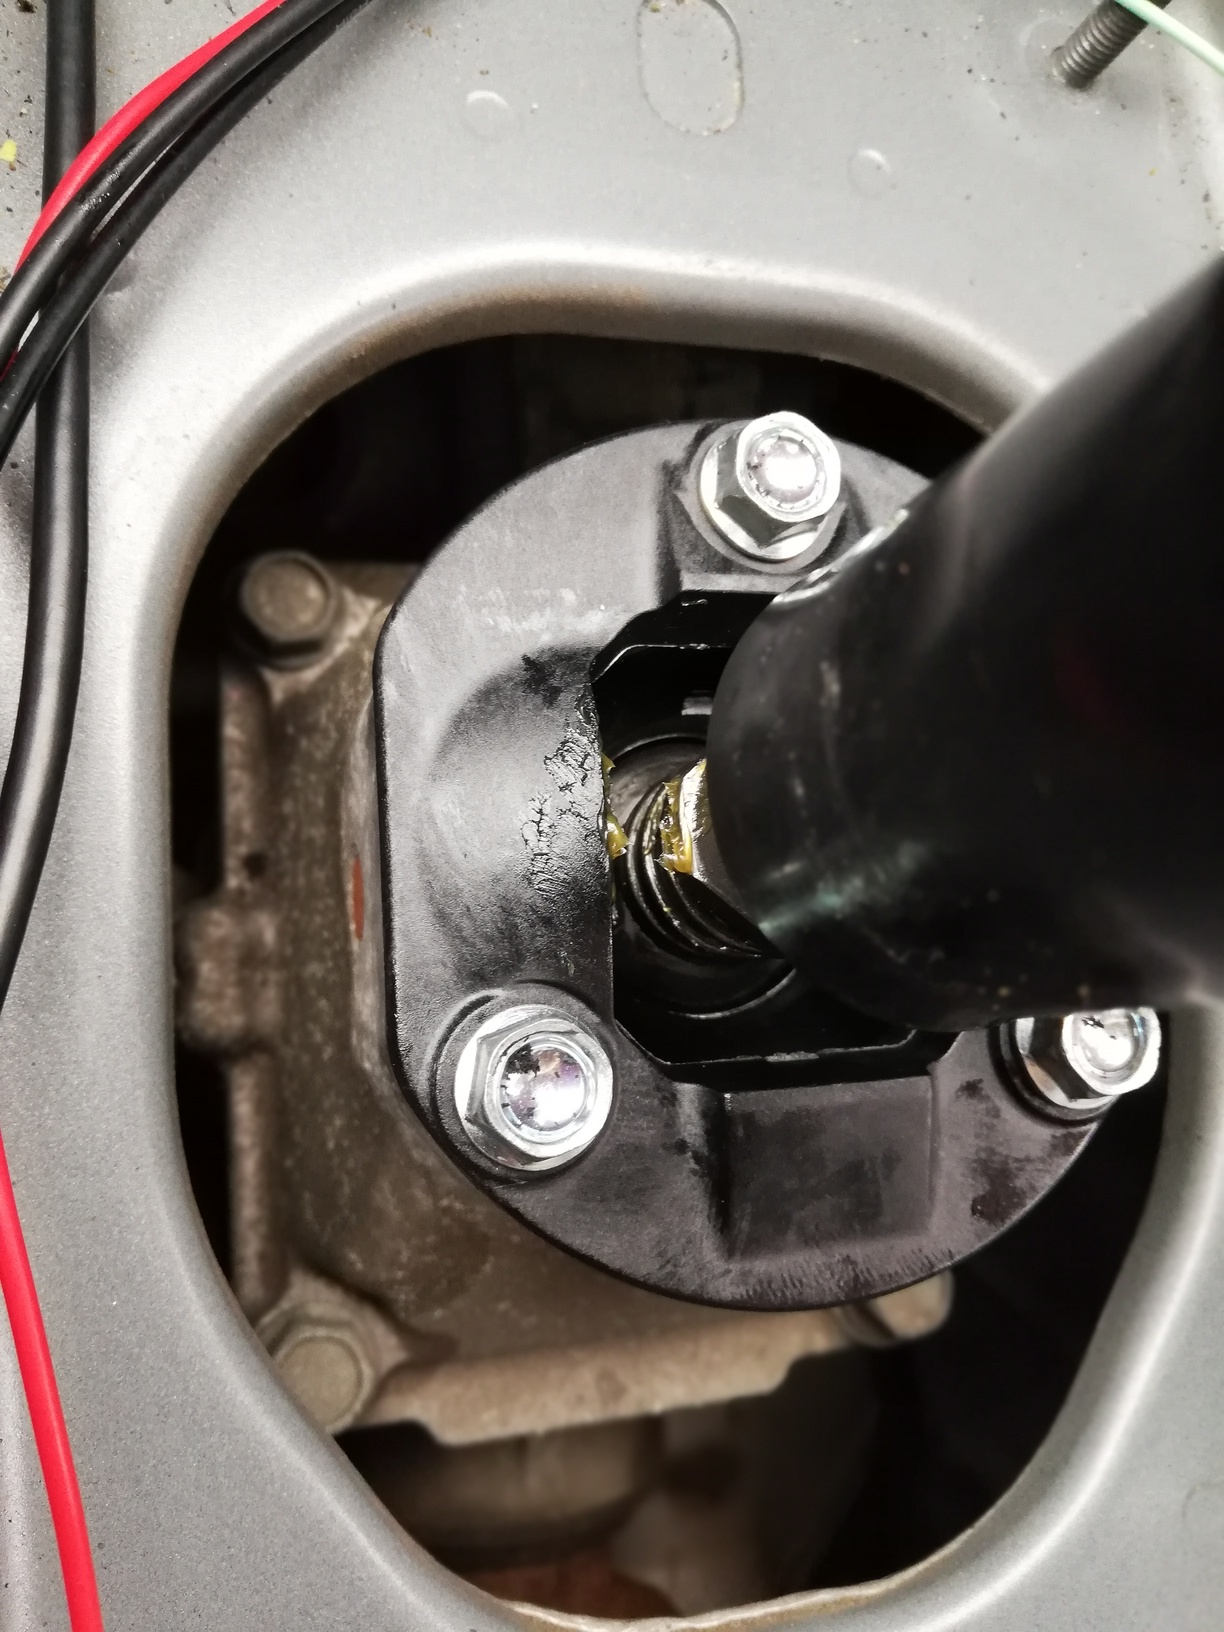
You can now see the plate which is clipped on the rest of the plastic gear lever components, and all held down by three 10mm bolts. Undo the three bolts and the whole gear lever assemble will lift straight up and out. Have paper towels ready to wrap it. You can now see if there is any oil in the turret. If not, pour some in. Mine took about quarter of a pint at a guess to get oil up an into the cup that the bush on the bottom of the lever goes into.

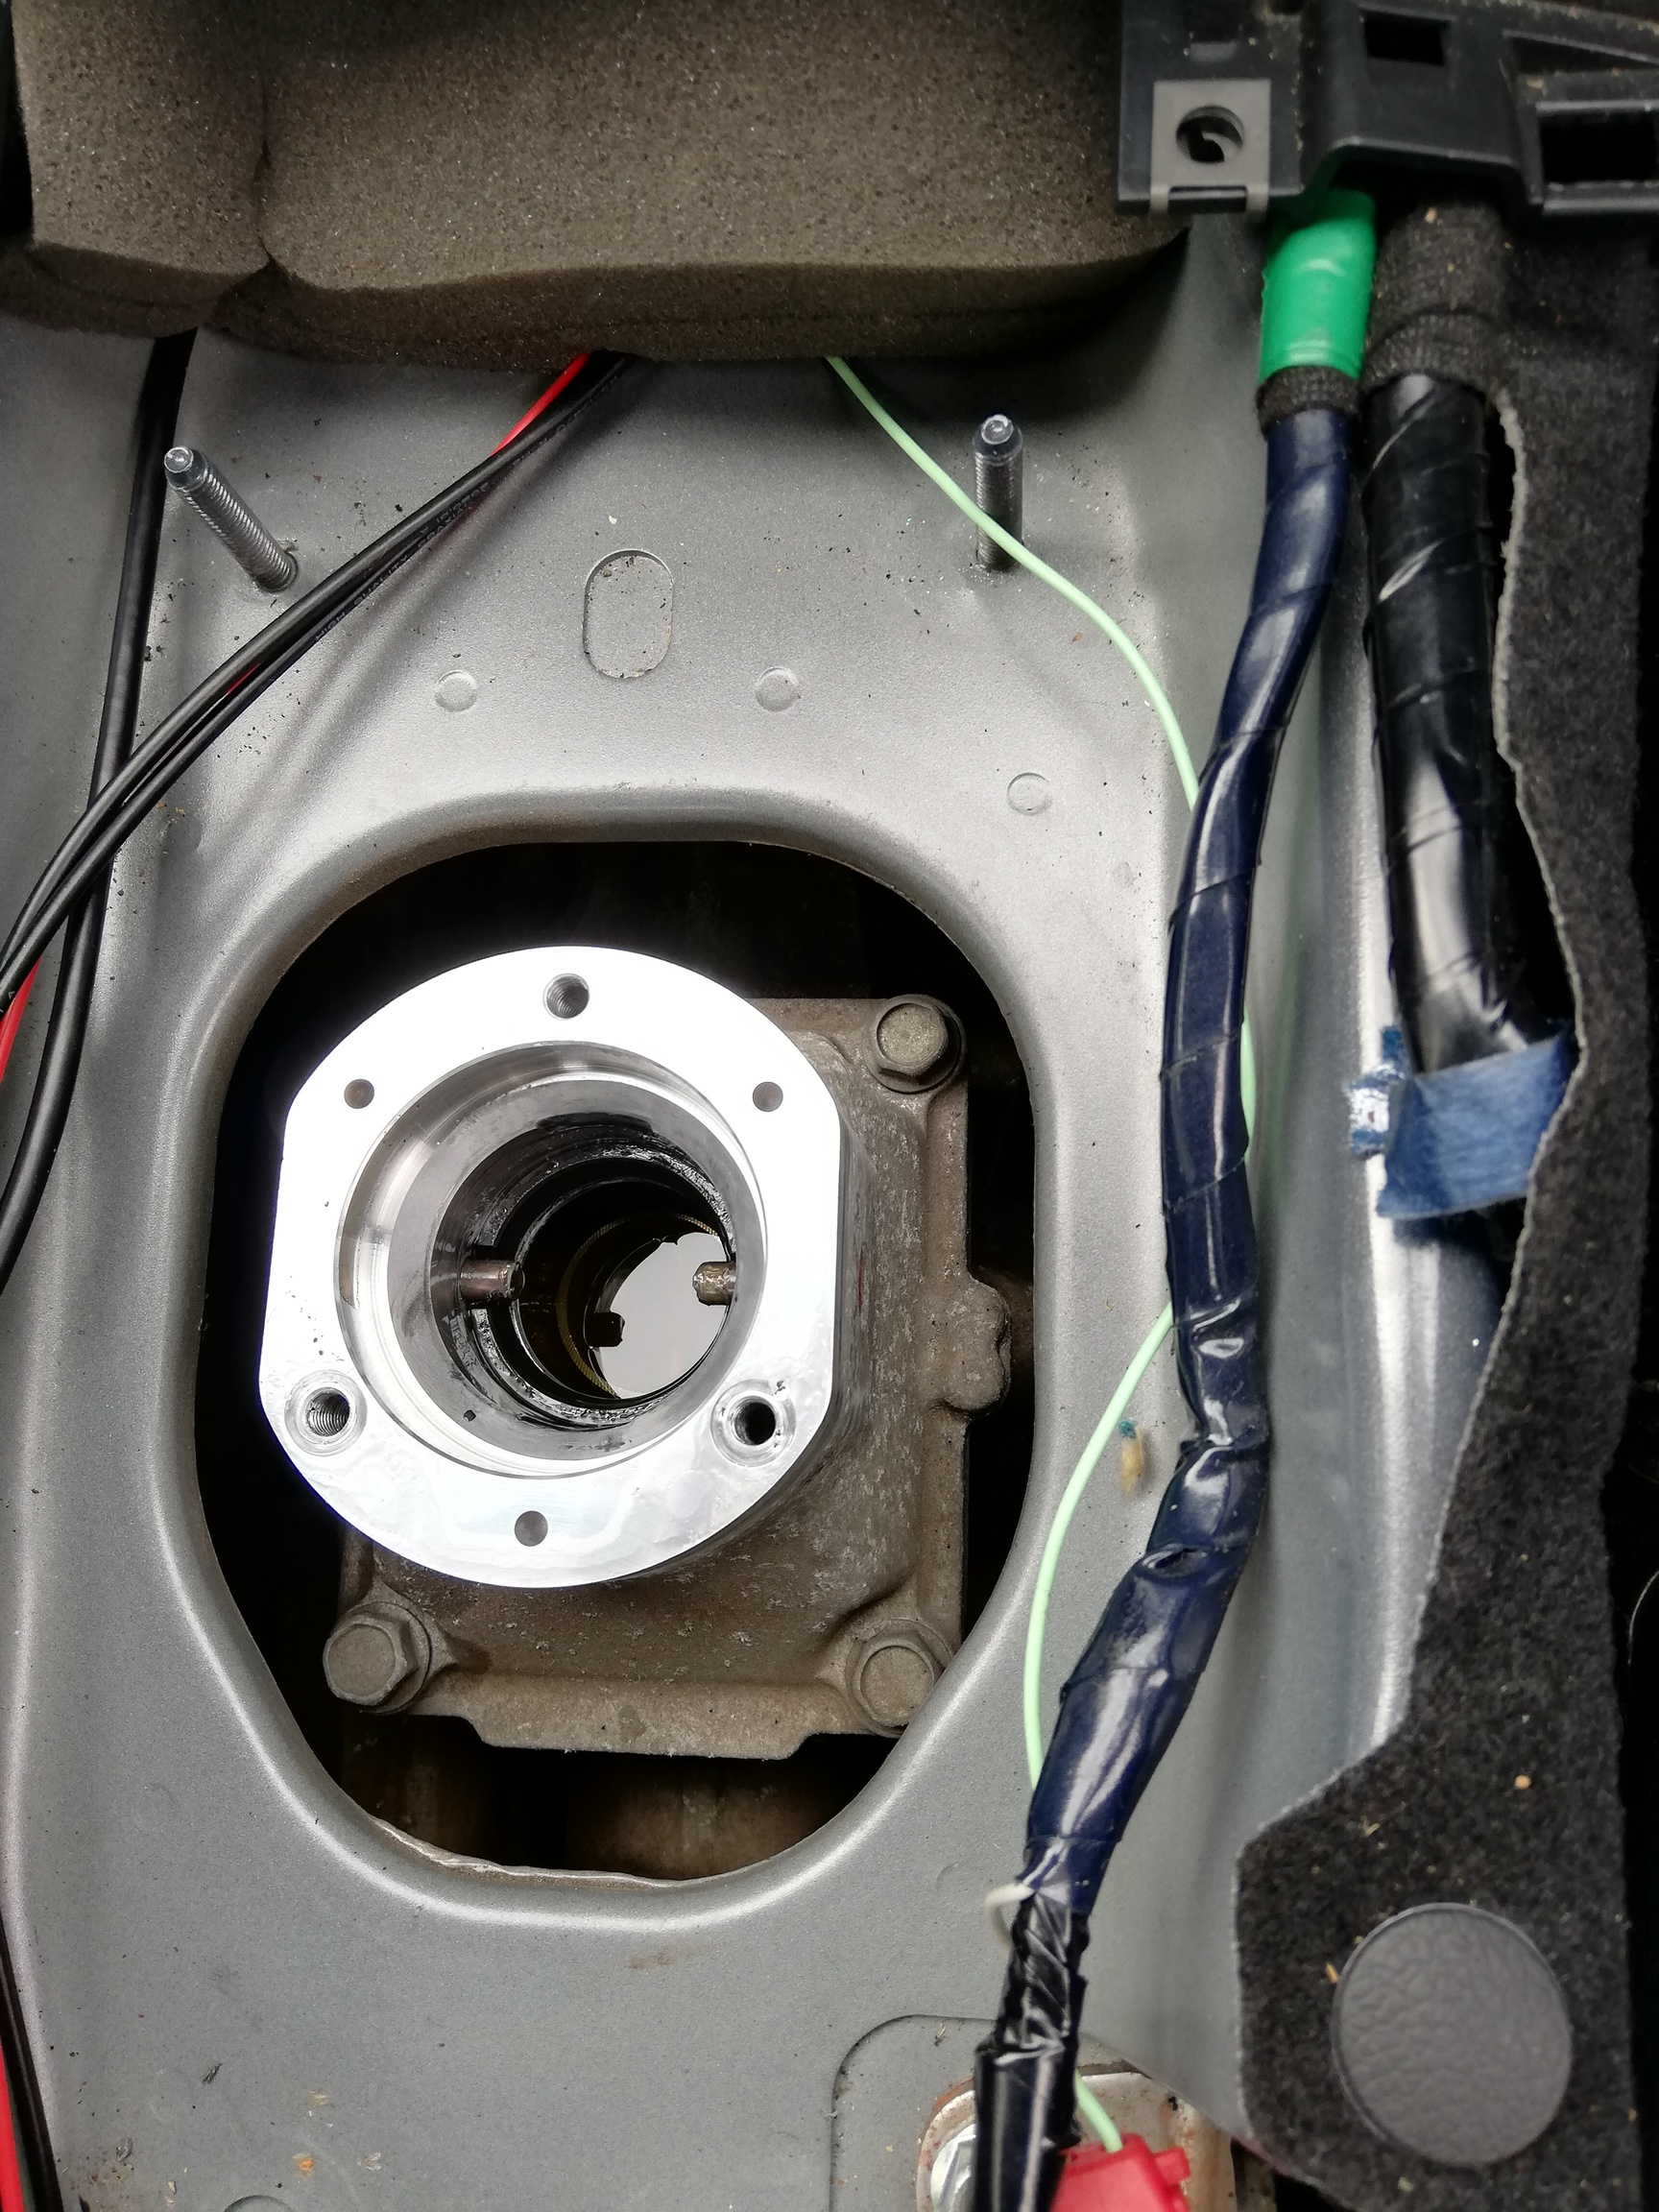
The whole plastic assembly on the gear lever cannot come off the gear lever assembly, but the top plate is clipped on with a clip front and back. Mine simply prised apart using my fingers, no tools needed.

Clip the new part on, and assuming you have oil in the turret, put some grease on the ball on the gear stick and put it back in (some say use white lithium grease, I used general purpose lithium grease as 1. I don’t have any White lithium grease, and 2. I have heard strories of While lithium grease going hard. (Don’t use any Molybdenum (CV or black grease) as there is a slim possibility of the moly migrating through linkages in to the gearbox and upsetting synchro mechanisms. Very unlikely, but why risk it). Putting it back is a little fiddly, you need to line up the locator dowels on each side and lower the bush into the cup. Go gently and it will fall into pace on the second or third attempt.

Once in place, fix with the three 10mm bolts.

I then put a smidge of grease on the left and right contact point on the plate.

Pull on the inner rubber and replace on the outer rubber. With the outer one, do not tighten the four nuts before you have pushed the hole over the gear lever down to its final position. If you do tighten the nuts, you will find that the whole assembly is air tight and it is like trying to push down a balloon. Be mindful of any wires you have routed in the area, and don’t pinch them with the rubbers. (in my photos you will see extra wires for running USB for my phone, parking brake cable for the head unit and wires for a powered DAB and FM antenna). Do not yet put the cable tidy back on the gear rubber bolt - you want the slack for reconnecting the switch.

Put the foam cylinder back on the gear lever.

Lift the console into place, over the top of the brake lever and down over the gear lever.

Now you can reach in and reconnect the Electric window switches. There is slack in the cable if you have not yet put the cable tidy on the turret rubber bolt to make your life easier. If you have pushed it on already, there is still room to get the connector back on, but it is not quite so easy. Picture below shows connector in place, and ready to push the cable tidy on to the bolt. It just pushes on, no cir-clip pliers needed to refit.

Lower the console back down into place, if you are sitting in the drivers seat, make sure the carpet on the passenger side locates correctly inside the console and is not trapped.

Put in the five screws. Screw on the gear nob. Refit the the handbrake surround. Clip on the coin holder and the rear trim. And drive to the shop enjoying the new smoother gear change, glowing with pride that you are now a fully qualified mechanic and buy yourself some well earned beer.

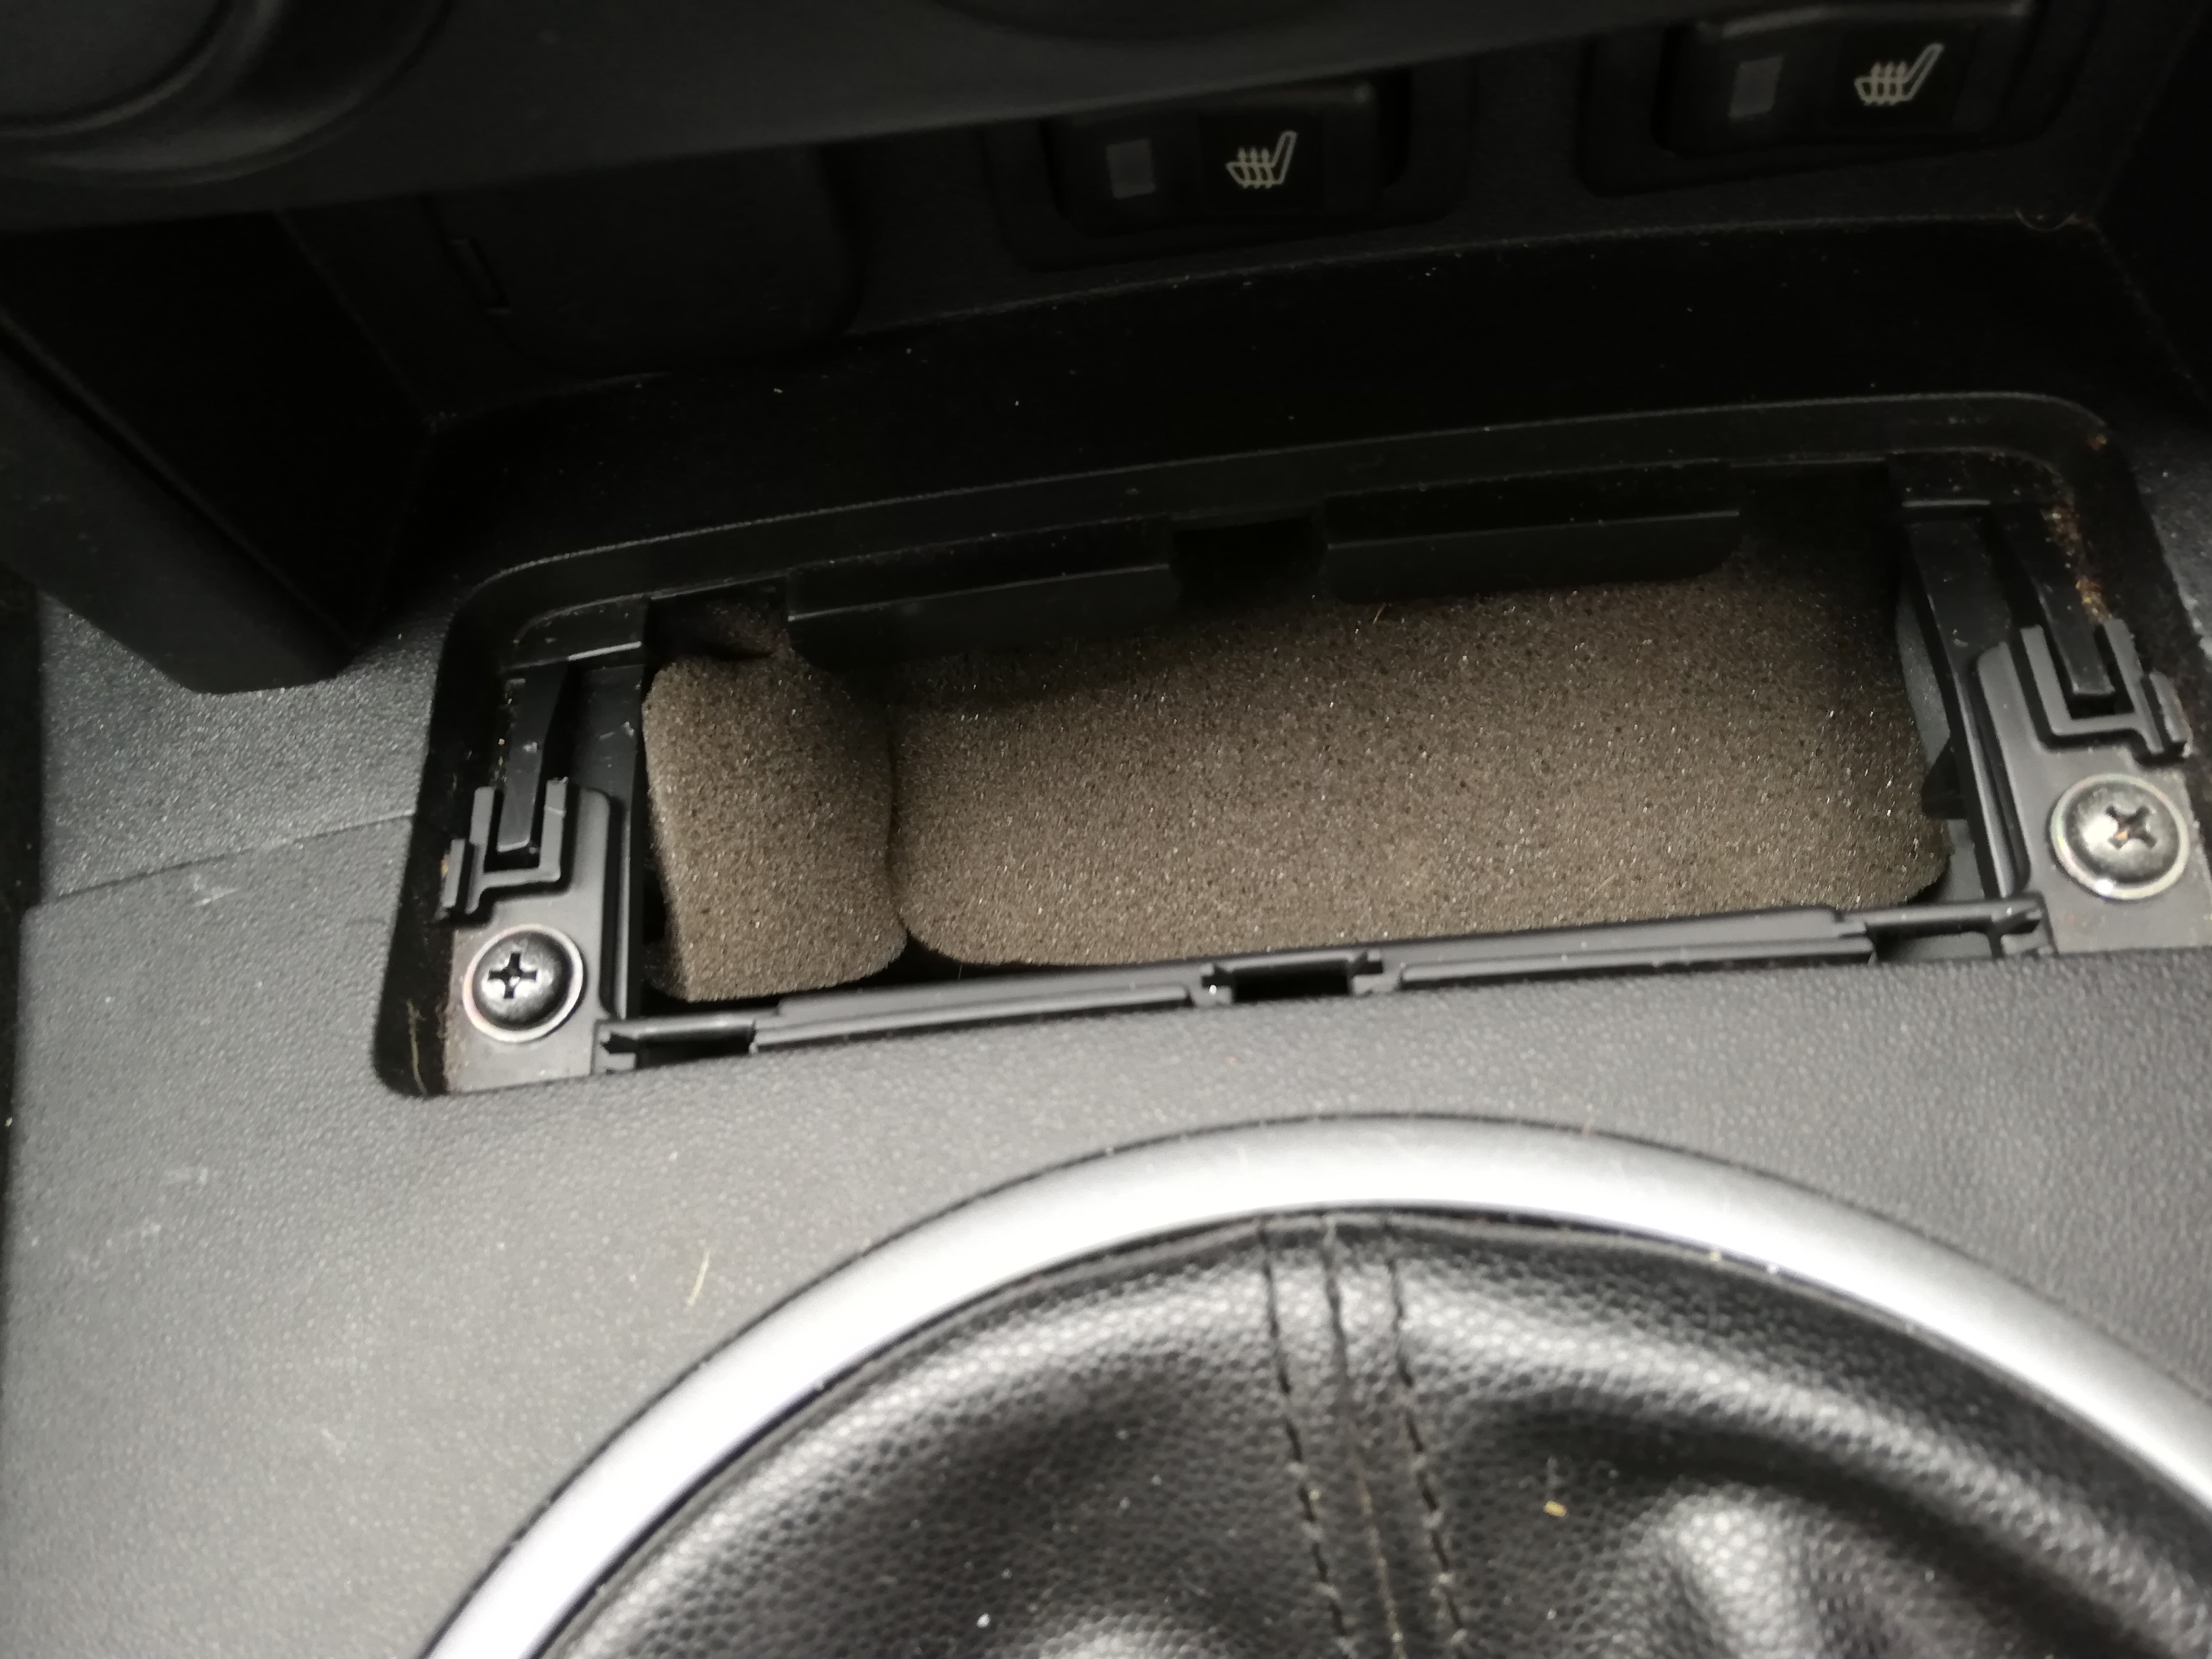
Just as an aside, I have found a big reduction in cabin noise by stuffing some acoustic absorbing foam in under the coin holder. If you use the cigarette lighter, this might not be the greatest idea. But it works for me.

23 Likes

Great ‘How to’ write up. I’ll be doing this come this winters hibernation.

2 Likes

Agreed, great write-up.

I posted my experience on your other thread, McTrucky. My gearchange wasn’t notchy (as I had previously attended to the turret oil) but getting 1st and 2nd was very hit and miss. The replacement of the lock out plate (on a car with 70k on the clock) has provided a remarkable improvement in the precision of these gearchanges.

I am a very happy camper and thanks for posting the info up.

1 Like

Sounds like a great job to do one Sunday afternoon. I hope MX-5 parts have a lot of these plates on order - could be a high level of demand! Thanks McTrucky for a really comprehensive set of steps, really appreciated.

1 Like

A really good write up! Very detailed, good pics and a positive outcome! This is now on my list of 'to do items :+1:
Barrie

A really detailed and well illustrated piece, well done McTrucky. However it raises the issue in my mind. Should the oil level in the ‘turret’ ever be checked and if so how? If the g/box oil is at the correct level does this not reach the turret? From my reply you’ deduce I’m no mechanic so please be understanding of what is probably a stupid question but it’s something I’ve not seen as a service item.

@David-H No not a stupid question. I understood that the gearbox oil reached the turret as well - until corrected on this very forum. On the Mrk3, 6 speed box, the turret has its own separate oil. (Other boxes and cars will differ - for example the 6 speed on the Mk2 shares oil between the turret and the box, so the turret can be ignored).

My turret was empty of oil the fist time I looked, but the rubber gator was also split and I suspect the oil was slowly escaping over thousands of miles. The oil can also migrate through the linkages in to the gearbox, but I don’t know how quickly this happens. Since I topped mine up about a thousand miles ago I have seen no drop in the level.

To check the level, do the procedure detailed above to remove the gear lever, then just have a look inside. There is no dipstick or level marking as such.

When I did mine, I put some oil in , then sucked it out with a big syringe to hopefully clean up any debris from the decayed rubber, or any other impurities in there. Gear oil is cheap so a simple flush seemed a good idea.

As to how much oil to put in the turret - there are very few moving parts in there, and what does move is moved by your hand changing gear, so it is not like it is coping with high speed rotating shells and pinions - so any lubrication is good, and quantity not too significant. I put standard gear oil in, same as in the box, so any migration through linkages will not cause any contamination of the gearbox oil. I filled it to partially fill the little cup the bush on the bottom of the gear stick locates in. Could have put less in and relied on occasional splashes to get the bush lubricated, but I see no harm in a little too much oil in there. The photo above with the top open shows the reflective surface of the oil level in the ‘cup’.

Are we talking smooth like most normal cars or just smoother better than it was…please say the first always been a bugbear of mine why we all put up with it and think it’s the norm.

I would be lying if I said it was as smooth as a new car, I don’t drive many manuals, only time would be almost new hire cars, and they have better/smoother changes than the NC. But the NC is 12 years old, I can’t remember what other manuals were like 12 years ago…

What I would say is that when I bought the NC, the gearbox was not great, it was one of those “they all do that sir” type of acceptance, be very gentle when cold, try to judge traffic to avoid changes. And then I read another thread that made me think, ‘if this was a new car, I wouldn’t buy it - would assume there was a fault and would reject it’.

Now with oil and a new selector plate I would still say the box is notchy compared to my new hire cars, but I wouldn’t be rejecting it as being faulty.

Fitting the plate takes around 20 minutes, maybe 30 if you take a bunch of photos and cant find your 10mm socket, and costs under £20 in parts. To me that makes it worth doing.

Make sense?

3 Likes

Thanks for your reply to my query. My 2009 NC Mk3.5 is only occasionally notchy on a 1st to 2nd change and with only 35,000’ish miles do not want to believe it needs this part changed - maybe I should use that left pedal that might help. Cheers.

1 Like

Thanks will order the part up and give it a try with 114k on the car good chance mines worn,done the turret oil before so not looking forward to fiddling with the window switch again.

I posted about this plate earlier should have followed my hunch

This is all beyond my capabilities unfortunately. Mine is an 09 plate NC 2.0L Sport and yes I find 2nd gear slightly awkward particularly when cold, however, after a few miles when the system has warmed up it does get significantly better. So thank you McTrucky for all this brilliant advice and information but I’ll just keep my fingers crossed for now.

1 Like

Now, I don’t mind admitting things if I’ve been daft or whatever :smile:
So, I’ve felt that my gear change 1st to 2nd, has been notchy. I like to have the seat low and as far back as possible but after some consideration, I’ve moved the seat forward a couple of notches afyer reading some of the things on here, and the gear change is better! I guess whats really happening is I’m fully disengaging the clutch when changing gear? :face_with_hand_over_mouth:
Every day is a school day but at my age I ought to do better!
Barrie

1 Like

I find that a slight hesitation when changing from 1st to 2nd works for me.
Sort of leave it in neutral for a split second, like a 2 part gear change.
Nice and casual.

Once it’s warm it’s fine.

1 Like

Good old advanced driving technique’s that is. :slightly_smiling_face:
“Say 1000 as it goes to neutral, pause, say 2000 as it goes into second”. :+1:

Nice bit of double declutching, I think that’s what’s its called, old school driving :joy:

I was taught to double de-clutch from day one, 40 years ago so it’s second nature as well as heel and toe but as this is my first MX5 I assumed it was a case of “they all do that” as the first 3 gears are very obstructive when cold to the point that I have sometimes had to coast along until it went in. Once warmed up it’s fine. It’s only done 30k.

This is a great “how to” but do I fancy taking my car to bits? Hmmm. It’s a 2012 3.5 so the console is different but I do have a Haynes manual.

It’s really easy and self explanatory once past the window switch which I did have trouble with due to the fact you can’t see it and done by feel

I now have a nc1 2.0 sport 6 speed when cold can be a bit sticky for a short while but nothing that is going to worry you before that I had a 2017 RF 2.0 only used for a 2nd car and if you took that out when it was cold it was a nightmare…took it back to mazda many times but they always said they could not find anything wrong…Well they would not as I had driven it to them to check out…so I asked if they could come to my house see it start up and drive out the garage then try it…but they would not they did keep it over night in a nice heated garage and still claimed there was nothing wrong…ended up with going to mazda direct they told me it was a caricaturistc of the car…I told them I didn’t buy a caricaturistic… I brought a sports car that I wanted to use and if it was like that on the test drive I would never have brought it…got no were with them only option was to go to court…in the end sold it and brought the nc 13 months later no problems at all and a fraction of the price look how much money I would have had if I had gone nc route first

I just want to say thanks to McTrucky for this excellent guide. I replaced my badly worn plate this morning using the instructions above and I can now use first gear again!

I wasn’t able to get hold of the part from MX5 Parts nor Mazda themselves (there must be a lot of people doing this mod) so I bought direct from Japan from a company called Amayama. It cost £18.50 including delivery to the UK.

2 Likes