Headliner???
Bonnet seal on top of firewall.
![]()
Basic 2737E cross-flow gave about 70bhp, 2737GT gave about 95bhp.
I’ve no idea what losses mine had through a gearbox I fished out of an early scrapped Lotus Cortina, and the Consul 375 back axle. So your guess is as good as any about what my engine actually produced. But it’s what happens at the wheels that matters most.
Mine had a skimmed head and block, a 32DFM progressive twin-choke Weber, a 4-2-1 long-branch manifold onto an extended CapriGT straight-through exhaust, a big-lump high-lift camshaft and that Lucas distributor.
The dyno showed the brand-new Ford distributor had random timing errors, up to +/- 5 degrees of wander at higher revs because of sloppy bearings. The Lucas was much more stable, to less than half a degree in total, and the vernier allowed fine tuning as well.
If I drove it like my Dad it did about 20mpg, but if like I stole it about 35mpg. It was a torquey, smooth, quiet family saloon on the first choke but open the second and it was a snarling rocket.
Just once I took it to 7000rpm staying in second to escape an accident, and it was like I had been punched in the back. That close shave convinced me it might really have been a racing engine.
Big Snag, it ate rear tyres no matter what shocks I tried, Koni selecta-ride, Boge adaptive, I forget the others. If only I had known about rear anti-roll bars, adding one might have controlled the axle tramp.
2 Likes
I dont think you told us what car this was, Richard.
It was an old 1965 Corsair GLN983C I bought in a hurry, knowing it had a shot engine (oil-burning), gearbox jumping out of gear, and the maroon paint was dreadful; I expected to find something better in a few weeks.
Plus points were the strut tops had already been done and amazingly no rust elsewhere and disc brakes at the front and big drums at the back. I added the servo I took out of my Humber Hawk that had been smashed by an idiot jumping the lights.
That Mk1 Lotus Cortina I mentioned also supplied five 5.5J flat-ledge rims.
I carefully left the dire paint on the Corsair to make it boringly unattractive because they were much too easy to steal; any 1/4" screwdriver could unlock them and start the engine.
It was an amazing Q-car in the mid 1970s. 0-60 in about 8.5 secs was an average of several attempts with a mate and his stopwatch after we had recalibrated the speedo (otherwise it under-read by 14%) for 165x13 SP Sports and the Consul 375 diff, we found making up a new scale legend was much easier than finding a nearly correct drive cog for the Lotus gearbox.
The car was too light (less than 1900lbs with light engine and alloy gearbox - I could carry them as a unit!) and the wrong shape at the front, and it desperately needed a front air dam and splitter. Going uphill at 115mph on the A1M past Welwyn one day it could not take the very slight bend to the right because the front wheels had no grip, fortunately when I lifted and it dropped to 100 it was OK again, but by then it was almost on the hard shoulder. Phew, I never tried that again, but strong headwinds were always a problem at a legal 70.
Eventually rust killed it, six years and 80,000 miles later the back ends of the rear springs began to crumple their box sections. It was time to go and I knew I could sell the engine and gearbox.
1 Like
I always remember the Corsair as the 2000E, which had the reputation of being a business man’s express.
No doubt there were lesser versions but I don’t remember them. Was the 2l engine a V6?
It comes as a bit of a shock to hear how unstable yours was at speed, perhaps the 2l lump was rather heavier, so less affectedby the lift generated by that pointy bow.
One of my abiding memories is of a 1600E launching from the lights and turning right uphill in a contolled opposite-lock power- on tailslide. No axle tramp there…
Mine was the 1500 basic weedy Cortina engine, and knackered.
V4 was “1700” (1665) or 2000. Nobody wanted them. Cross-flow 1600 was much, much better.
There was talk of putting the V6 3000 in the car, but it would have been a nightmare with the thin, flexible body.
They did 1500, 1600 4cyl plus 1700 and 2000 V6?
Thats a lot of engines considering they were selling the Cortina in parallel as well.
Ive an idea they used the V6 in Transits too.
Fitted the reversing camera.
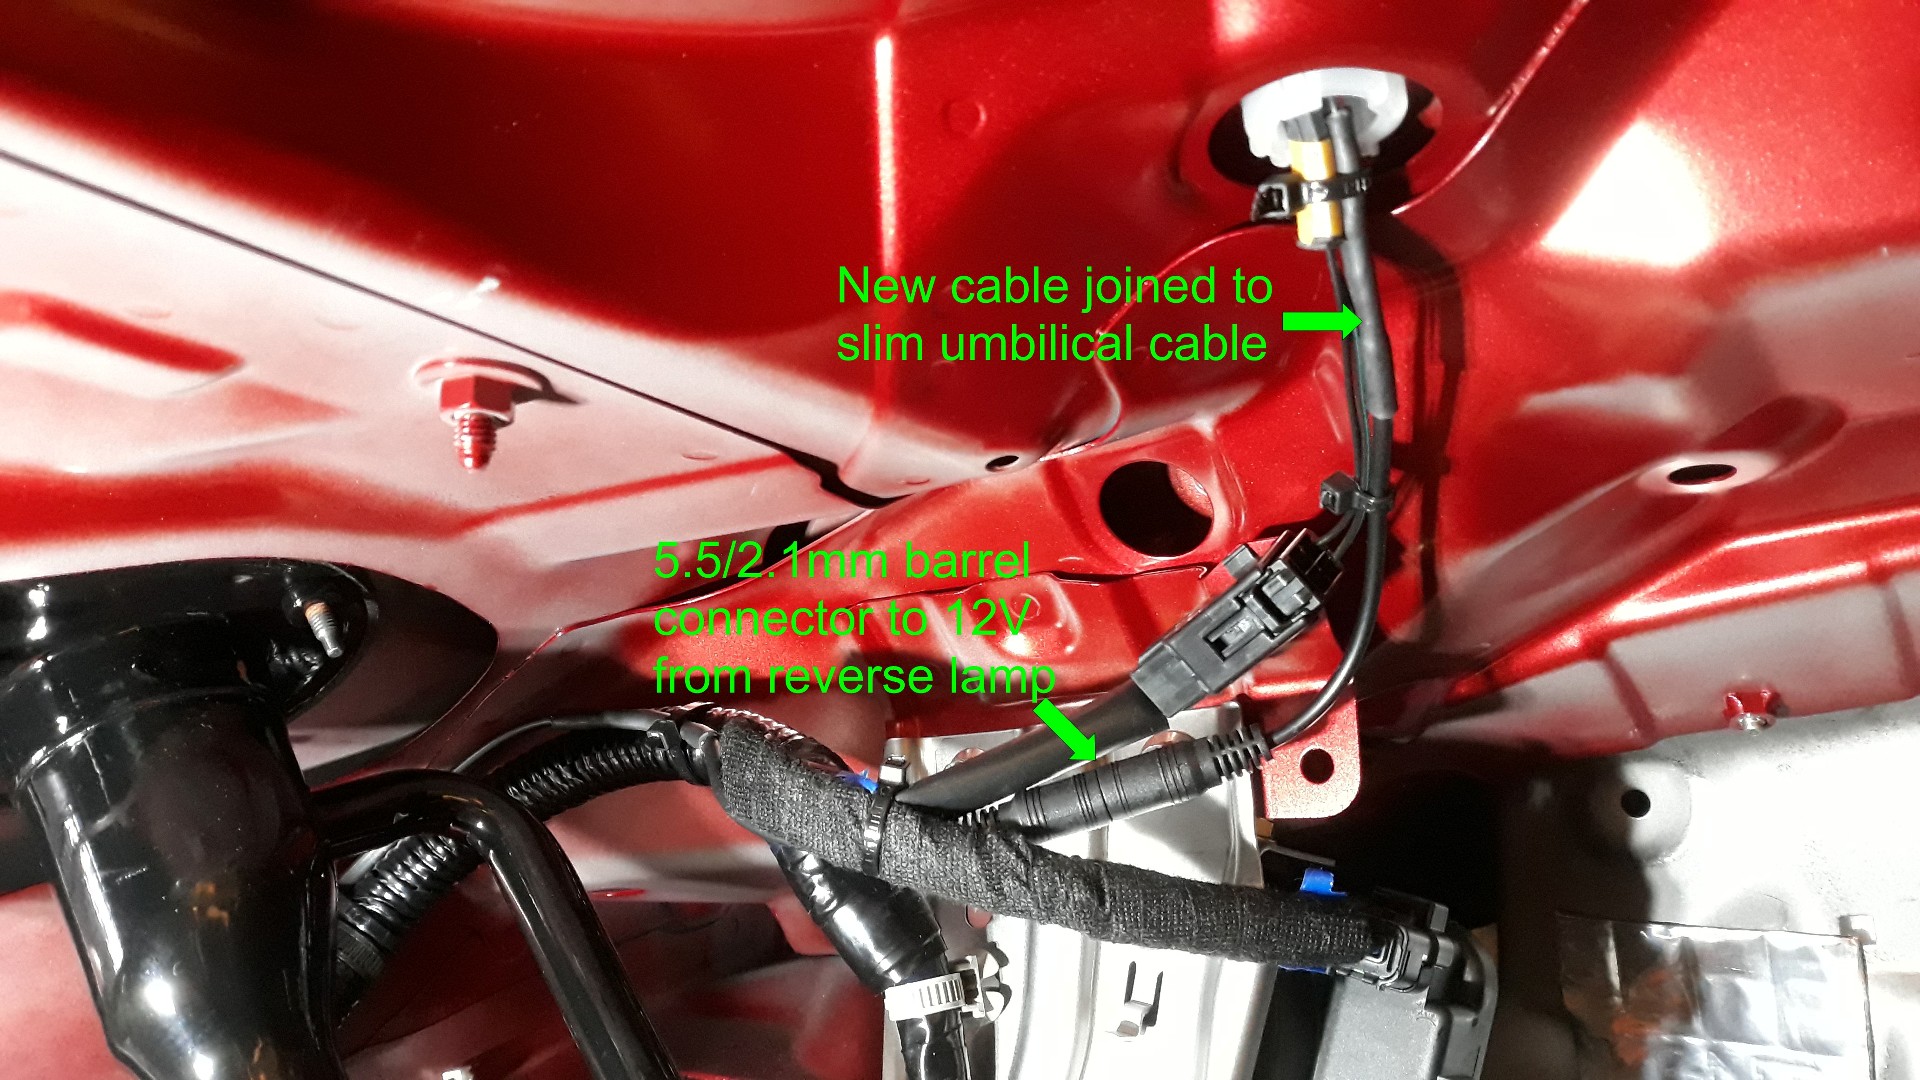
I used the Garmin reversing camera rescued from the Niseko and followed the same fitting procedure to install the extra wiring to use 12V power from the reverse lamp for the camera, or any other wireless camera. I’ve also tee-d off a power connector for the parking sensors, but that can wait for another post.
Power output to the slim extra umbilical cable shown here, with a standard 5.5/2.1mm barrel connector if the boot lid ever needed to to be removed. Now two pairs in it; the original Brake and Ground, and new Reverse and Ground.
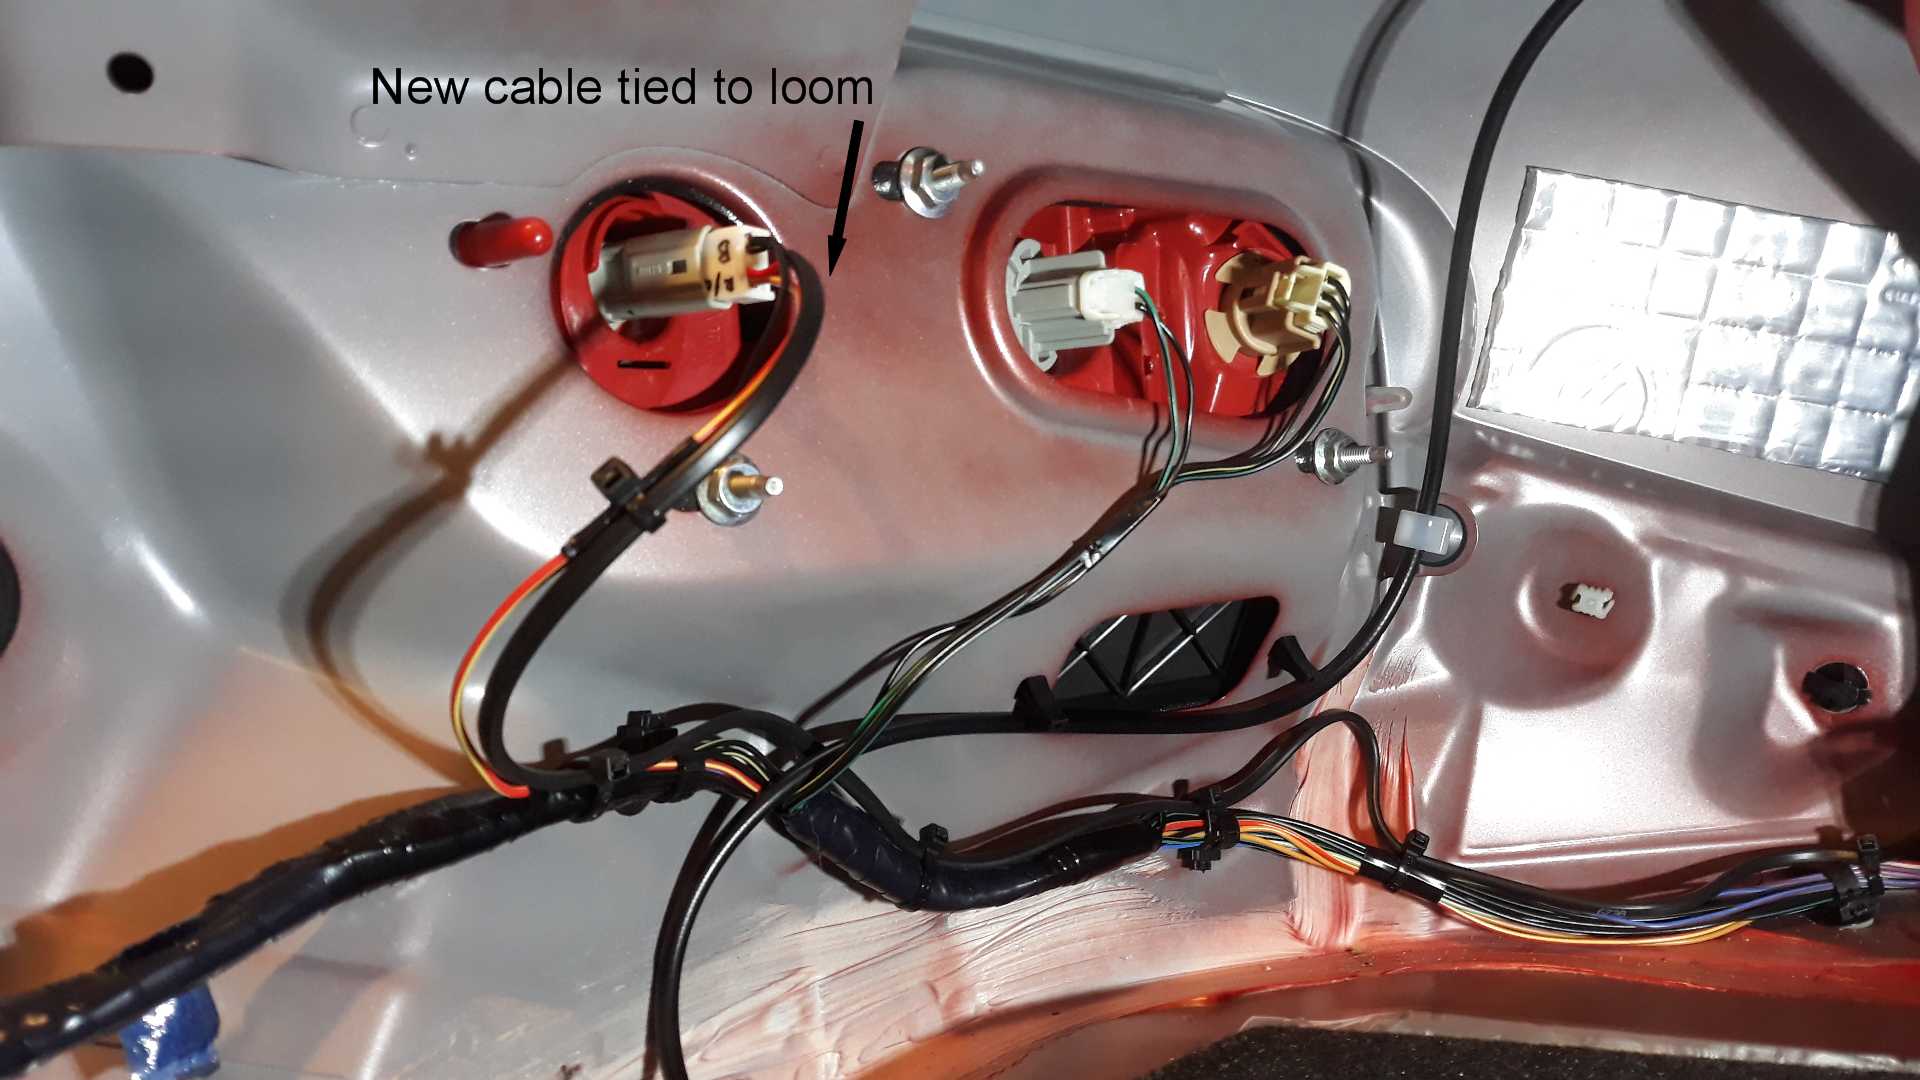
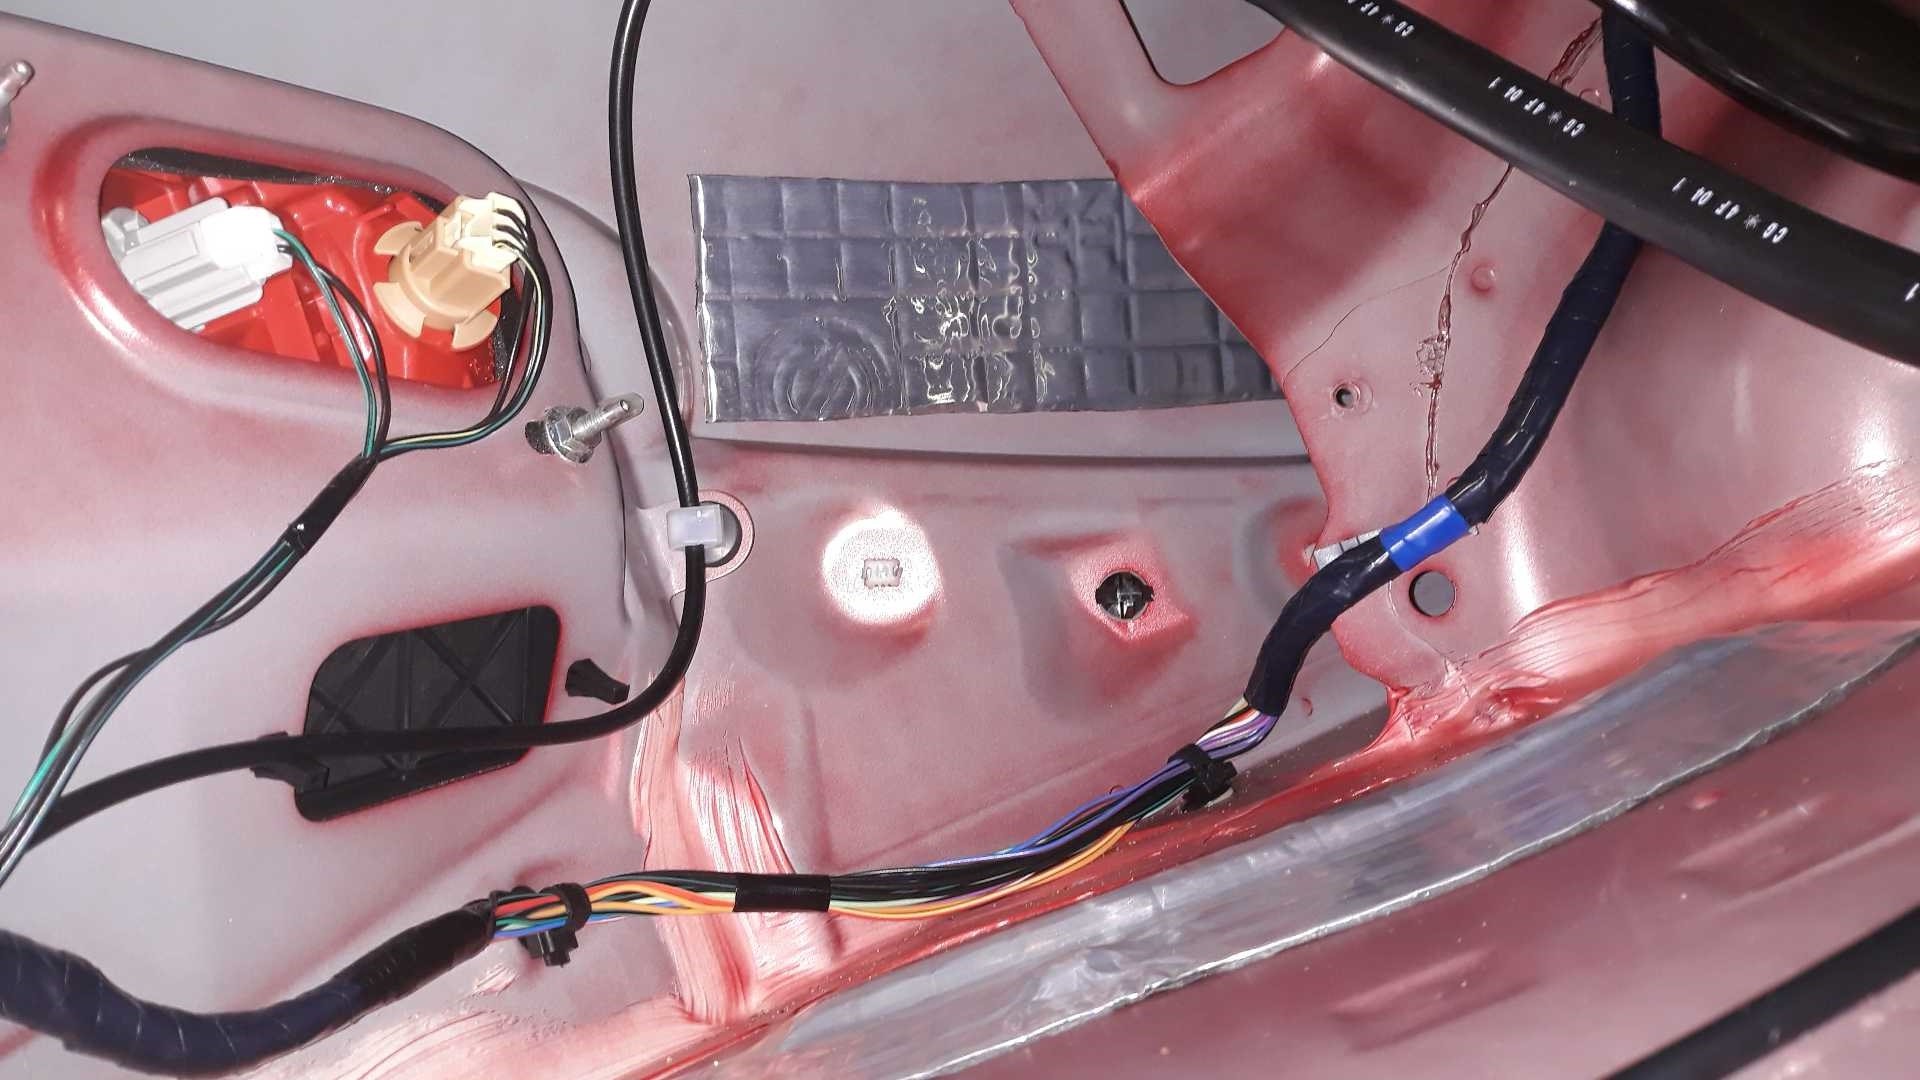
Power taken from the reverse lamp connector as before.
I didn’t show how to extract the contacts from the lamp connector before.
Contacts look like this, note the little dimples or notches.
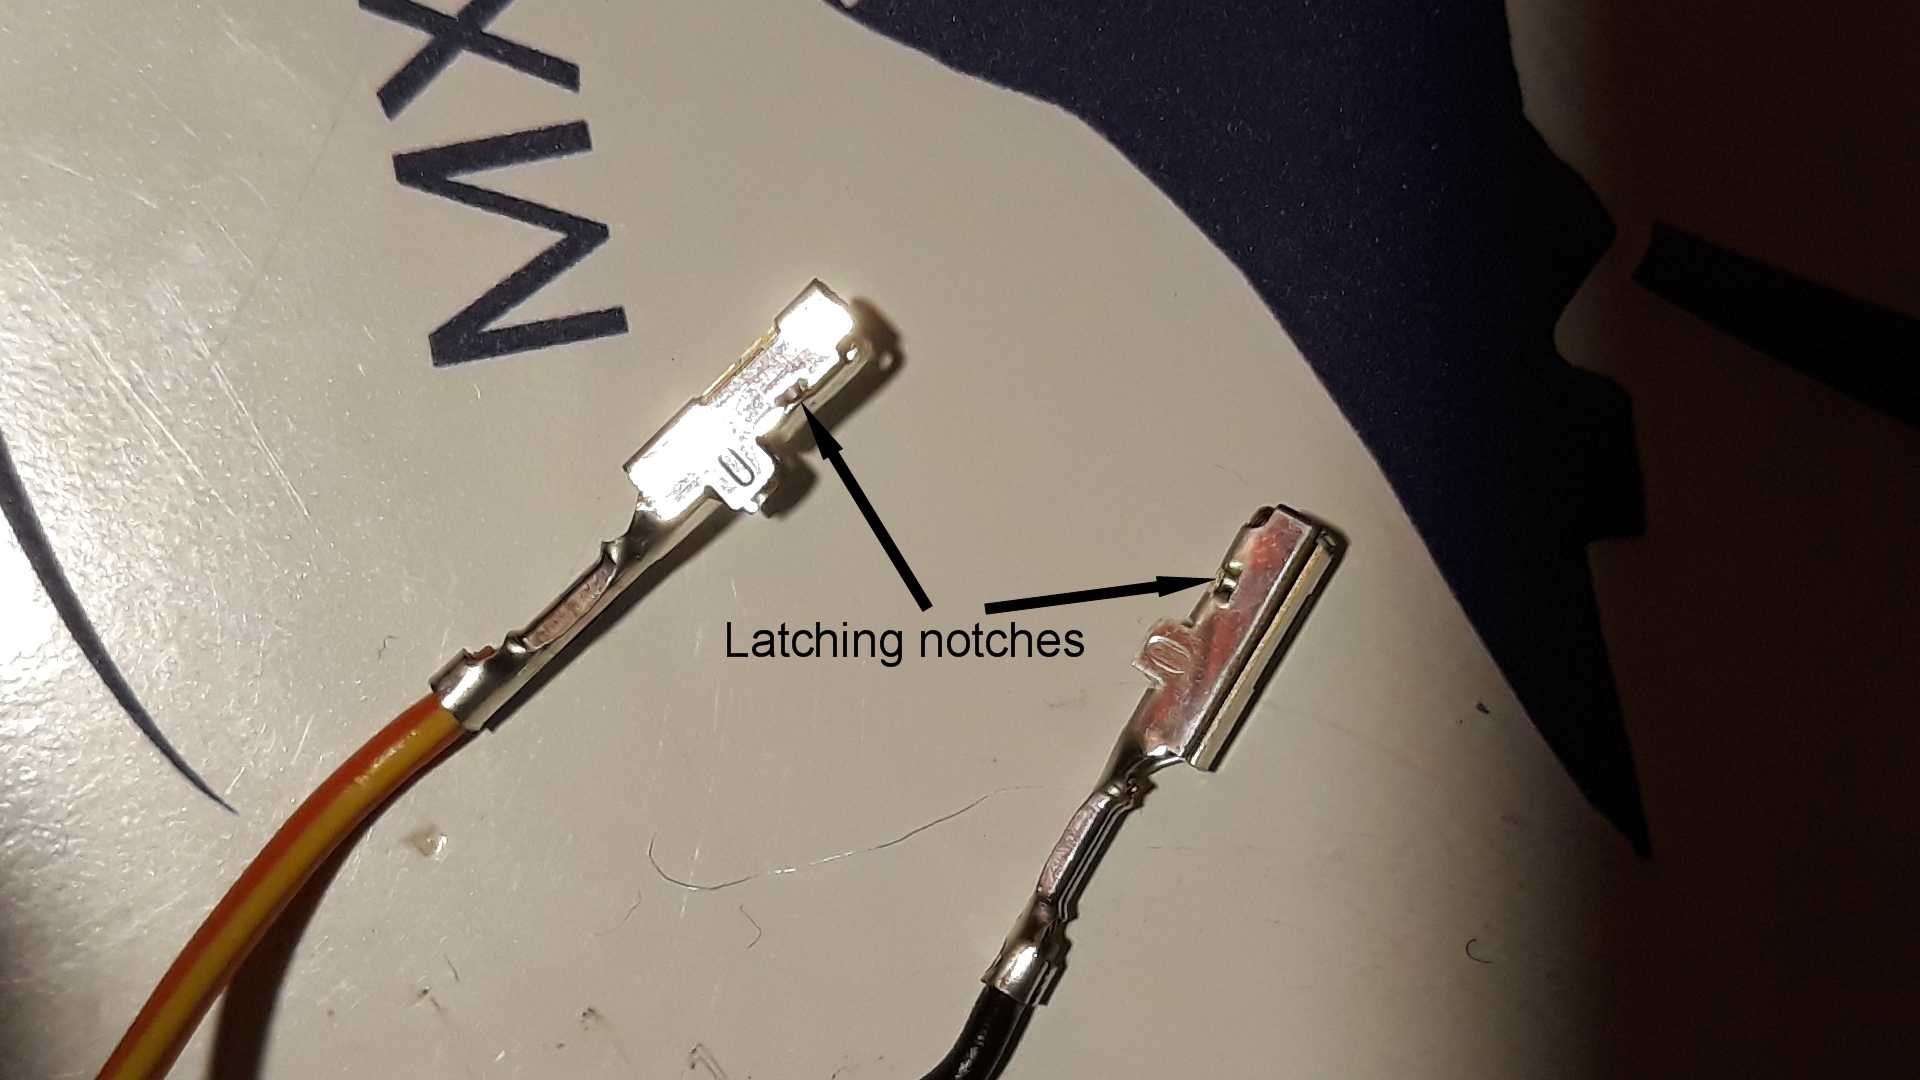
Contact holder looks like this. Simply push a small jeweller’s screwdriver (0.5mm x 2mm blade) between latch and contact, and the latch moves towards the centre of the holder to release the contact

1 Like
Noise-reduced the boot.
Most of the noise is either from tyres or wind and exhaust squeezing in the ventilation exits, mostly high frequencies exciting sympathetic resonances in thin panels.
Think of plucking a guitar string; and then touching it in some places will excite a harmonic, yet in most other places it kills the sound stone dead.
The simplest way to detect where deadening is required is to gently tap the panel with the round plastic handle of a small screwdriver and run a finger tip across the panel. When the finger damps out the most sound, that is where to centre a bit of Silent-coat.
The Silent-coat does not need to be a big piece or cover the whole surface. This small piece inside the wing cuts the resonance almost completely. The difference to the other wing which had sounded the same was remarkable.
The bulkhead had a few tingy bits much closer to ones ears as well, no longer.

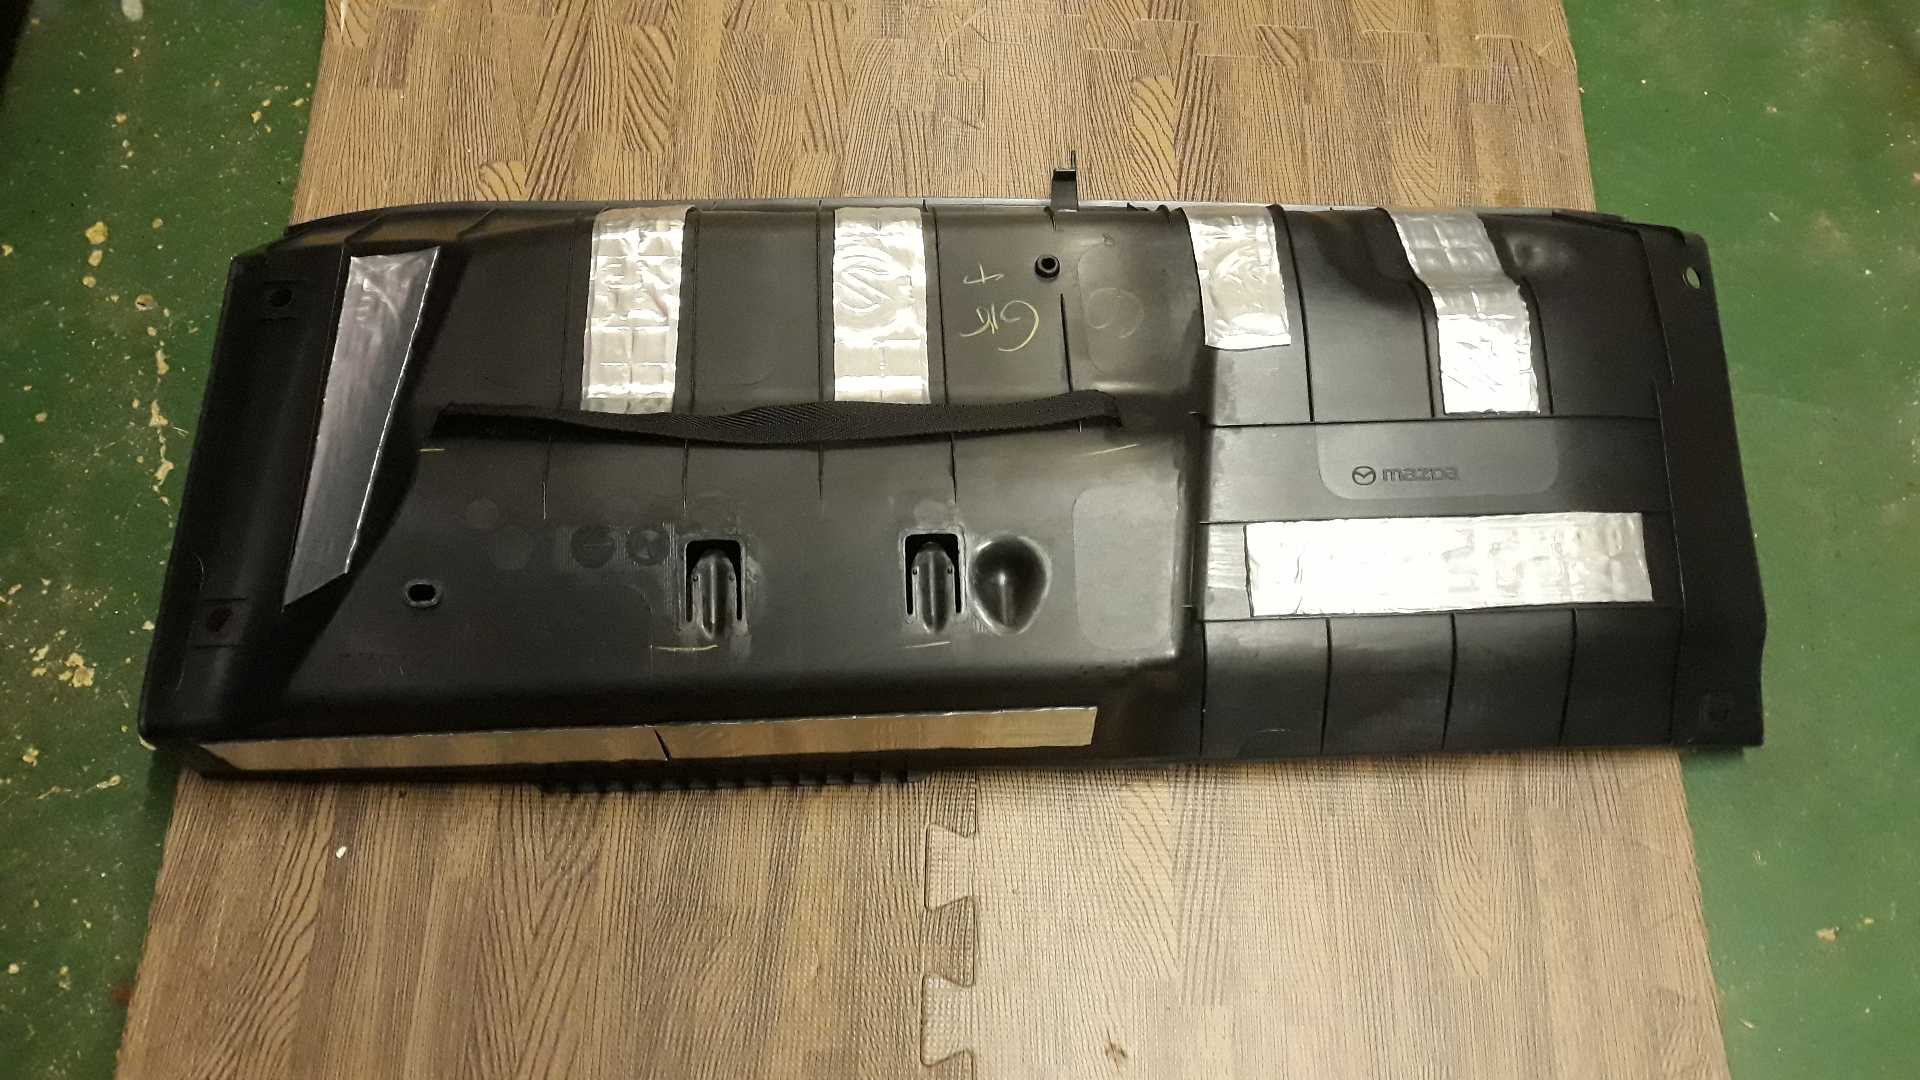
The loudest single bit of metal was the protective cover for the fuel system, now much quieter.

The only place a brute force approach was needed is the boot floor. Even Mazda has addressed it with a bit of hardboard glued under the carpet and extra padding.

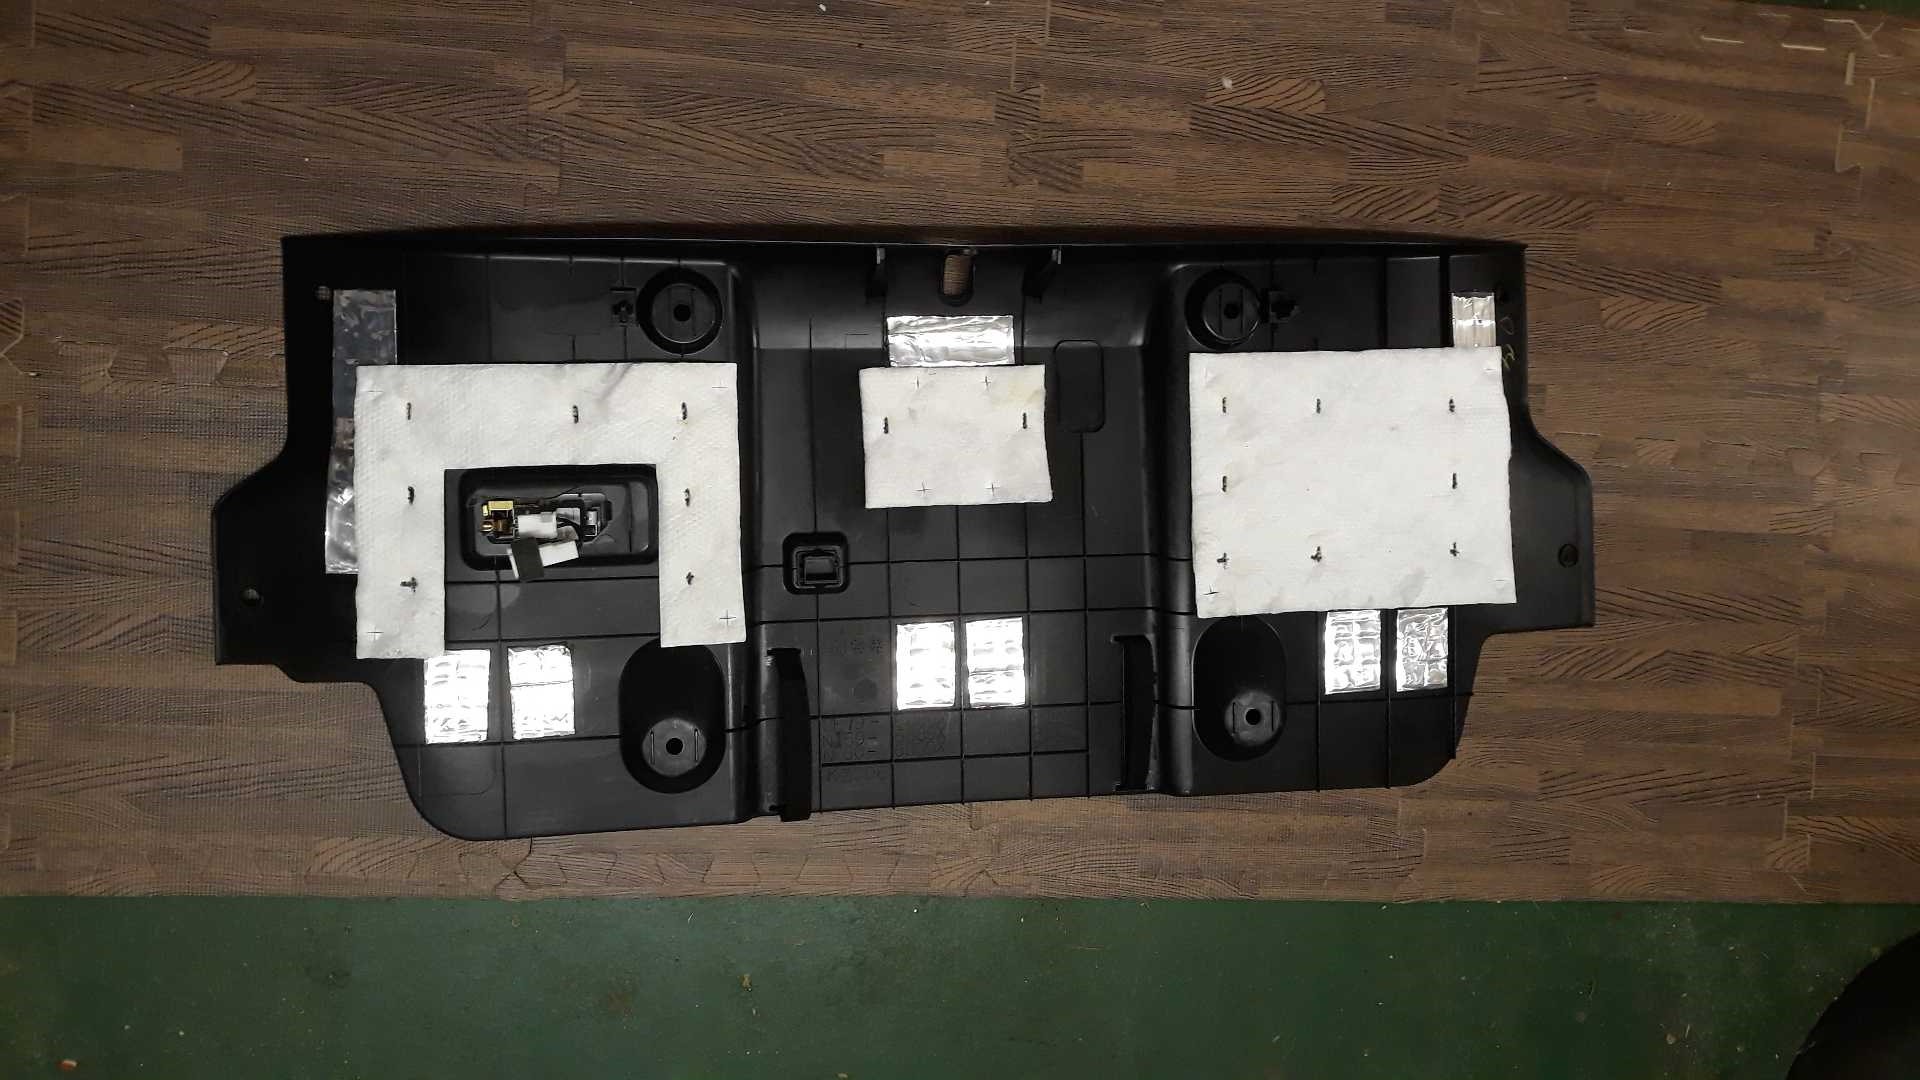
Then there is the trim, some of it is right opposite the vents and so here both have a bit of mass at the highest frequency tap-spots and some randomised sound absorbing foam facing the vents.

This one also has three bits of draft excluder brush to stop the jack-door rattling.
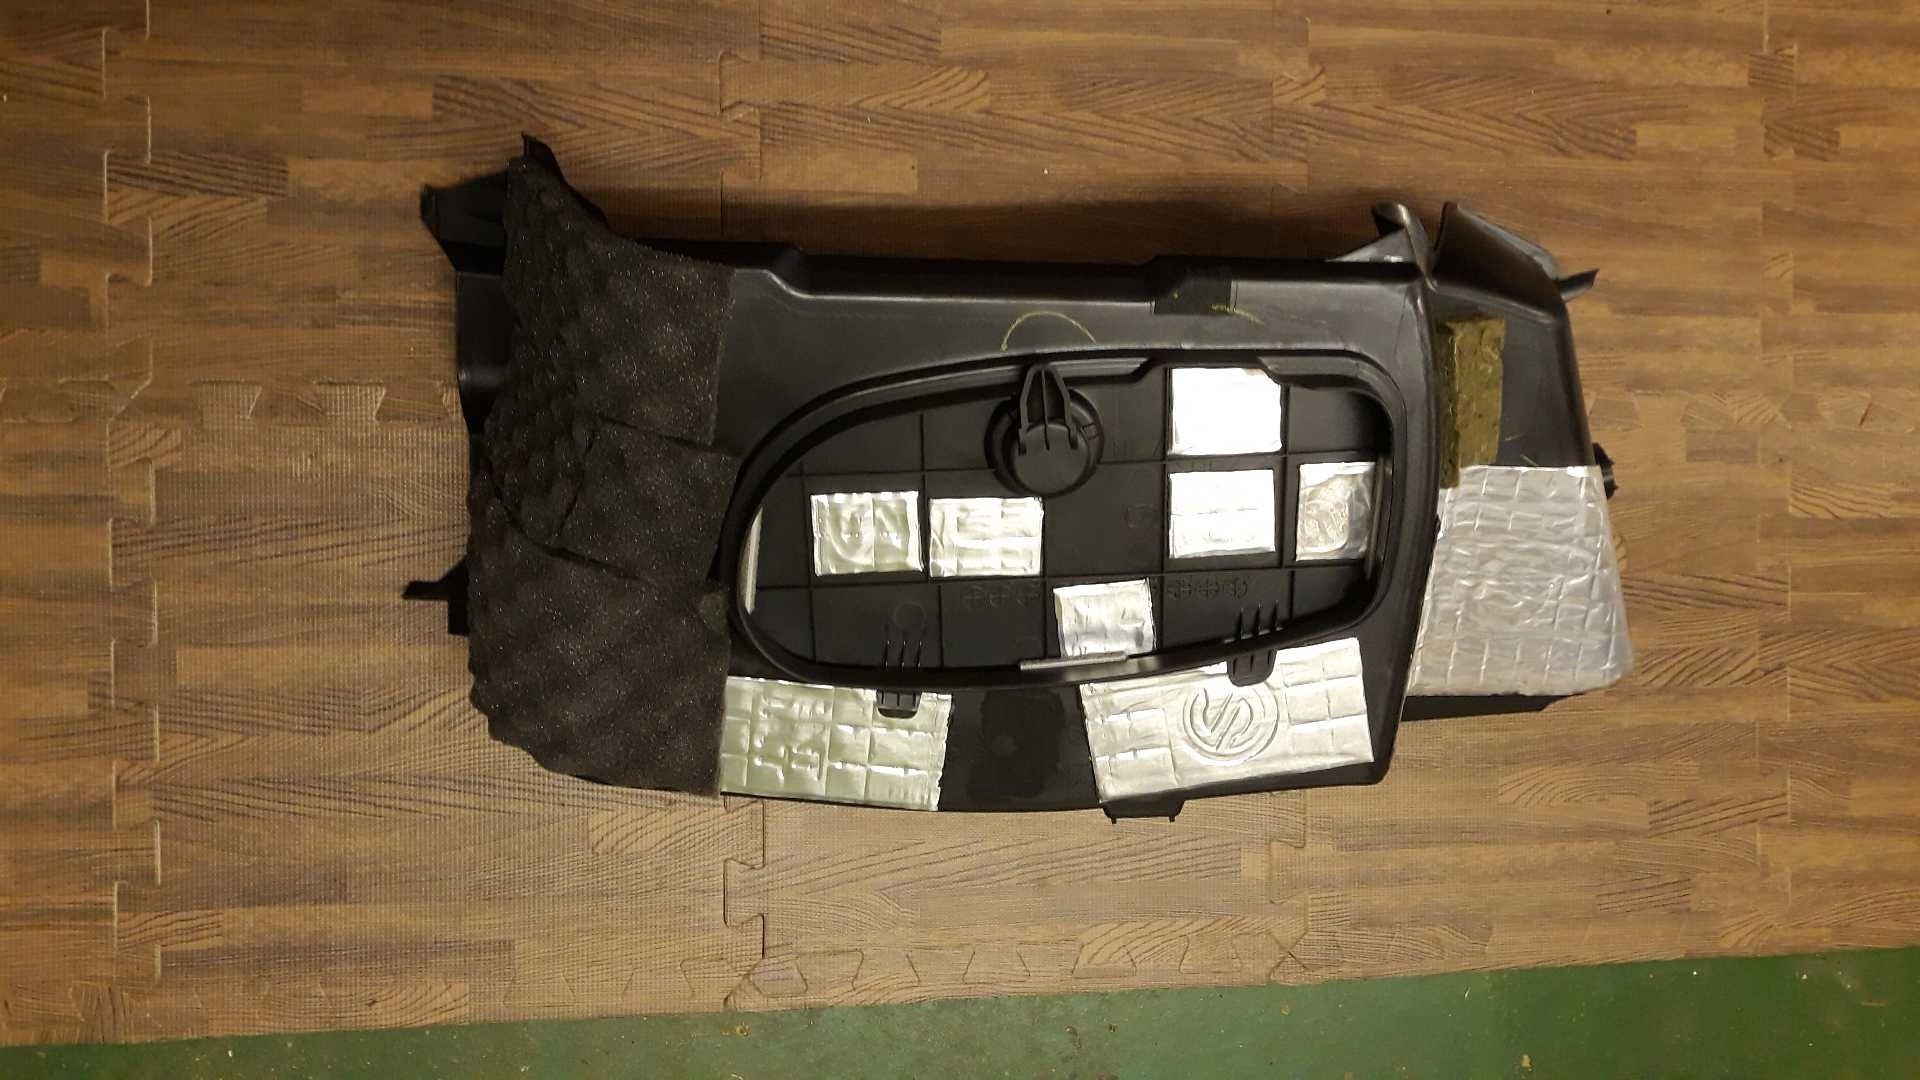
and for completeness sake the other two trims have a bit of de-ting as well, not much needed at all.
I might add some sound absorber foam to this last one, but only after a test drive, maybe better is boot-side of the panel directly behind the seats.
8 Likes
I’ve still got some silent coat from another job on the last NC. Guess I’ll be busy Richard removing some trim around the boot soon.
Thanks for your detailed tip.![]()
1 Like
RichardFX
You bring such joy to my heart with your posts of your new Precious…an example to us all regarding recovering after loss …thank you ![]()
1 Like
Fitted the parking sensors.
The 25AE is subtly different from the NC1 Niseko in where stuff is, but the old instructions almost worked and I followed the same routine as when I fitted the sensors on that.
First of all I tested the new system out of the car.
Potentially this saves a lot of wasted time if it might have been faulty. All was joy and the distances for noises were about right so I didn’t need to play with the little slide switch which might, or might not, do something useful. It wasn’t broke so I didn’t fix it.
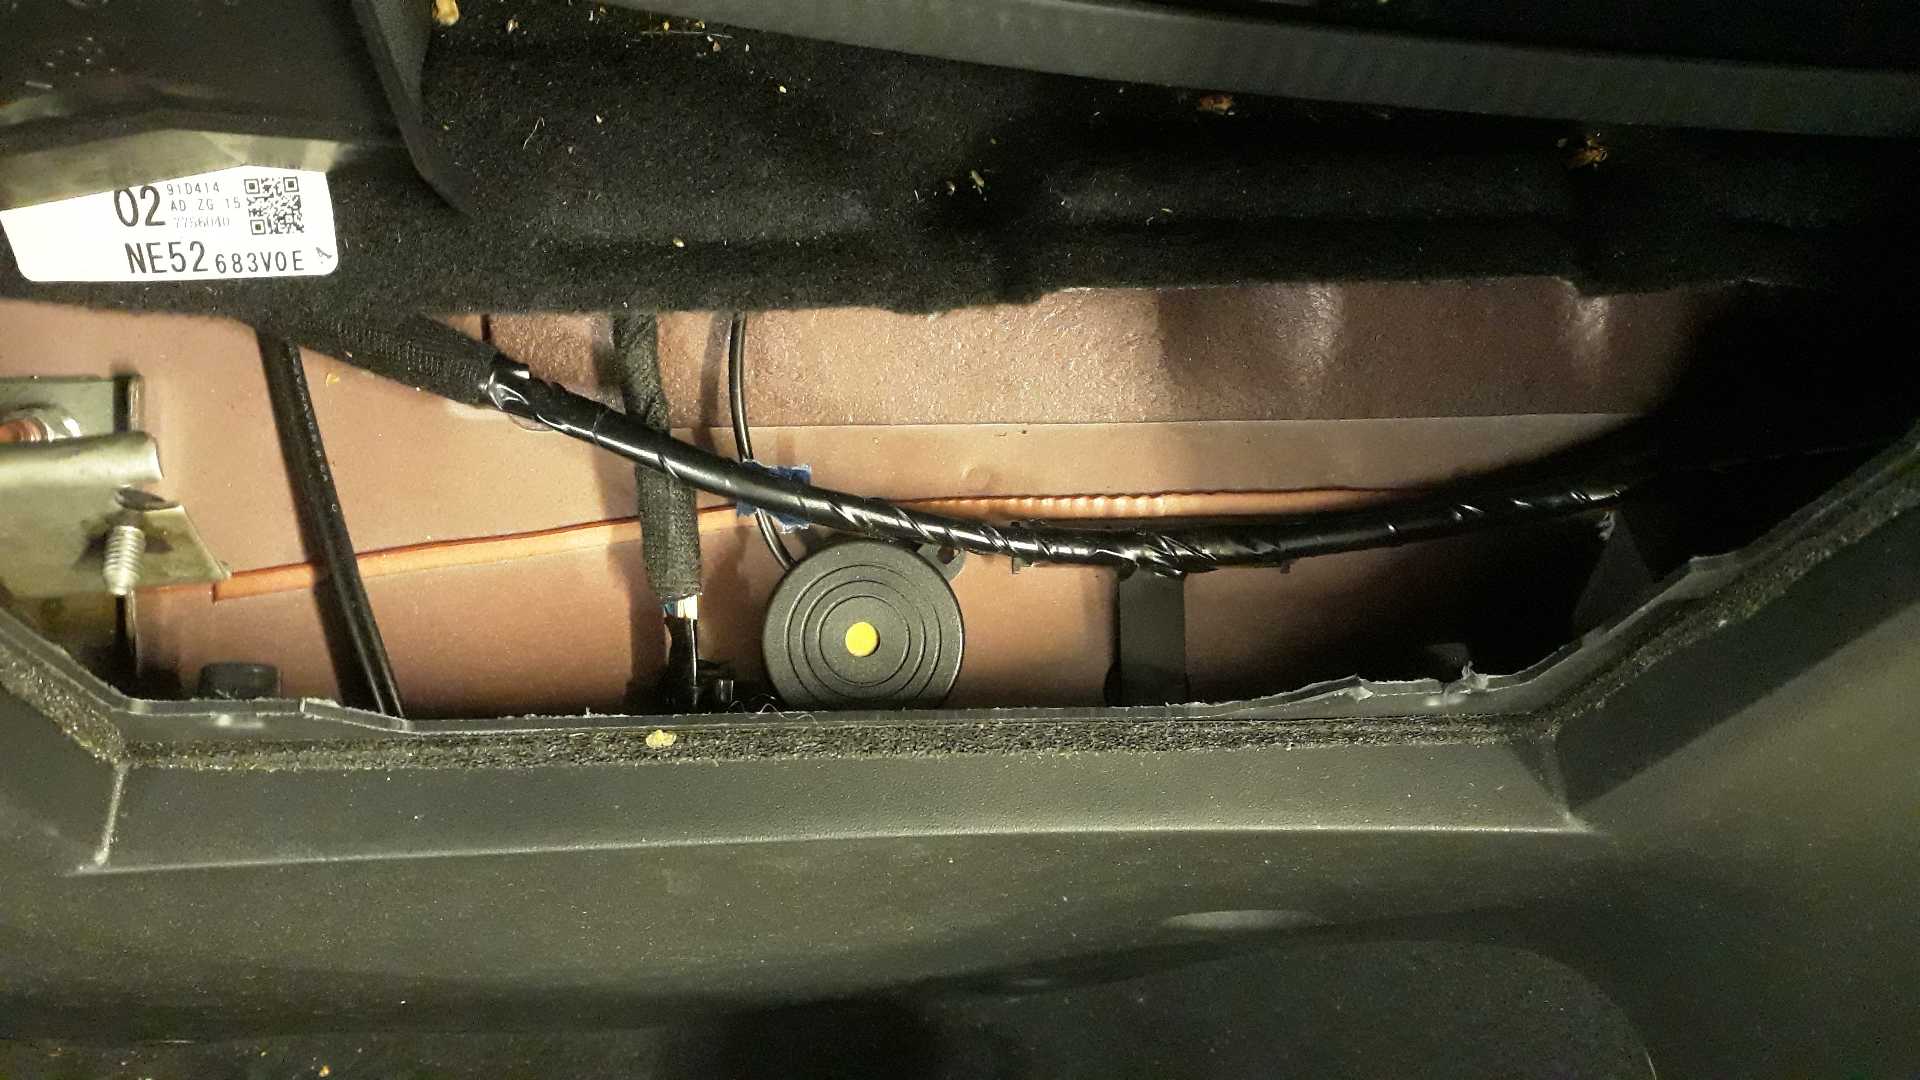
Installing the beeper was easy as I followed the same route as with the Niseko. Here behind the driver’s seat again.
I used some clear all-weather tape to hold the wires in place in the boot.
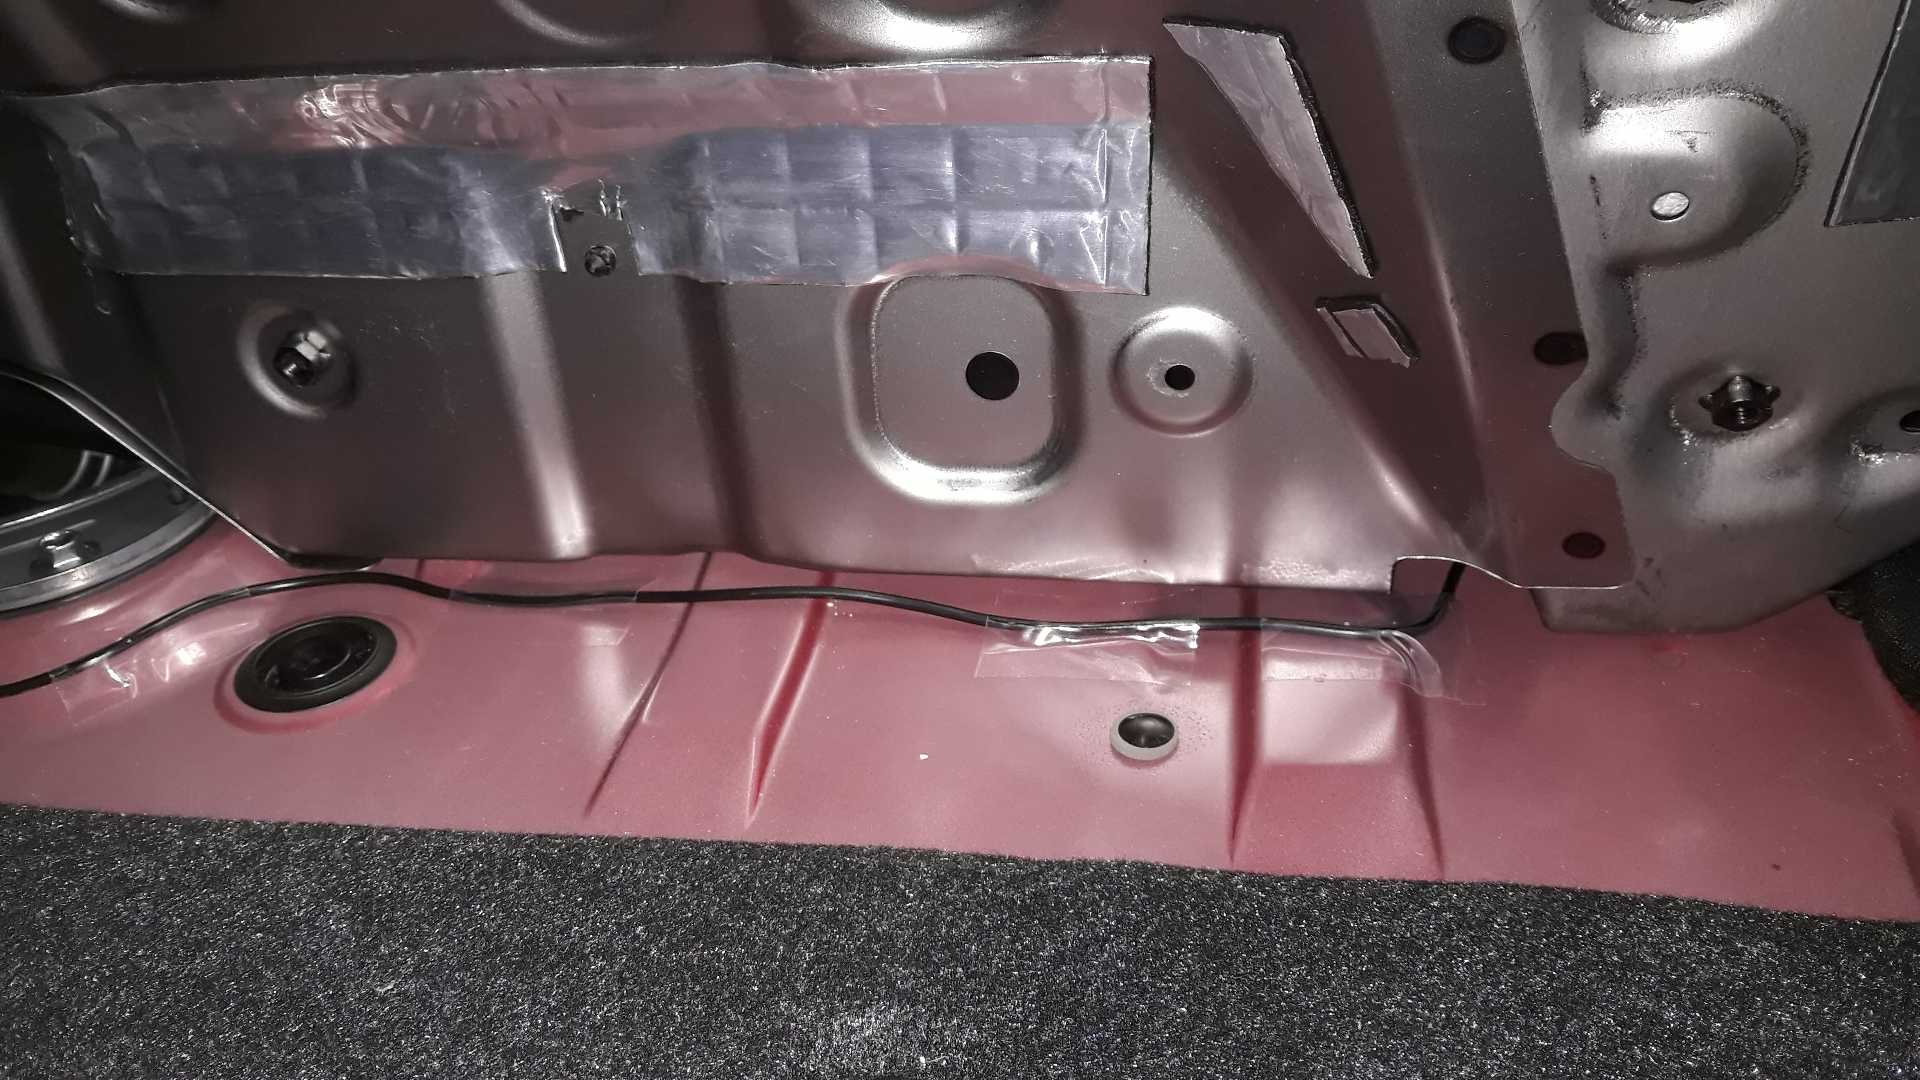
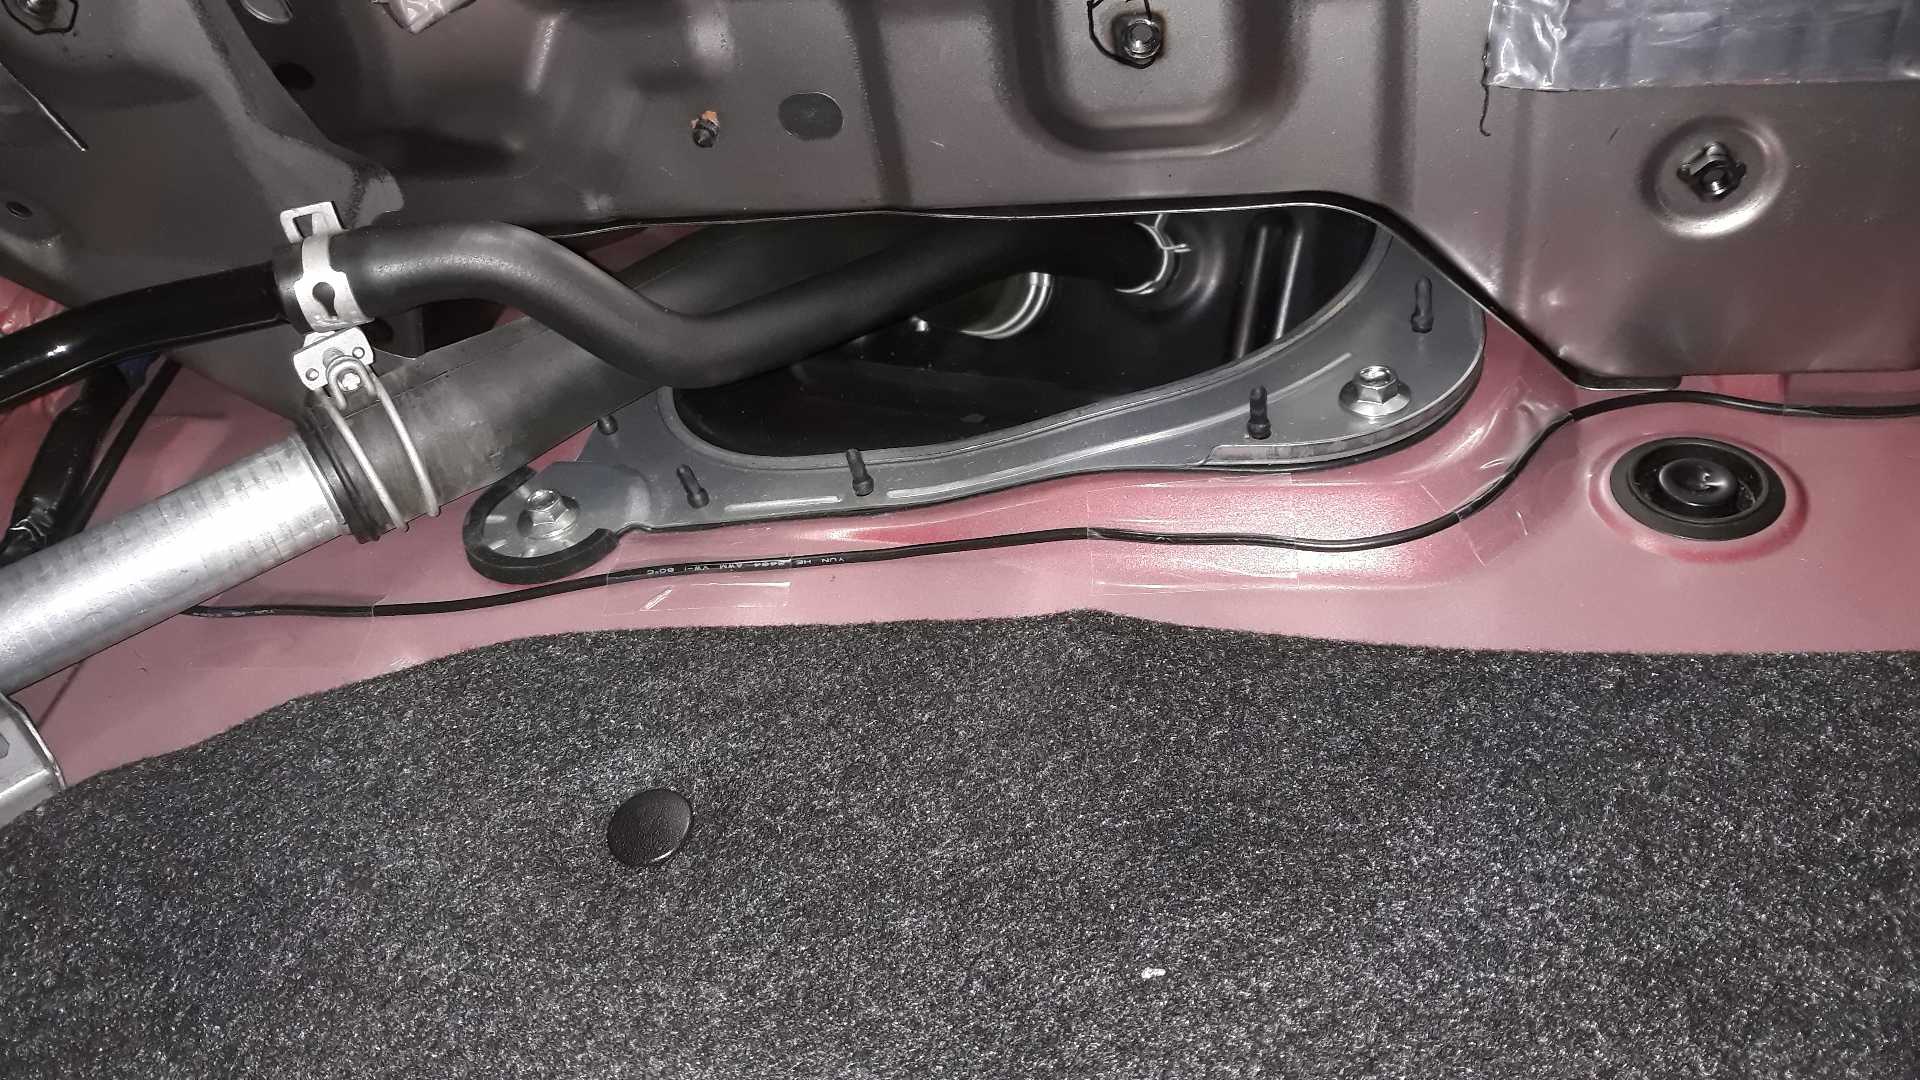
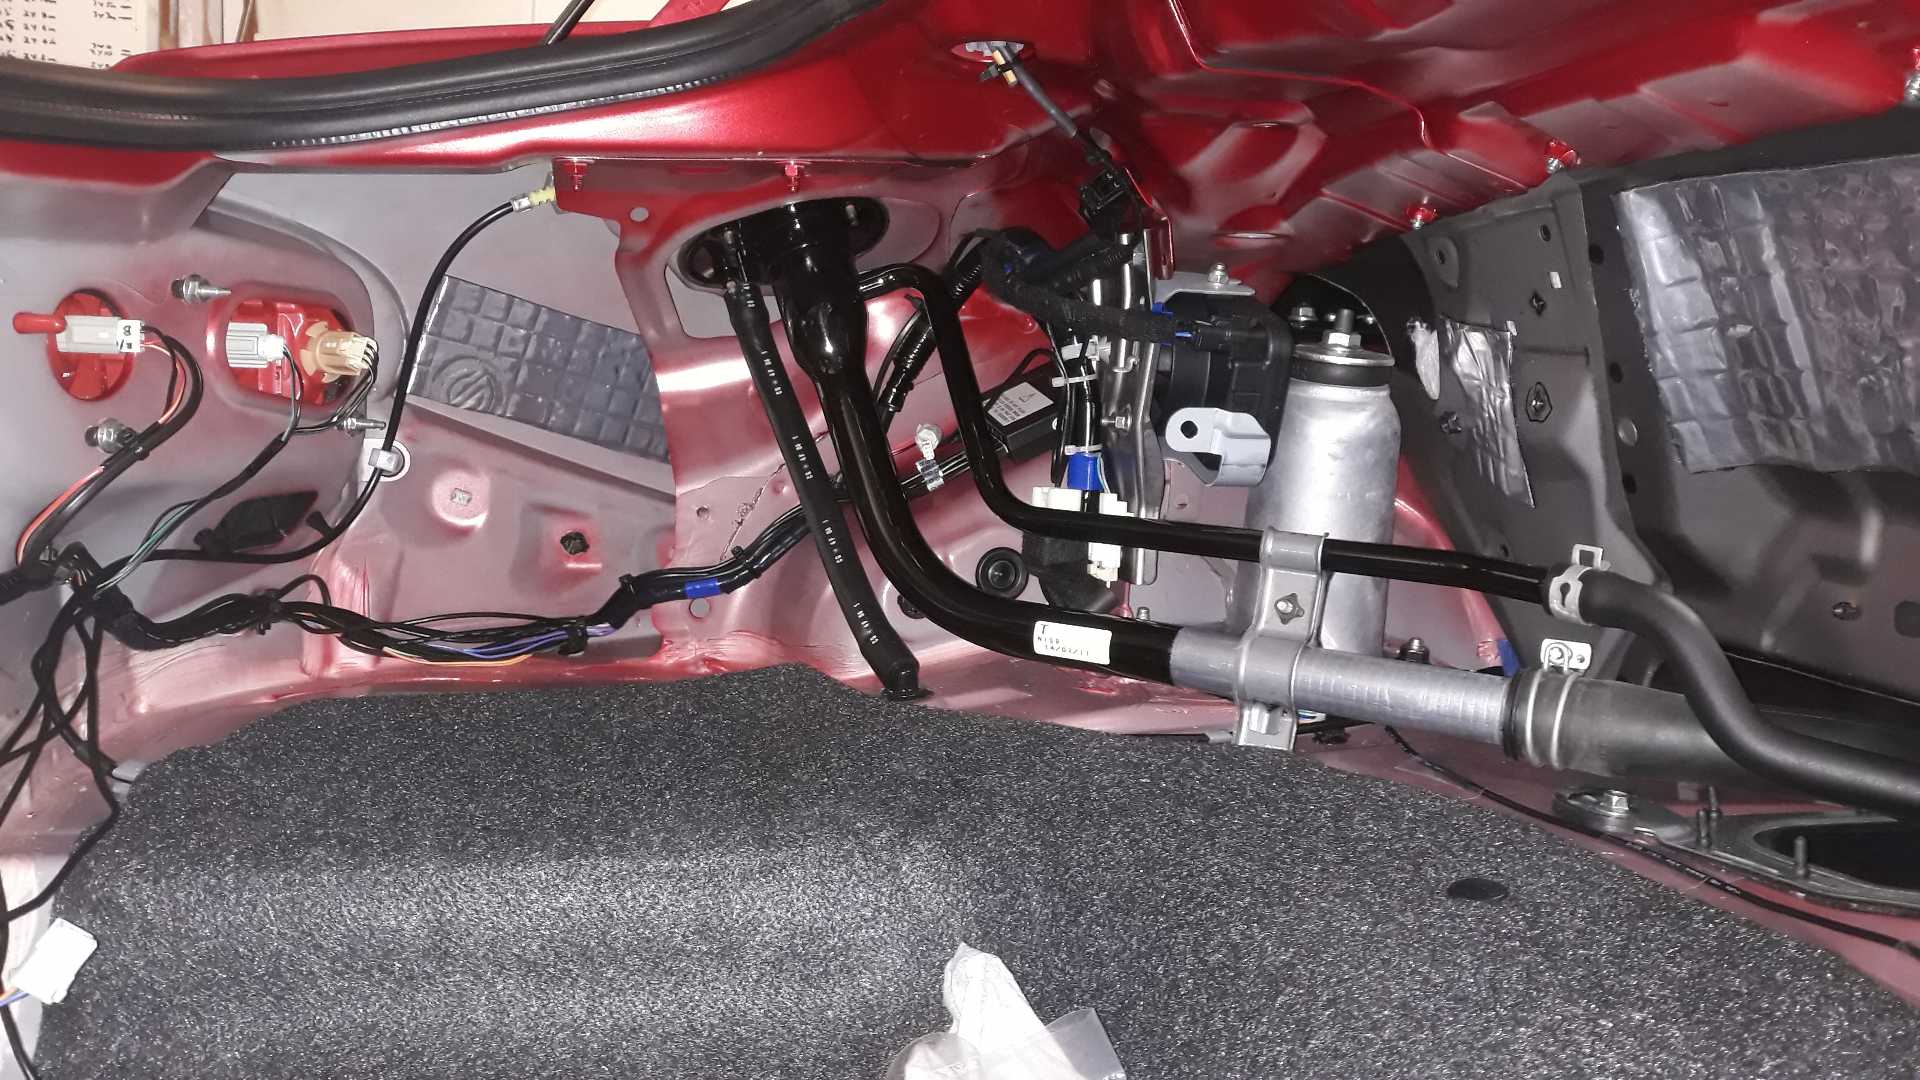
And tucked the control box in the Mazda preferred spot, not yet powered though.

No wires out to the bumper yet, but otherwise finished inside the boot.
And the first layer of base coat on the black sensors after washing them with isopropanol, obviously they will need more layers from the standard soul-red touch-up kit. It’s fiddly getting an even coverage with the brushes.
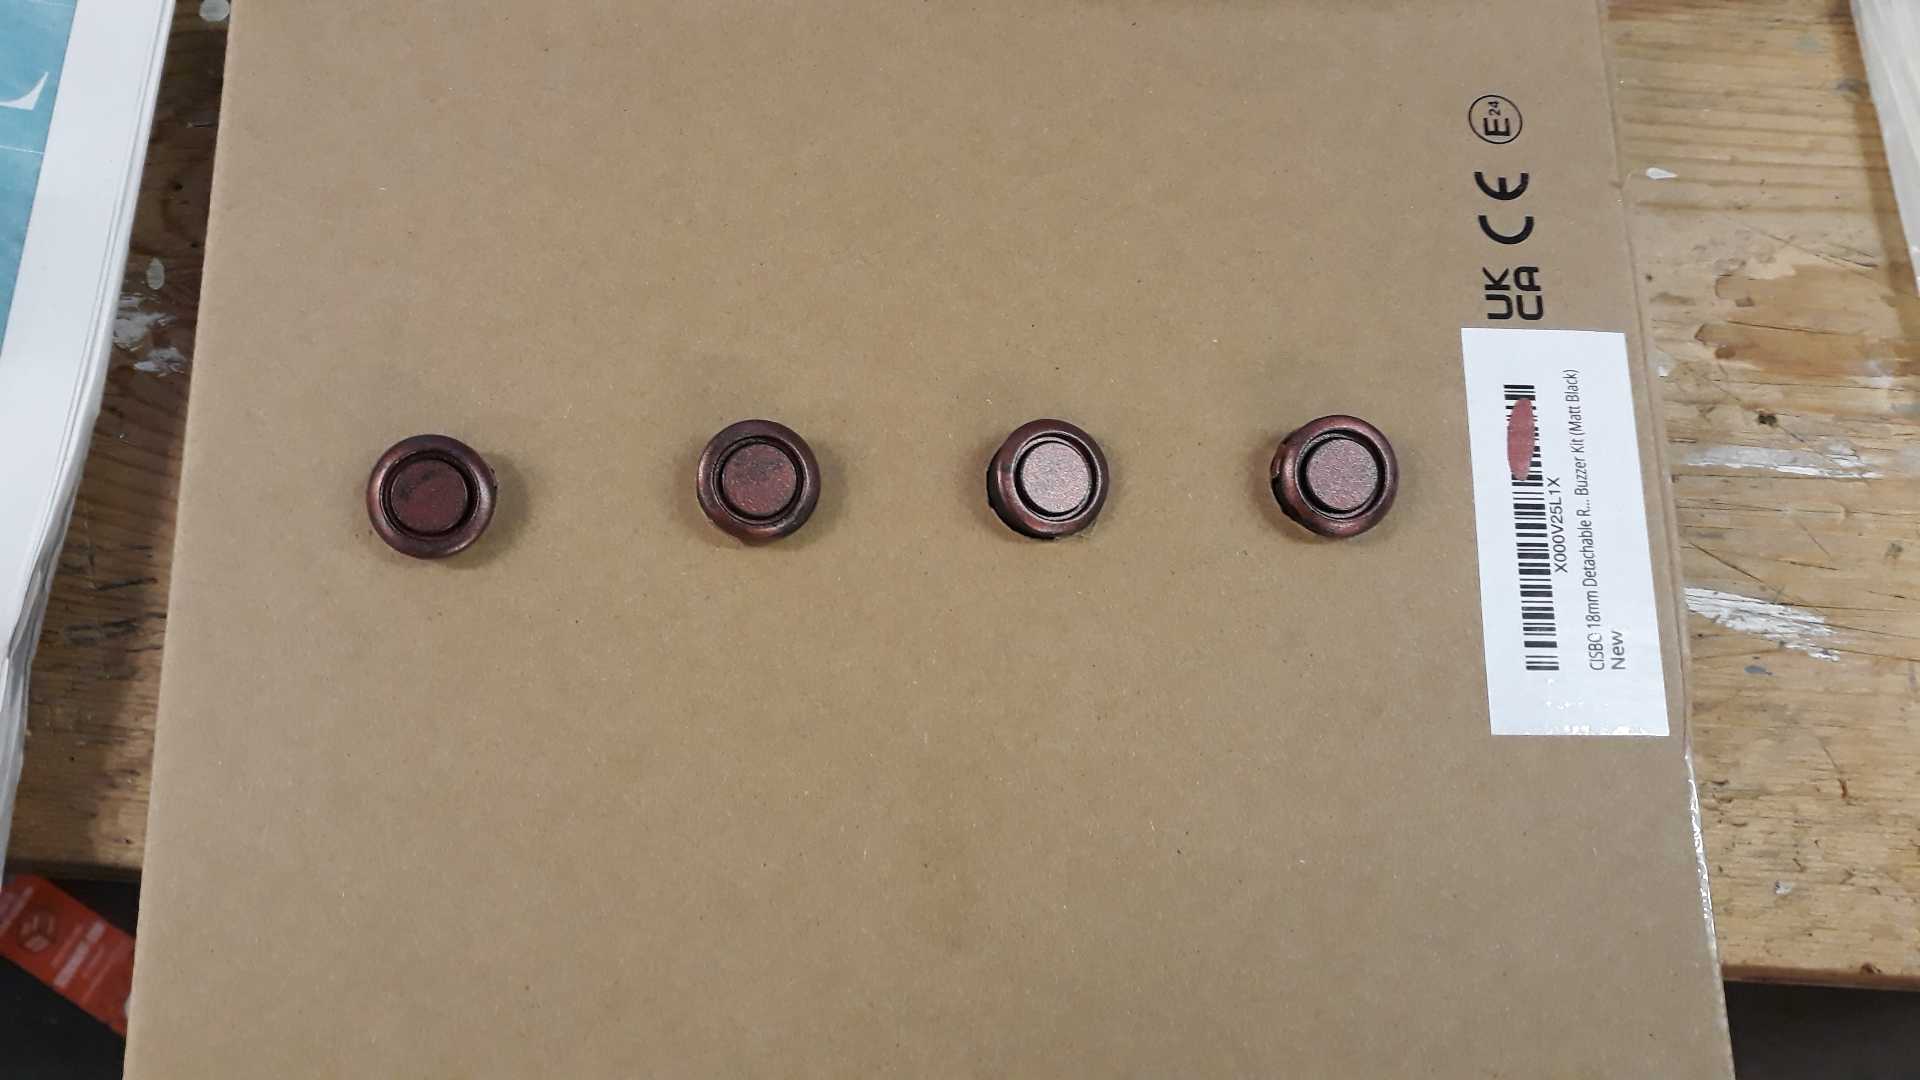
That was where I had reached on Sunday. A few more layers on the sensors overnight and yesterday for this result this morning, pic taken with it sitting on the bonnet, but fluorescent lighting. Four layers of quite dark base and three of the tinted “clear” to make it red enough.
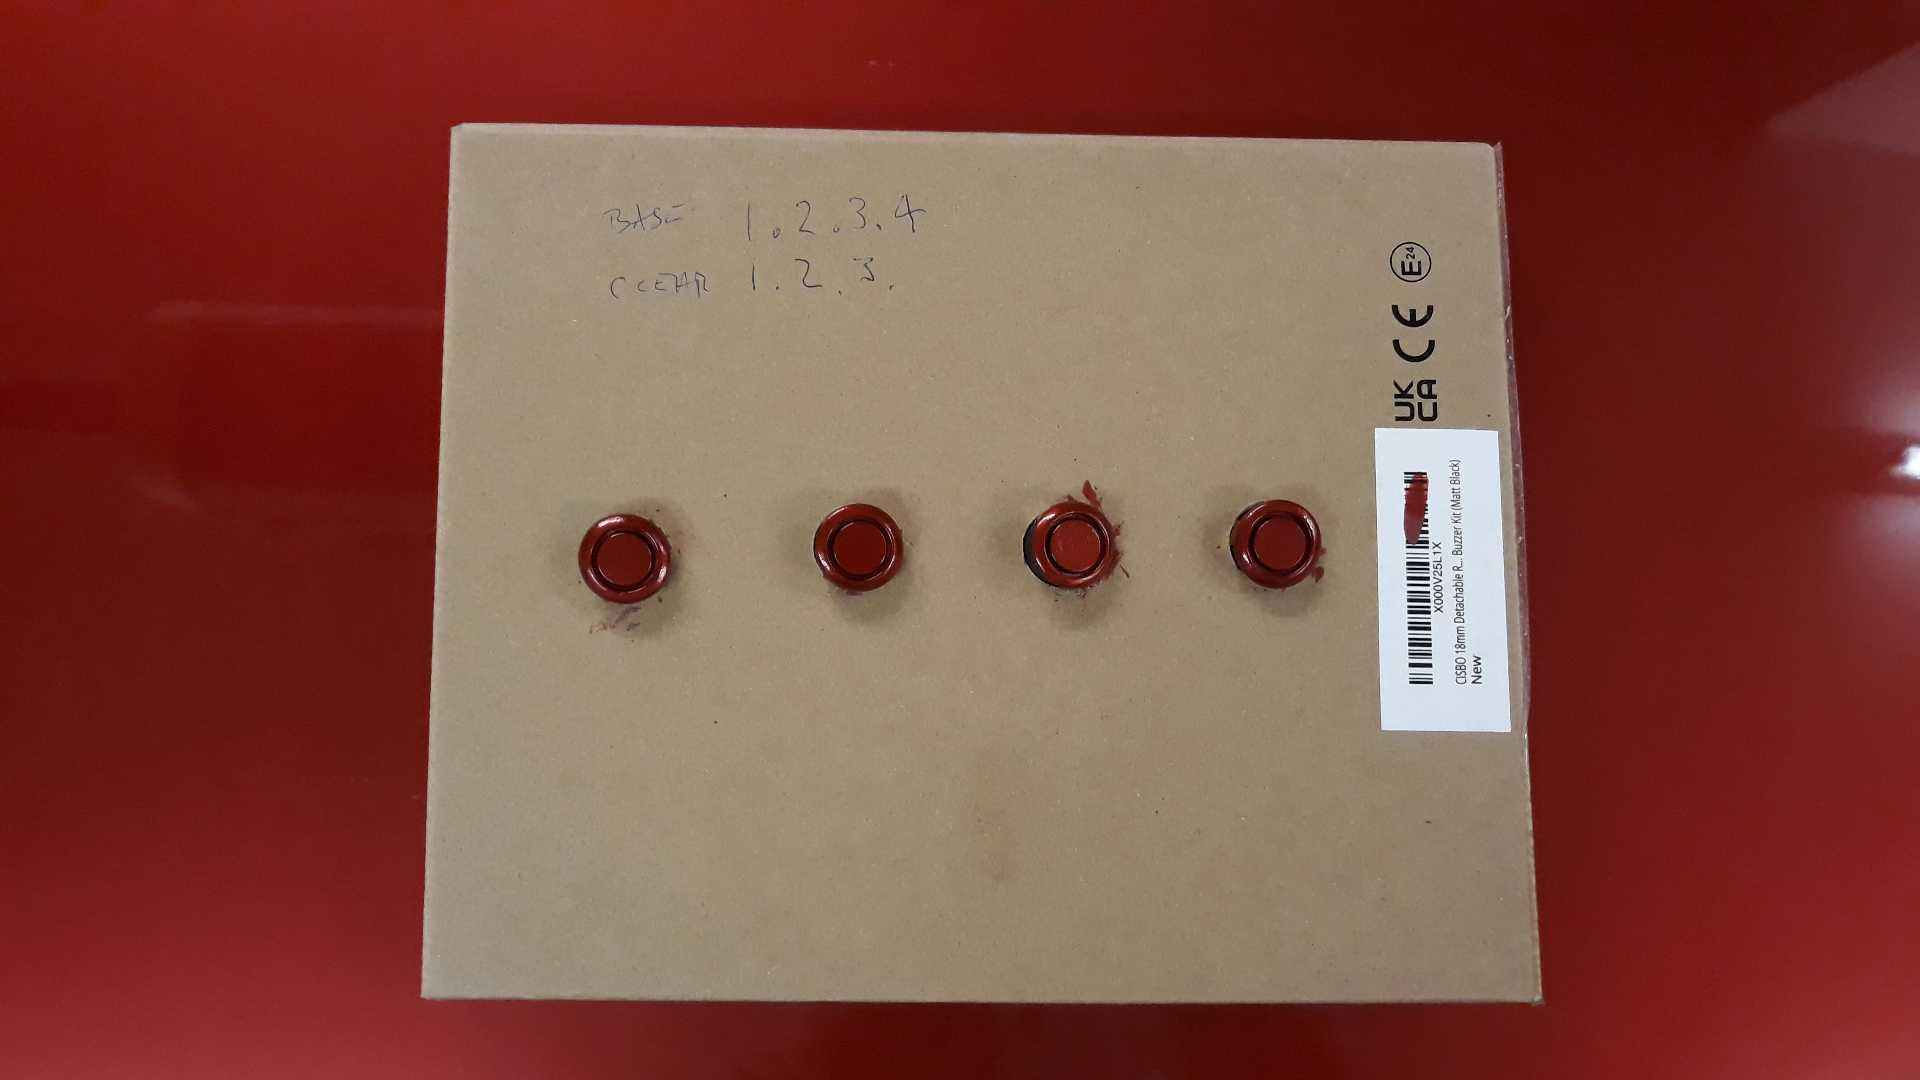
Today it was bumper off and mark up as before.
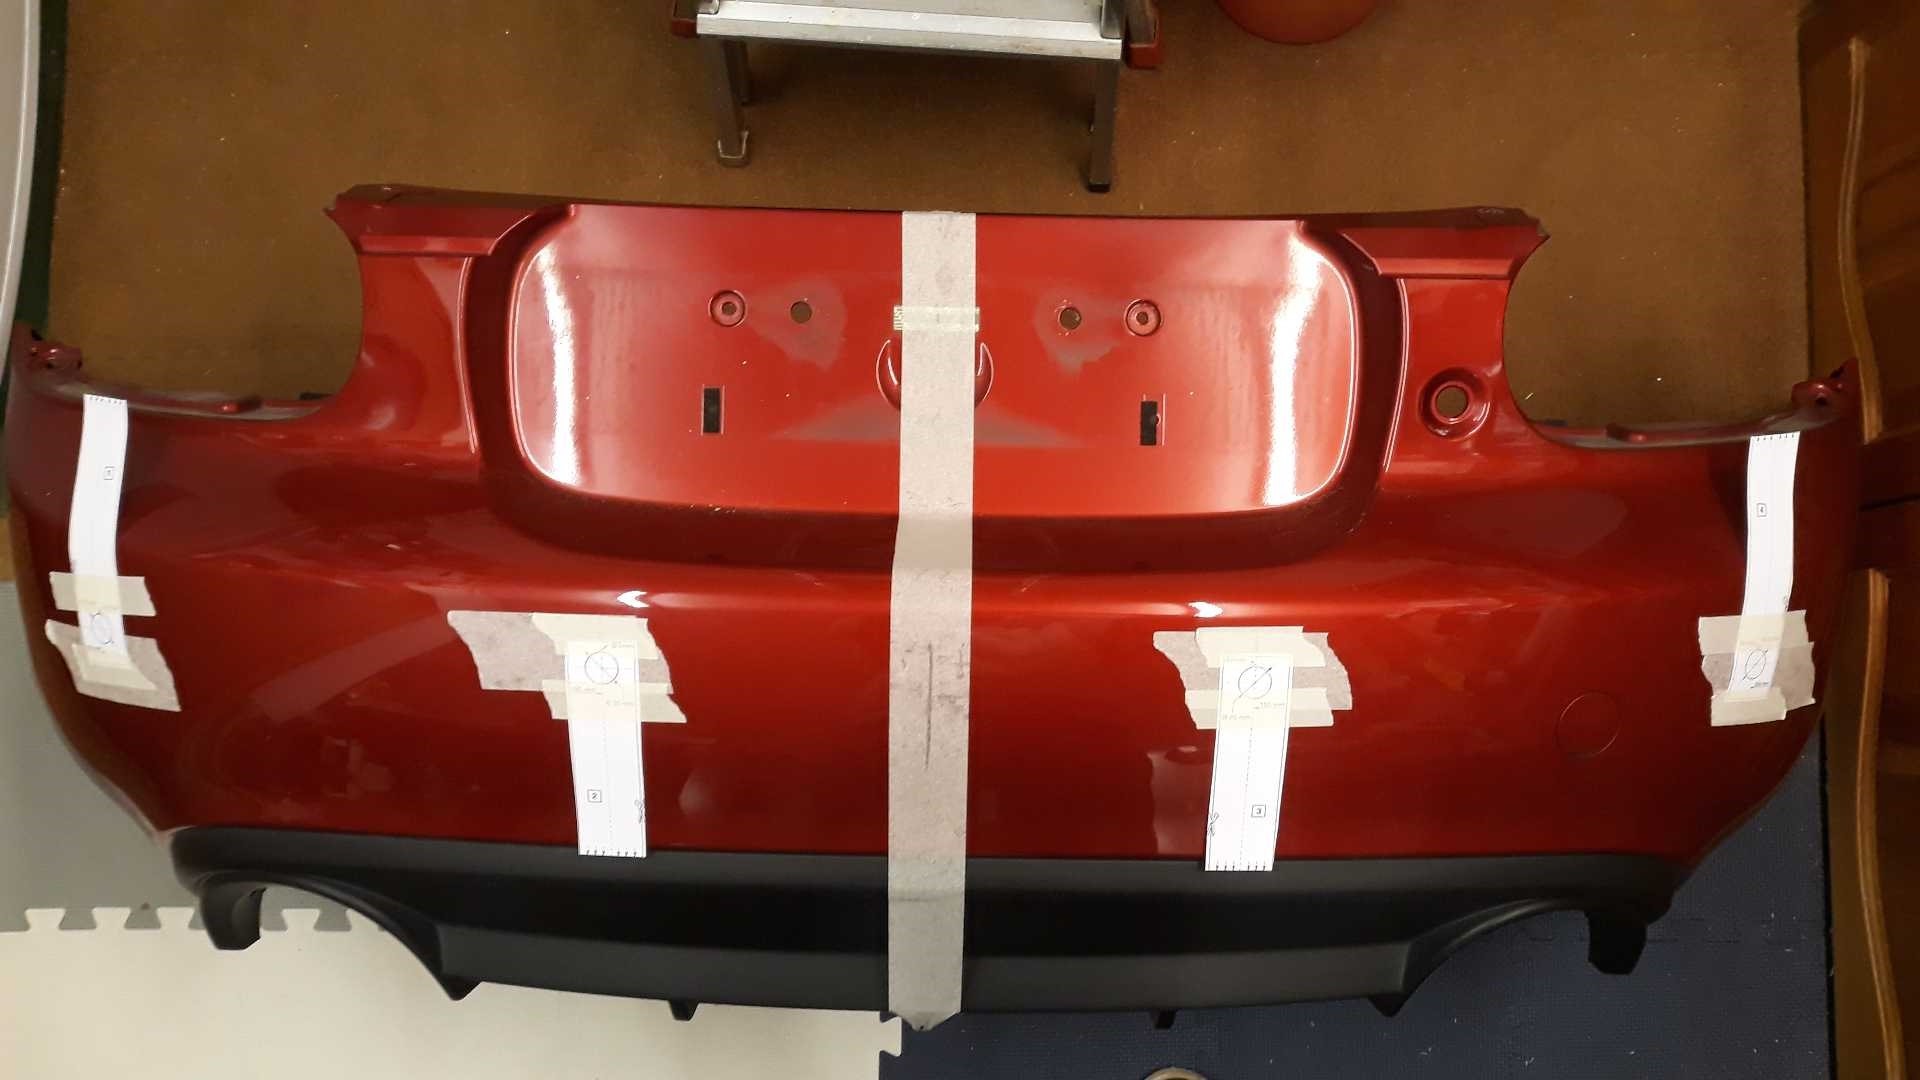
This 3.75 bumper does NOT have any guide marks inside for sensors, and it also has a different sub-structure, with some frames just edging onto the two inner sensor locations.
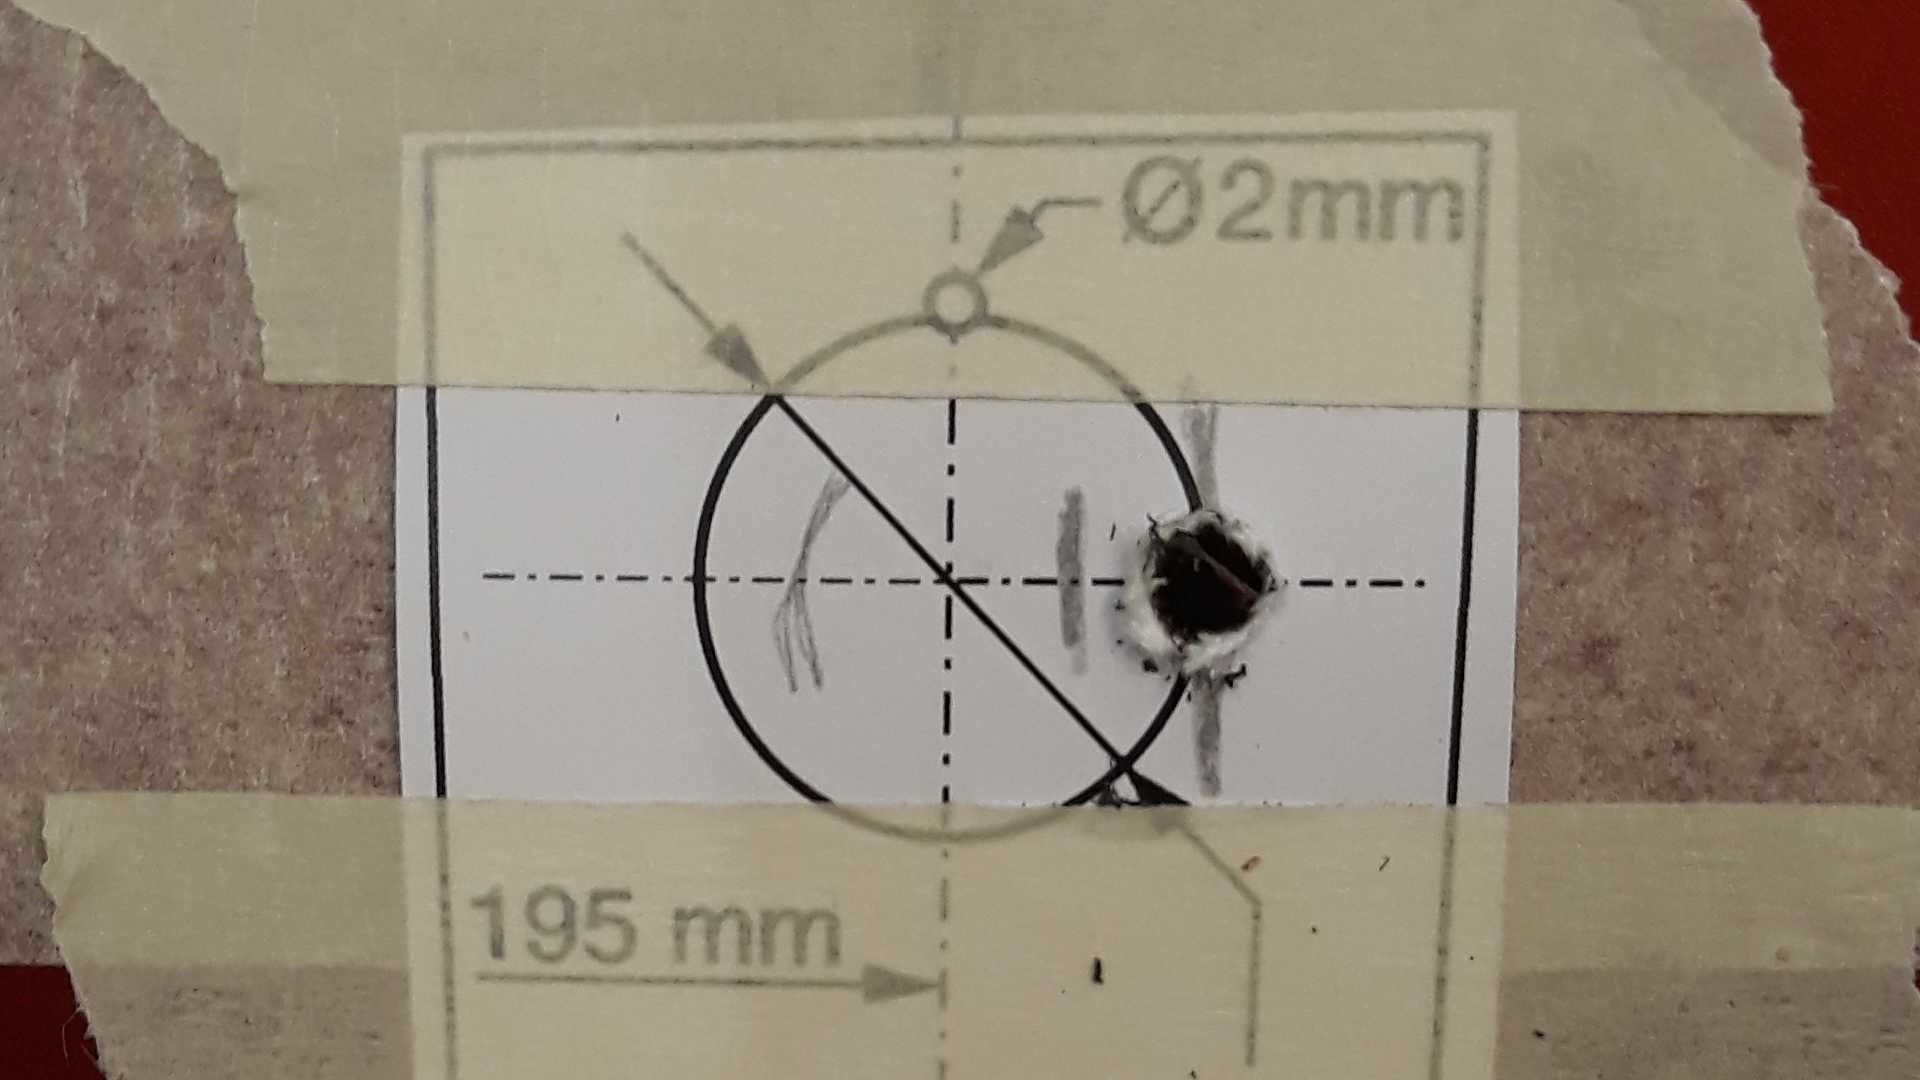
So I drilled the inner pair of holes each 10mm towards the middle (5mm was not quite enough) to be 185mm from the centre line instead of 195mm.
Also the guide strips will be slightly wrong lengths because of the lights and rear diffuser datums not being the same as before.
So I simply started with the Mazda strips then stood the bumper upright on the floor and measured each sensor to make them same height.
The markings are convenient.
Sensors with this kit are 18mm, and fortunately I have an exact 18mm cutter. I noticed the kit-supplied cutter is 18.3mm because the holes I cut in the box with that for a painting holder were too loose for the sensors.
End result is like this. The sensors are on short leads with connectors at the bumper end. I chose these because they make it easy to take off the bumper in the future. They also have an Up arrow marked for installation. Press on the rims only, not the centre!
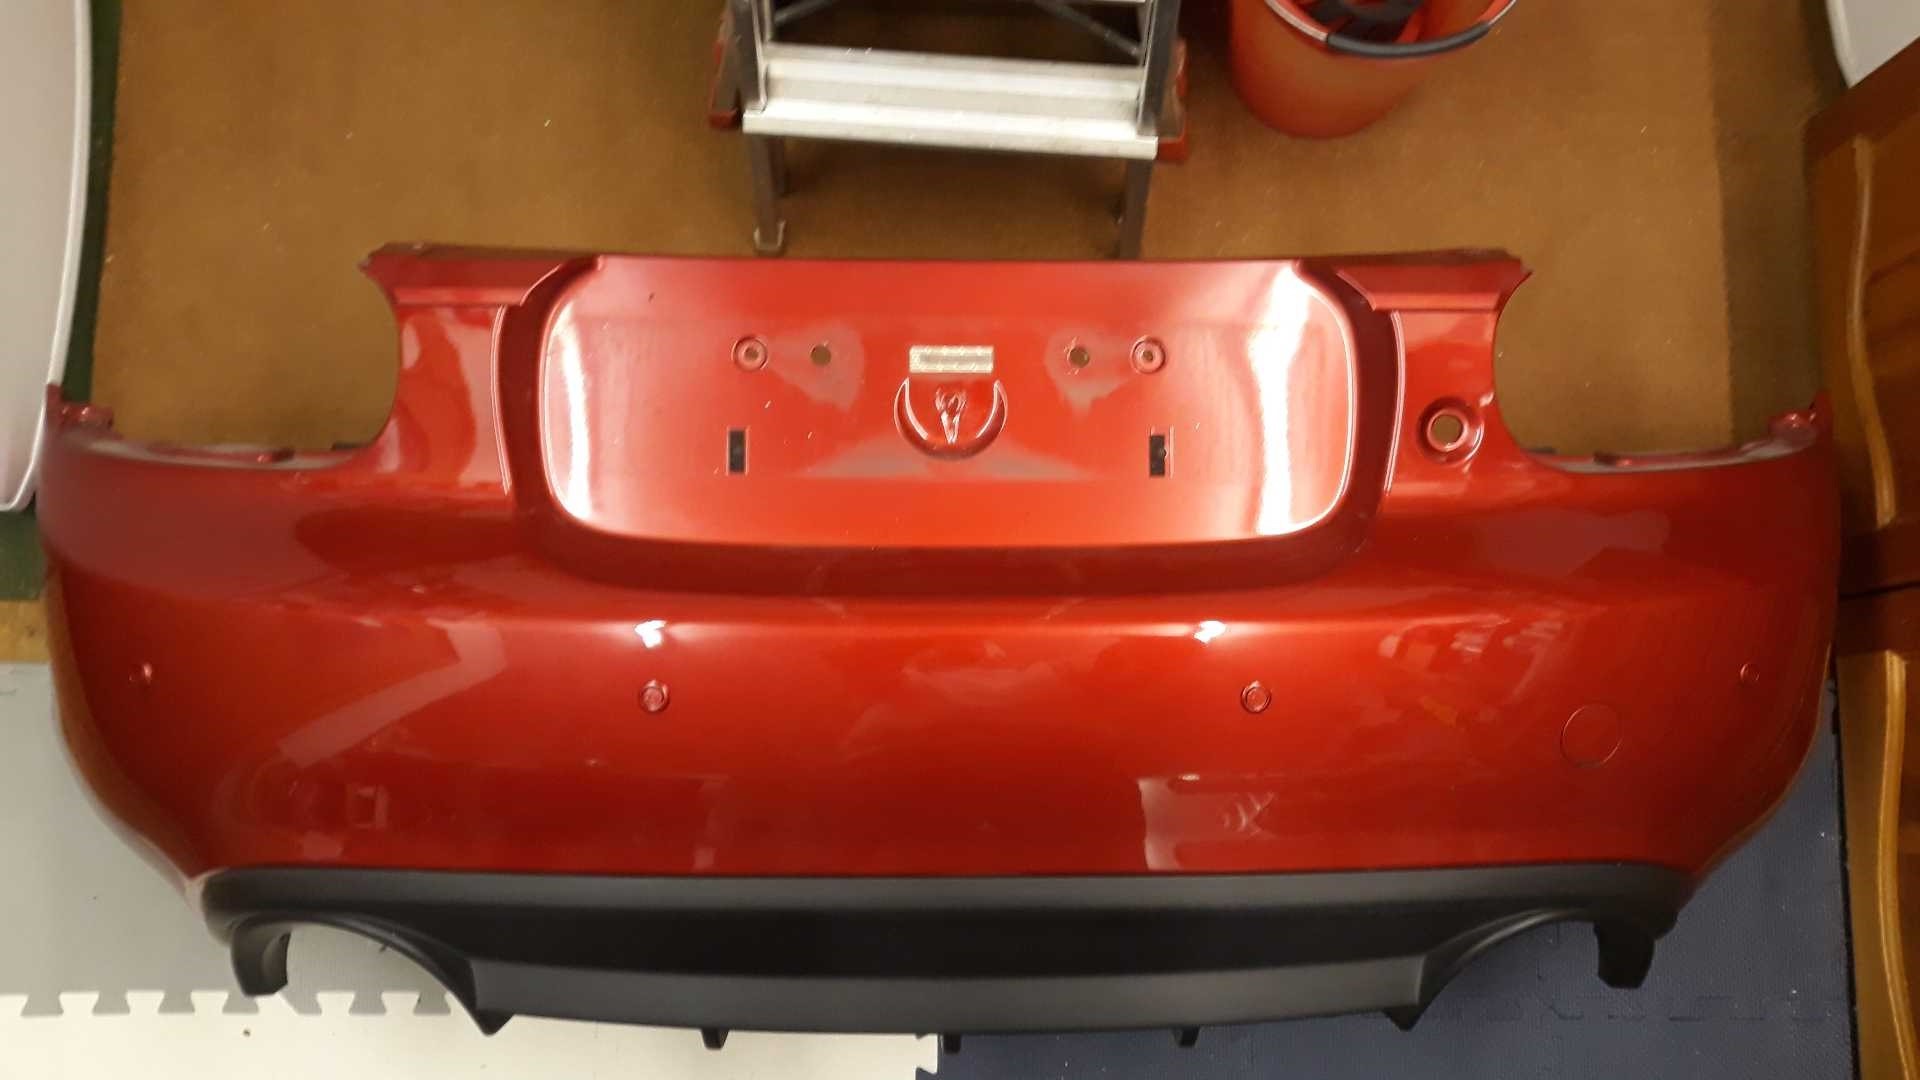
Surplus wires bundled up under the light cluster and entry grommet sealed with silicone. I was very surprised the nuts holding the rear light clusters were barely finger tight- no spanner needed, but the rubber seals were well stuck to the body. I cleaned the surfaces and fastened the nuts again firm finger tight.

And a final pic of the bumper installed again.

7 Likes
Found the rattle in the driver’s footwell and fixed it - by adjusting the clutch pedal free travel.
I took out almost all the free play between the push-rod shackle and pedal pivots with the adjustment.
So now when the pedal is resting the shackle can still think about rattling sideways a bit, but touch the pedal a fraction of a millimetre and the shackle is now steady and ready to do its job.
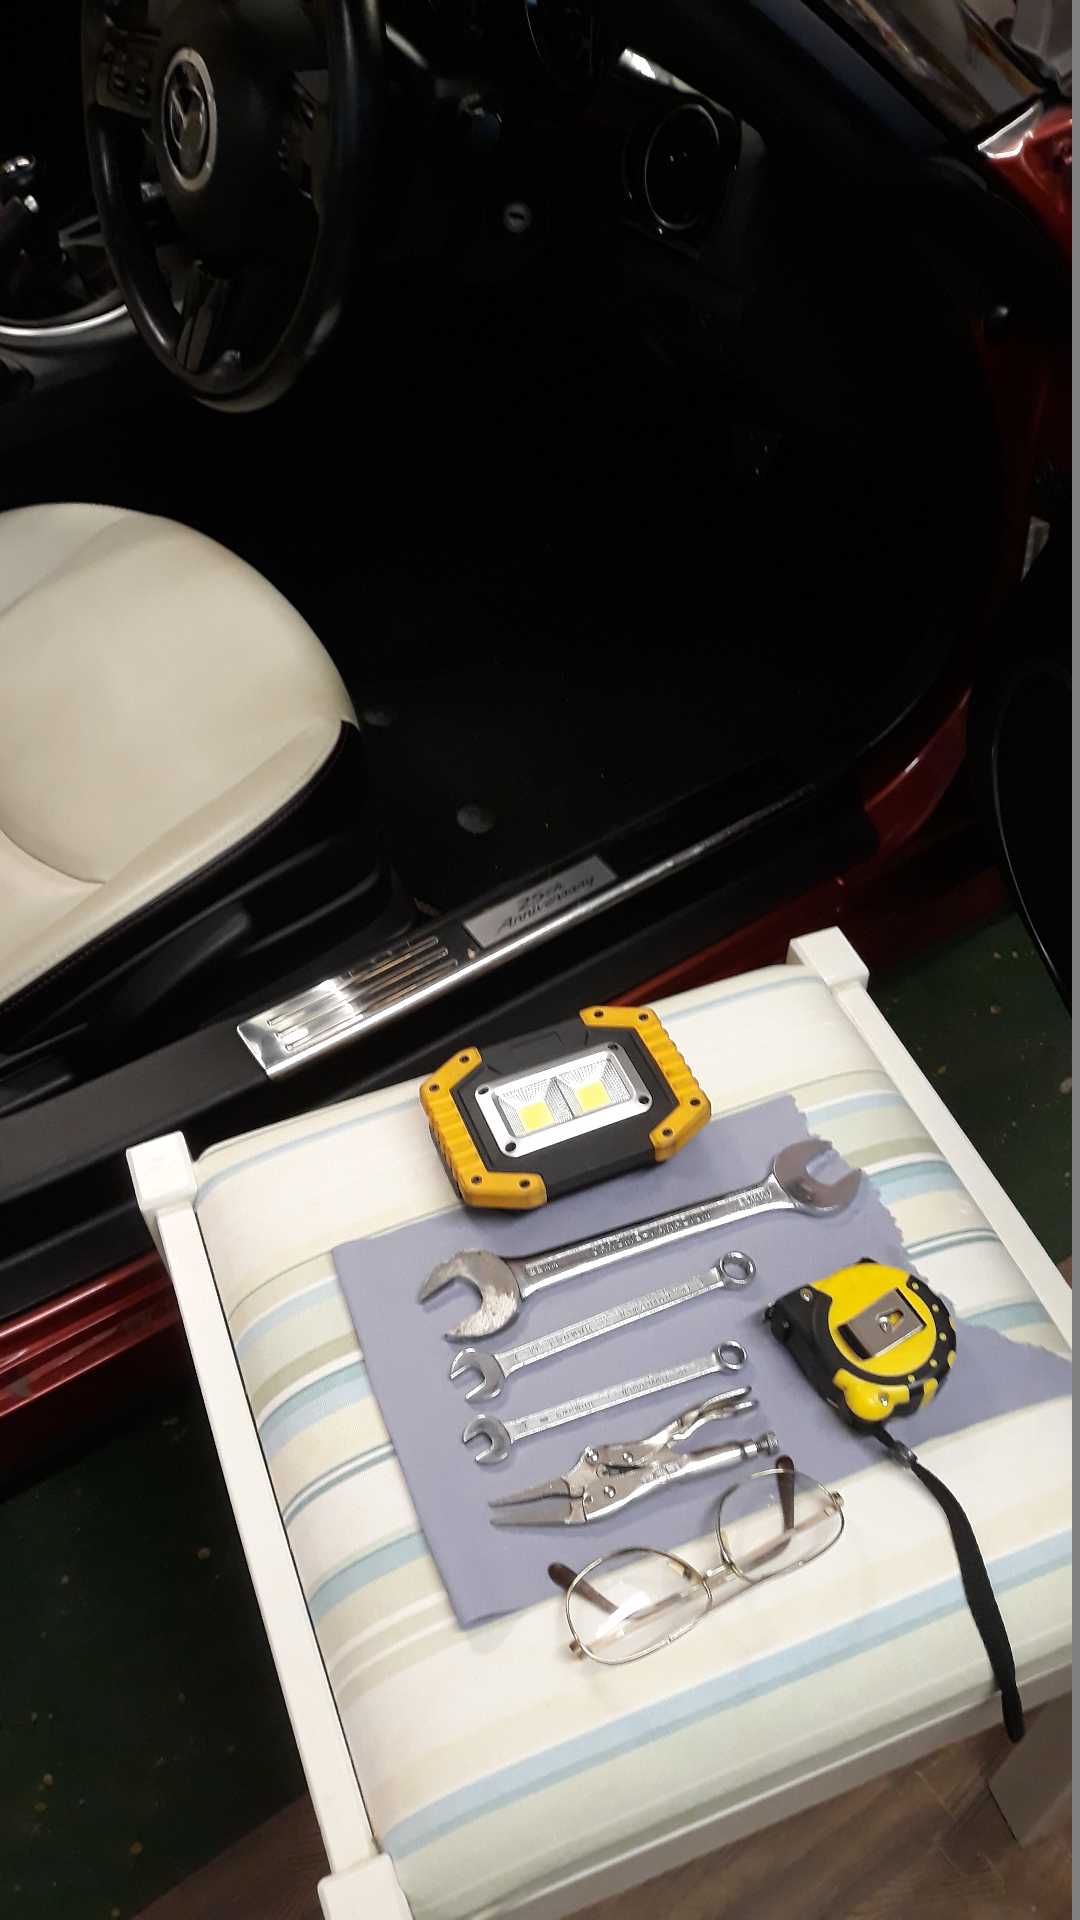
I gathered the essentials
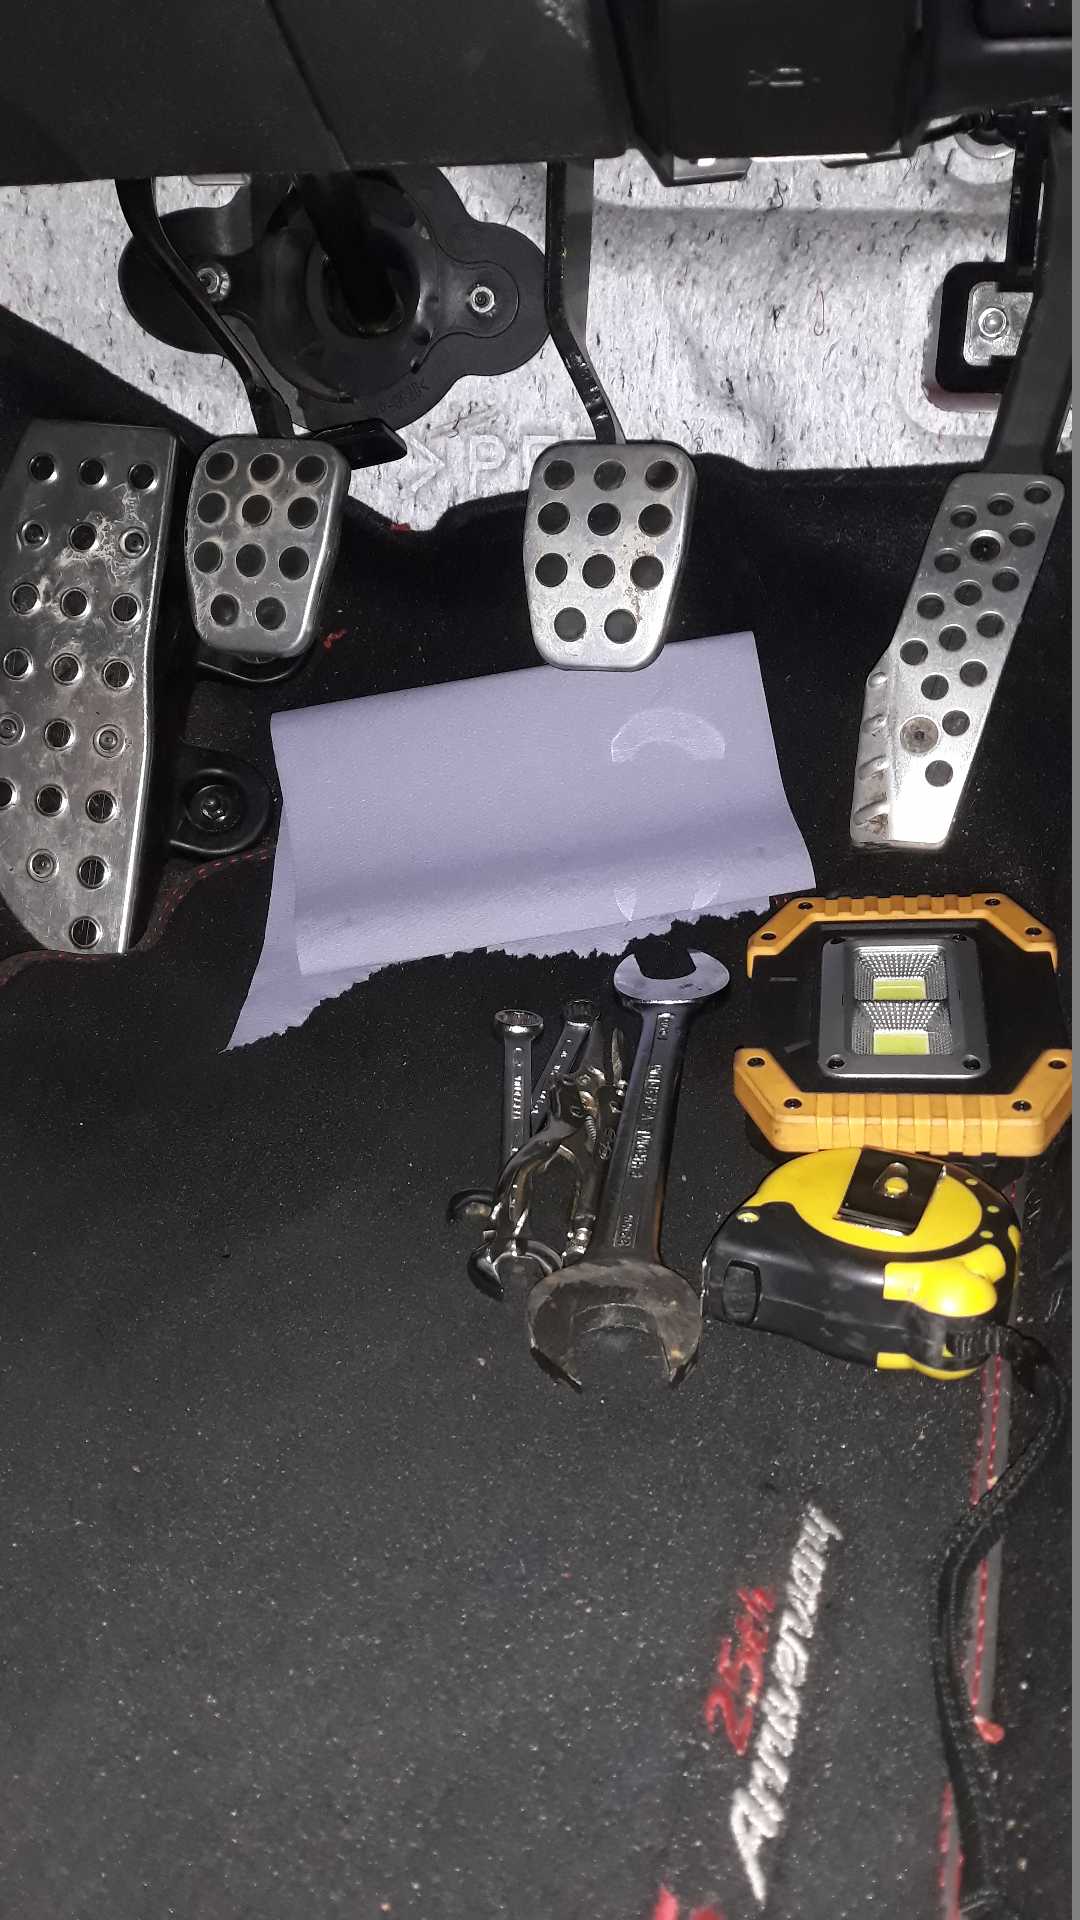
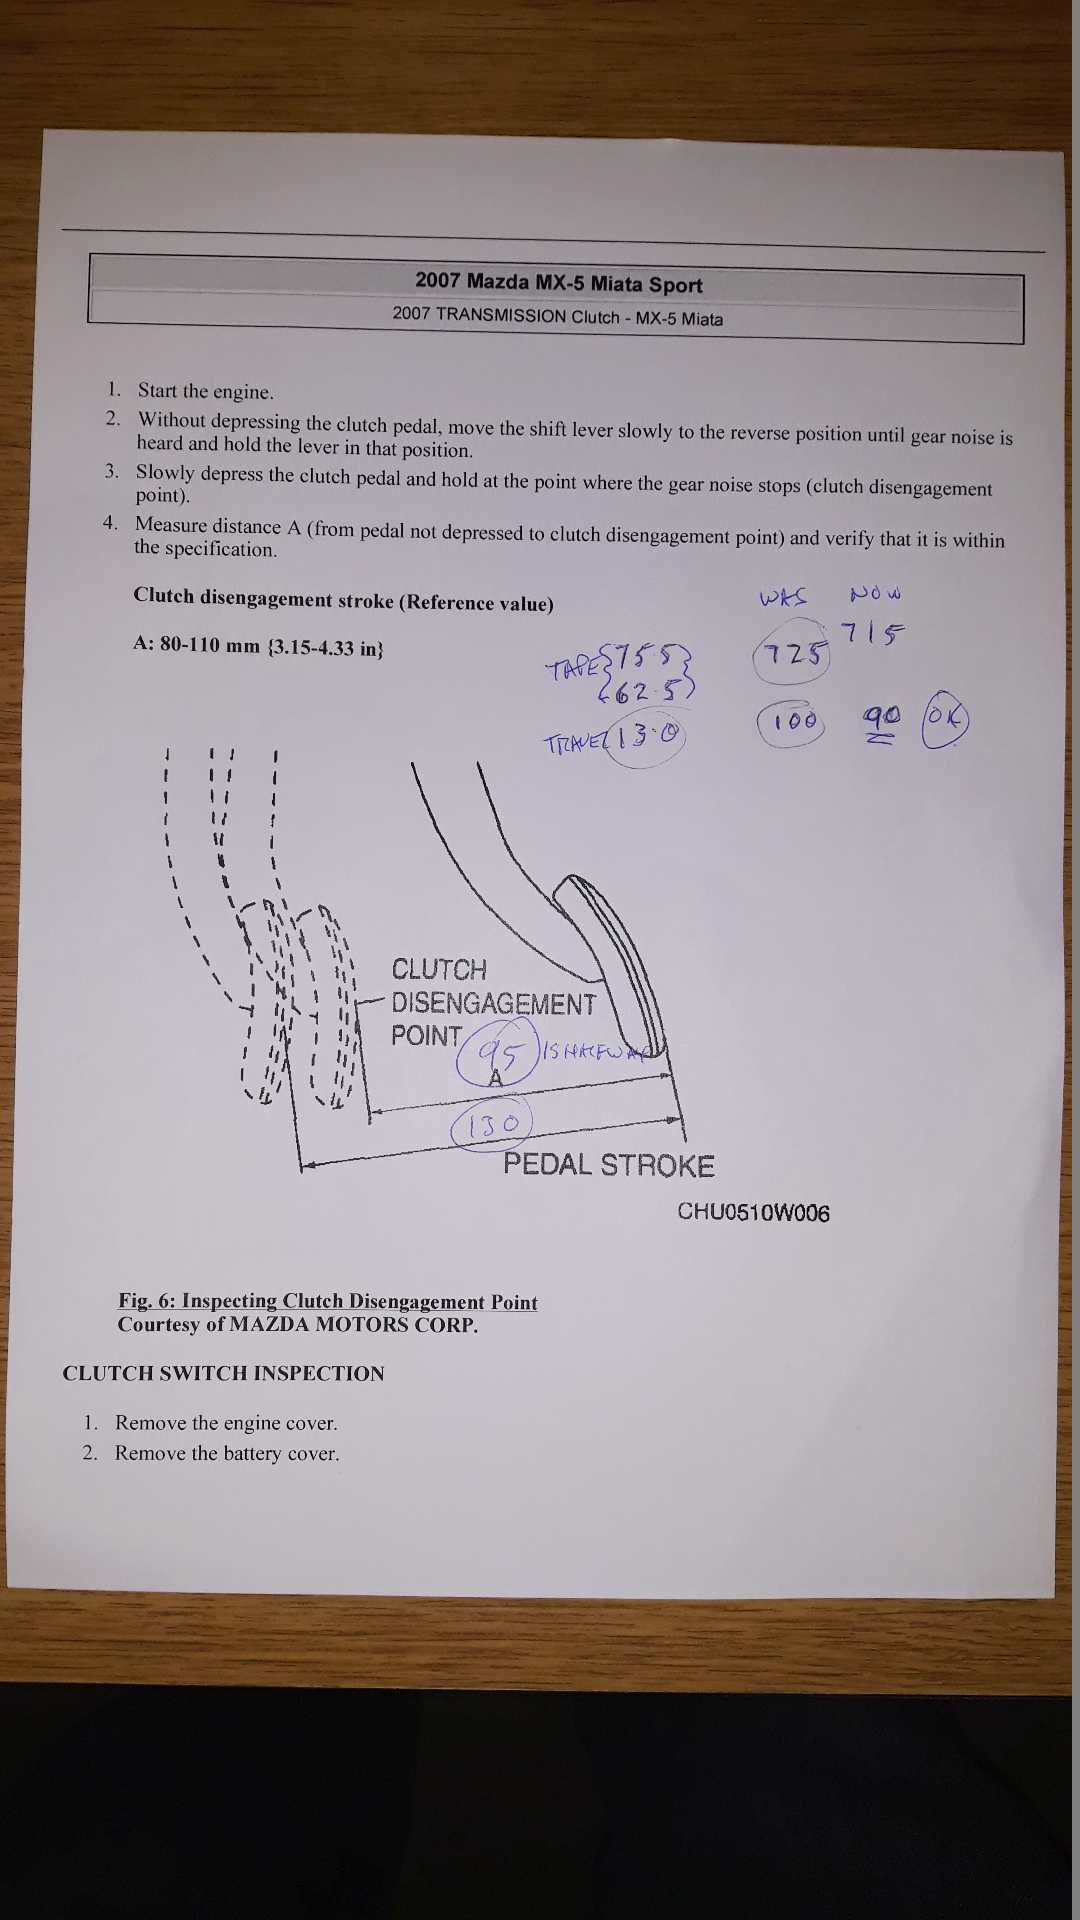
and measured the travel as I did before for the Niseko, and found the pedal has the normal maximum range of 130mm, but the bite point is at 100mm, maybe a bit lower. Mazda say between 80 and 110mm. Anyway 100 is not good enough on this car. I think the fluid needs changing too.
The 25AE seat does not go quite as far back as with the Niseko and I’m a bit more arthritic so took longer to “dive” into position with newer torch and same old tools. Eventually after about half an hour of fiddling about I’ve set the bite point at 90 and tested it.
My notes here use the tape measure from the bottom of the steering wheel, and some simple sums.
Took it for a quick top-down test in the sun; clutch is so much better. Car needs a clean before I take any proper pictures and still pongs of Dinitrol and penetrating oil.
5 Likes
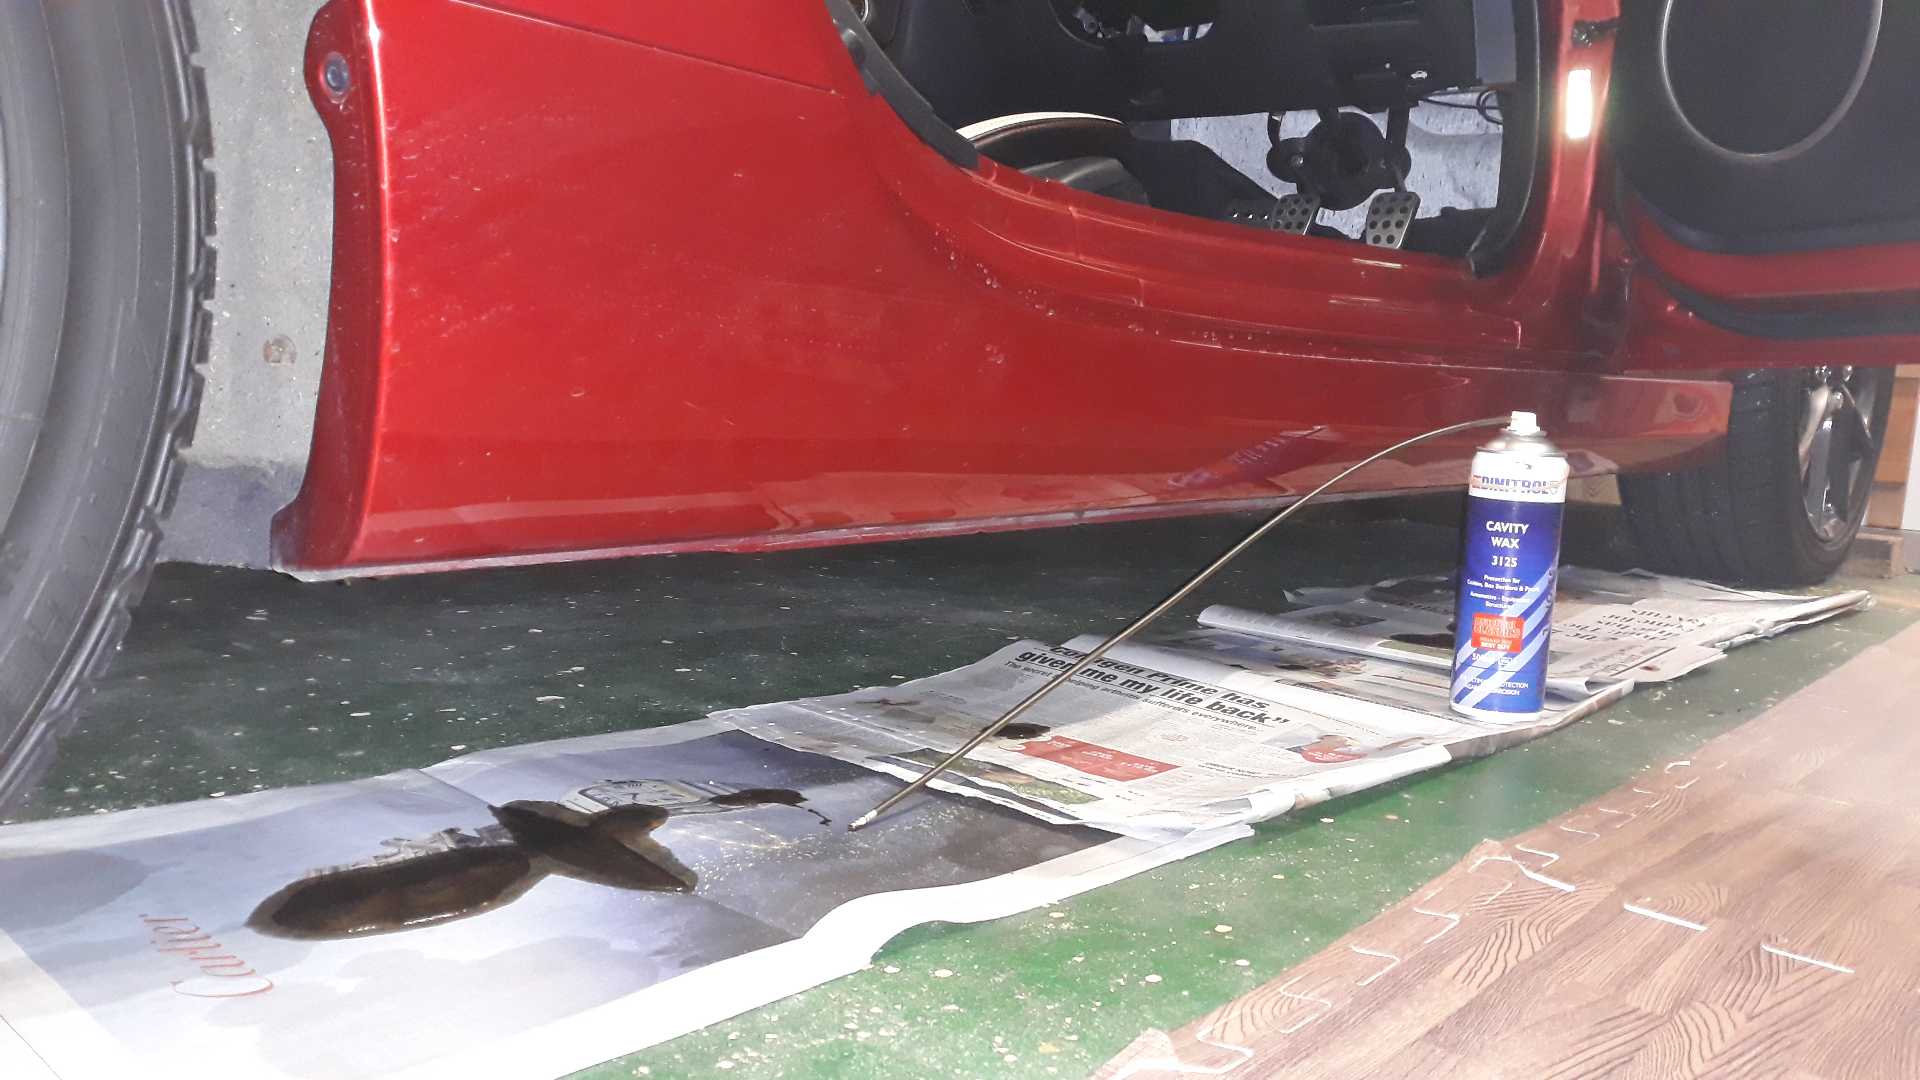
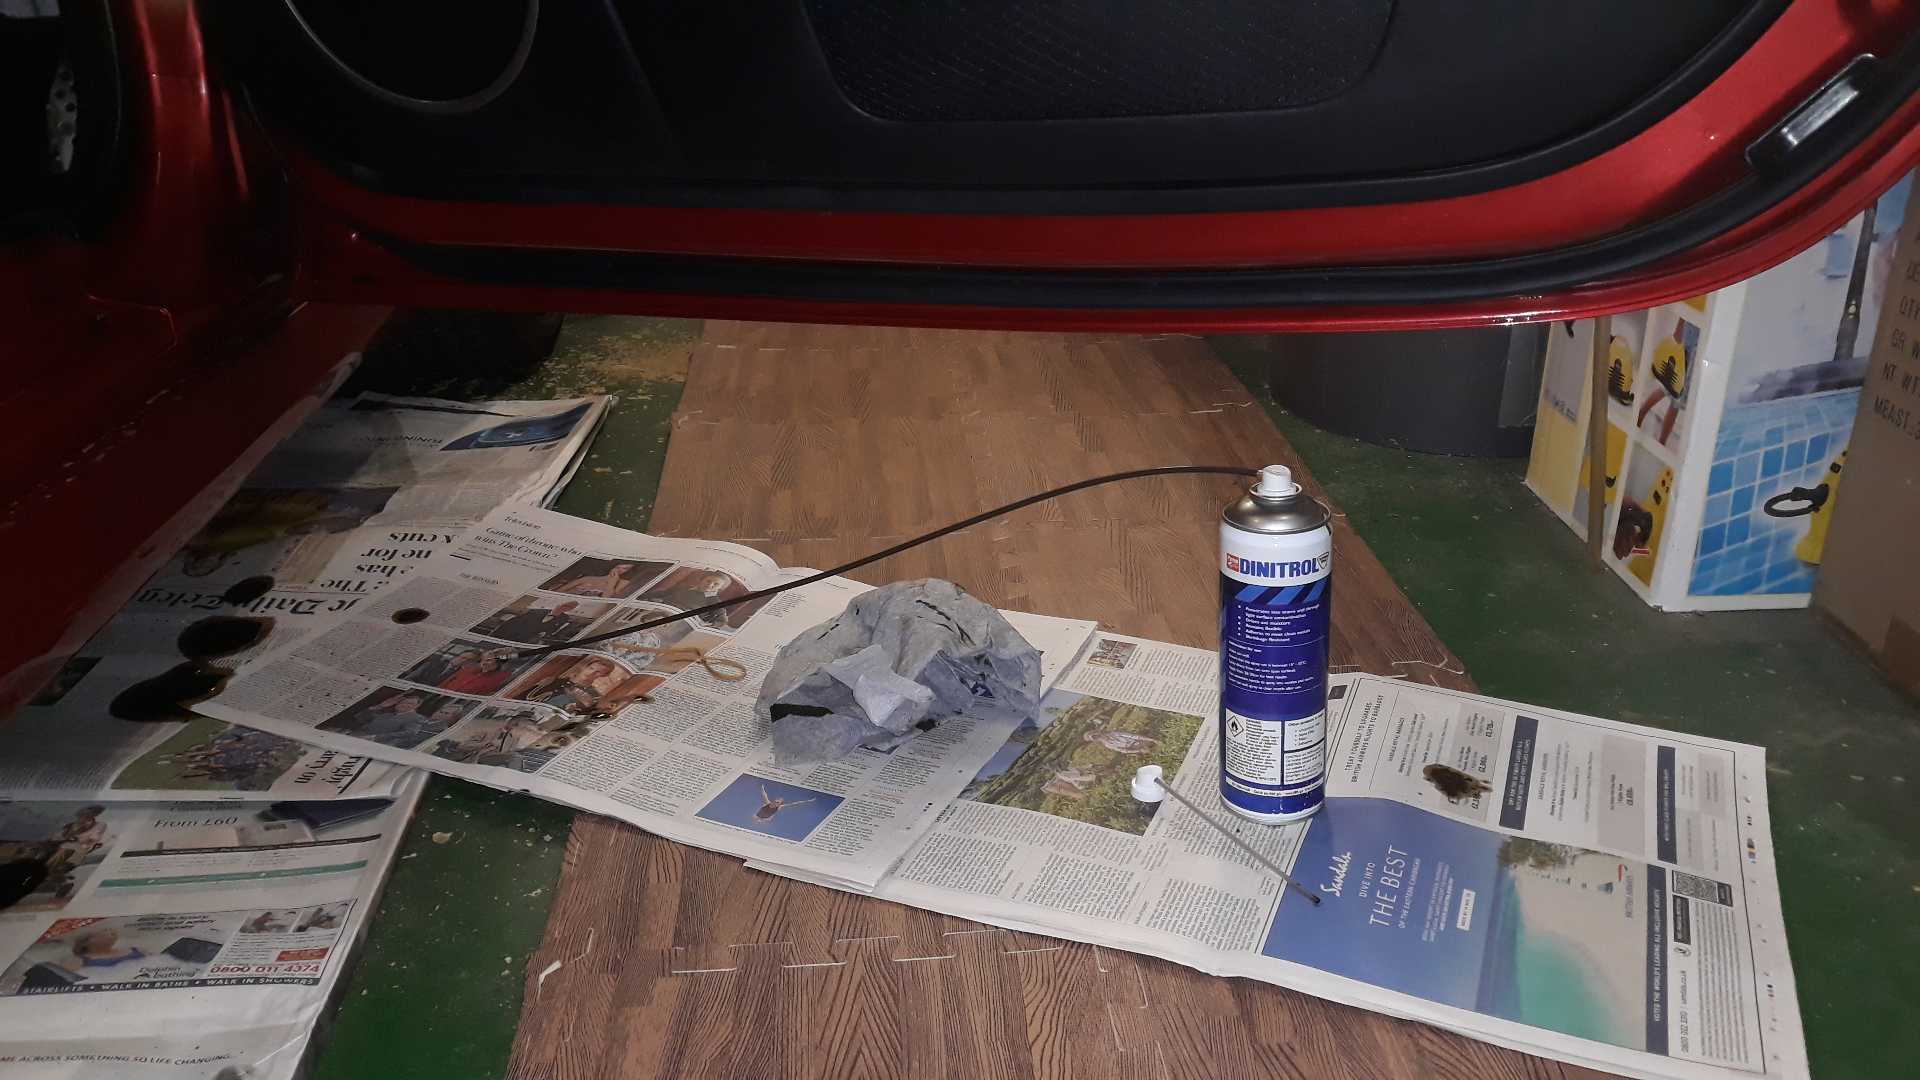
Some more Dinitrol.
This time on driver’s side simply because there’s not enough room in the garage to have both doors wide open.
Both channels of the metal sill and a bit of over-kill with the brown sauce since this is the first place to go on an NC. Here my old borecam showed clean primer and a few grains of sand, but its pictures are difficult to capture meaningfully. Plastic sill panel left untouched - no clips yet to replace possible breakages.
And the bottom of the door. No point in taking off the door card since they mostly rust along the bottom seam and the drains offer decent access for the long tube.
Also, I went around all the accessible rubber seals again with the Gummi in case I had missed spots on PRHT first time.
1 Like
What borecam have you got? They have come down in price and I’ve thought about getting one - but it’s difficult to tell which are dependable makes. Self contained or linked to phone?
Cracking read by the way. What do you eat for breakfast?
I have three!
None are entirely satisfactory, and they tend to be focussed (!) on specific requirements, but each has sufficient merit I’ve not binned it.
I’ve been using the oldest one for sills etc, and it is USB2 with a good depth of field and needs a nice big-screen laptop with a decent battery! But it’s standard definition and slow.
Then I acquired a close range USB Potensic, no longer available and more suited to a microscope application, but full HD and decent frame rate
Most recently one that can only work with a phone popped up. Snag, while it’s full HD and worked OK, any small phone screen is going to be a pain for old eyes, and you need someone to hold the phone close enough you can see it while finagling the camera into position. I tested it with an old wiped phone that I didn’t care if the App trashed the phone.
1 Like
Good work Richard ![]() I have literally just ordered the special long nozzle. Great update on your new car.
I have literally just ordered the special long nozzle. Great update on your new car.
Make sure you get the right one!!!
I could not find my original, so bought this which does not fit Dinitrol cans, unlike that in the Amazon illustration with the metal spigot same as the Dinitrol one.
Compare how they might fit.

Luckily I found the original Dinitrol long one, and it was still not blocked after several years.
Now ordered the correct one! Thanks for the heads up.